
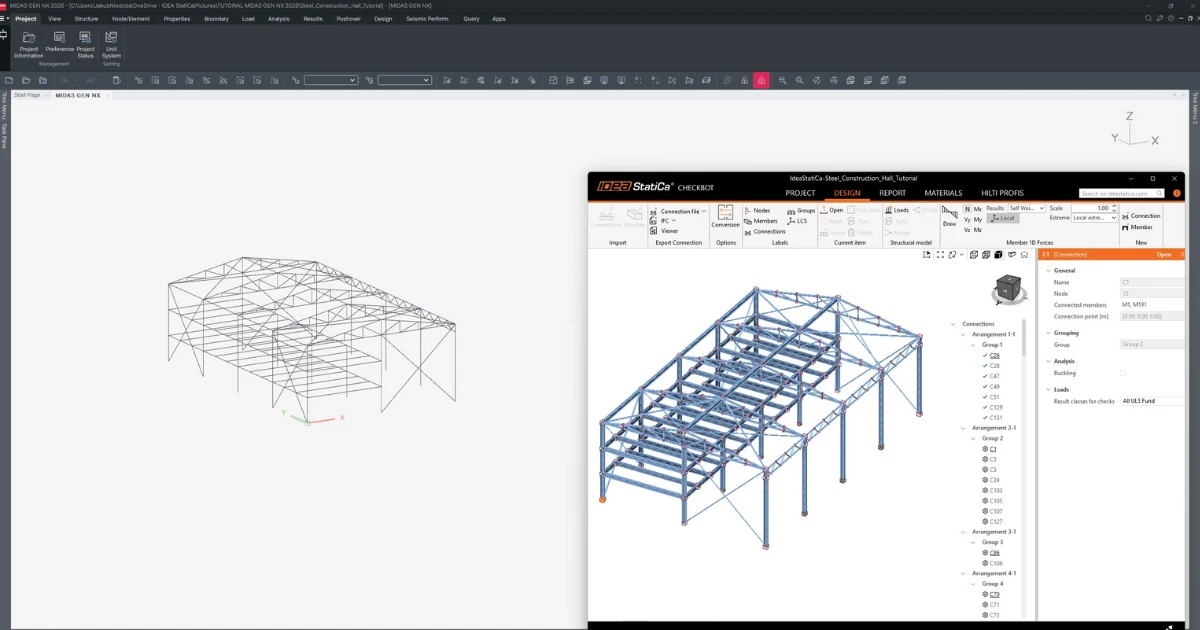


How to activate the link
Since version MIDAS GEN NX 2026 (V1.1) and newer, the API has been added, and due to this new possibility, the new link to IDEA Statica Checkbot was created.
In the following figures, you can see how to activate the link.
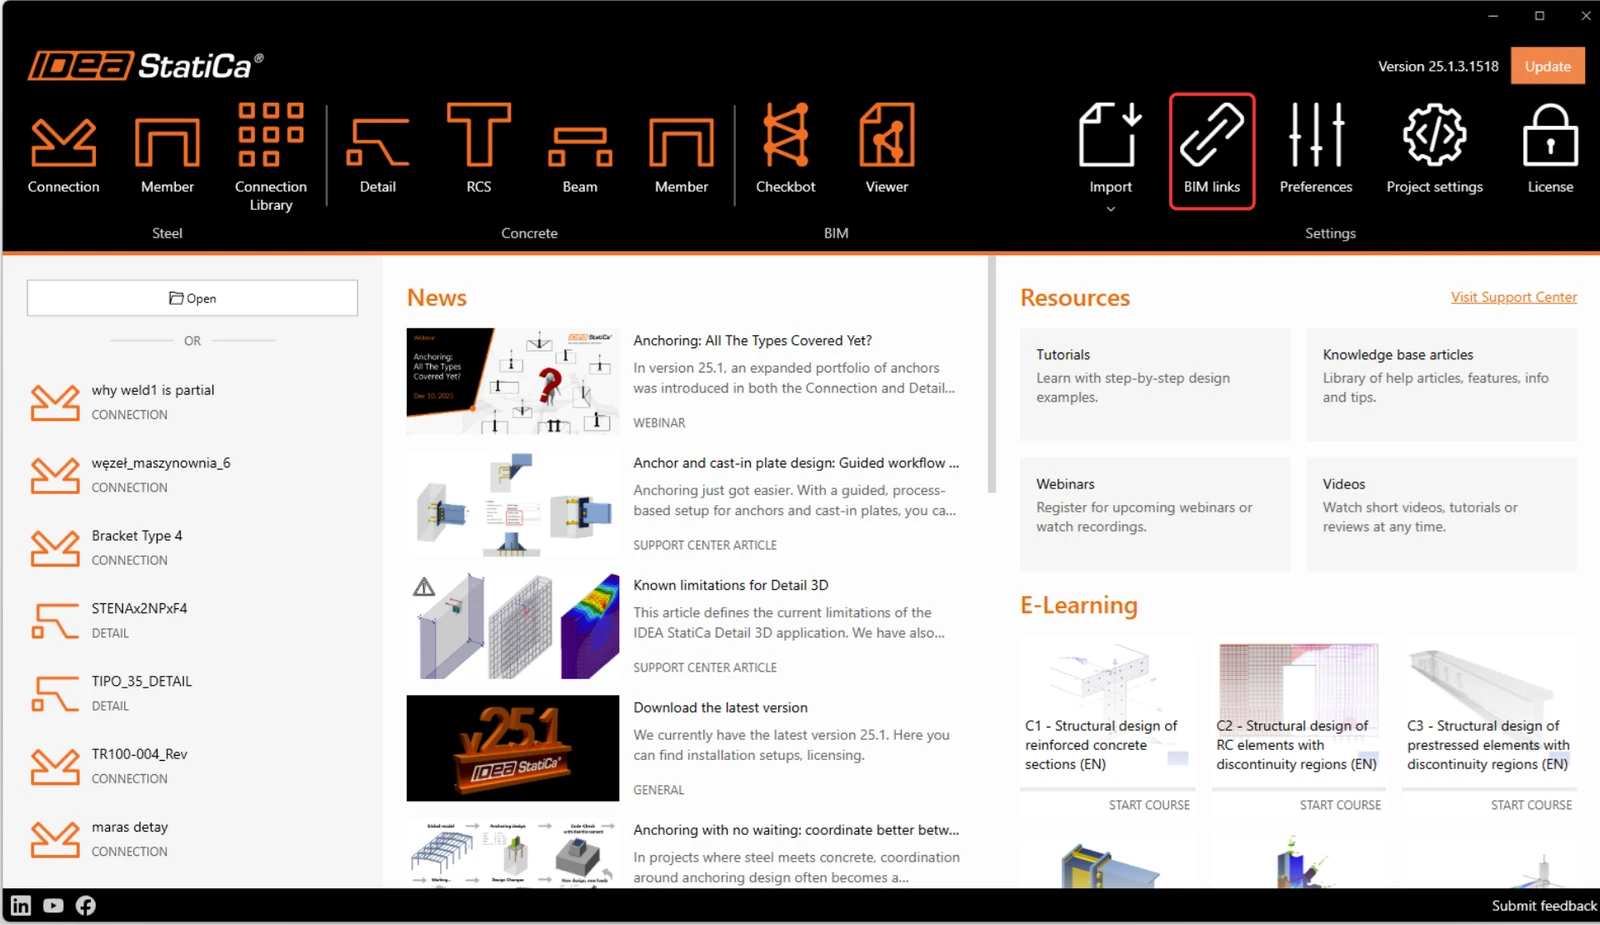
When prompted by Windows User Account Control, click Yes to allow installation.
Install the Midas GEN NX BIM link.
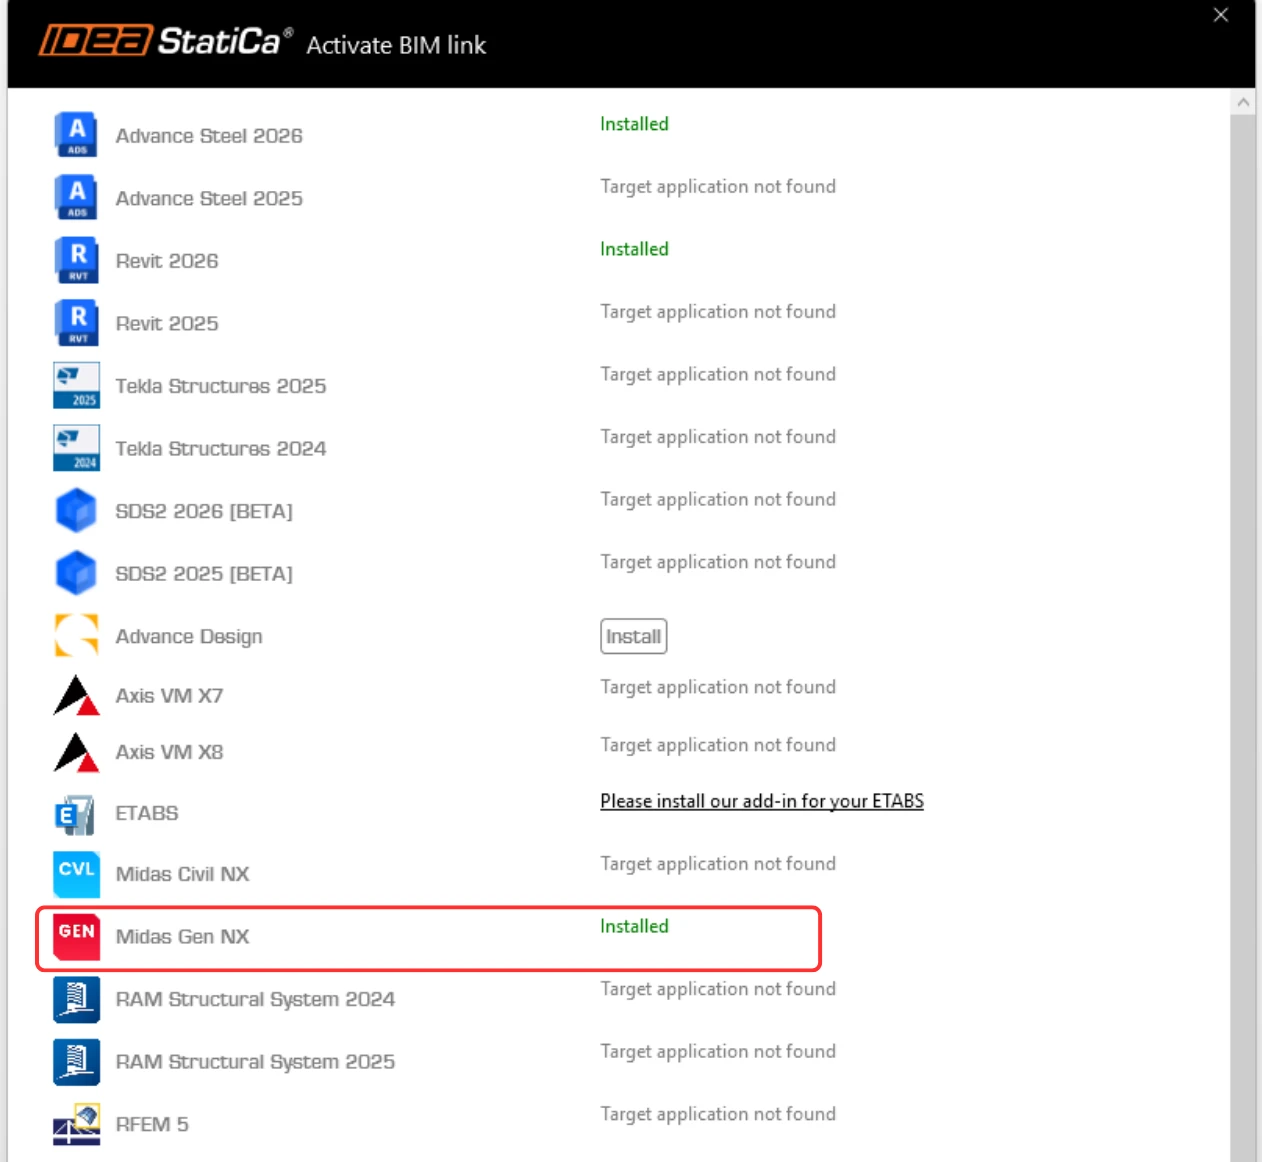
Subsequently, the new icon appears on the Desktop.

How to use the link
Now run Midas GEN NX and open the new or existing project. To follow tutorial use the attached project.
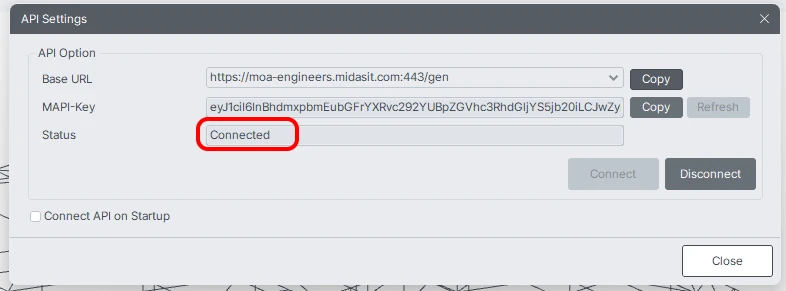
In the ribbon, in the last tab APPs, there is API Settings, where the Base URL and MAPI-Key are given. At first, the MAPI-Key is blank; it must be generated by clicking the Refresh button. The MAPI-Key is unique for every user and shouldn´t be shared with others. The Copy button can be used to copy them.
Click on the Connect button to activate the API connection.
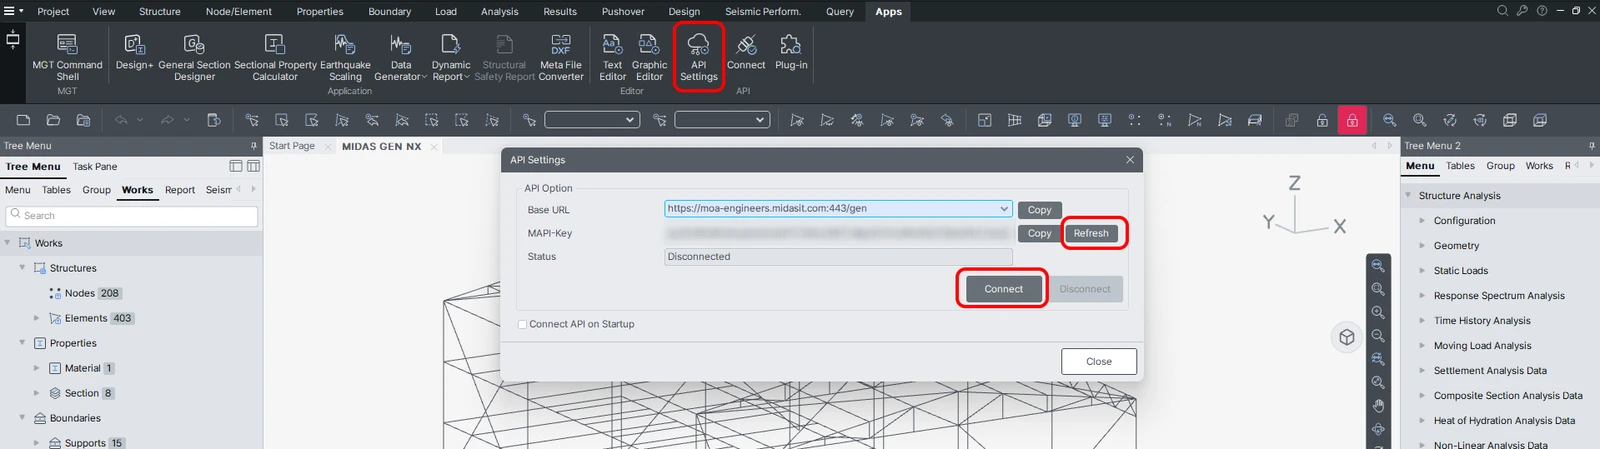
*NOTE: Enabling Connect API on Startup automatically establishes the link between MIDAS GEN NX and IDEA StatiCa Checkbot upon launch, eliminating the need for manual API activation.
The API is connected when the Tab changes to "Disconnect" and the status is "Connected".
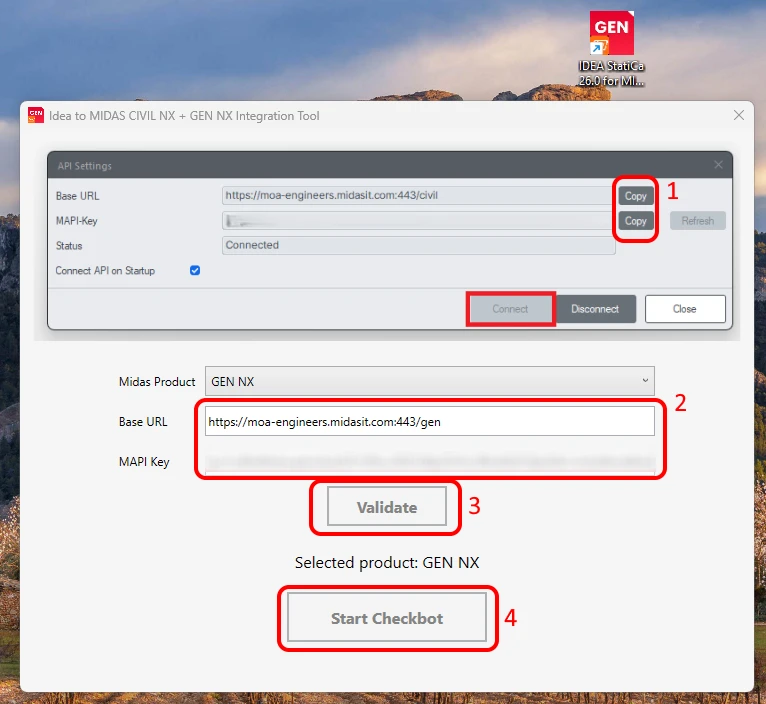
Open the IDEA to MIDAS GEN NX Integration Tool from the Desktop and paste the copied Base URL and MAPI Key from your opened MIDAS GEN NX project (1)(2). Then, Validate (3). Select the path to the connected MIDAS GEN NX model. Both .mgb and .mgbz file formats can be chosen. After that, Start Checkbot (4).
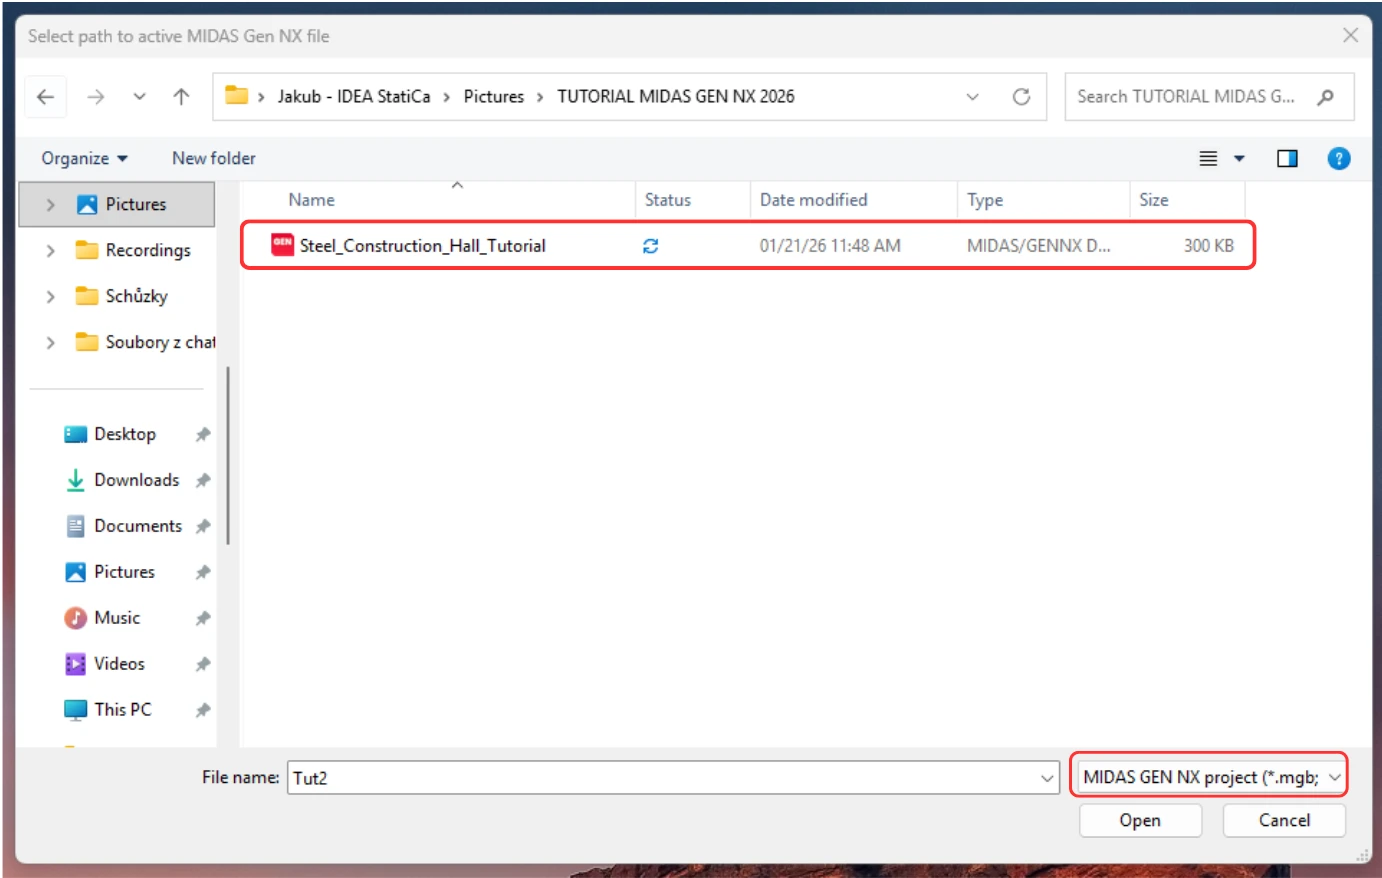
*NOTE: Once the initial connection is established using the BASE URL and MAPI Key, the credentials are retrieved directly from the system registry, which significantly simplifies the workflow. You do not need to re-enter these parameters. Launching the desktop shortcut automatically restores the connection, allowing you to immediately select the project for transfer to Checkbot.
Important: To successfully transfer your model, ensure that MIDAS GEN NX remains open with an active API connection throughout the process.
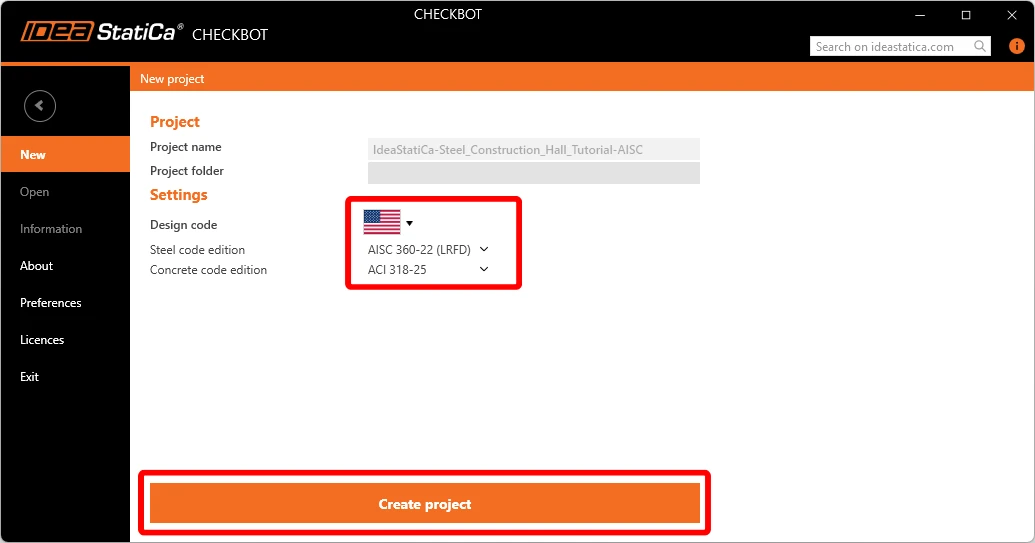
Set the required design code, and then create a new project in Checkbot.
The Checkbot folder is created in the same folder as the MIDAS GEN NX project.
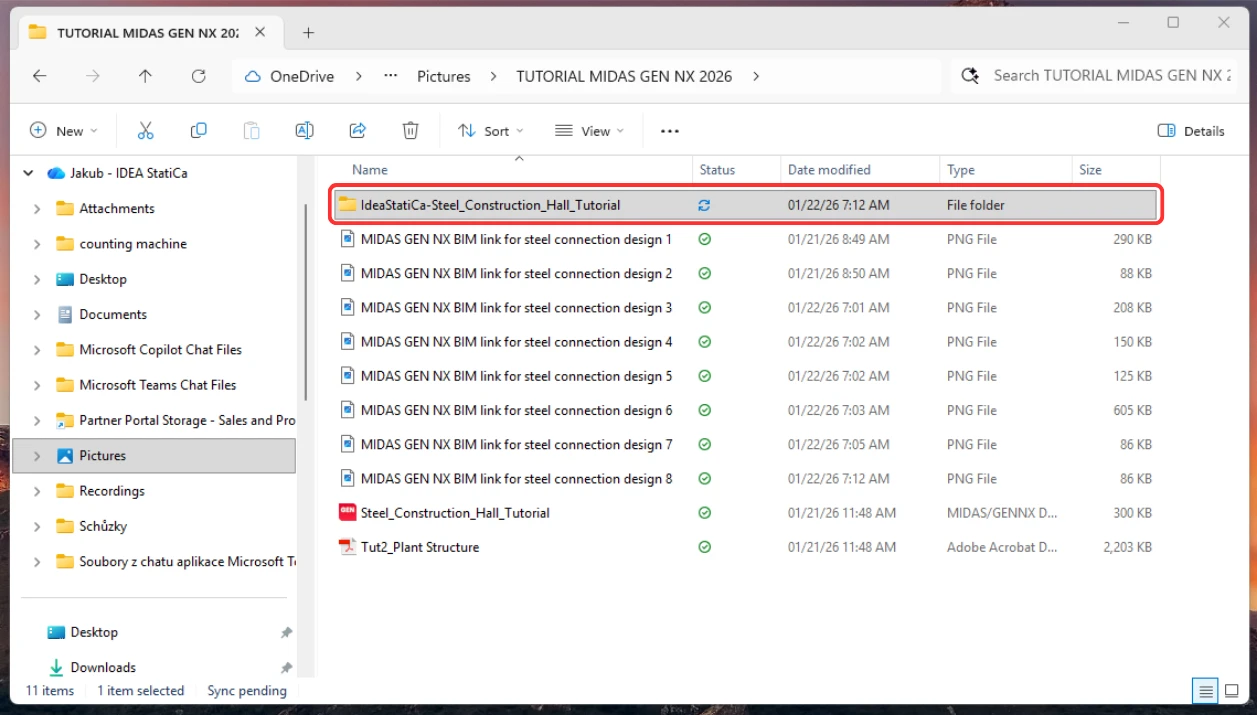
After that, a new project is opened. The Checkbot is connected to GEN NX (see the bottom-right corner).
Import to Checkbot
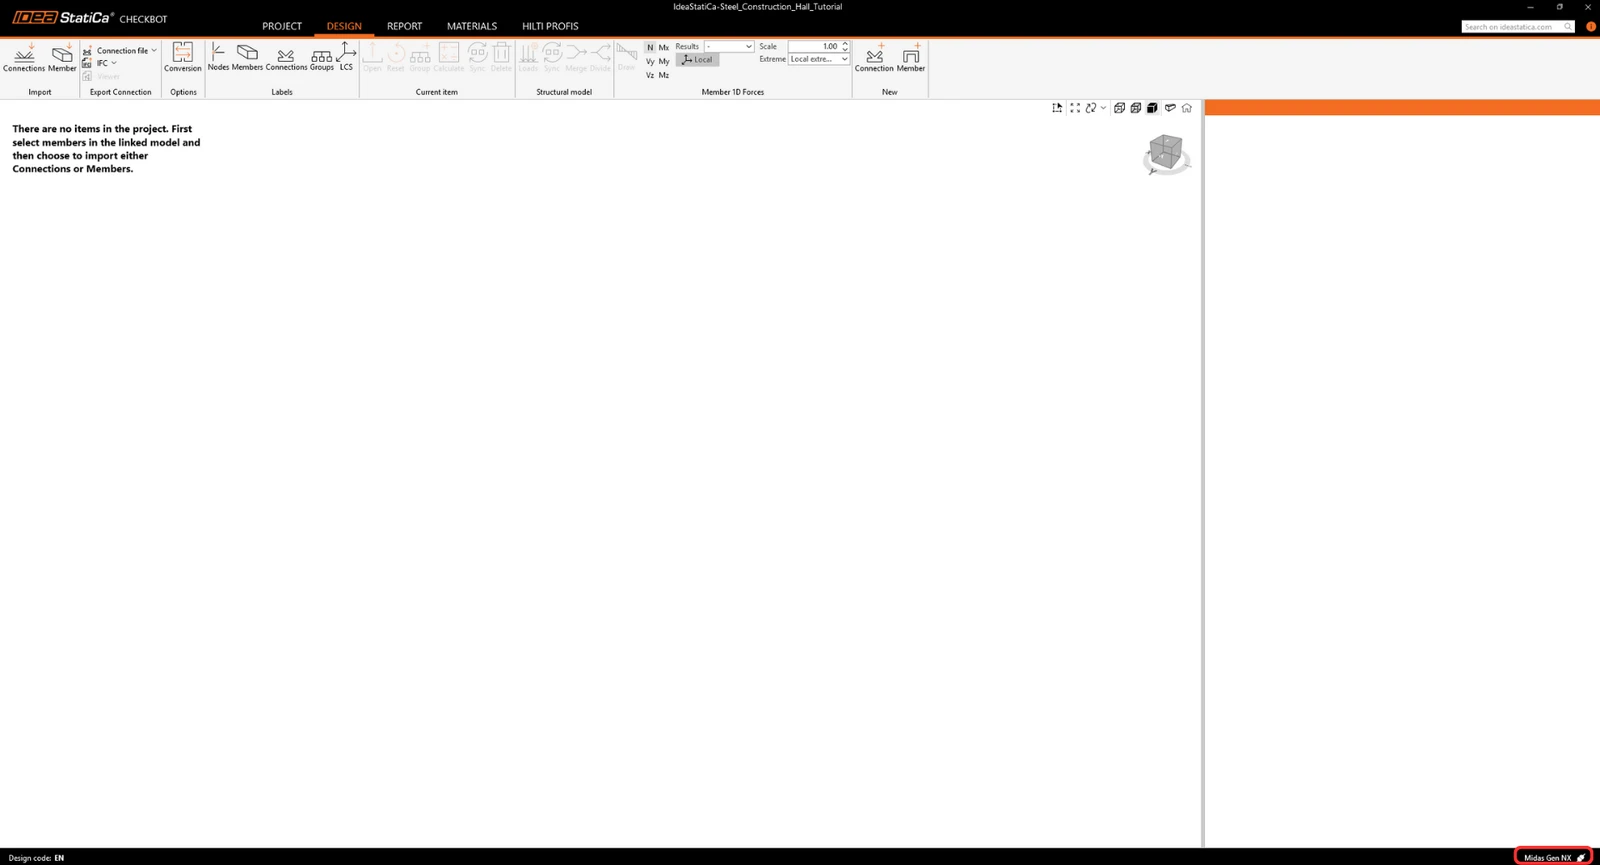
First, run a linear analysis in GEN NX to obtain the internal forces.
After analysis, you can import the whole model. To do so, select all the elements.
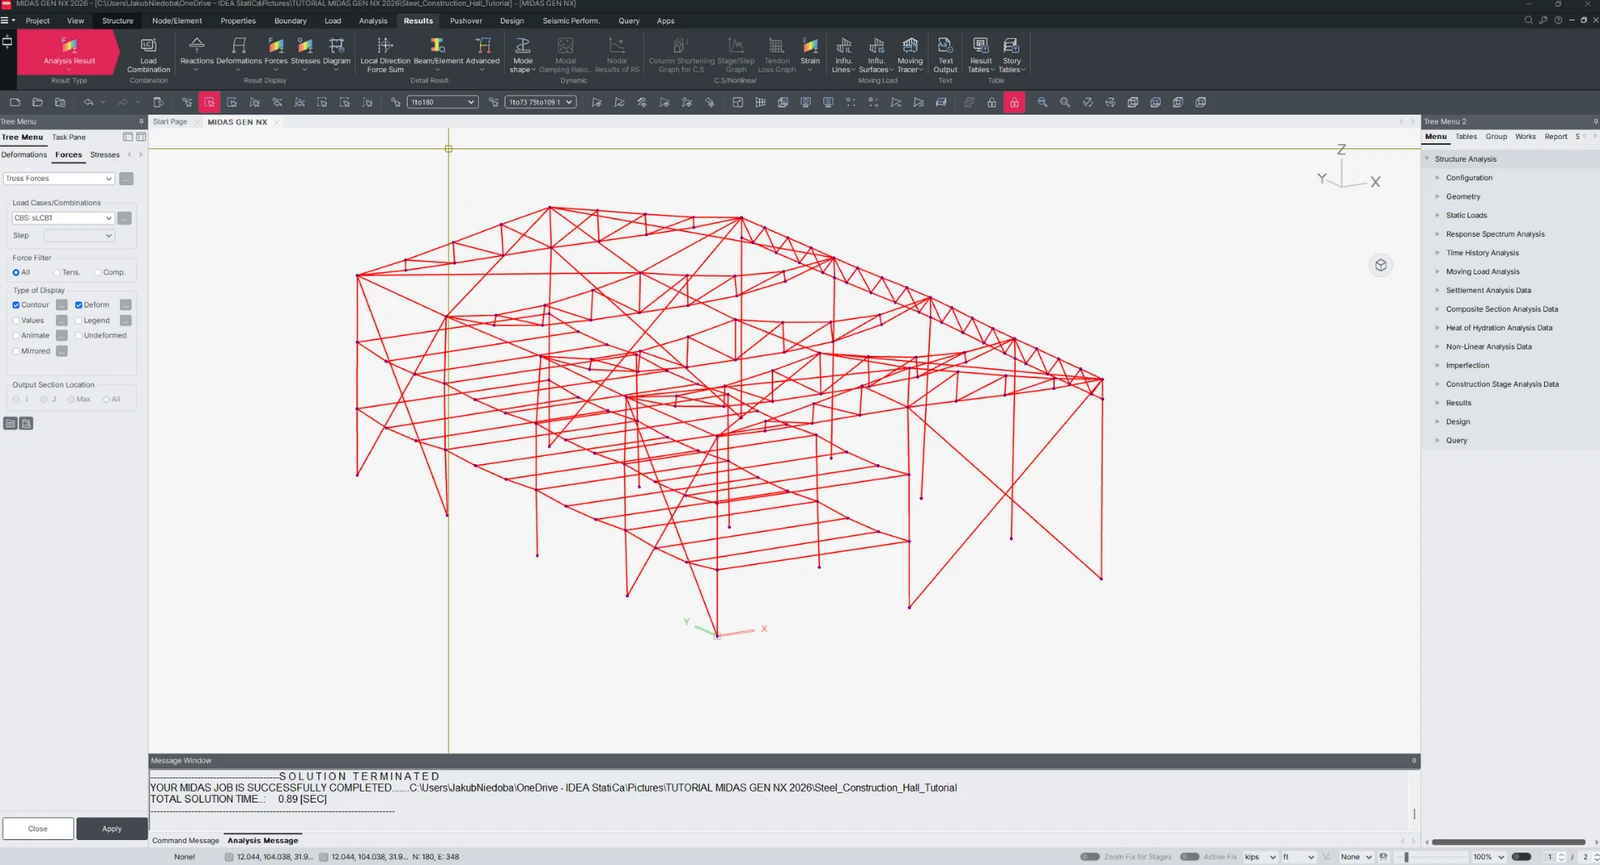
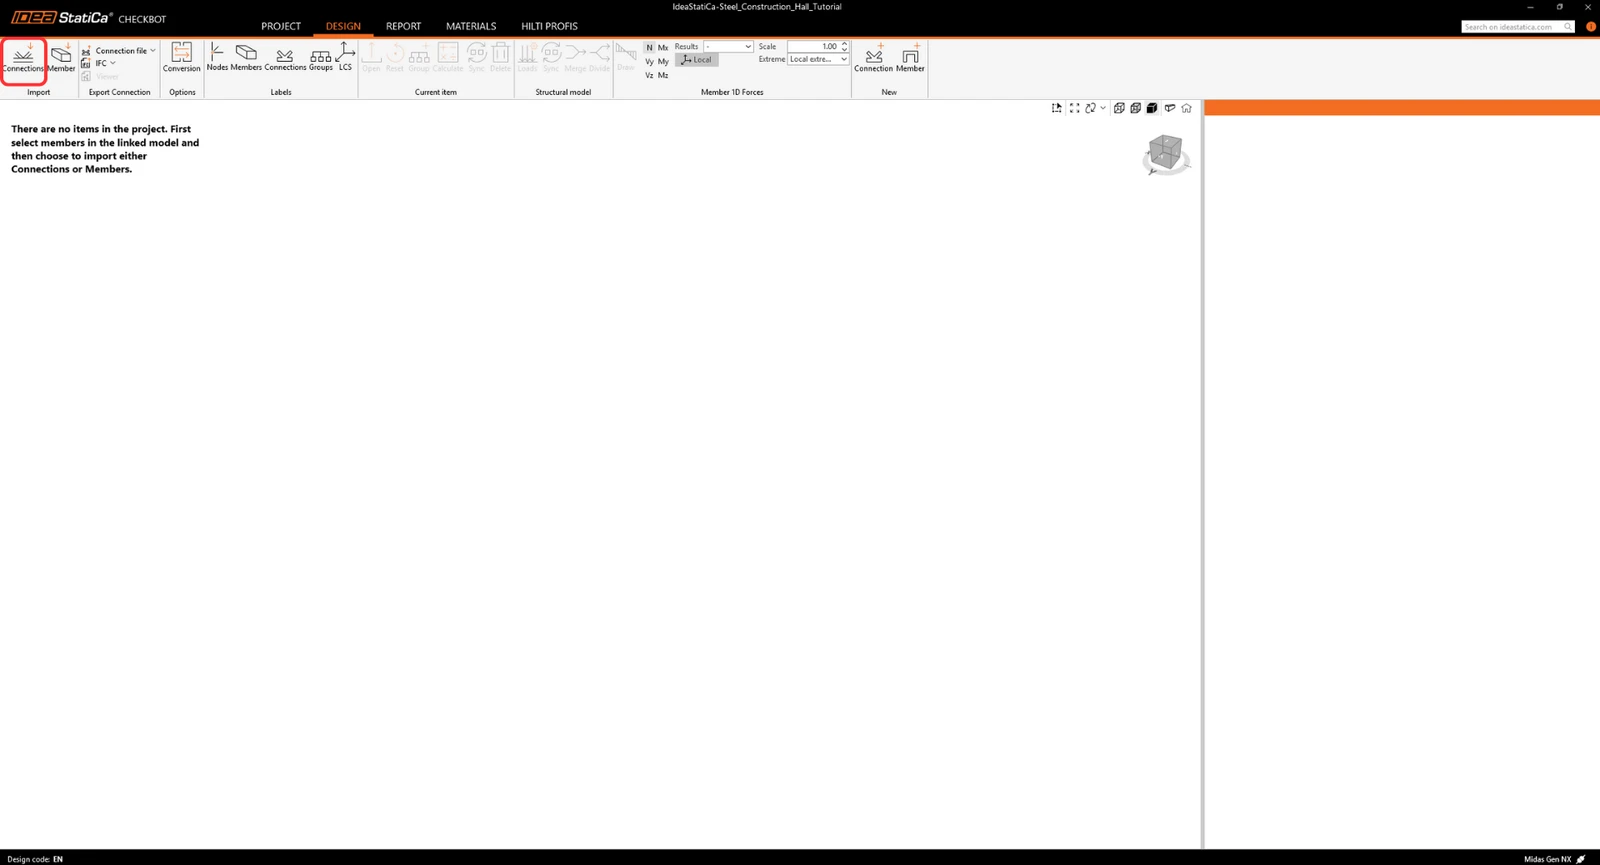
Click on the Connections Import tab.
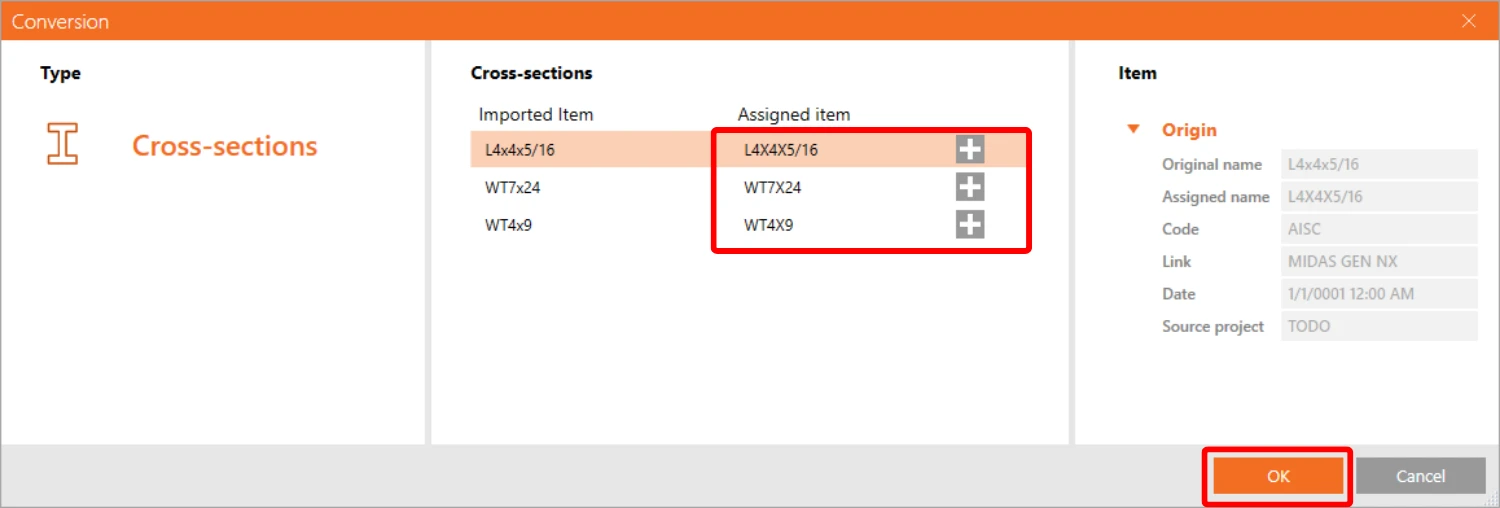
During the import process, a conversion table appears, and you need to manually assign materials and cross-sections that were not assigned automatically.
Now the whole structure has been imported.
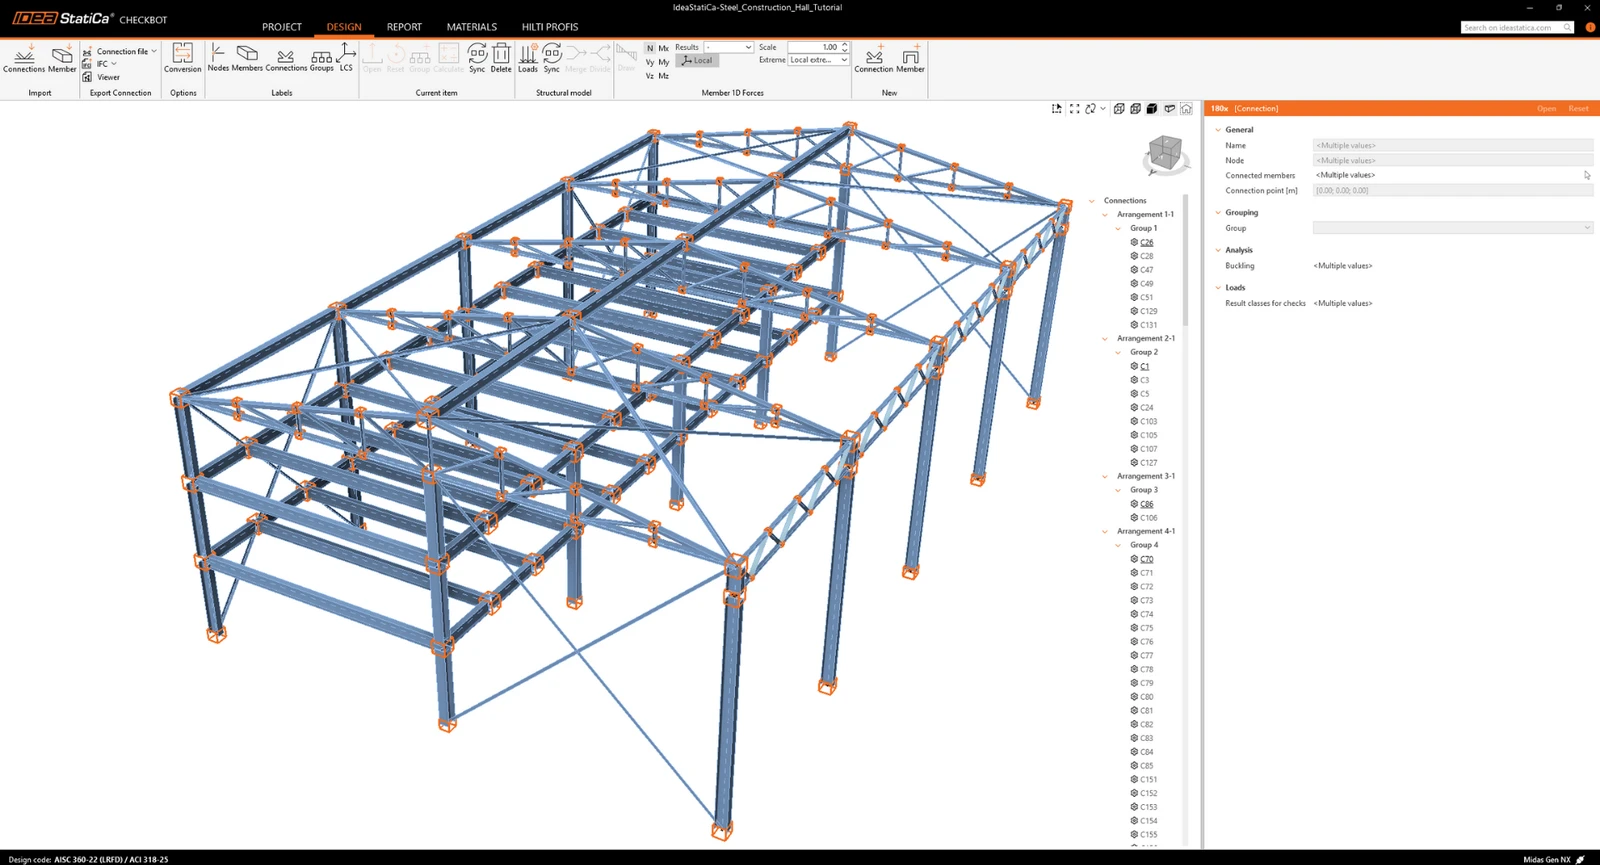
Alternatively, the connections could be imported one by one by selecting only one or more connections. The connections of the same typology are sorted into one arrangement or group.
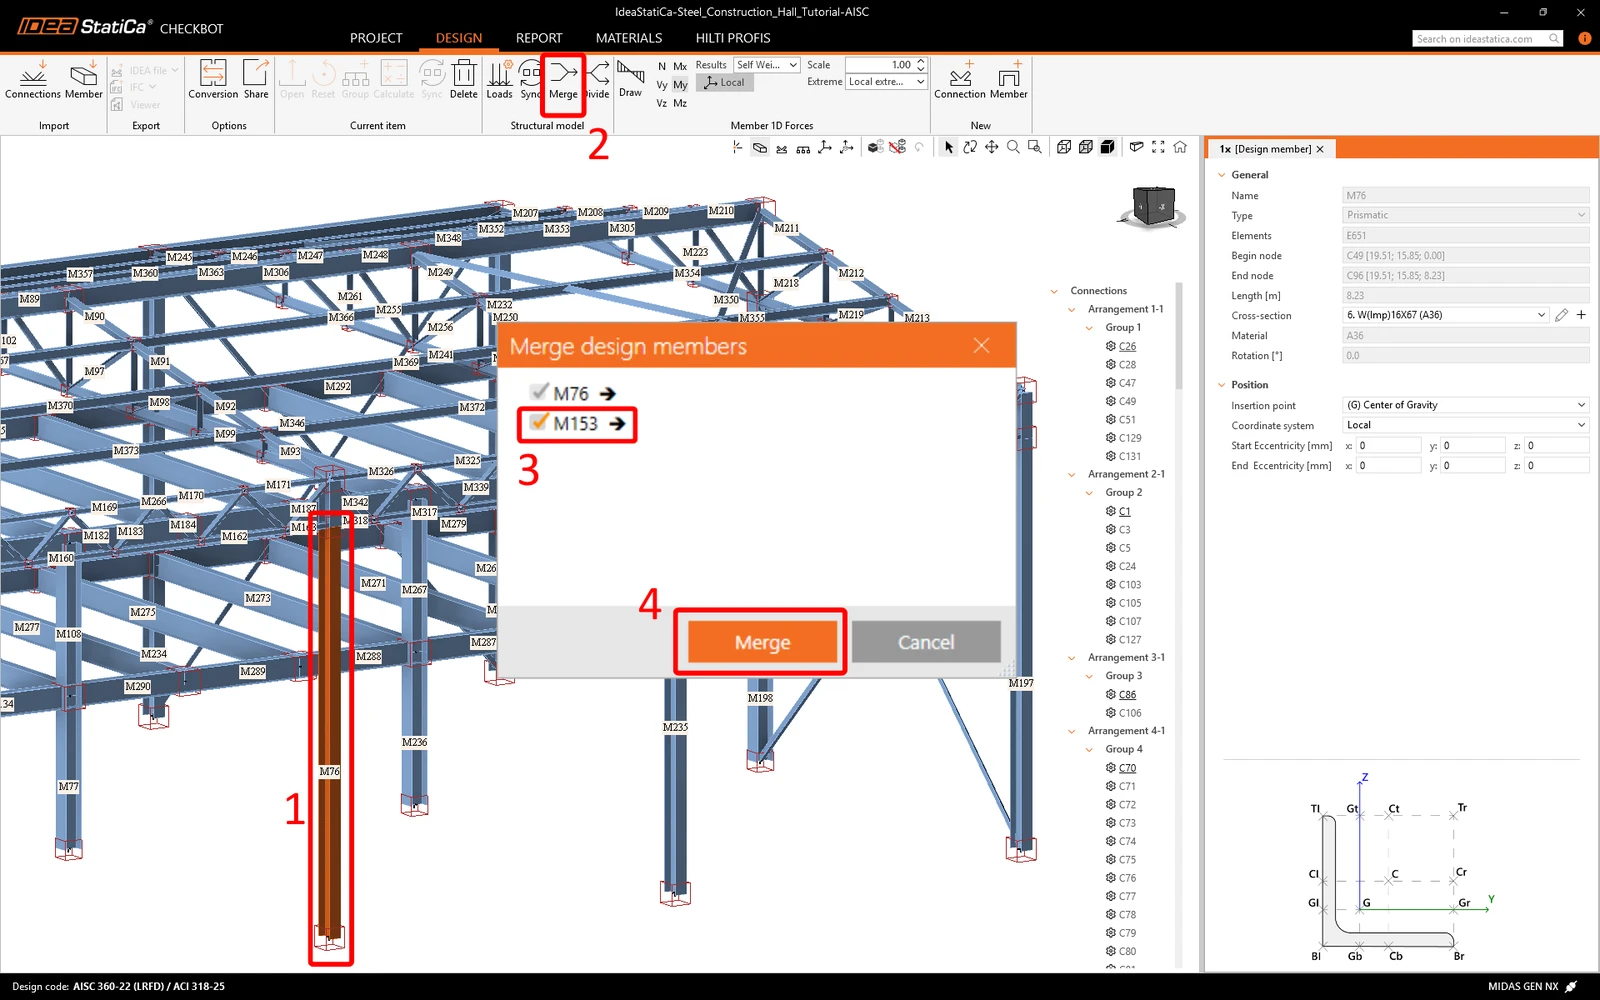
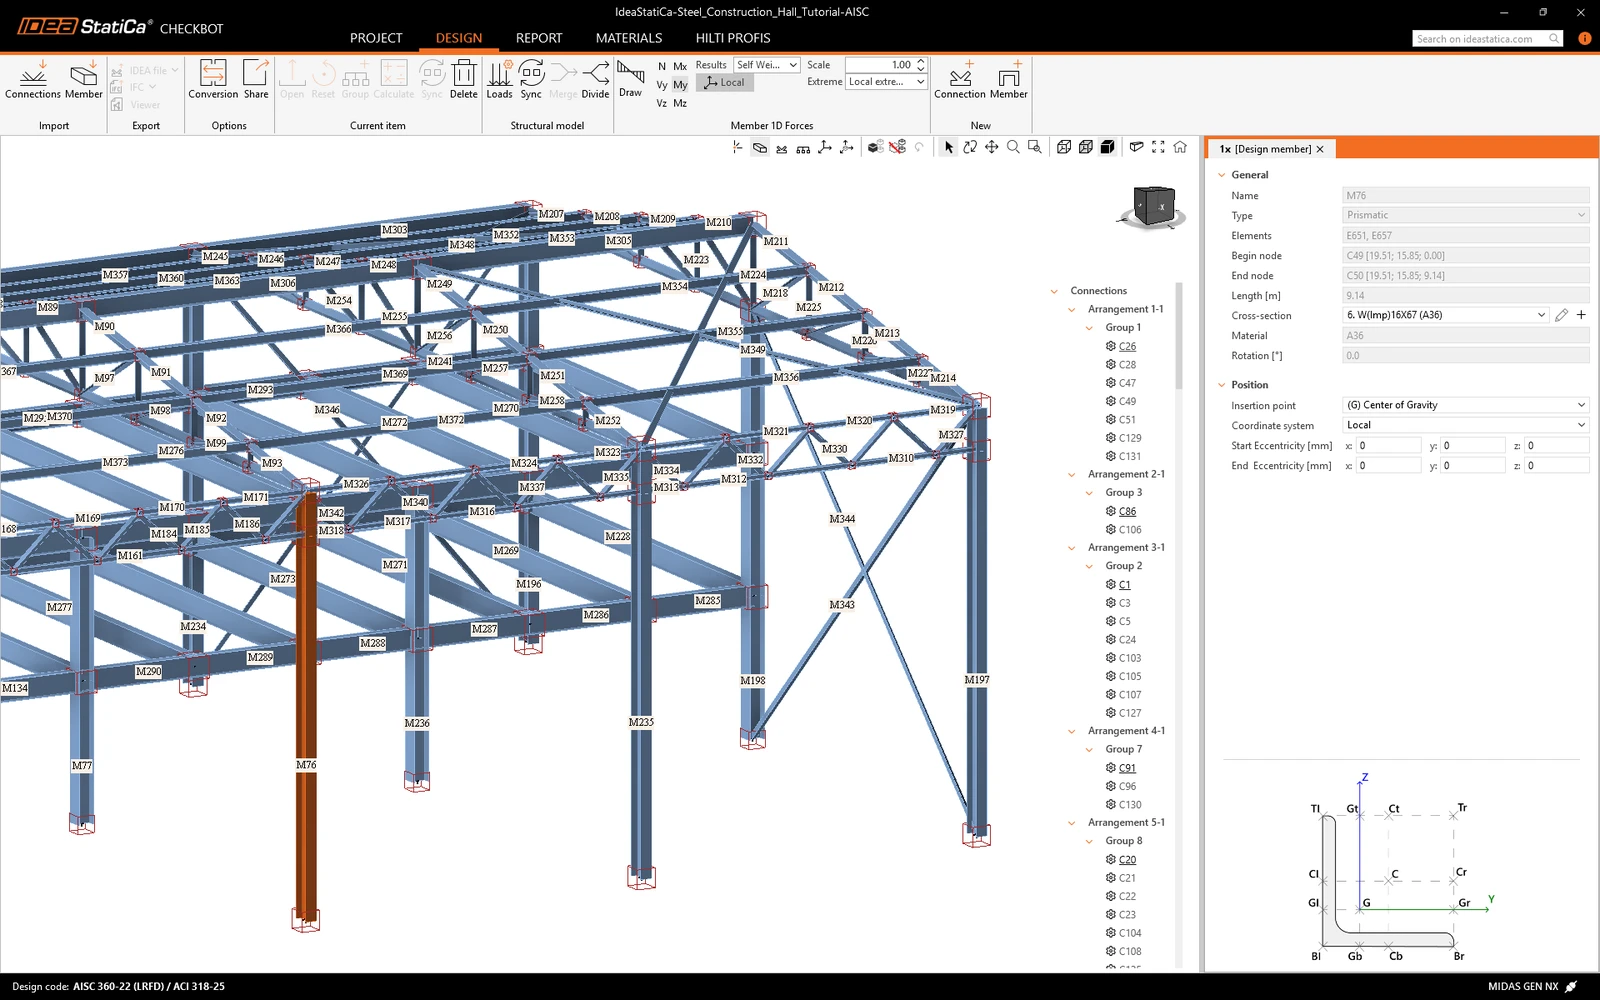
We can see that mebers with intermediate nodes were imported as several separate members, so we need to merge them together. Select the first member, click on Merge, mark other members to merge and confirm.
Grouping
The software groups connections by topology and cross-sections. The system automatically designates the Reference connection (visually distinguished by an underlined name in Three). This assignment is fixed and cannot be changed manually.
- Reference connection: Fully editable source of the design.
- Child connections: Non-editable duplicates of the Reference.
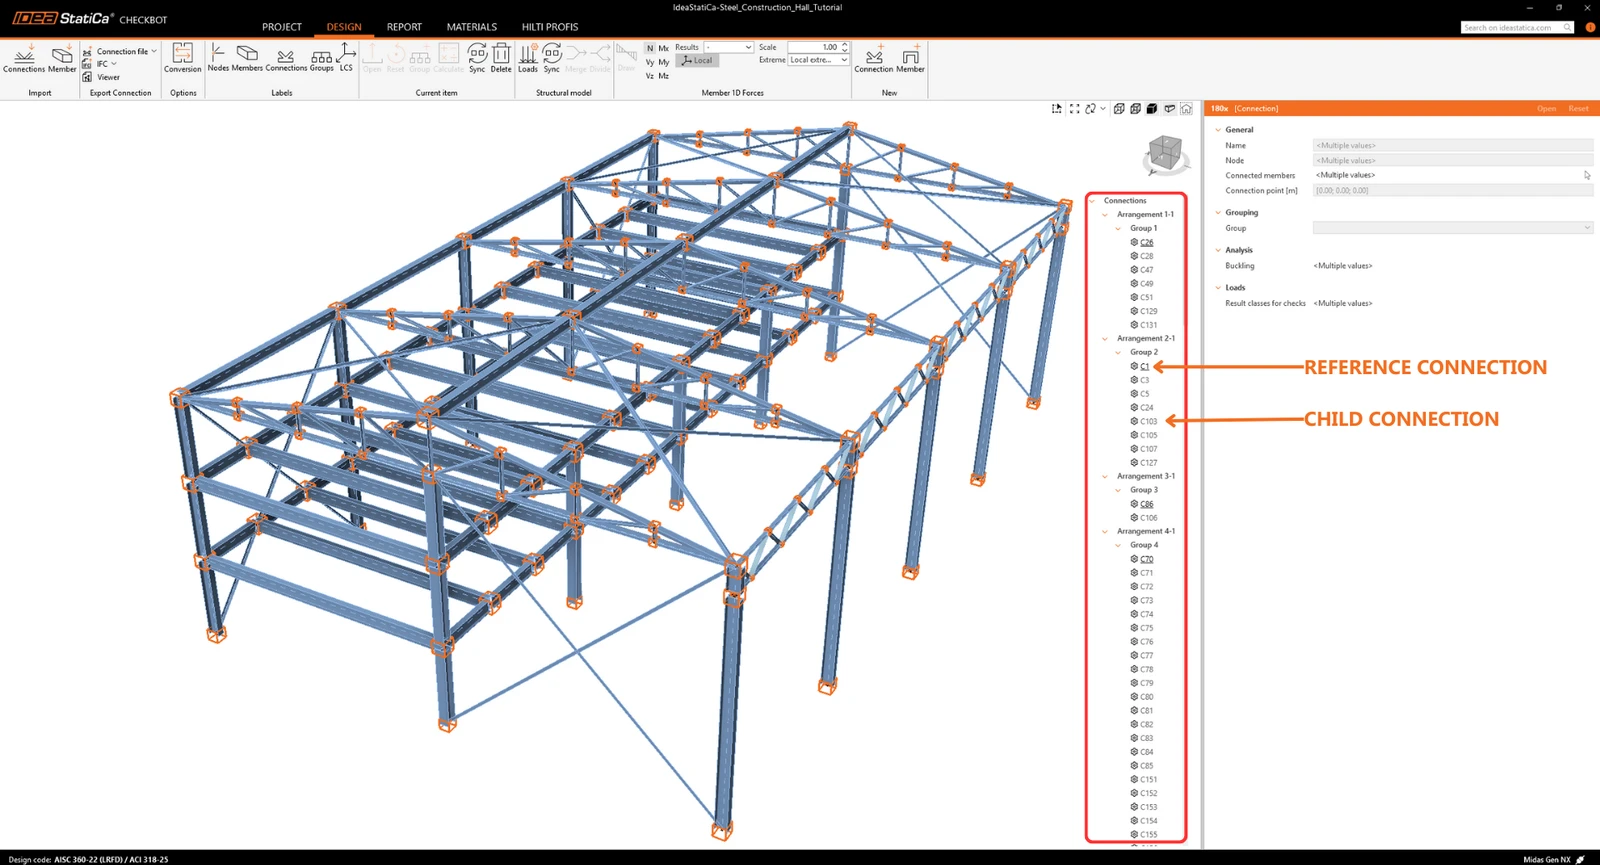
Operations, settings, and model types defined in the Reference are automatically applied to all Child connections. To modify a Child connection independently, use the right-click menu to Remove from group. This action disconnects it from the Reference and clears any inherited operations.
You can also create custom groups to organize the project as needed. To designate a specific connection as the Reference, first create a group containing only that target connection. Then, add the remaining connections to this new group. You can also select and assign multiple connections to a group simultaneously.
More about the workflow in the Checkbot, see the article Checkbot – bulk BIM workflows.
See also the article Known limitations for MIDAS BIM link.
Design and code-check of connections
In the list of project items, select the reference node of the group you want to design. You can now either right-click and select Open or click the ribbon command Open.
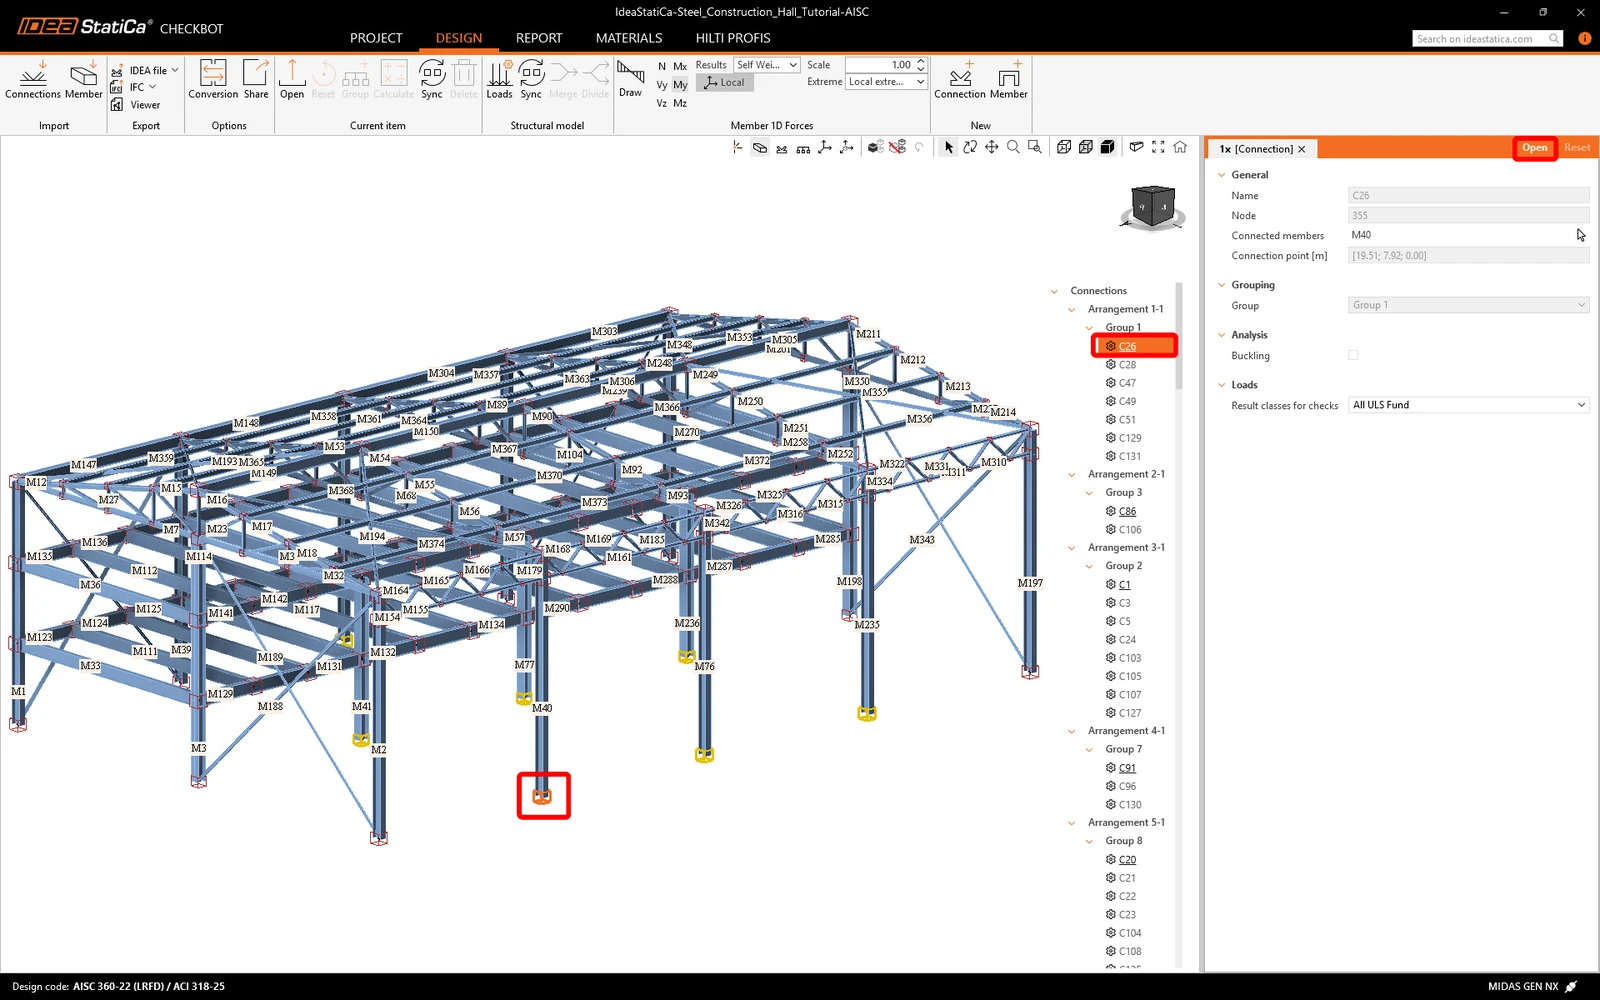
The selected connection is opened in the IDEA StatiCa Connection. Now design the connection — you may use one of the templates from the Connection library.
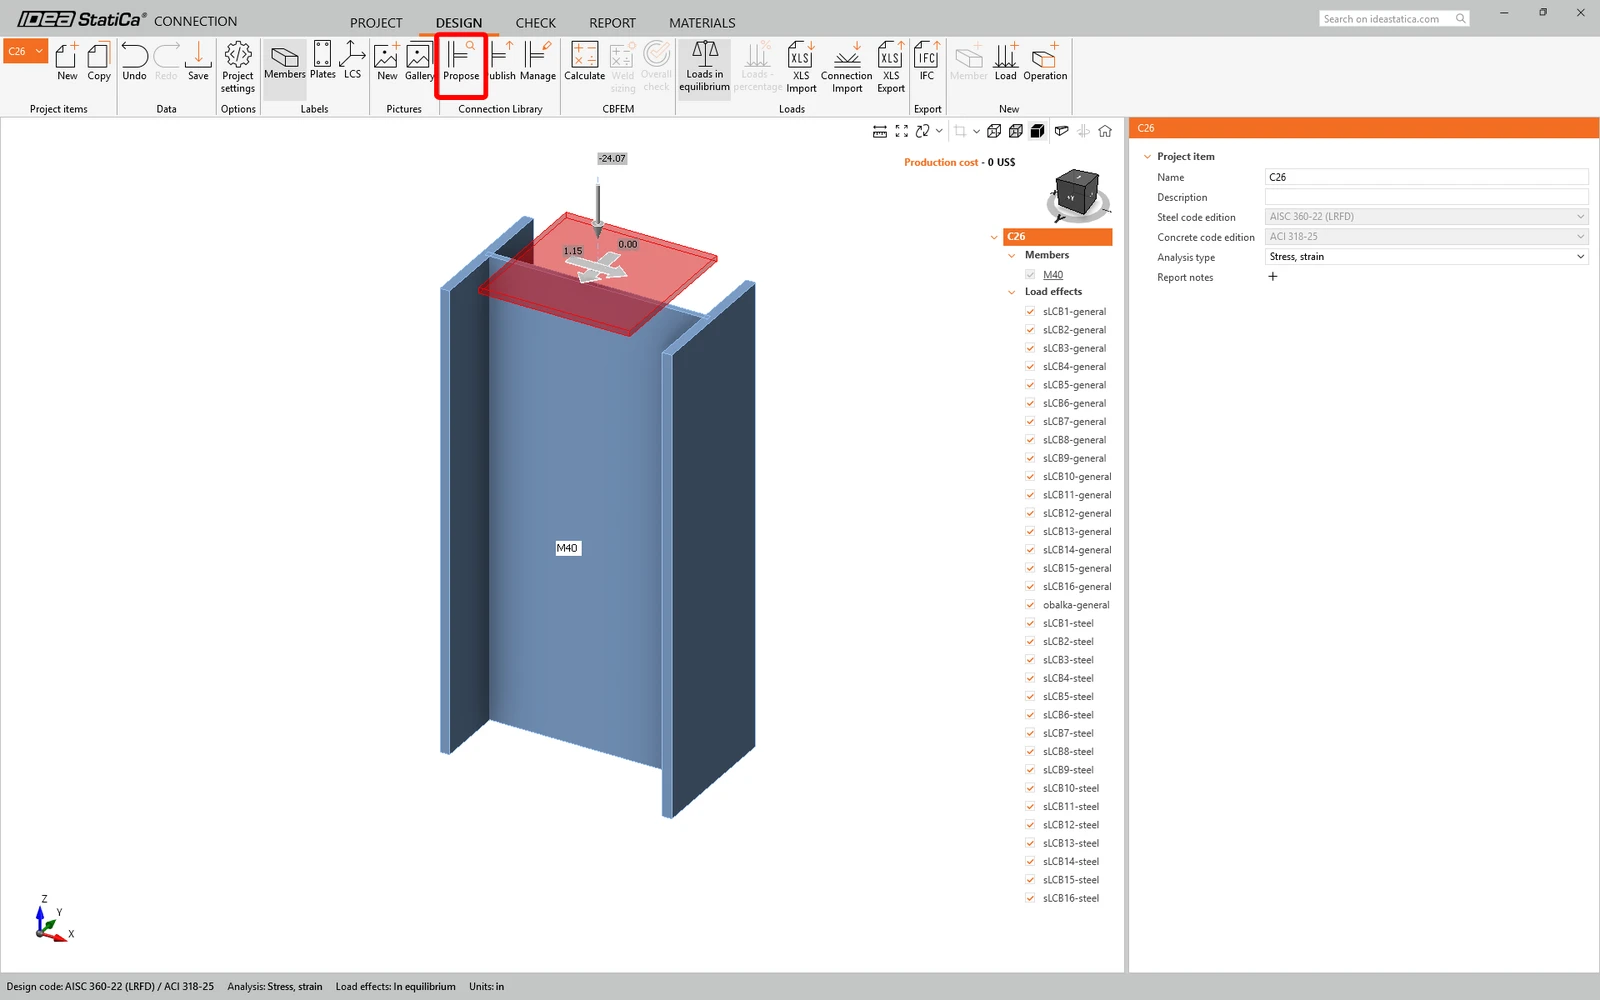
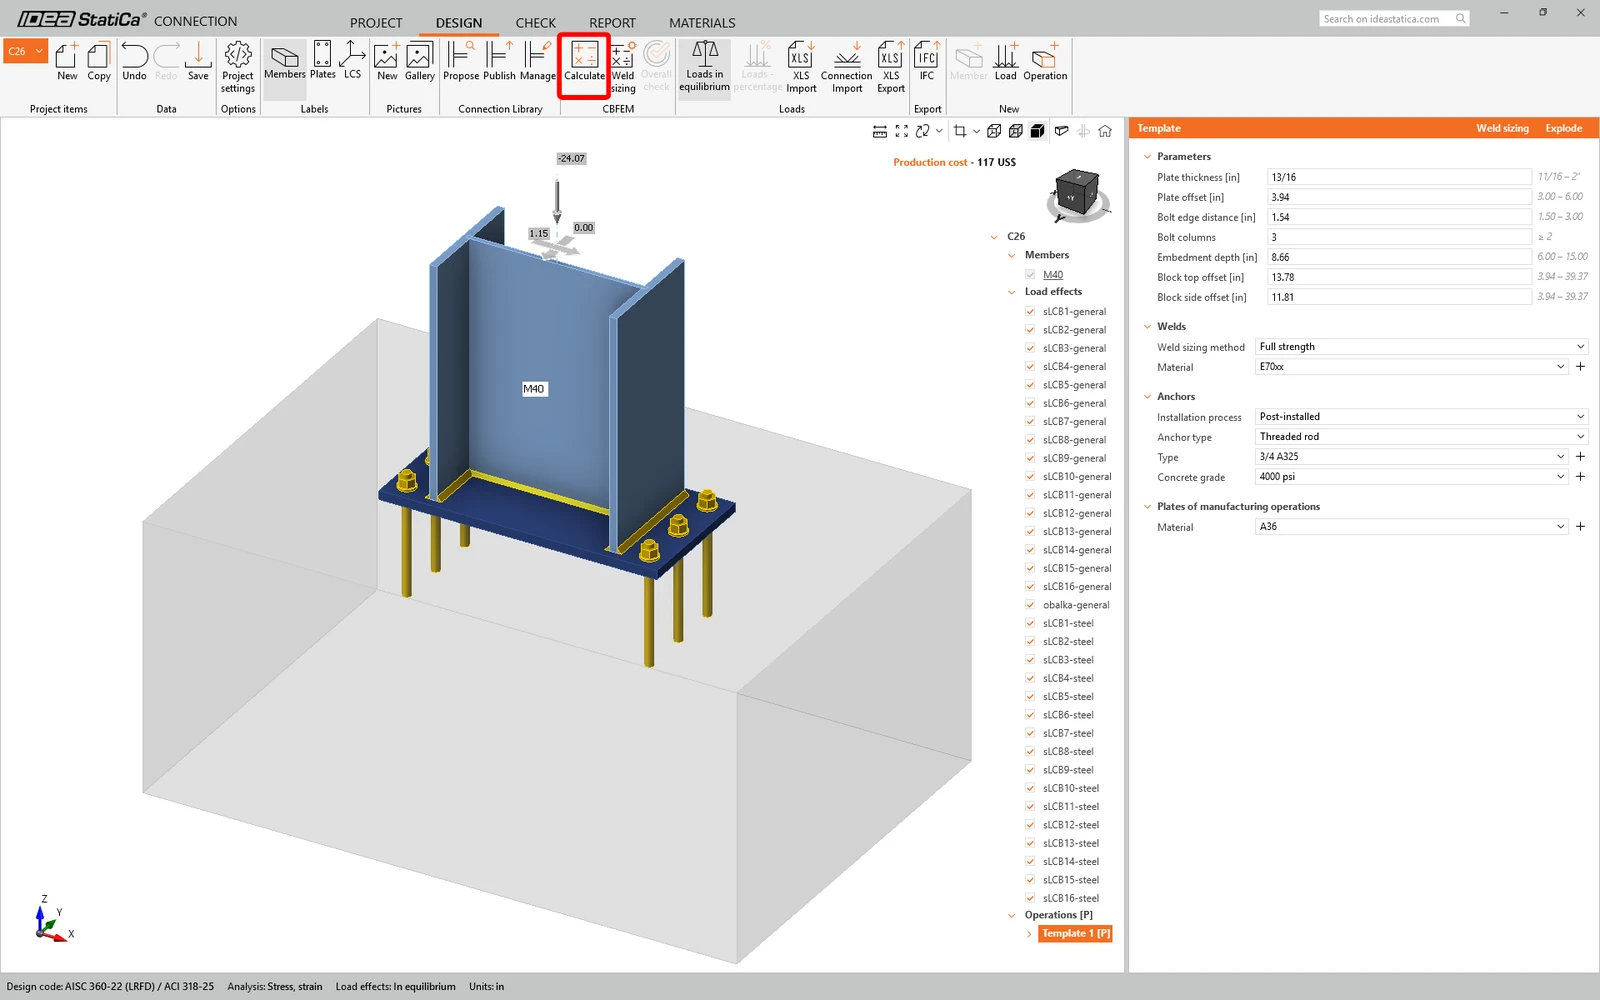
Run the analysis by clicking on Calculate.
You can go to the Check tab to review the results.
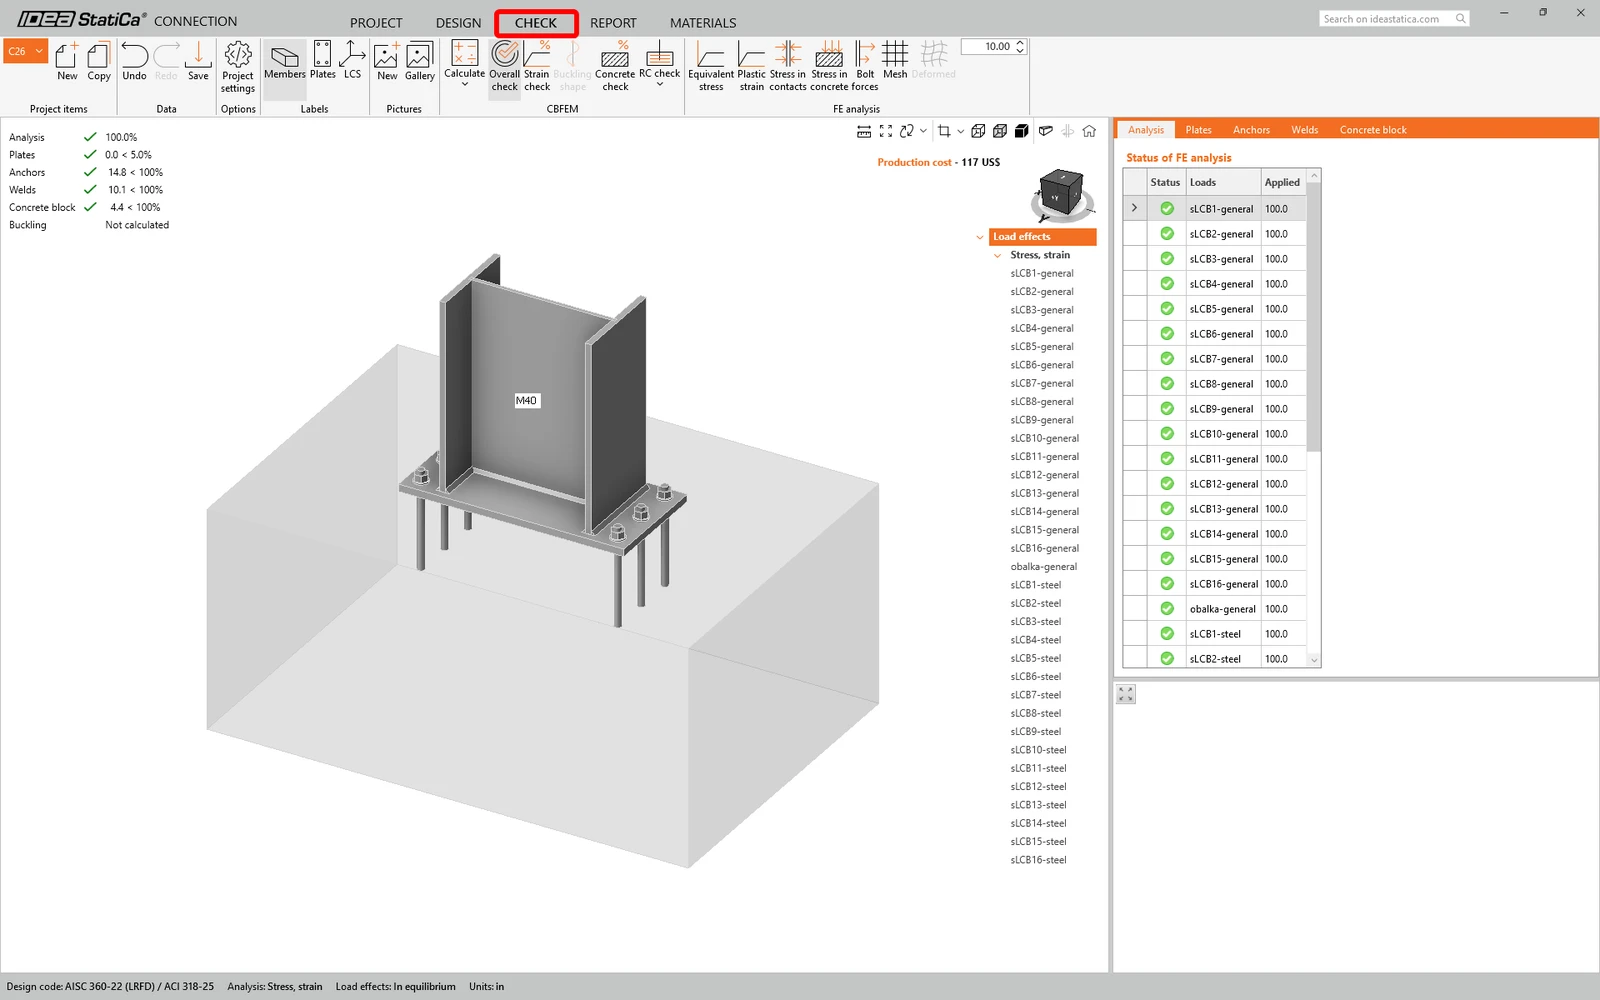
Once the code-check is finished, Save this connection and switch back to the Checkbot window (you can keep the Connection window open).
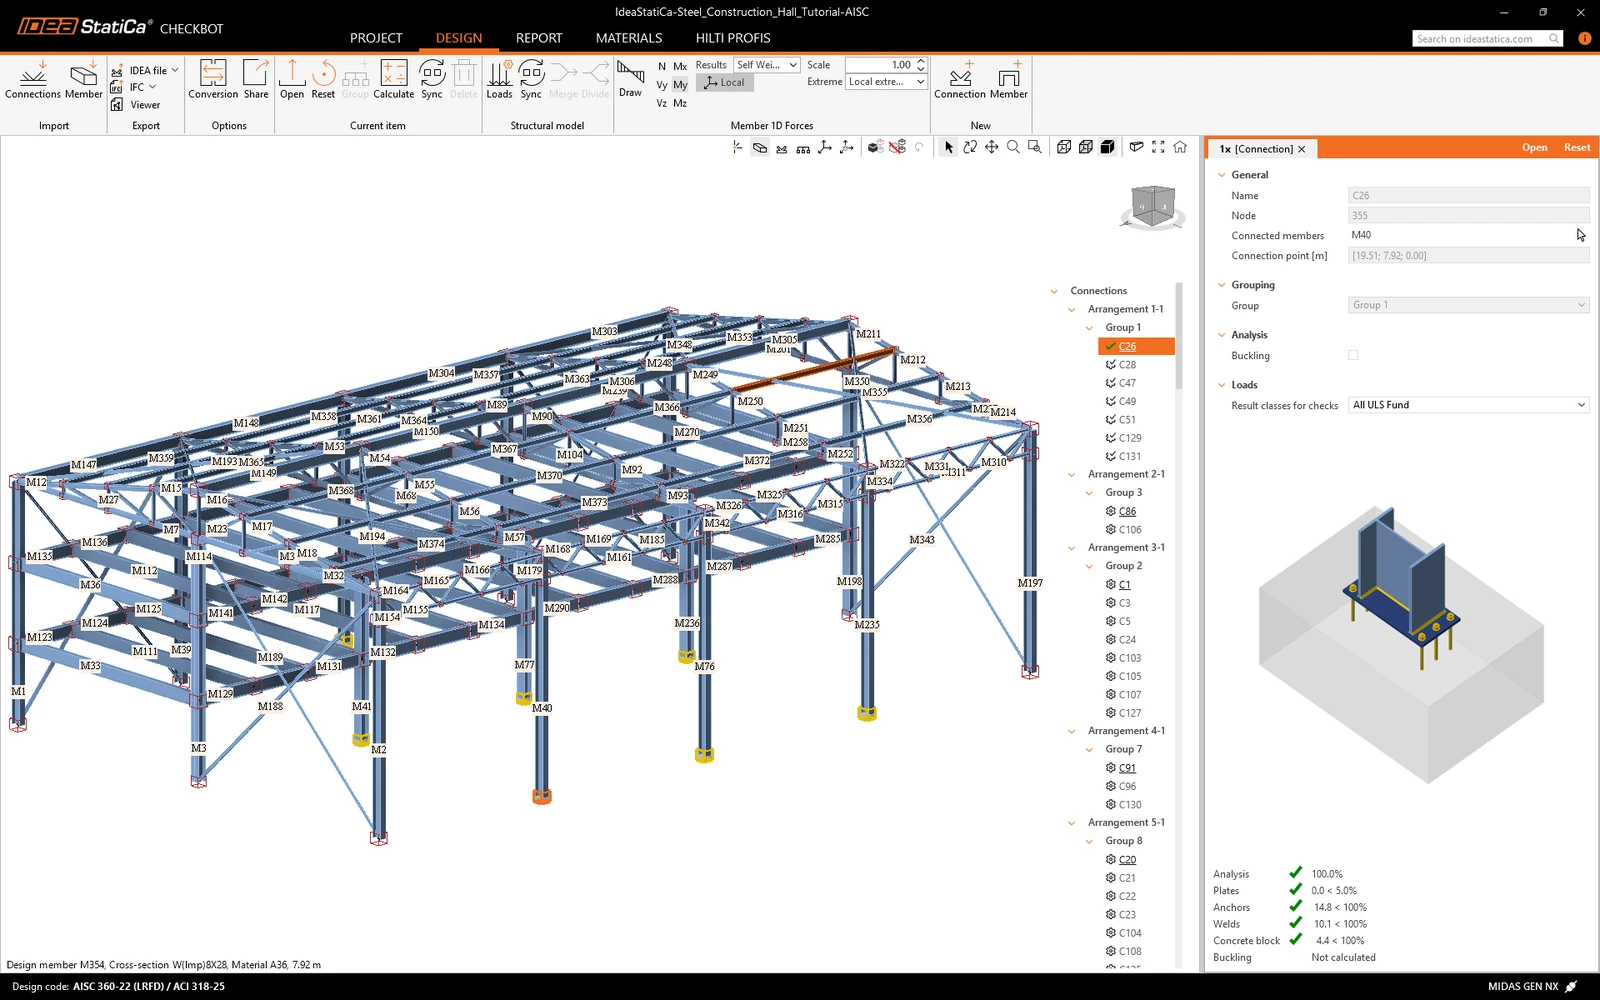
In Checkbot, you will see a green tick next to the connection and the node box filled with green color. This means that the connection has passed all code-checks. In the Connection panel, you can also see a representation of the connection and a summary of the code-check results.
Now you have successfully linked MIDAS GEN NX with IDEA StatiCa Connection via Checkbot.
Want to improve your skills? Visit our Campus
Learn how to use IDEA StatiCa effectively with our self-paced e-learning courses
Start learning- Steel
- Knowledge base
Known limitations for MIDAS BIM link
Read more
- Connection design
- Steel
- Case study
Railway bridge across Vltava river, Czech Republic
Read more
- Member design
- Steel
- Tutorials
Structural design of a steel cross-beam affected by lateral torsional buckling (EN)
Read more- Steel
- Connection design
- Member design
- Concrete
- Reinforced concrete
- Prestressed concrete
- Knowledge base