


How to activate the link
- Download and install the latest version of IDEA StatiCa
- Make sure that you are using a supported version of your FEA solution
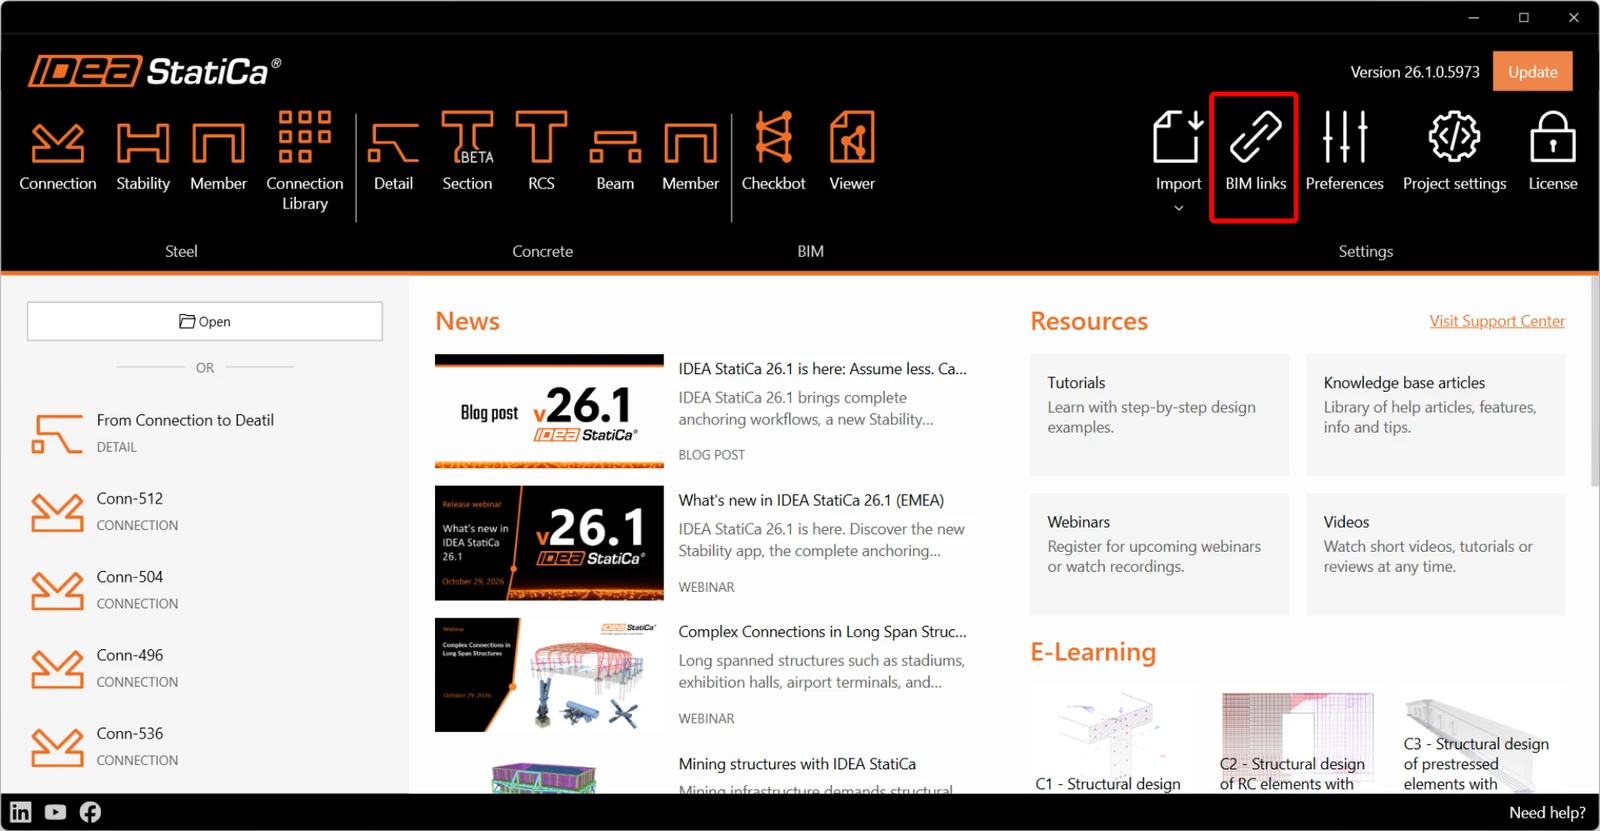
IDEA StatiCa integrates BIM links into your FEA software during its installation. You can check the status and eventually integrate more BIM links by running IDEA StatiCa and opening the BIM links. Please note that some FEA software require additional steps to fully activate their BIM link to IDEA StatiCa.
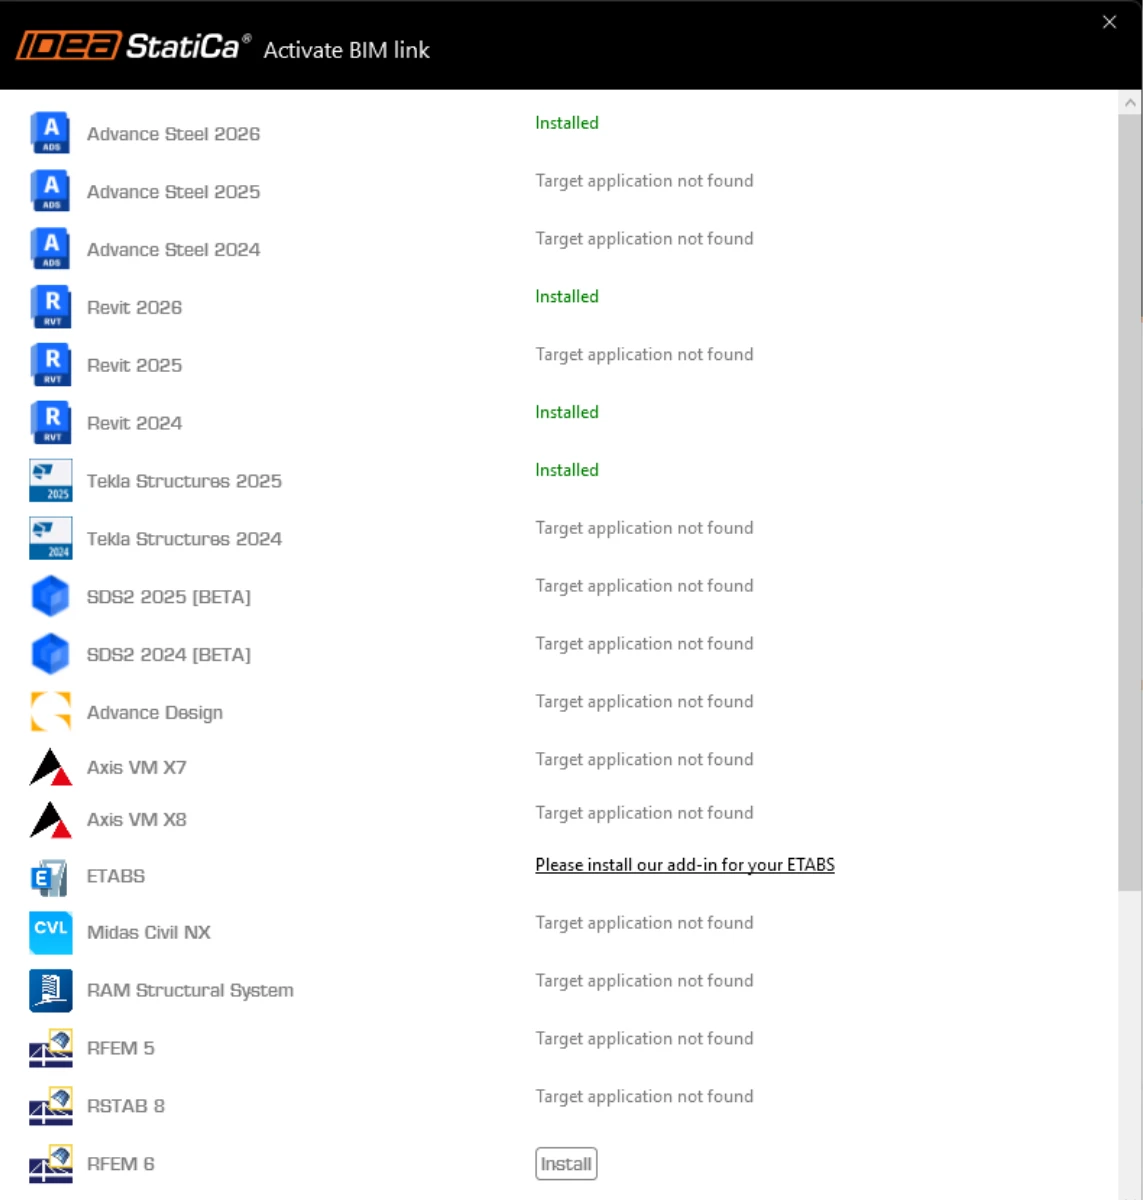
A notification "Do you want to allow this app to make changes to your device?" may appear, if so, please confirm with the Yes button.
By clicking Install, the BIM link for the selected software is integrated. The screen also tells you the status of other BIM links.
How to use IDEA StatiCa Checkbot
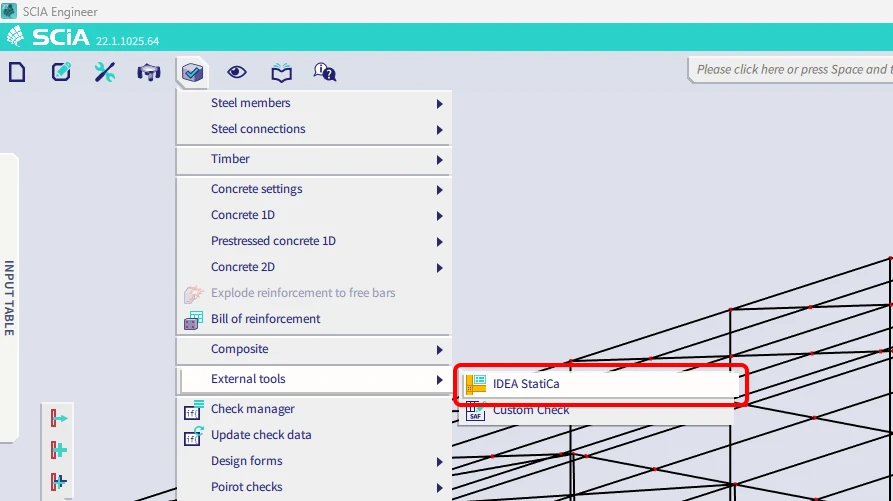
Download the attached project, open it in SCIA Engineer, and run the calculation to get the internal forces over the structure.
After that, run the IDEA StatiCa Checkbot application.
After launching the Checkbot app, select the workflow Checkbot and design code EN. Then select Create Project.
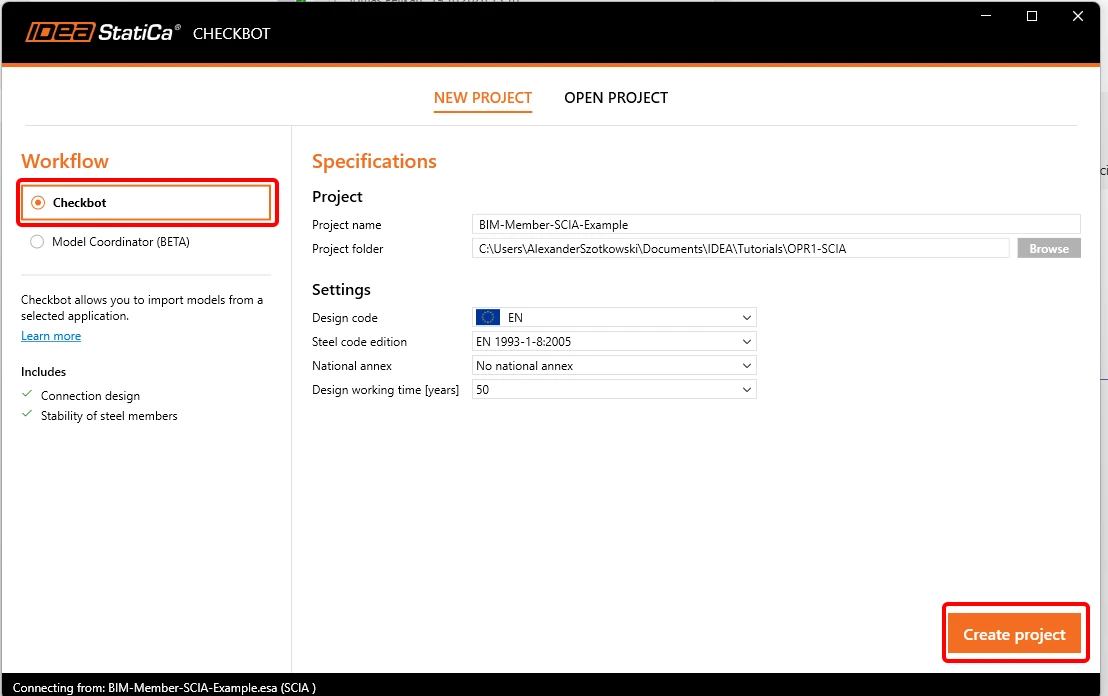
The new Checkbot project is ready to import connections and members from SCIA Engineer.
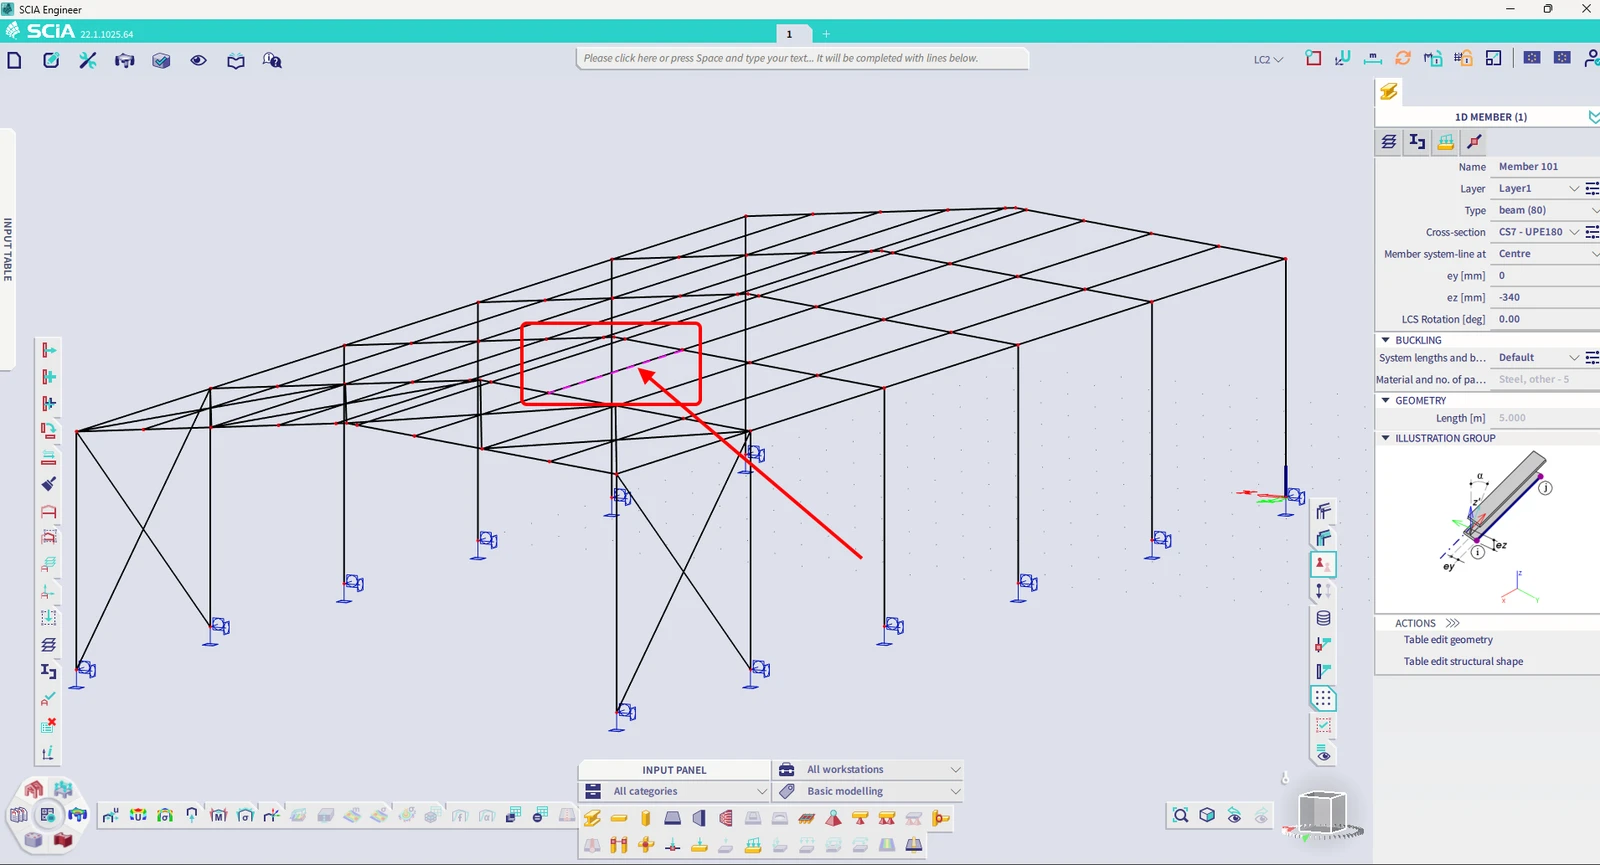
In SCIA Engineer, select one of the inside members, as shown in the picture.
Import
Then in Checkbot select Member.
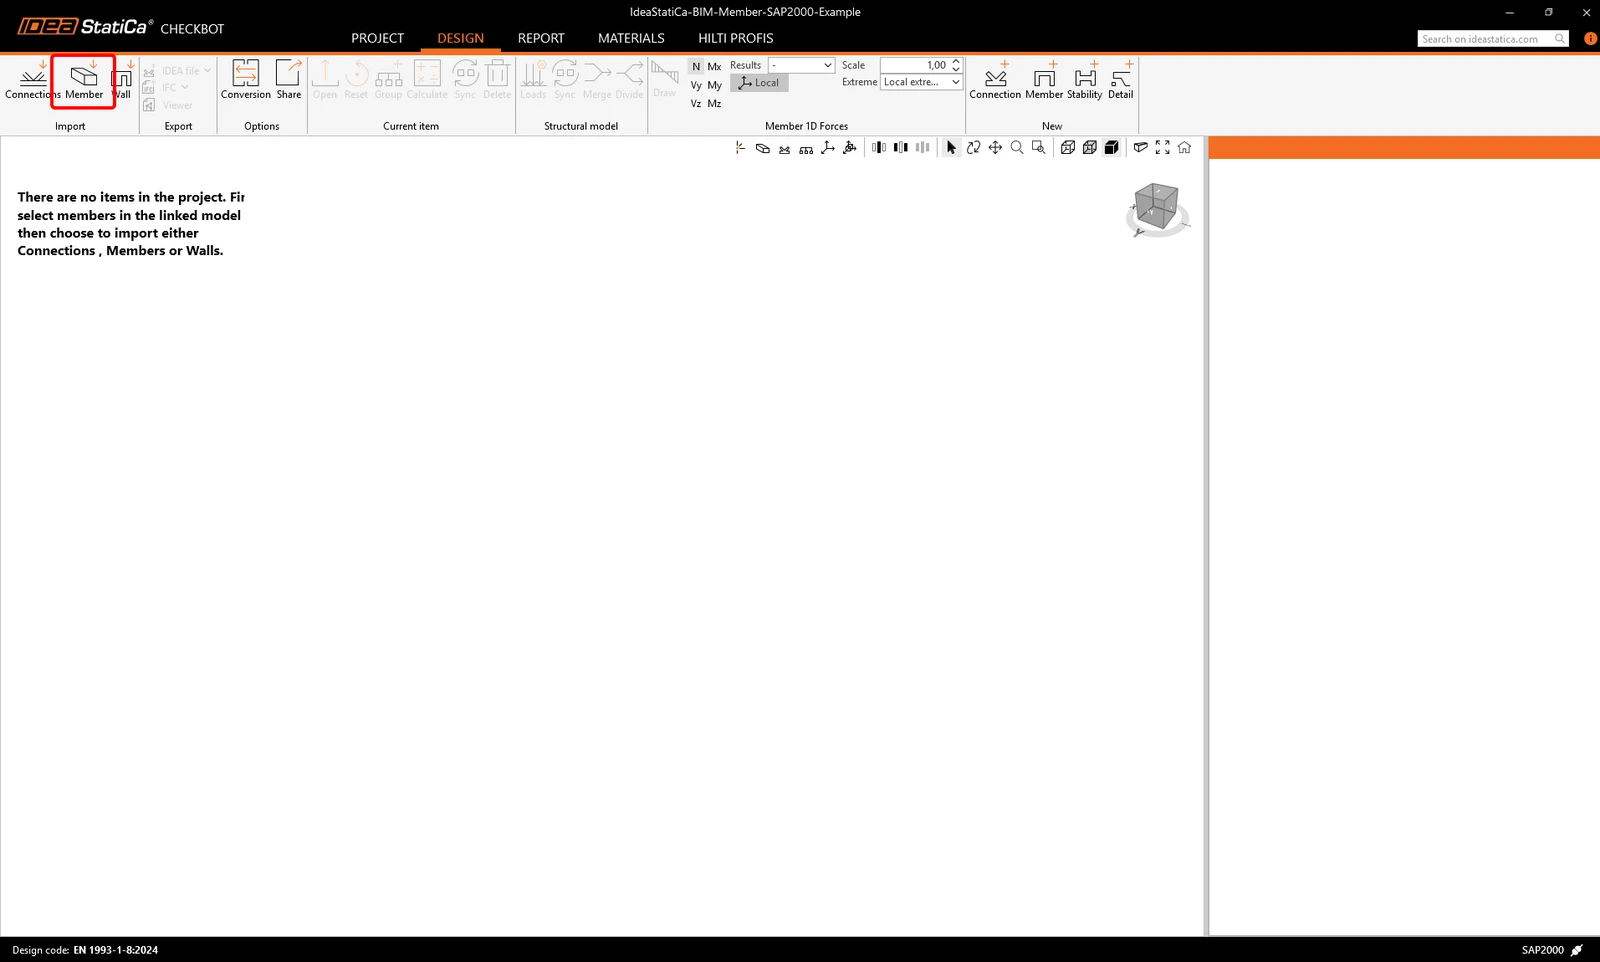
This will import the beam and its load effects into Checkbot - with the exact coordinates, orientations, and section sizes as per the FEA/BIM model.
Please note that your node and member numbering might be different.
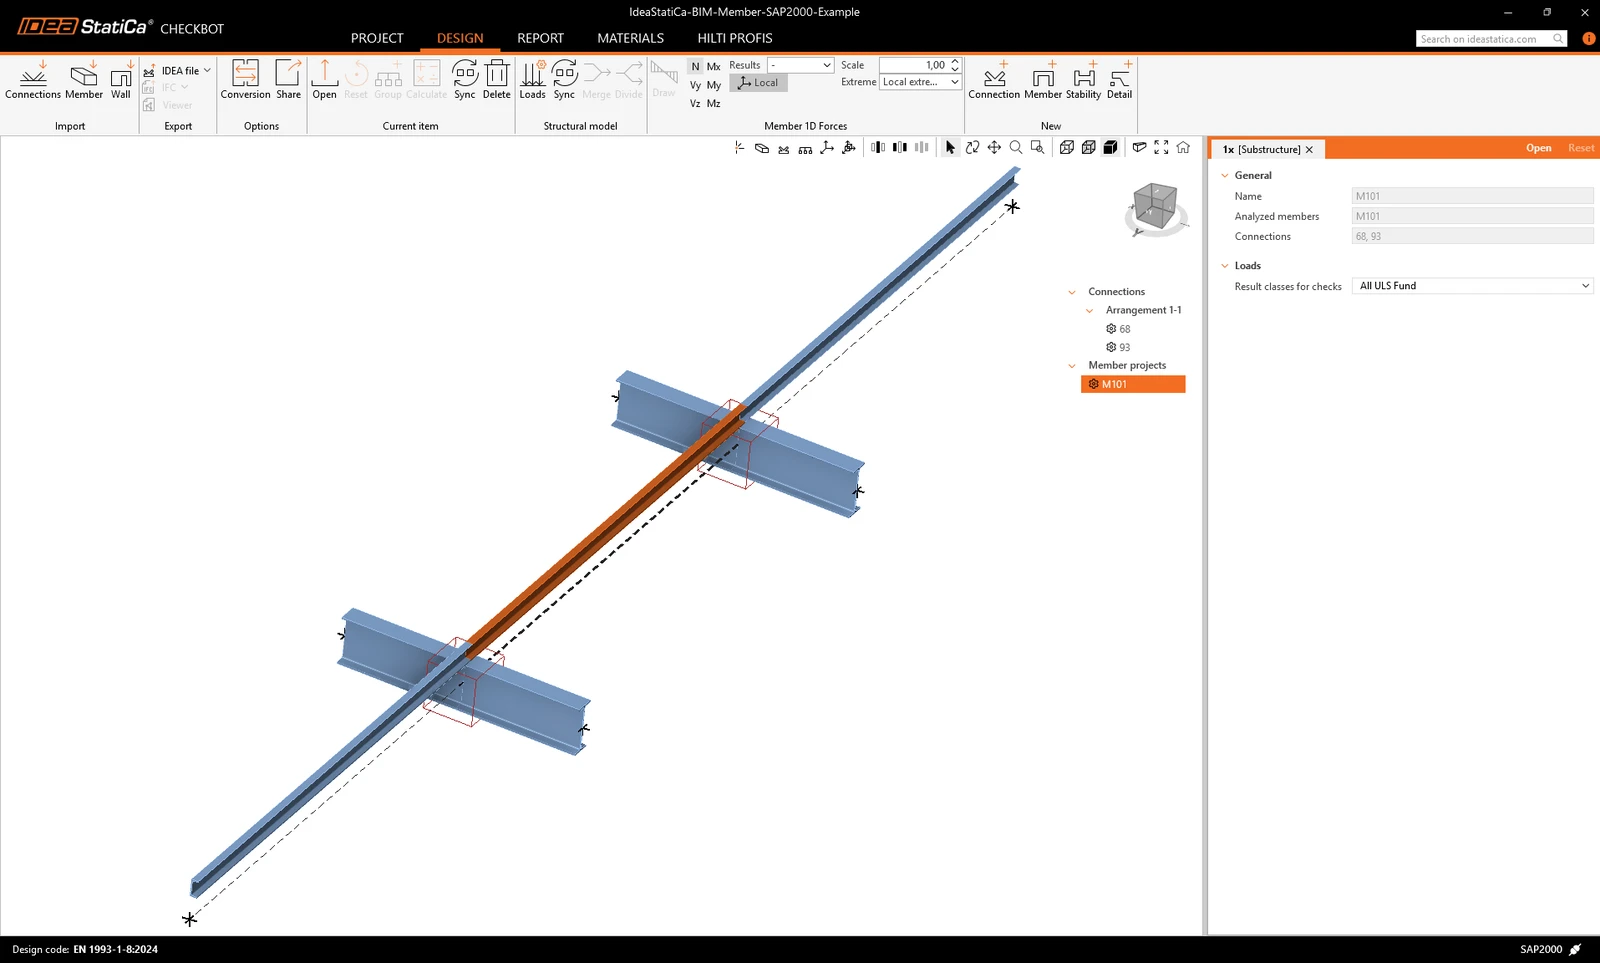
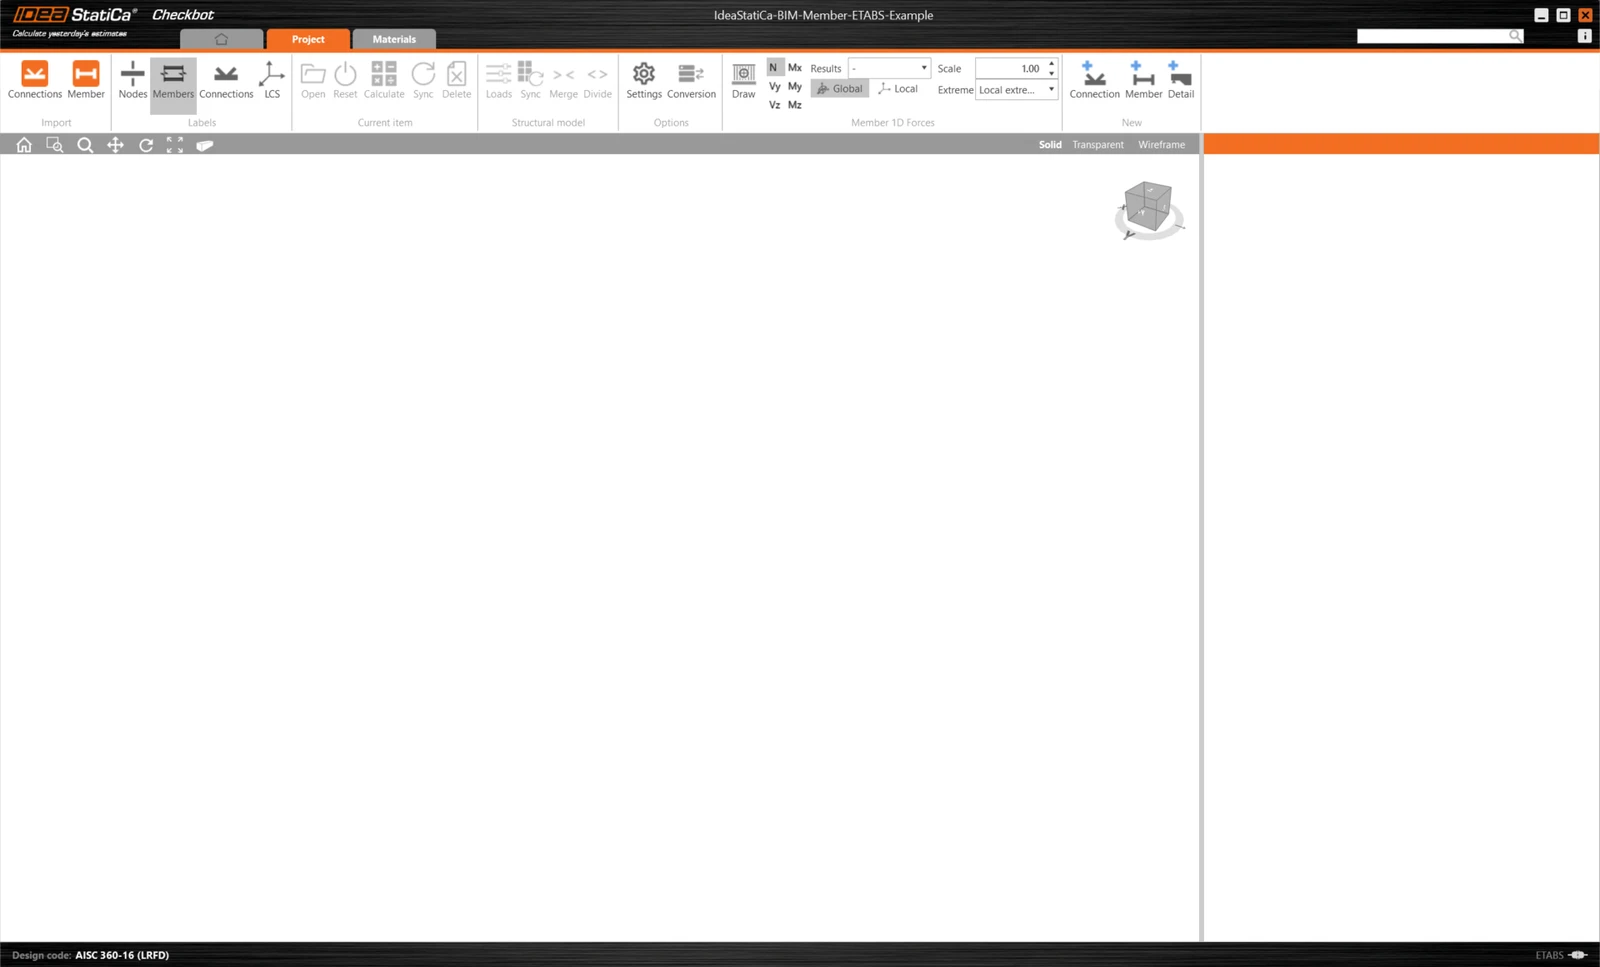
As you can see, the selected member with all related members has been imported.
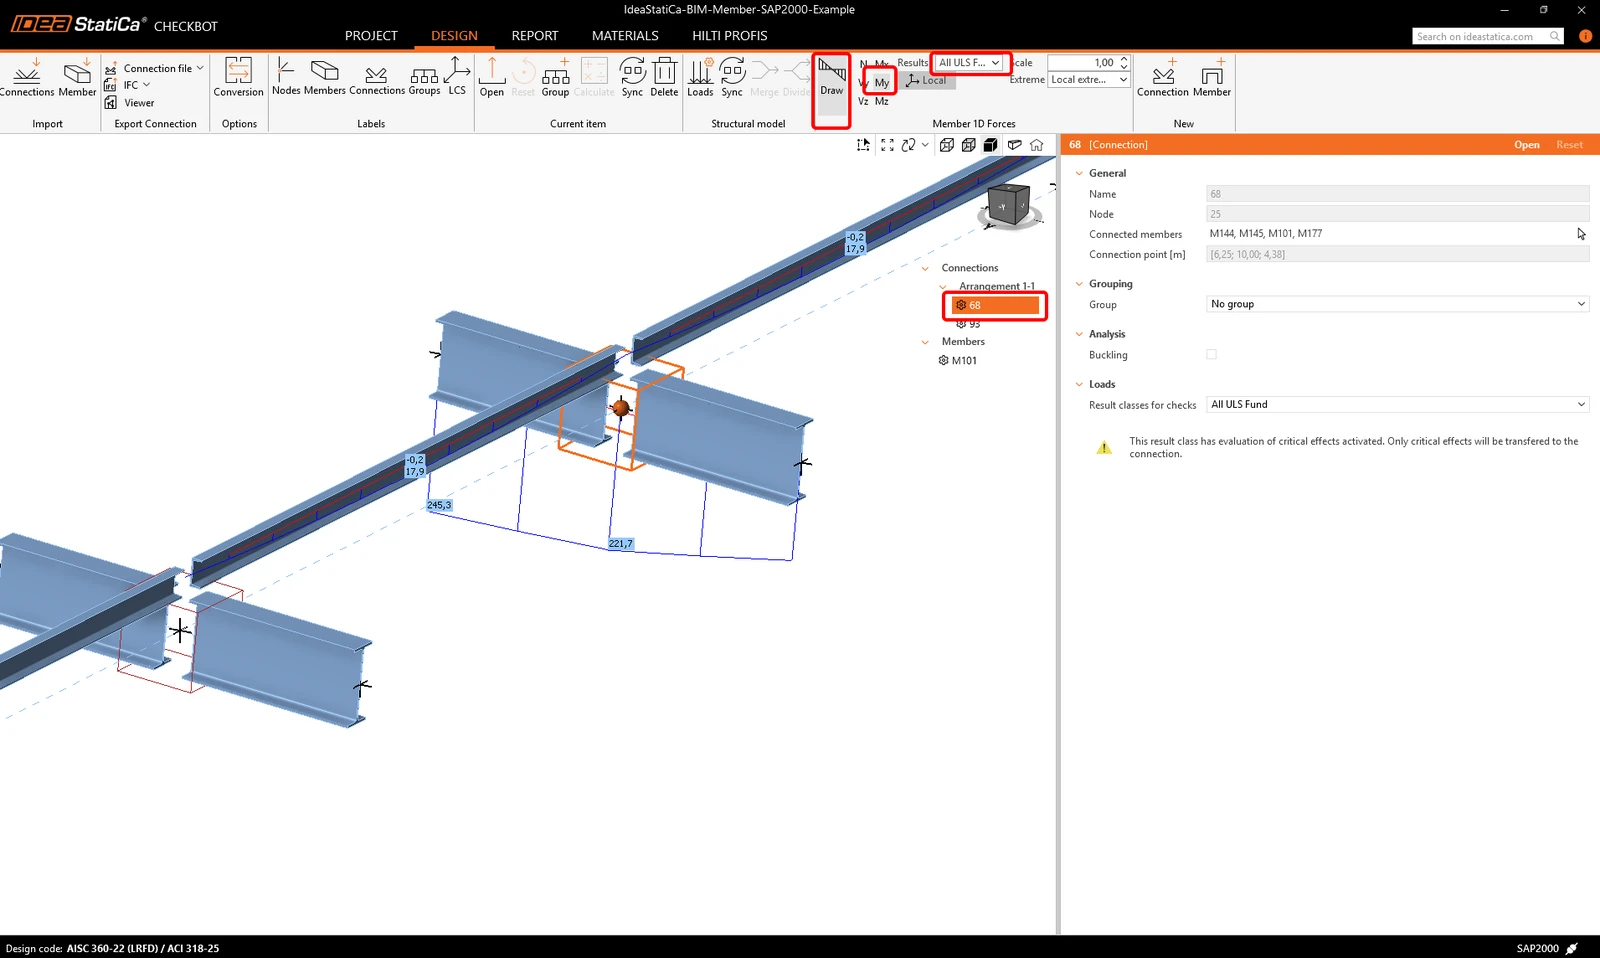
You can check the internal forces. Select Draw, then the desired internal force and combination, then left-click on the connection box, and follow the steps below in the picture.
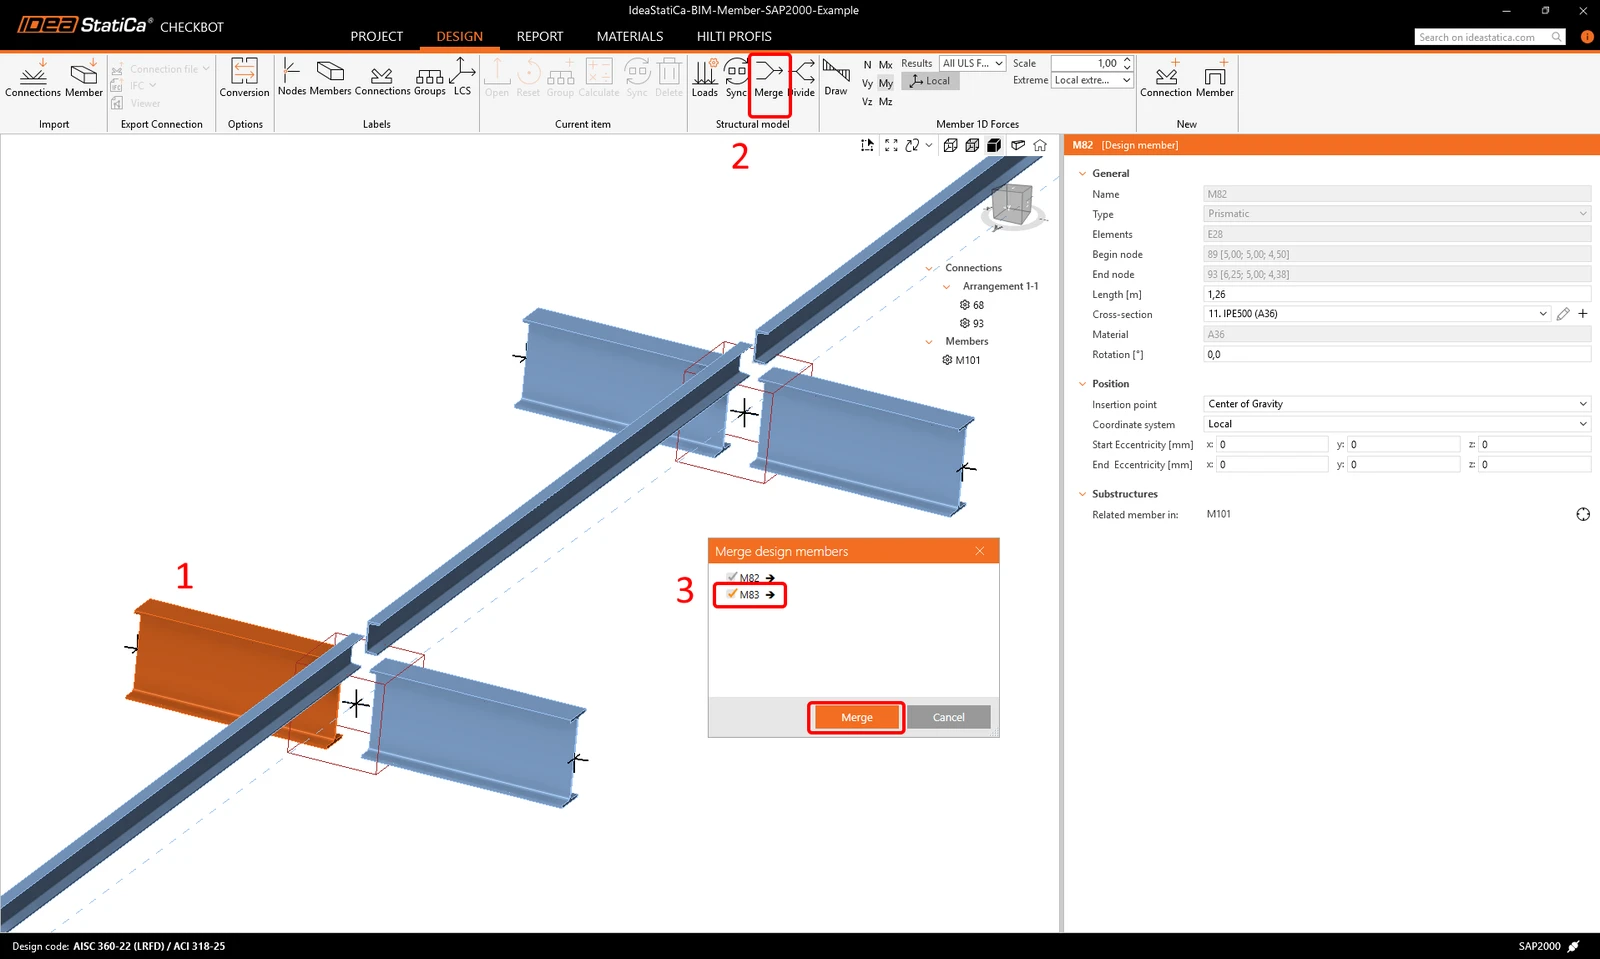
Elements can be merged together directly in Checkbot, then in the Member application; they will be a single continuous element.
Merge both perpendicular related members. Left-click the I-profile M-82, select Merge operation, then tick the M83 box in the merge design window, and follow the steps as shown in the picture.
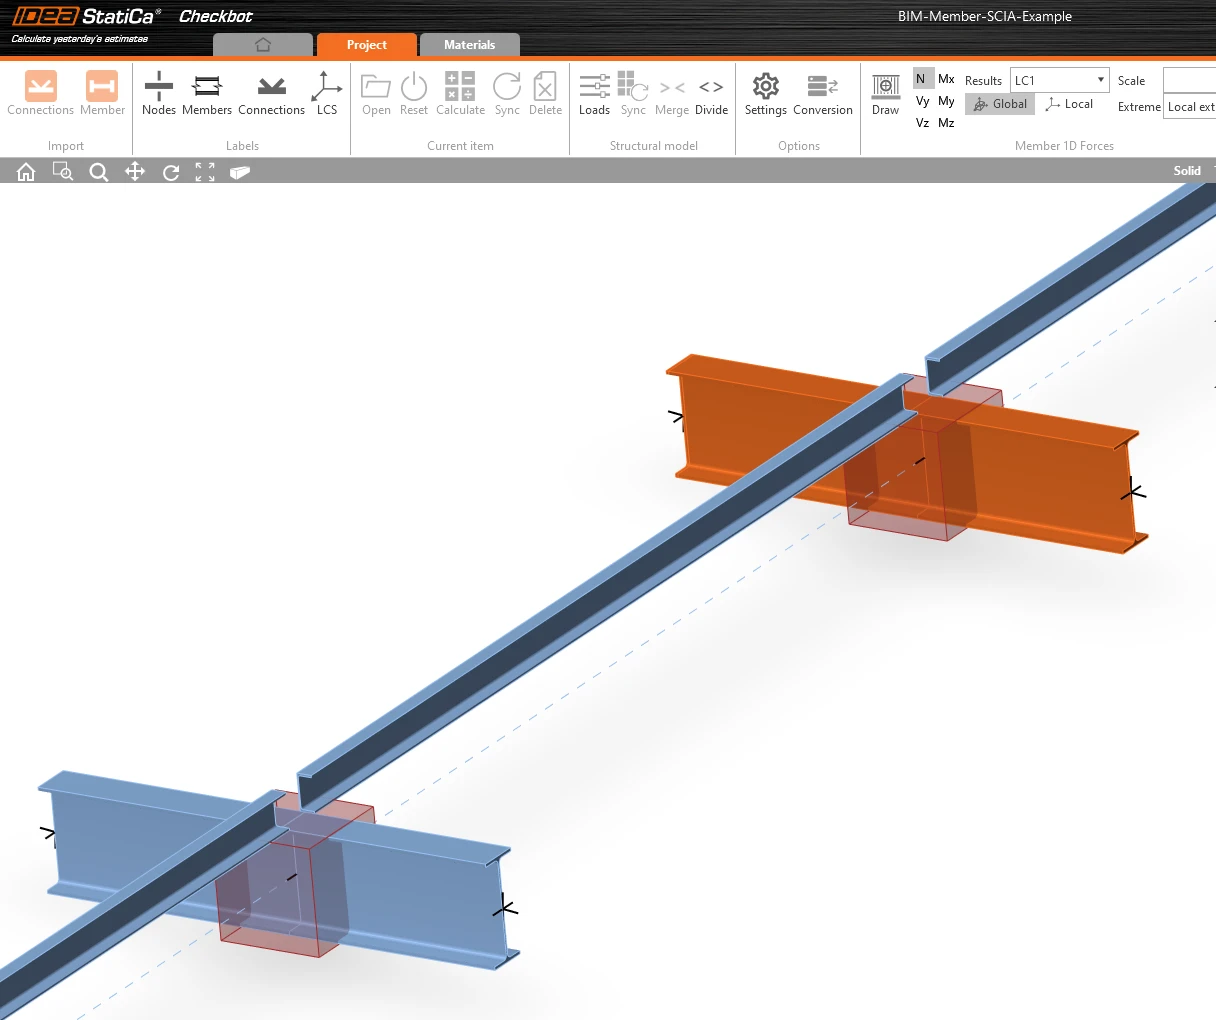
Make the same merging action for another group of I-profile. After changes, our model should look as in the following picture.
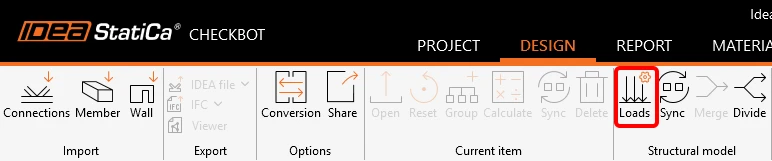
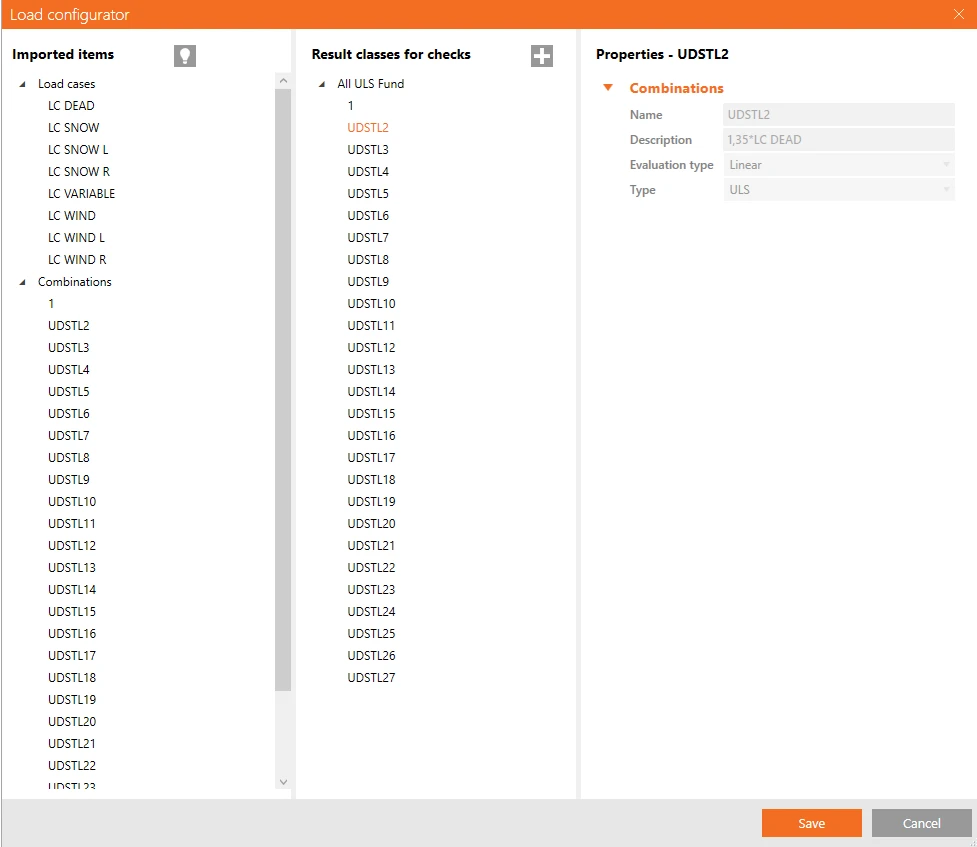
You can control what load case or combination will be loaded to the Member application by clicking on Loads and managing Result classes for checks.
Here in Load Configurator, you can add load cases for the member application.
Connections - Arrangement and Group creation
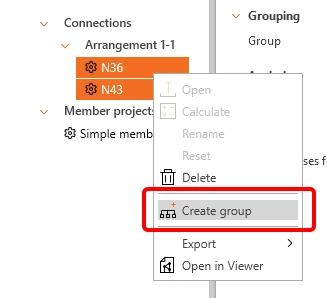
Since we have two similar joints, IDEA StatiCa has already grouped them into a single Arrangement. To design and get both joints checked in one stem, we have to group them. Select both, right-click, and click on Create group.
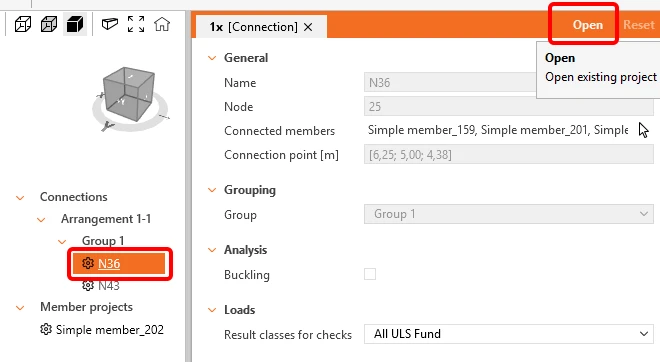
Select the reference connection (underlined in the tree) that drives the group's design, then open it.
Connections design
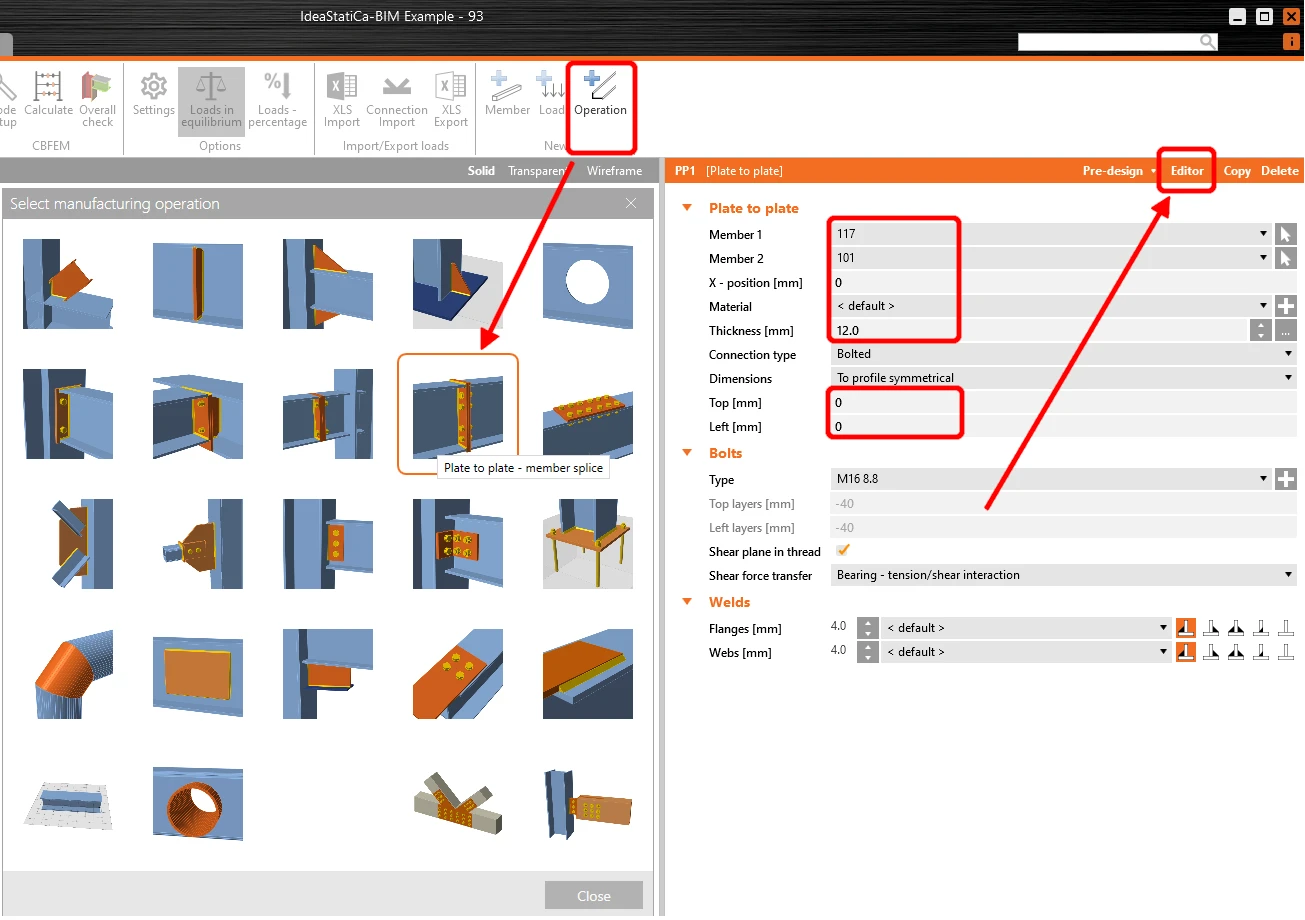
Click on Operation and select Plate to plate. Change the values according to the picture, then click on Editor.
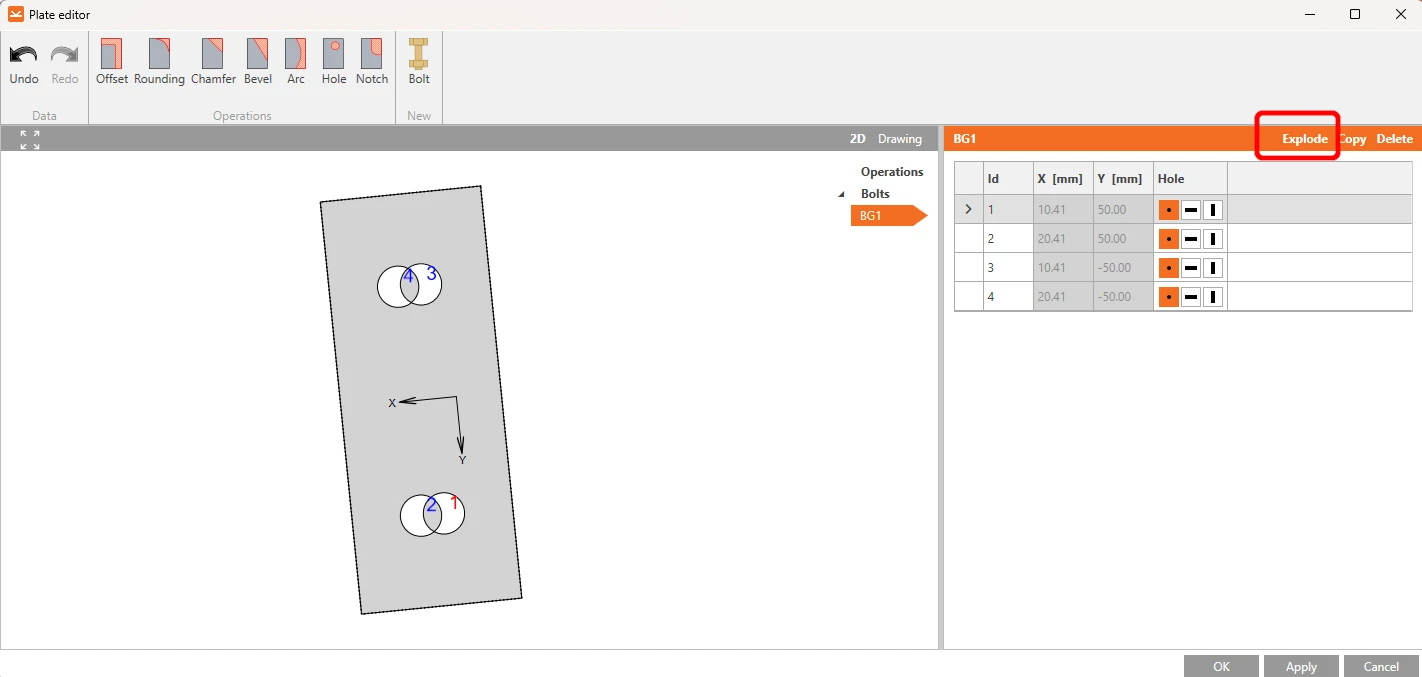
Click on Explode, delete the bolts Nr. 1 and 3, and set the values for bolts Nr.2 and 4 according to the picture.
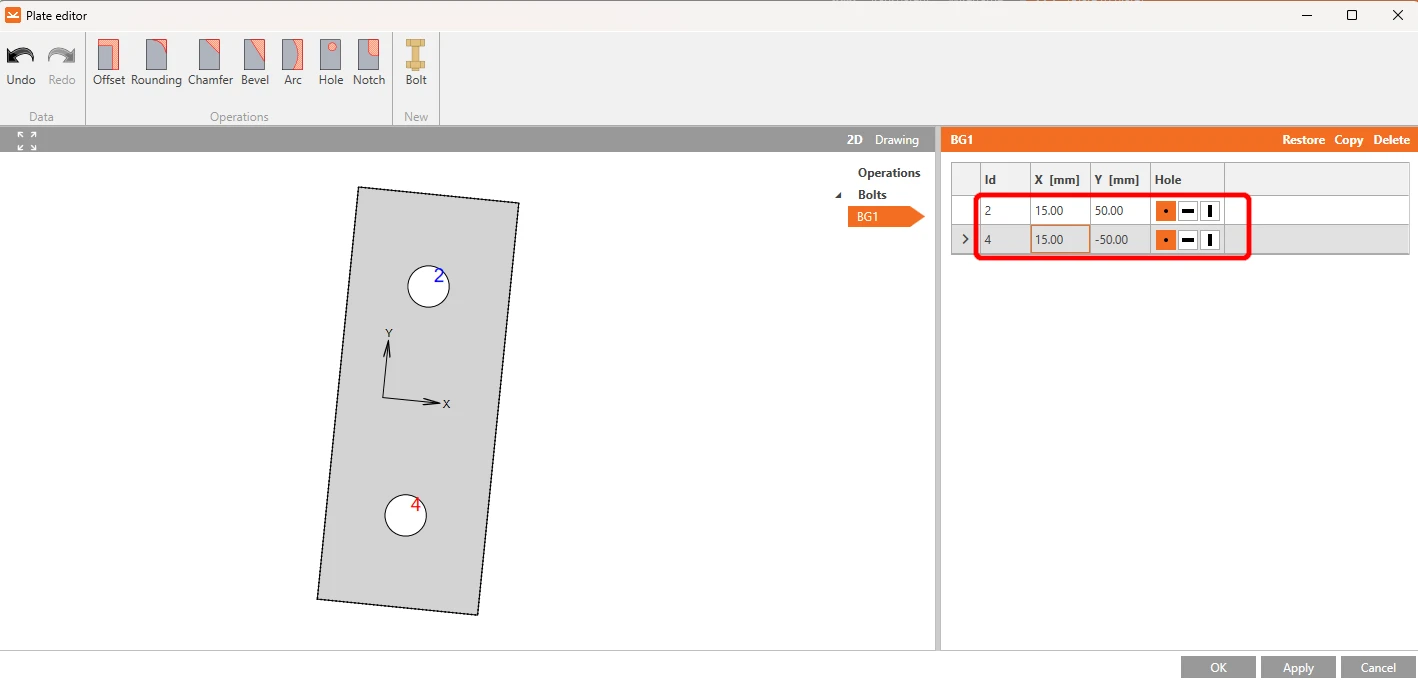
After you will make the changes, the element should look like this. Continue by clicking ok.
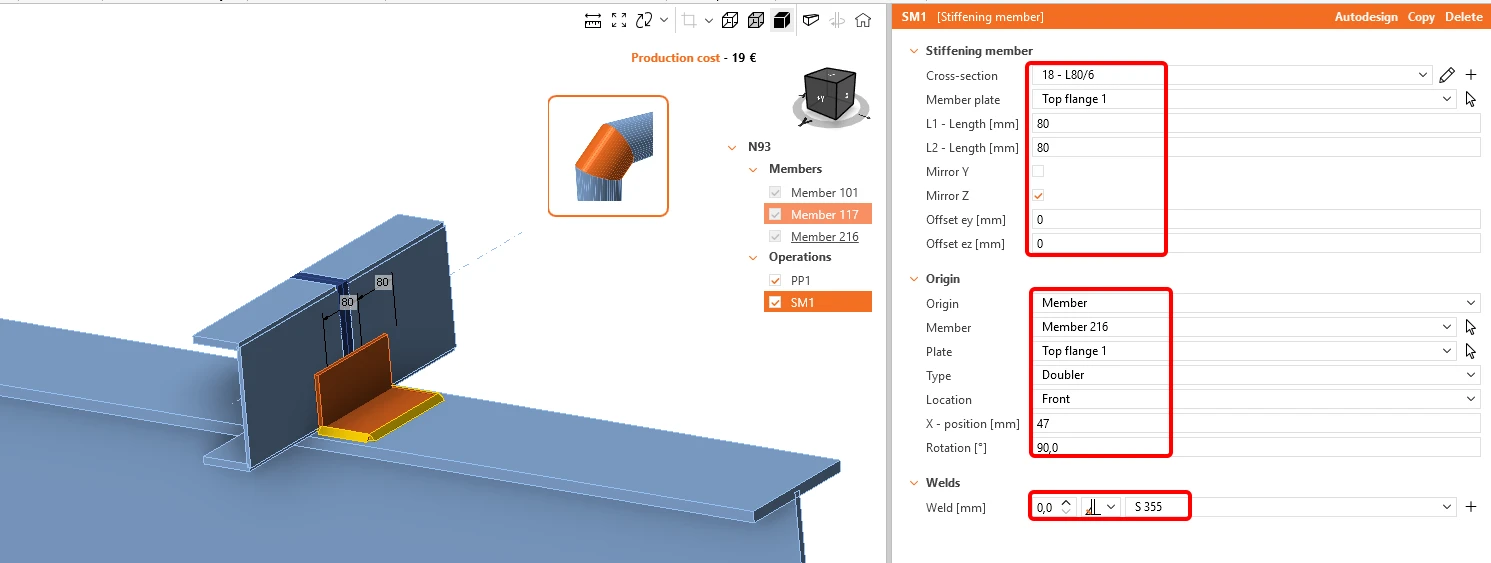
The next operation is the Stiffening member. First, you need to add a new L80x6 cross-section, click the white cross in the cross-section row, select L-profile, and enter the necessary name in the search. After that, fill the values as shown in the following picture. Consequently, our model should look as shown in the picture below.
Add the operation Bolt/Anchor grid.
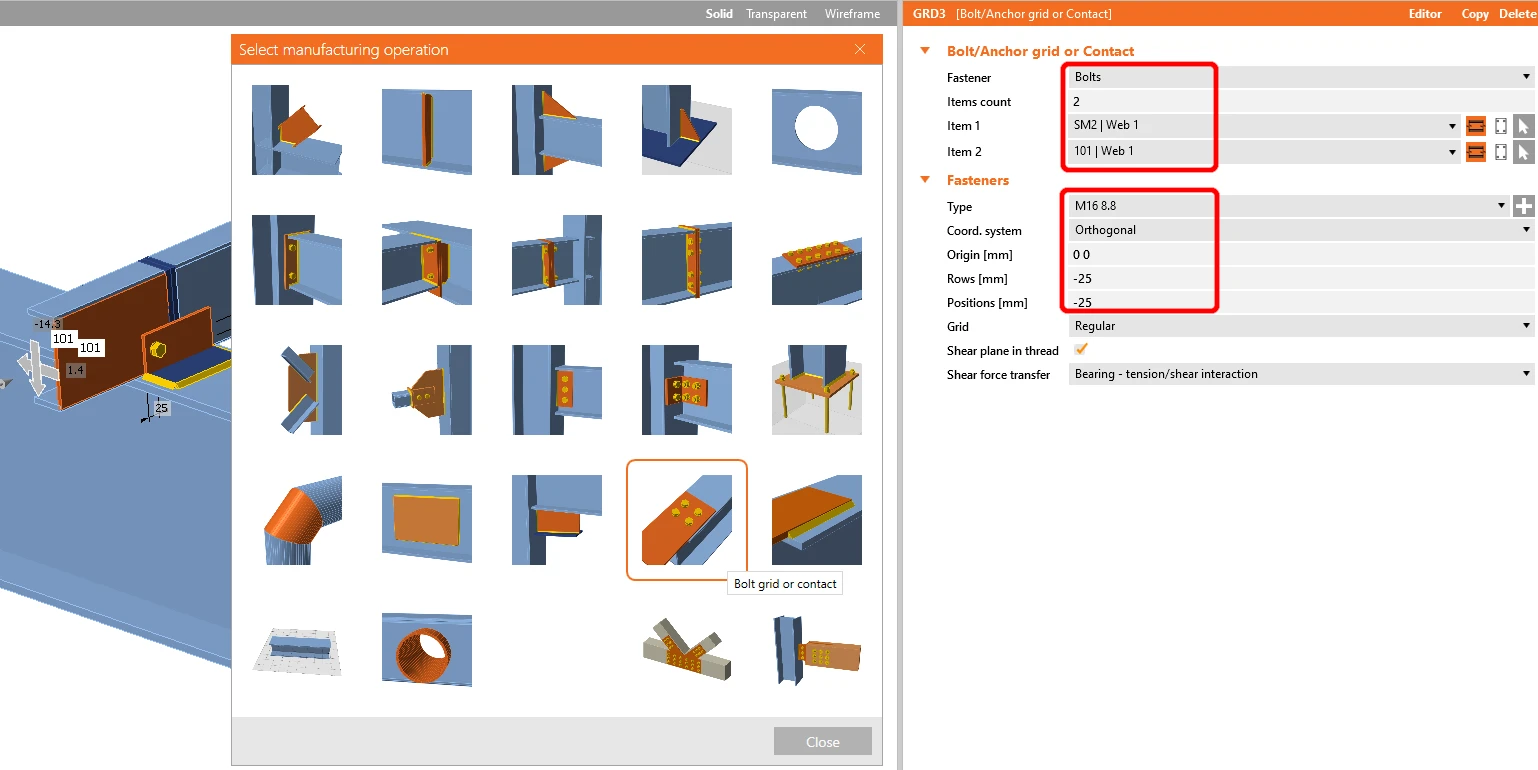
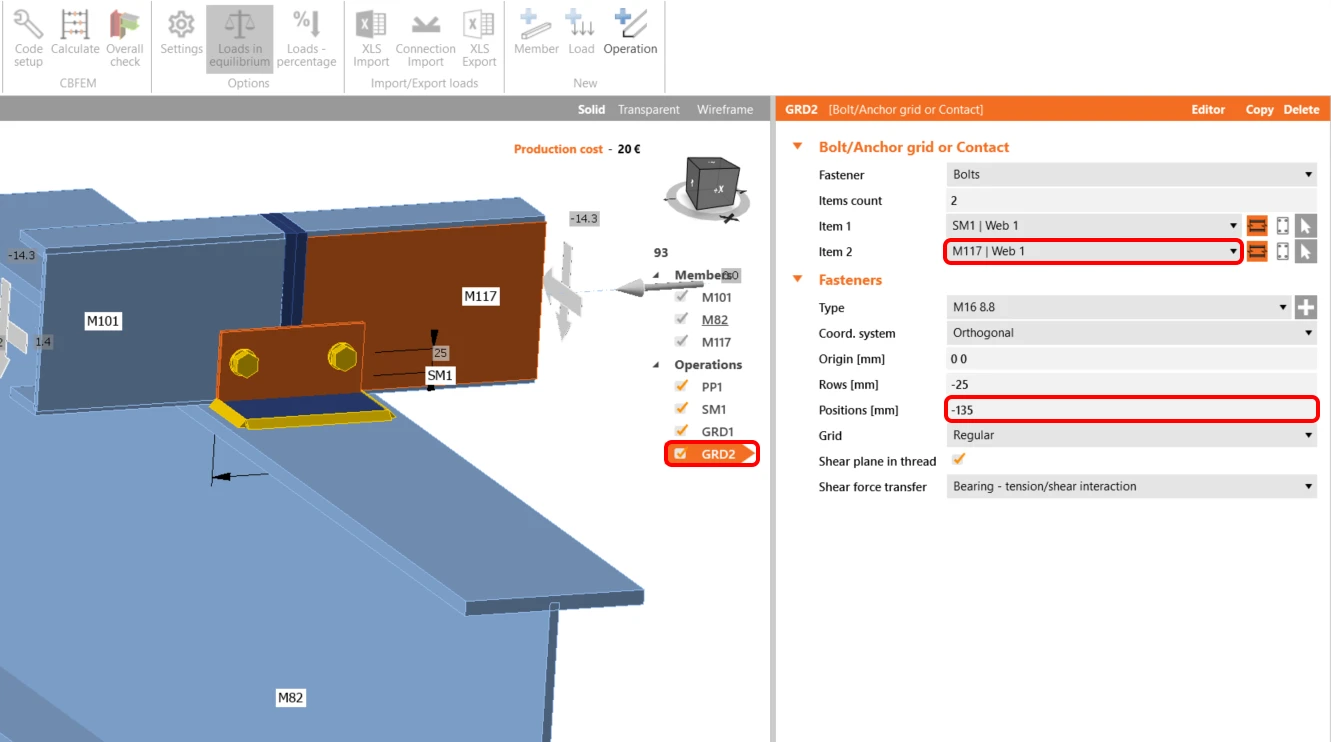
Copy this operation and change the selected values.
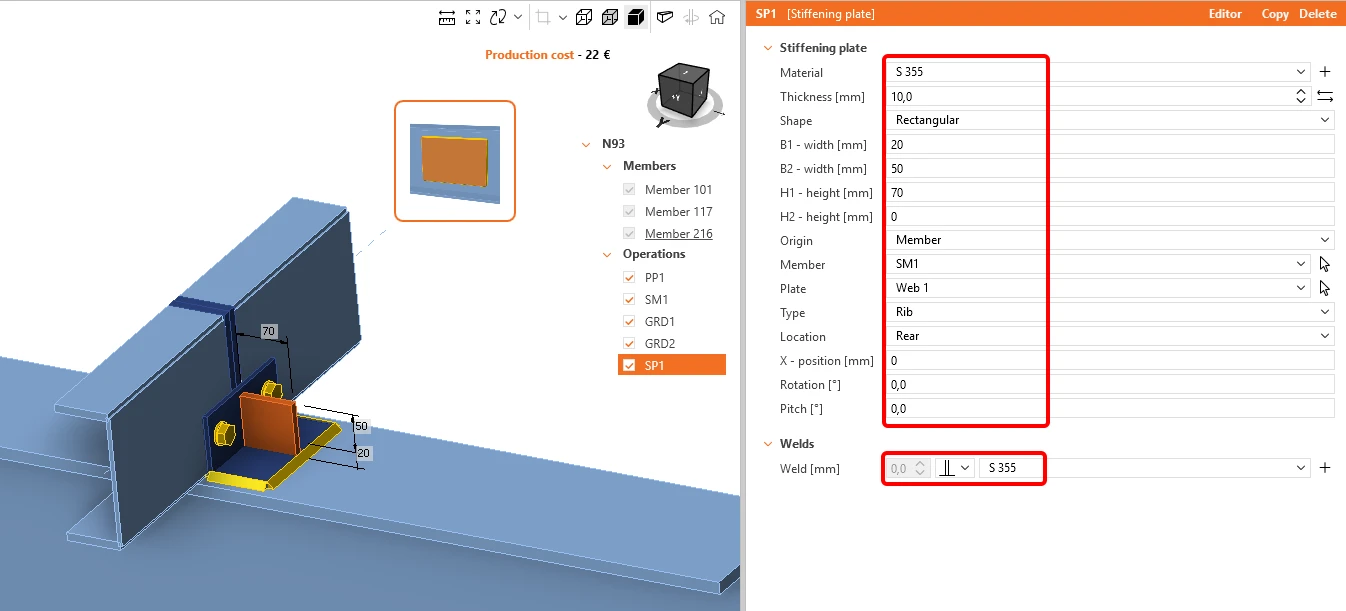
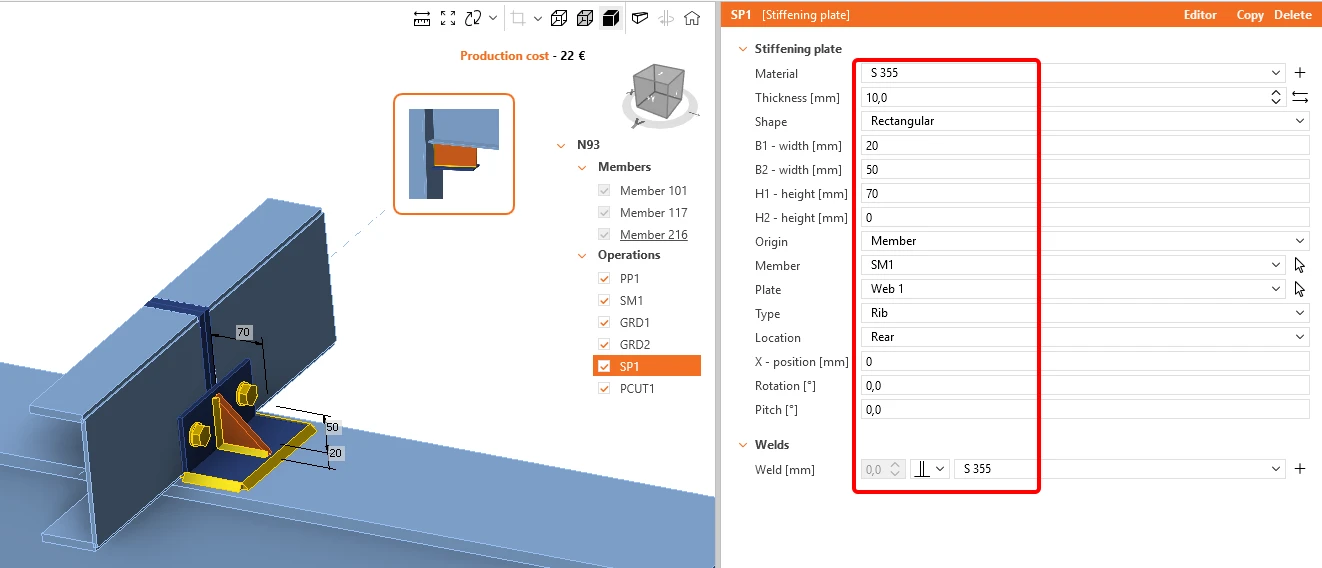
Now add a Stiffening plate to the joint and set the values according to the picture.
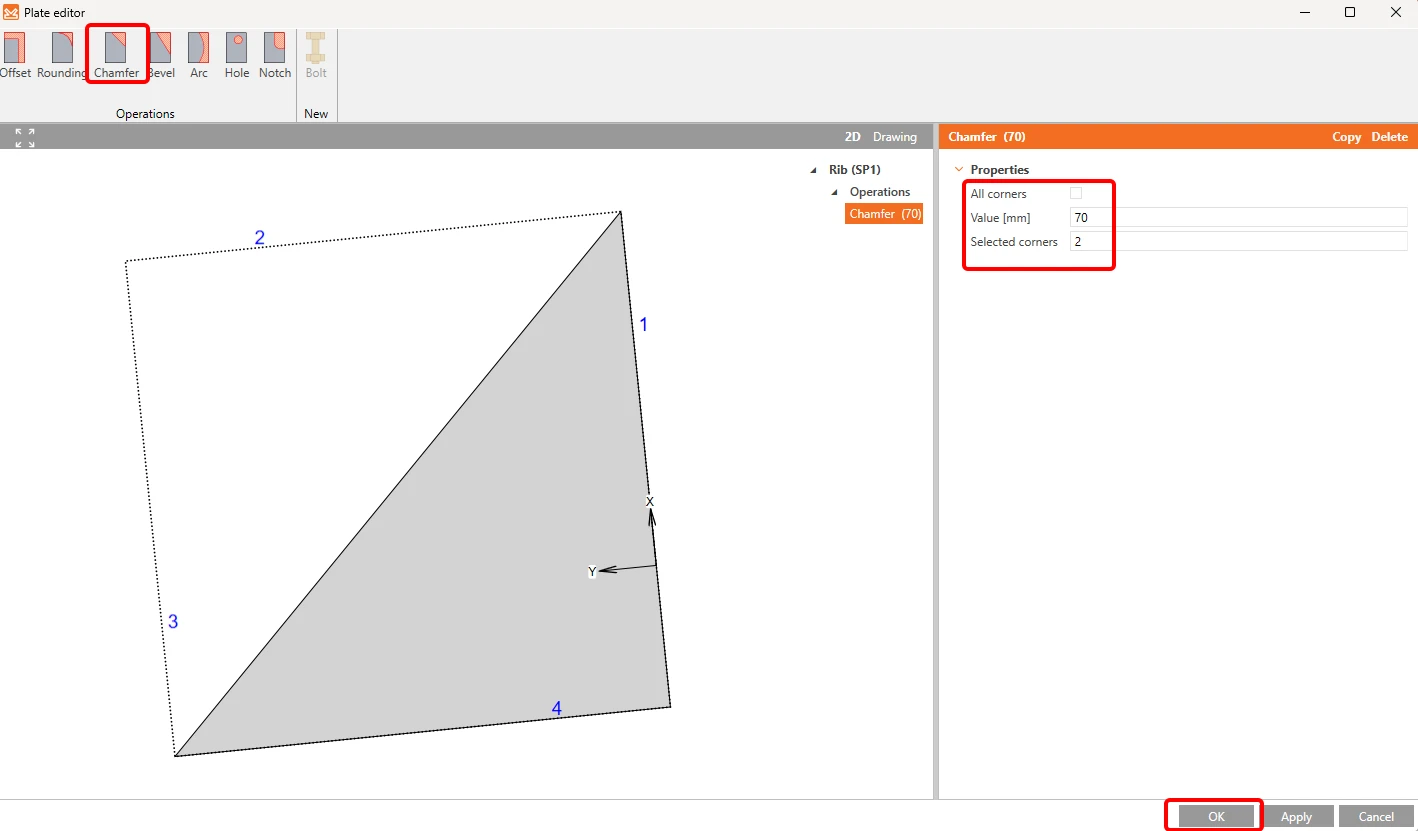
Then go to the Editor, select the chamfer operation, and set it according to the image.
The last operation is Cut of plate operation.
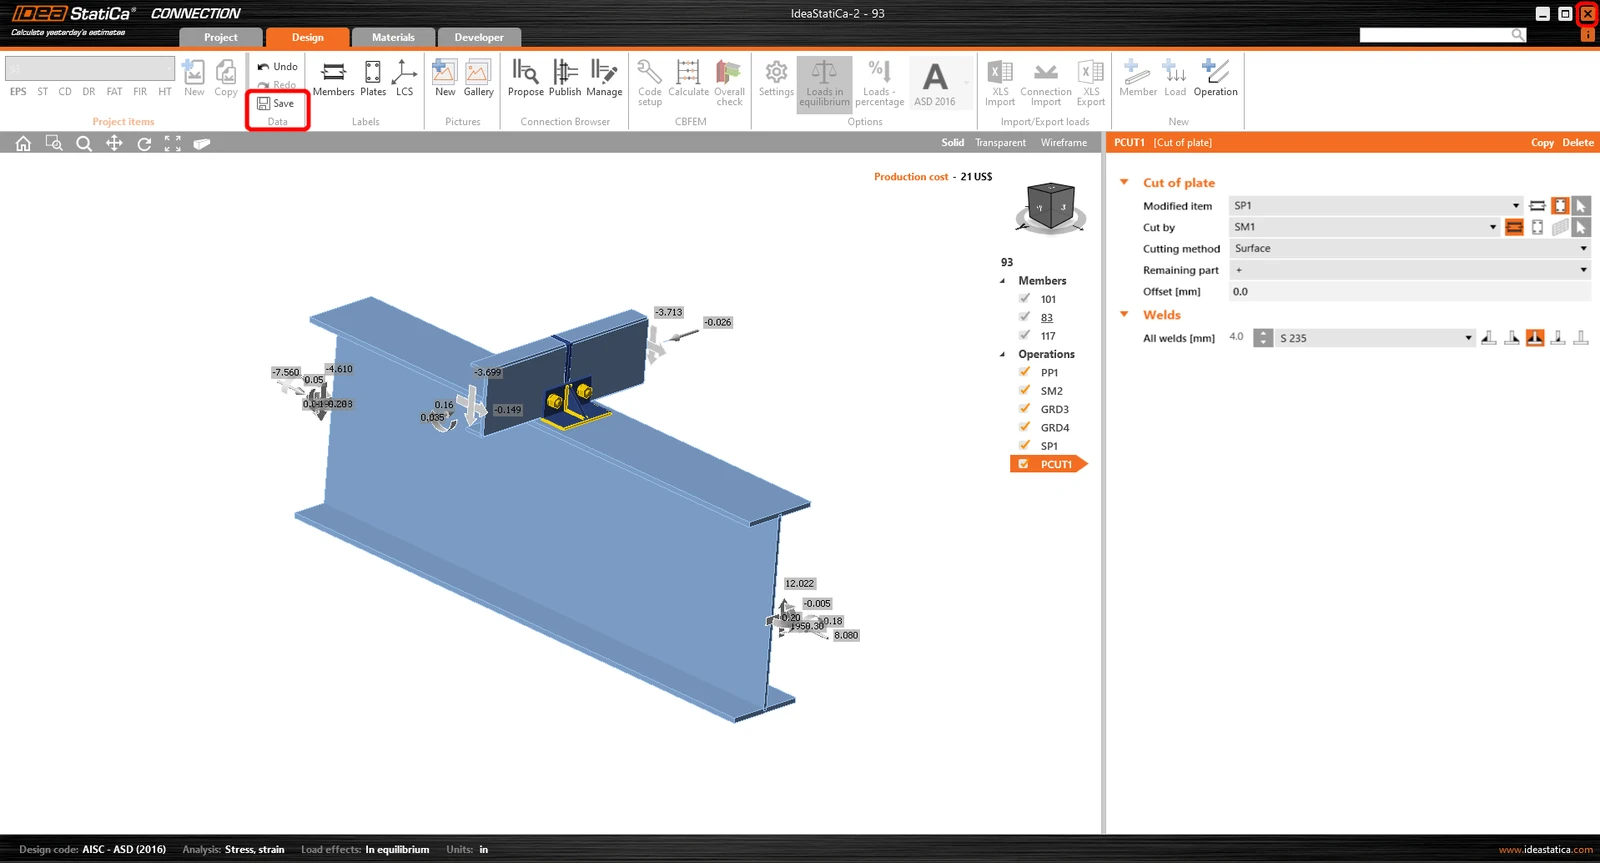
Now click on Save and close the module Connection.
Members modul
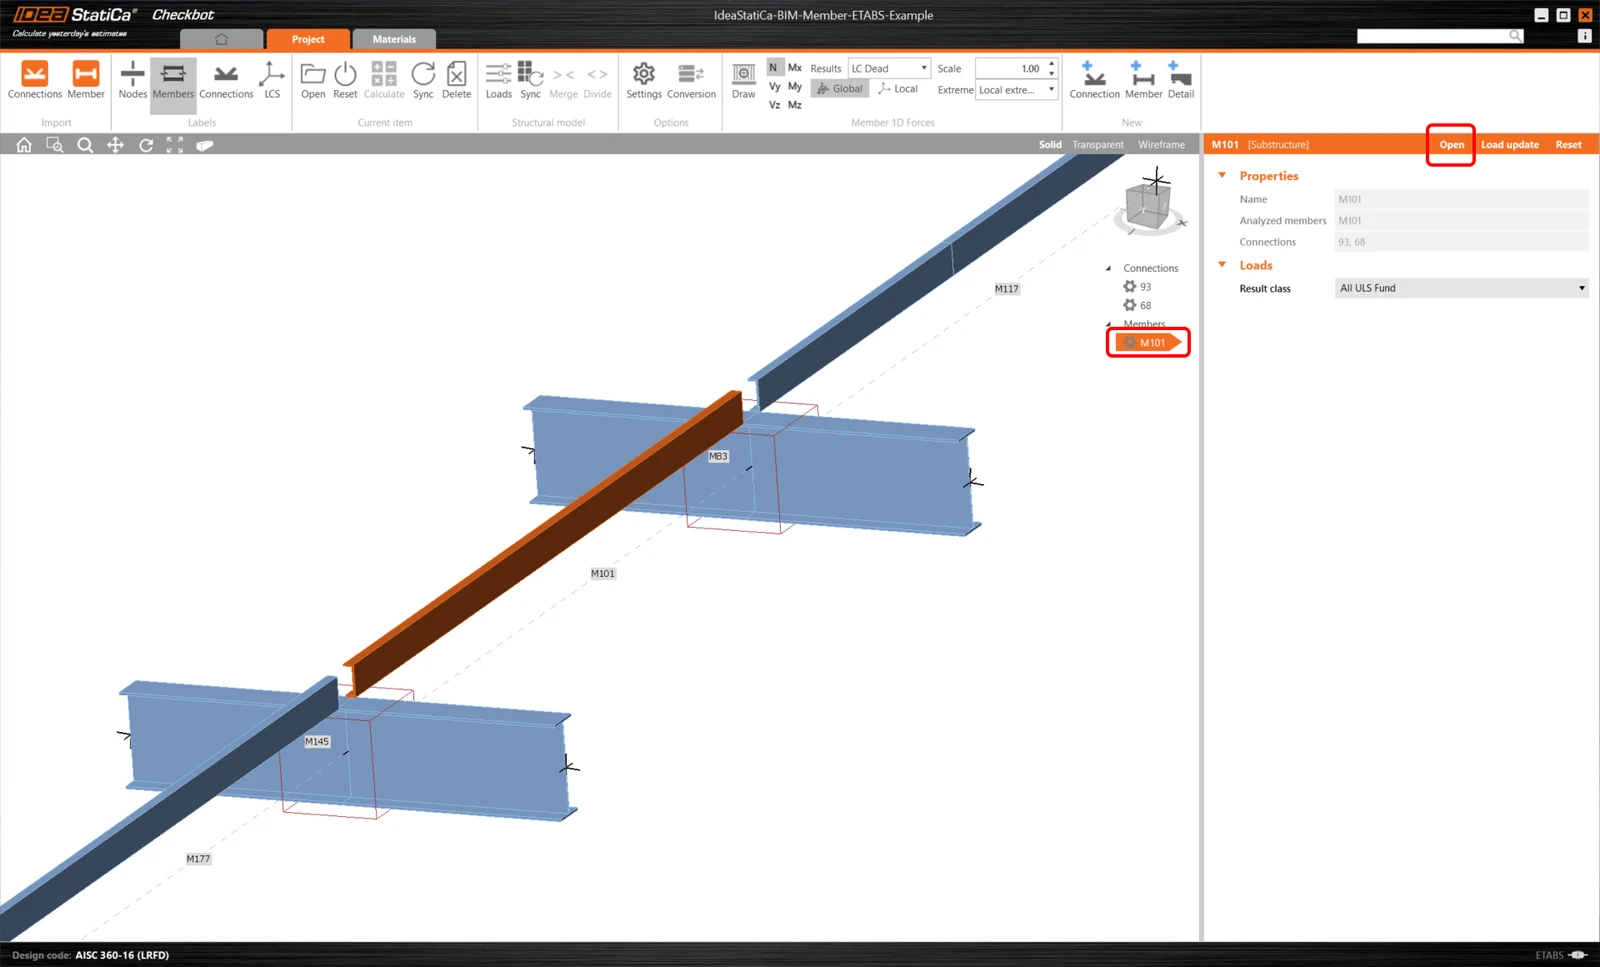
Now we can open the Member application. Just left-click on Open.
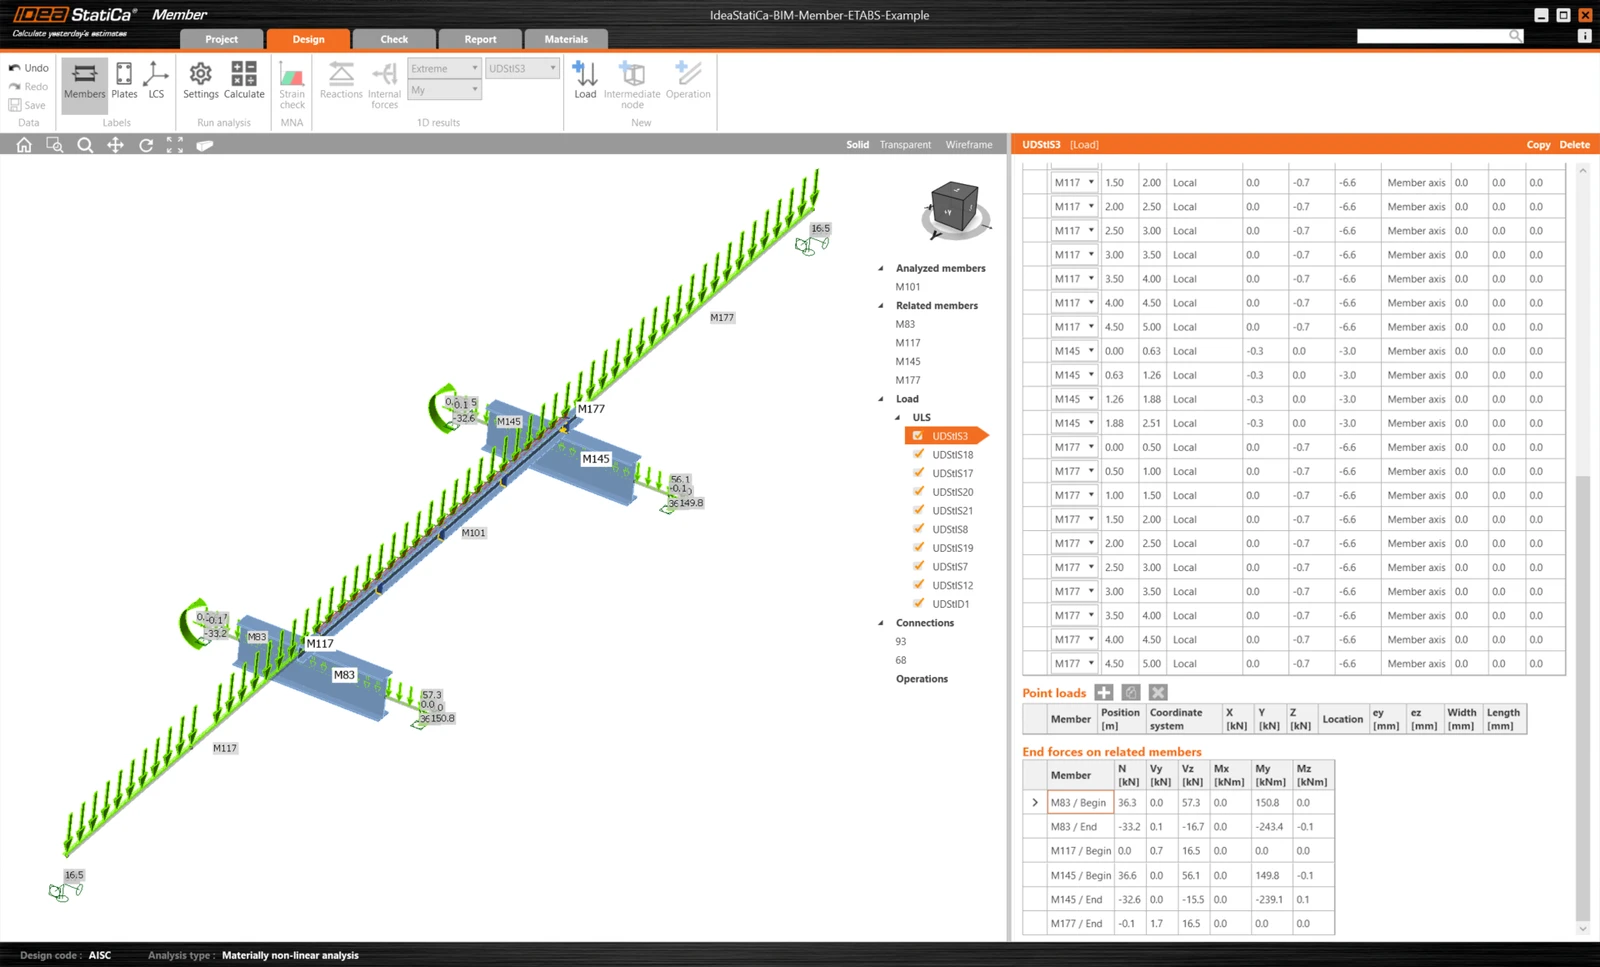
Here you can see our Member application.
Check and Control
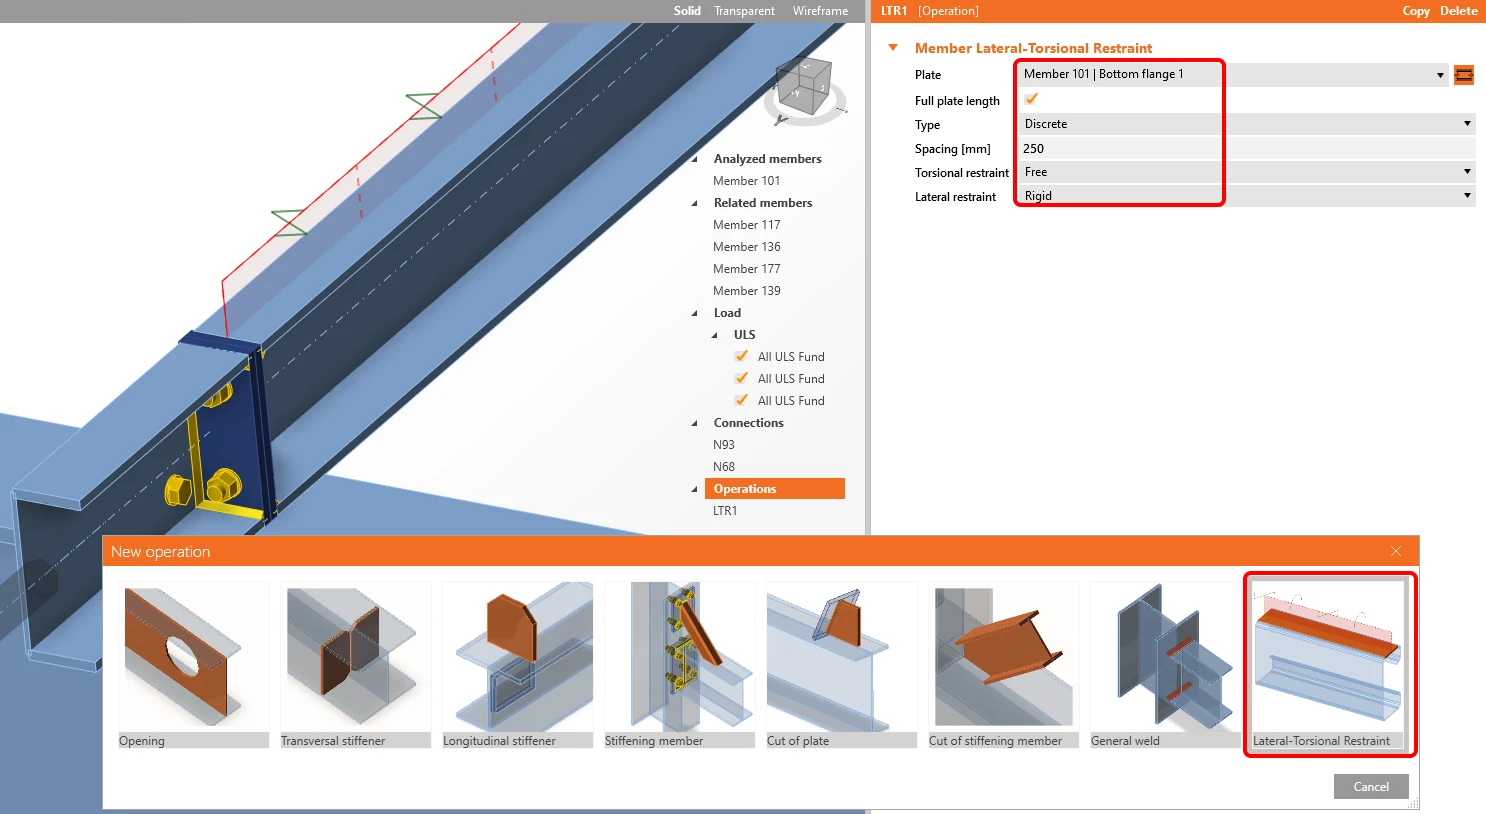
Before starting the analysis, firstly, left-click on the U-member, add operation Lateral Restraint, and set up the values according to the picture.
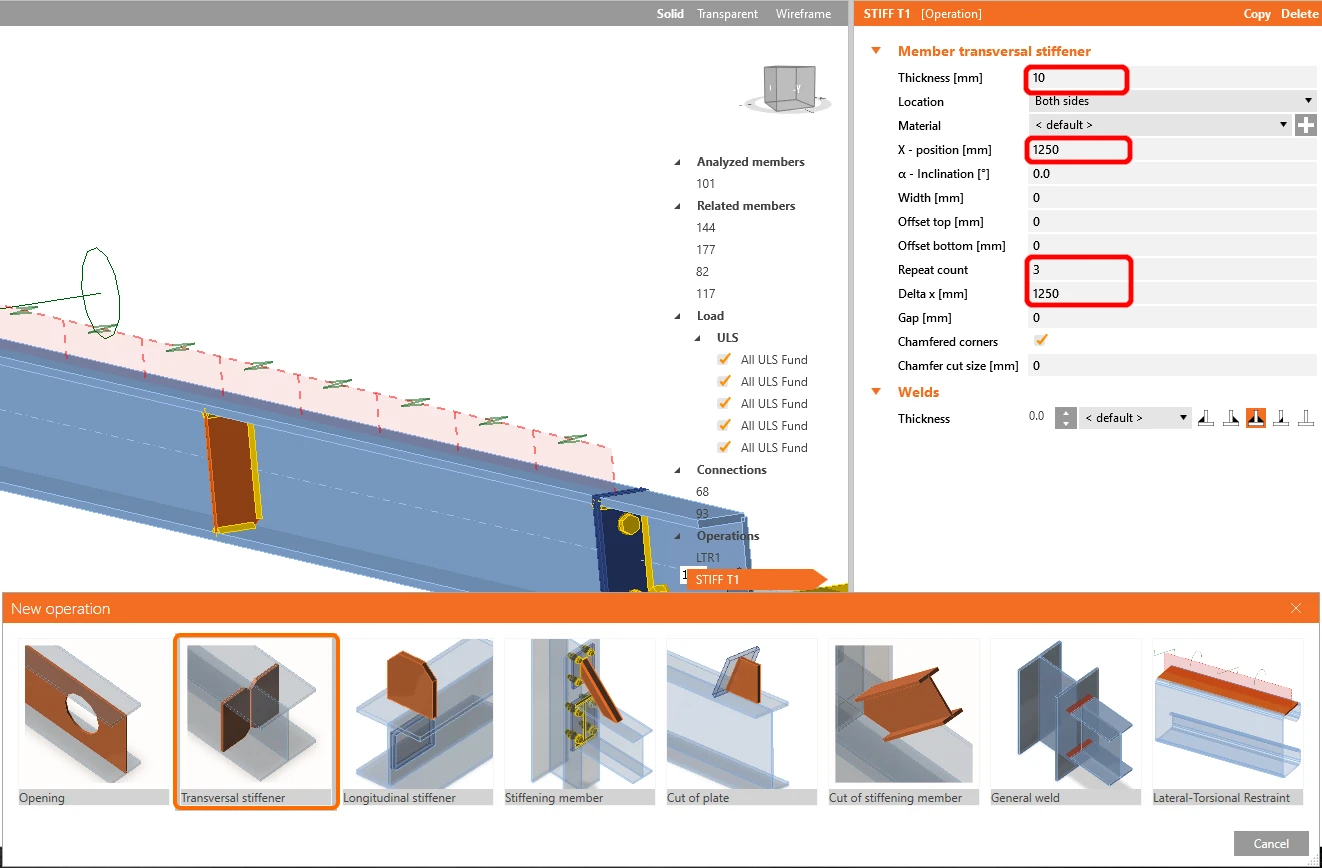
In the next step, add operation Stiffeners the same way as in the previous step, and configure the values as shown.
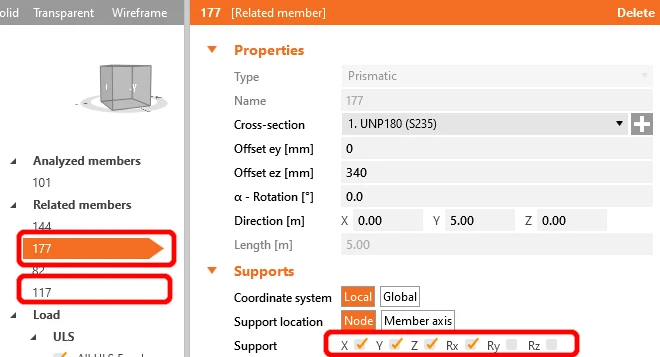
For the realistic behavior of the related members, restrict the supports of the connecting purlins to X, Y, Z, and Rx.
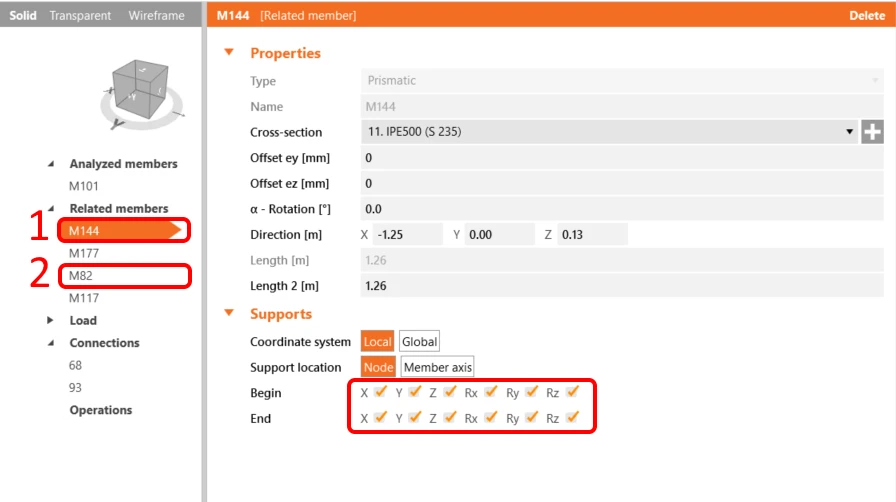
Do the same for the I-profiles frame members; restrict them to X, Y, Z, and Rx, Ry, Rz.
Now the member is ready to be analyzed.
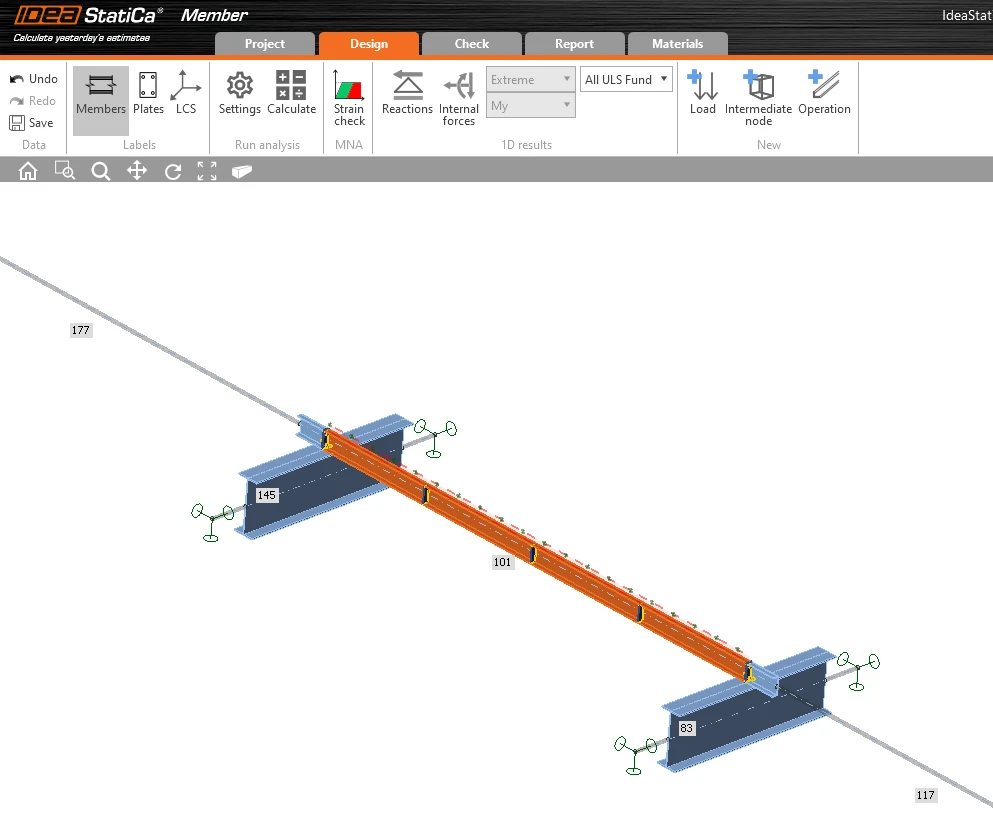
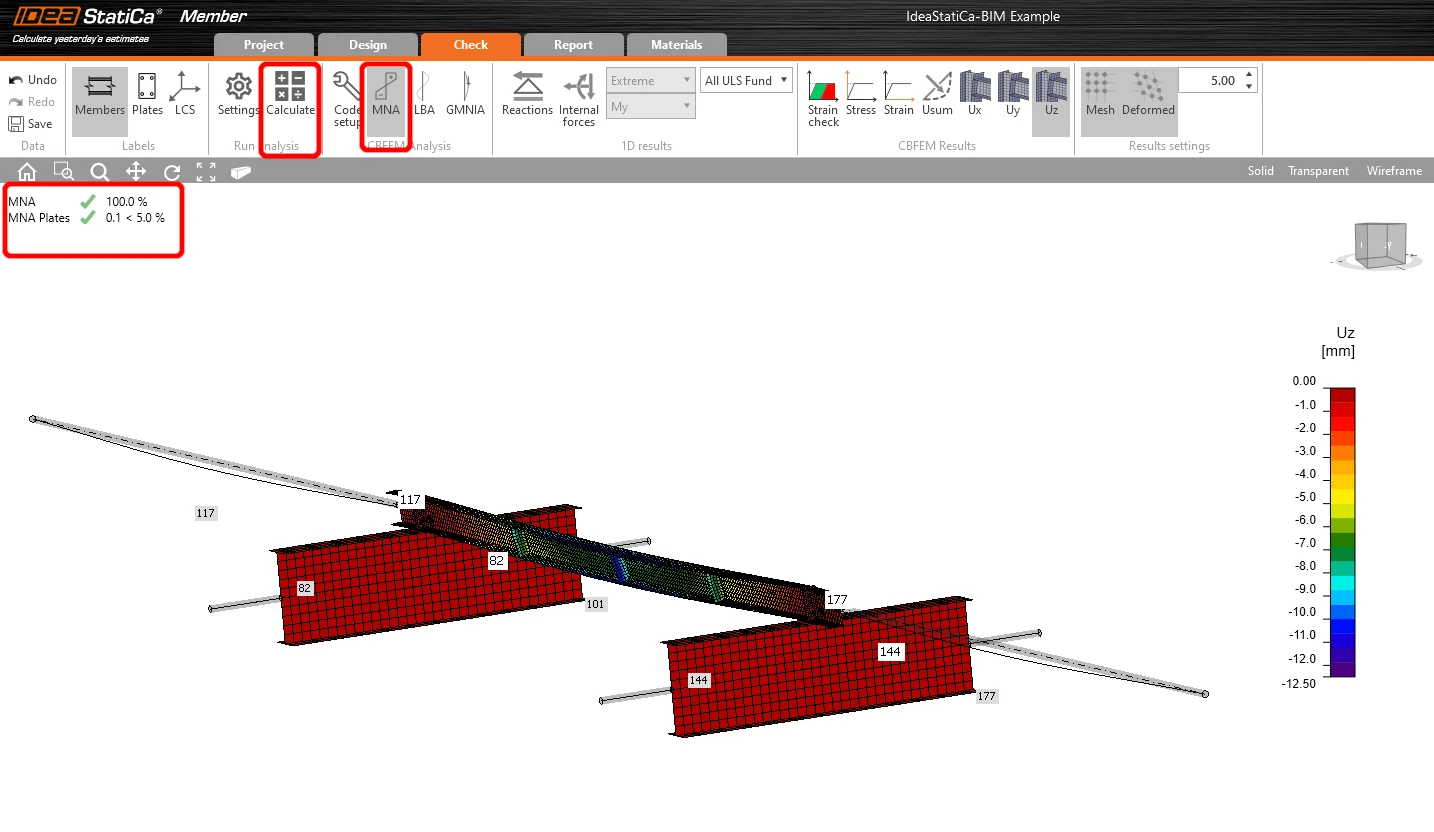
Select the Tab Check and run the MNA (materially non-linear) Analysis.
The second analysis is LBA (lateral buckling analysis), where we get a critical factor of less than 15.
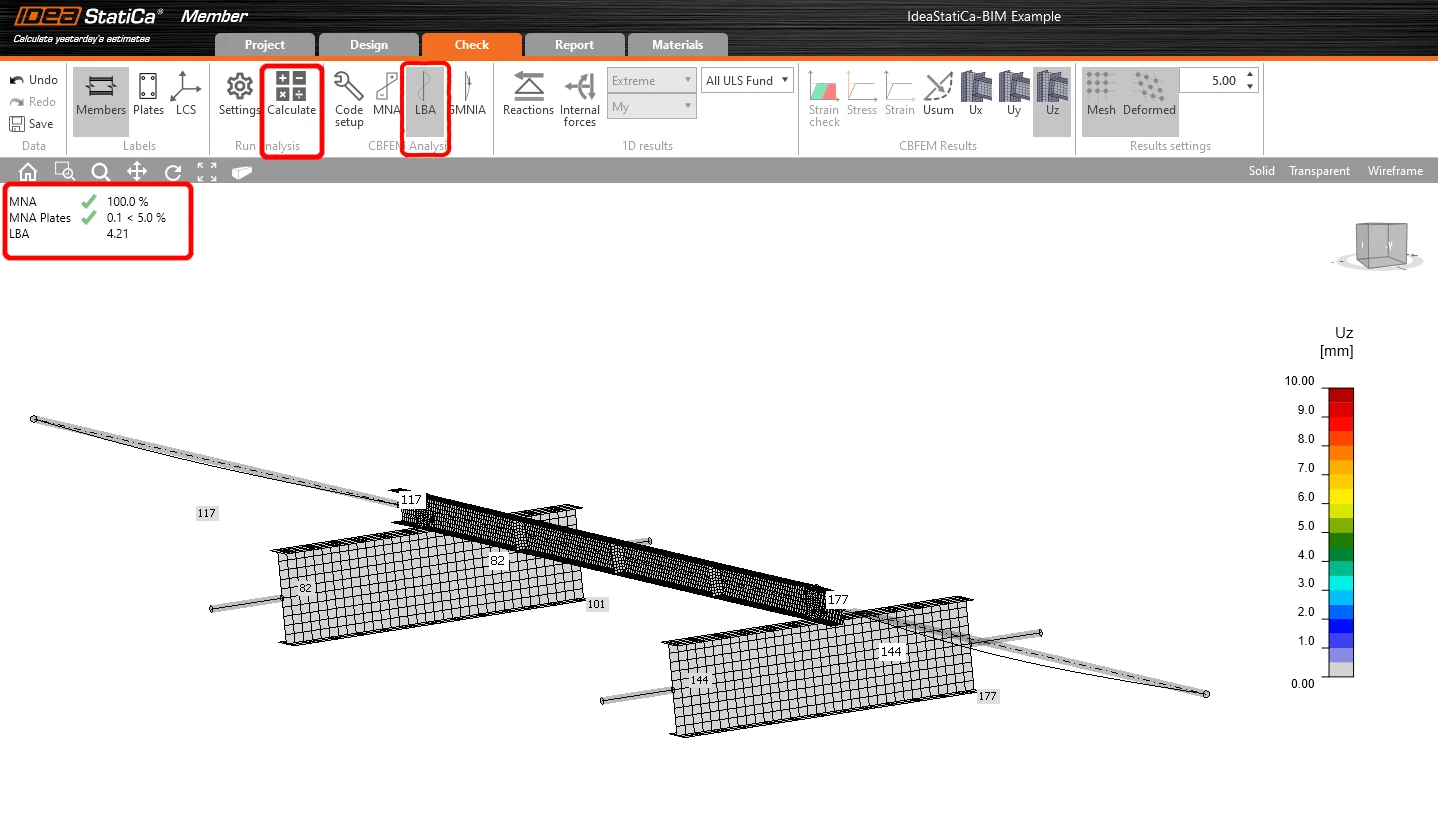
This result shows the necessity of running the GMNIA (geometrically and materially non-linear analysis).
Because lateral-torsional buckling is investigated, factor k0 = 0.5 may be used. Amplitude 0.5 • 5000 / 200 = 12,5 mm is applied to the first buckling mode.
Click on the imperfection field for the critical buckling factor, and fill in the value we calculated above in the row, as shown in the following picture. Then you can run the last GMNIA (geometrically and materially non-linear) analysis.
Read more about:
- Member stability in IDEA StatiCa Member.
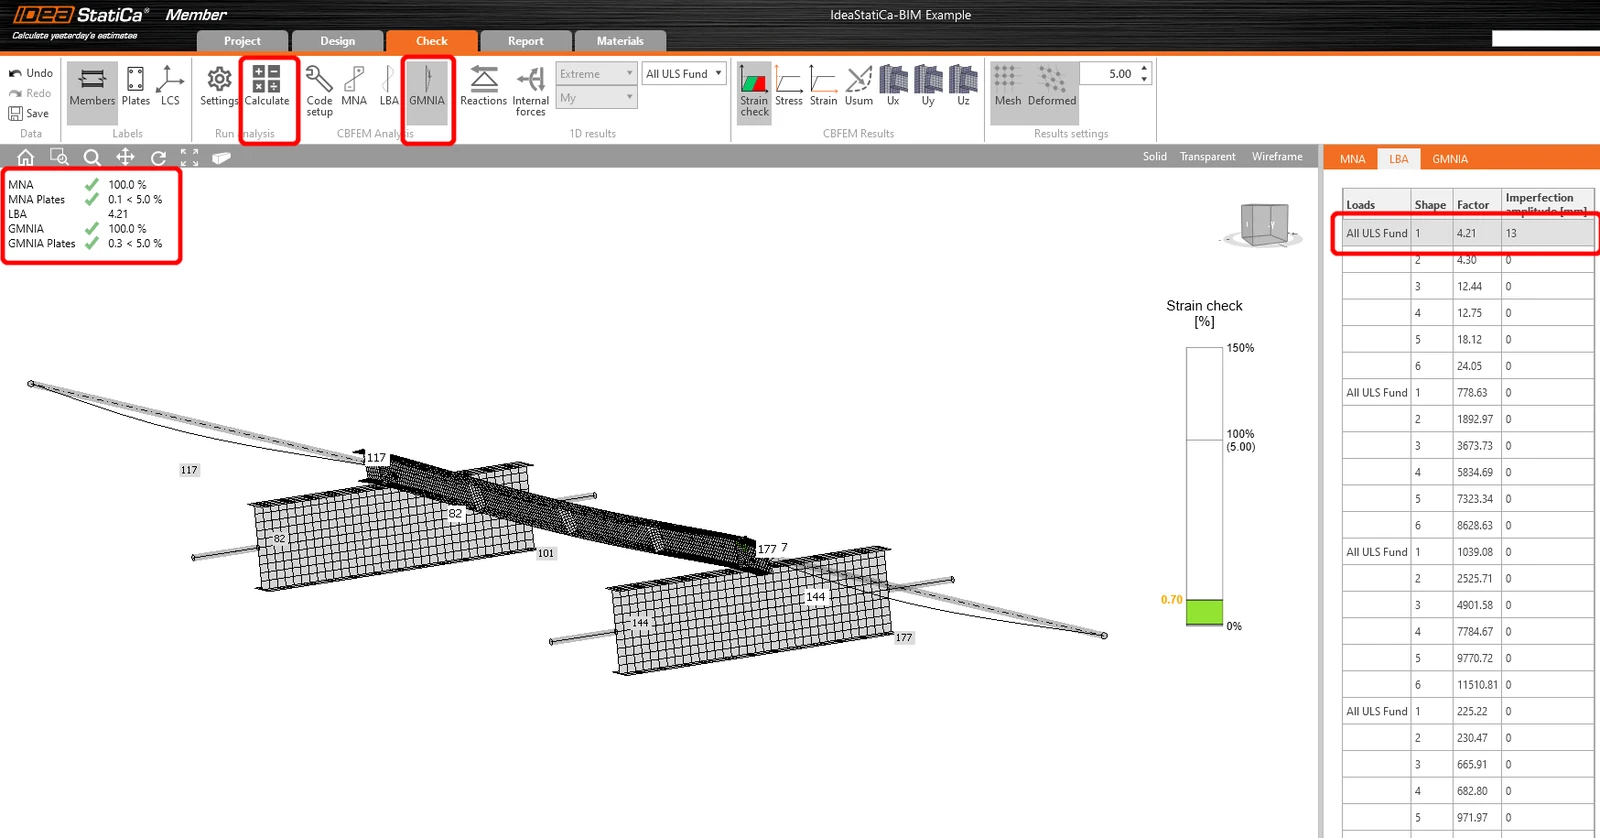
We have successfully imported and checked a purlin from the SCIA Engineer.