Idea Statica
  • Steel
  • Concrete
  • BIM & Workflows
  • Support & Learning
  • Pricing
  • Company
  • Steel overview
  • Connection design
  • Member design
  • Parametric design
  • Steel case studies
  • Concrete overview
  • Walls and D-regions
  • Anchoring design
  • Concrete case studies
  • BIM Overview
  • Supported integrations
  • Checkbot
  • Viewer
  • APIs
  • Support Center
  • E-learning & certification
  • Blog
  • Downloads & Licensing
  • Plans
  • Free community tool
  • Enterprise customers
  • Students & educators
  • How much will you save?
  • About us
  • Contact
  • Research & development
  • Authorized resellers
  • Meet our customers
  • Career
  • Steel
    Steel overviewConnection designMember designParametric designSteel case studies
  • Concrete
    Concrete overviewWalls and D-regionsAnchoring designConcrete case studies
  • BIM & Workflows
    BIM OverviewSupported integrationsCheckbotViewerAPIs
  • Support & Learning
    Support CenterE-learning & certificationBlogDownloads & Licensing
  • Pricing
    PlansFree community toolEnterprise customersStudents & educatorsHow much will you save?
  • Company
    About usContactResearch & developmentAuthorized resellersMeet our customersCareer
14-Day Trial
14-Day Trial

Subscribe to our newsletter

Company

  • About us
  • Partners
  • Careers
  • Patent

Resources

  • Customer projects
  • Case studies
  • Connection Library
  • Verification books

Legal

  • EULA
  • Global privacy policy
  • California Privacy
  • TOS Viewer
  • Licensing

Help

  • Contact
  • Quote request
  • Resellers
  • Downloads
FacebookInstagramLinkedInYouTube

© IDEA StatiCa 2009-2026

Trusted and used worldwide by engineers, fabricators & consultants.

Support CenterTutorialsGrasshopper API link - how to create an IDEA StatiCa IOM file for imports (01)
Grasshopper - Example1
SteelConnection designTutorialsConnectionIDEA Open Model (API)

Grasshopper API link - how to create an IDEA StatiCa IOM file for imports (01)

This article is also available in
ENCZDEESFRITPTNLHUROKRPLTHTRVIZH

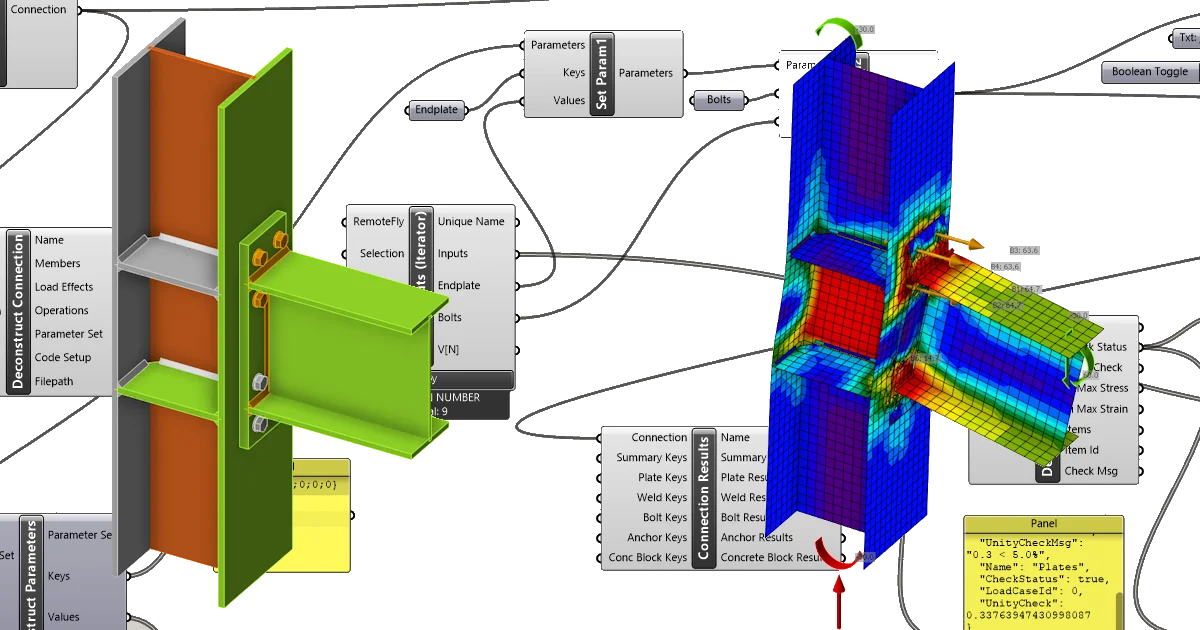
In this tutorial, you will learn how to create an IOM file from a template and work with it in Grasshopper 3D.

This tutorial is using Rhino 8. If you work with IDEA StatiCa version up to 24.1.3, see this tutorial.

Grasshopper - Plugin Installation

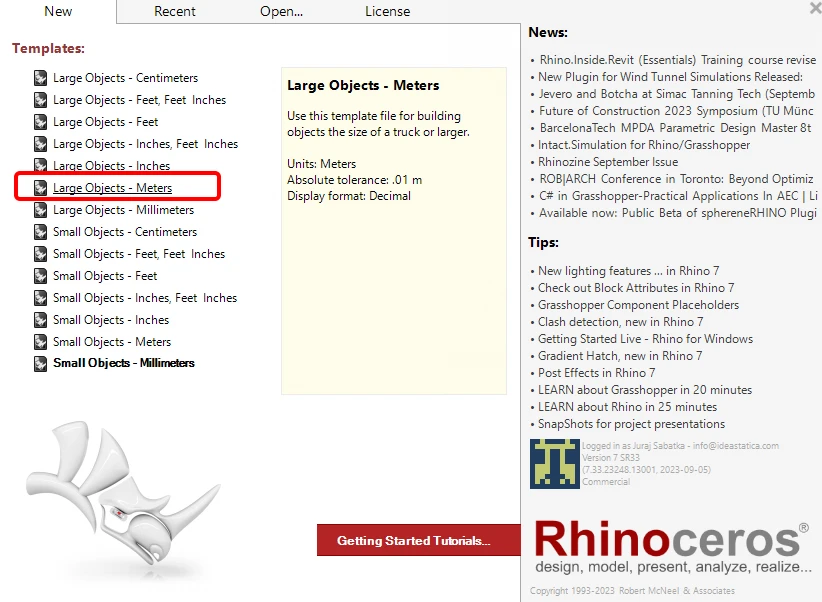
You can get a trial version of Rhino3d and Grasshopper from the Rhino3d website. Run Rhinoceros and select the template with Meters:
In the Command line, please enter "Package Manager":
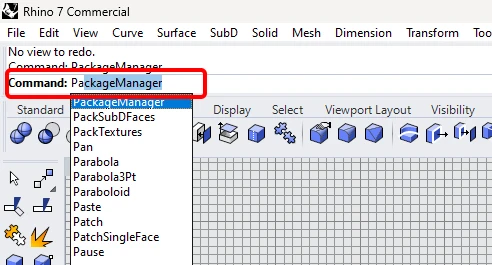
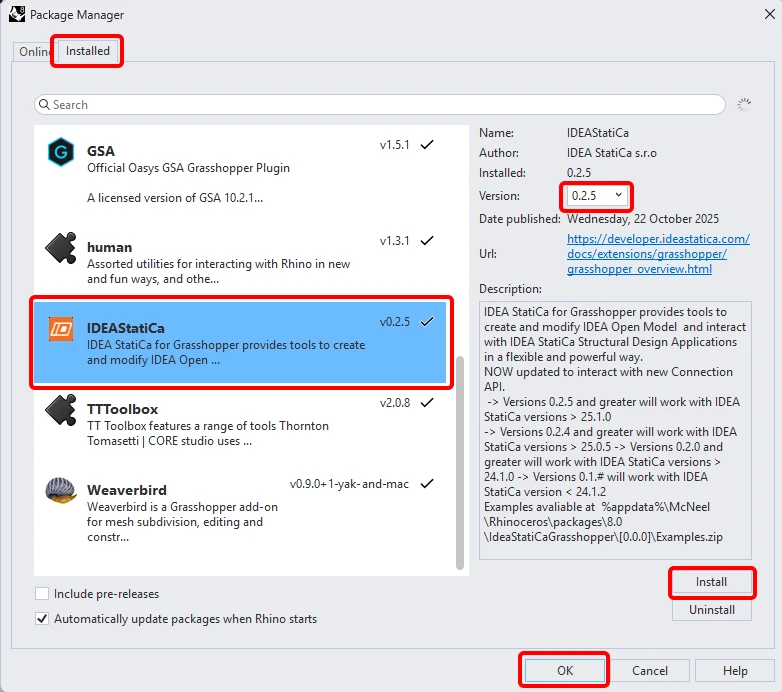
A new window appears; select IDEAStatiCa and click Install. The plugin will be downloaded and installed. To become active, a restart of Rhinoceros is necessary.
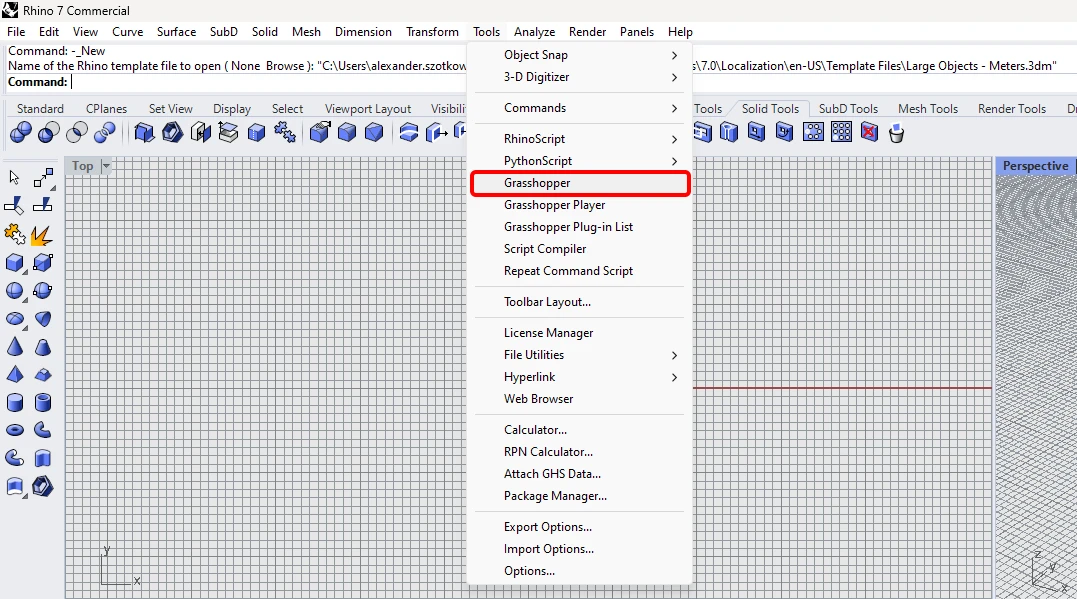
 To start Grasshopper with the IDEA StatiCa plugin, select Tools / Grasshopper in the Rhihoceros tab.
As you can see, the plugin is already incorporated.

Learn about the components and commands in the IDEA StatiCa plugin for Grasshopper in the article Description of Grasshopper plugin components.

IDEA StatiCa Connection - Export a joint as an IOM file

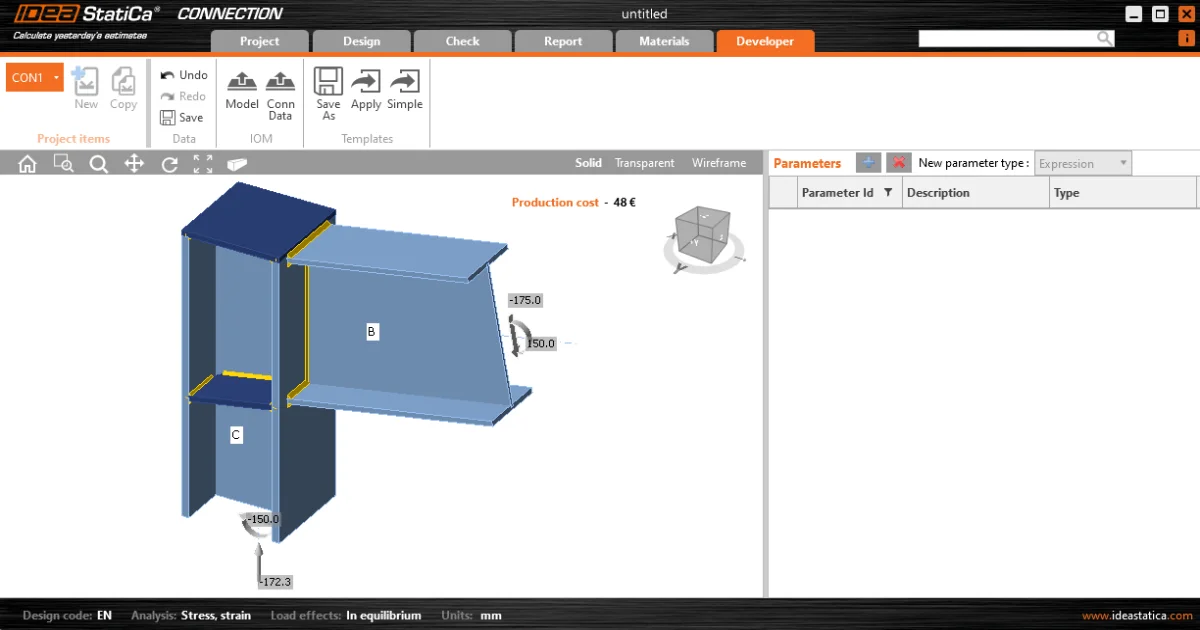
For this example, open the attached ideaCon file.

To be able to work with IOM, it is necessary to enable the Developer tab in Preferences / Advance Settings: 
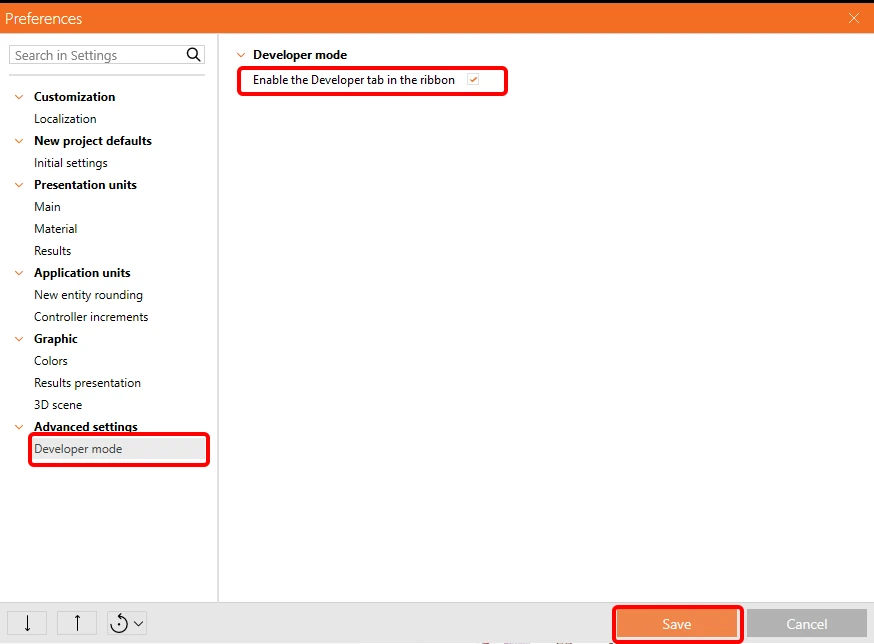
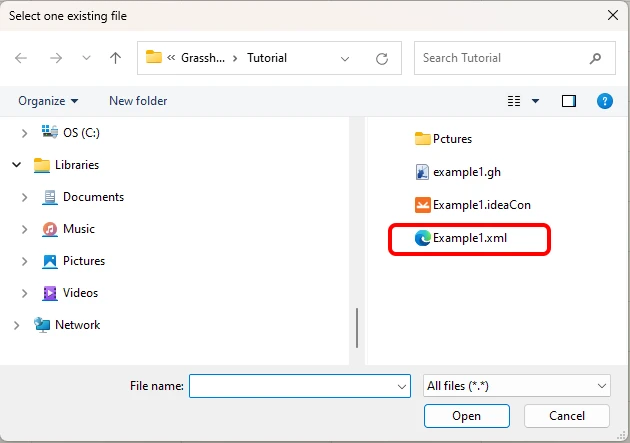
Export this connection to the IOM file Example1.xml.

Grasshopper - Import the IOM file, display the joint in Rhino, and see the calculation results

Create a new document, select the tab Params in the upper ribbon, and place the component File Path on the Canvas. 
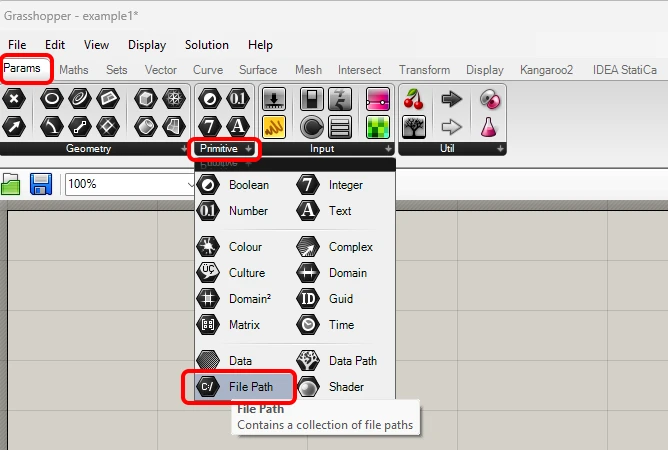
file

Right-click on the component and select the file we saved before: 
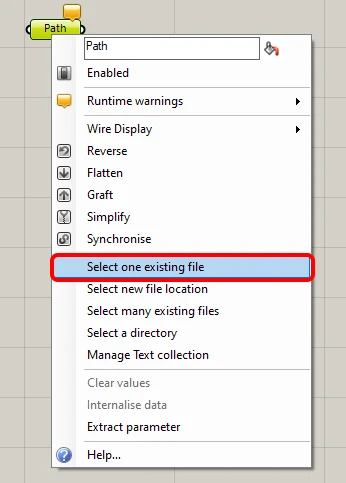
Note: If you open the attached file, you must change this path accordingly. 

Since version 24.1.4, IDEA StatiCa has come with a new API, described here. 

To run Grasshopper scripts, you must add a component called Connection Service Runner to every file. This component can be found in  IDEA StatiCa / App Common.
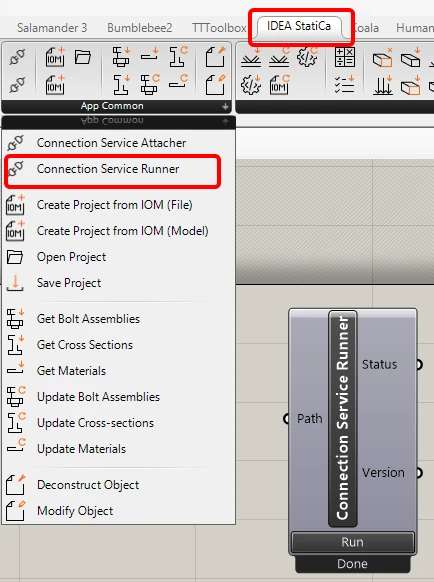
Runner

To connect the Grasshopper plugin to the correct IDEA Connection version, add the component File Path and link it to the actual IDEA folder (C:\Program Files\IDEA StatiCa\StatiCa 25.1)

When running this component, you should see the following window appear.
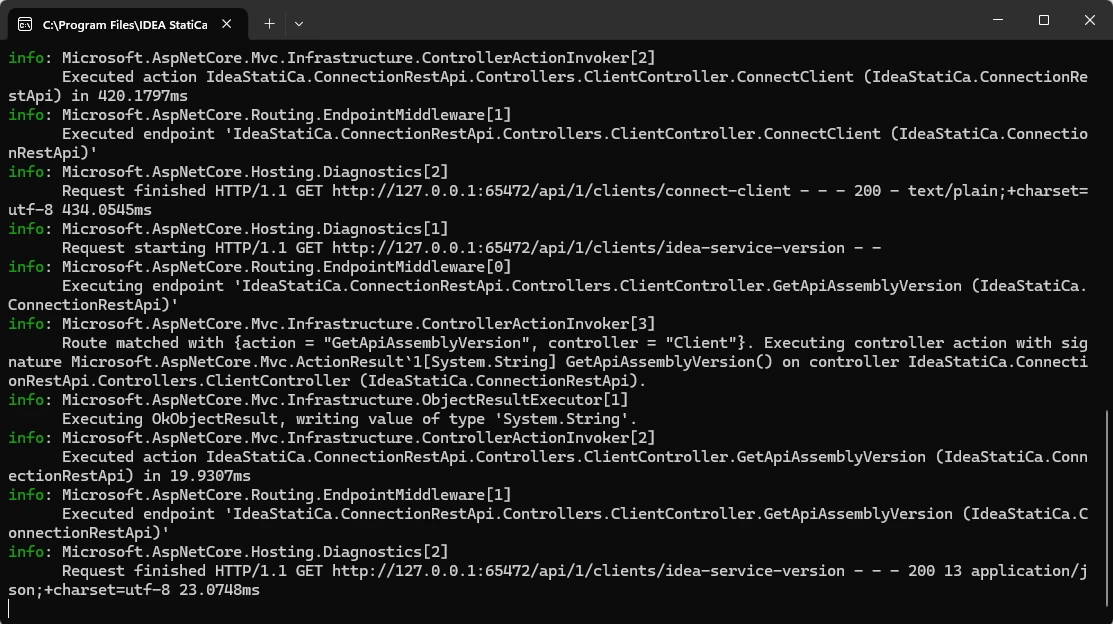
CMD

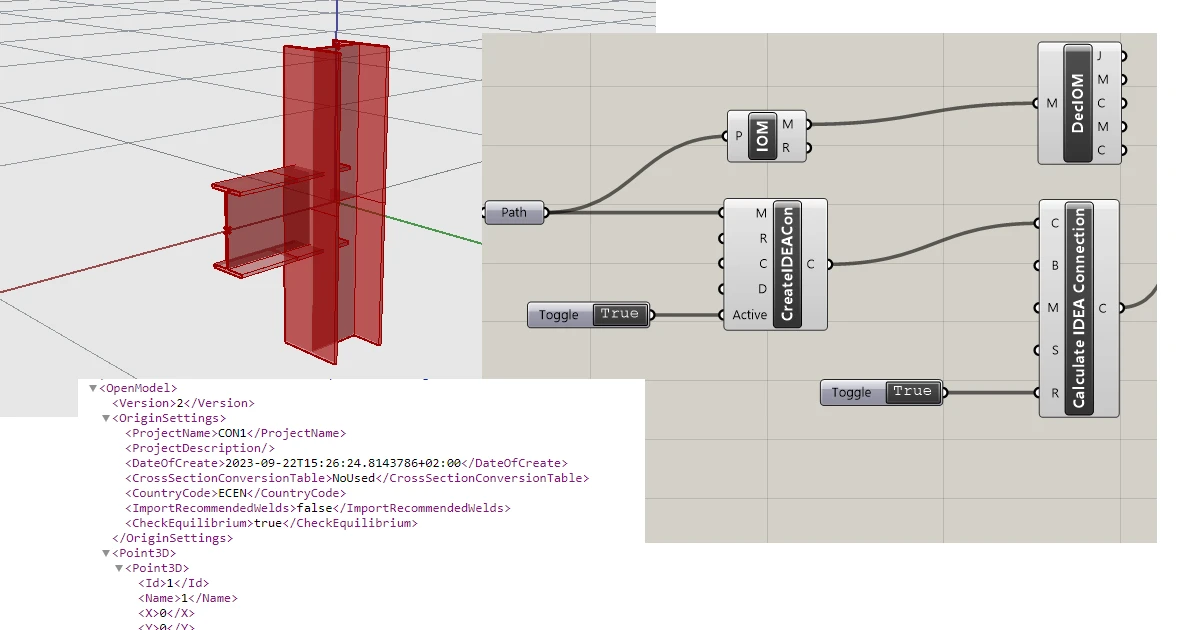
Now add the following components to the canvas and connect them as seen in the picture.

IDEA StatiCa / Open Model / Import IOM File
IDEA StatiCa / Open Model / Deconstruct Open Model
IDEA StatiCa / Open Model Create / Deconstruct Connection Point
IDEA StatiCa / App Common / Create IDEACon
IDEA StatiCa / Connection / Calculate IDEA Connection
IDEA StatiCa / Connection / Deconstruct Result Item
Params / Input / Boolean Toggle
Params / Input / Panel
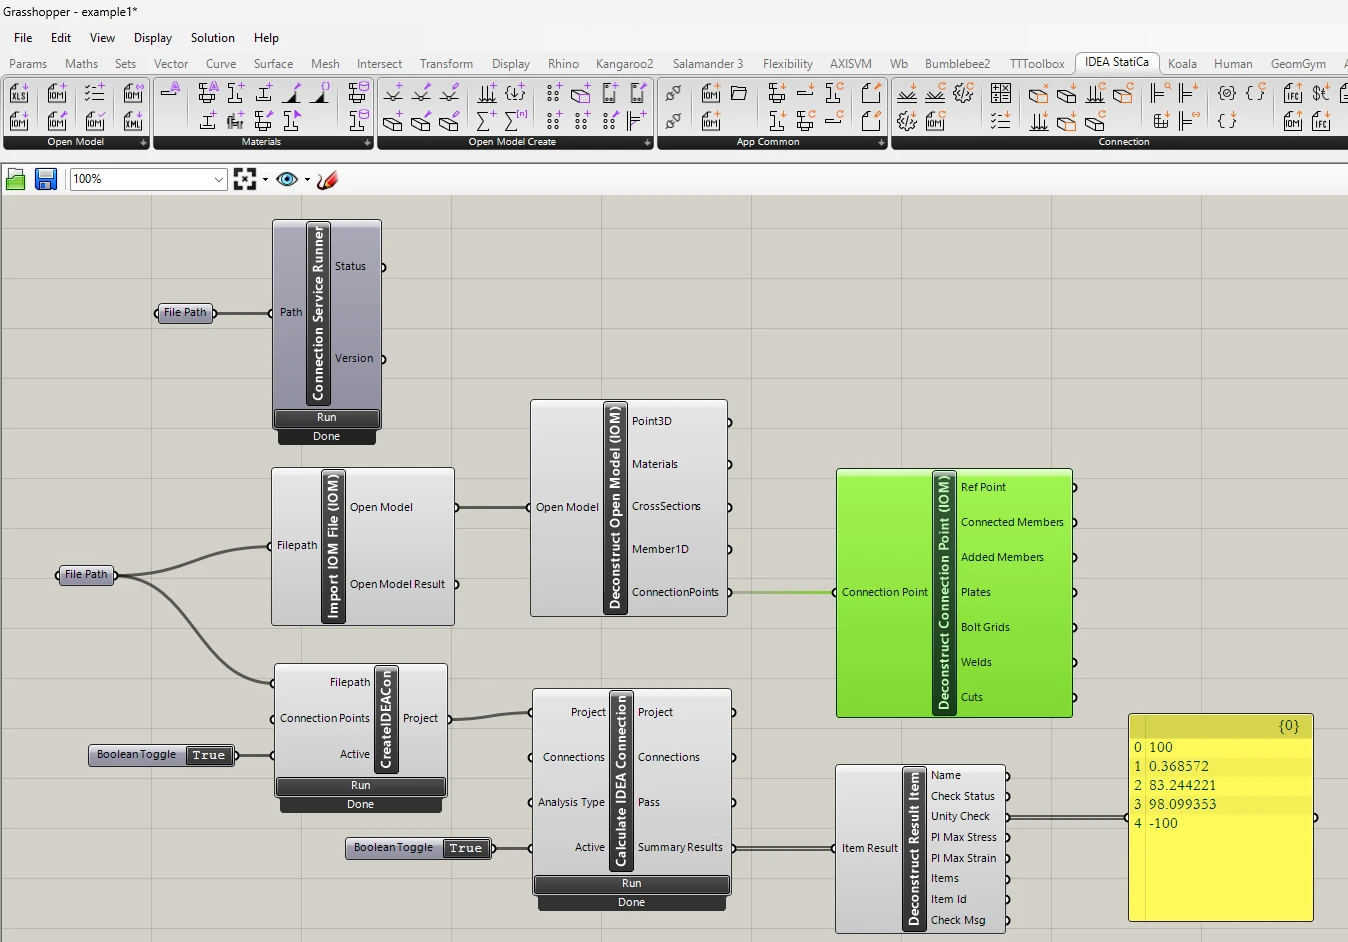
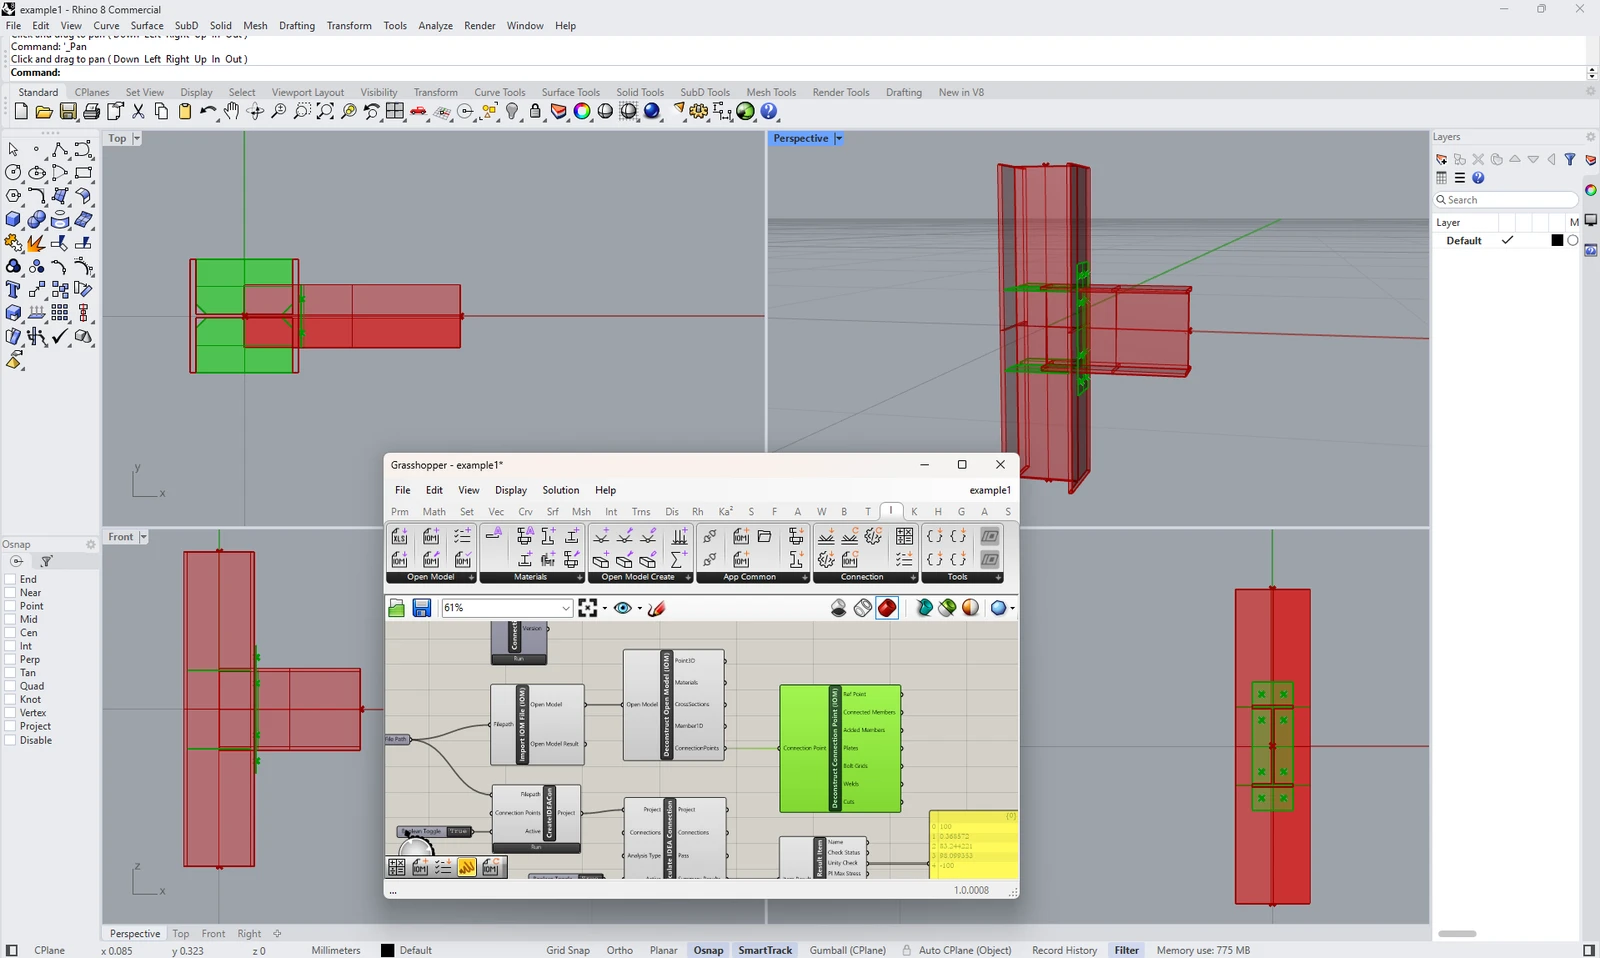
To run the calculation and get visible results, double-click on False/True. If you added the components Deconstruct Open Model and Deconstruct Connection Point, you can also see the contours and plates of the joint in Rhinoceros.
More complex examples can be found on your PC in the directory

“%appdata%\McNeel\Rhinoceros\packages\8.0\IDEAStatiCa\0.2.5\Examples0.2.5.zip”
Attached Downloads

  • Example1.zip (ZIP, 59.4 KB)

Related articles

Developer mode
  • Steel
  • IDEA Open Model (API)
  • v23.0
  • +3
  • Steel
  • IDEA Open Model (API)
  • v23.0

Knowledge base

Setting up parametric design with Developer Tab

Read more
Description of Grasshopper plugin components
  • Steel
  • Connection
  • IDEA Open Model (API)
  • Grasshopper
  • +4
  • Steel
  • Connection
  • IDEA Open Model (API)
  • Grasshopper

Knowledge base

Description of Grasshopper plugin components

Read more
In this tutorial, you will learn how to play with parametrized connections and how to change and evaluate them in Grasshopper.
  • Steel
  • Connection
  • IDEA Open Model (API)
  • Grasshopper
  • +4
  • Steel
  • Connection
  • IDEA Open Model (API)
  • Grasshopper

Tutorials

Grasshopper API link - how to import and calculate parametric connection model (02)

Read more
Grasshopper API link – parametric optimization of a connection weld
  • Steel
  • Connection
  • IDEA Open Model (API)
  • Grasshopper
  • +4
  • Steel
  • Connection
  • IDEA Open Model (API)
  • Grasshopper

Tutorials

Grasshopper API link – parametric optimization of a connection weld (03)

Read more