

1 How to activate the link
- Install the latest version of IDEA StatiCa, get it in the Downloads
- Make sure you are using a supported version of AxisVM – info about updates is published in the BIM section
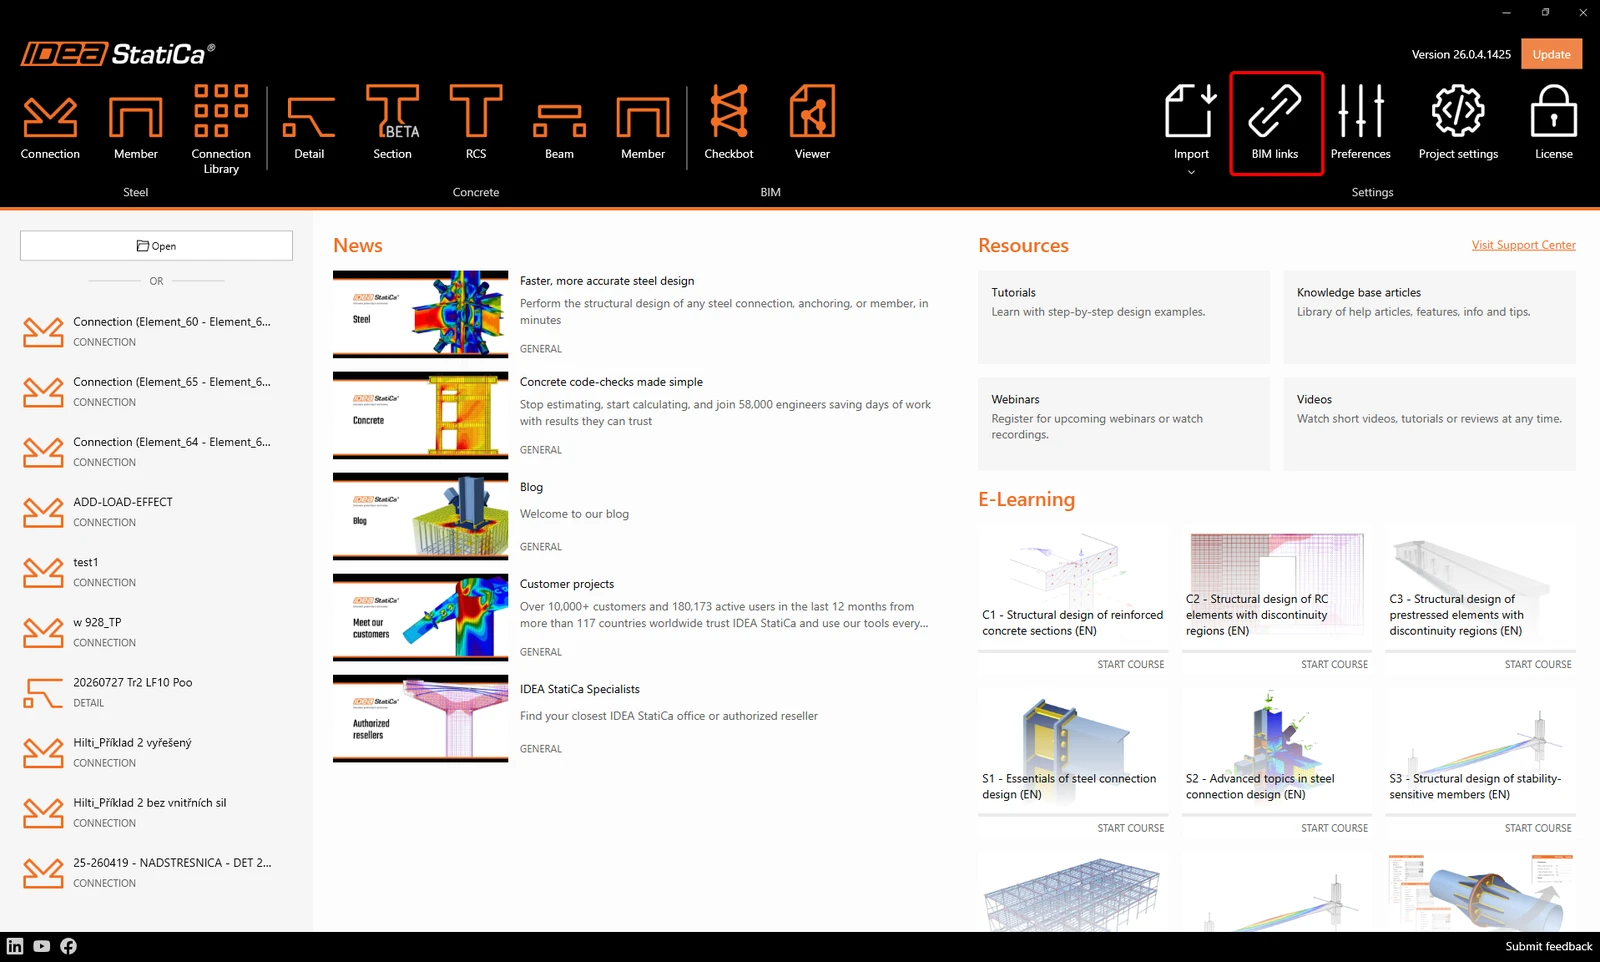
After installing both programs, run IDEA StatiCa and start with the BIM links item.
Before the window opens, when Activate your Bim Link opens, a "Run as administrator" notification appears. Please confirm with the button Yes.
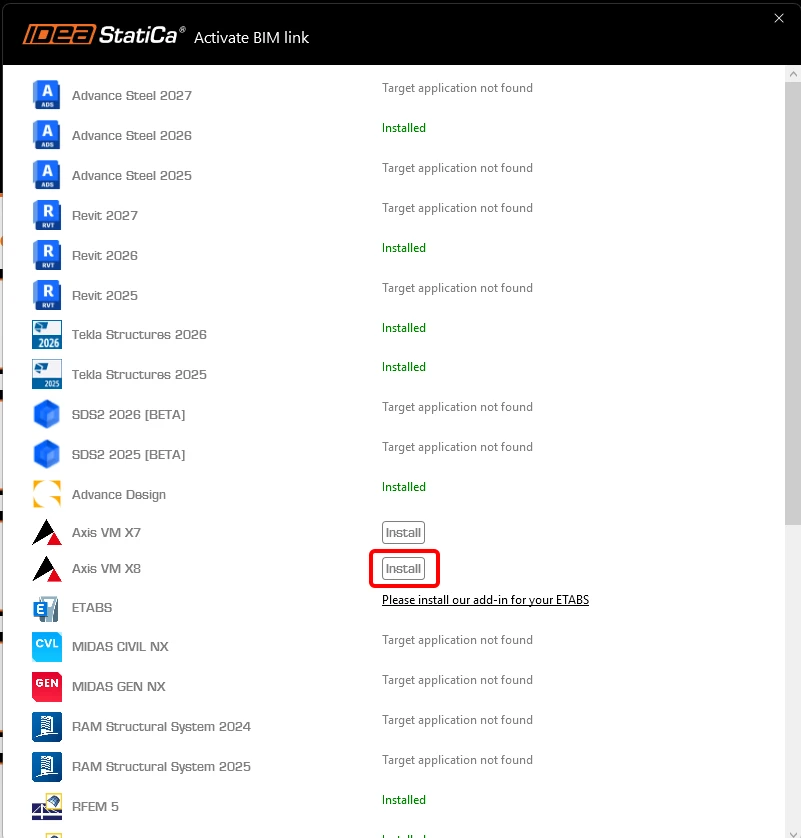
Select your version of AxisVM and click the button Install. The process of integration will start.
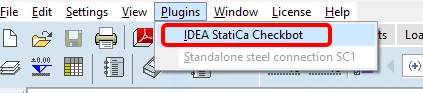
Start AxisVM. In the menu, plugins for IDEA StatiCa Checkbot is now installed.
2 How to use the link
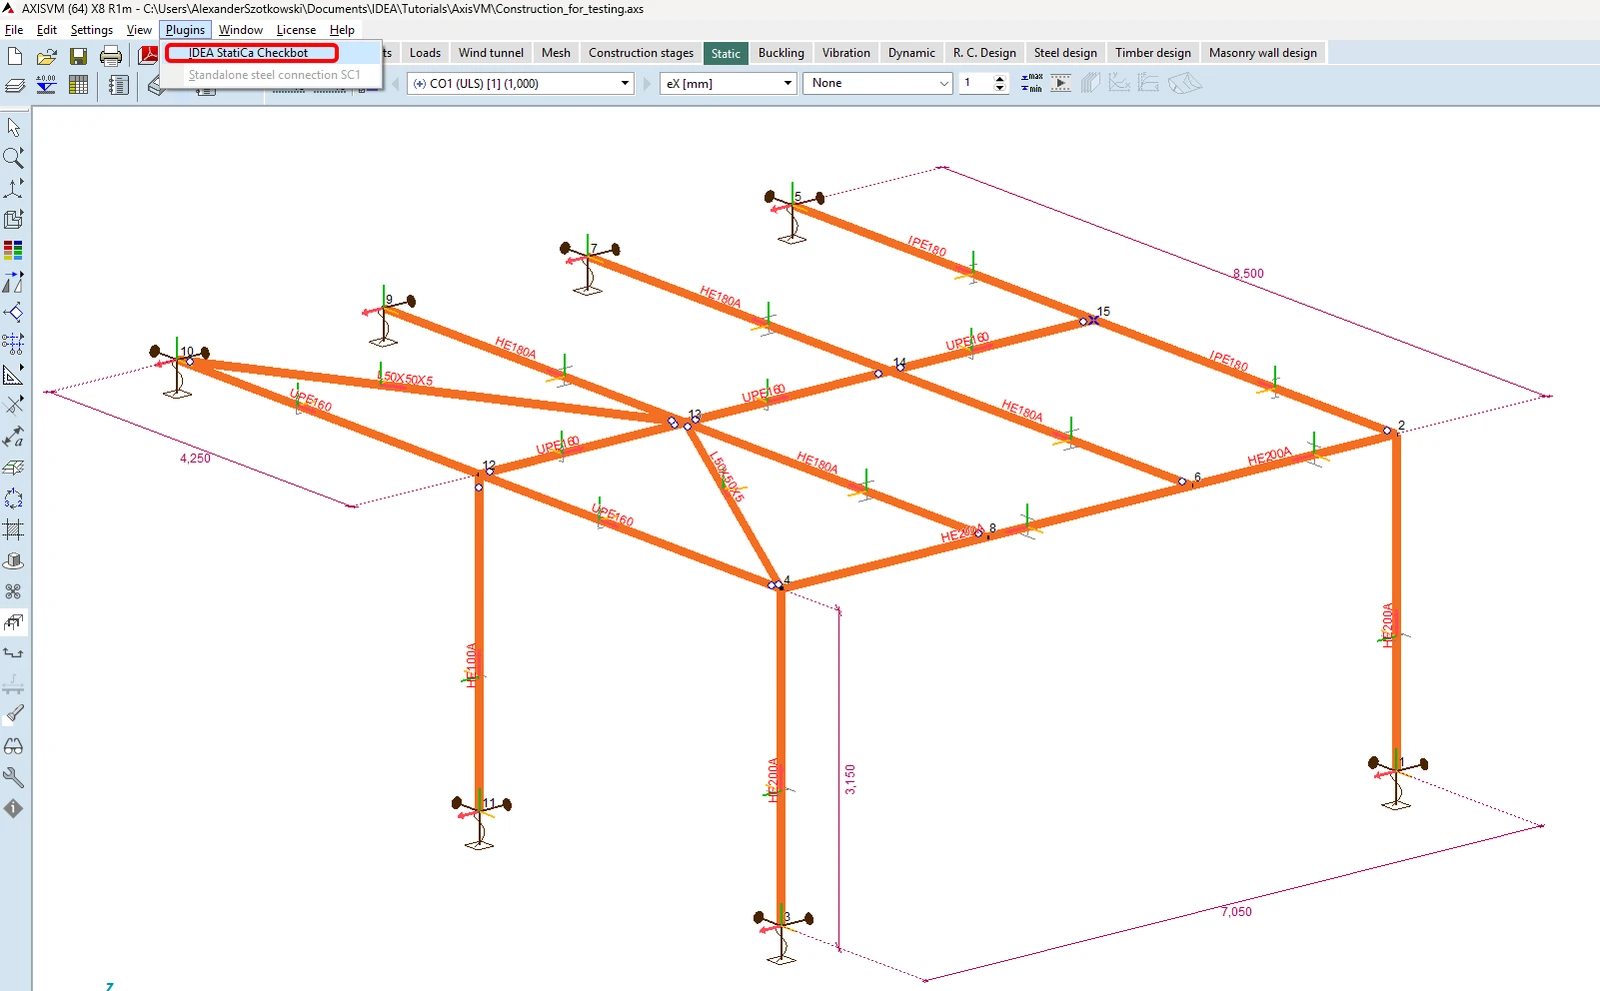
Open the attached project in AxisVM, run the linear analysis first, and then the nonlinear analysis too.
When finished, go to the menu item Plugins and choose IDEA StatiCa Checkbot.
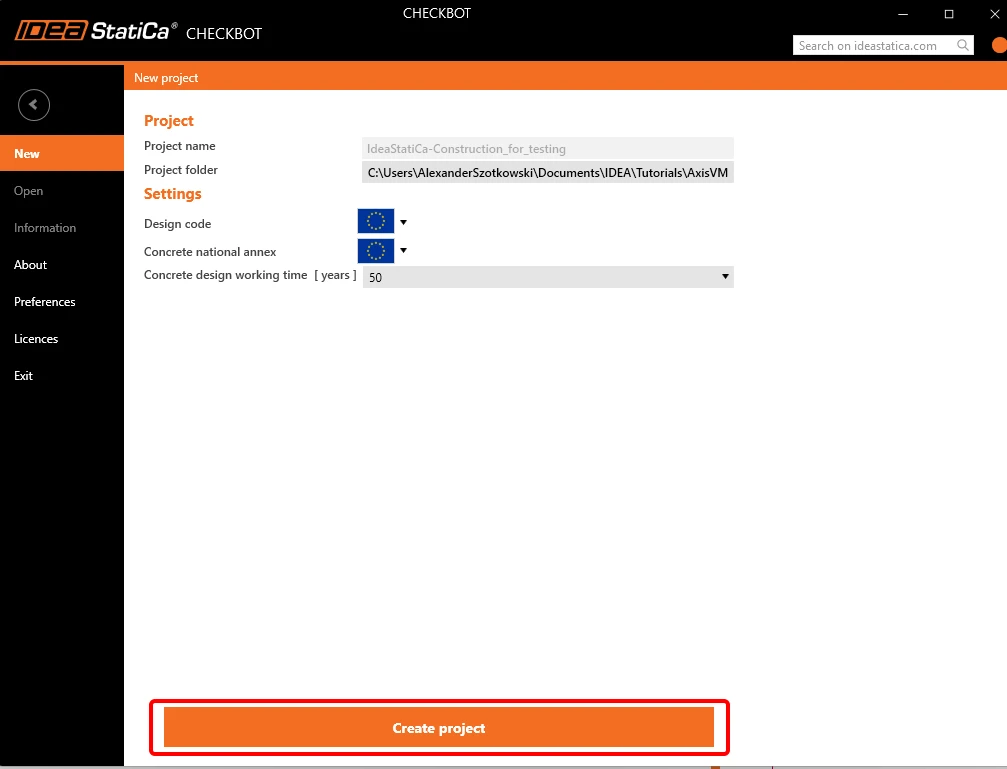
A wizard window opens, click on Create project.
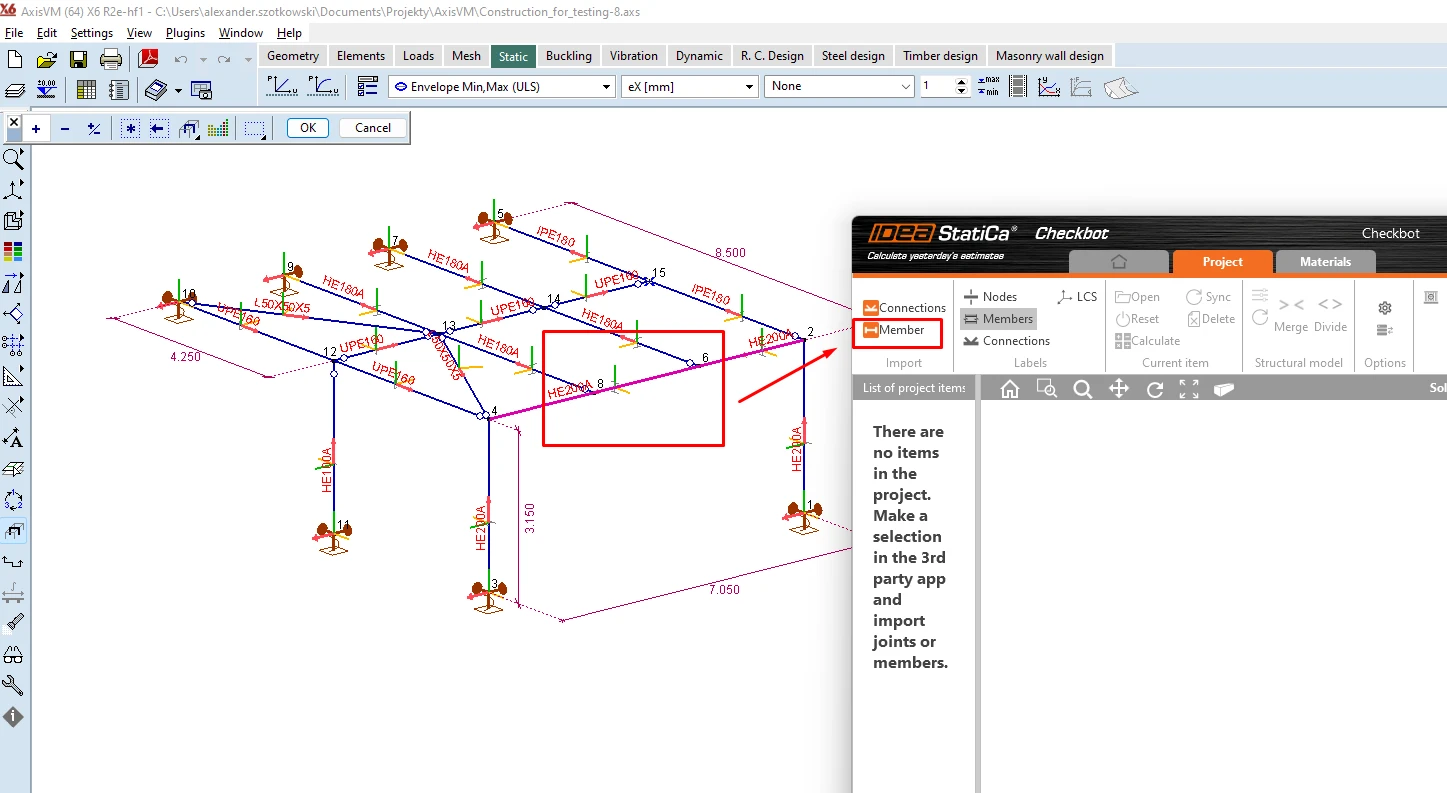
In AxisVM, please select the member you want to transfer to IDEA StatiCa Connection, and click on Member.
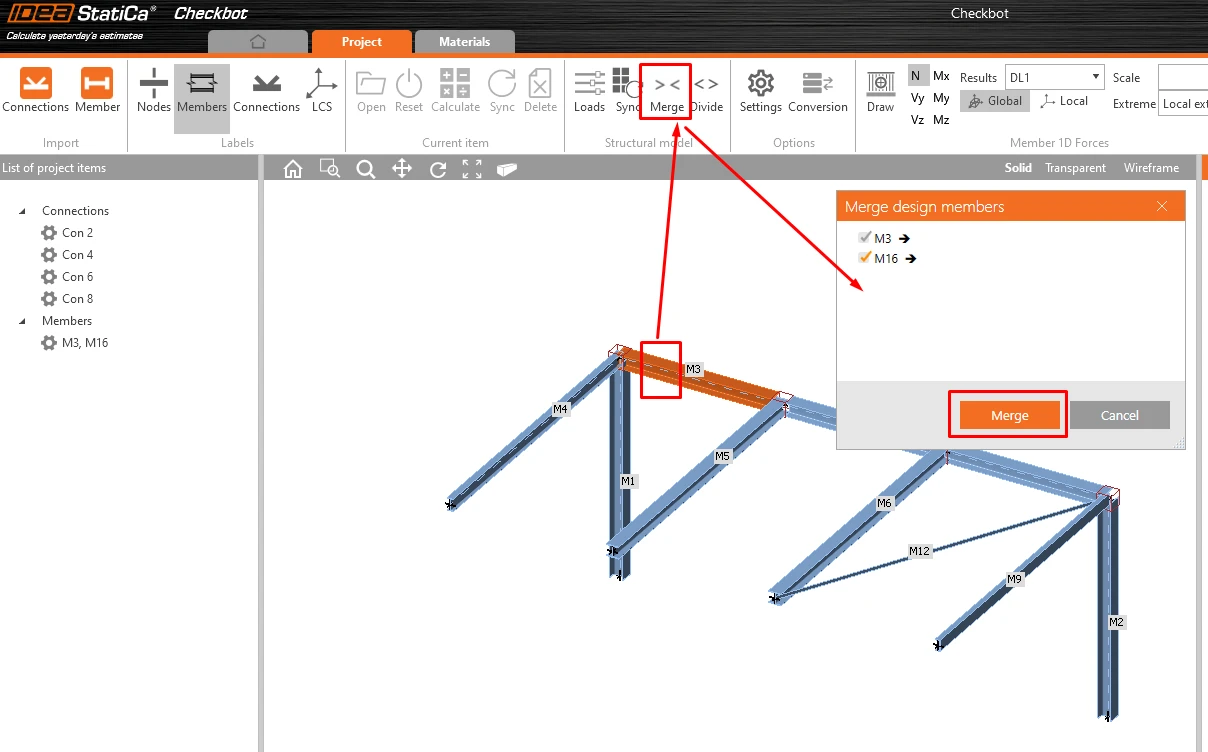
Because the whole member is created from two separate beams, merge the beams M3 and M16.
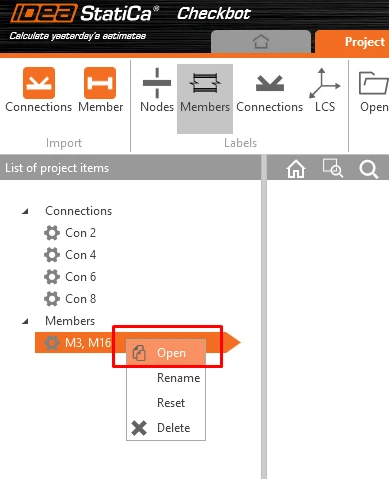
Now you can click on Open, a new window with the module Member appears.
3 Design
To get the analysis of the member, we first have to design all the joints along with the member. The intermediate nodes, where no operations are needed, can be left off. Let's start with Node 2 when clicking on Edit connection.
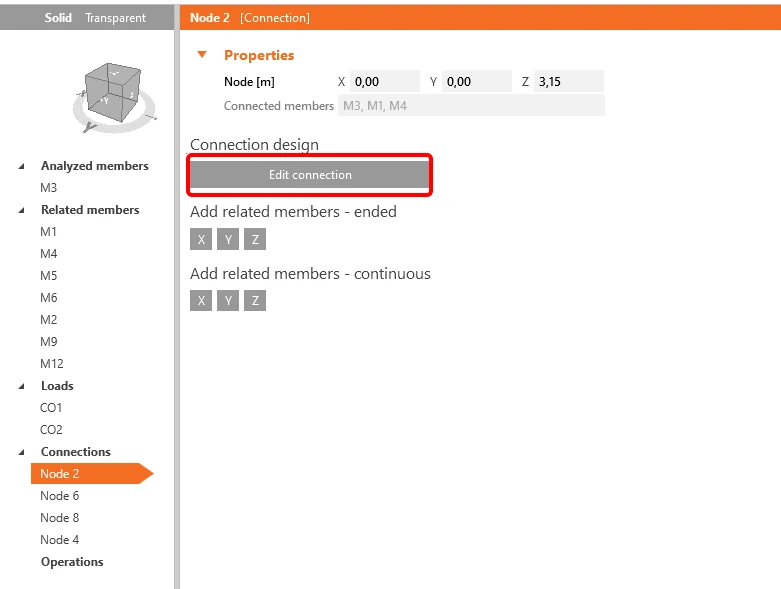
The window with the joint appears, and you can add the first Operation Cut.
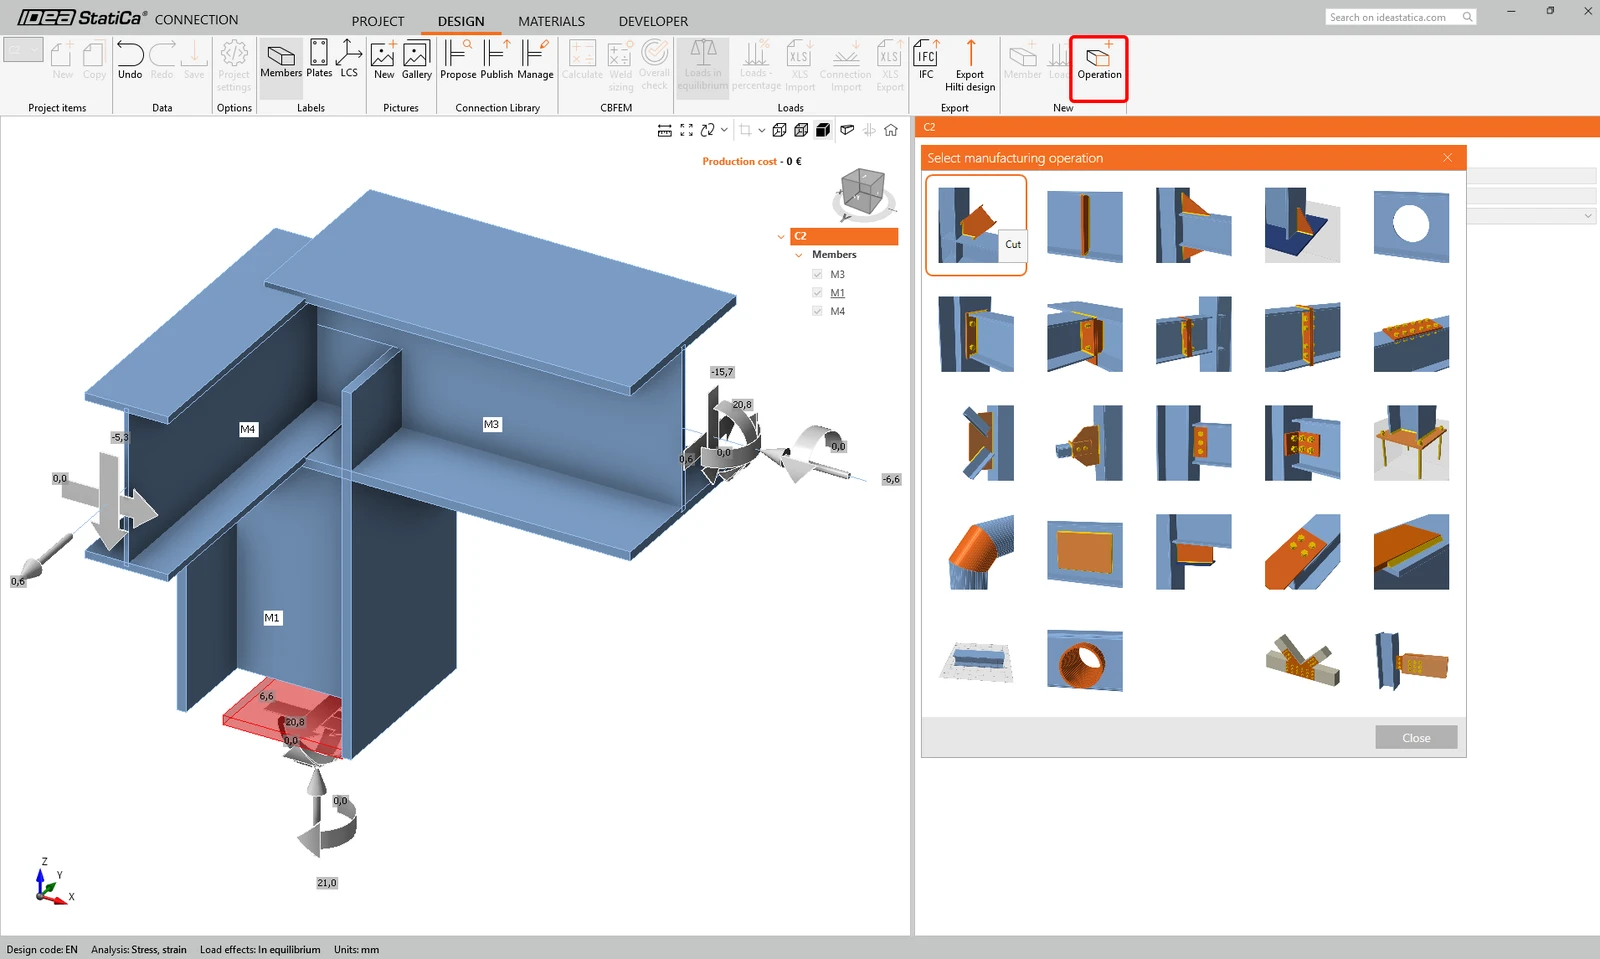
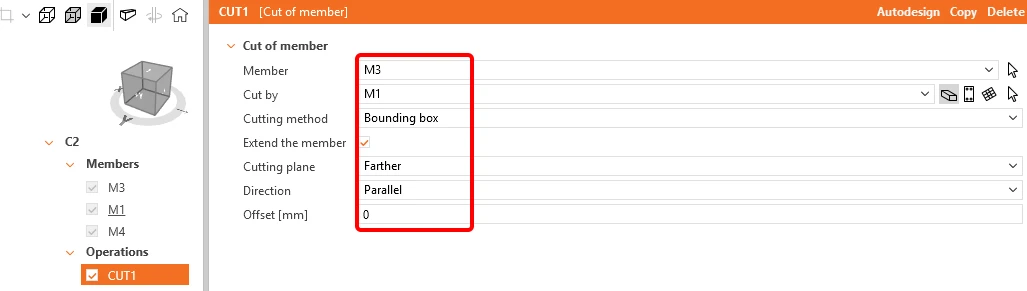
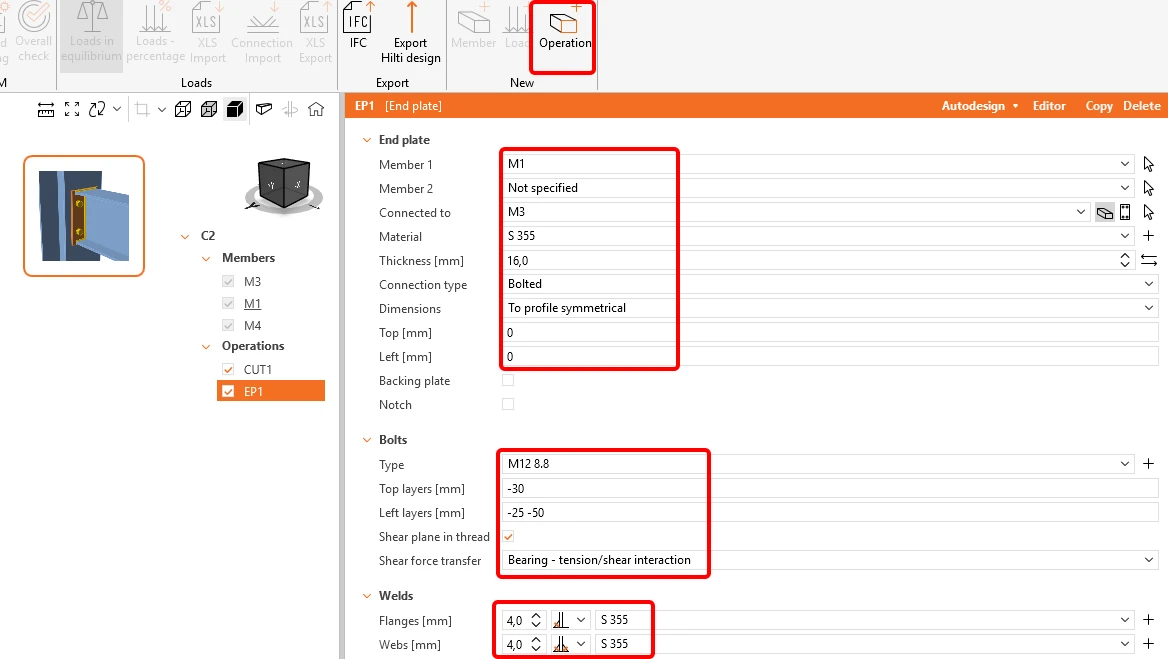
The next operation is the End plate. Fill in the data according to the next picture.
The member M4 can be connected using the Fin plate operation.
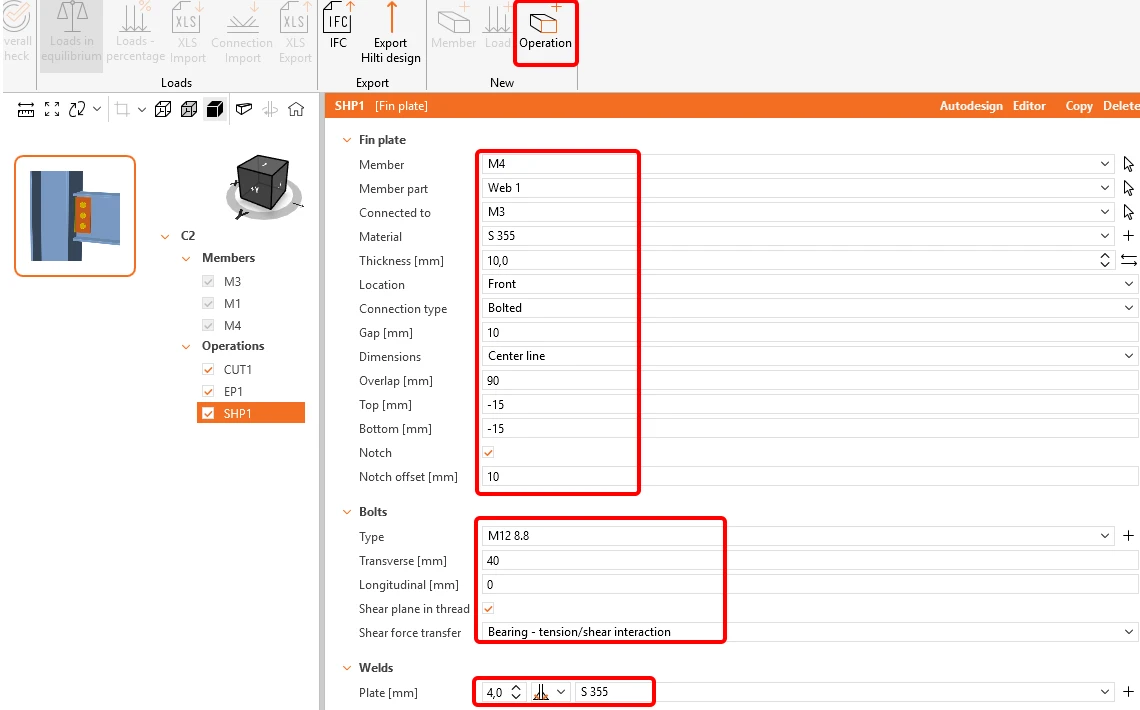
The last operation on this joint is to add the operation Stiffeners.
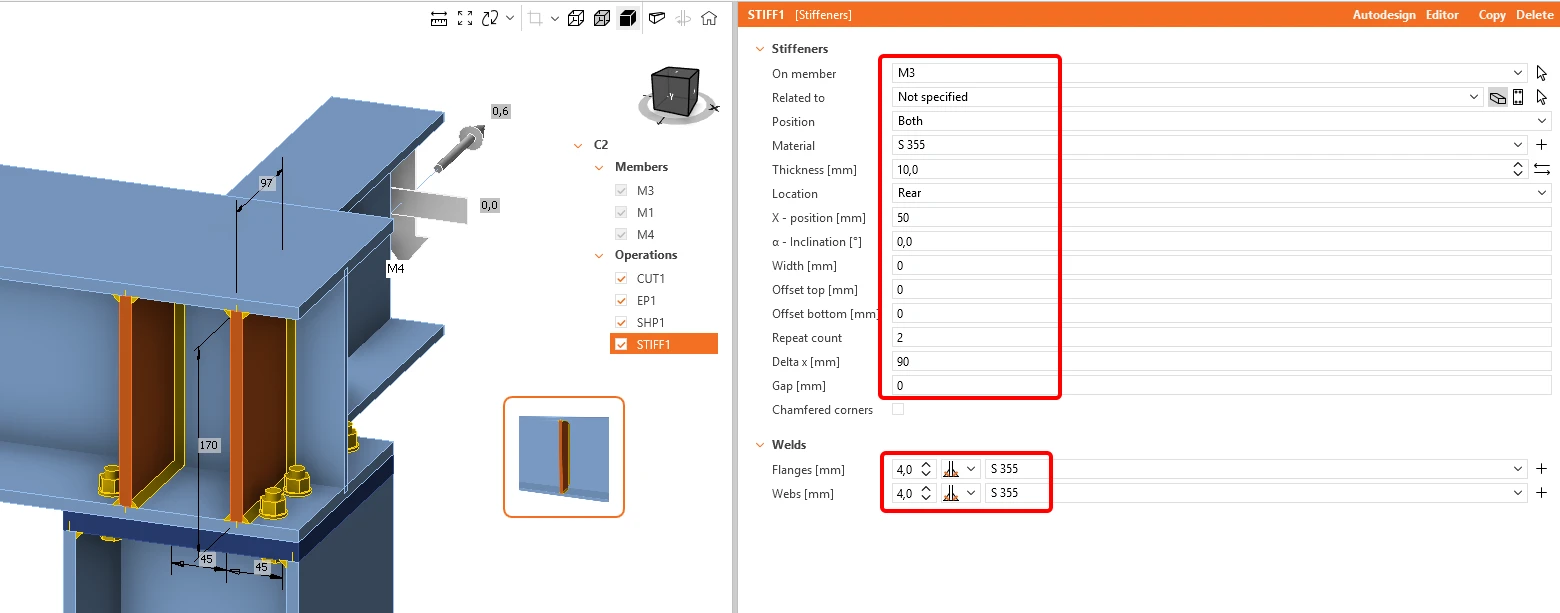
Now we click on Save and close the window.
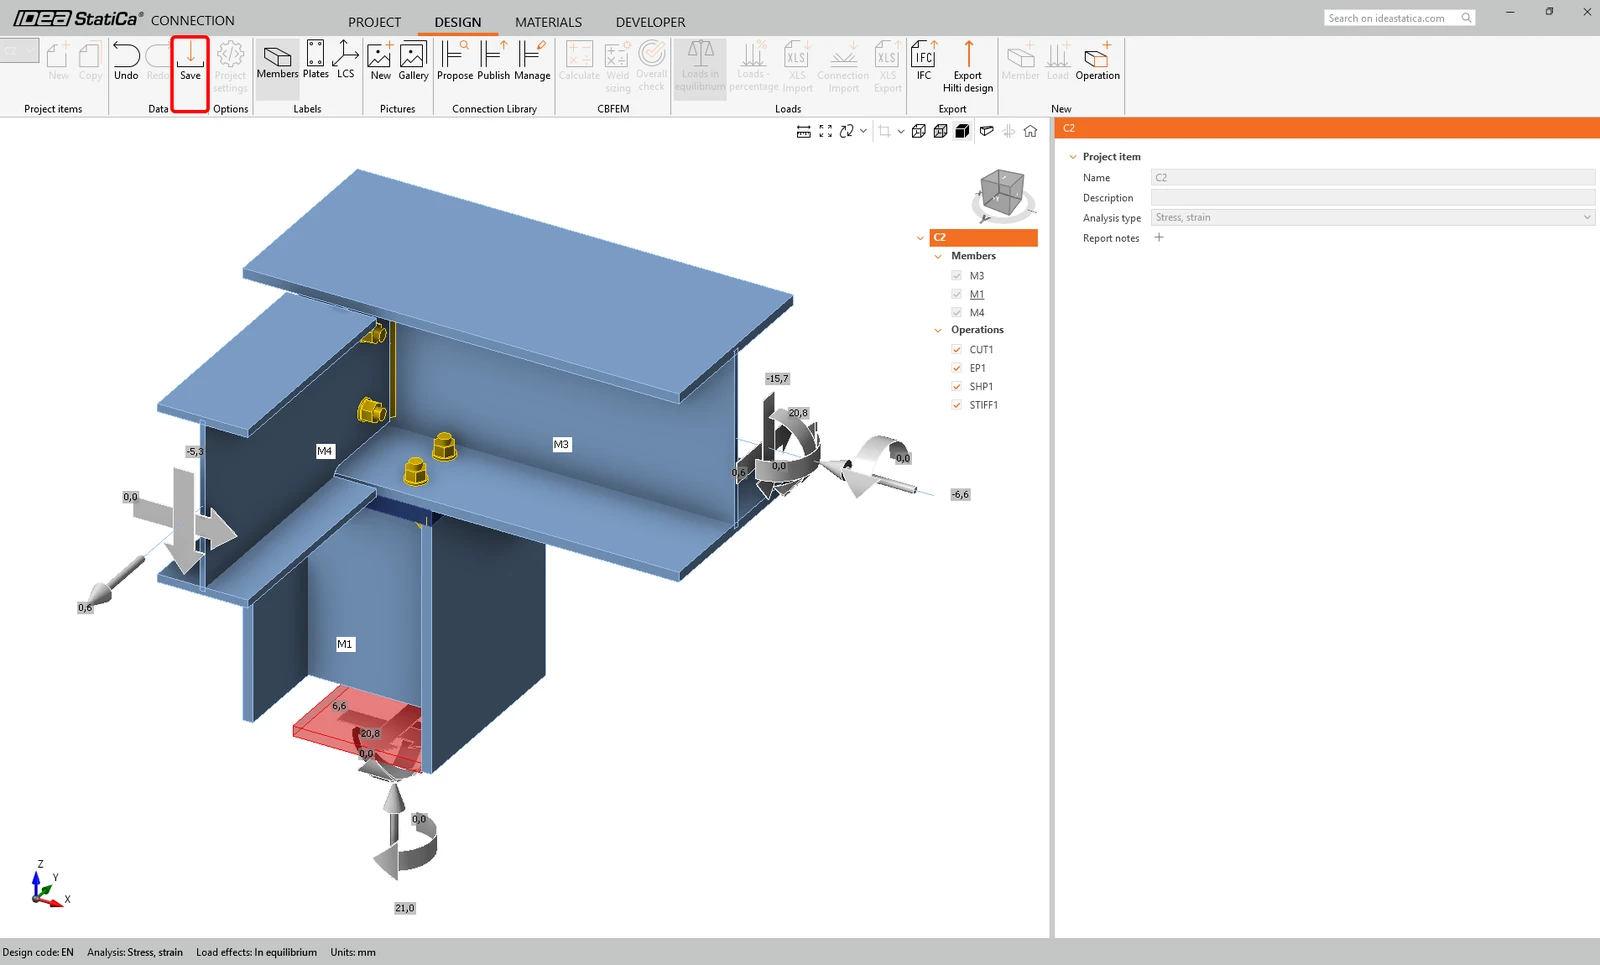
The same has to be done with Node 6. Click on Edit connection.
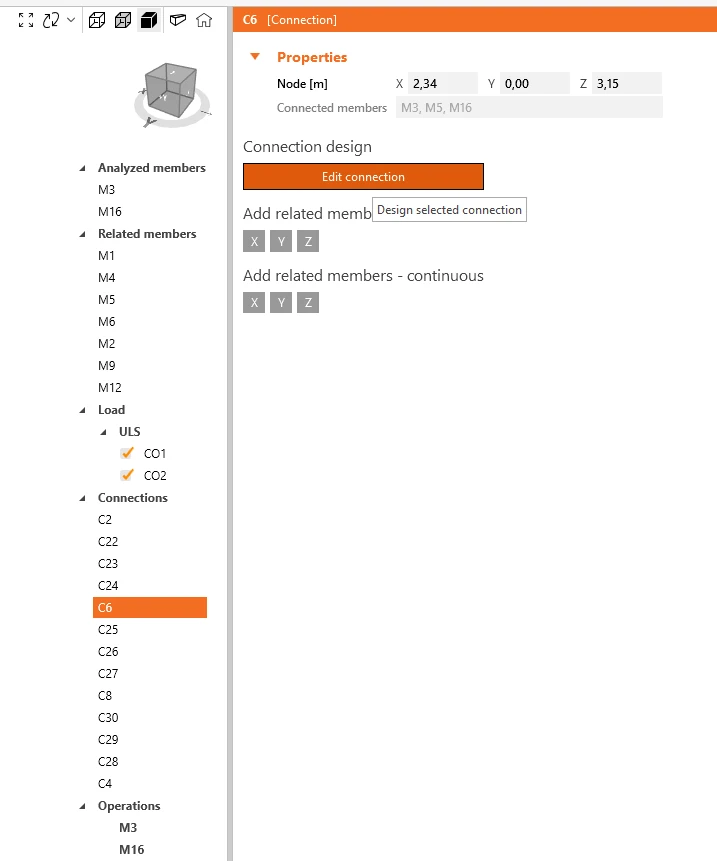
Apply the operation Fin plate with the following settings:
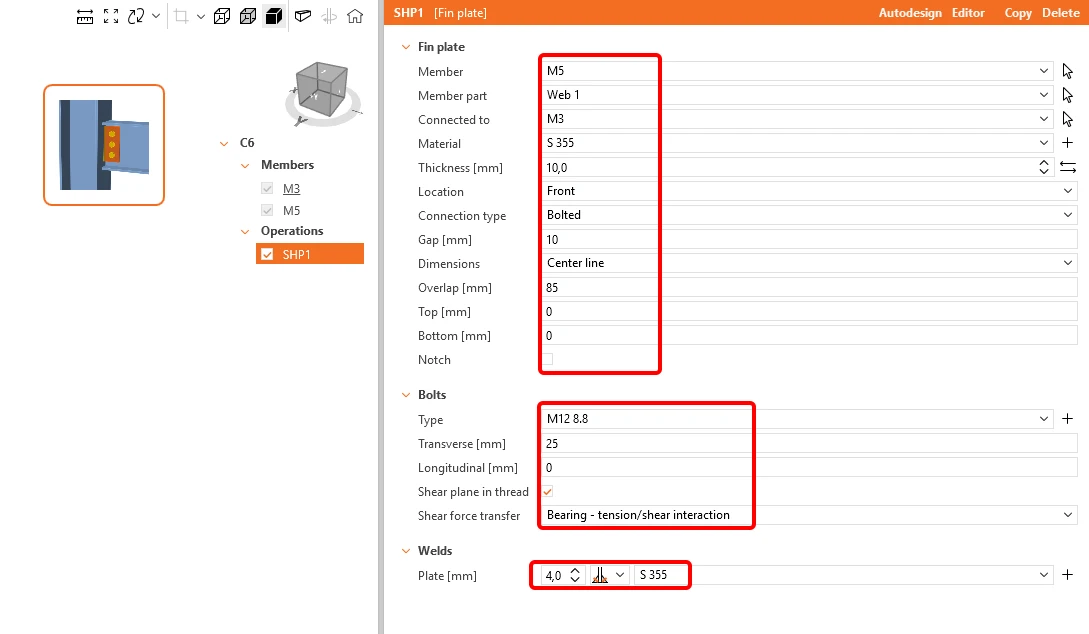
The next operation will be Cut of member M5.
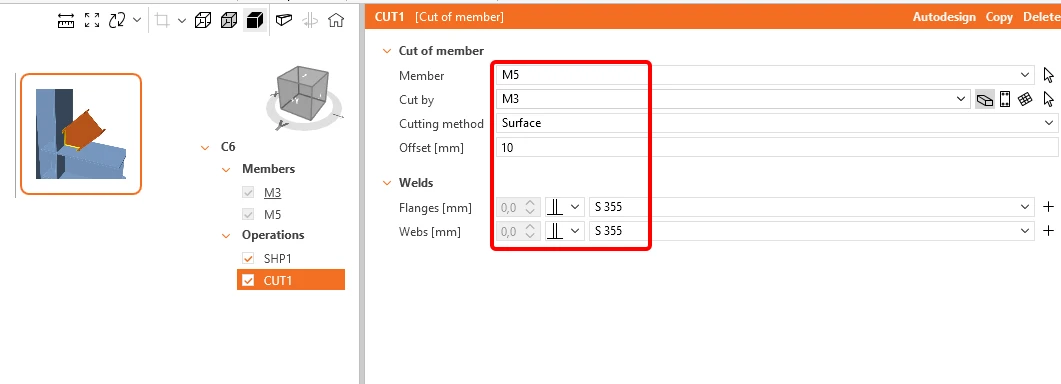
Now click Save and close the window.
For node 8, you can use the same design as for node 6. Just click on Apply.
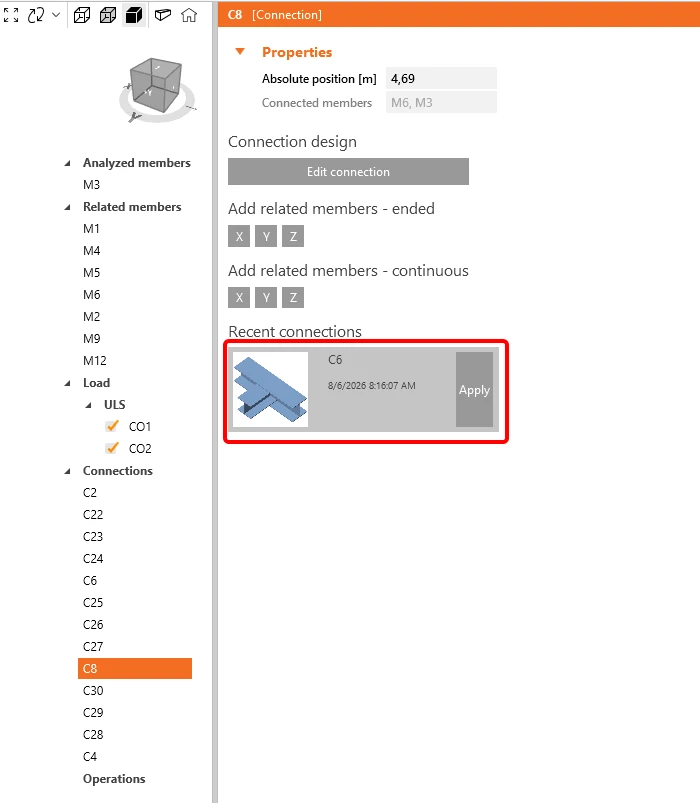
Here is the design of the last node 4.
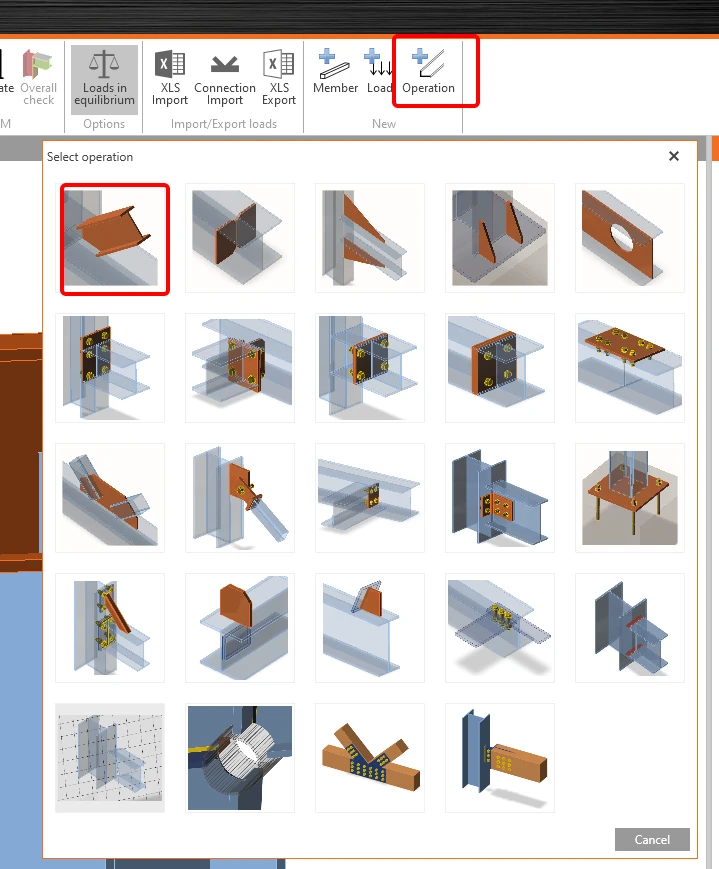
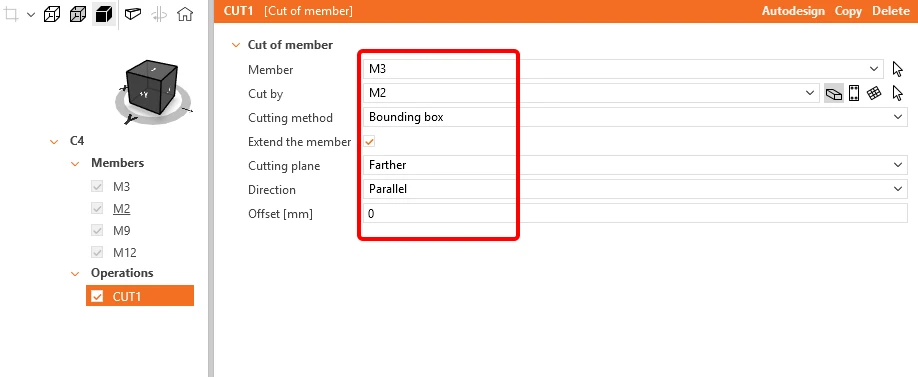
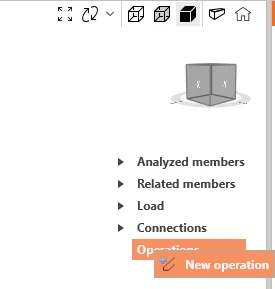
In the upper ribbon, click on +Operation and add a New operation, Cut.
Please modify the table according to the next picture.
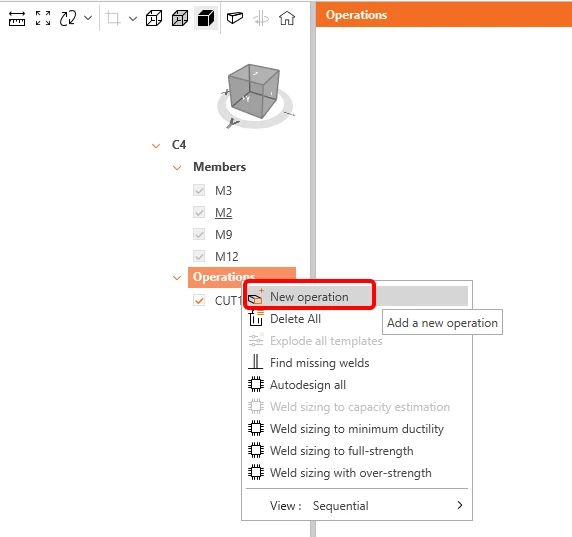
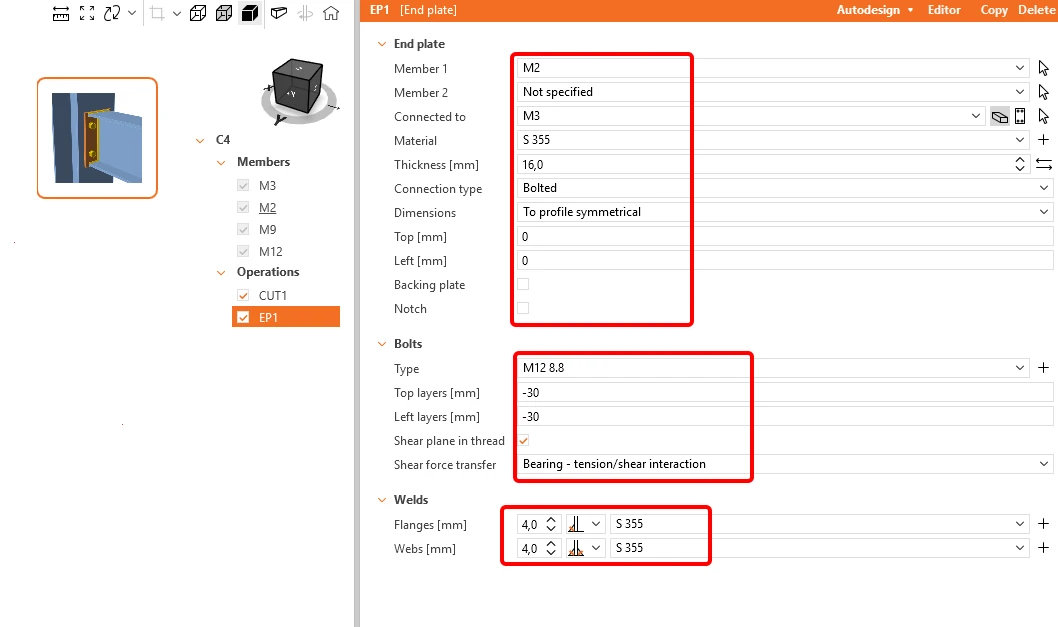
You can now add another operation by right-clicking on Operation to add a New operation End Plate. Change the dimensions and welds according to the next picture.
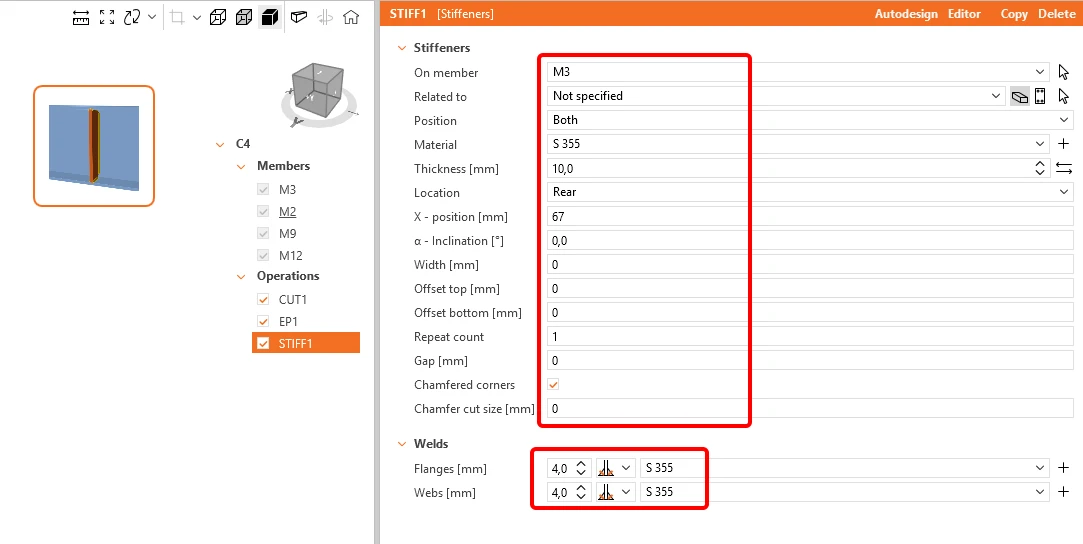
The next Operation will be Stiffener. You can change the dimensions according to the next picture.
Now you have to connect the member M9 by the operation Fin plate.
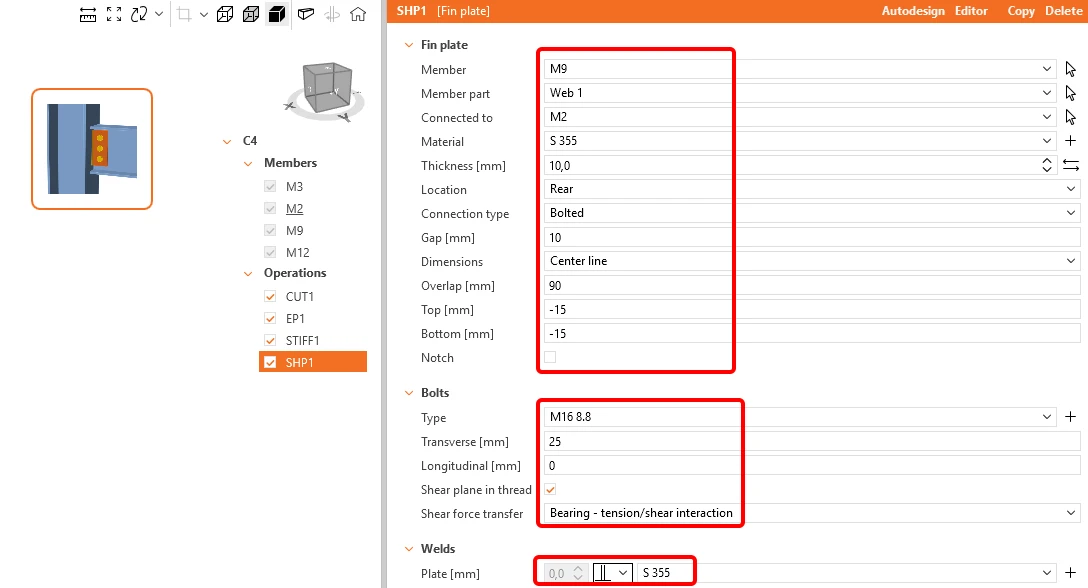
This plate has to be welded to the web of the member M3. So choose the operation Weld and set the values according to the next picture.
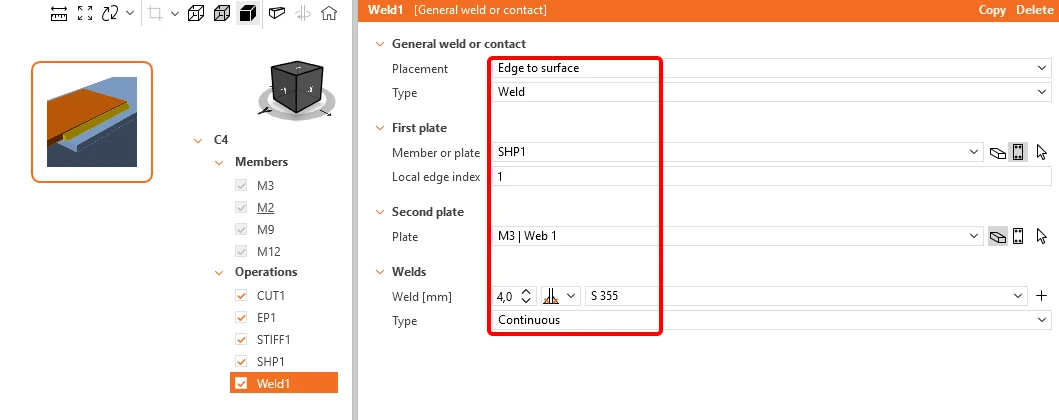
The last Operation you have to apply is the Gusset plate operation to connect the diagonal.
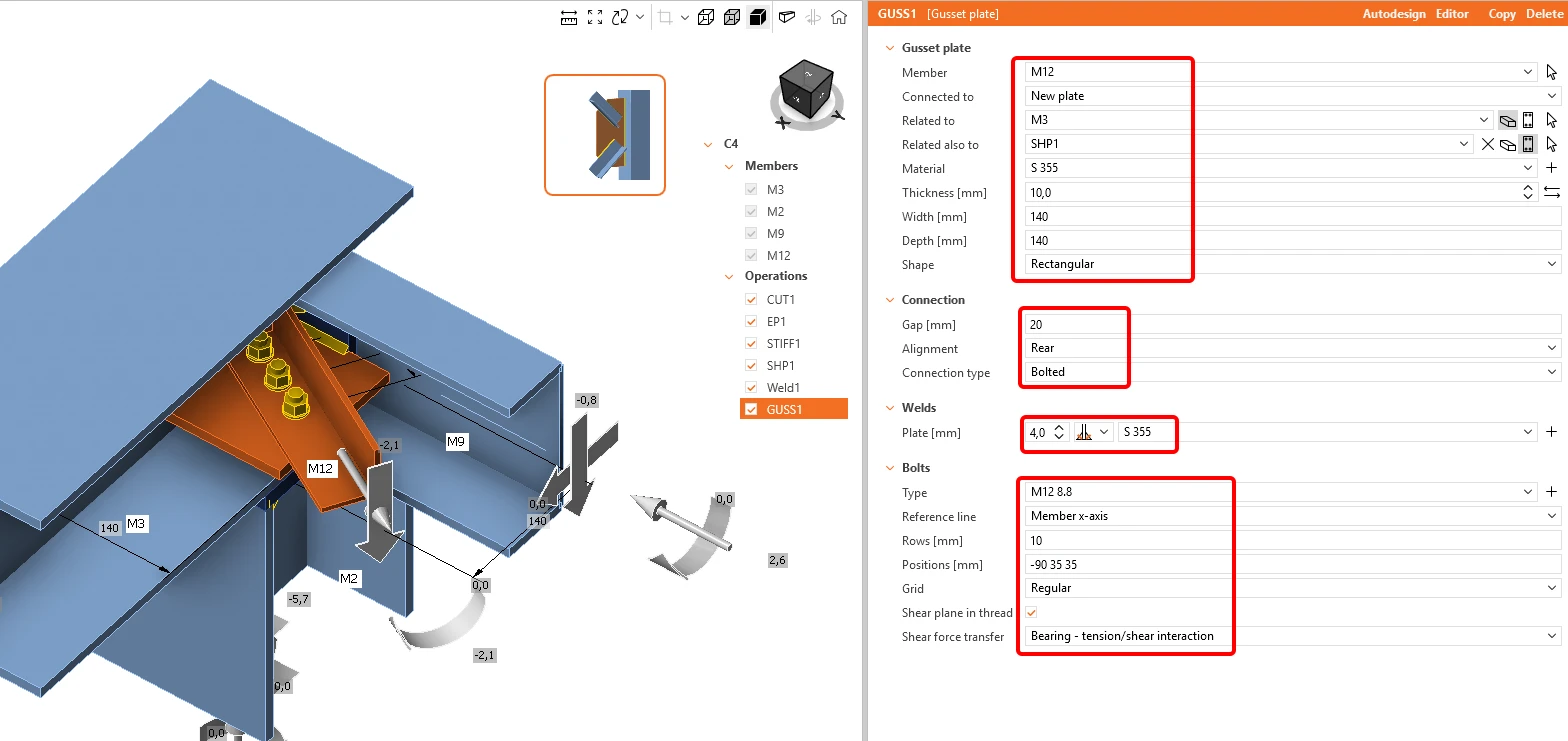
Click on Save and close the file.
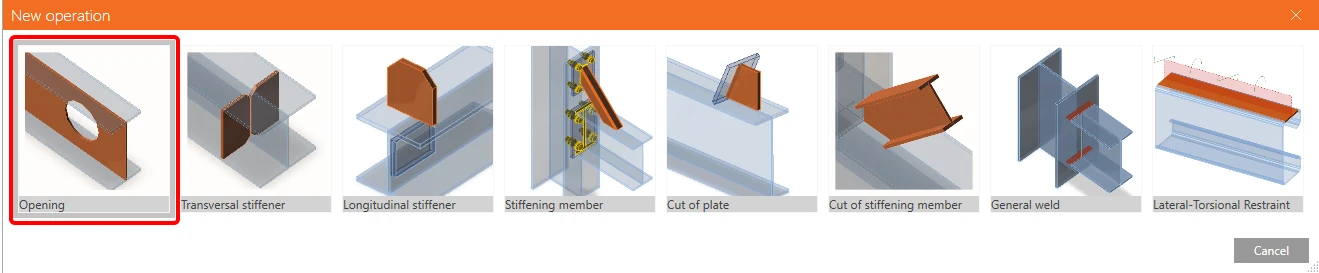
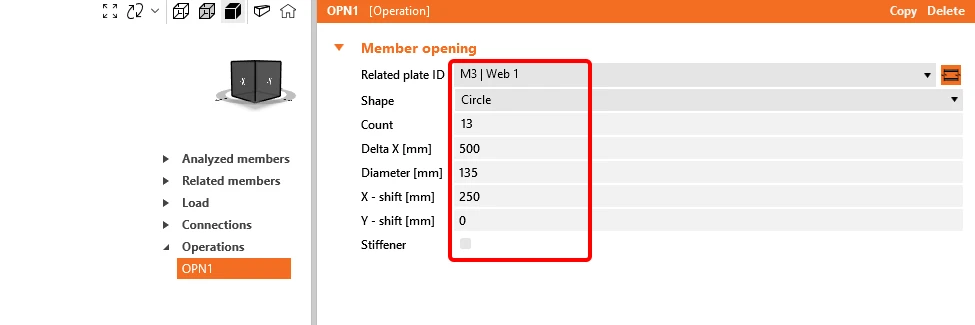
The last operation in Member, you will apply is openings along with the member M3.
4 Analysis
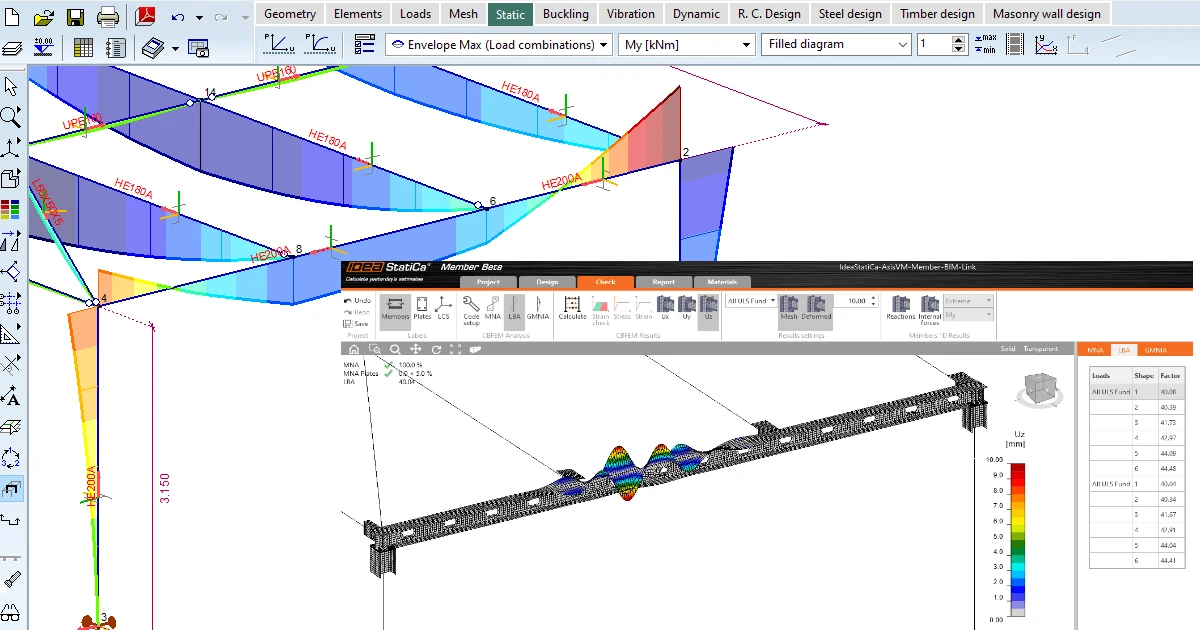
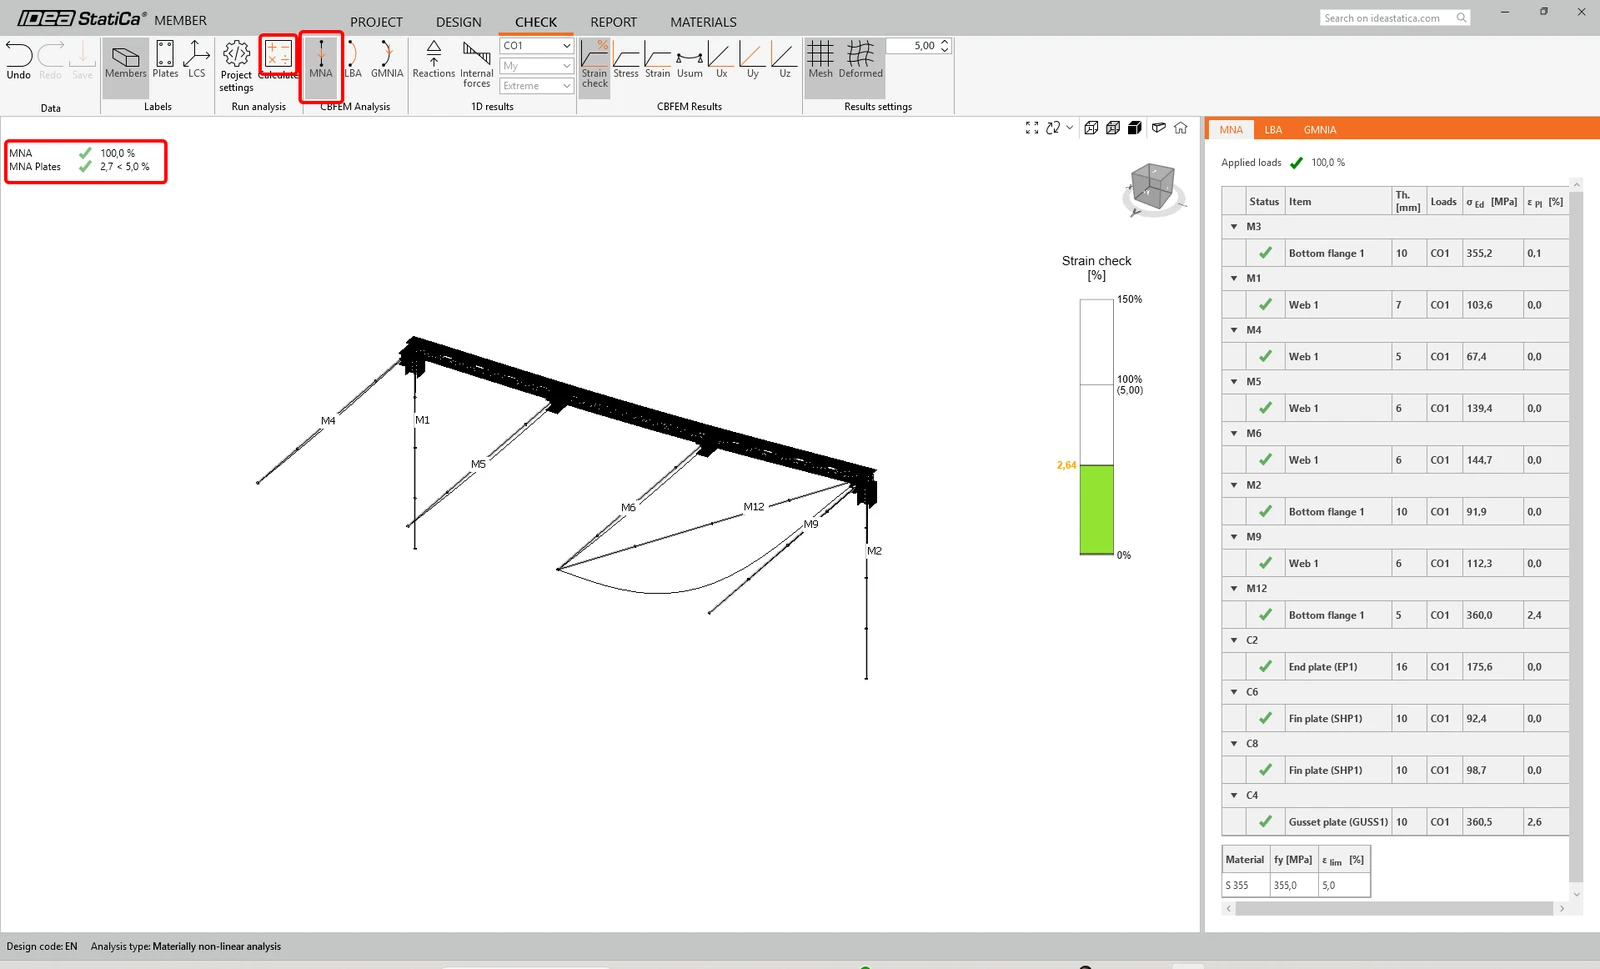
When finishing with the design of all joints, start the linear analysis by clicking on MNA and Calculate in the Tab Check.

The results look like here in the picture:
The next analysis is the Linear Buckling Analysis, so just click on LBA and Calculate.
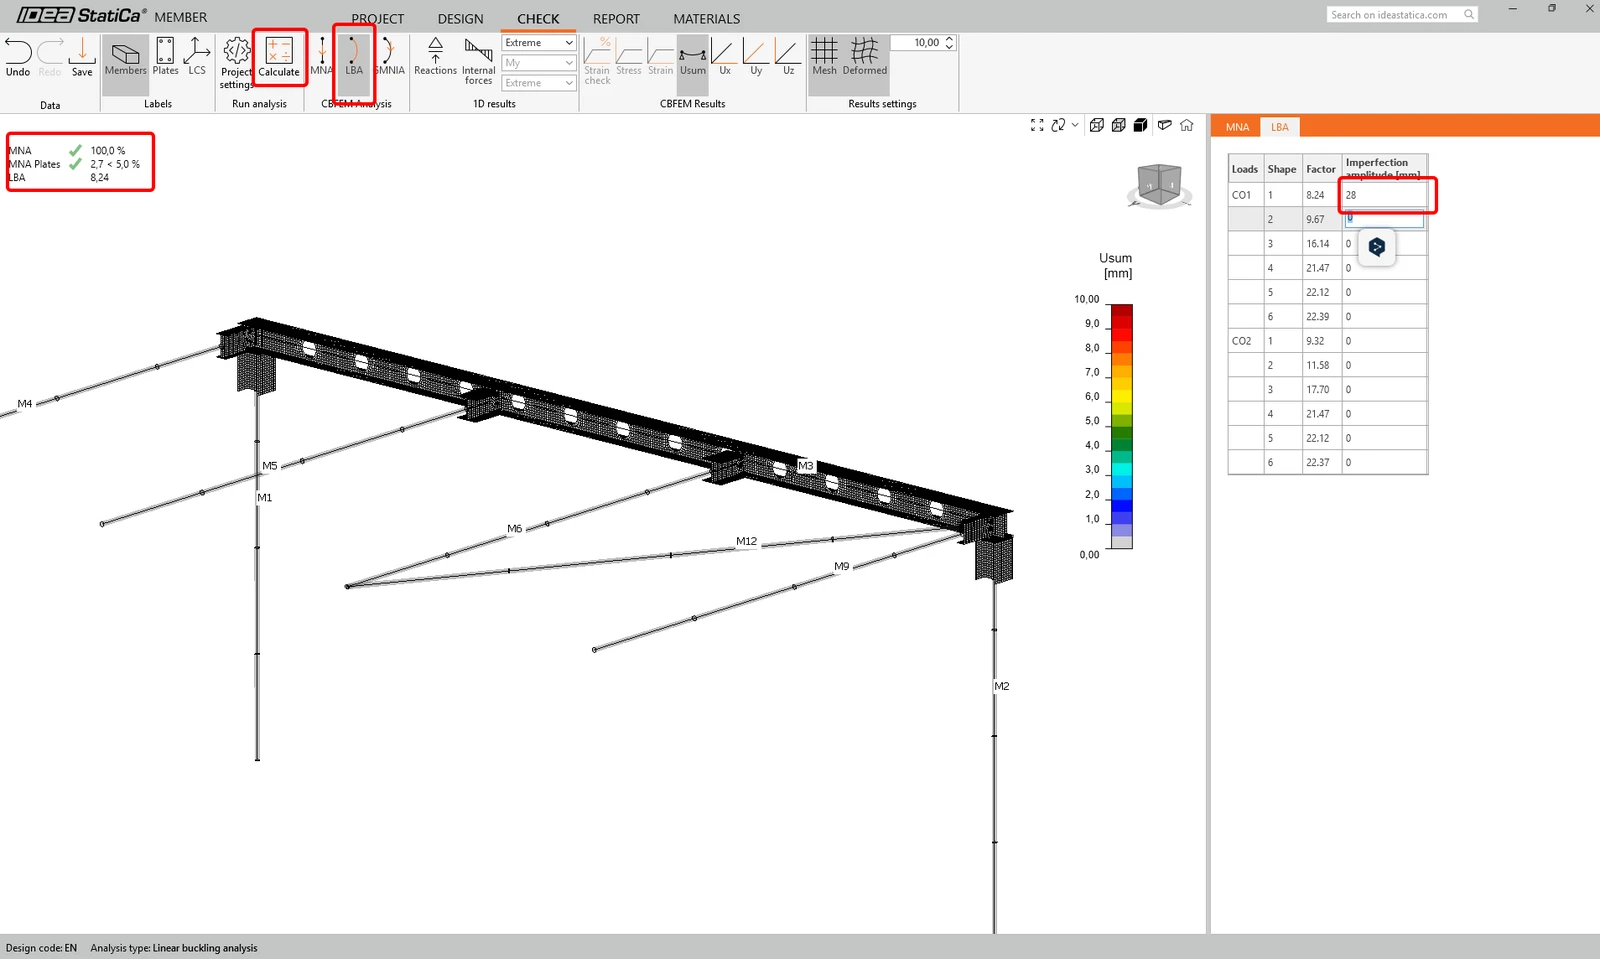
As you can see, the result of this analysis is smaller than 15, so it is necessary to continue with the Geometrically and materially nonlinear analysis. To learn more, see the article about imperfections or the Theoretical background.
According to the article How to input imperfections in Member we set the amplitude in the 1st shape to 28.2 mm (7050 / 250) and run the GMNIA analysis.
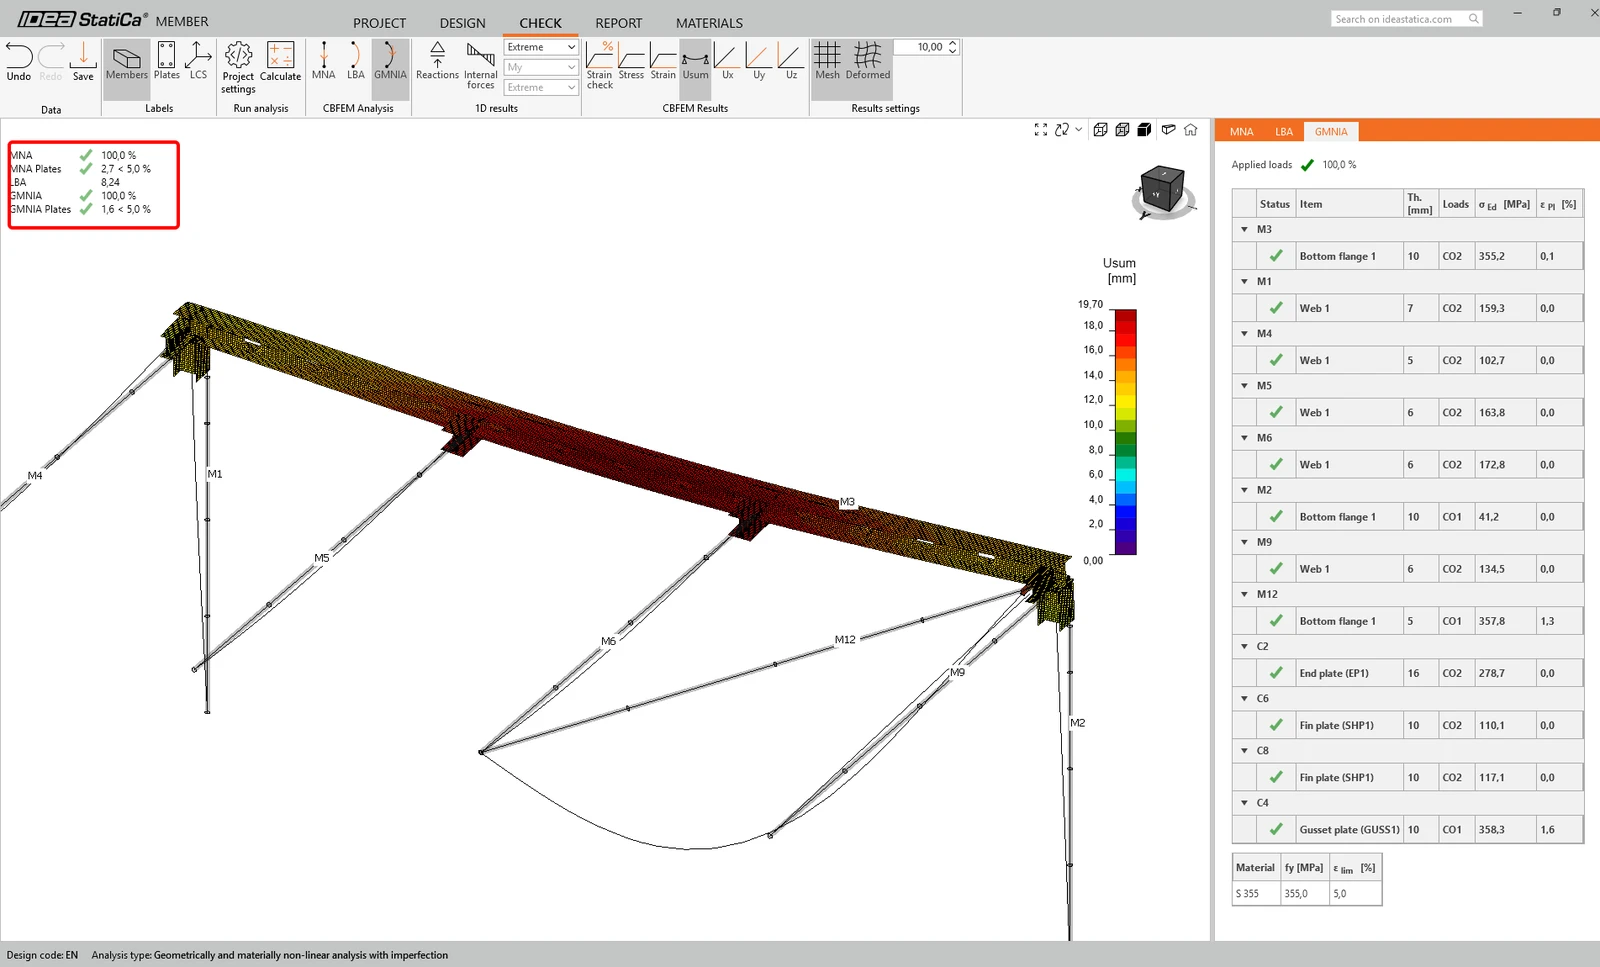
As we can see, the check for this member is OK.
5 Report
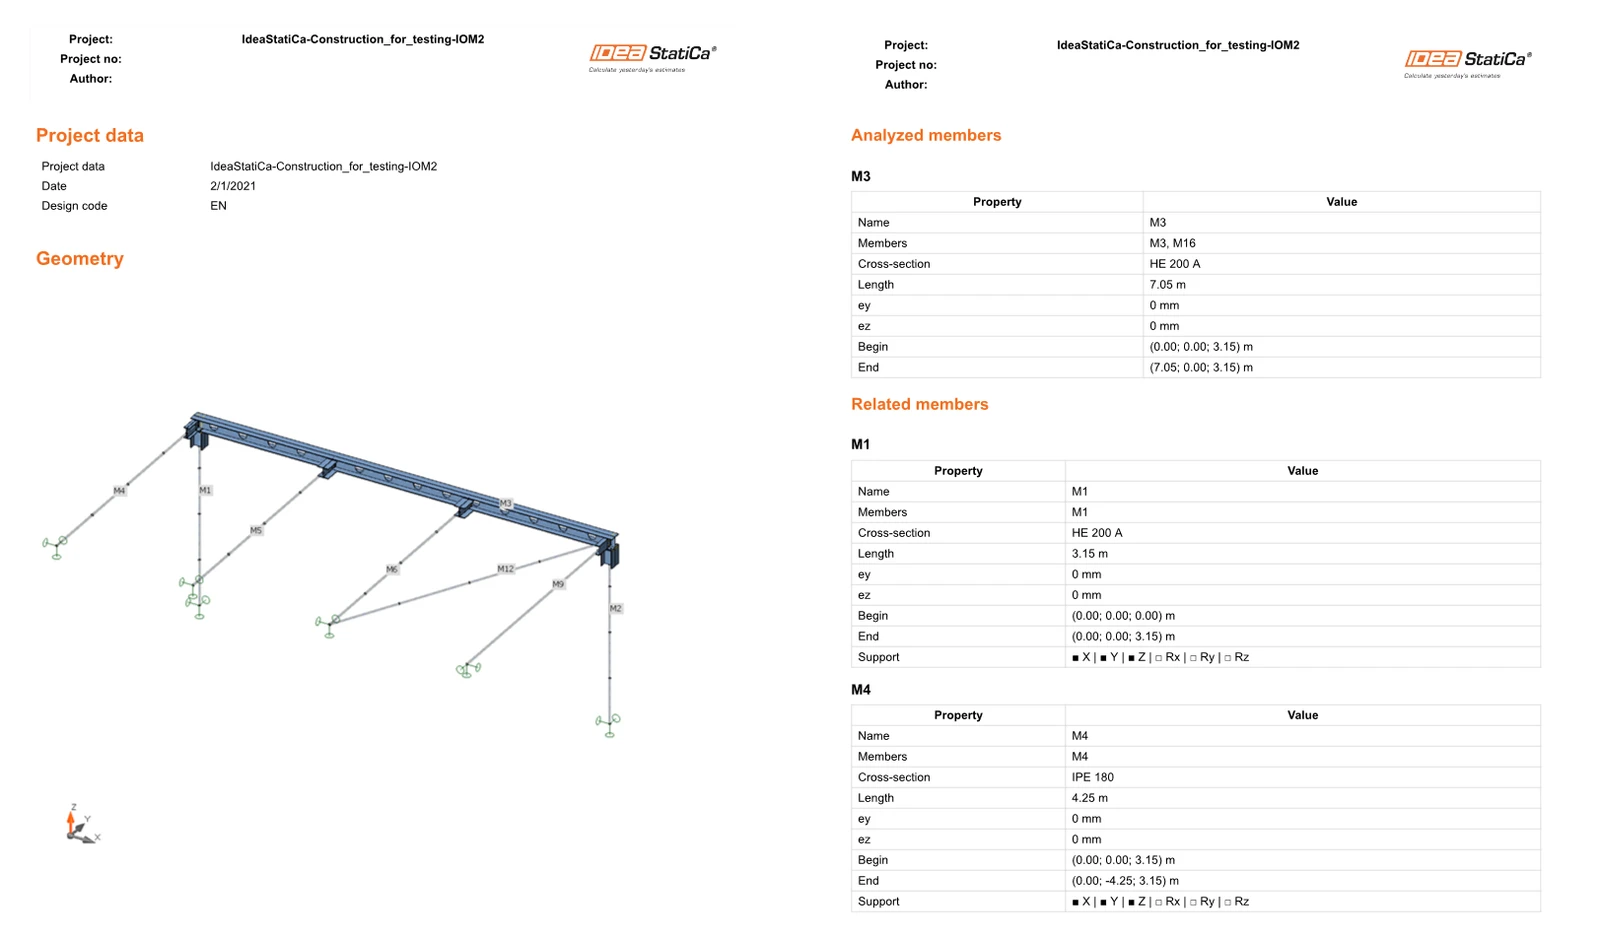
At last, go to the tab Report. IDEA StatiCa offers a fully customizable report that can be printed or saved in an editable format.
Want to improve your skills? Visit our Campus
Learn how to use IDEA StatiCa effectively with our self-paced e-learning courses
Start learning