Structural design of a concrete frame joint (EN)
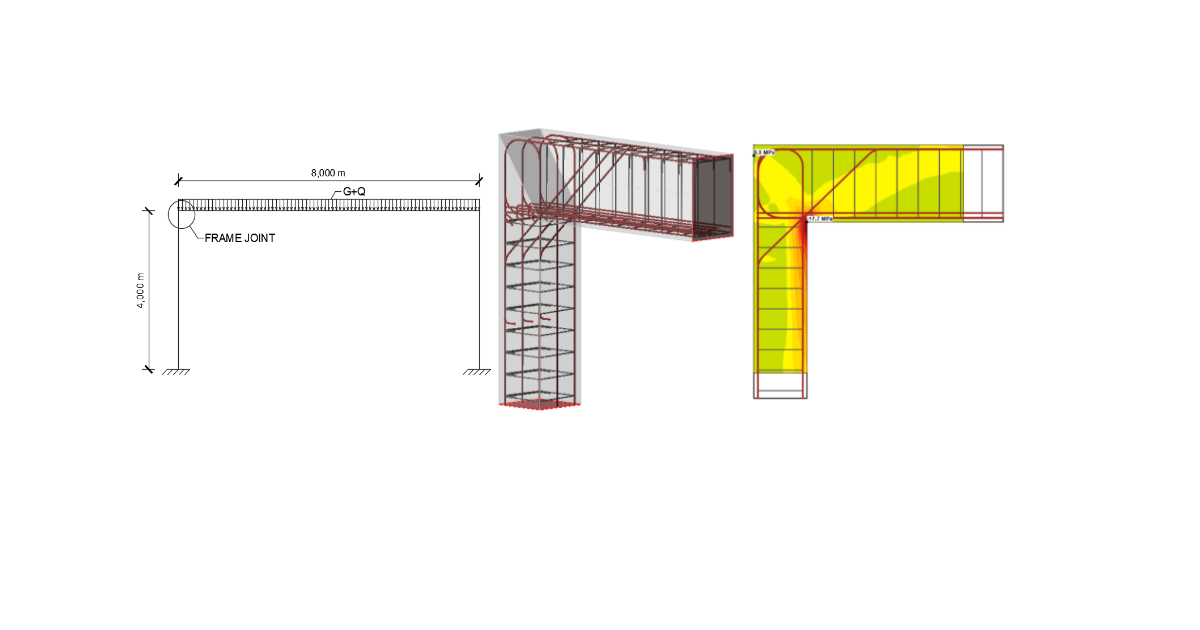
The analyzed frame joint will be part of a real reinforced concrete frame structure. The frame is 4 m high, the span is 8 m and both columns will have fixed supports.
1 New project
Let’s launch the IDEA StatiCa and select the application Detail. Wizard window is opened and you can set the concrete and reinforcement grade and define the concrete cover thickness. Select the 2D Model type, Frame joints class and Knee joint topology.
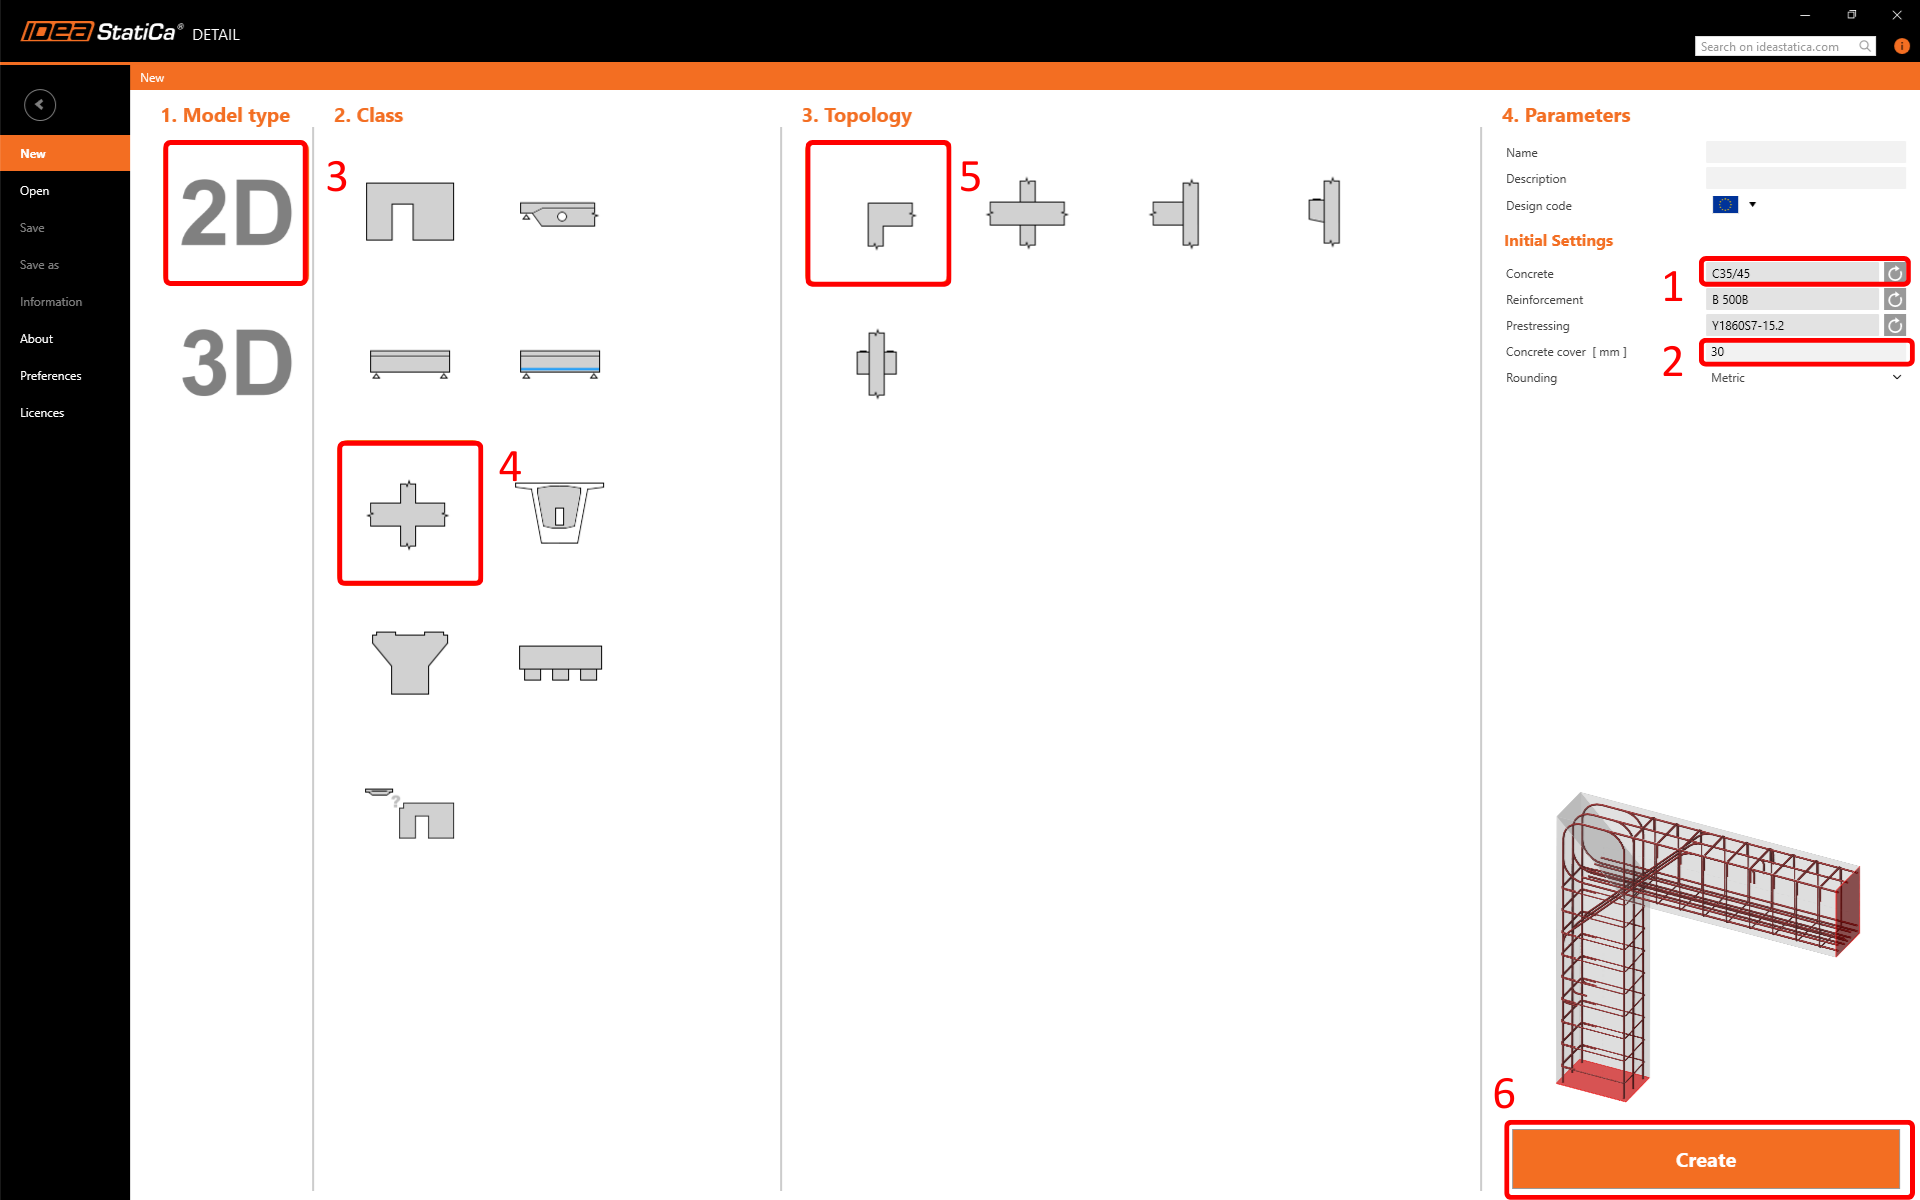
By choosing a predefined template the software will automatically generate the geometry, load, and reinforcement.
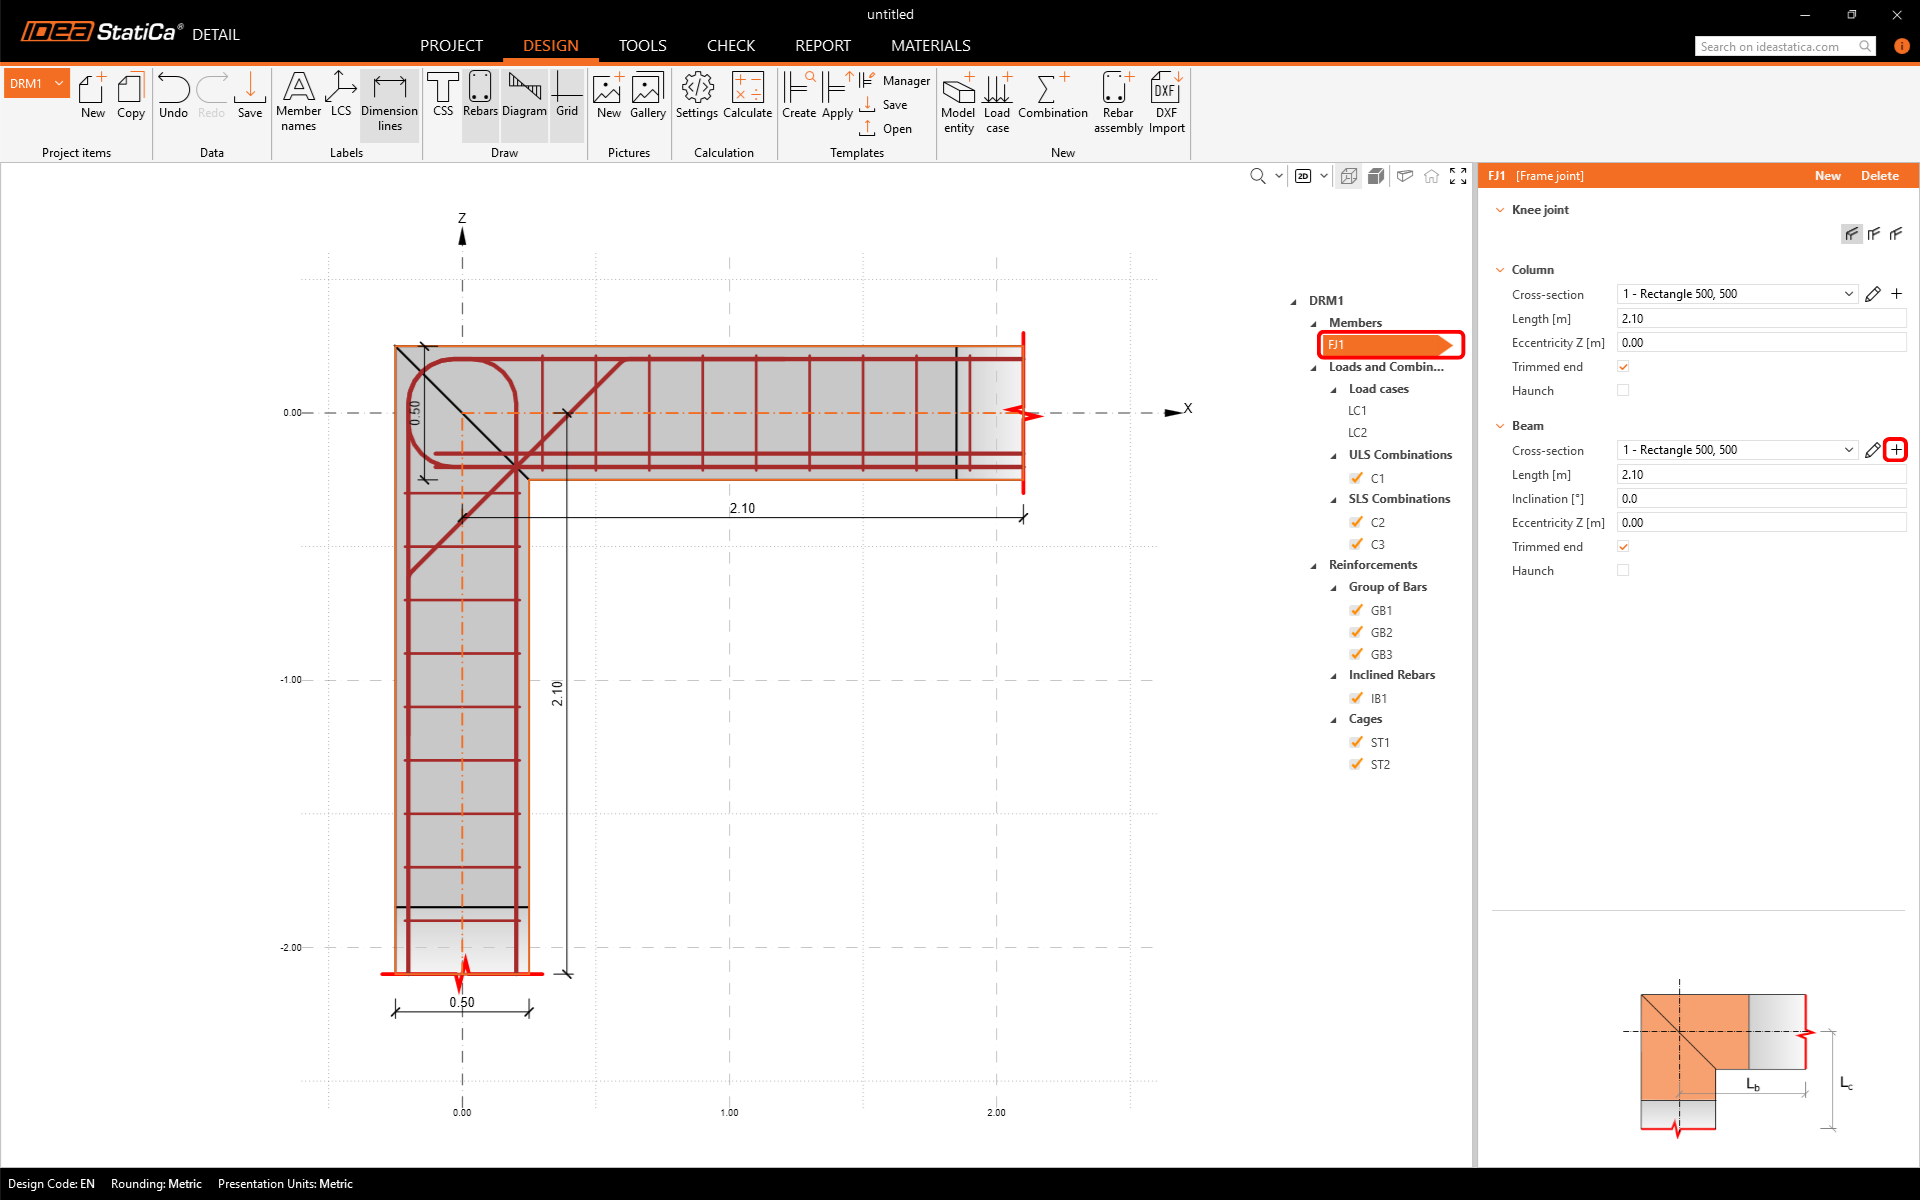
2 Geometry
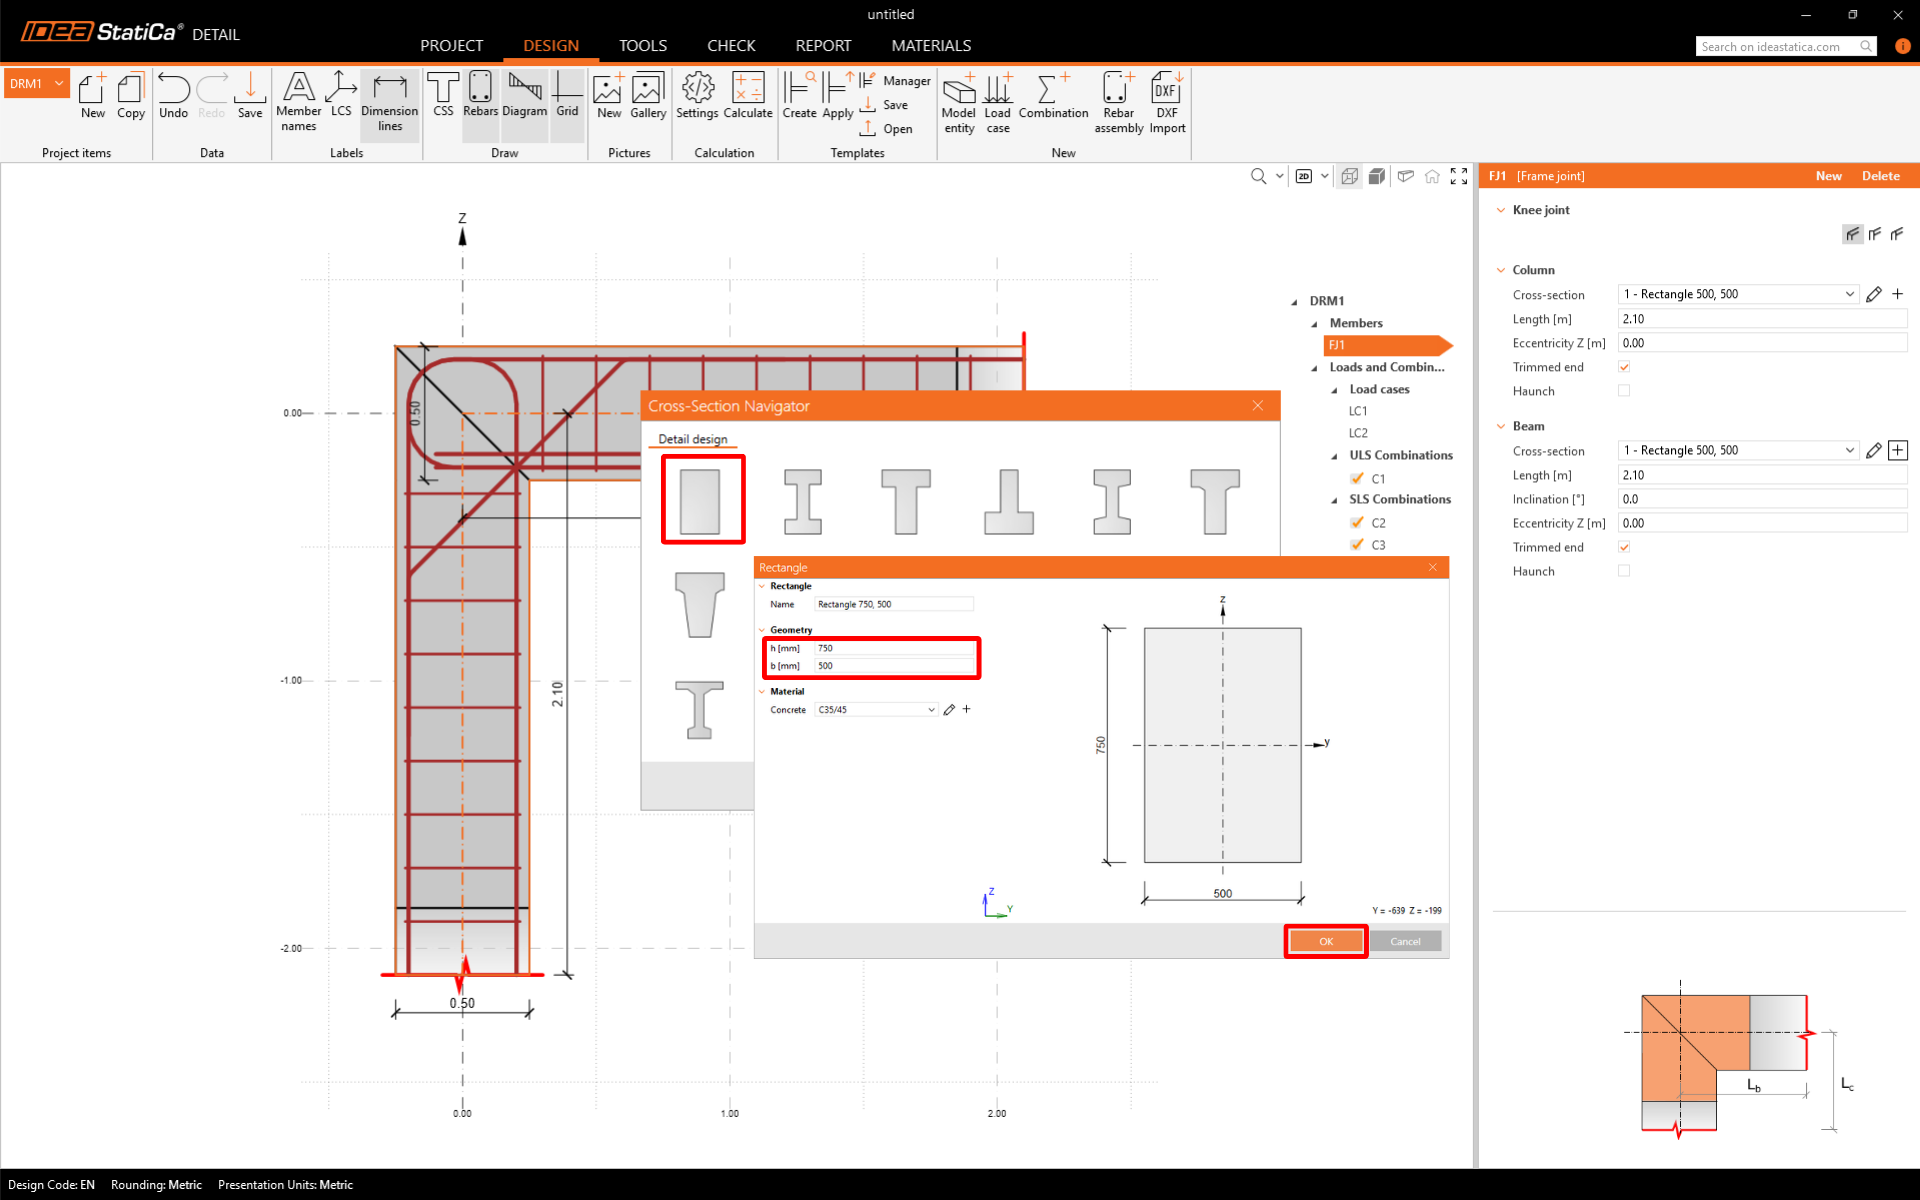
Start with the modification of the geometry. The predefined knee joint (Member FJ1) consists of a Column and a Beam. Change the cross-section of the column by clicking on Edit parameters.
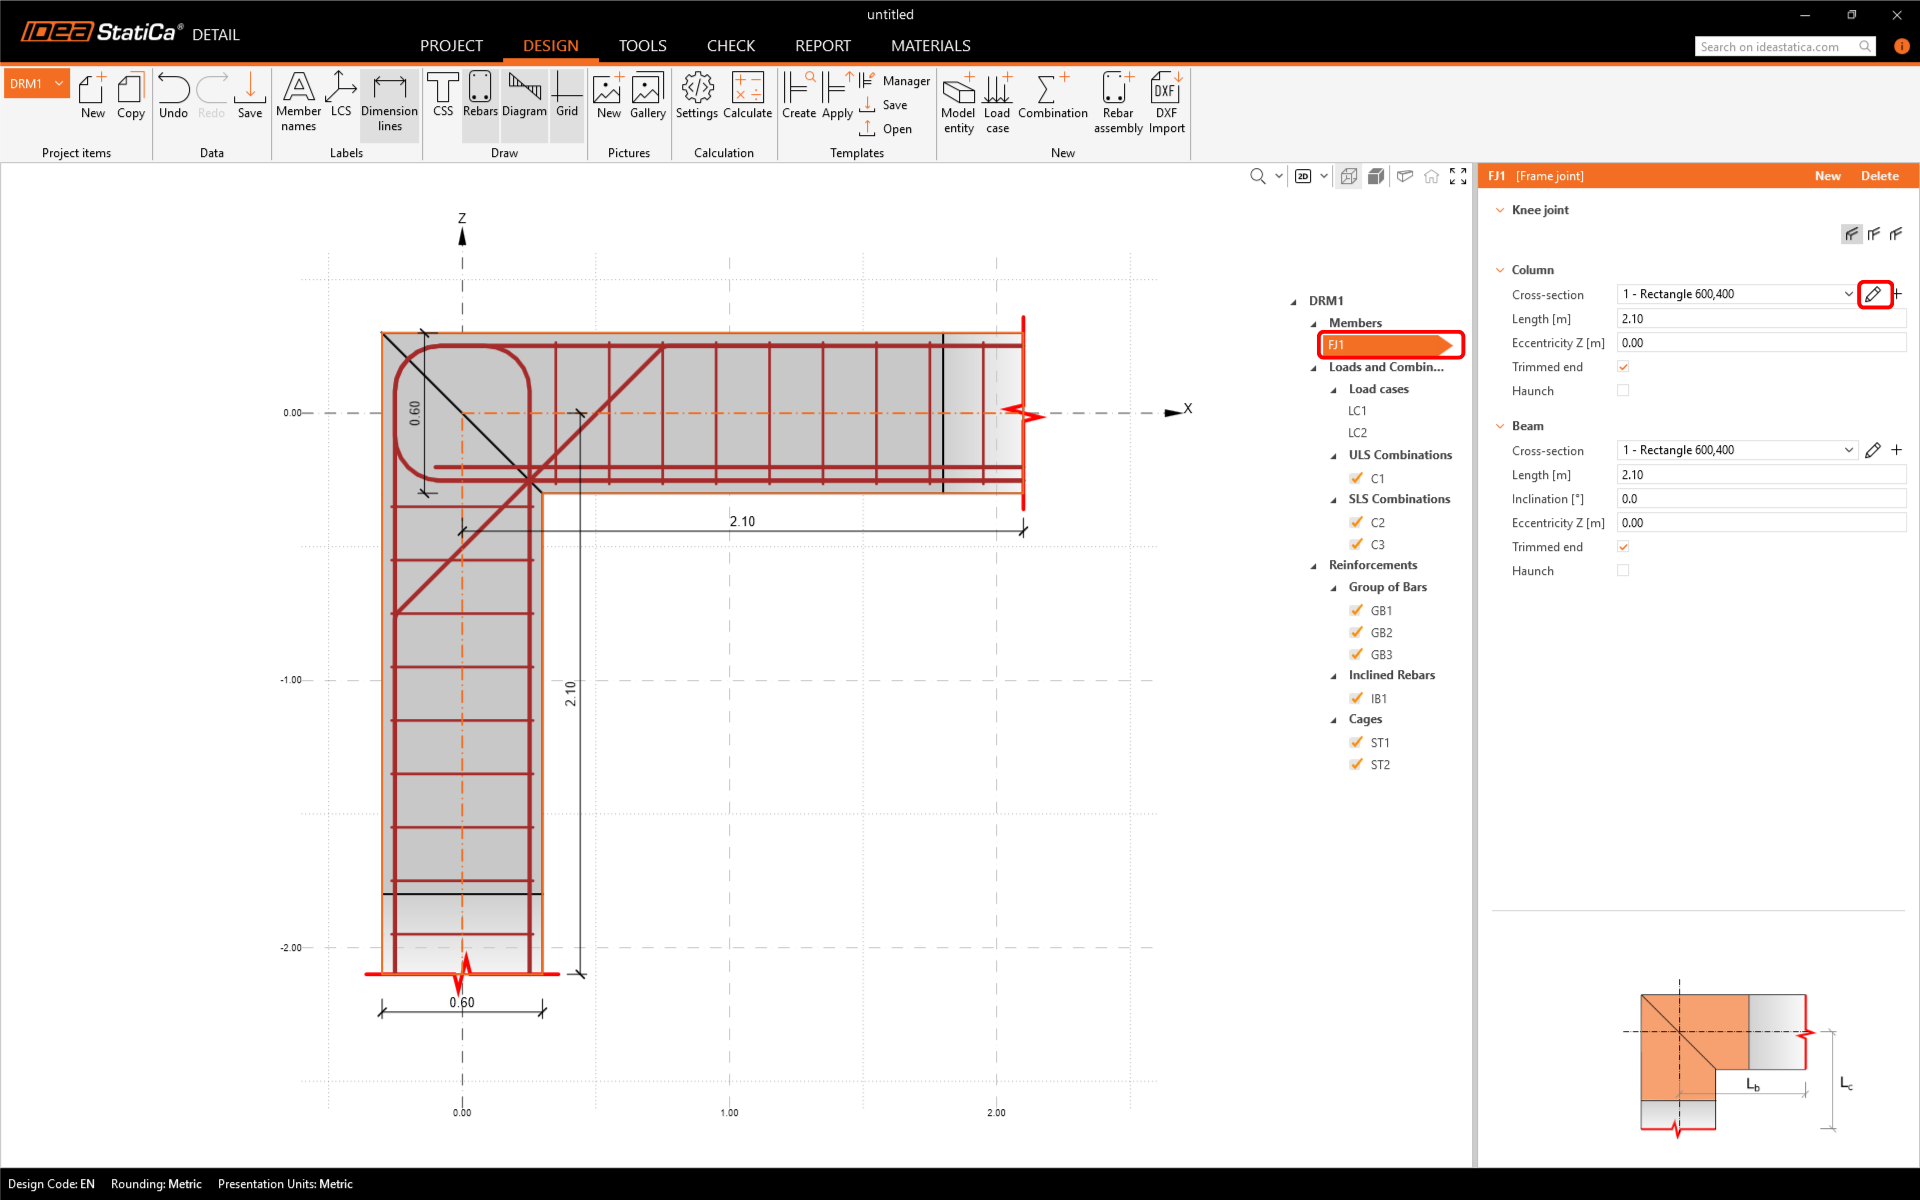
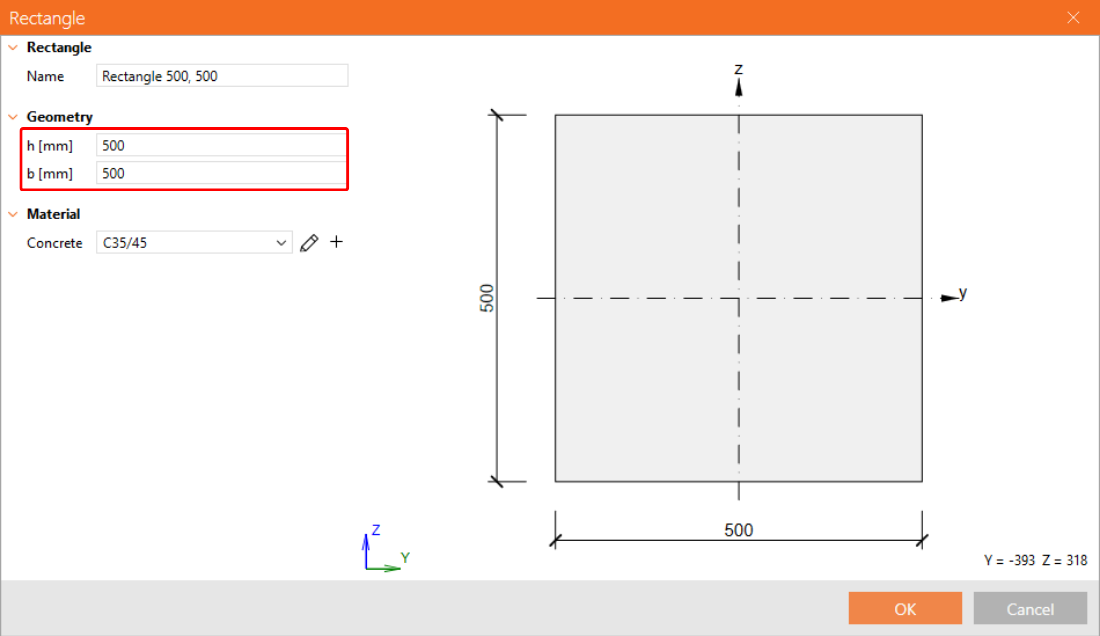
Let’s change the dimensions of the cross-section.
Then add a new cross-section for the beam.
Again, change the dimensions.
3 Loads
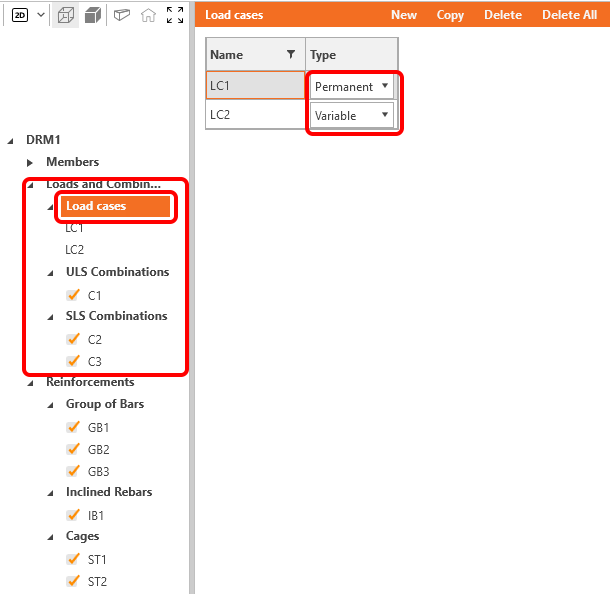
In the tree menu proceed to the definition of loads. Two load cases and three nonlinear combinations were automatically added by the software. You need two load cases to distinguish between permanent and variable loads and three combinations to cover ULS and SLS checks.
Let's modify load case LC1 for permanent effects. First, remove the line load from the column.
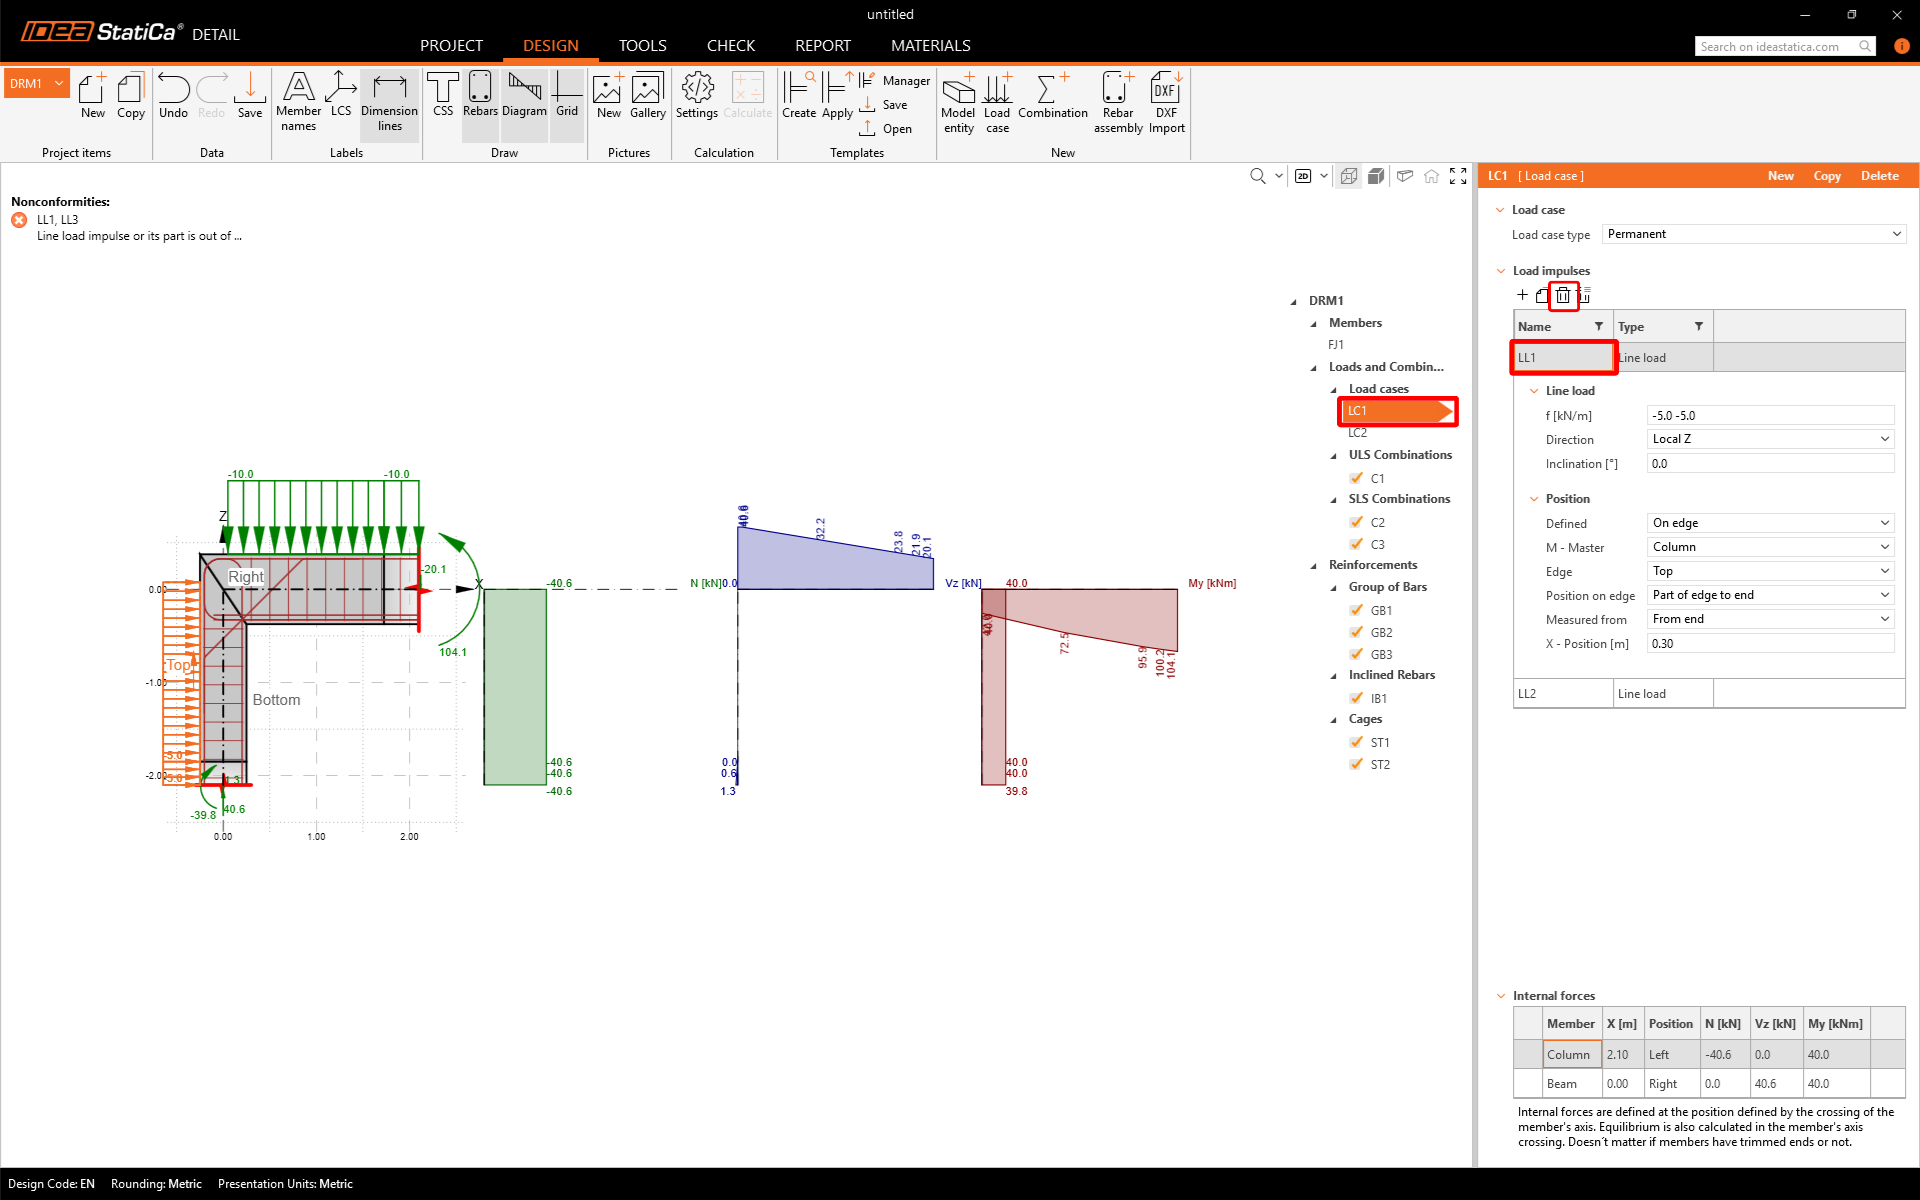
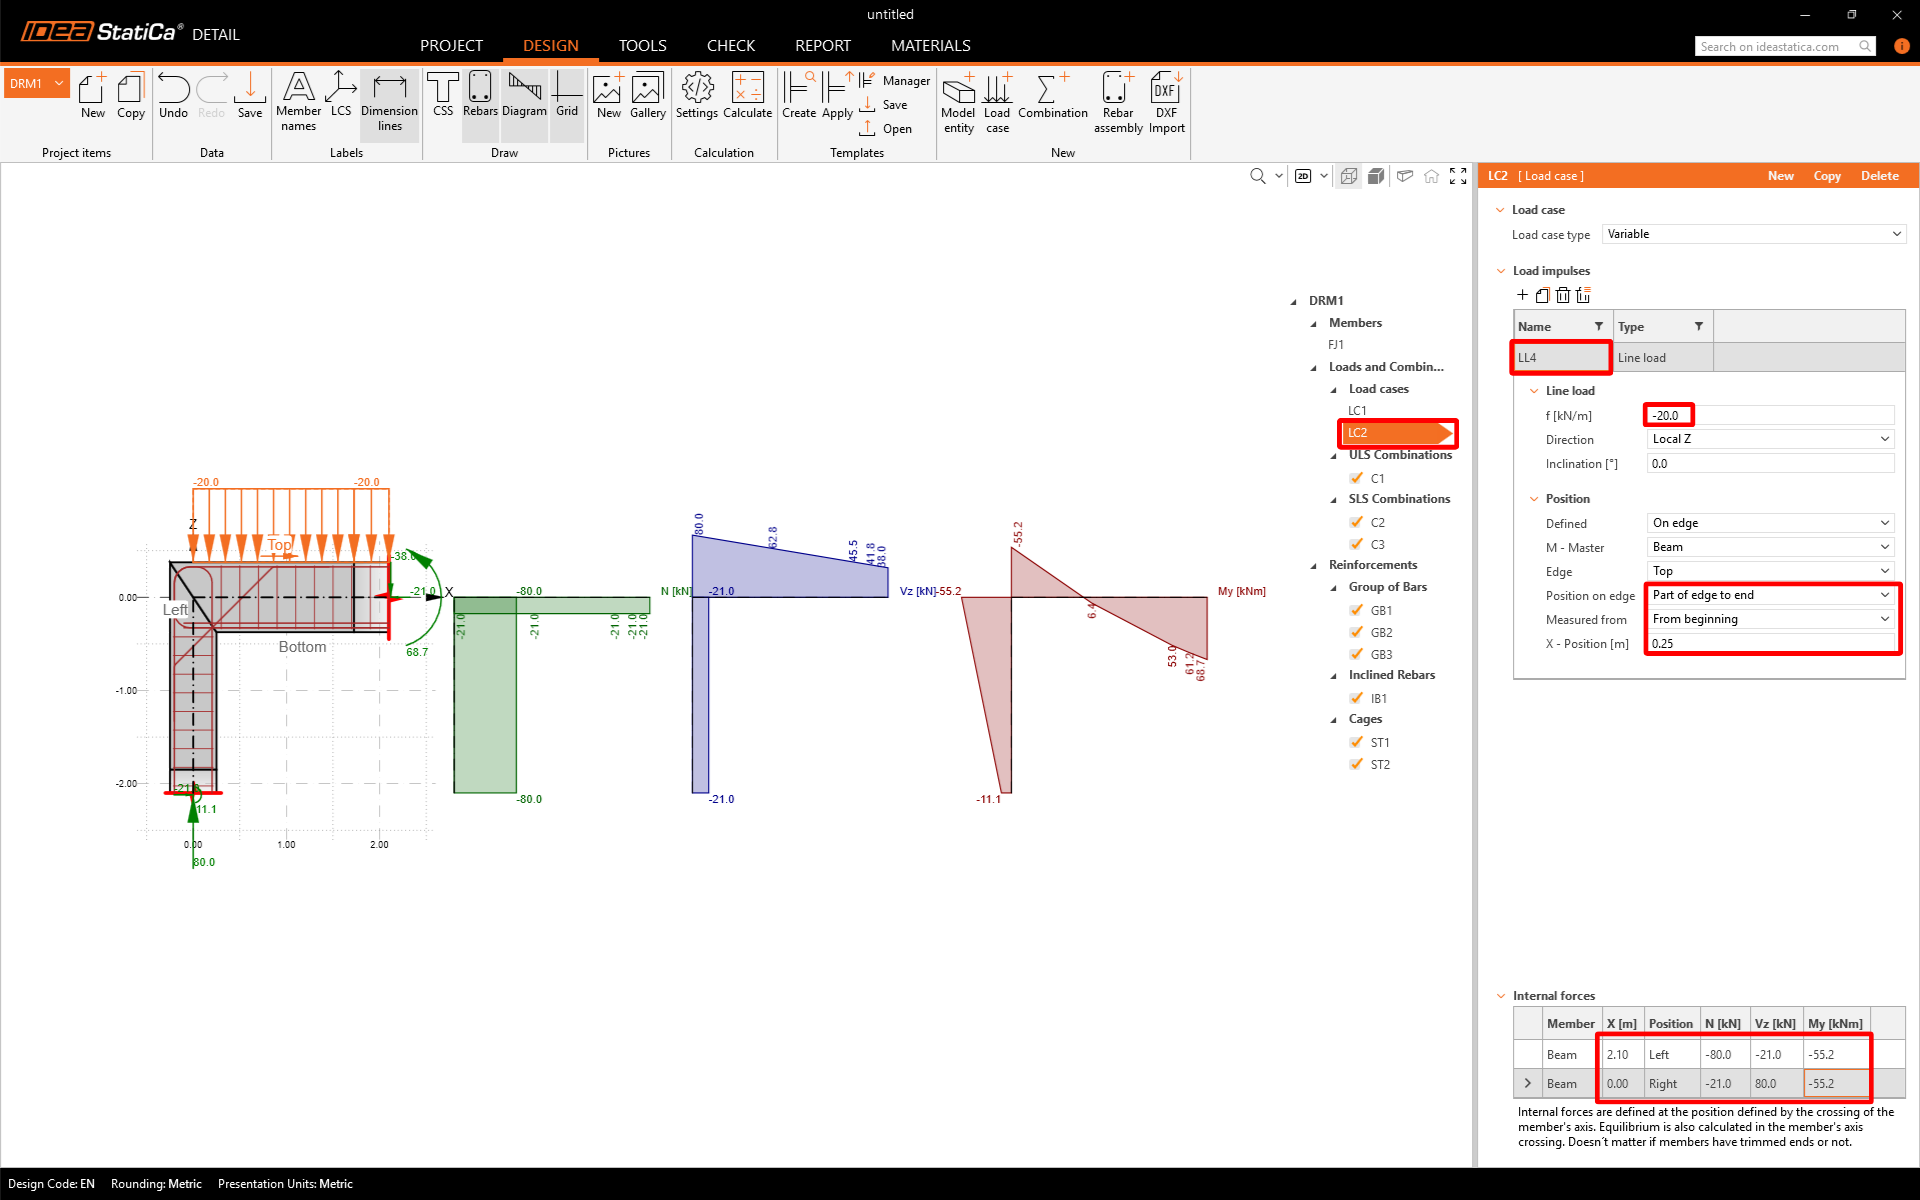
Then you can modify the intensity of the line load on the beam. In the table at the bottom set values of Internal forces which are applied the cross-section placed in the intersection of the column and the beam. You can get these internal forces by modeling and calculating the whole frame with the corresponding line load (30 kN/m for LC1 and 20 kN/m for LC2) in any CAE/FEM software in minutes.

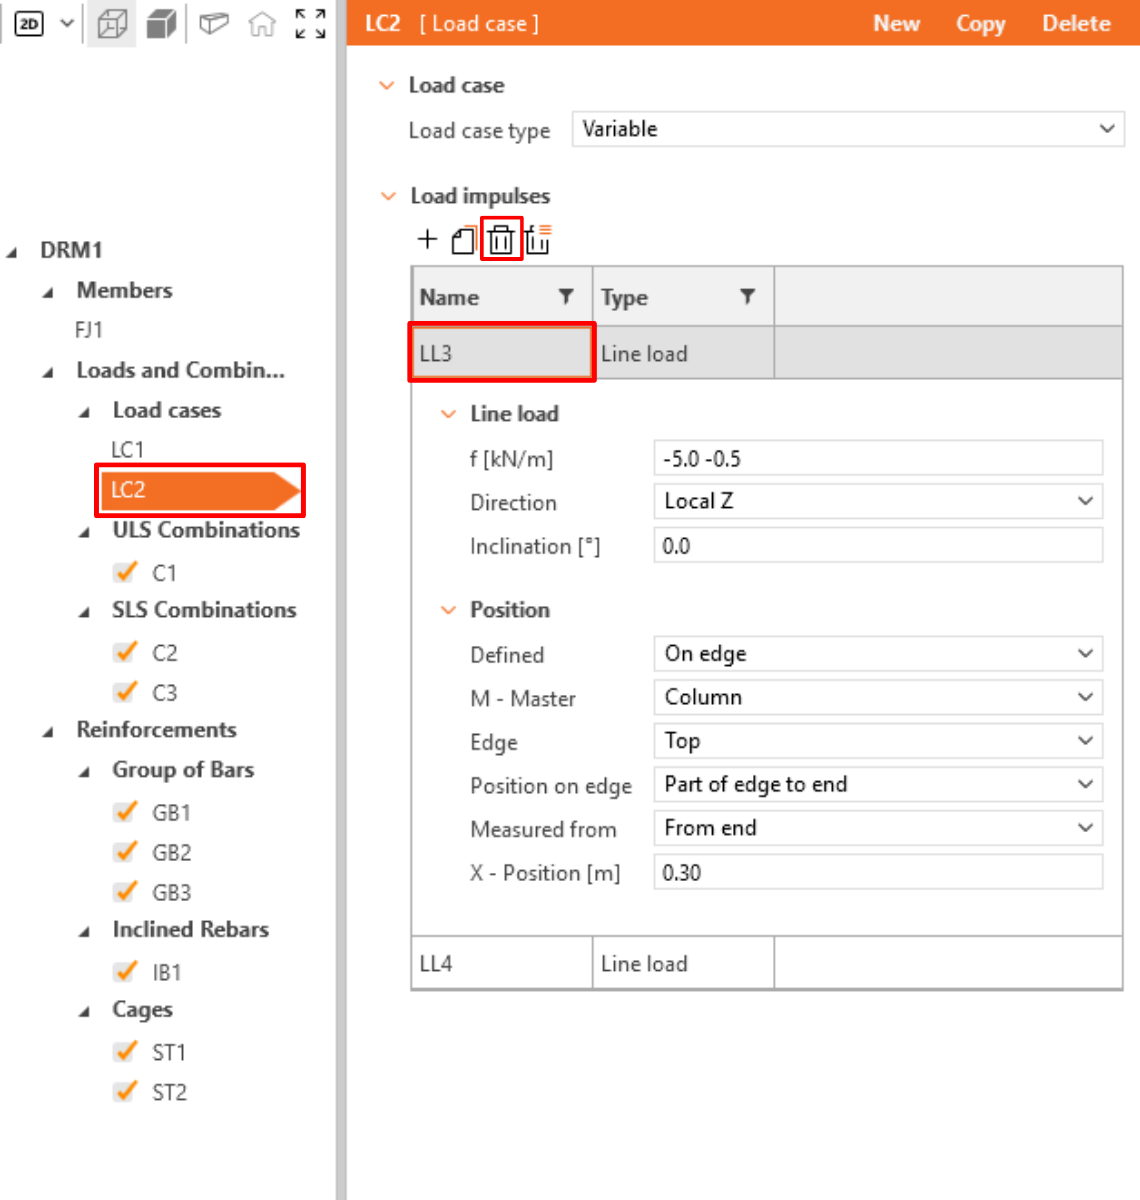
Switch to LC2 load case and repeat the steps with different values. First delete the line load LL3.
Then adjust the line load LL4 and the internal forces.
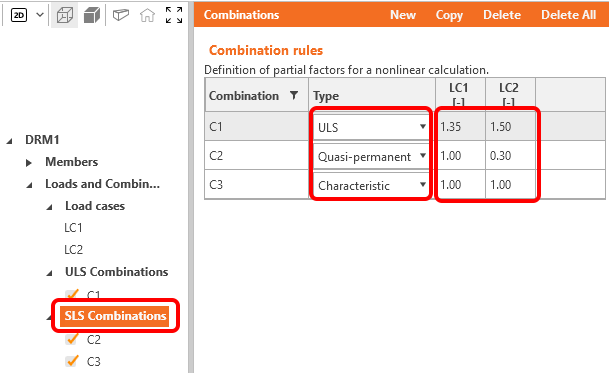
By clicking on ULS or SLS Combinations you can select the type of combination and adjust the partial factors for each nonlinear combination.
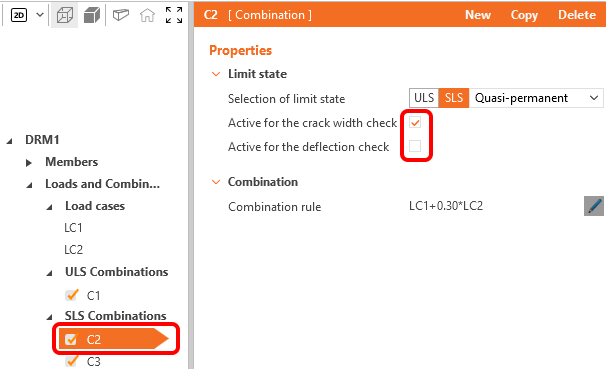
For each SLS Combination you can select which code checks shall be performed.
4 Reinforcement
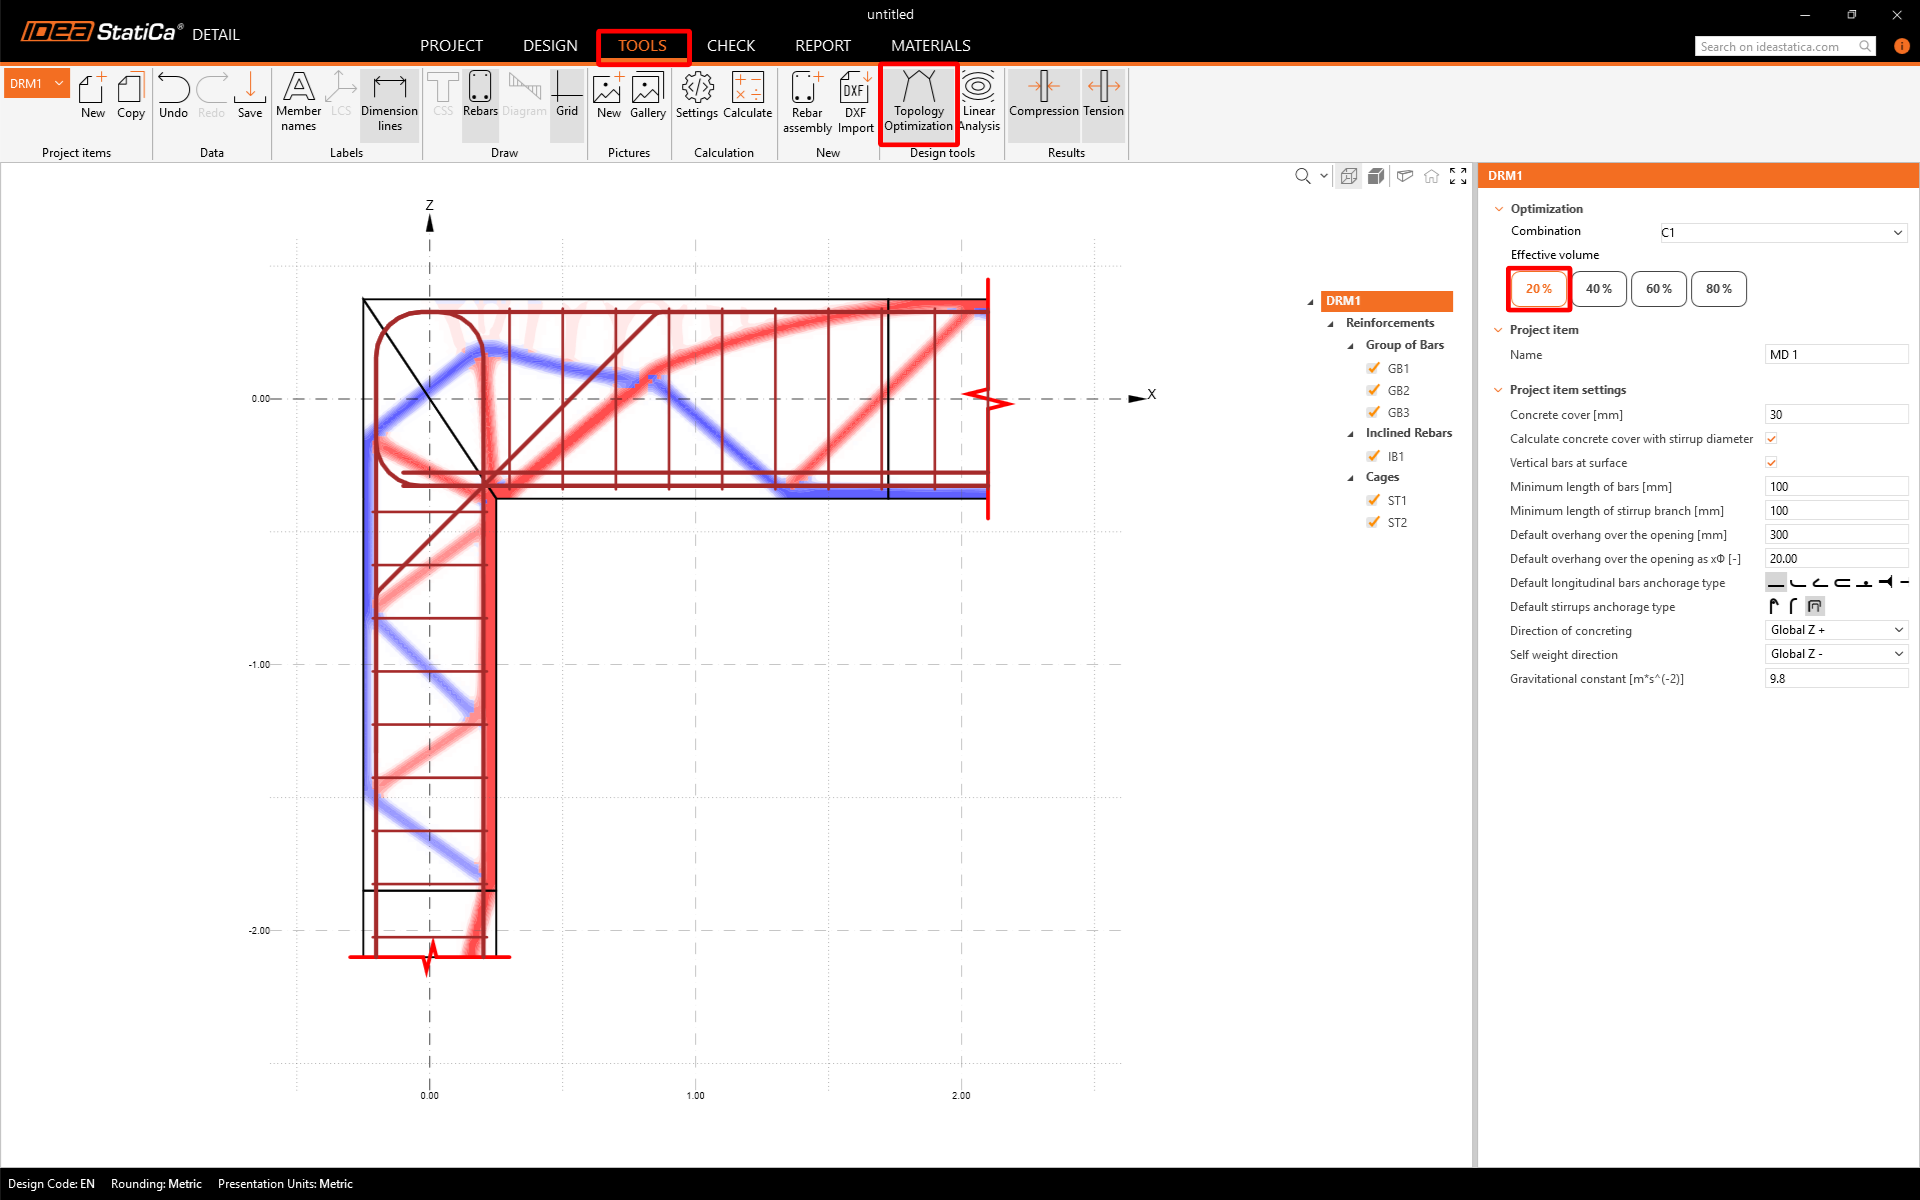
Once the load has been defined, you can proceed to reinforcement design. Before you design one, you can try to run the Topology Optimization tool to see how the most effective reinforcement layout should look like if you want to use selected effective volume of the structure.
For the effective volume of 20%, the structure looks like this (red lines represent compression, and blue lines represent tension). You can switch between effective volumes in the right window.
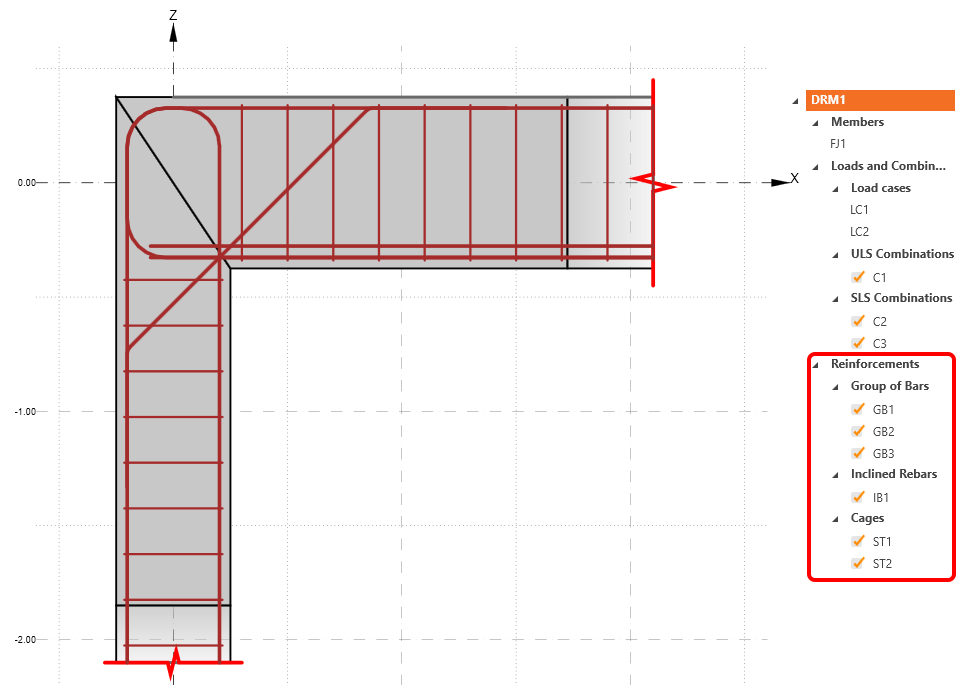
Proceed to the definition of the Reinforcements. You will edit the items created by the template.
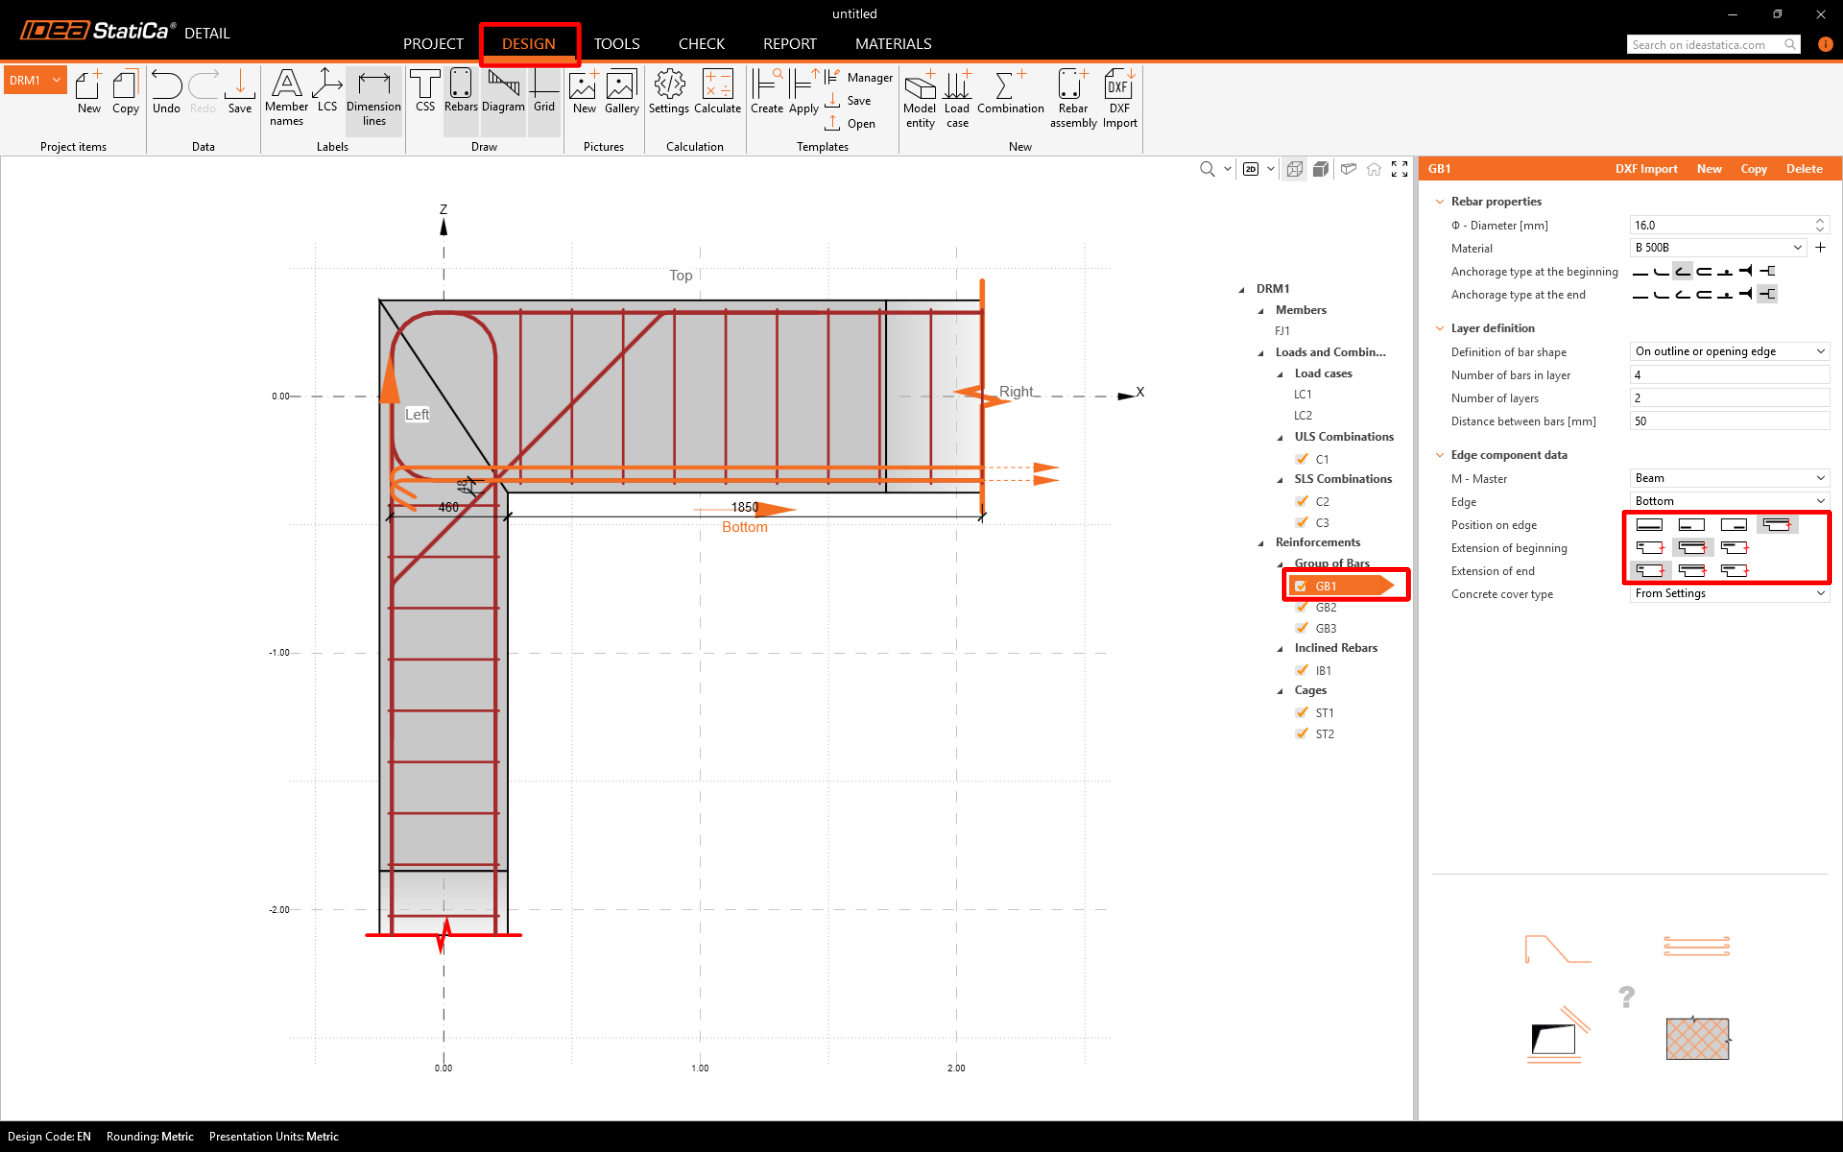
Modify the group GB1, the bars will be lengthened to the left edge:
5 Calculation and Check
Start the analysis by clicking Calculate in the ribbon. The analysis model is automatically generated and the calculations are performed. Switch to the Check tab. Now you can see the Summary of the results. At the top left you can see all ULS and SLS with their percentage utilization.
In the right window you can see a table with more detailed results for selected load combinations.
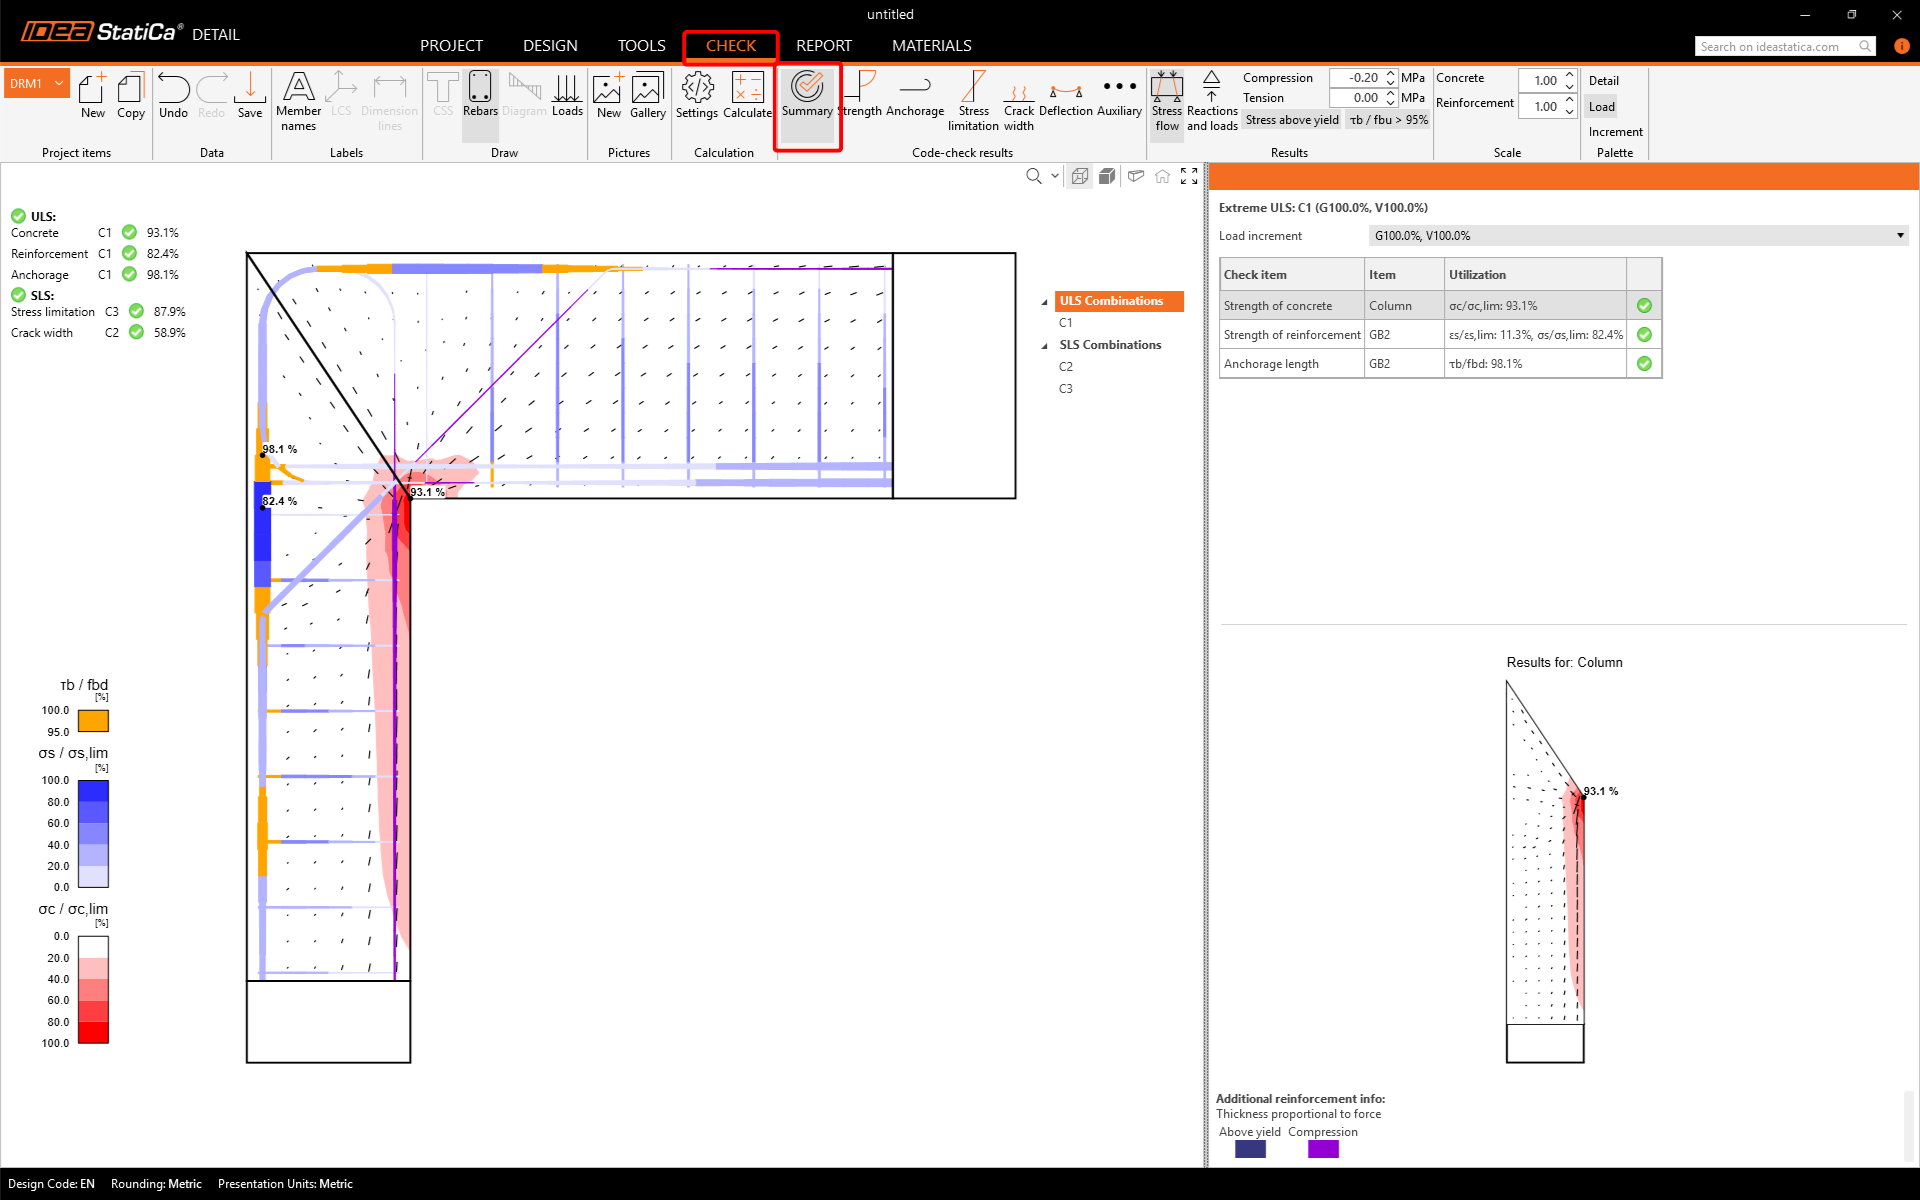
You can also notice the Increment line. The values P100%, V100% say that the calculation finished successfully, and all the permanent and variable loads were applied on the structure.
To open the detailed results of ULS, click the Strength icon. As noted above in the table, the C1 combination was used to check ULS.
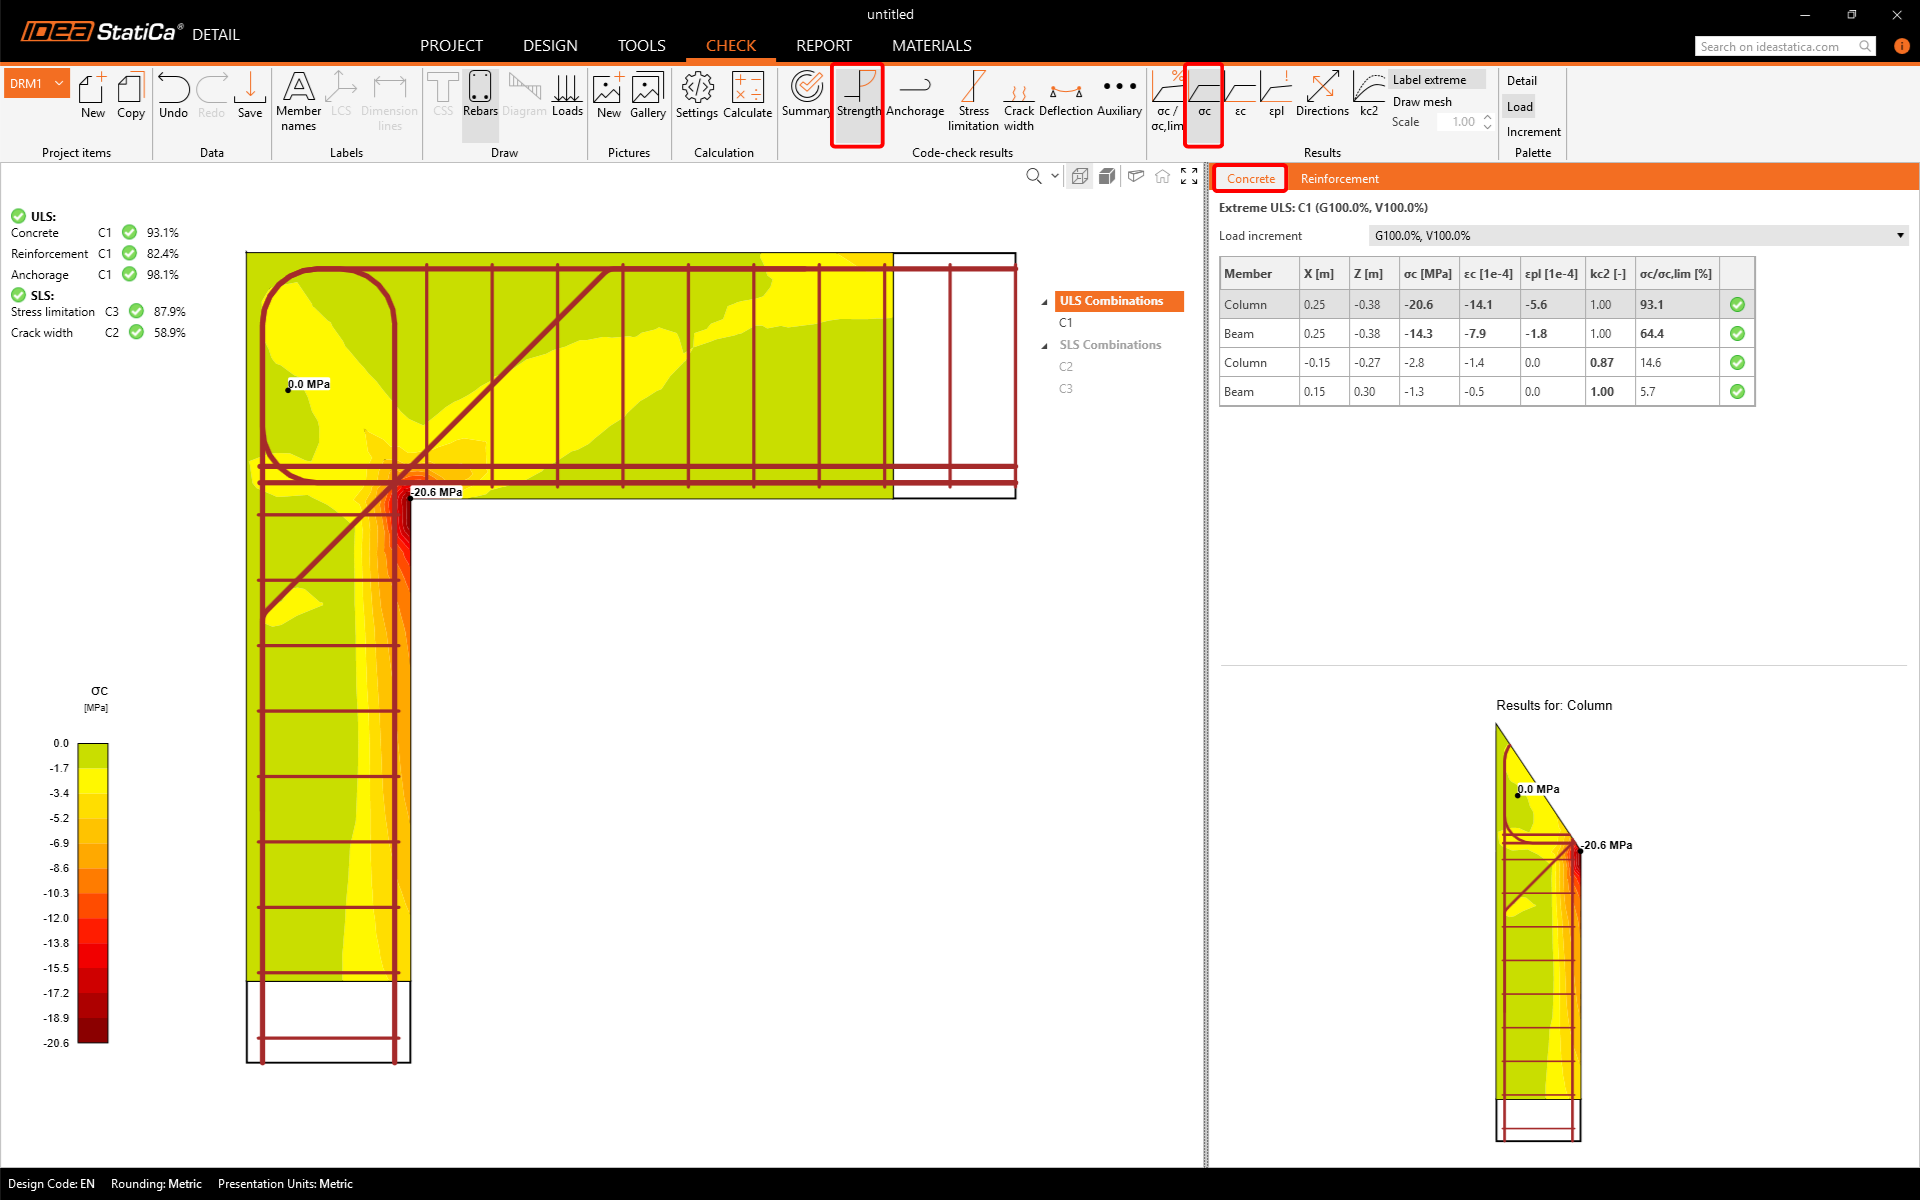
By using the icons in the top ribbon, you can display all the code checks. In the Summary, the main results for ULS/SLS are presented. Click on Anchorage to display the utilization of the bond between concrete and reinforcement (with the most critical spot marked in the figure).
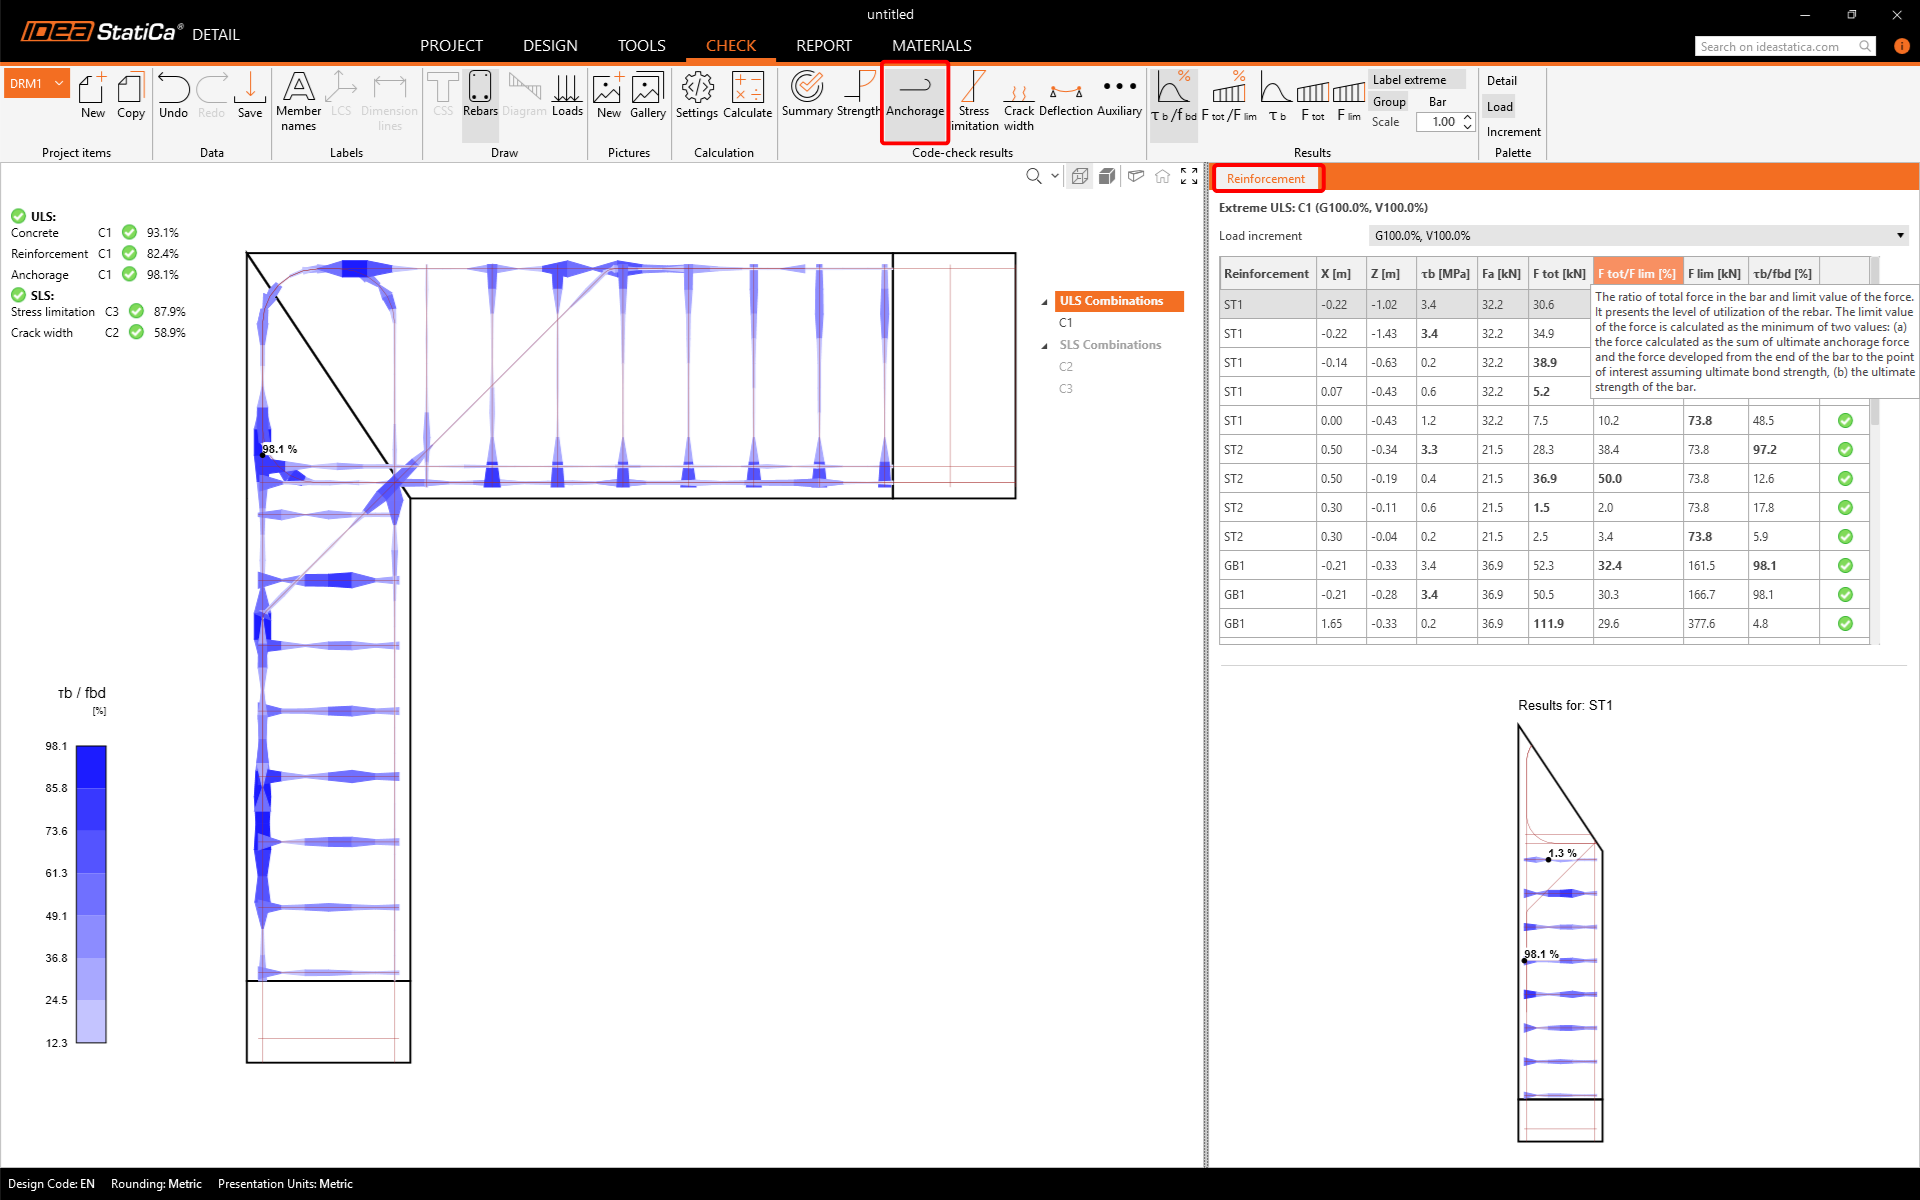
You can display the results of SLS code checks (Stress limitation, Crack width and Deflection) in a similar manner.
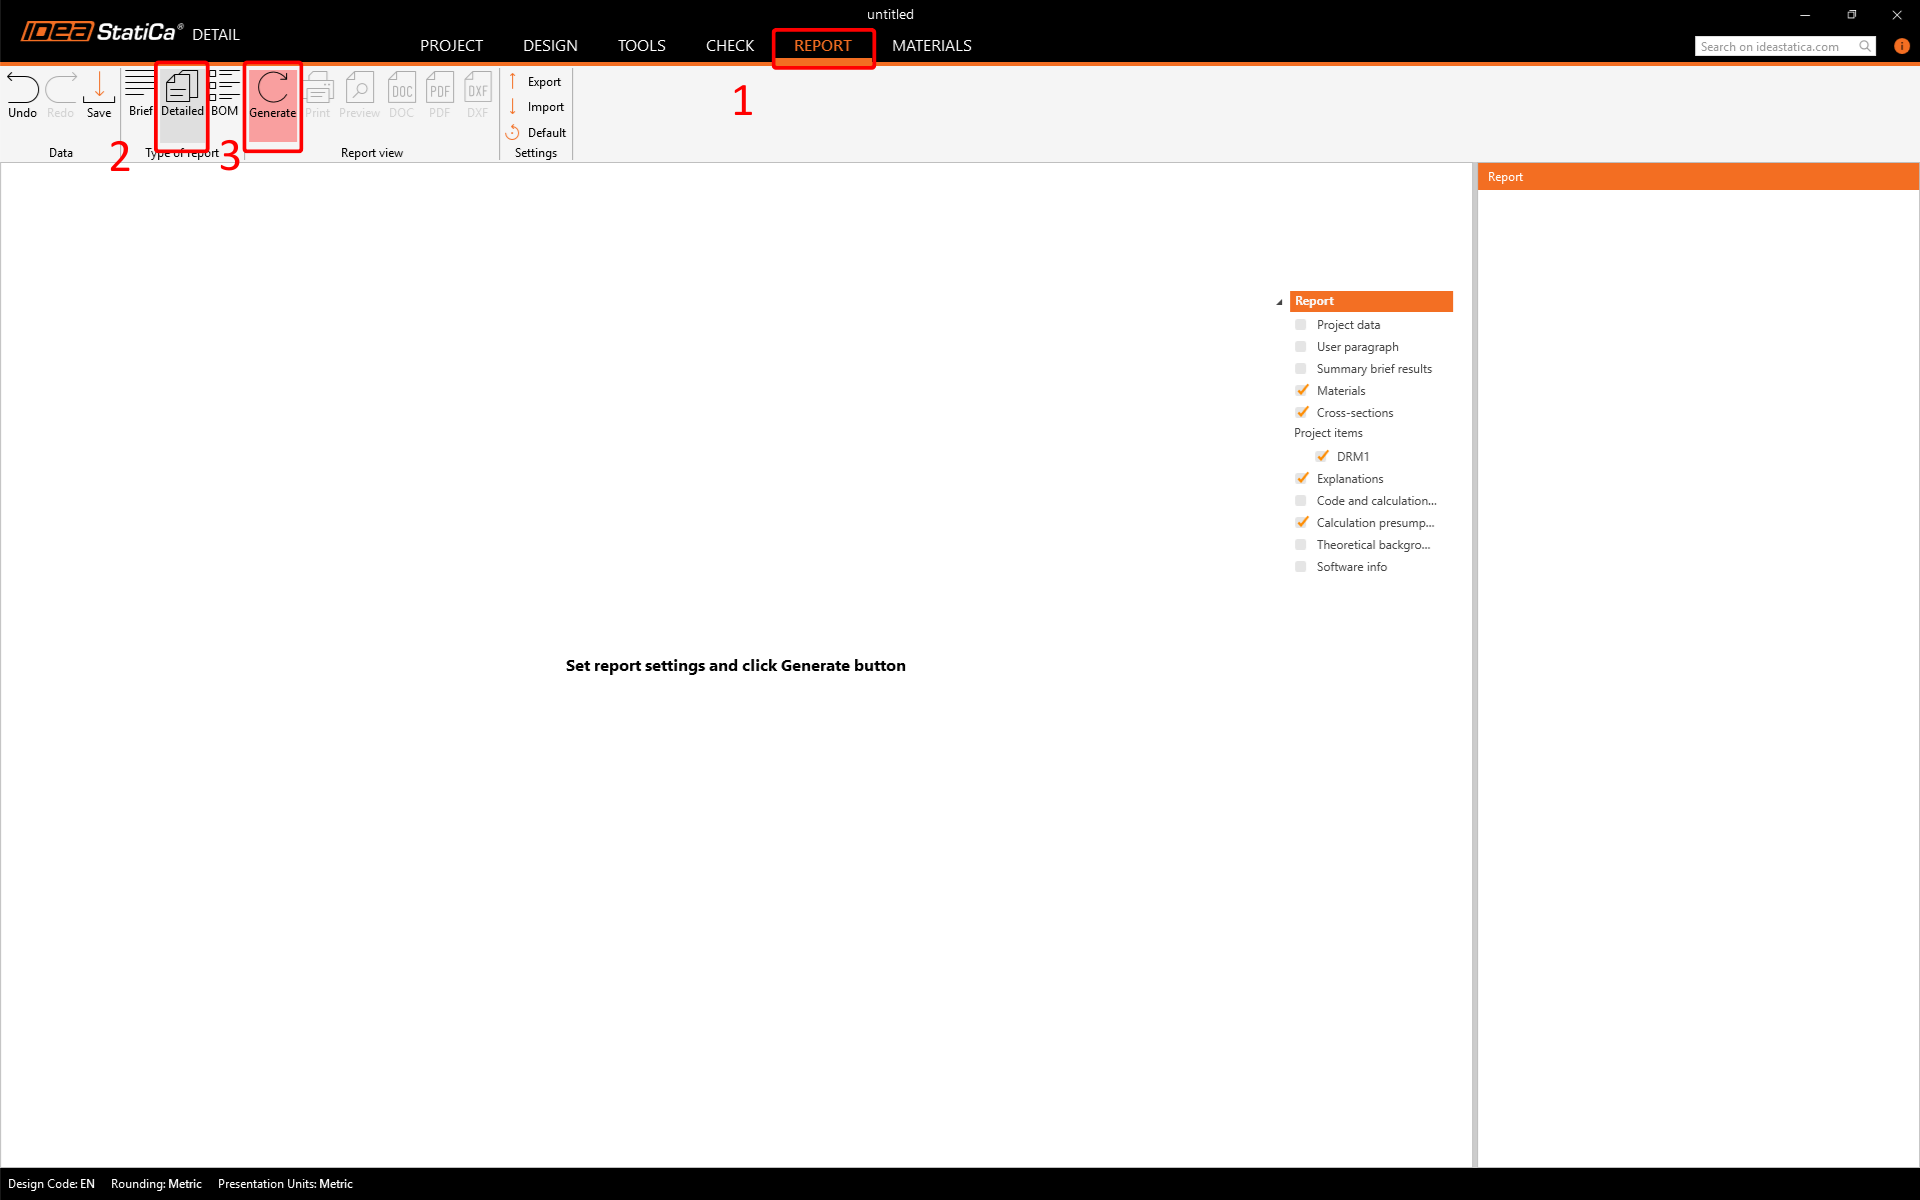
6 Report
At last, we go to the Report tab. IDEA StatiCa offers a fully customizable report to print out or save in an editable format.
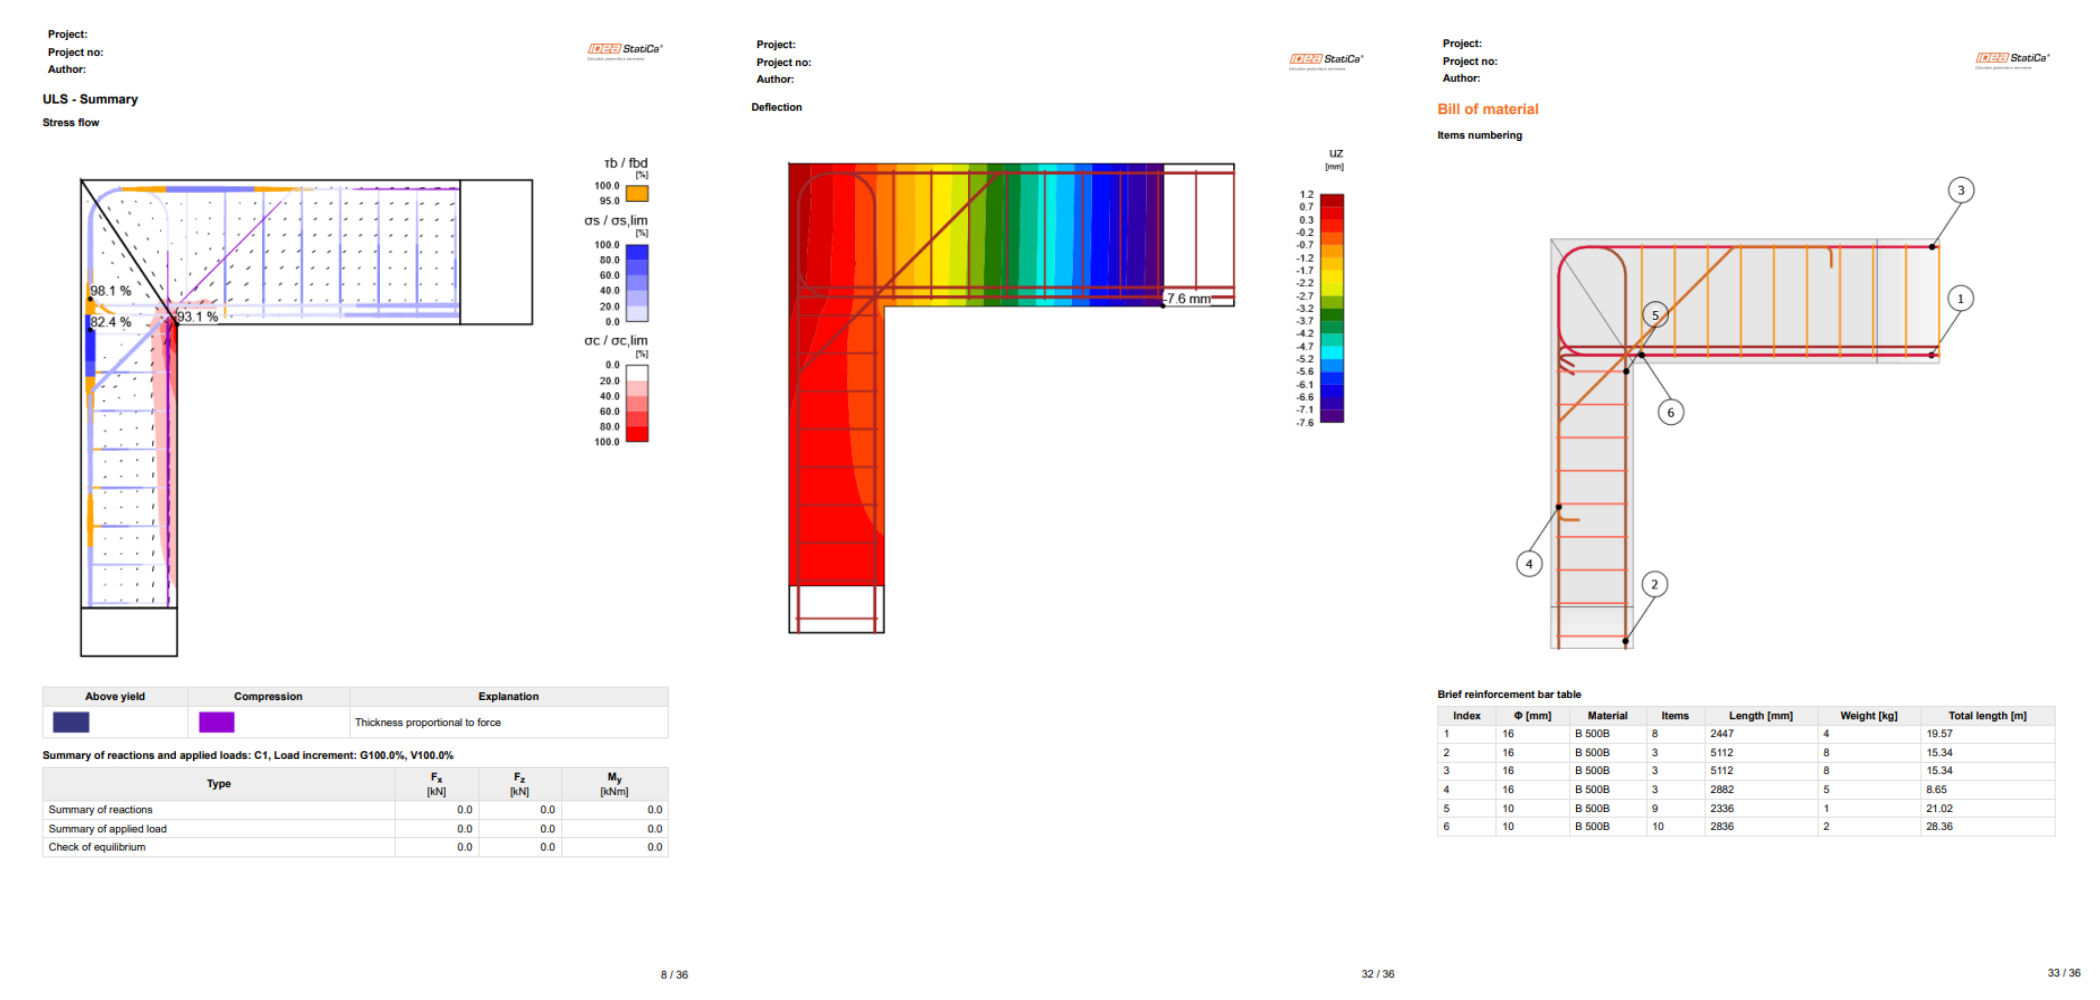
You have designed, optimized, and code-checked a frame joint according to Eurocode.