Tutorial for Midas Civil BIM link for concrete design
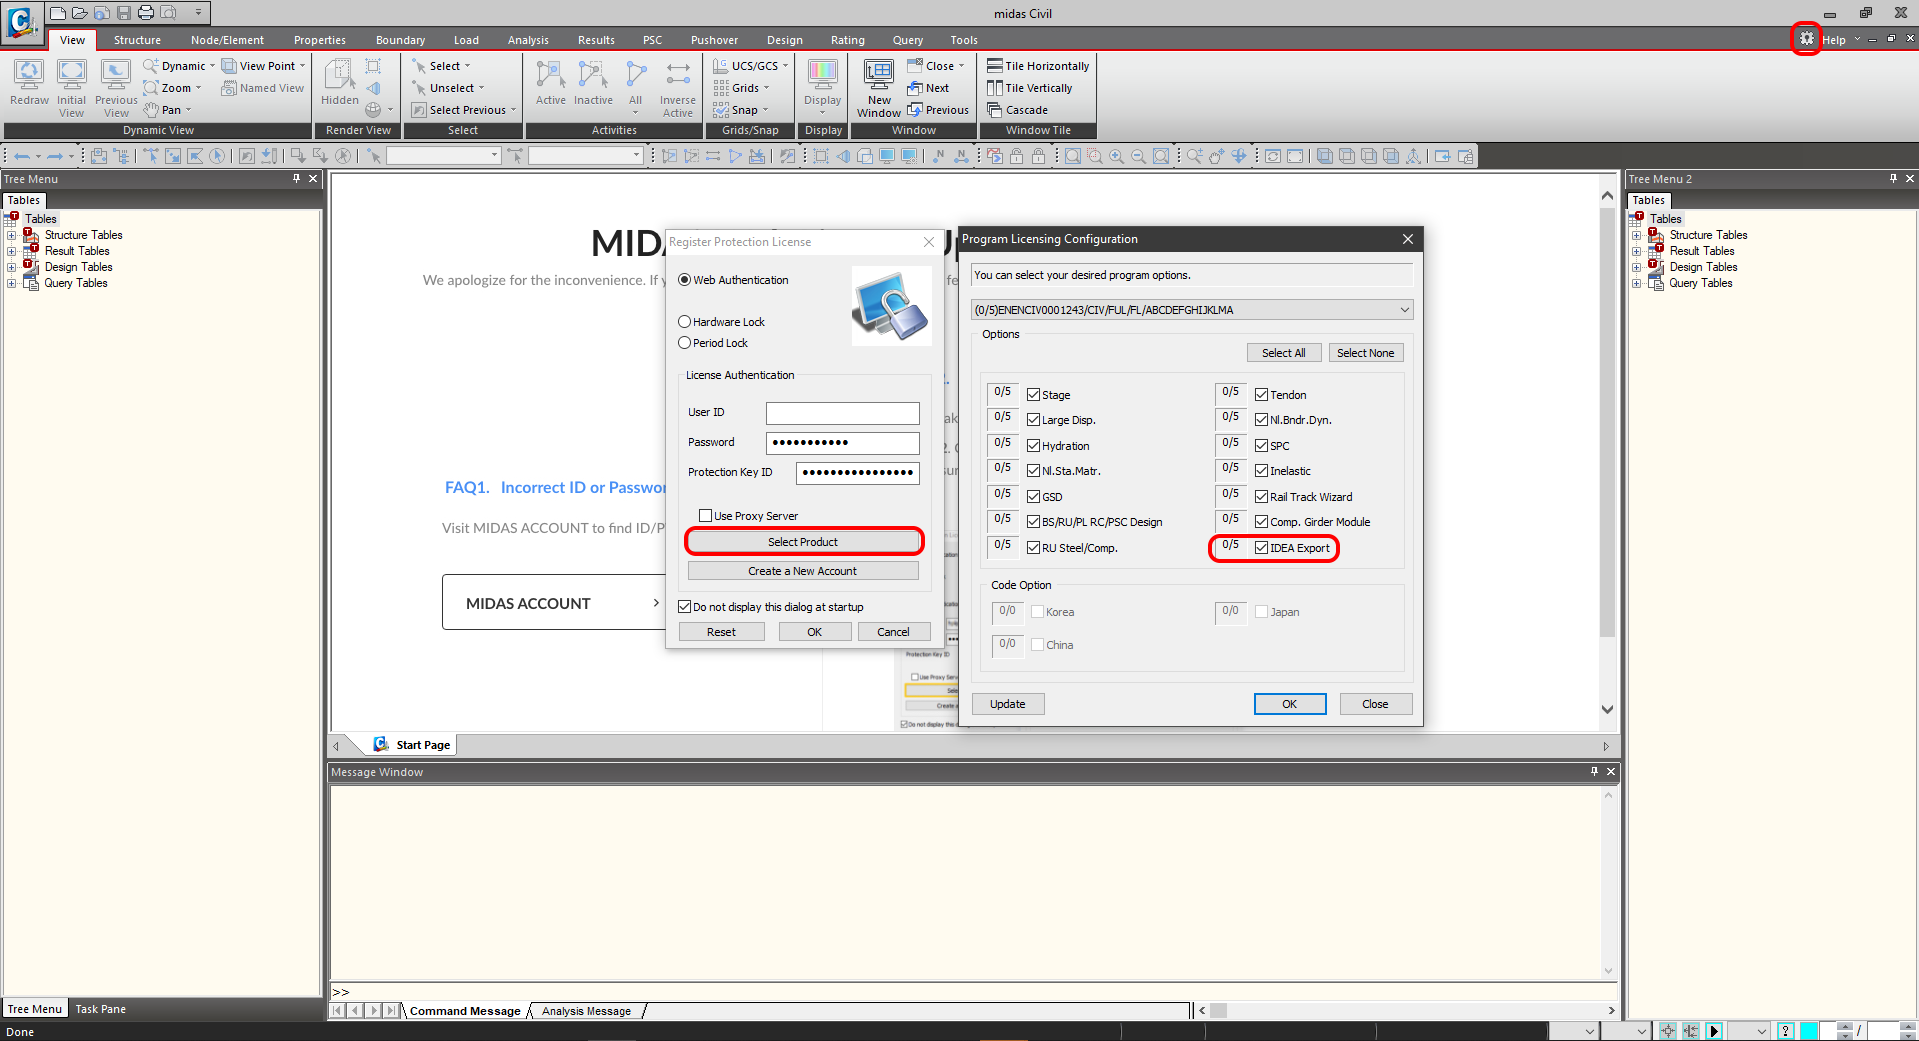
1 Activation
Since the version Midas Civil 2020 3.2 and newer has been added, the activation checkbox to the Program licensing configuration.
2 Export
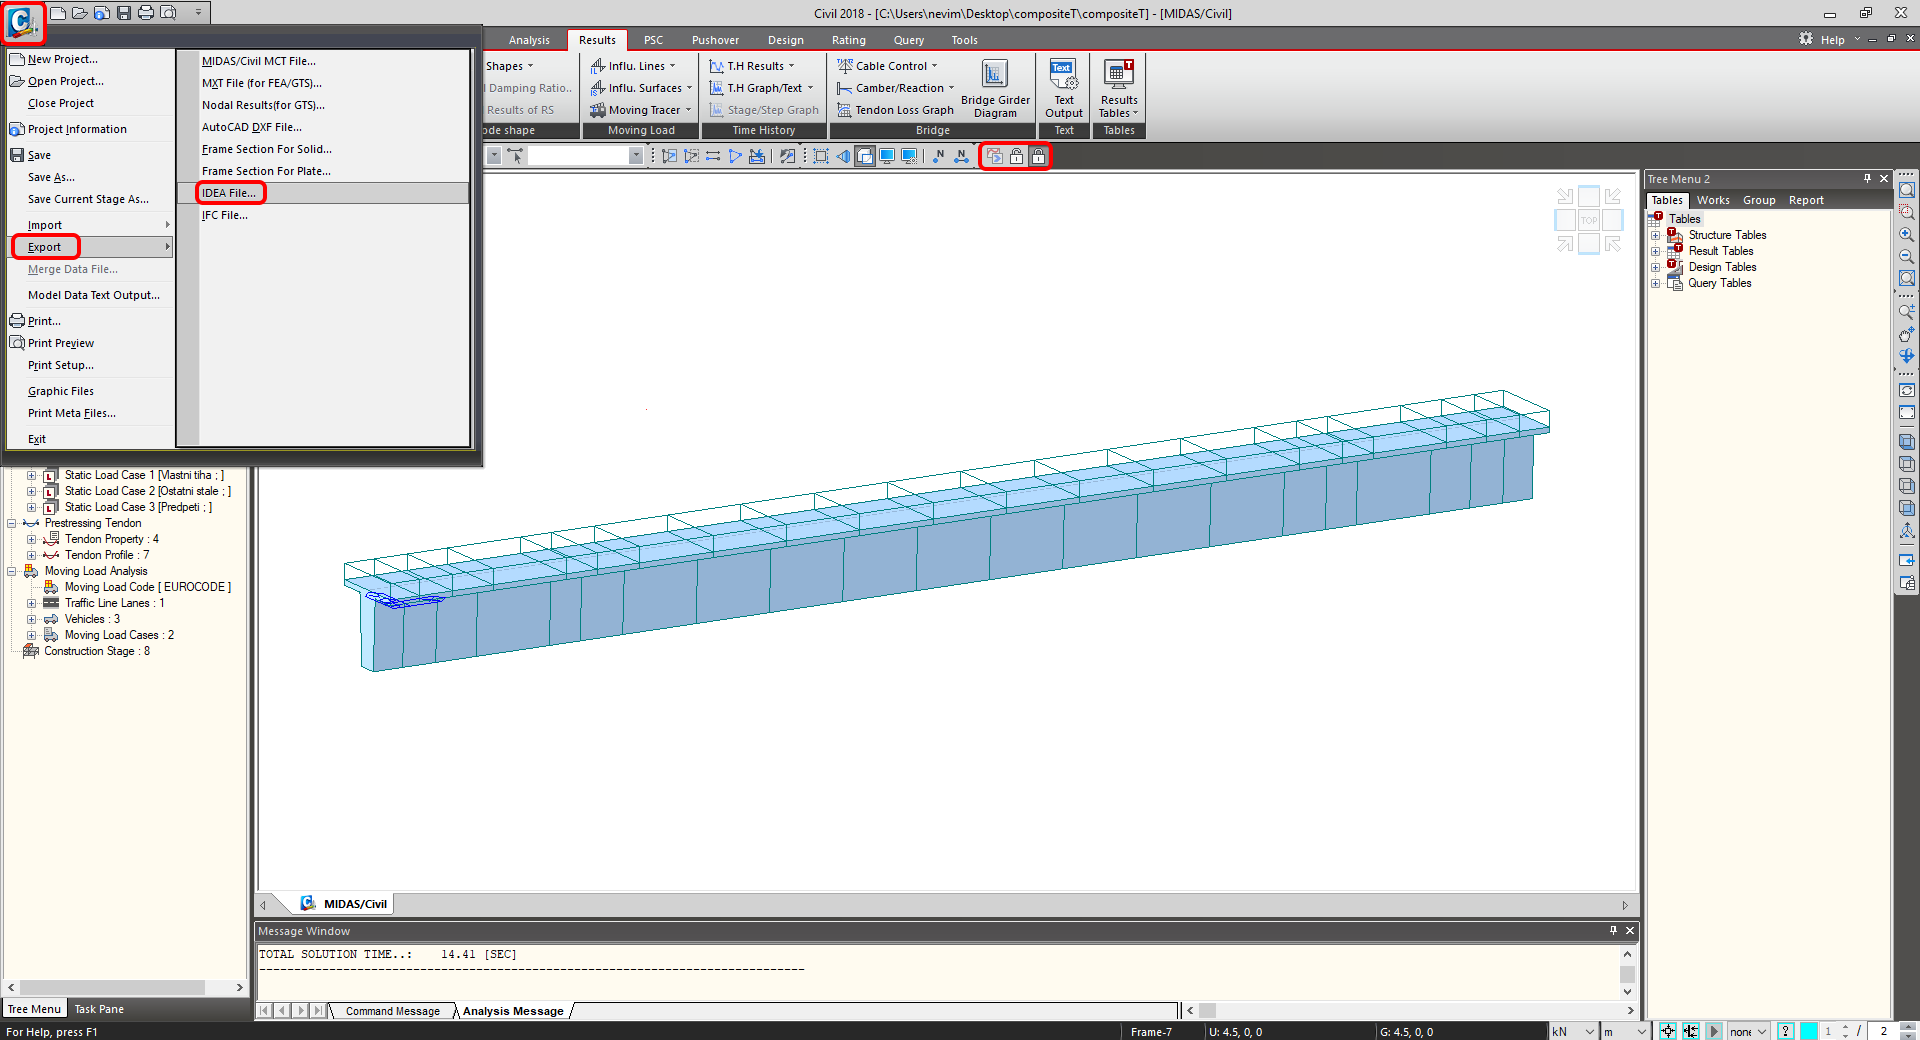
Open the attached project compositeT.mcb and run the analysis. After analysis, go to the menu tree and select Export and IDEA File.
Select the path where will be saved the mct. and mid. files. Both files are necessary to save in the same folder. Otherwise, the import to IDEA StatiCa BIM won't be accessible.

3 Import
Launch IDEA StatiCa application and move to BIM part. Select the Import from other programs and select the compositeT.mct. The selection of the compositeT.mct will be allowed if you scroll down the menu of supported FEM programs and select Midas mct Files(.mct).

You can sort the design members into groups. It's suitable from the design point of view. The members assigned to one group are checked at the same time.

The Import details tab is being informed you what is highly recommended to control or what is not taken over from the Midas Civil.

Due to the bridge T-section beam, it is necessary to select the appropriate code. The Project data provides the settings of the code EN 1992-2:2008-07. The load groups are set for the Road bridge in the Type of bridge scroll menu.

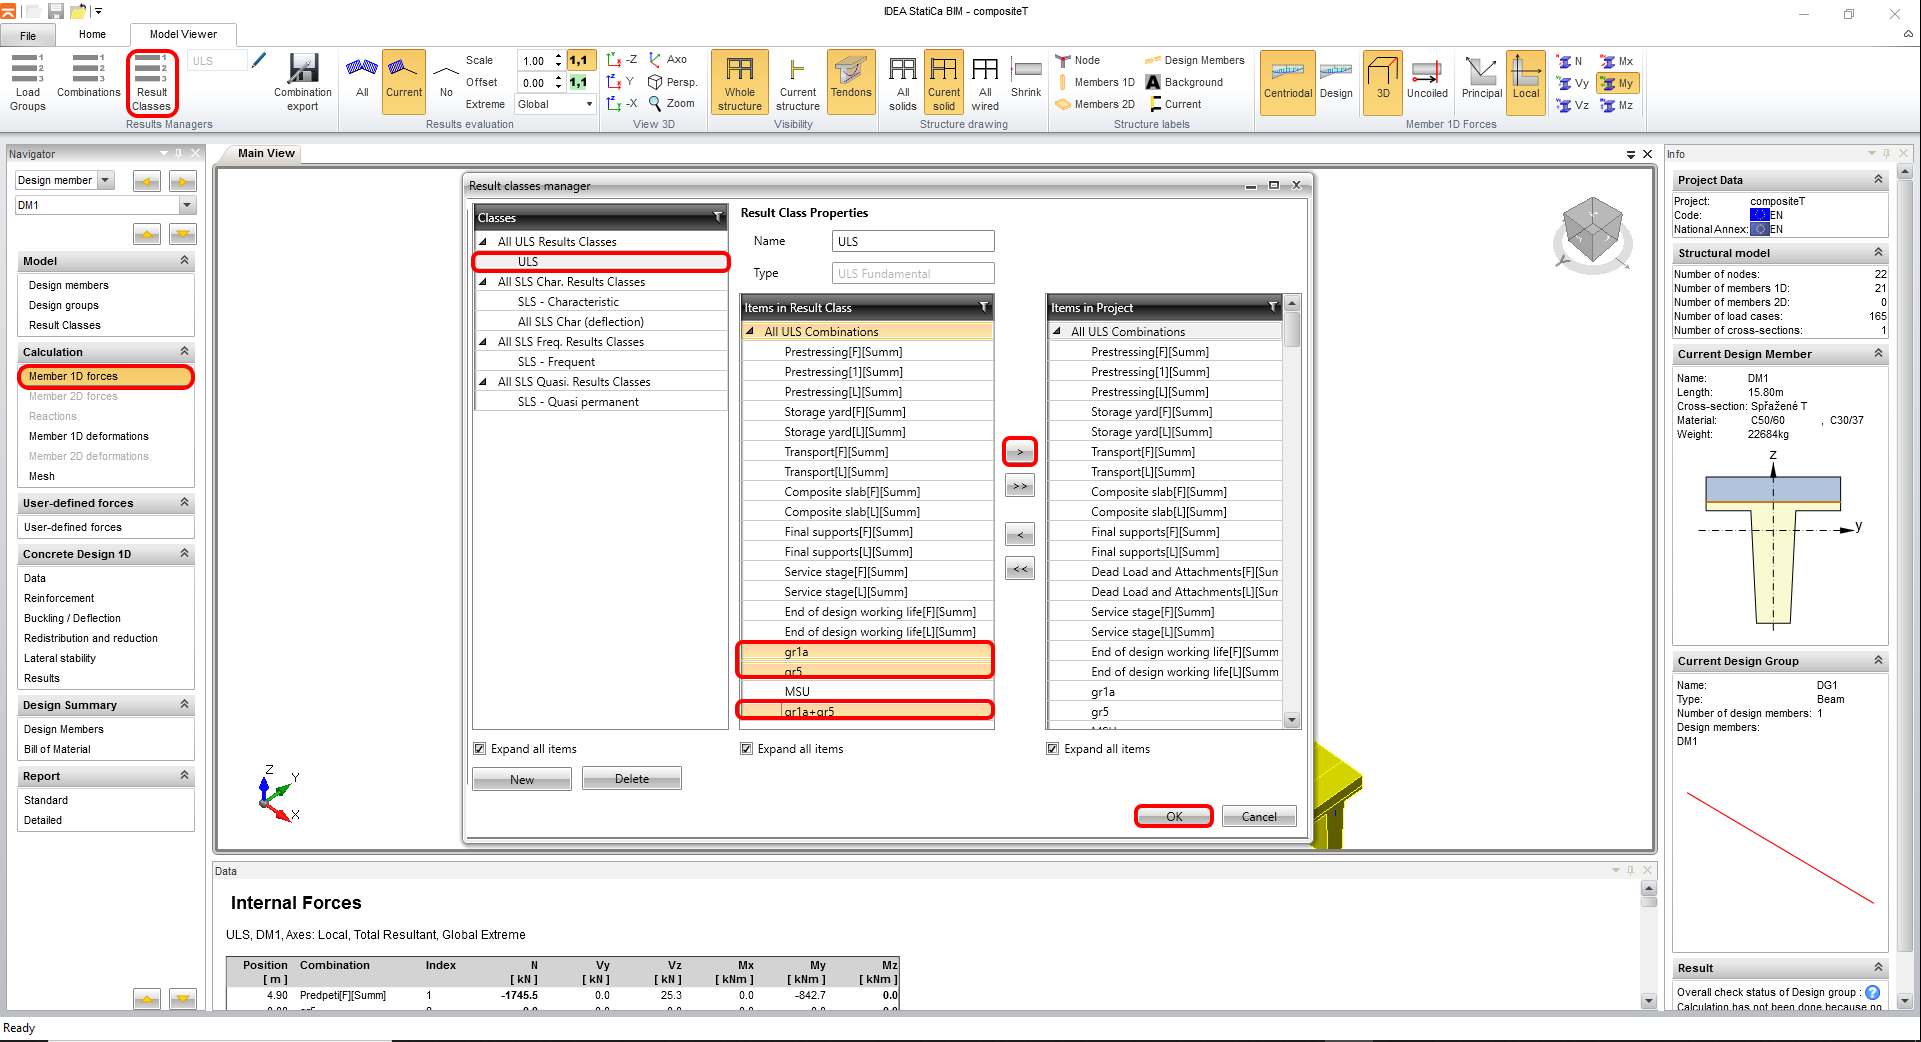
The Result class tab serves for selecting combinations that will be included in the code-check. The envelopes from the Moving load analysis will be deleted because are not sorted to the construction stages and are not important for code-check as the standalone combinations. The envelopes are included in the other combinations with permanent load cases.
4 Design
In the Data card are predefined significant code -checks. The Detailing is turned off due to the average tendon for every layer. The insufficient distance of tendons is due to the simplification of the FEM model.

The upcoming stage is Reinforcement. You will work with one zone across the whole beam to make it easier. Press the cross-section in the scene, and you get to the reinforcement editor.
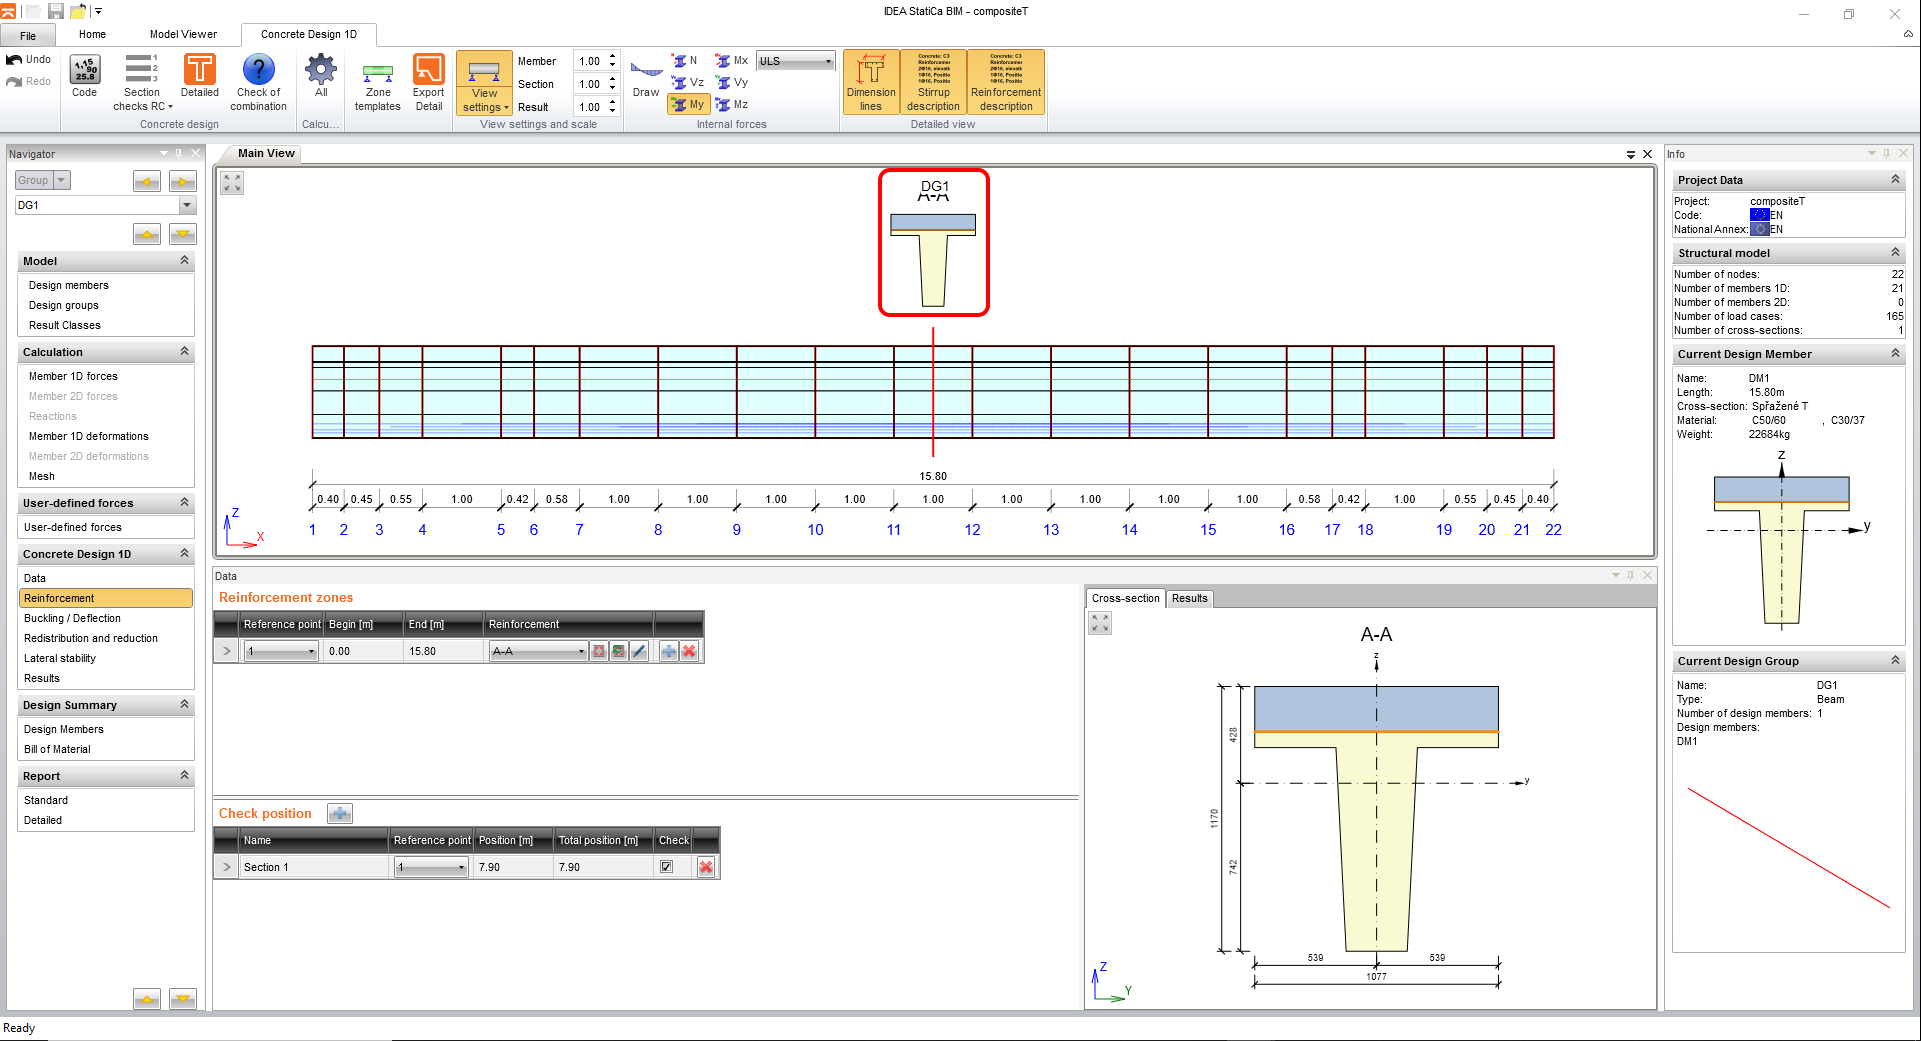
Load the predefined cross-section template compositeT.nav and insert it.

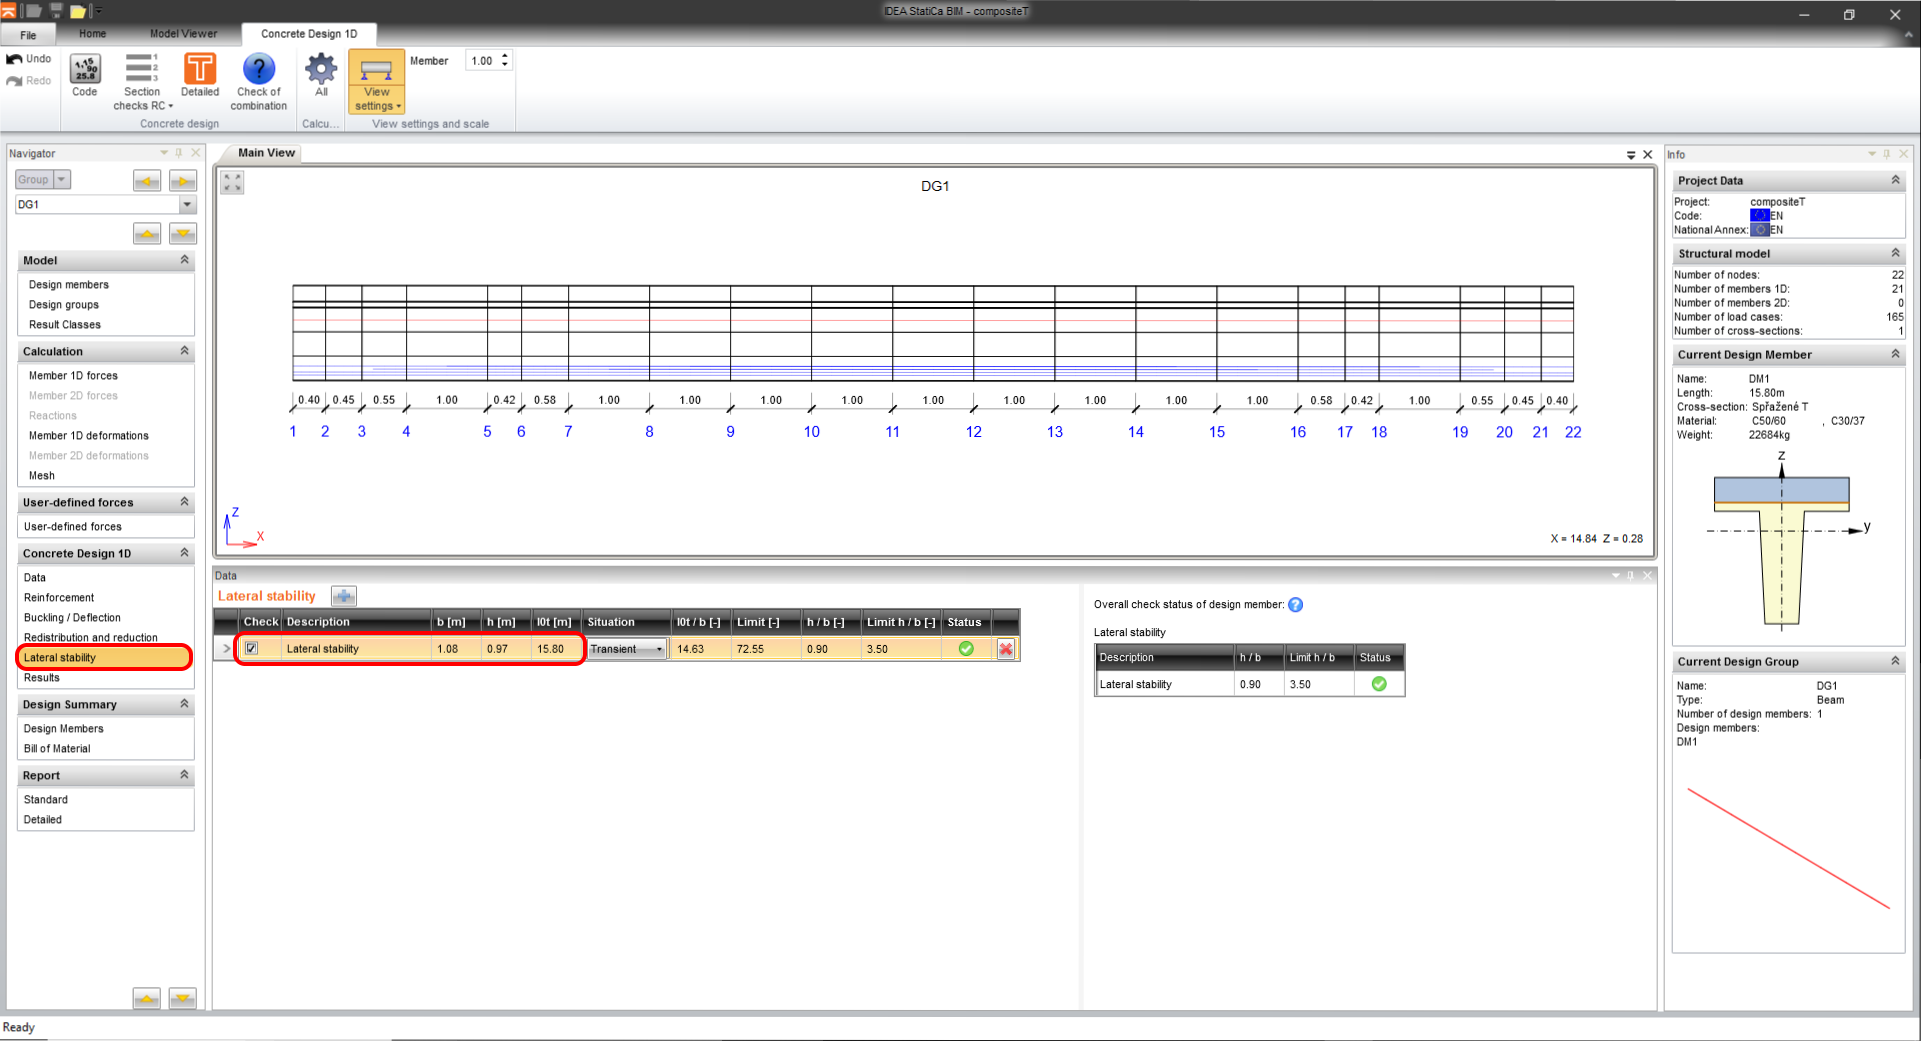
The lateral stability check is a really important part during the stage of prestressing to prevent the snap-through point of the beam. Move to Lateral stability and set parameters for code-check. Change the situation to Transient.
b = 1,077 m
h = 0,97 m
lt = 15,8 m
5 Results
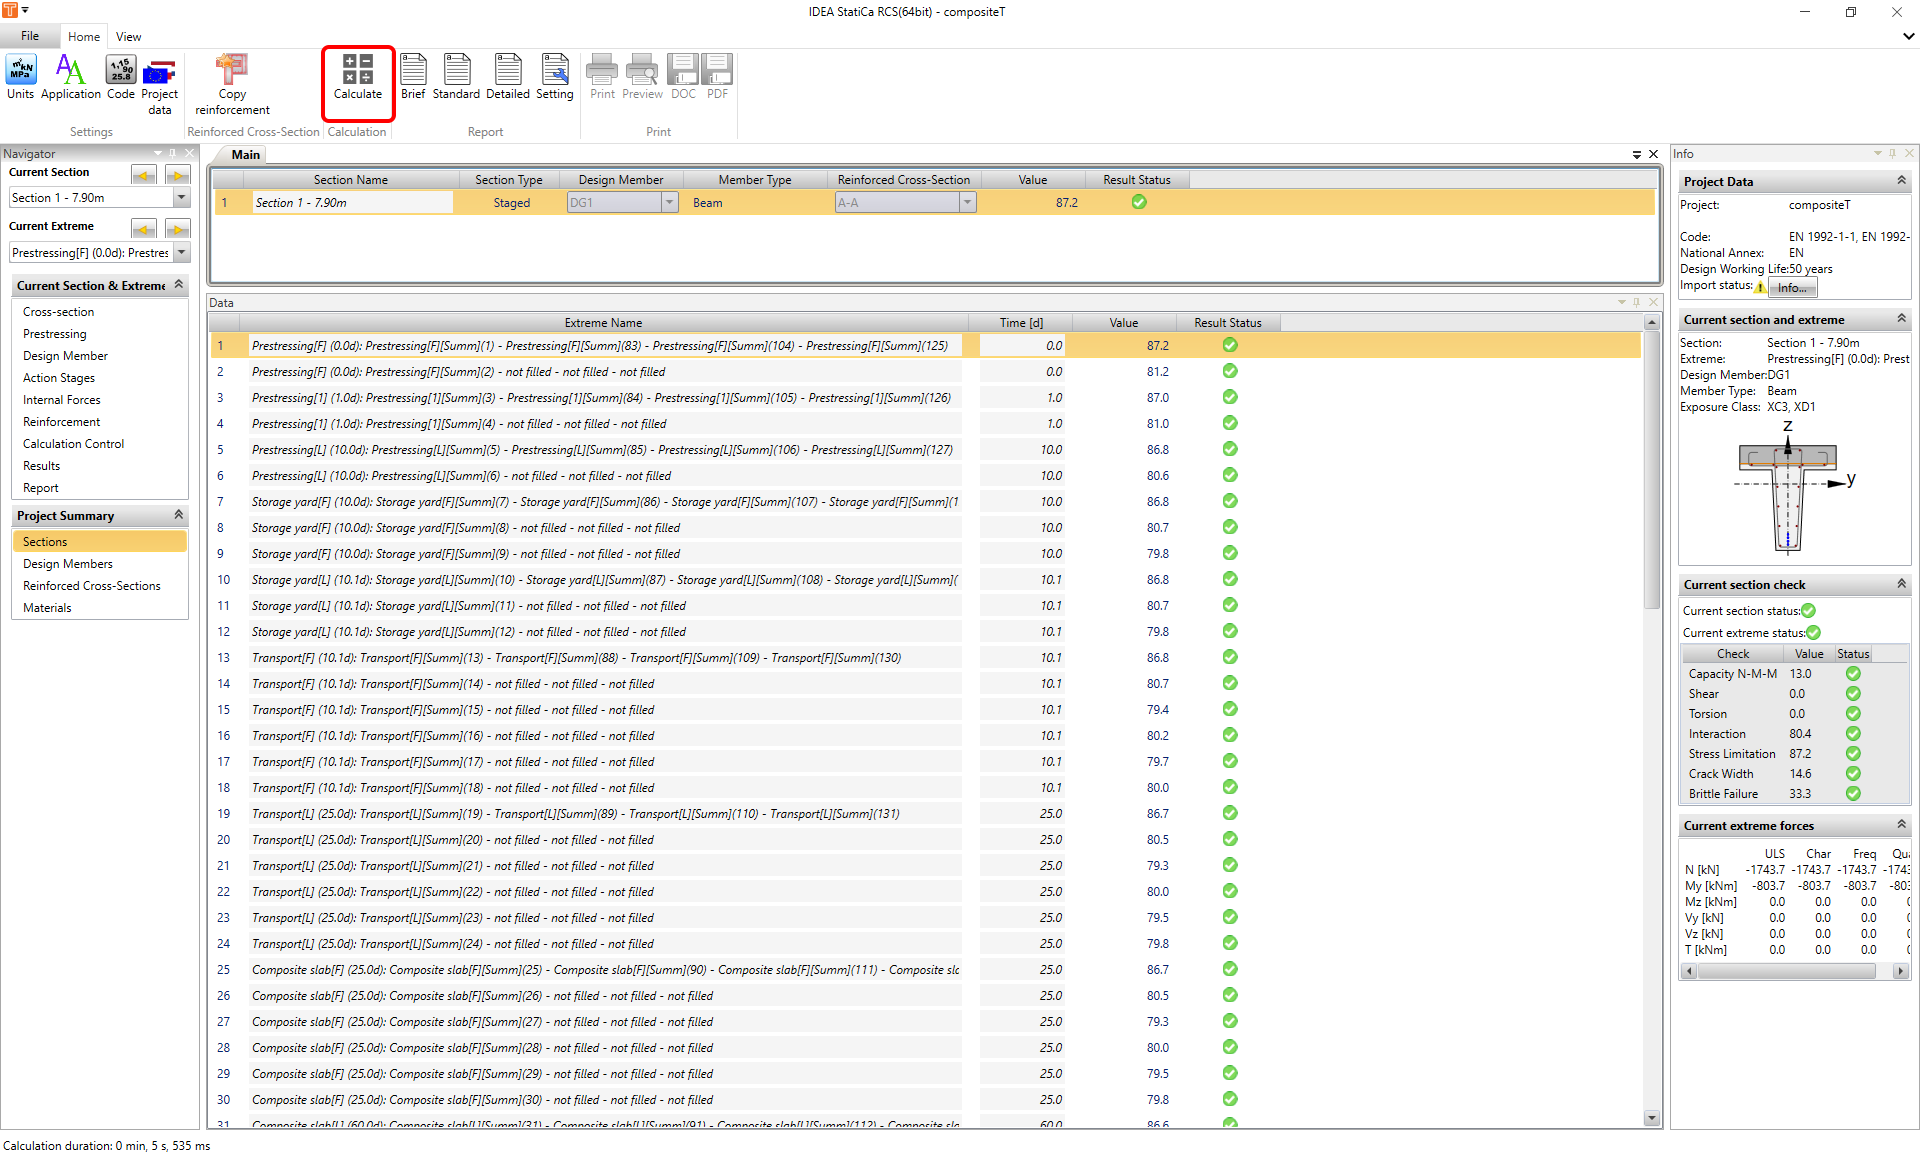
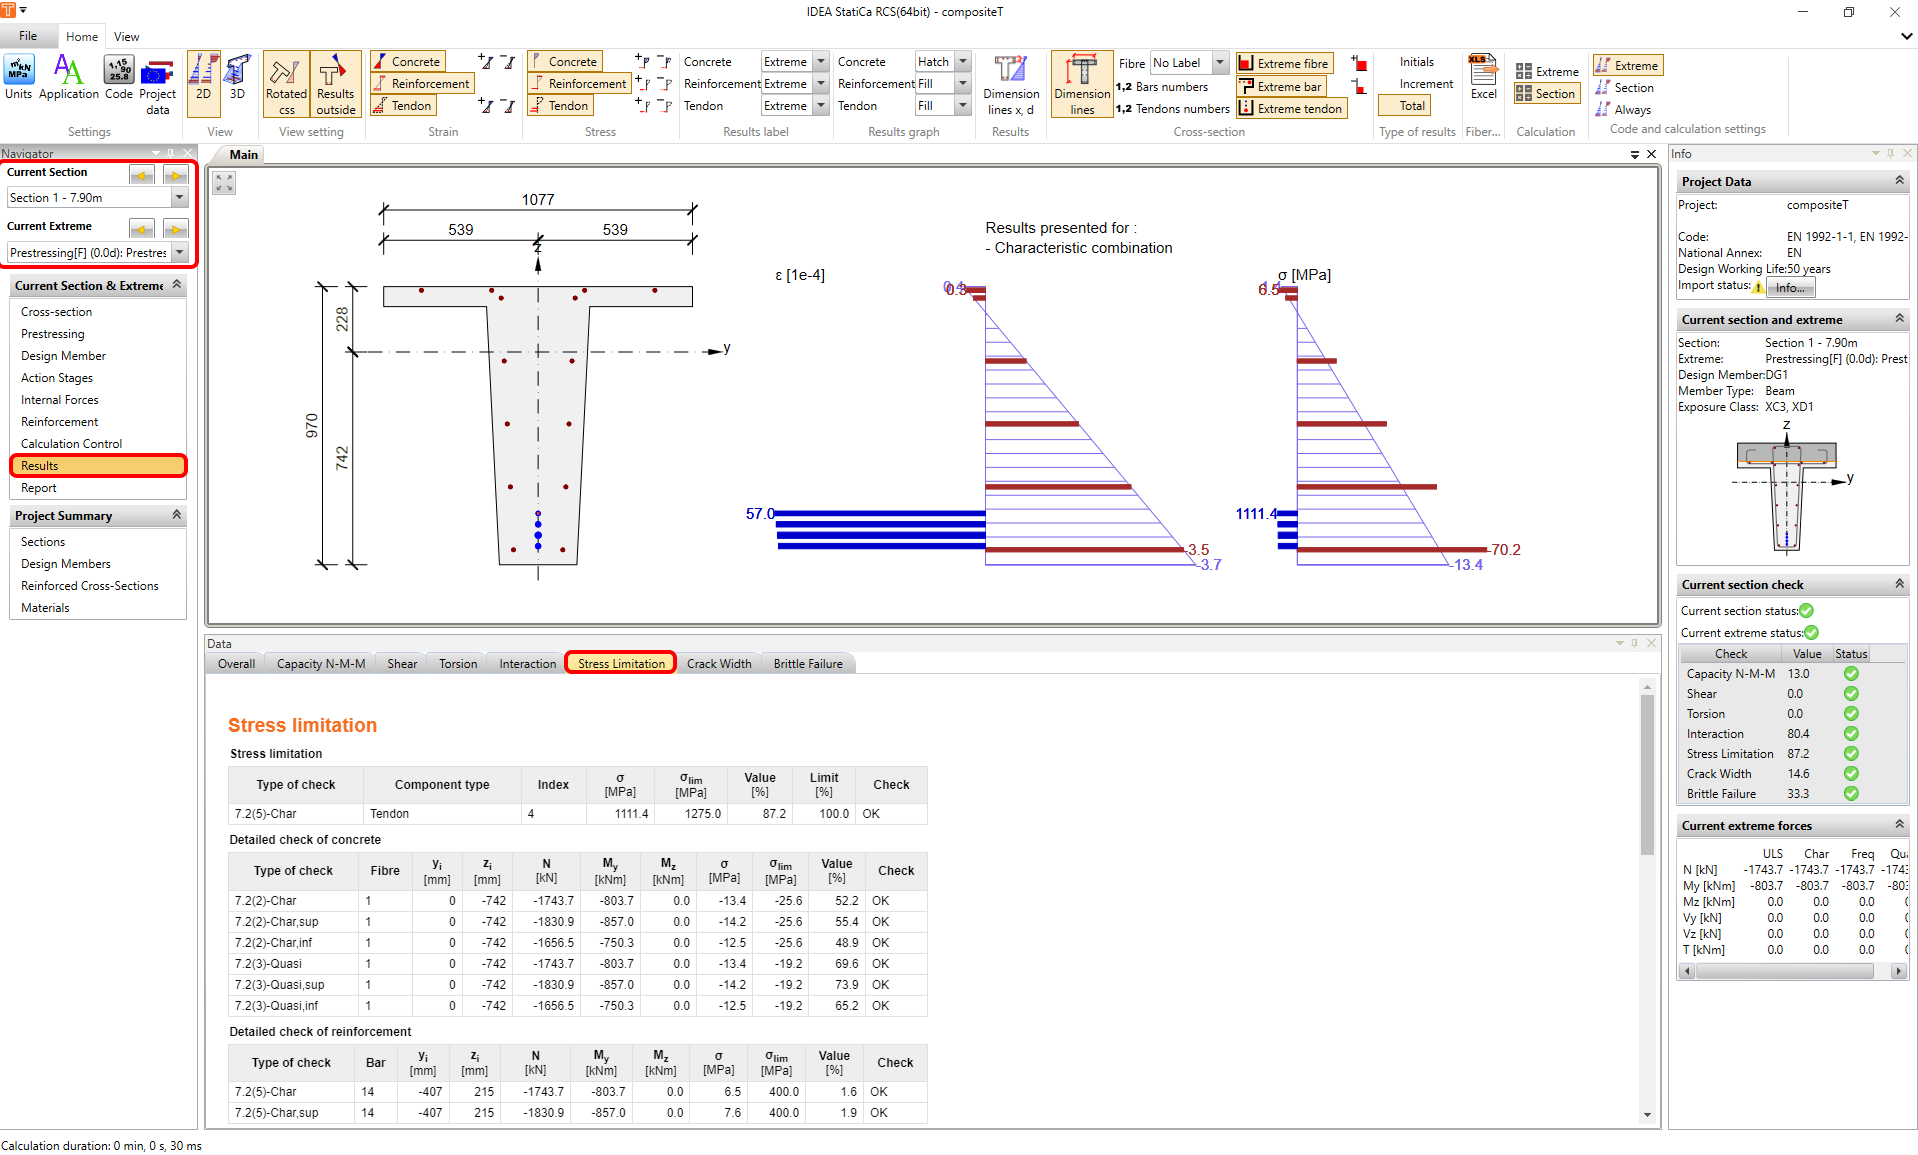
Switch to the Results card and the calculation will be automatically started. You reach detailed results if launch module RCS by clicking on the Detailed button.
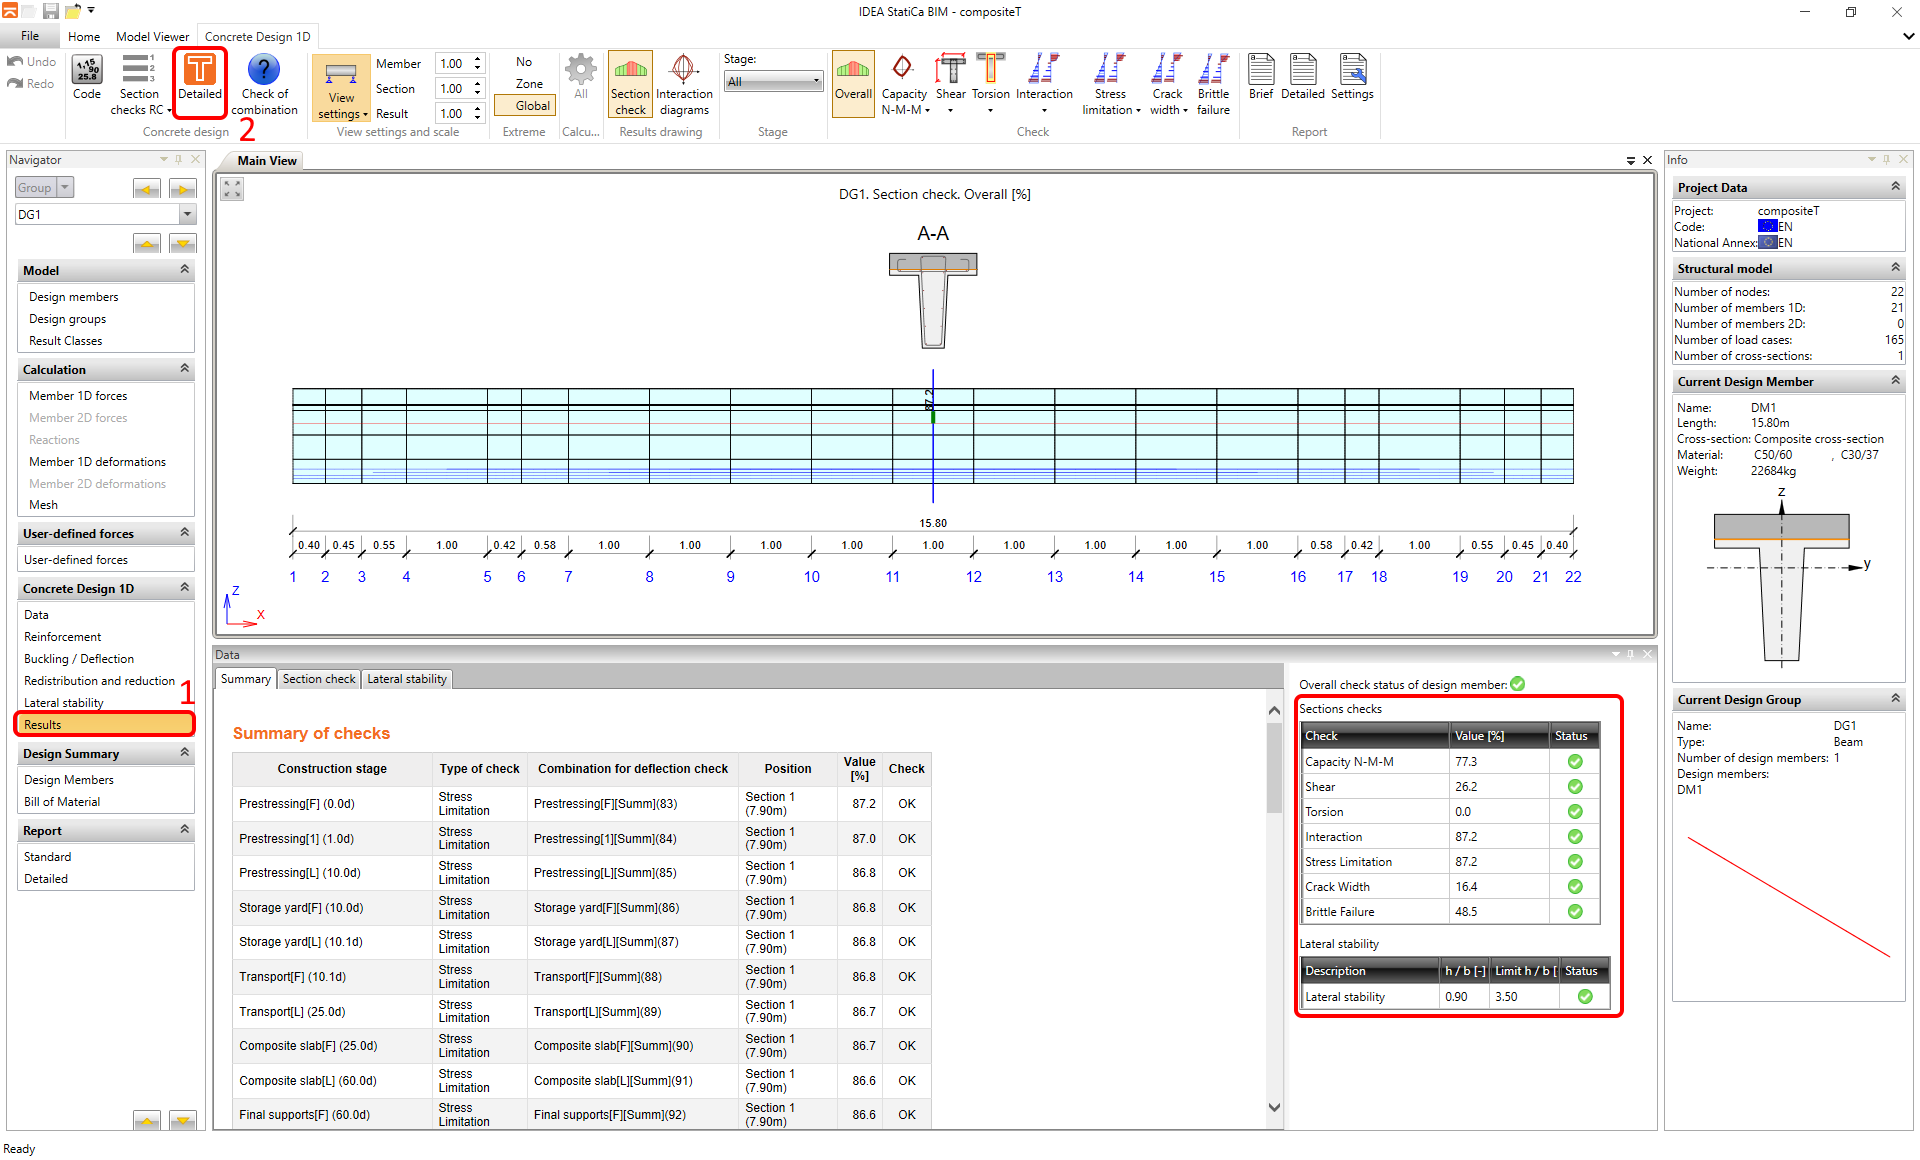
Run the Calculation.
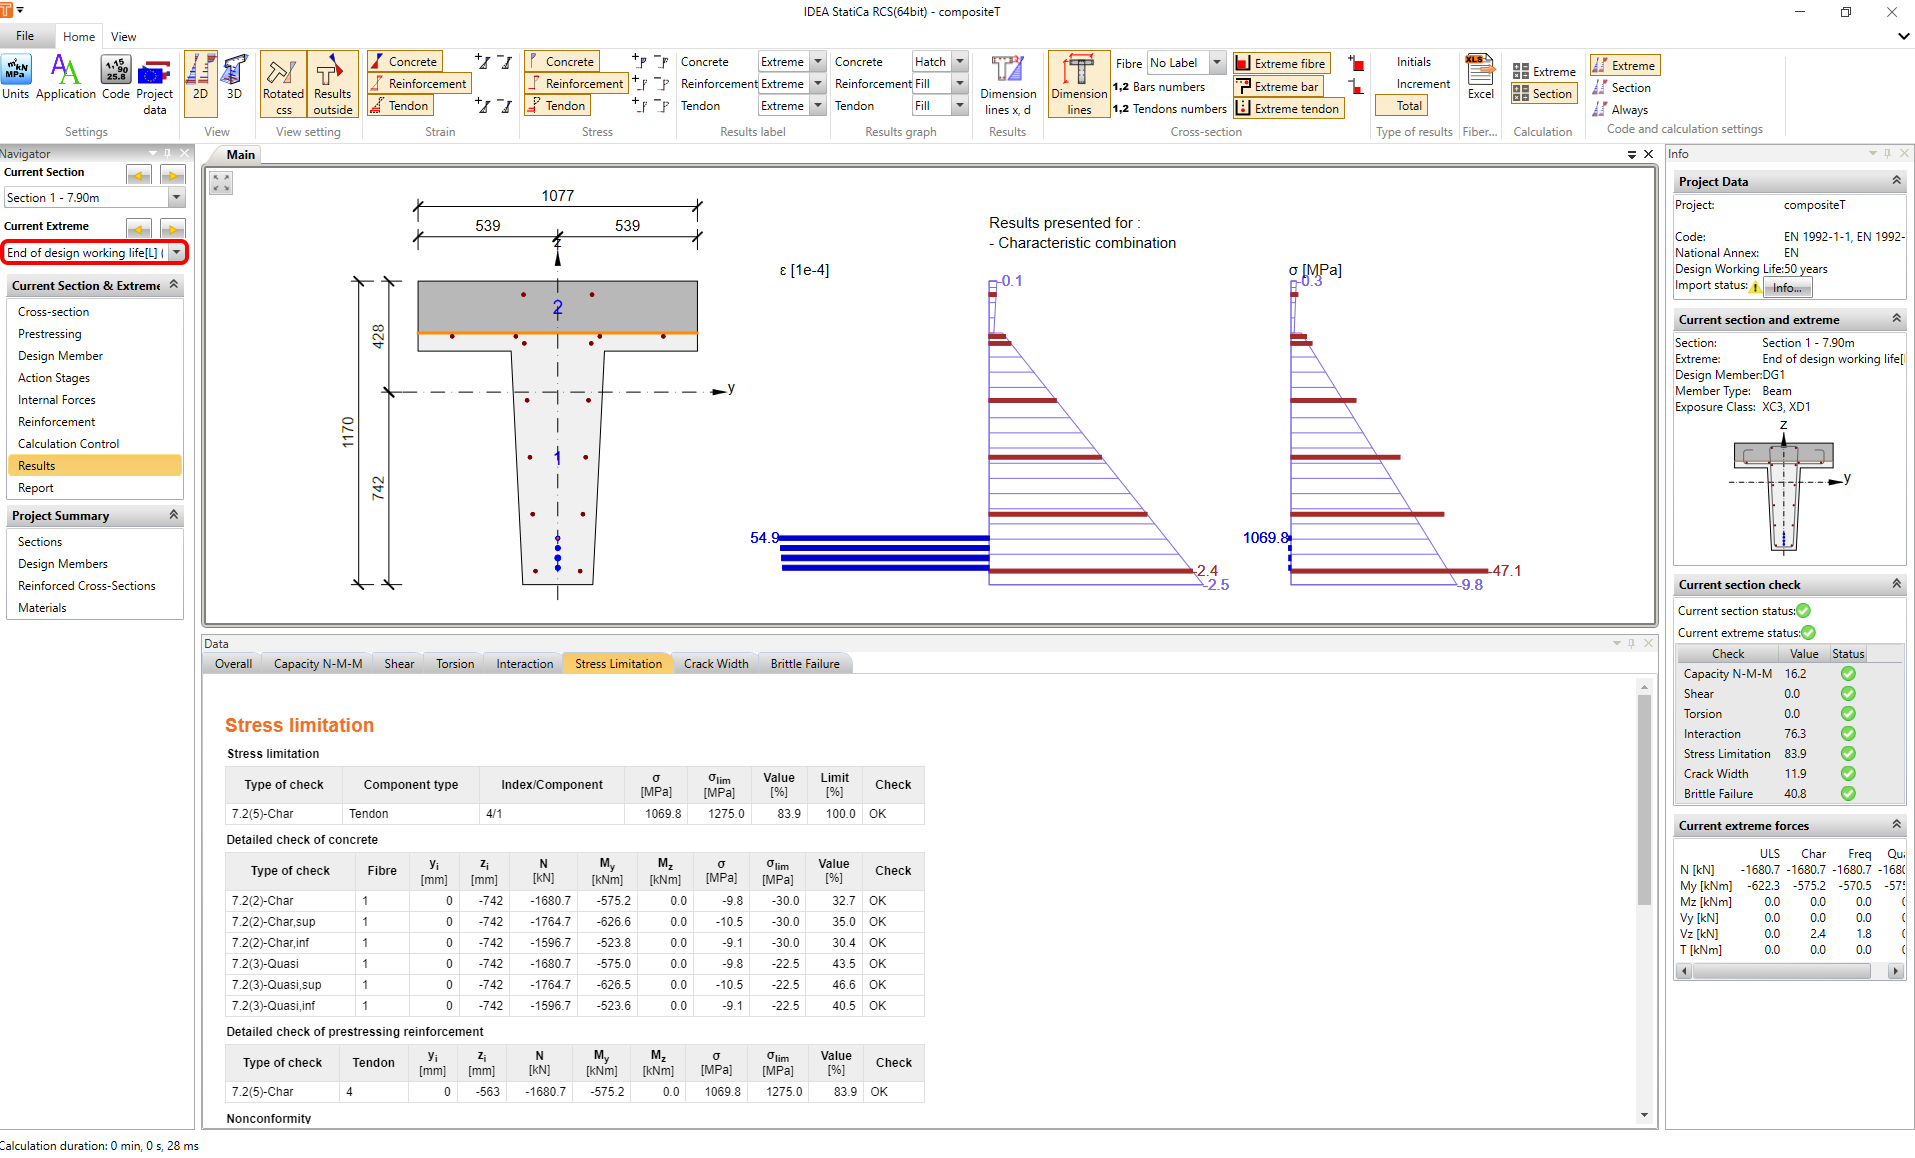
The Results card offers in the navigator tree detailed results drawing. In the upper part is located a switcher between stages and sections for the selection of the desired part. Are presented the results of the prestressing stage without a composite slab.
The change of the stages is performed via a switcher of stages. The stages with the composite slab. The module will be closed by cross-button usage.
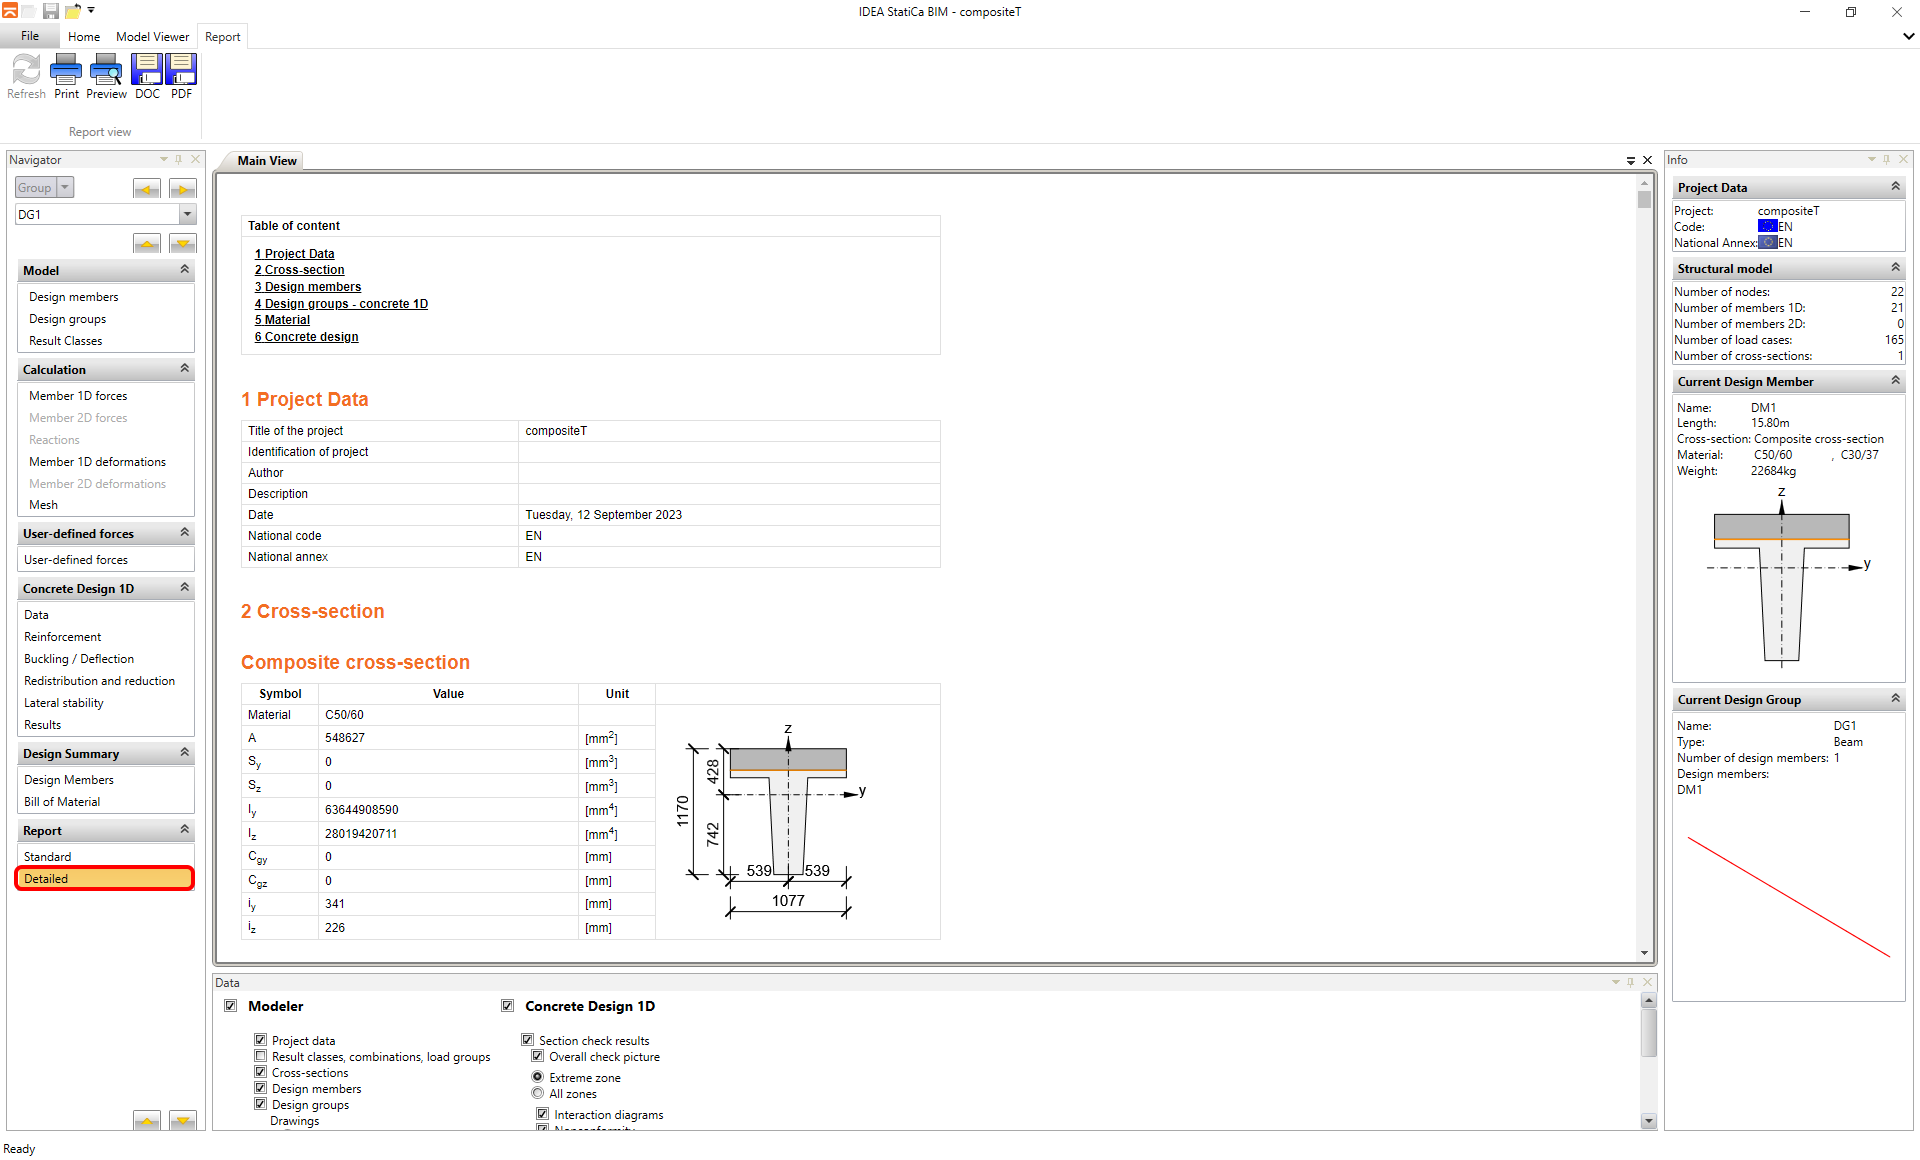
6 Report
The final step is printing the report. The report can be brief or Detailed. It depends on your intentions. The protocol is fully customizable and can be exported to PDF or Docx. file.