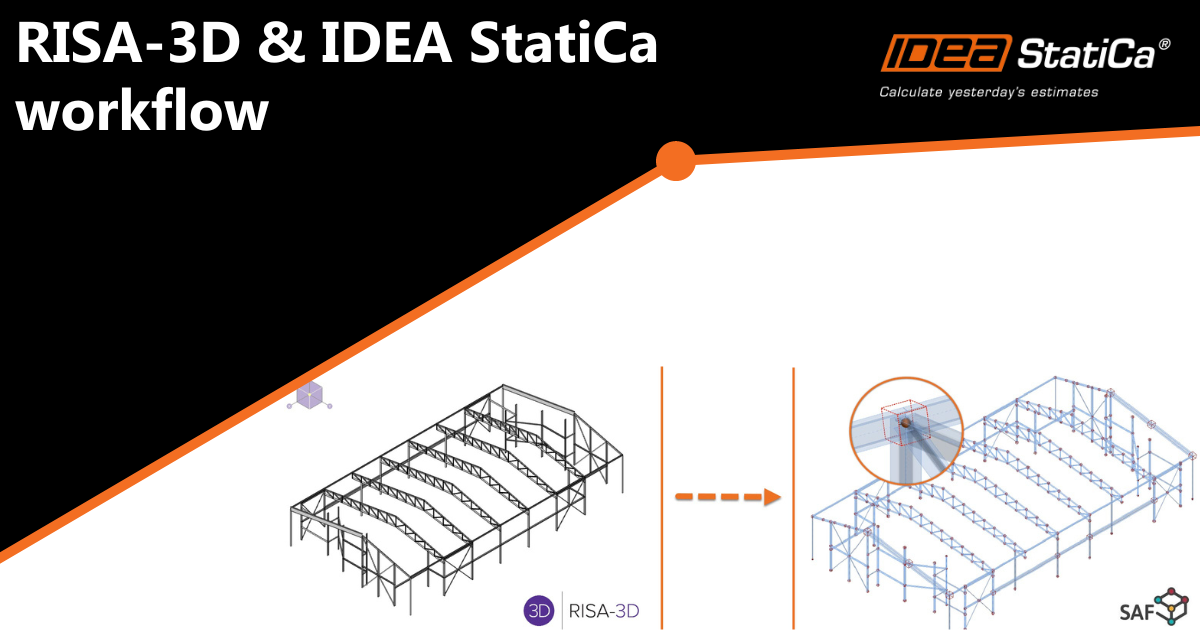
RISA-3D & IDEA StatiCa workflow
SAF file import with Symmetrical cross-sections
SAF file import with Non-symmetrical cross-sections
RISA excel template for importing loads
RISA Workflow through Checkbot
(SAF file import with Symmetrical cross-sections)
Notes:
This SAF-based integration is developed and maintained by RISA. IDEA StatiCa is not involved in maintaining this integration. All technical requirements and questions should be addressed to RISA directly. This approach considers that there are no rotations on the members.
Workflow:
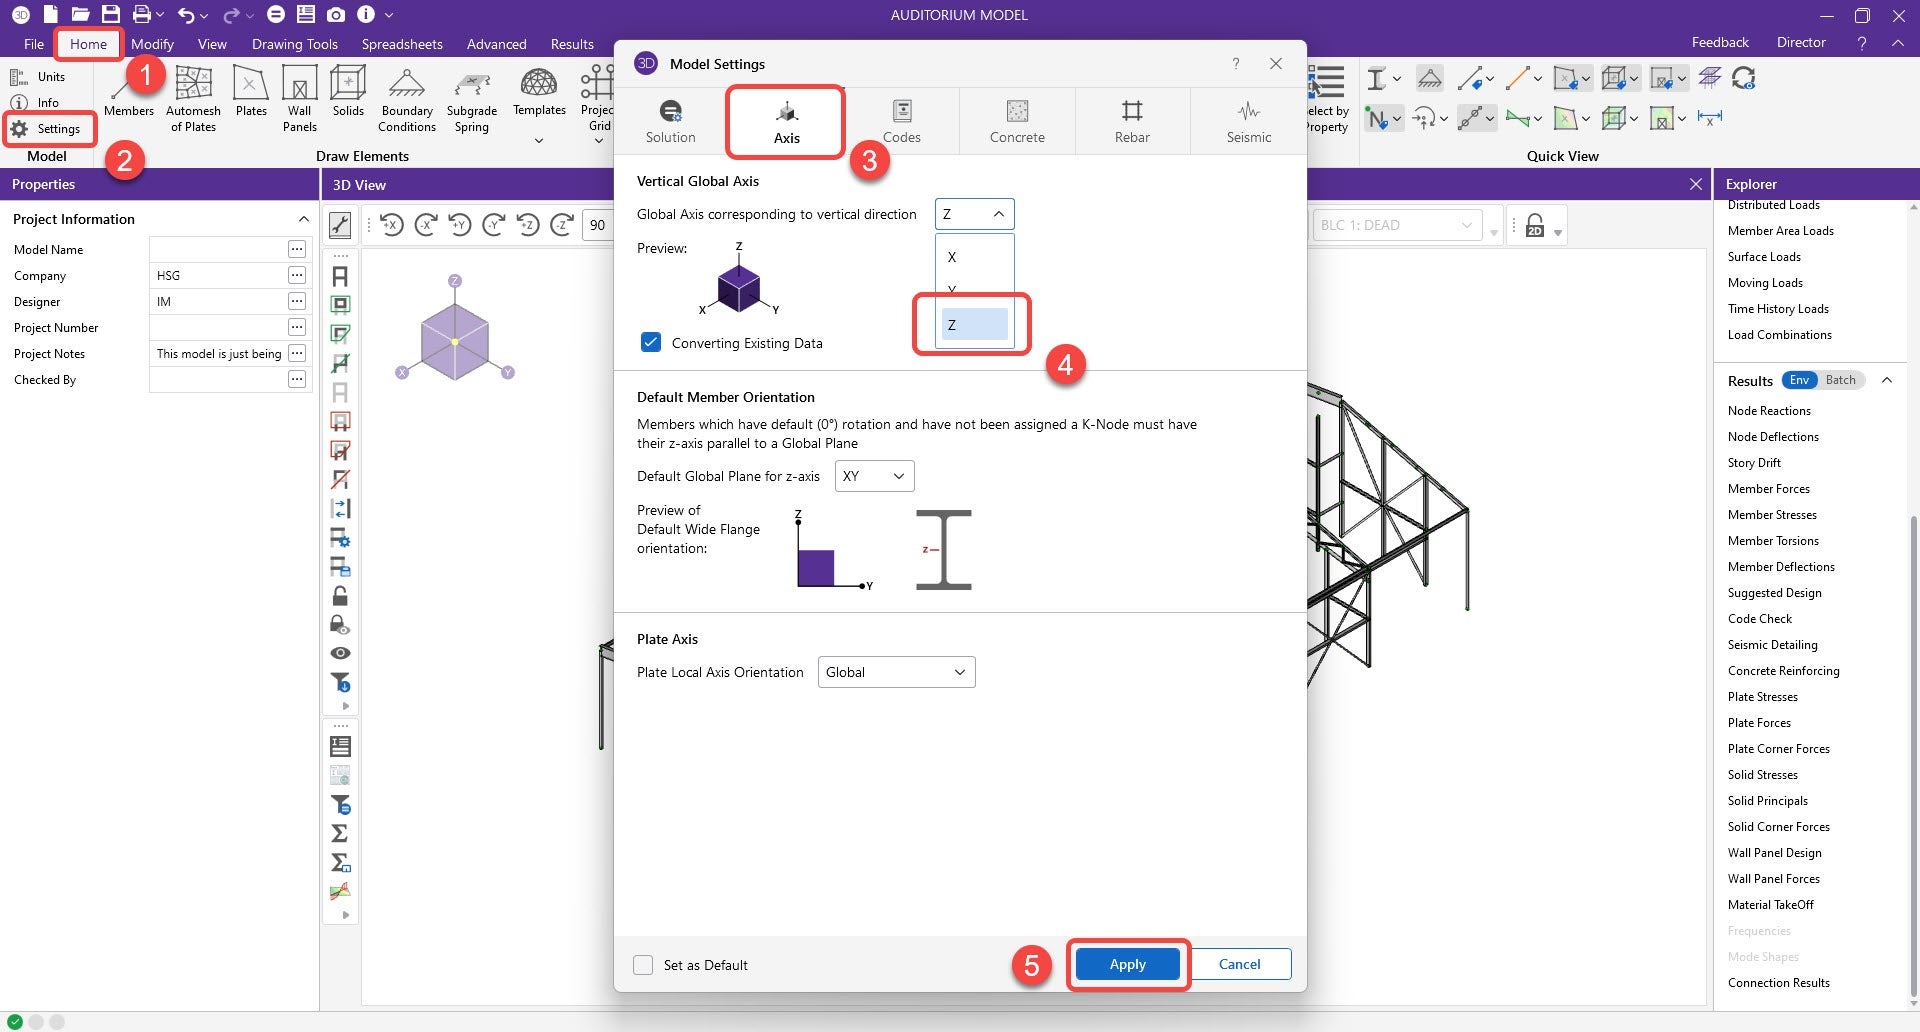
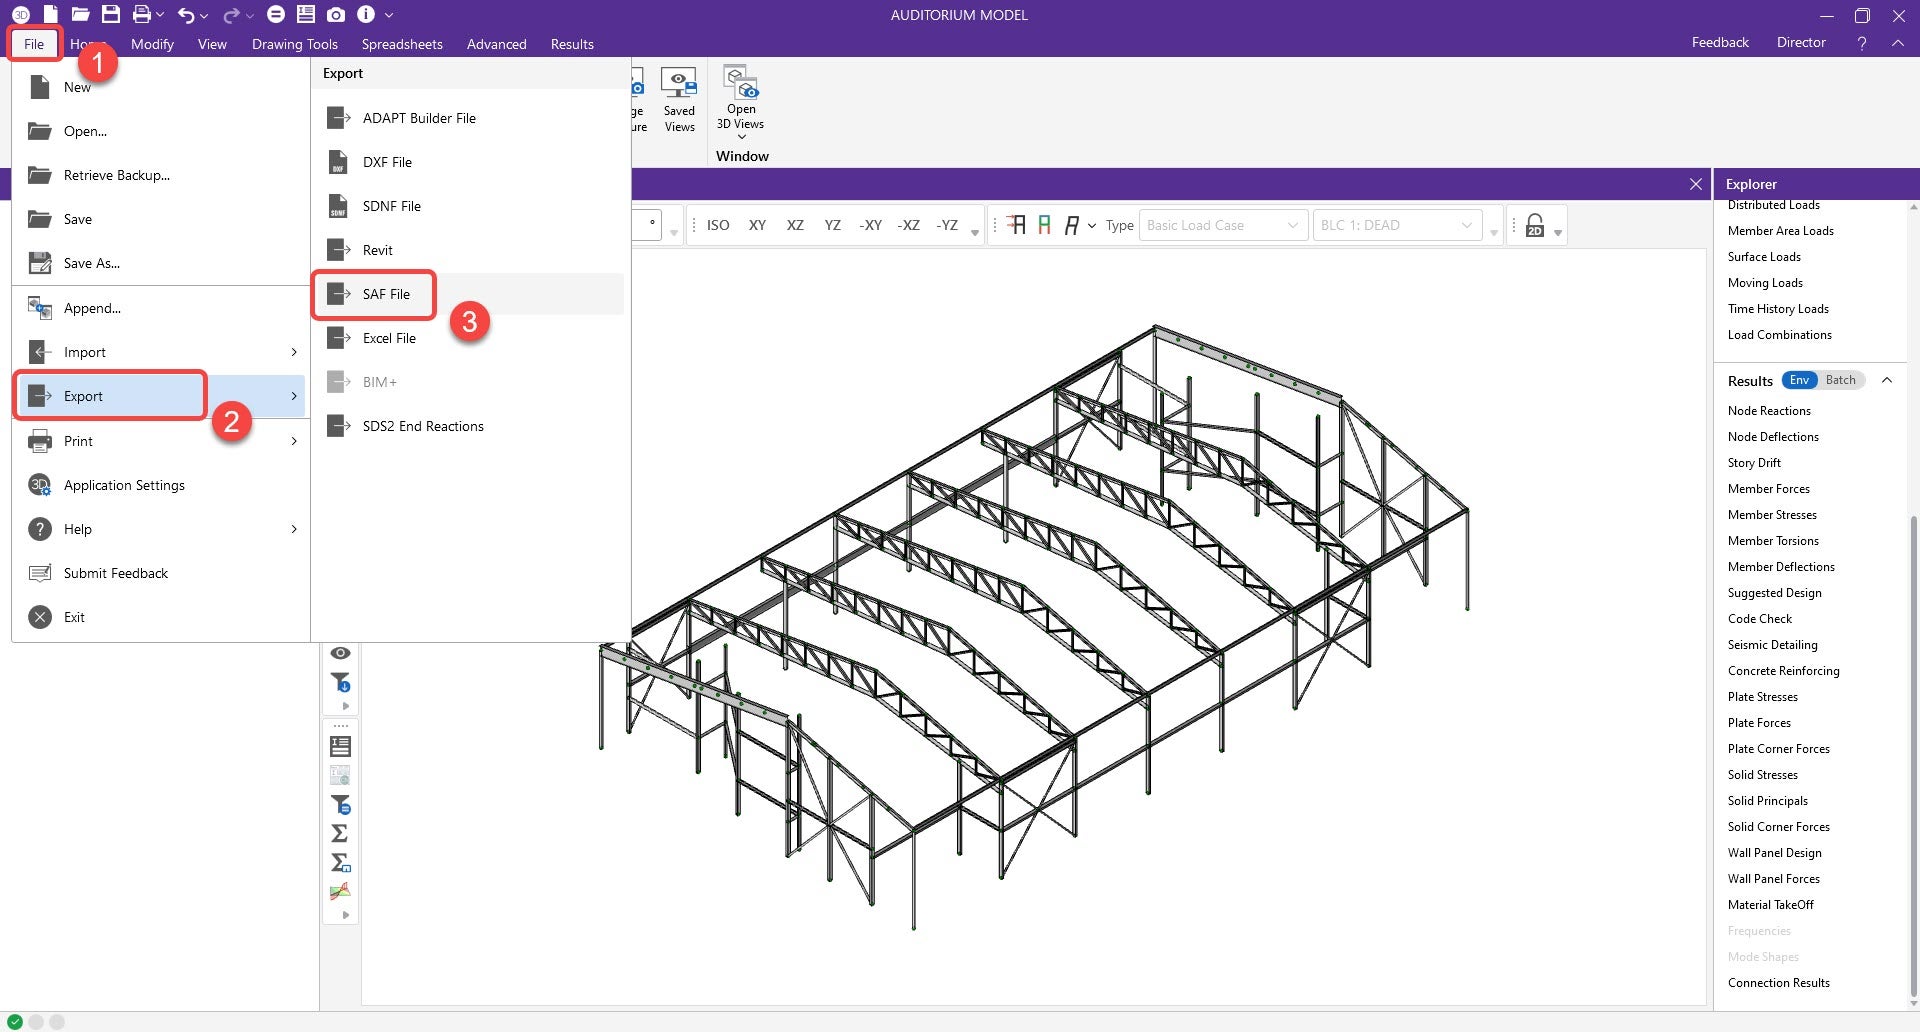
1. The user will create and save a SAF file from RISA. This option can be found under the export options. However, RISA will prompt a message stating that the Global vertical axis needs to change from Y to Z before exporting. The update will only change the global coordinate system (GCS), and not the local coordinate system (LCS).
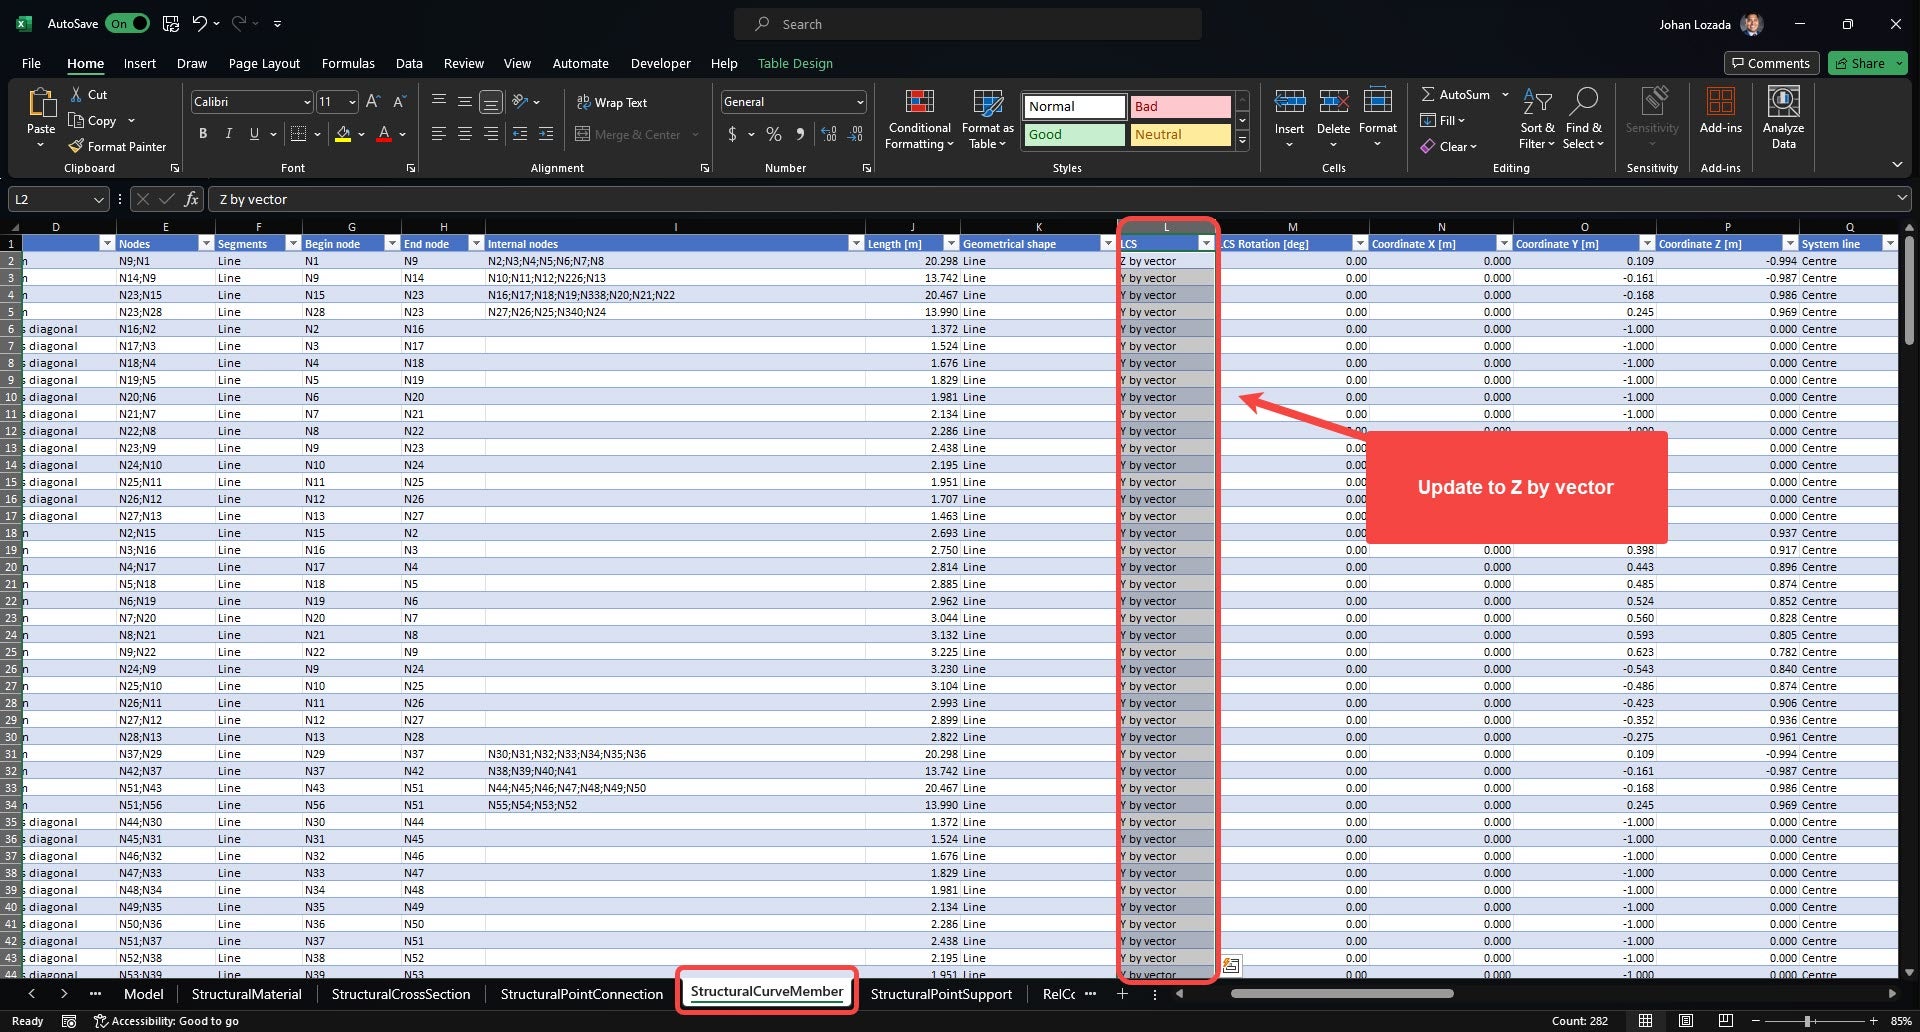
2. Open the SAF file before importing in Checkbot and go to “StructuralCurveMember” sheet.
- Change column L (LCS) from “Y by Vector” to “Z by vector” on all the members.
3. Create a new Checkbot project.
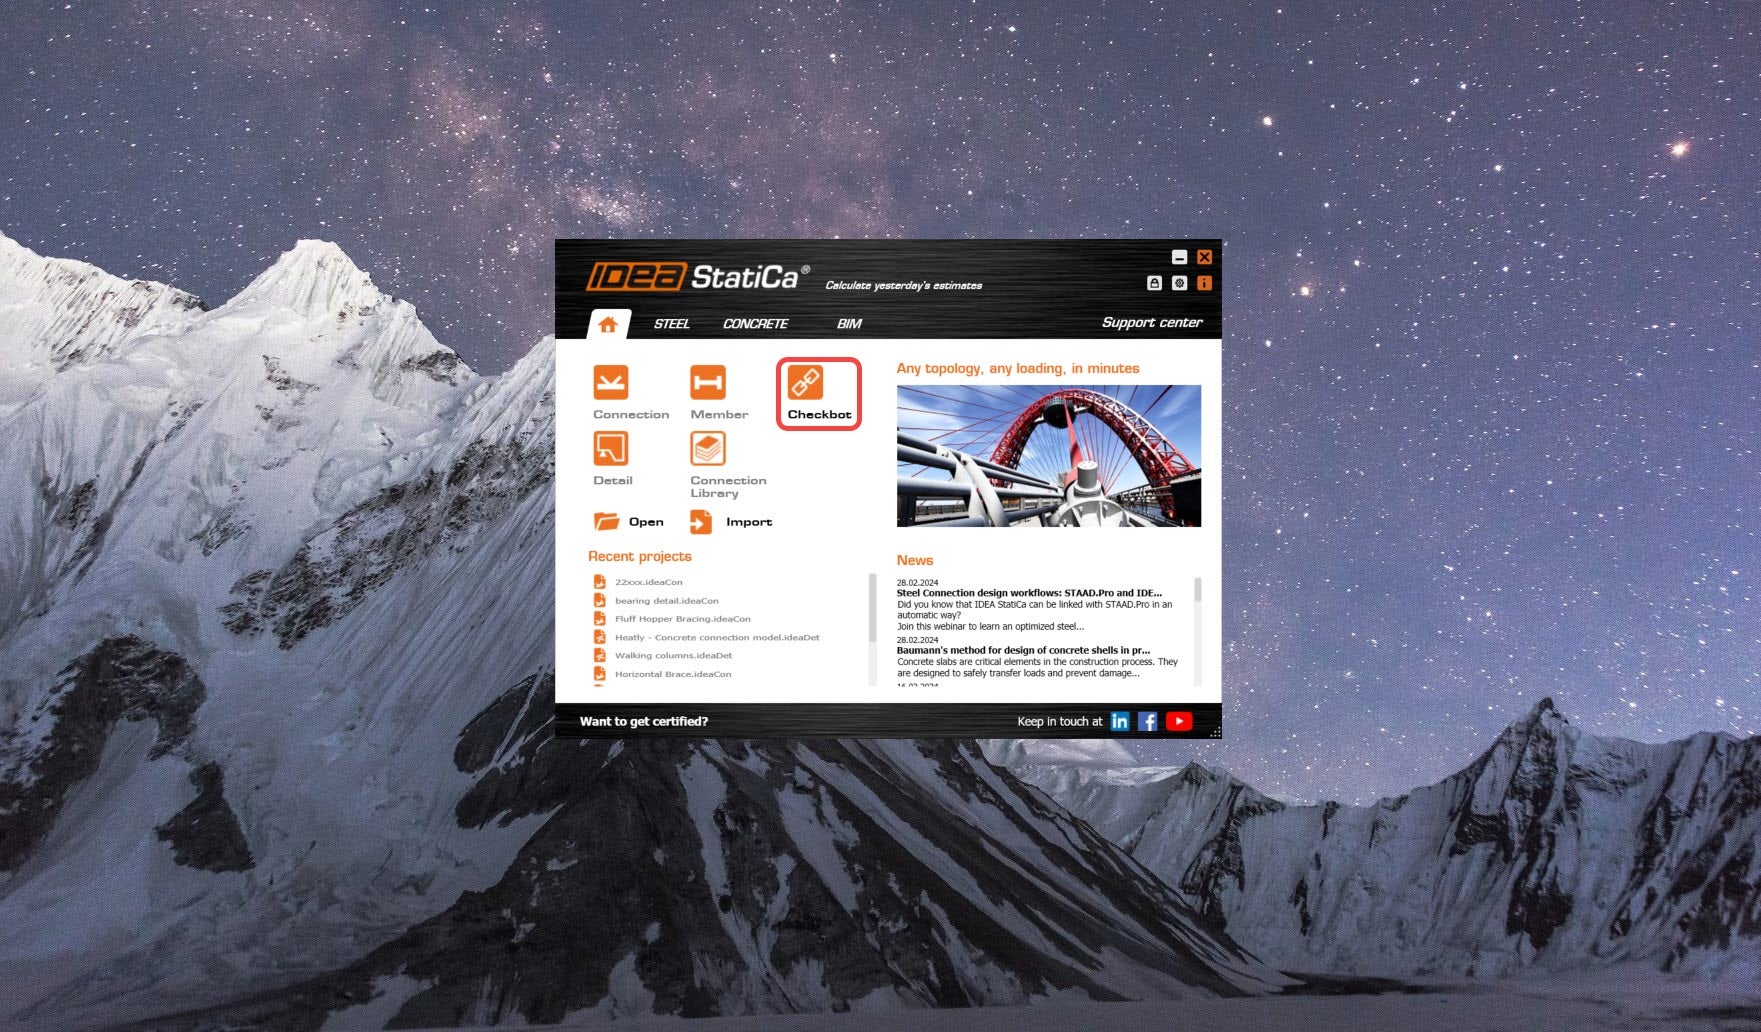
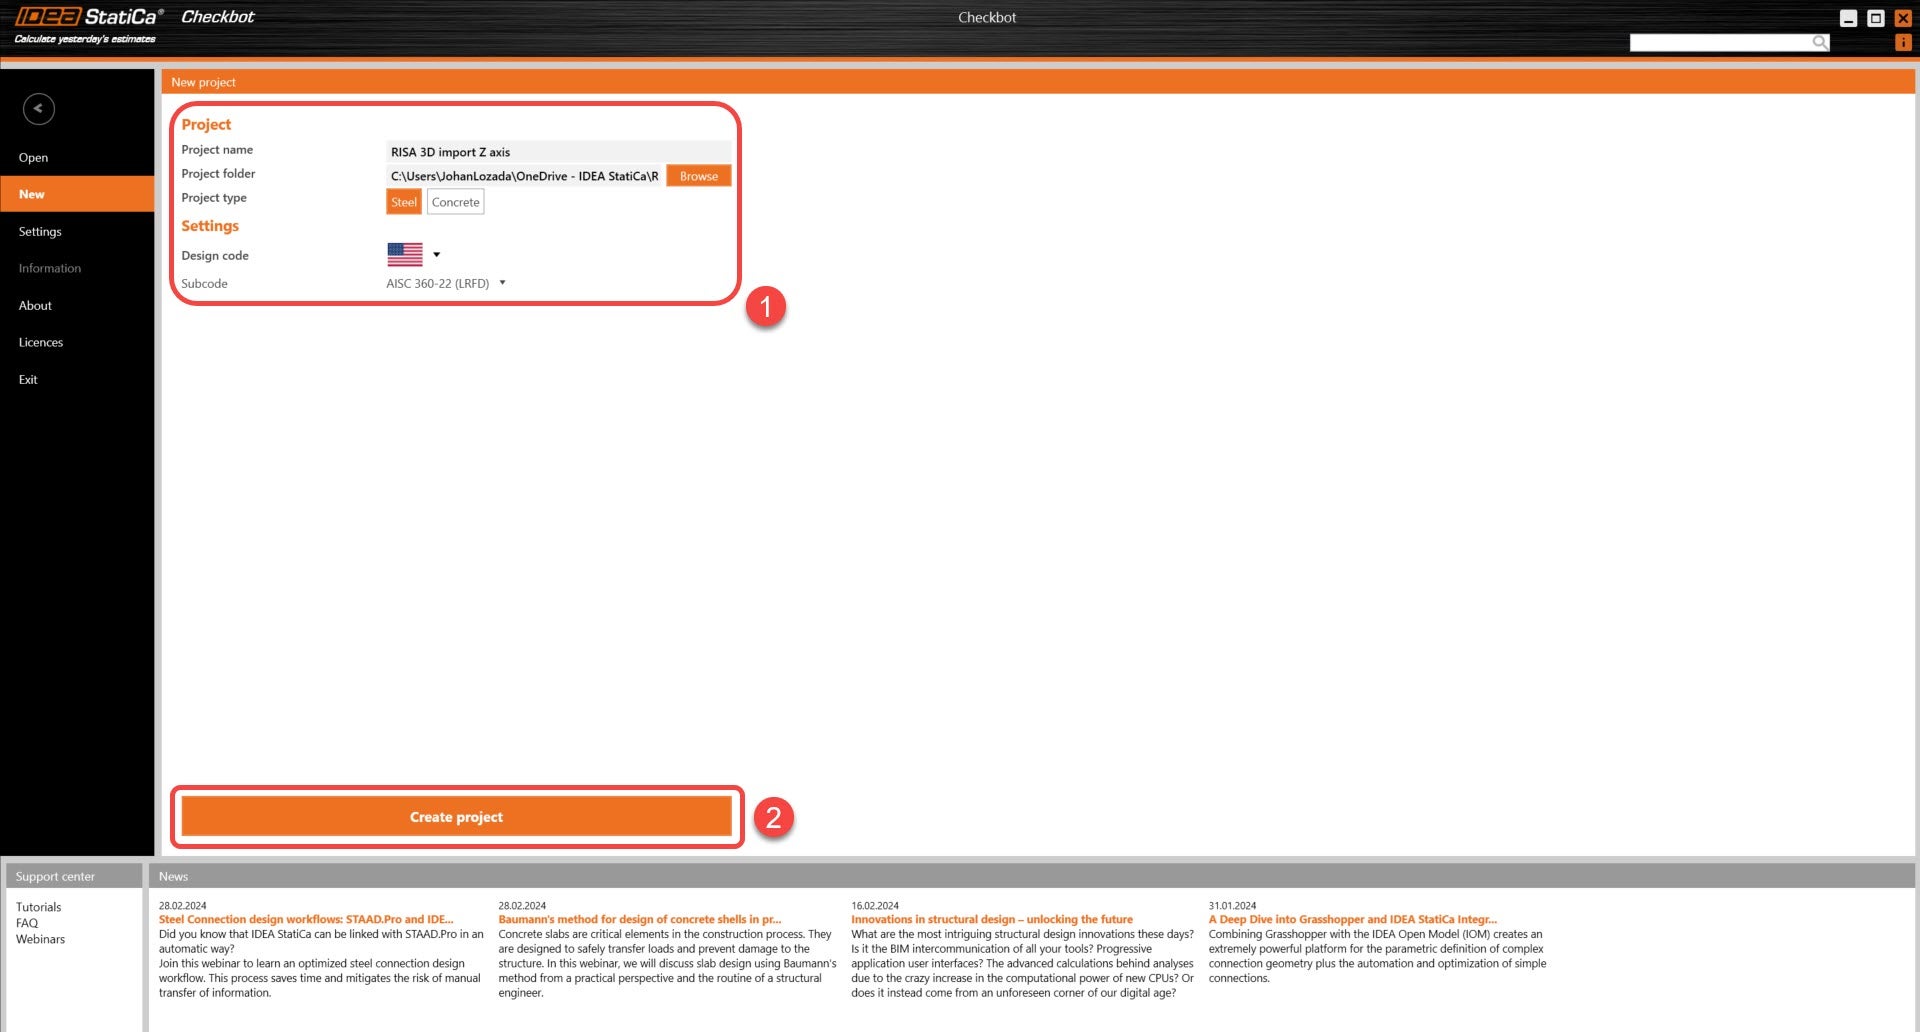
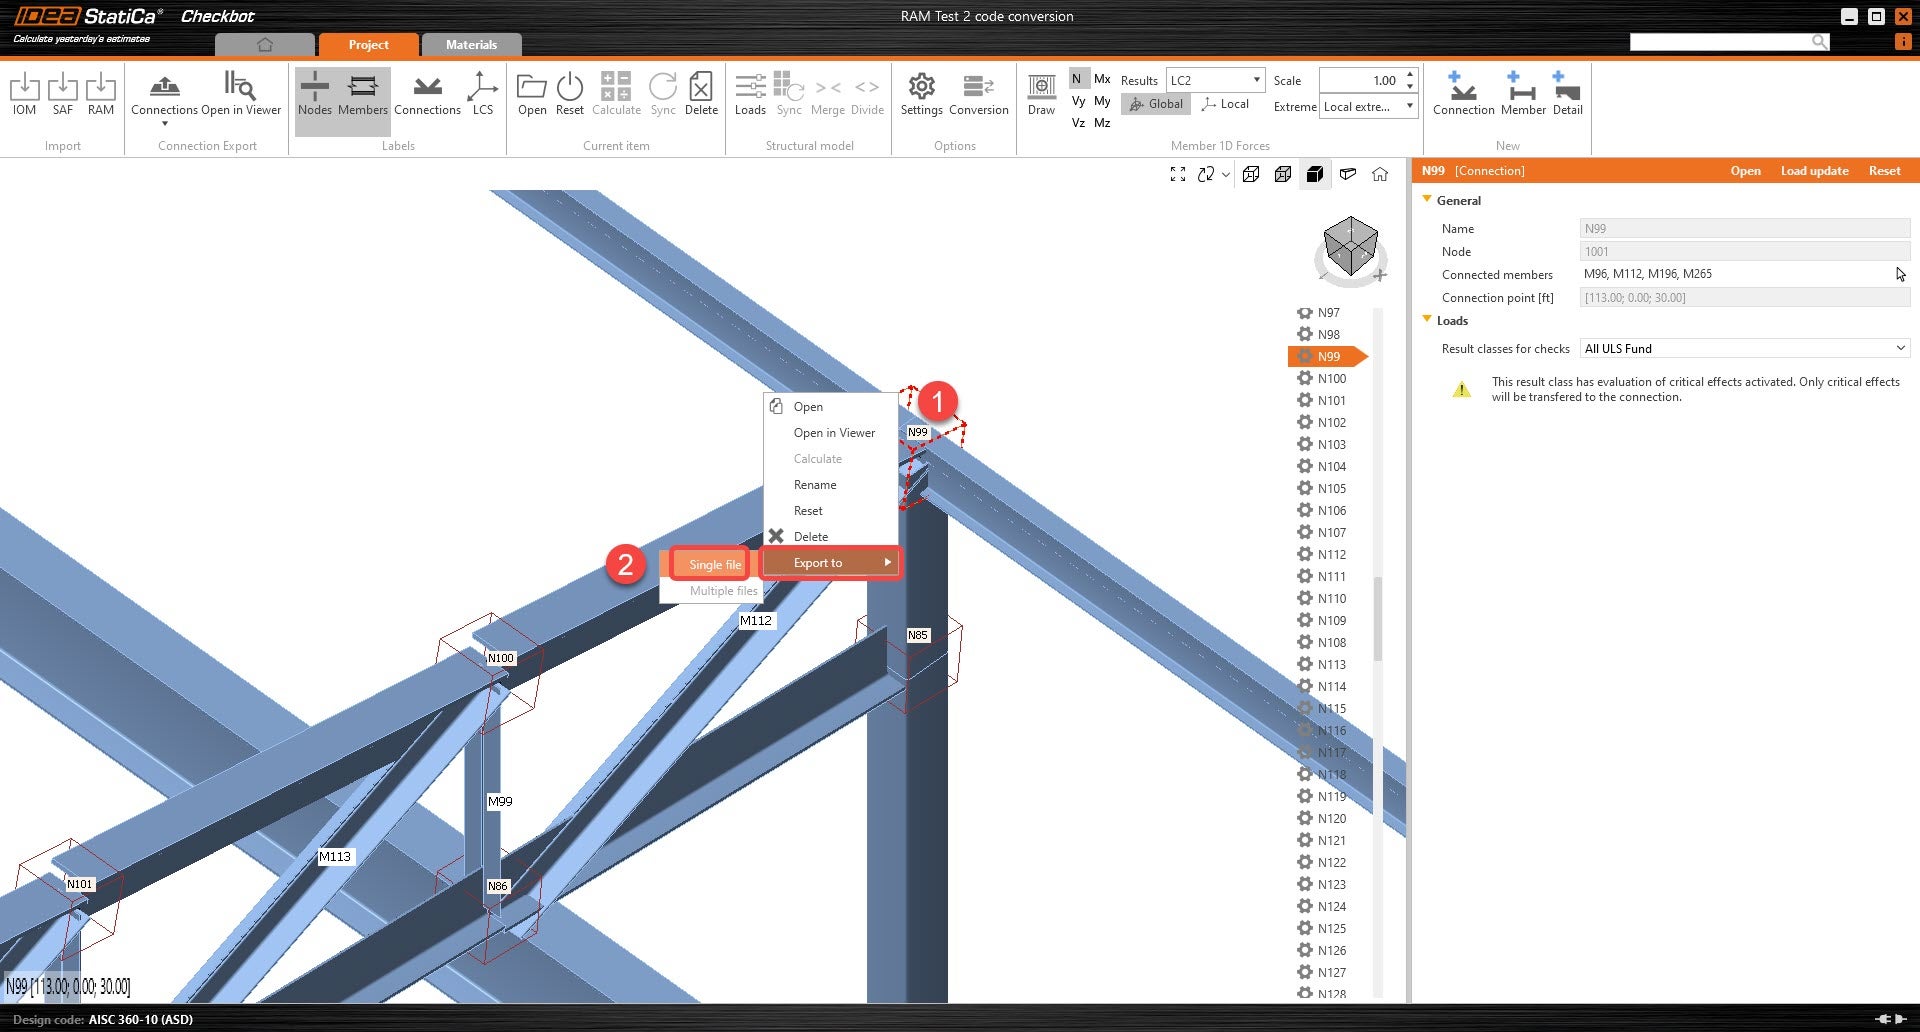
4. Import the model into new IDEA Checkbot project.
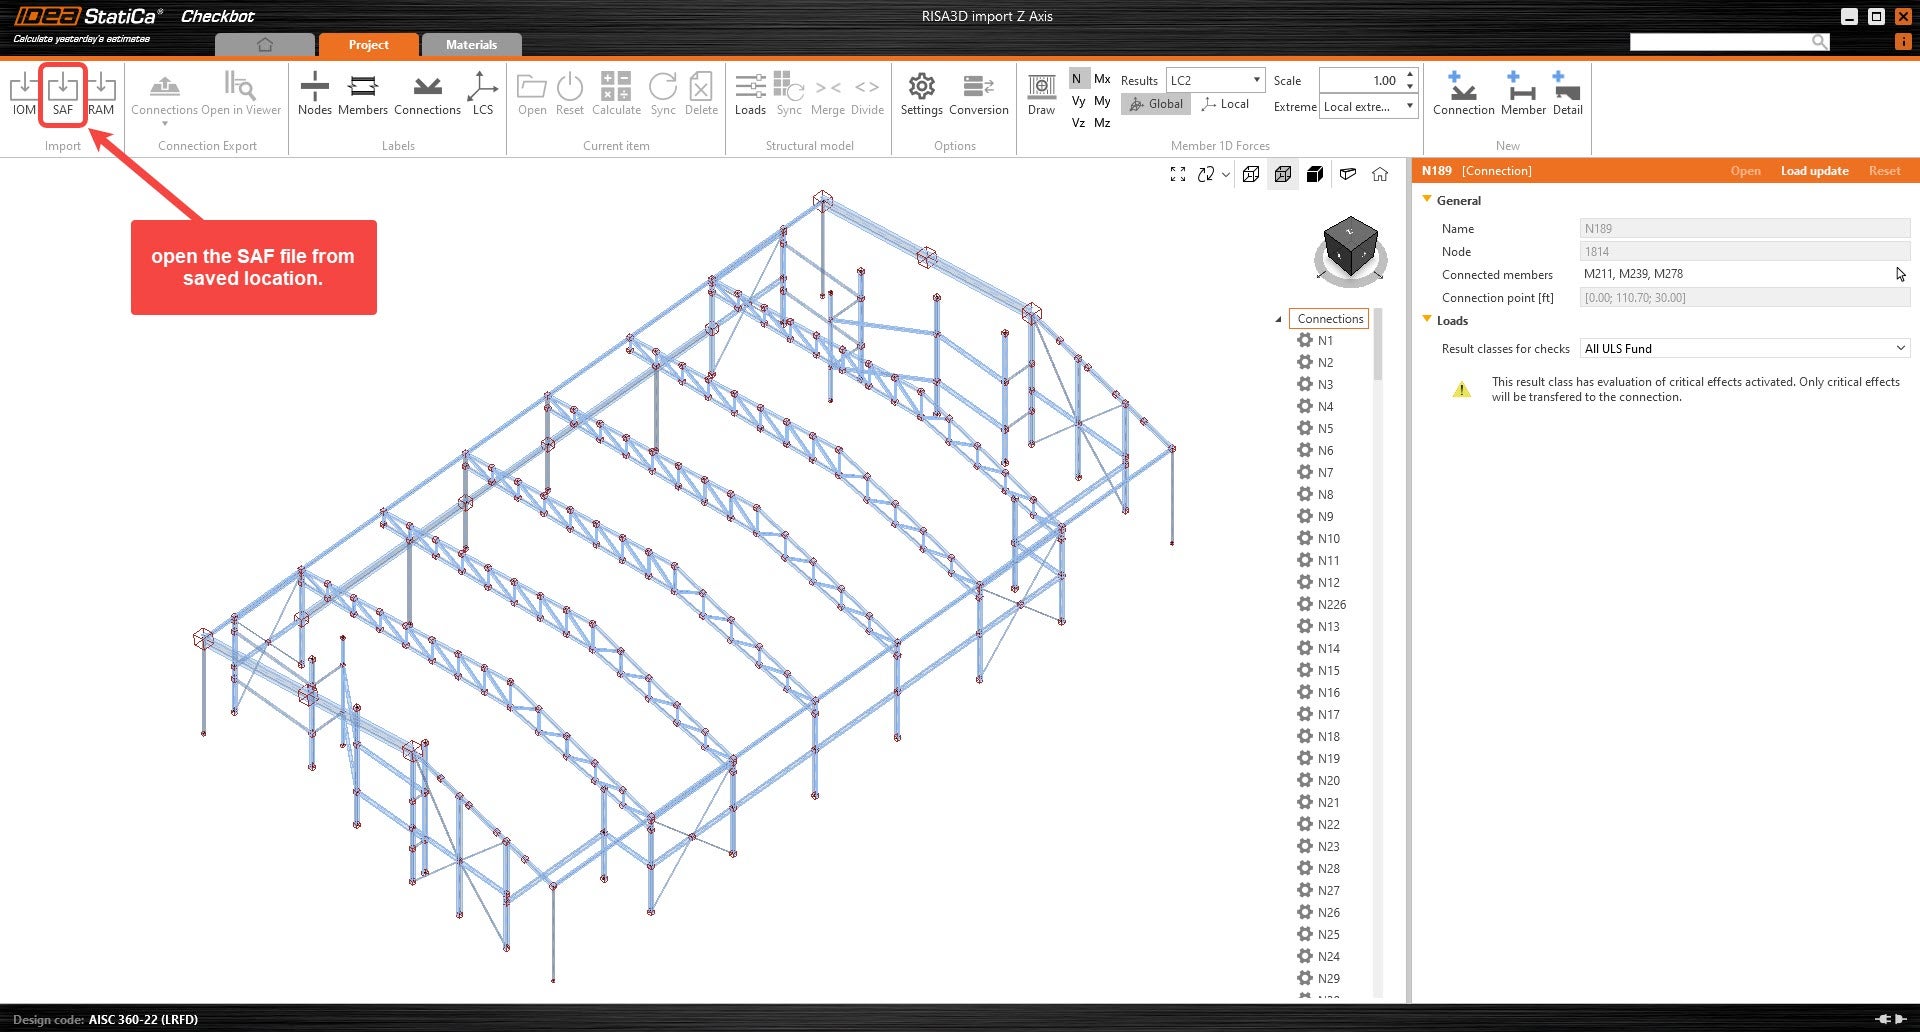
5. All symmetrical cross-sections will be fixed accordingly. Since the file contains ONLY symmetrical cross-sections, the user can begin modeling the connections.
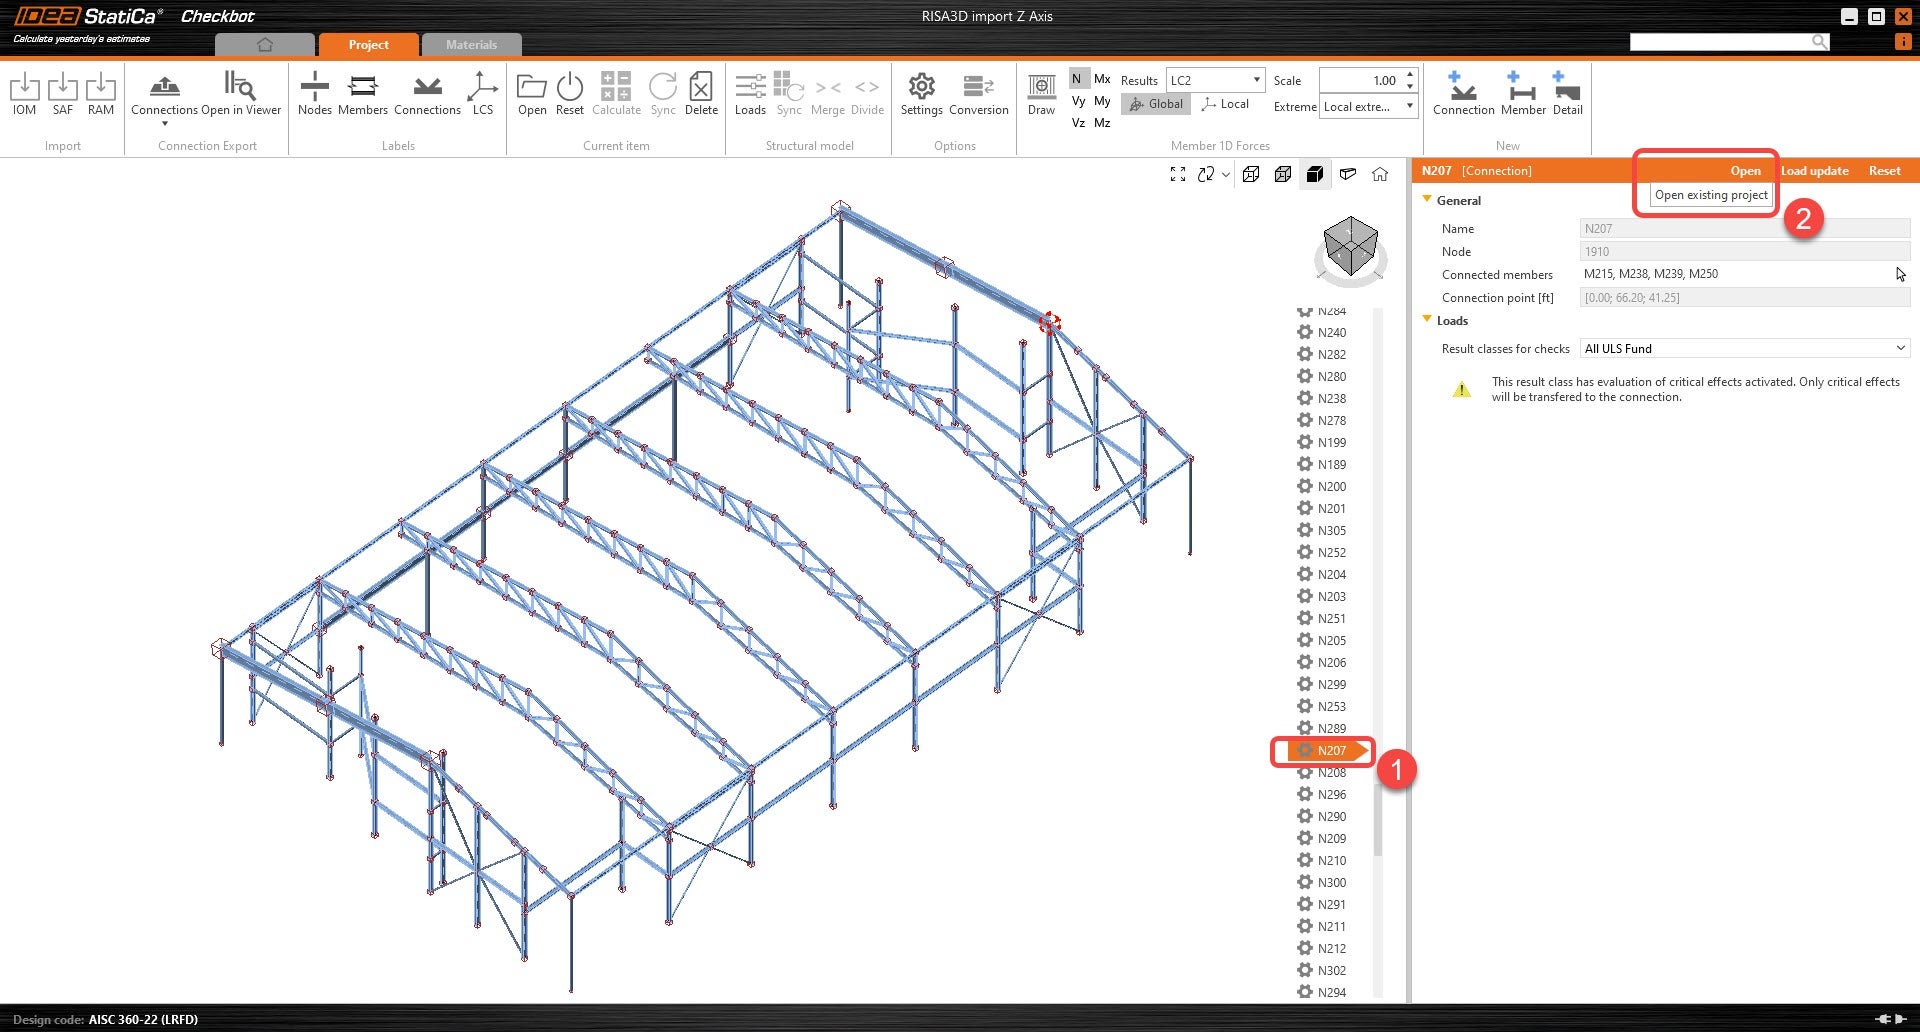
6. The user can use the attached Excel template to convert the RISA load effects to IDEA. Please refer to the RISA excel template instructions for the import process.
RISA Workflow through Checkbot
(SAF file import with Non-symmetrical cross-sections)
Notes:
This SAF-based integration is developed and maintained by RISA. IDEA StatiCa is not involved in maintaining this integration. All technical requirements and questions should be addressed to RISA directly. This approach considers that there are no rotations on the members.
Workflow:
1. The user will create and save a SAF file from RISA. This option can be found under the export options. However, RISA will prompt a message stating that the Global vertical axis needs to change from Y to Z before exporting. The update will only change the global coordinate system (GCS), and not the local coordinate system (LCS).
2. Open the SAF file before importing in Checkbot and go to “StructuralCurveMember” sheet.
- Change column L (LCS) from “Y by Vector” to “Z by vector” in all the members.
3. Create a new Checkbot project.
4. Import the model into new IDEA Checkbot project.
5. Select the member that has an incorrect rotation. Under the members parameter, click on the "+" icon to create a new cross-section. Non-symmetrical sections will allow the user to mirror the geometry of the cross-sections by either Y-axis or Z-axis before being applied to the member.
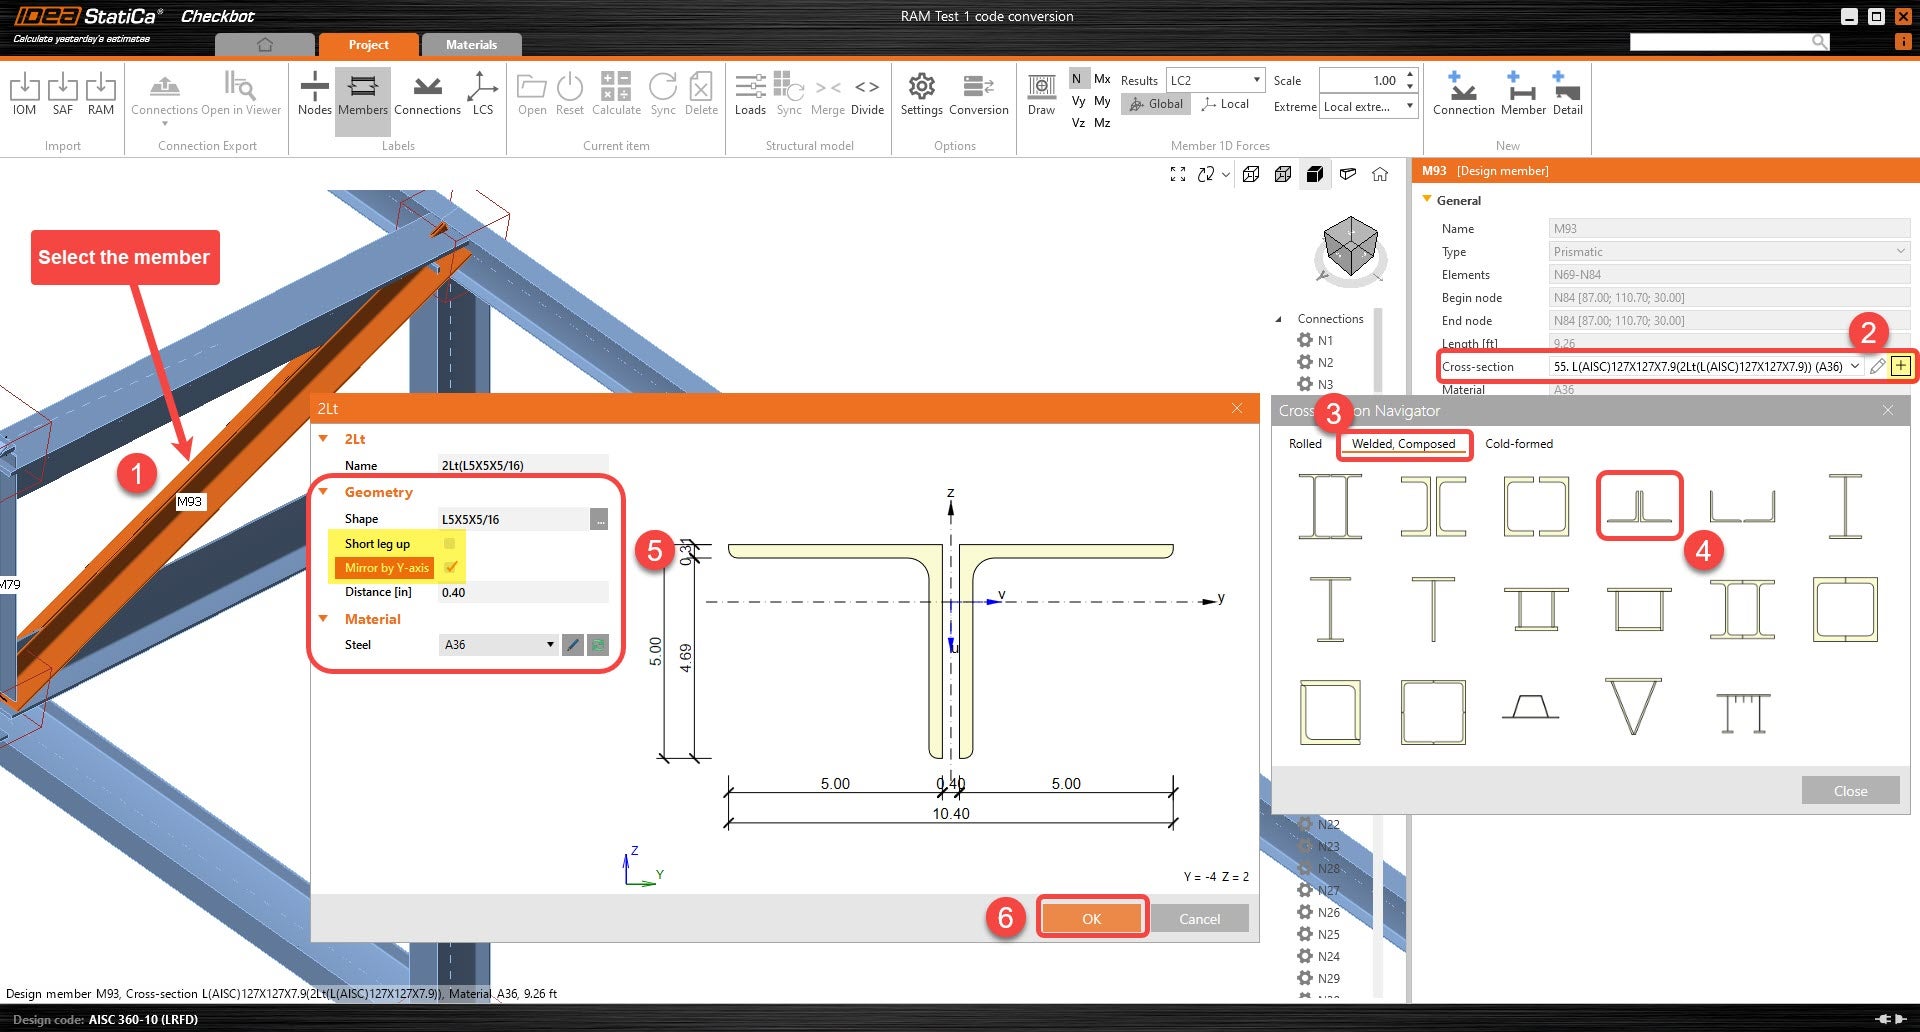
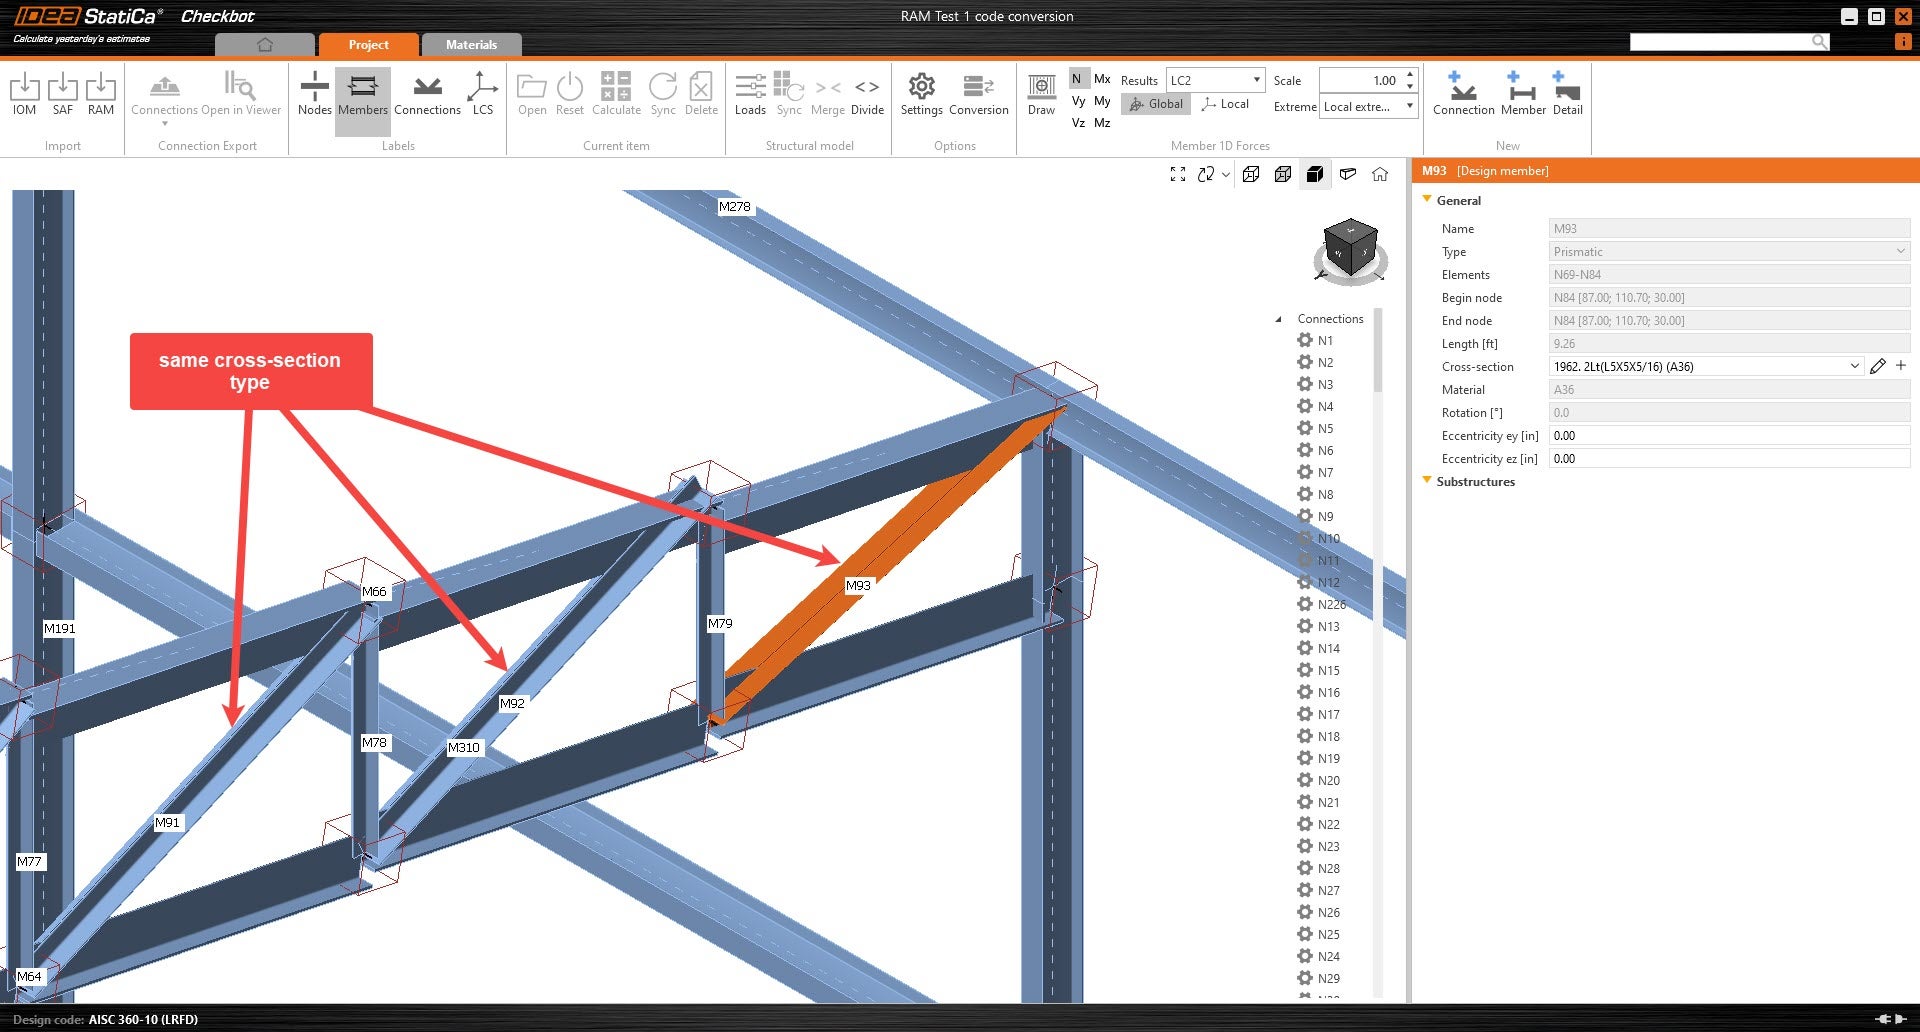
6. The option above gives the user the availability to fix the non-symmetrical cross-section without leaving Checkbot, allowing for all the connections to be in one project file. However, since a new cross-section is being created (rather than editing the existing cross-section), all affected members will have to be fixed one by one.
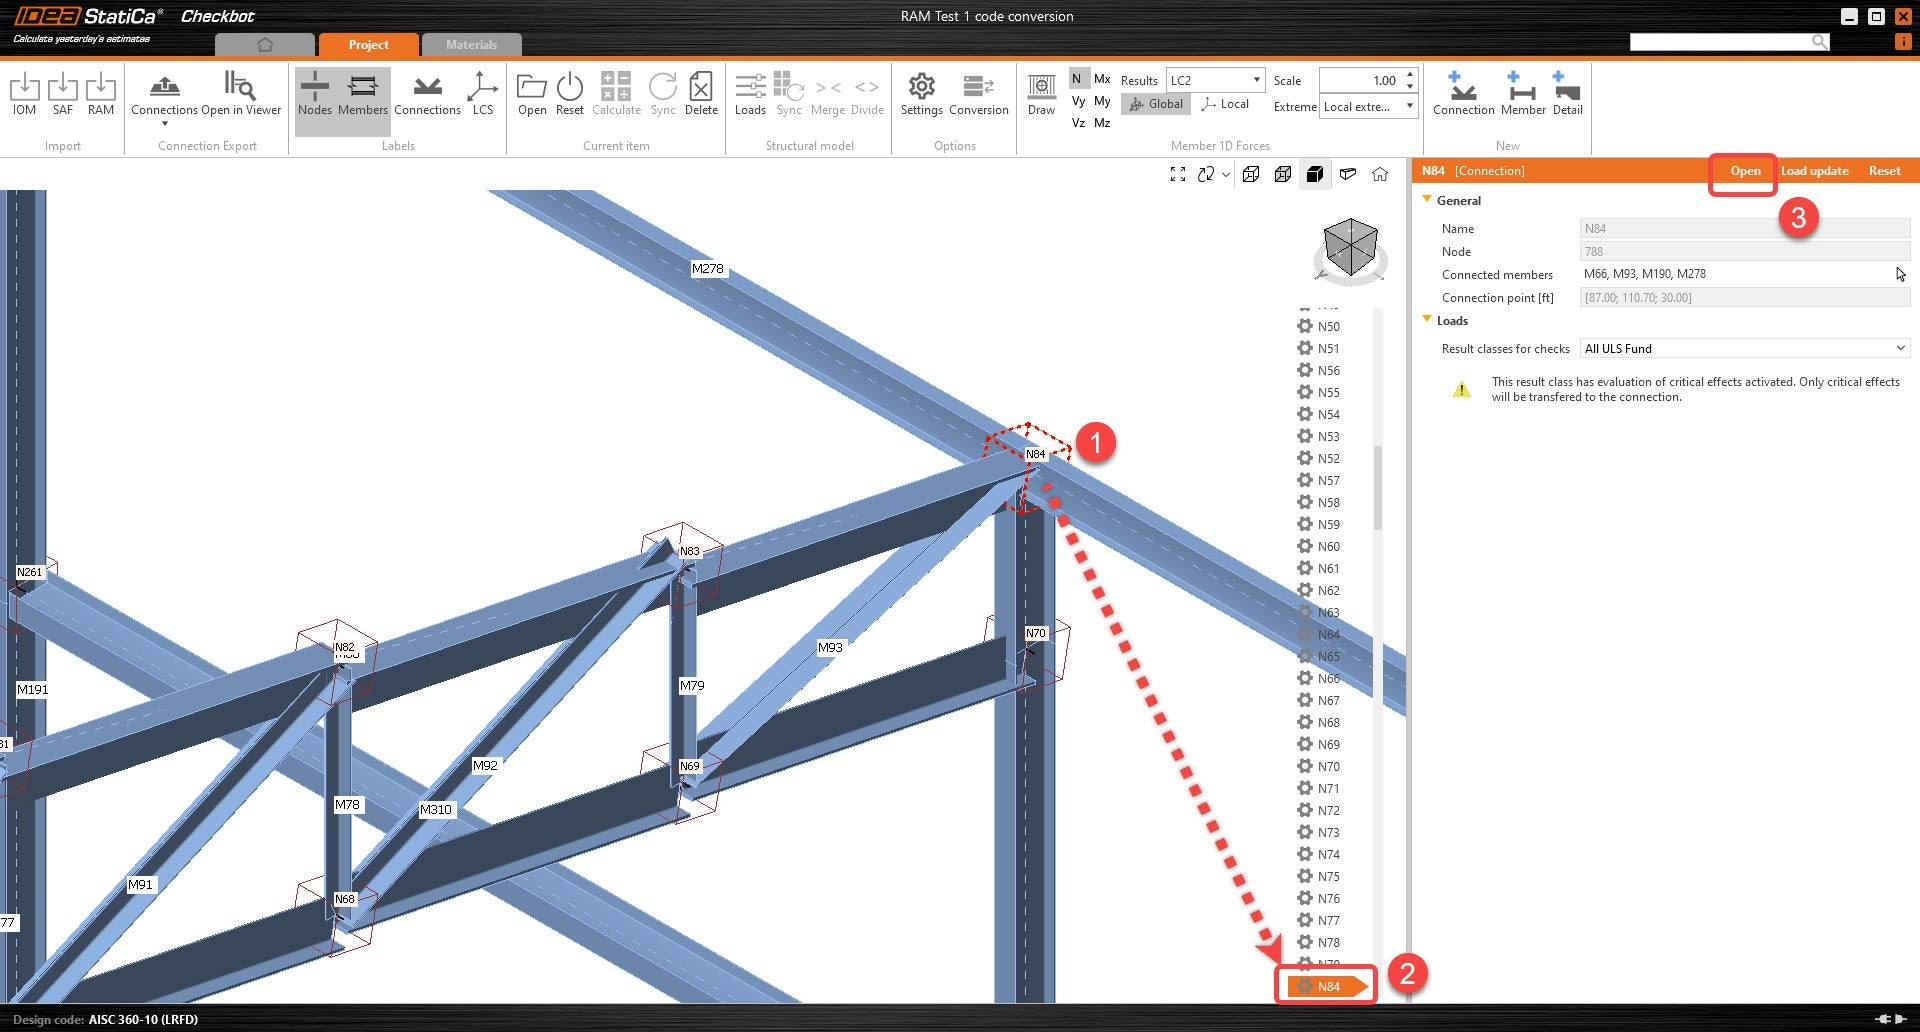
7. Once the members of the connection have been fixed, the user can open the connection and start modeling.
8. The user can use the attached Excel template to convert the RISA load effects to IDEA. Please refer to the RISA excel template instructions for the import process.
RISA excel template for importing loads
(Only use this template when following the above two workflows)
Notes:
This template assumes that the import of the connections have the same LCS x-axis on the same direction. Meaning I & J ends are shown correctly from RISA and IDEA. This SAF-based integration is developed and maintained by RISA. IDEA StatiCa is not involved in maintaining this integration. All technical requirements and questions should be addressed to RISA directly.
The Following link contains the excel template for importing loads:
Workflow:
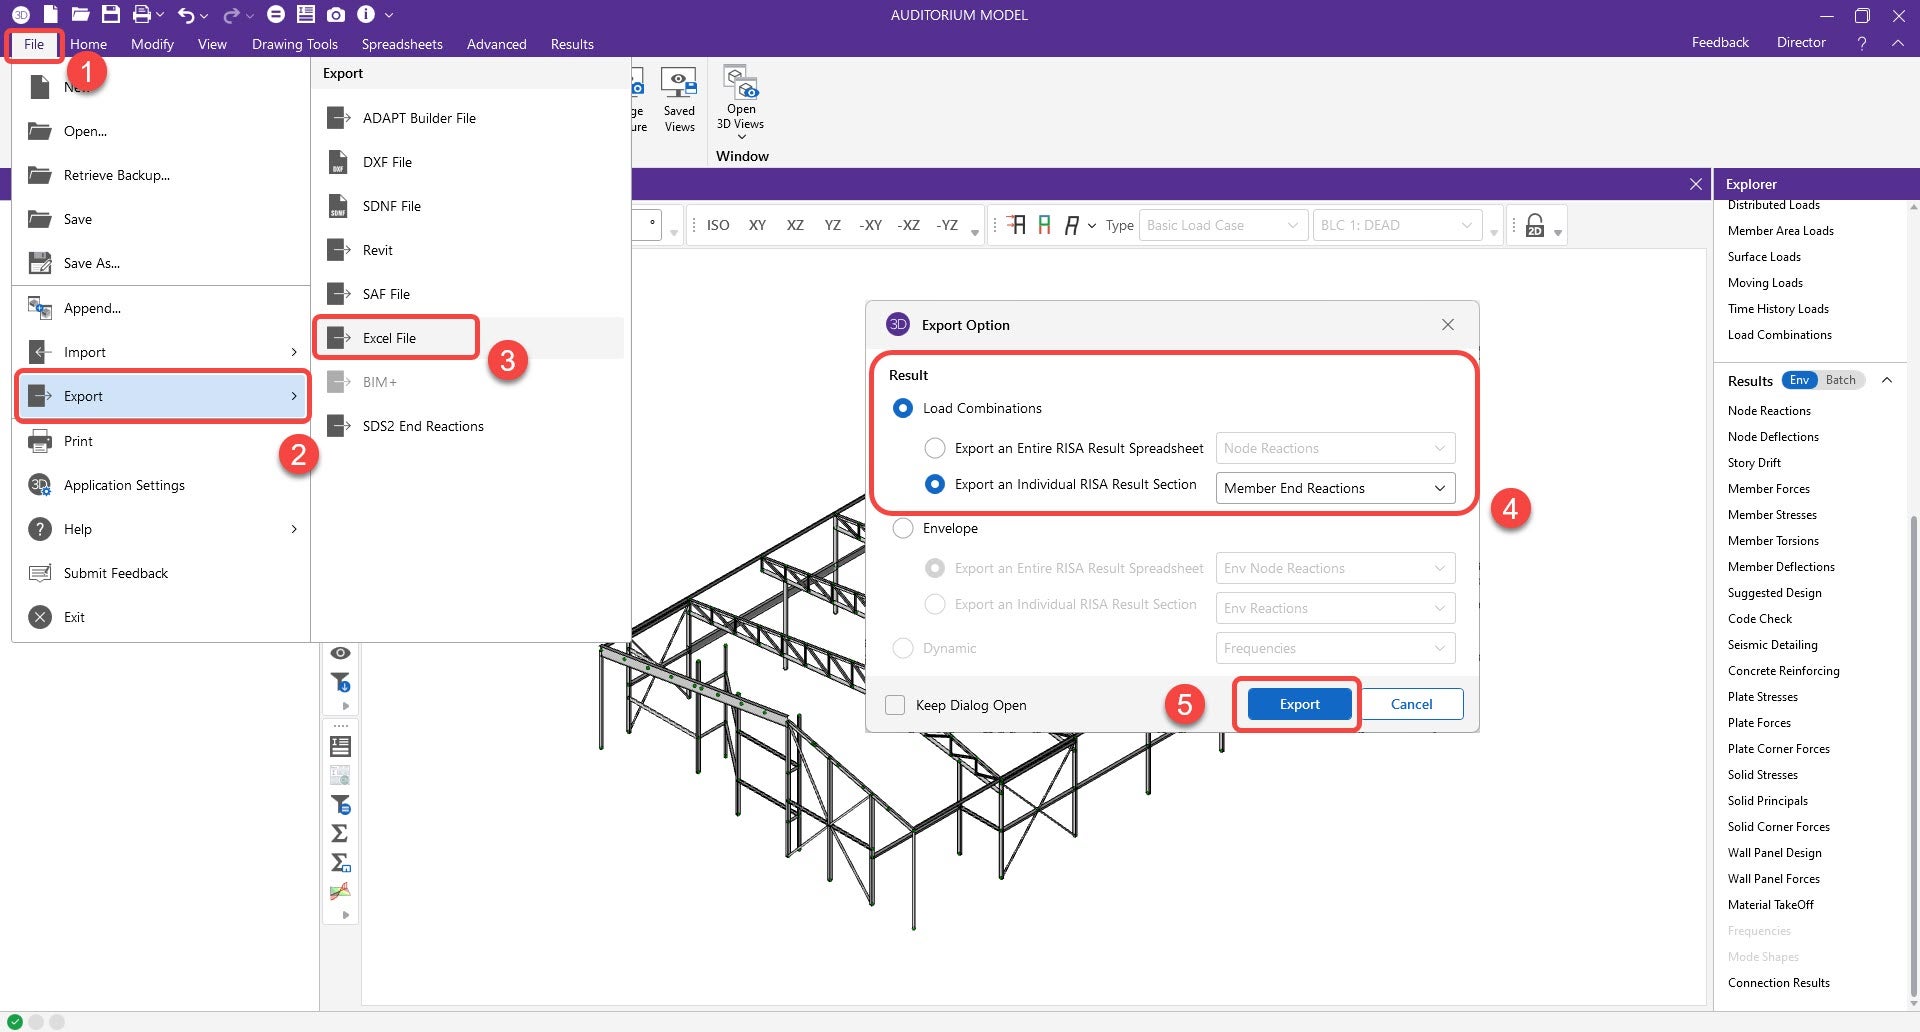
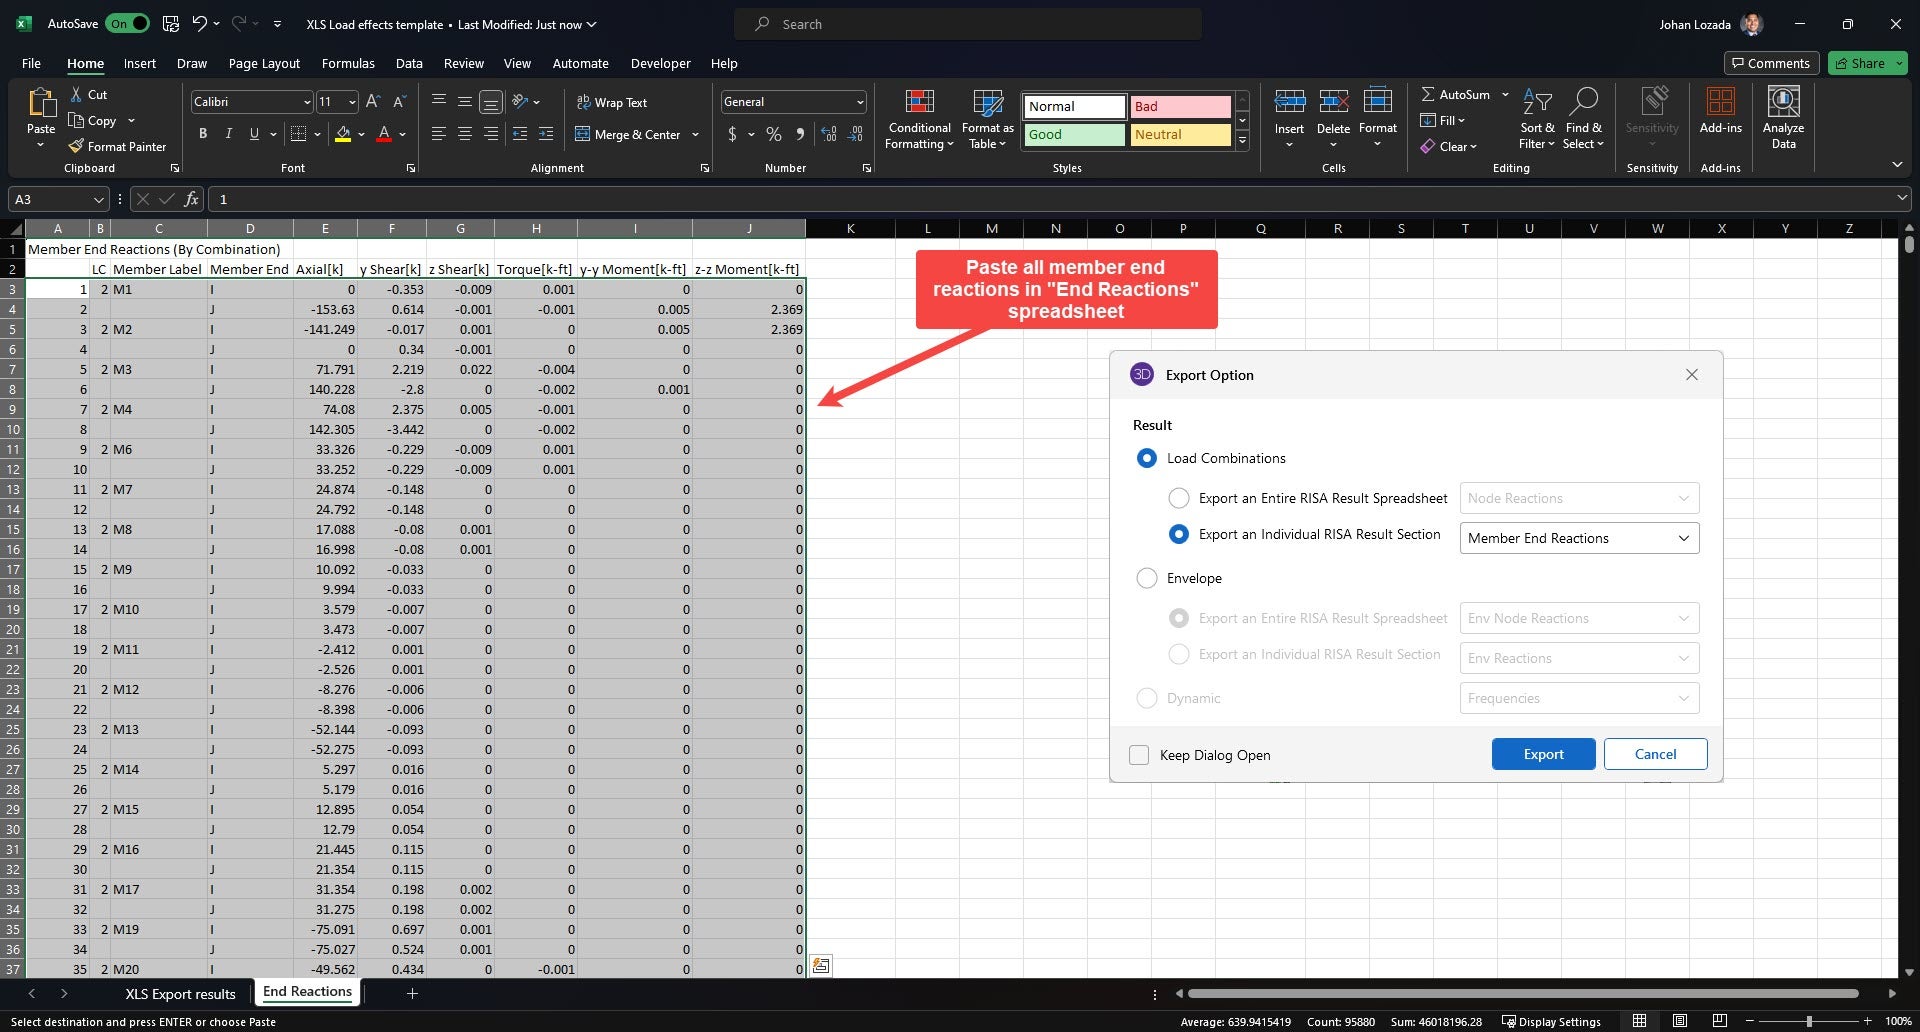
1. Export and save the load results from RISA. Ensure that the load combination results for the member end reactions are exported.
- File --> Export --> Excel file --> Load combinations --> Export an individual RISA Result Section --> Member End Reactions
2. Open the Excel file. Select and copy all the member force information from rows A-J.
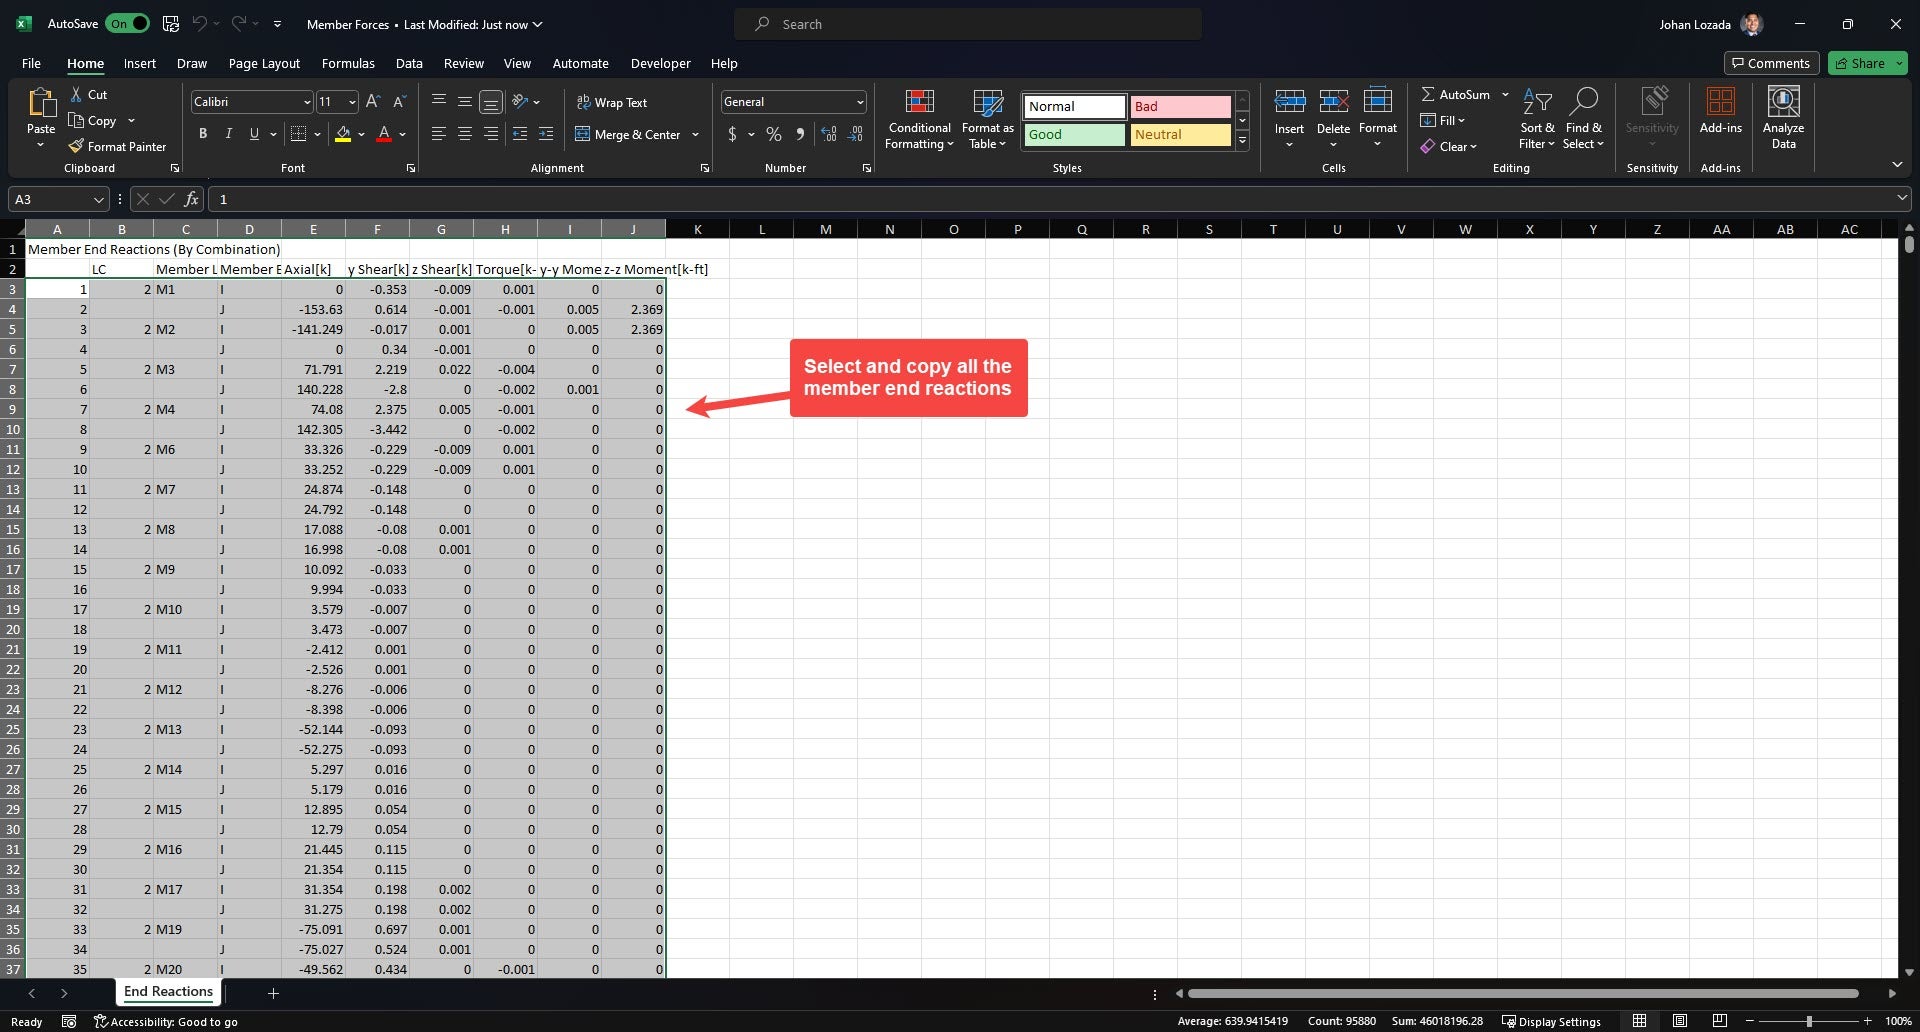
3. Paste the copied information onto the “End Reactions” spreadsheet of the Excel Template.
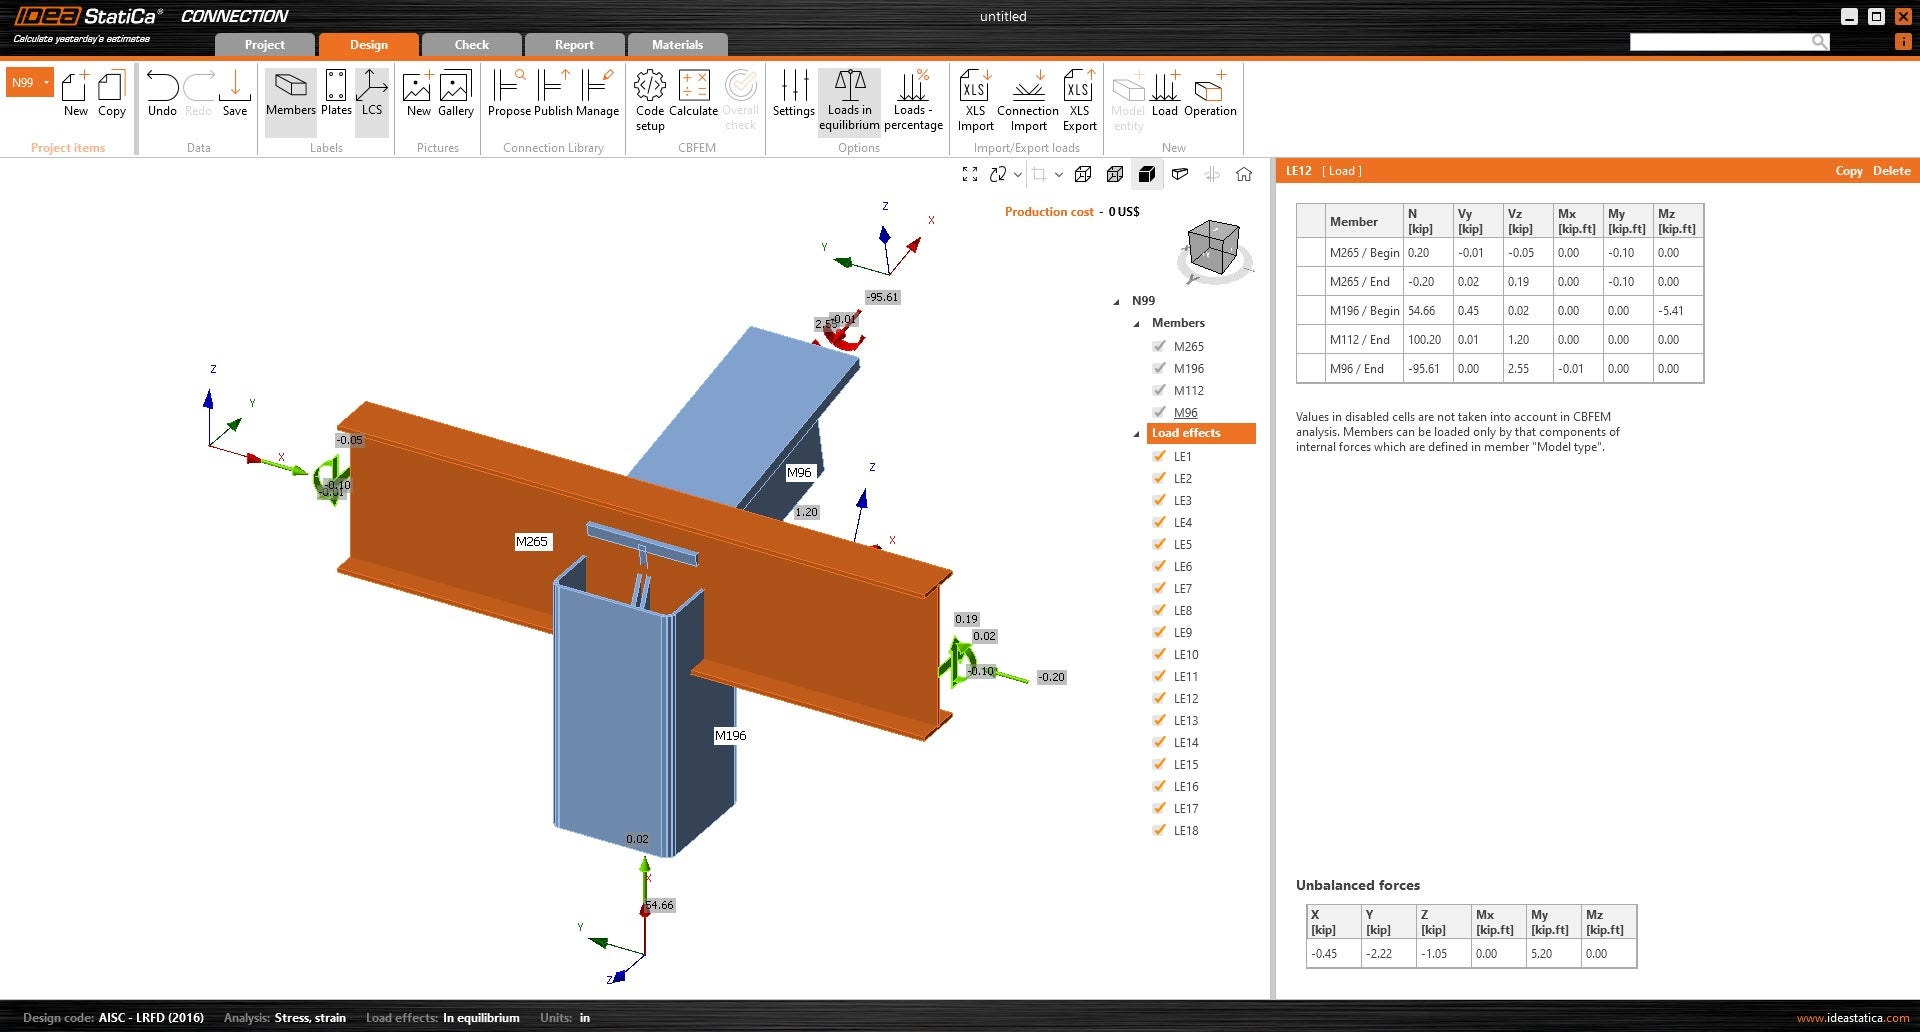
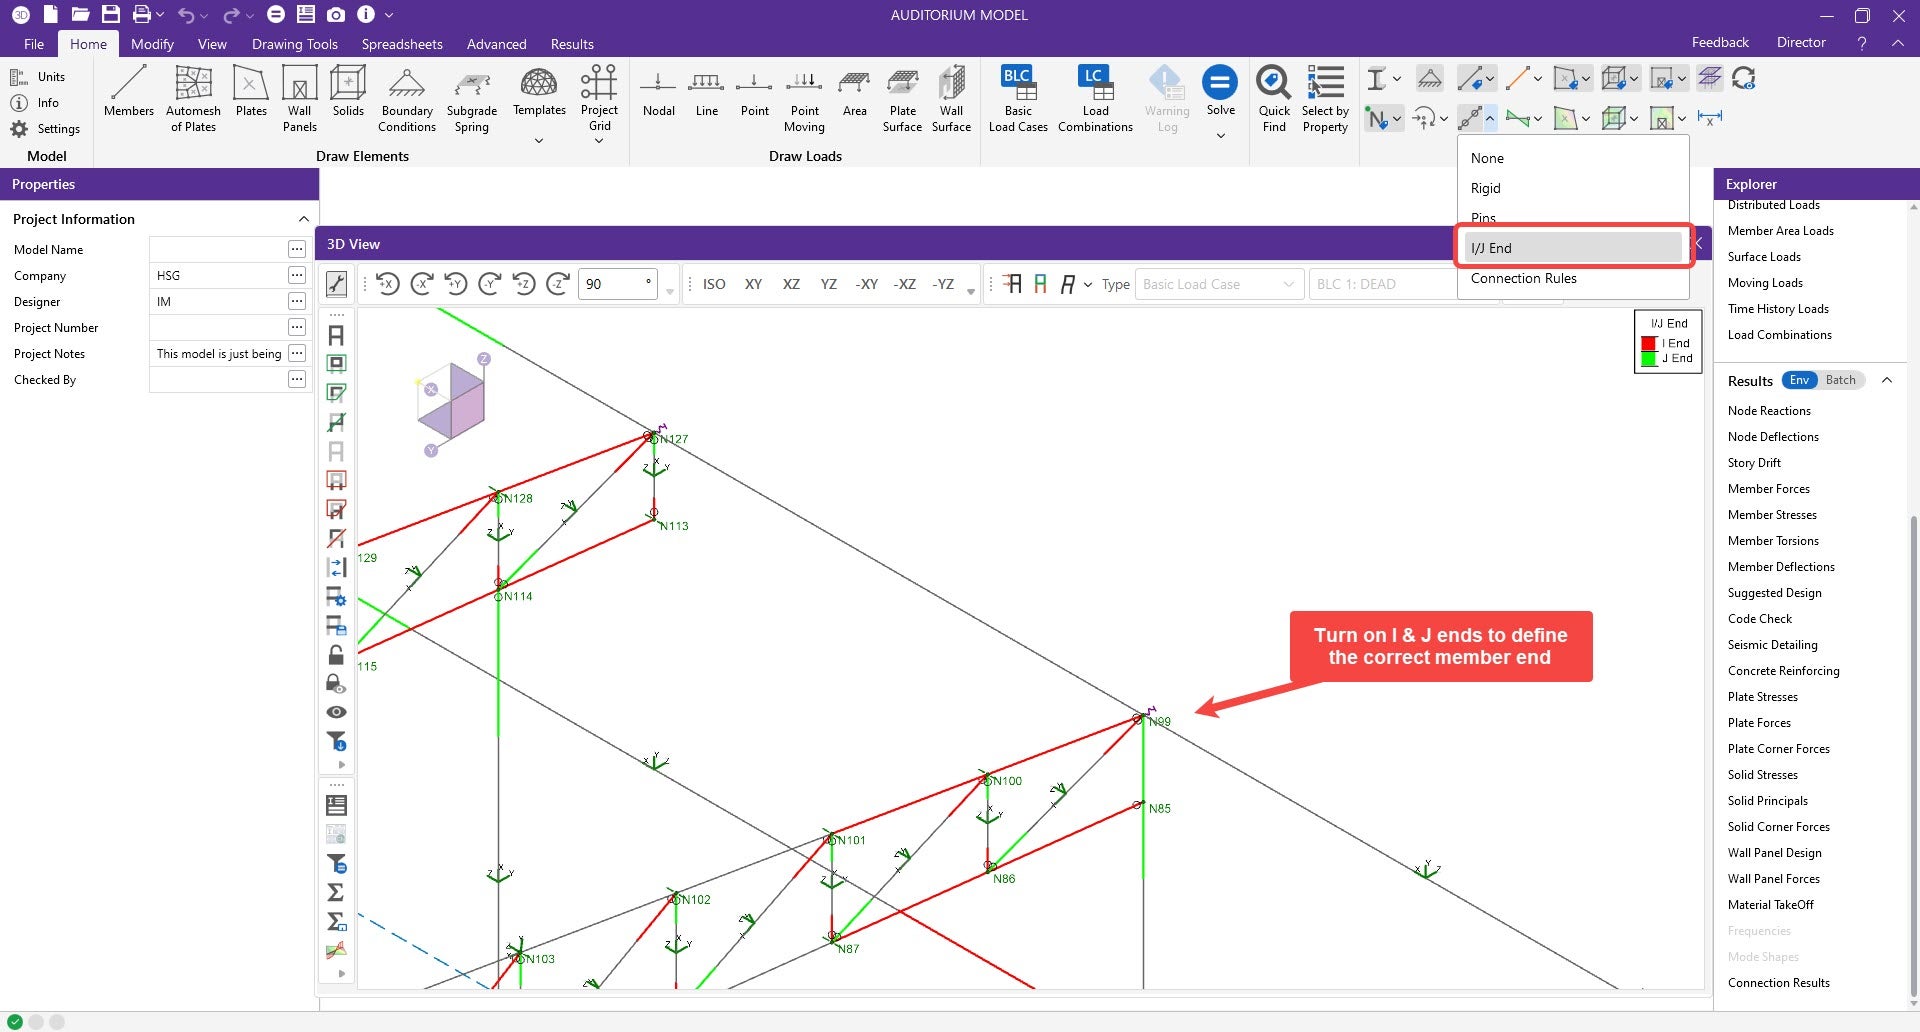
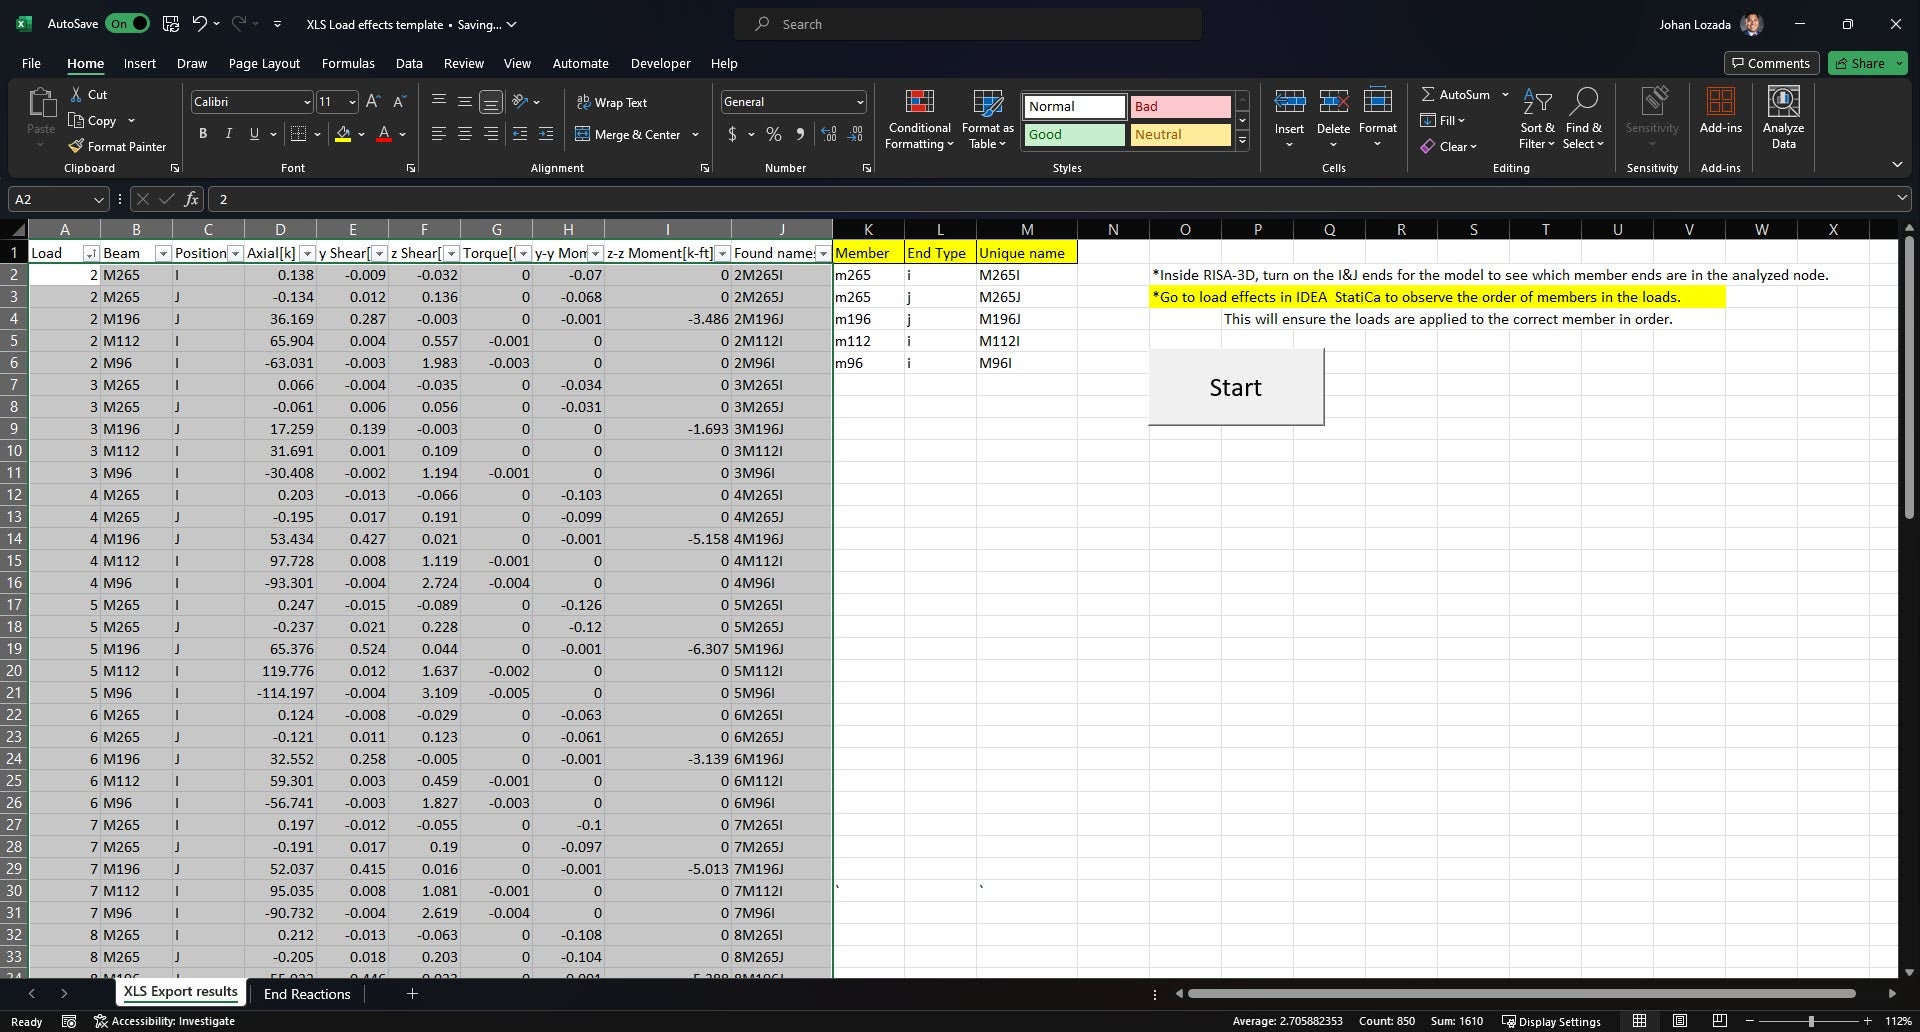
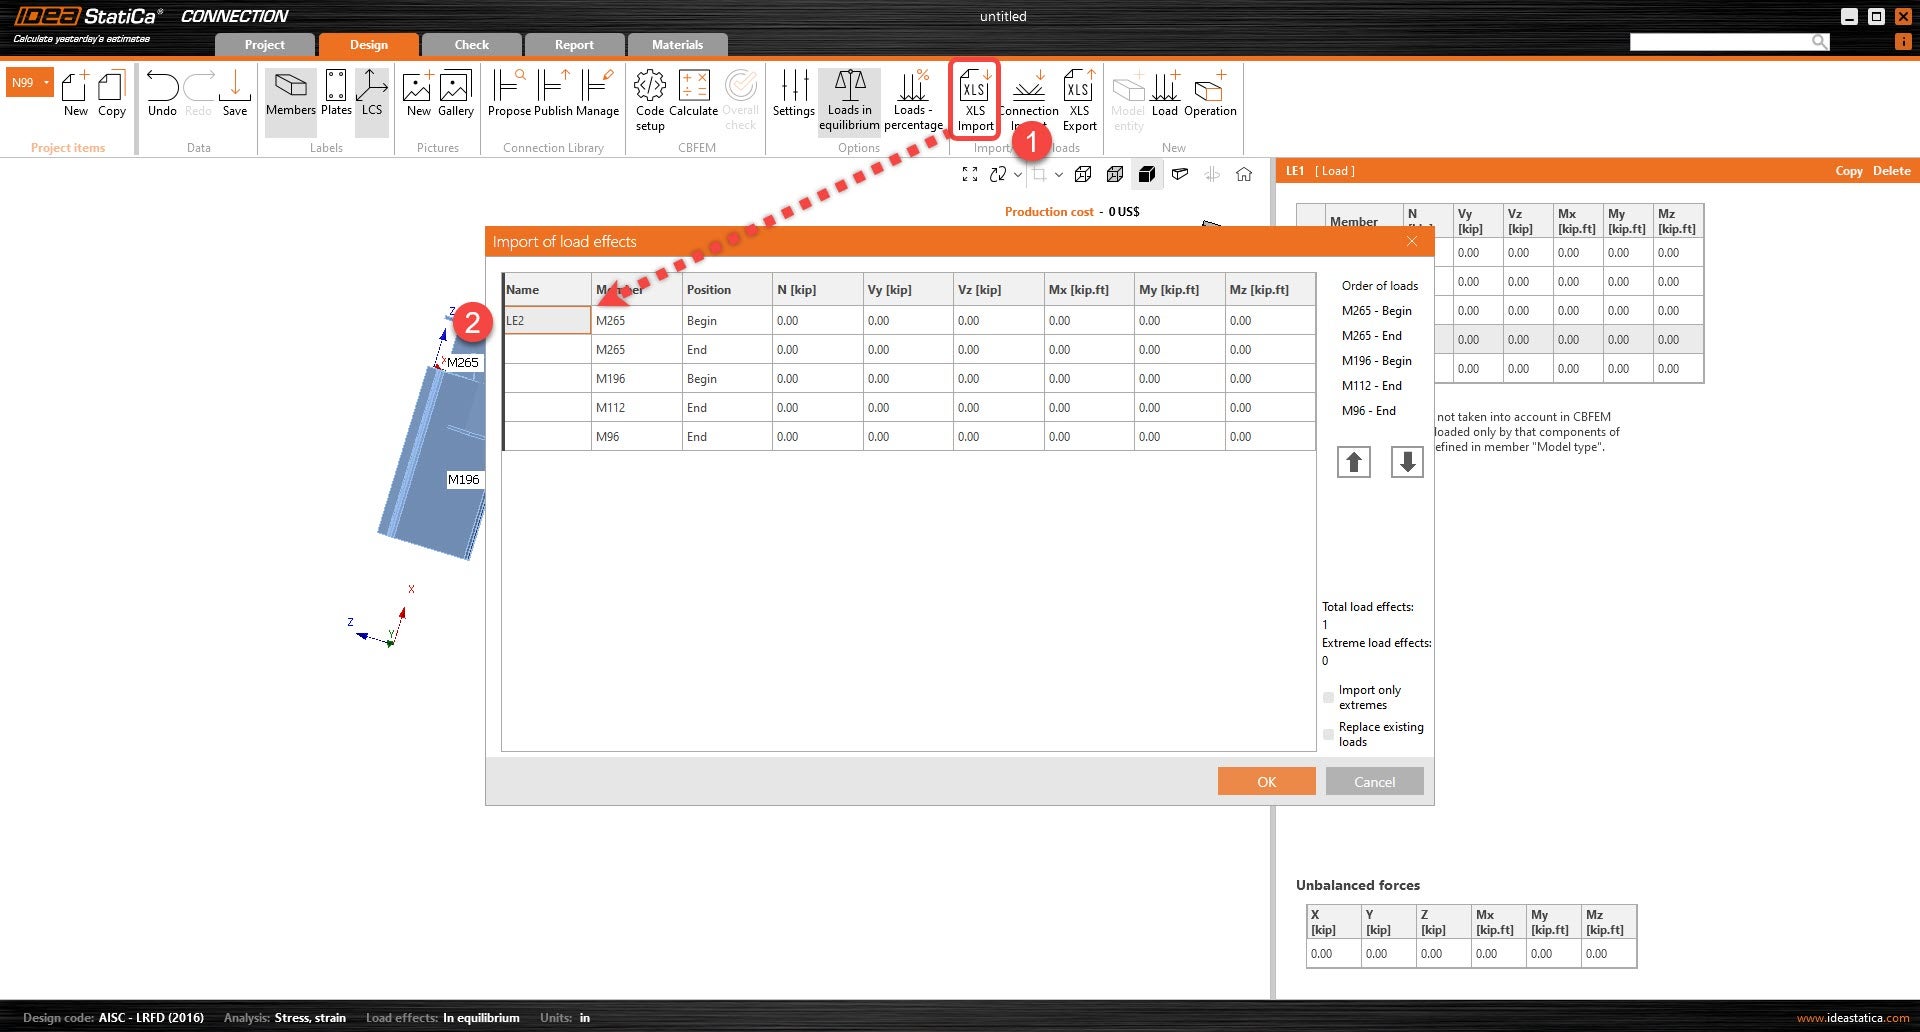
4. Under XLS Export results, Enter the analyzed members in the connection, along with the corresponding end type (I or J end). Ensure that the order of members is in the same order as IDEA load effects. The I and J ends should also match those from RISA-3D.

5. Click “start” so that the excel can convert the loads to be imported onto IDEA. Select all the load effects from rows A-J and copy them.
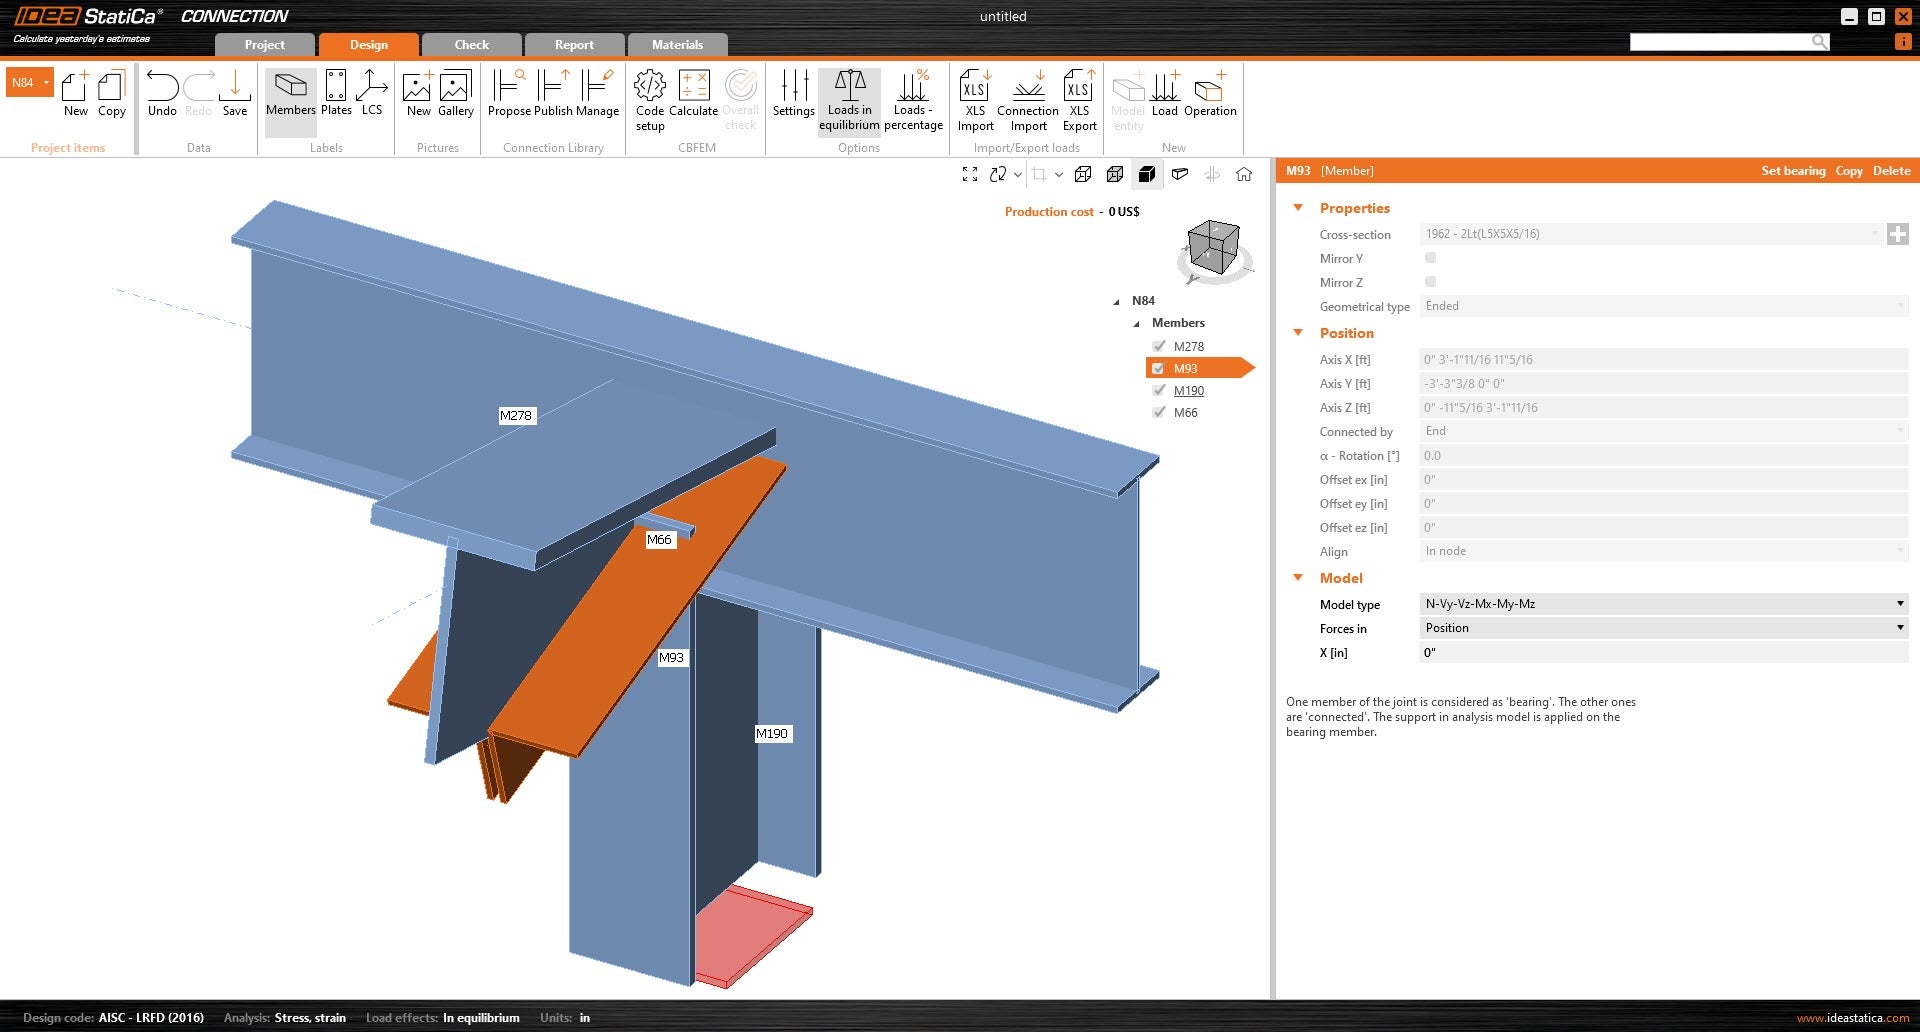
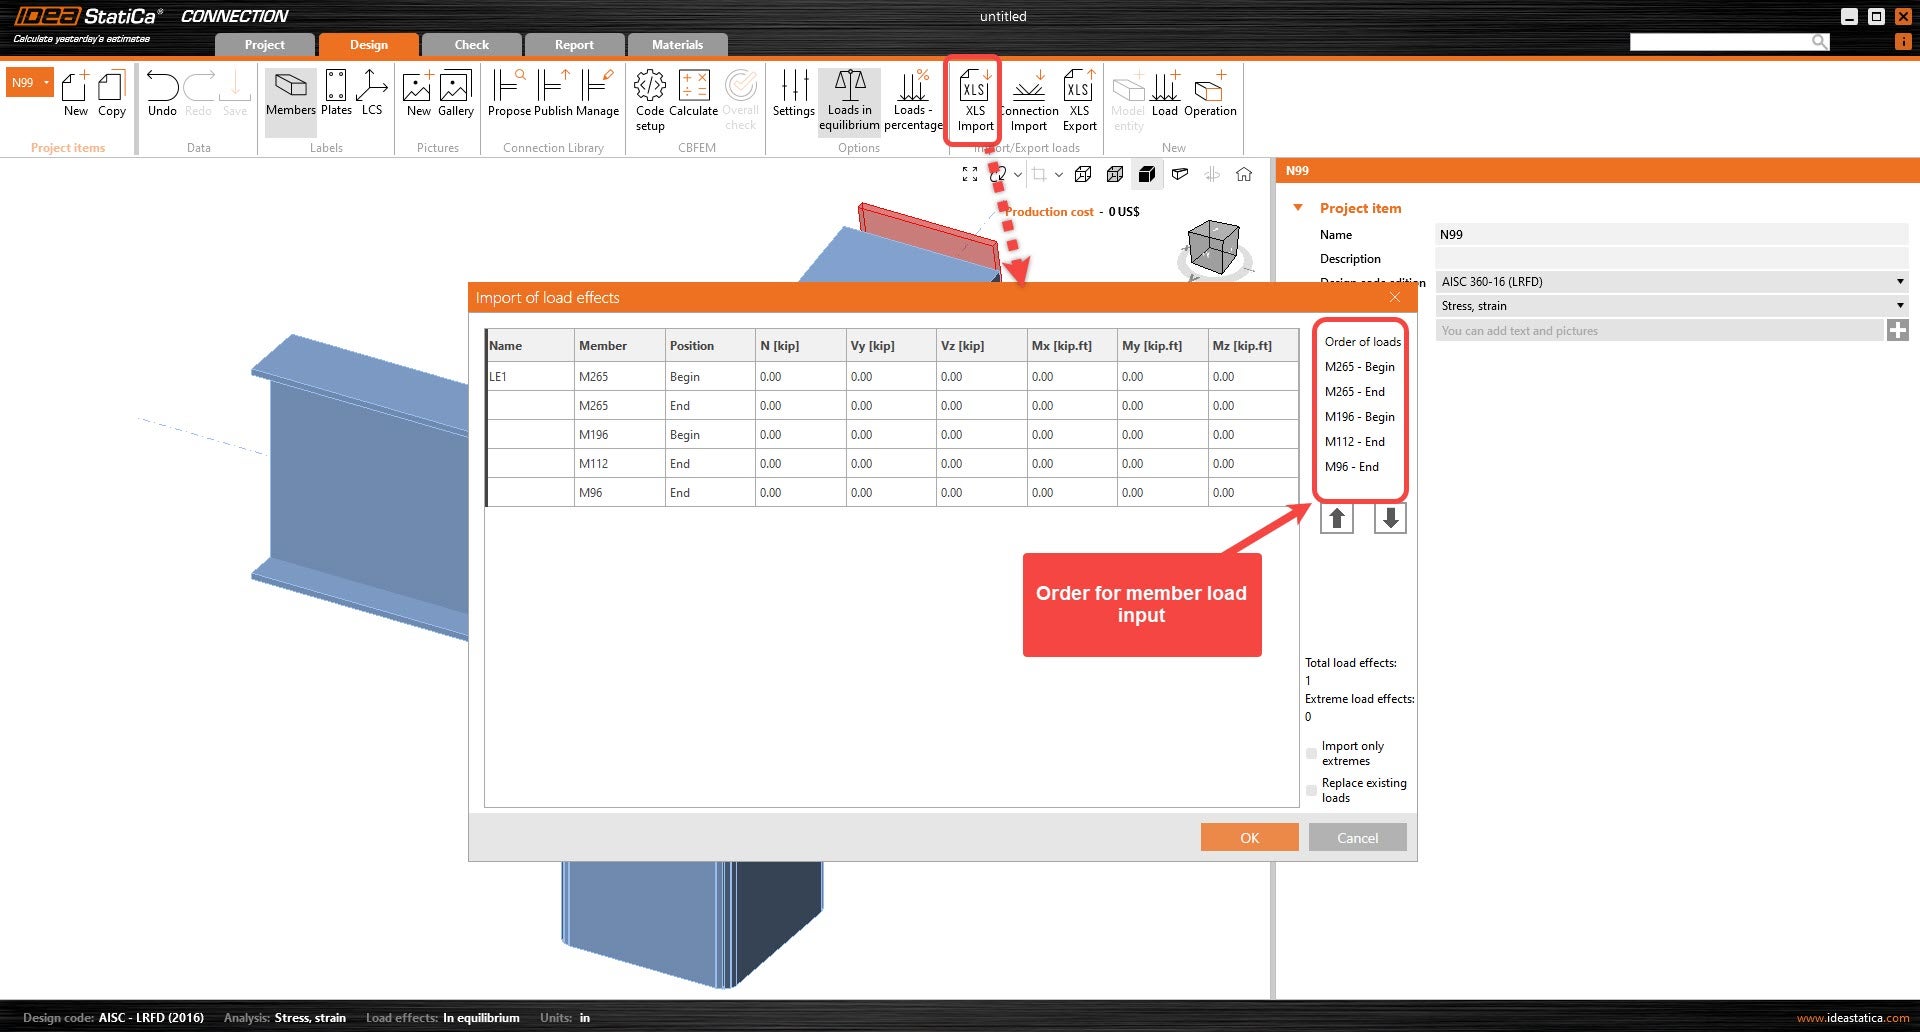
6. Go to IDEA and open the connection file pertaining to the loads.
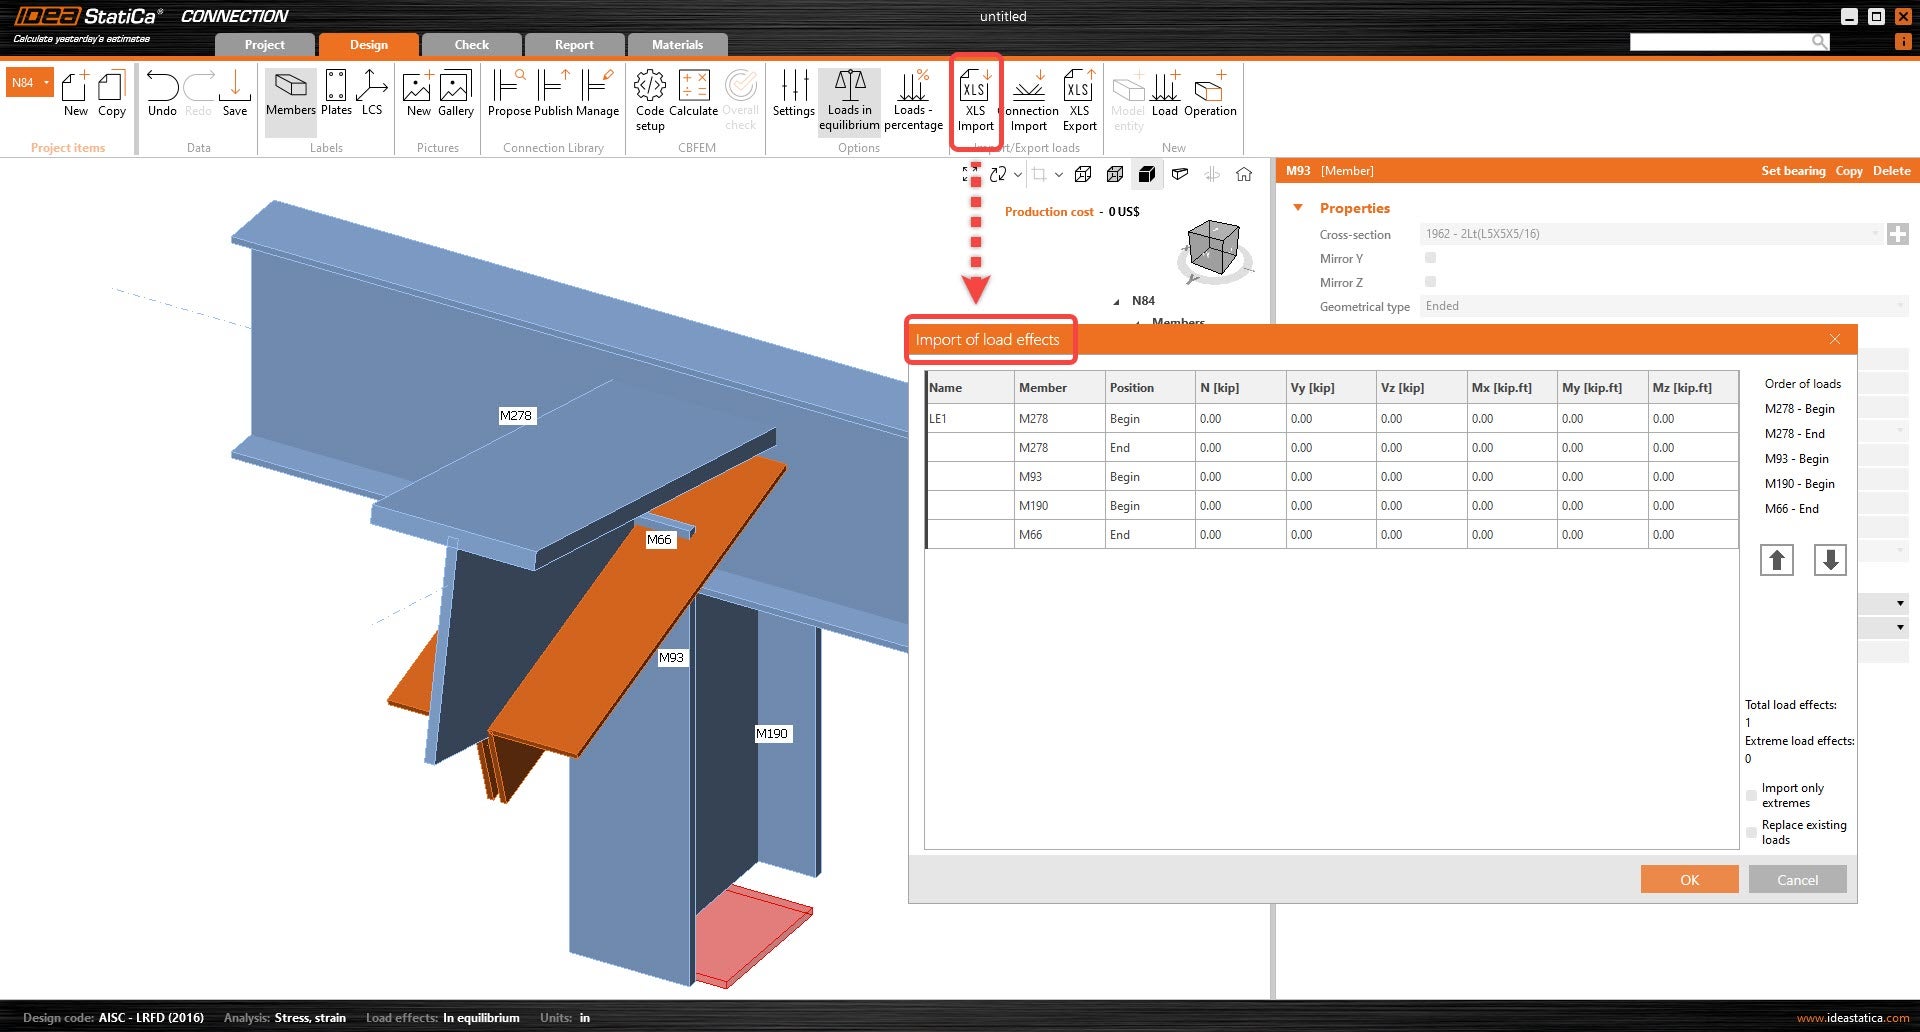
7. Under Import/Export loads, select XLS Import. The Import of load effects window will appear. Click under the existing load effect name. It should be the first cell under the “Name” column. Paste the copied load effects, Ctrl+V.
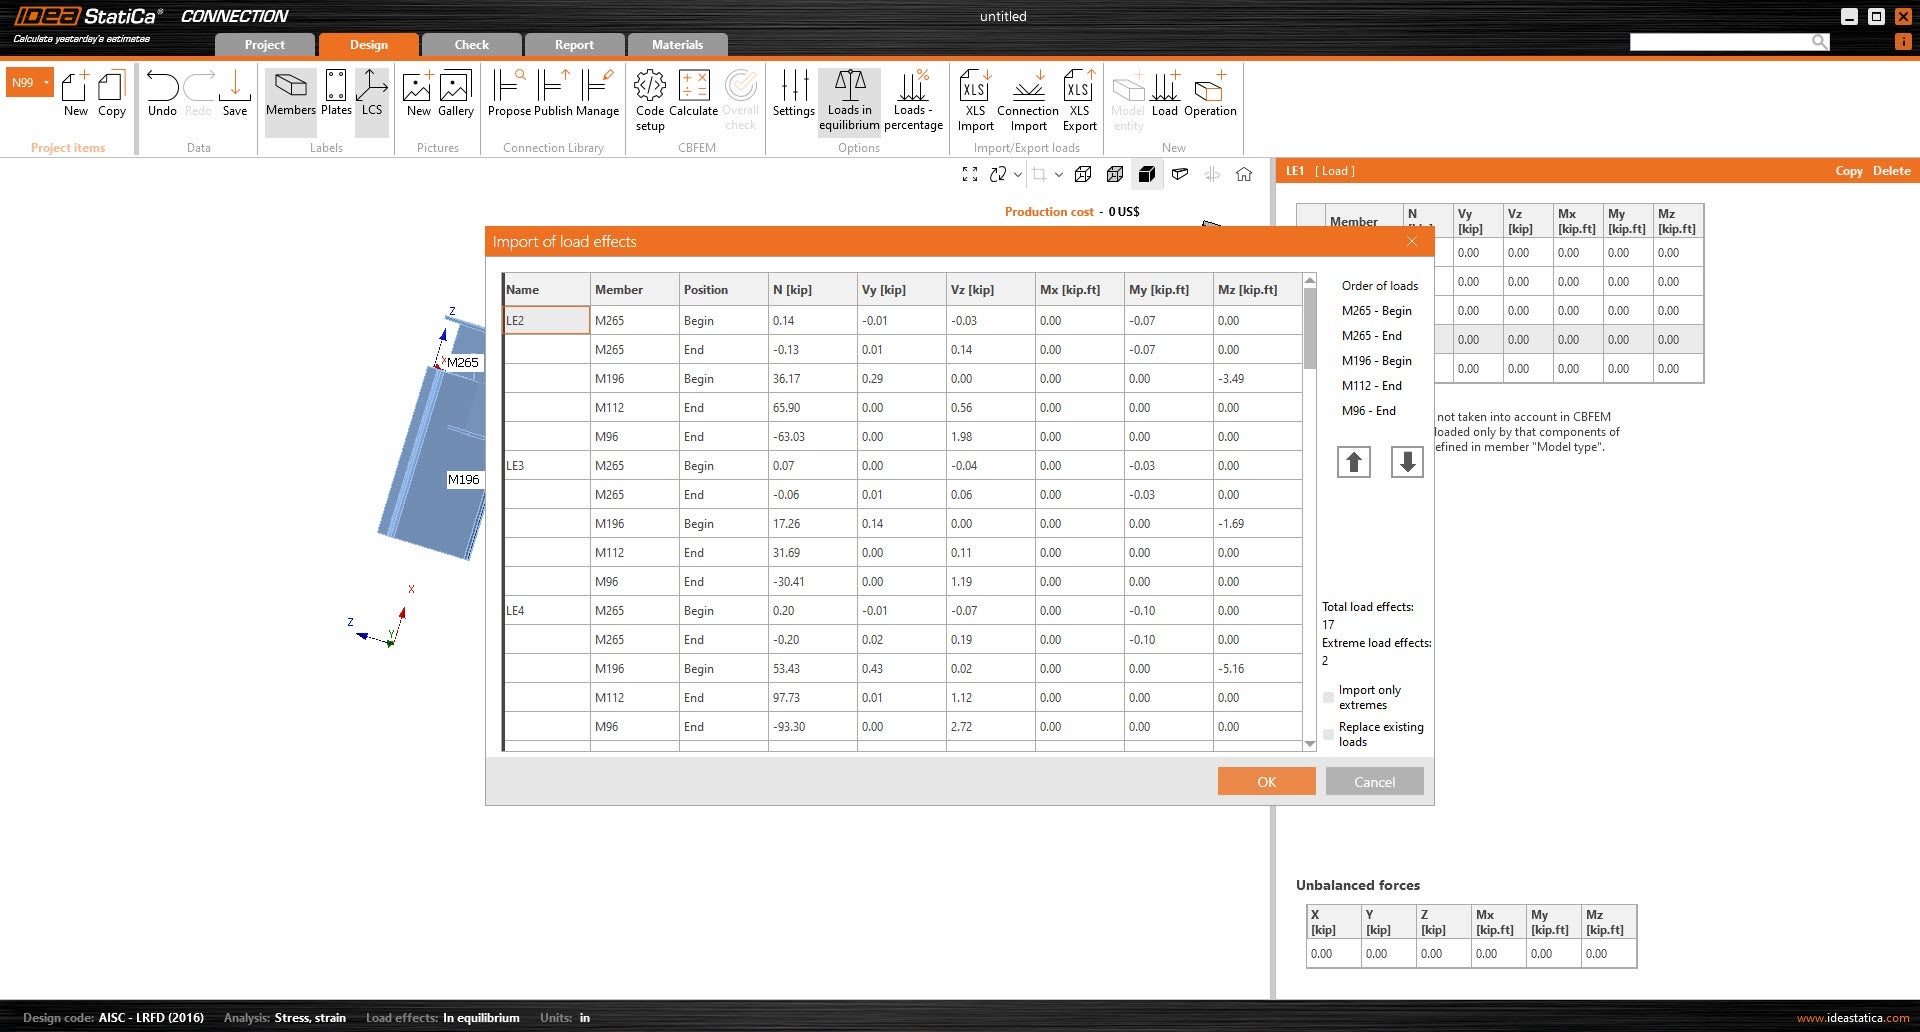
8. Click OK so that the loads can be applied to the connection.