
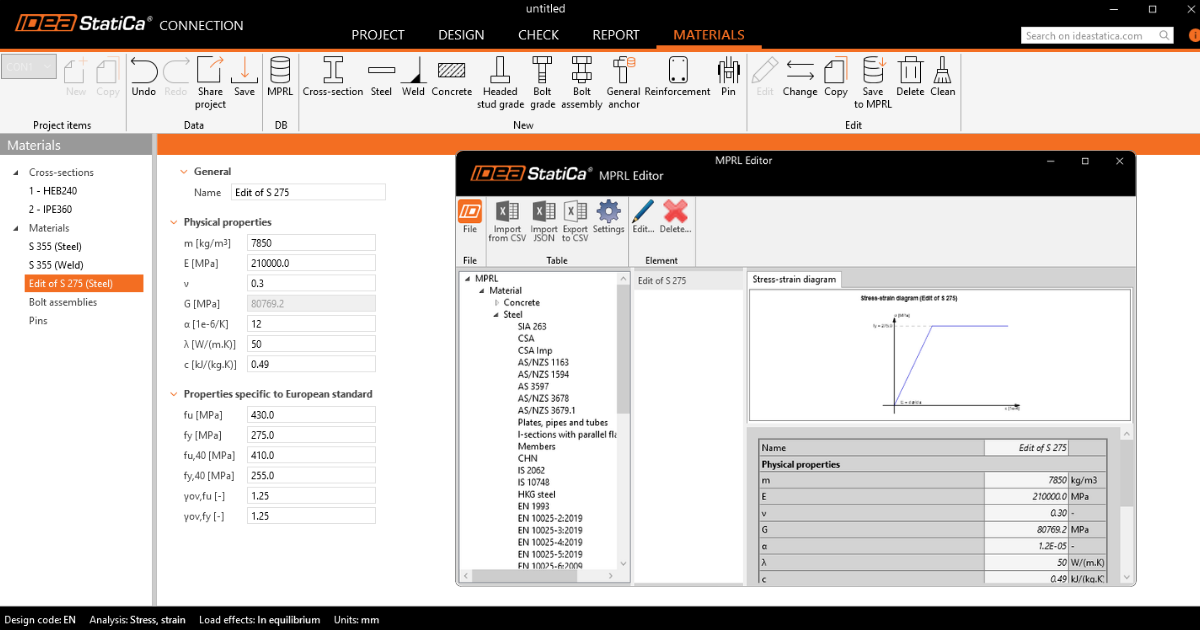


Instead of recreating custom steel grades or section geometries for every job, MPRL acts as a centralized database across Idea StatiCa applications. In this article, we will describe individual steps of working with the MPRL.
Defining and saving custom materials and cross-sections
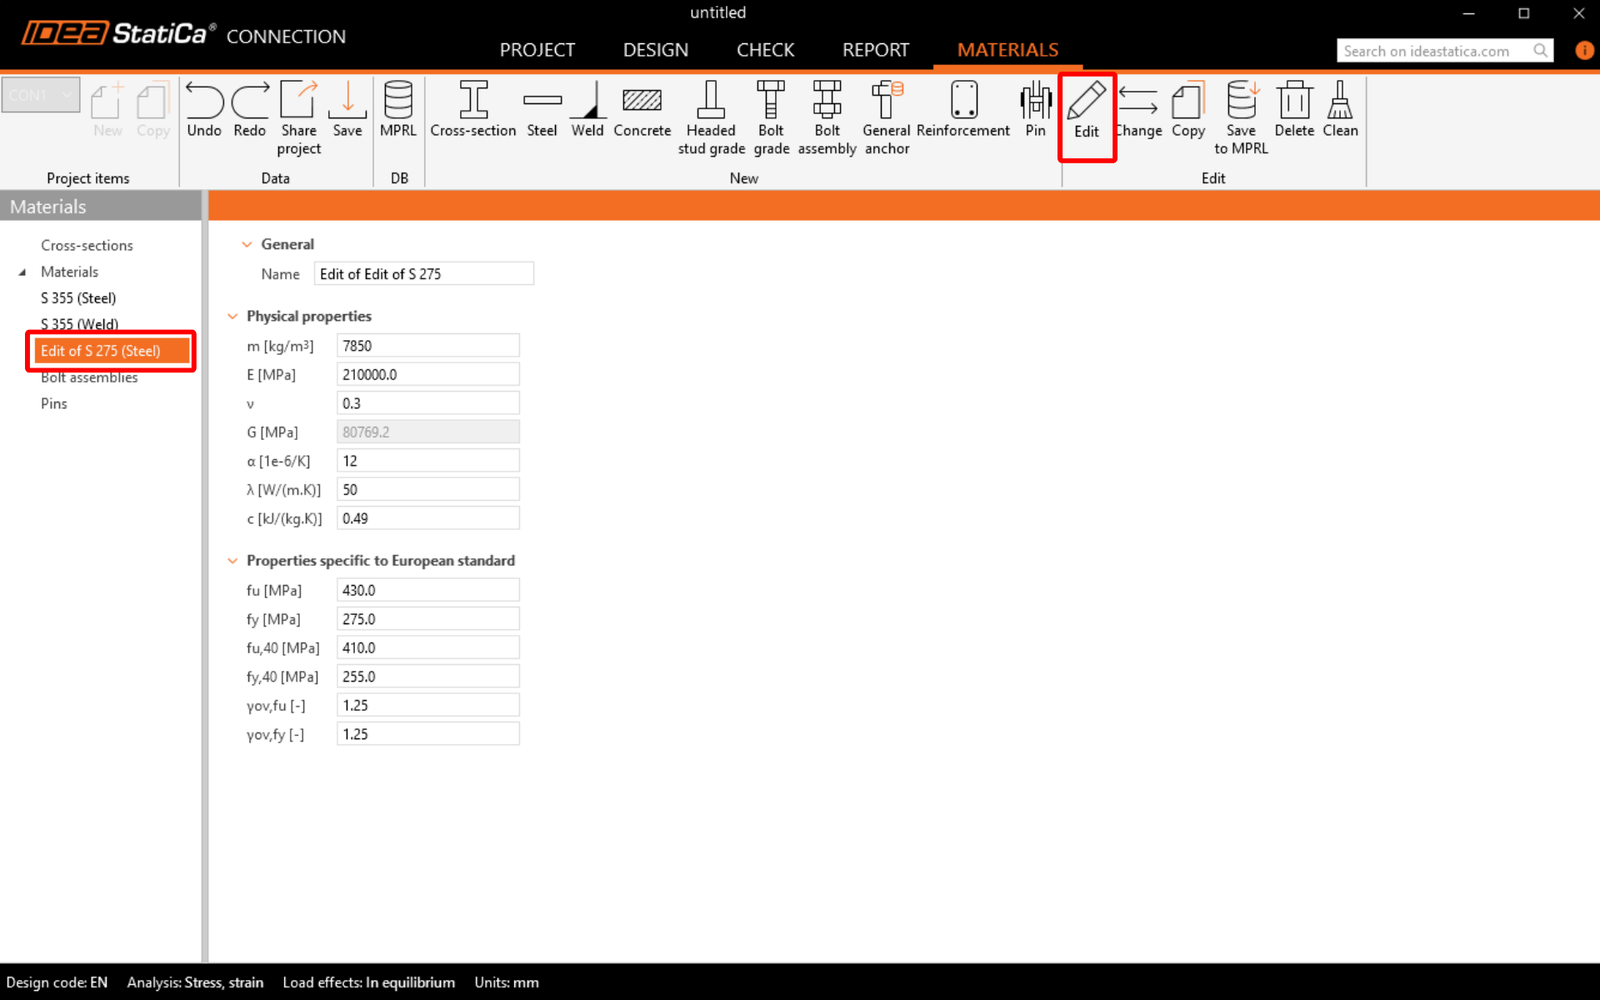
The possibility to define the new material/cross-section (and also save it into MPRL) is under the Materials tab. You can add a new material by using the buttons for individual materials on the top ribbon, or you can copy an existing one. Afterward, the material properties can be changed by the Edit command.
After editing, Save to MPRL, which enables you to use this material in other projects and Idea StatiCa applications as well. Define the name of the material/cross-section in the database and table (category for sorting purposes). Either select the table from the drop-down menu or define a new one by the three dots button.
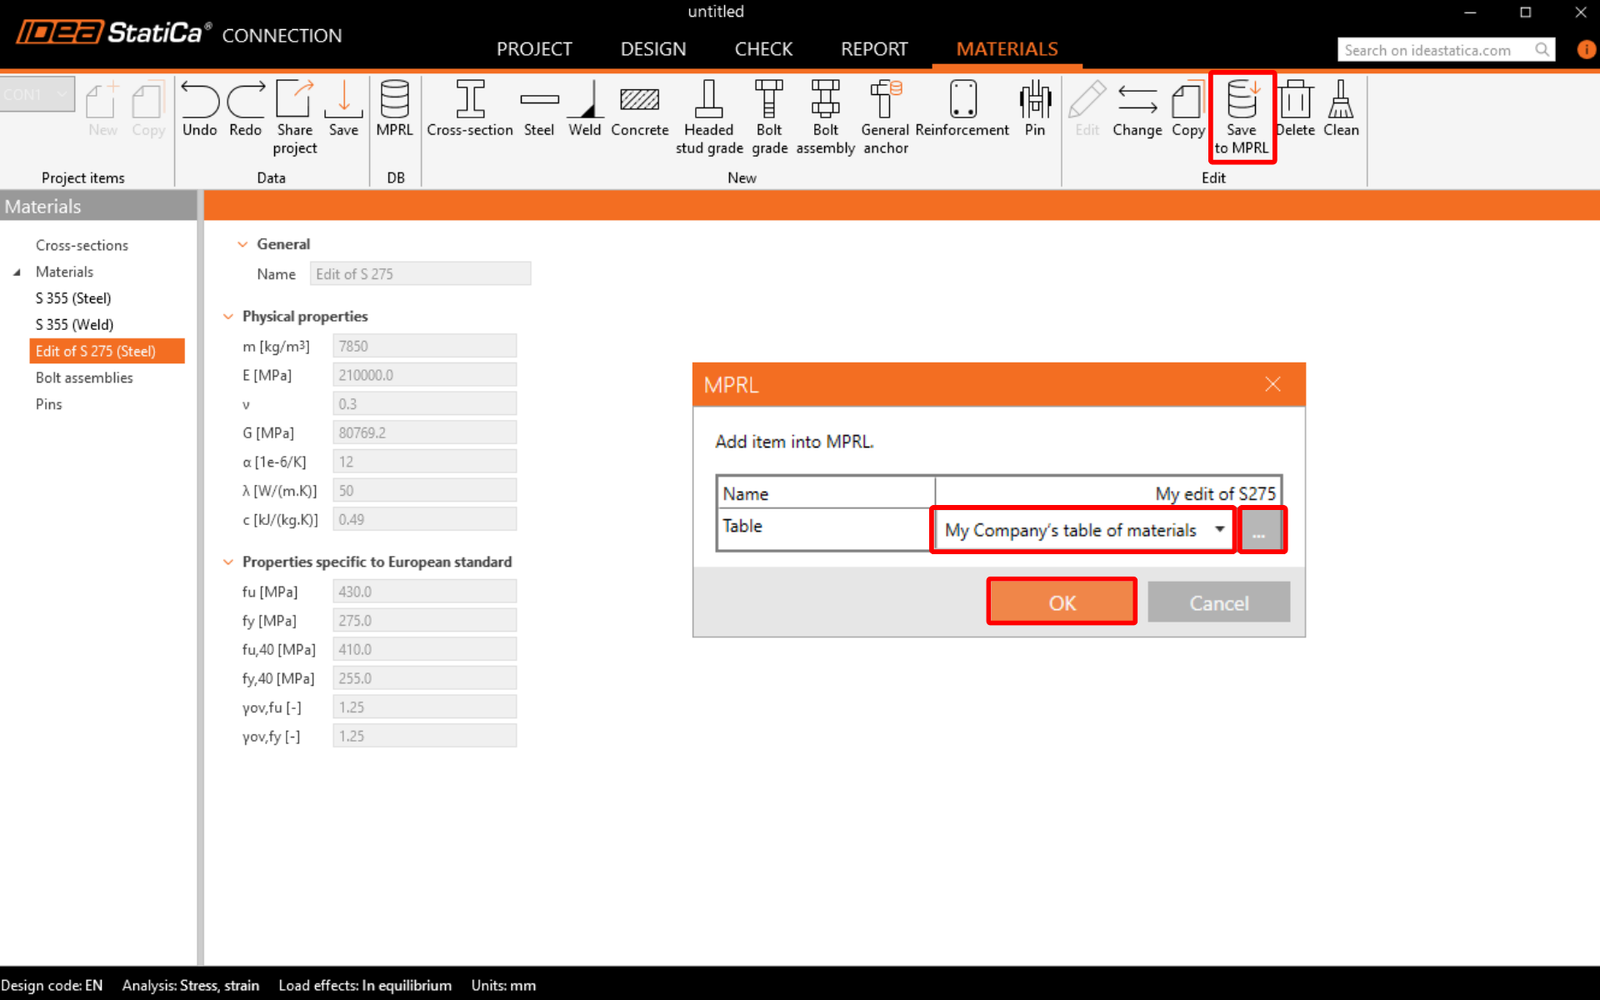
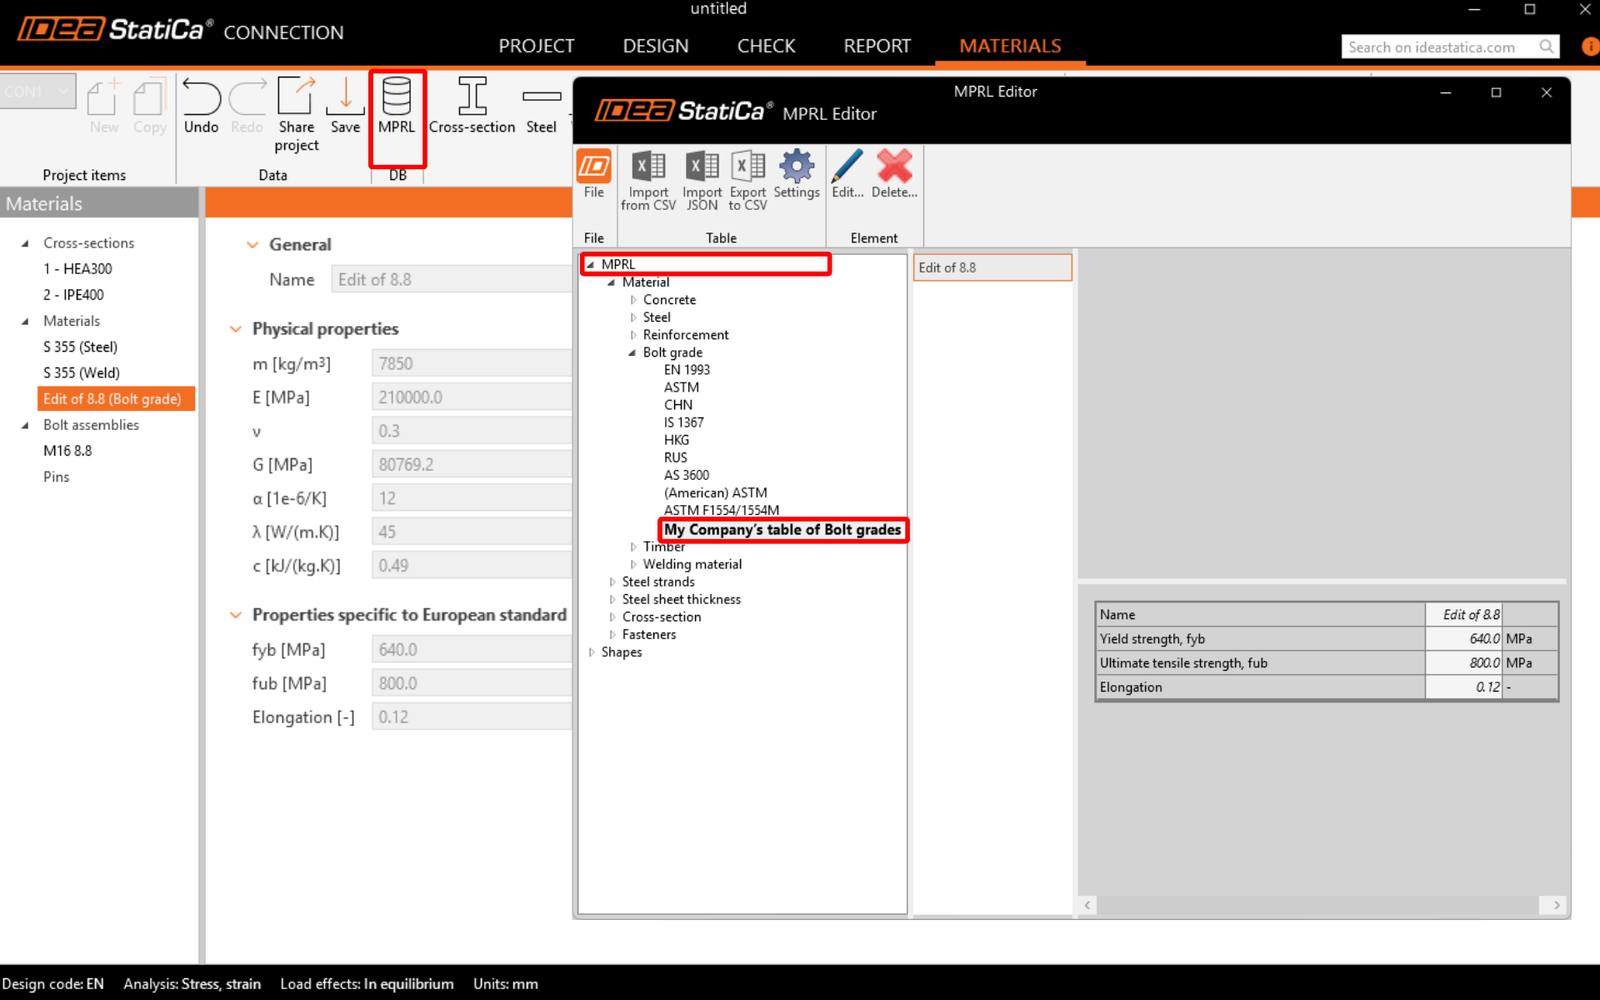
In the presented example, the edited material (My edit of S 235) will be saved under the new My Company’s table of materials table.
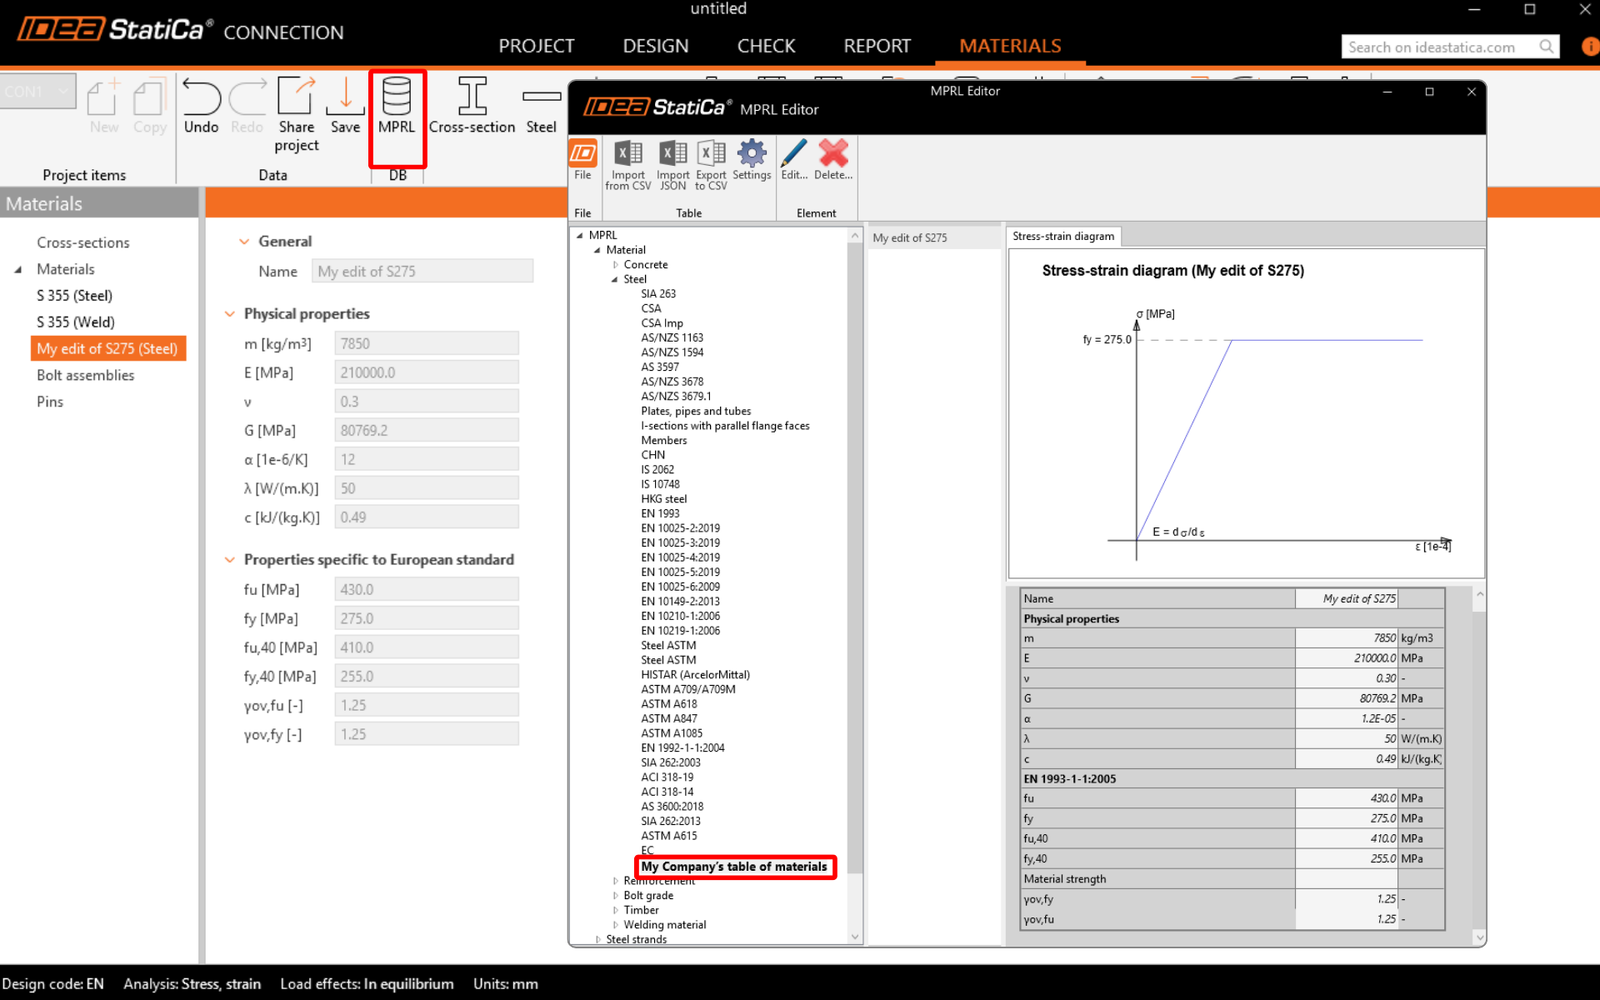
New user-defined materials (concrete, steel, reinforcement rebars, bolt grades, pre/post-tensioning cables,...) are stored in the dedicated folder in the MPRL tree.
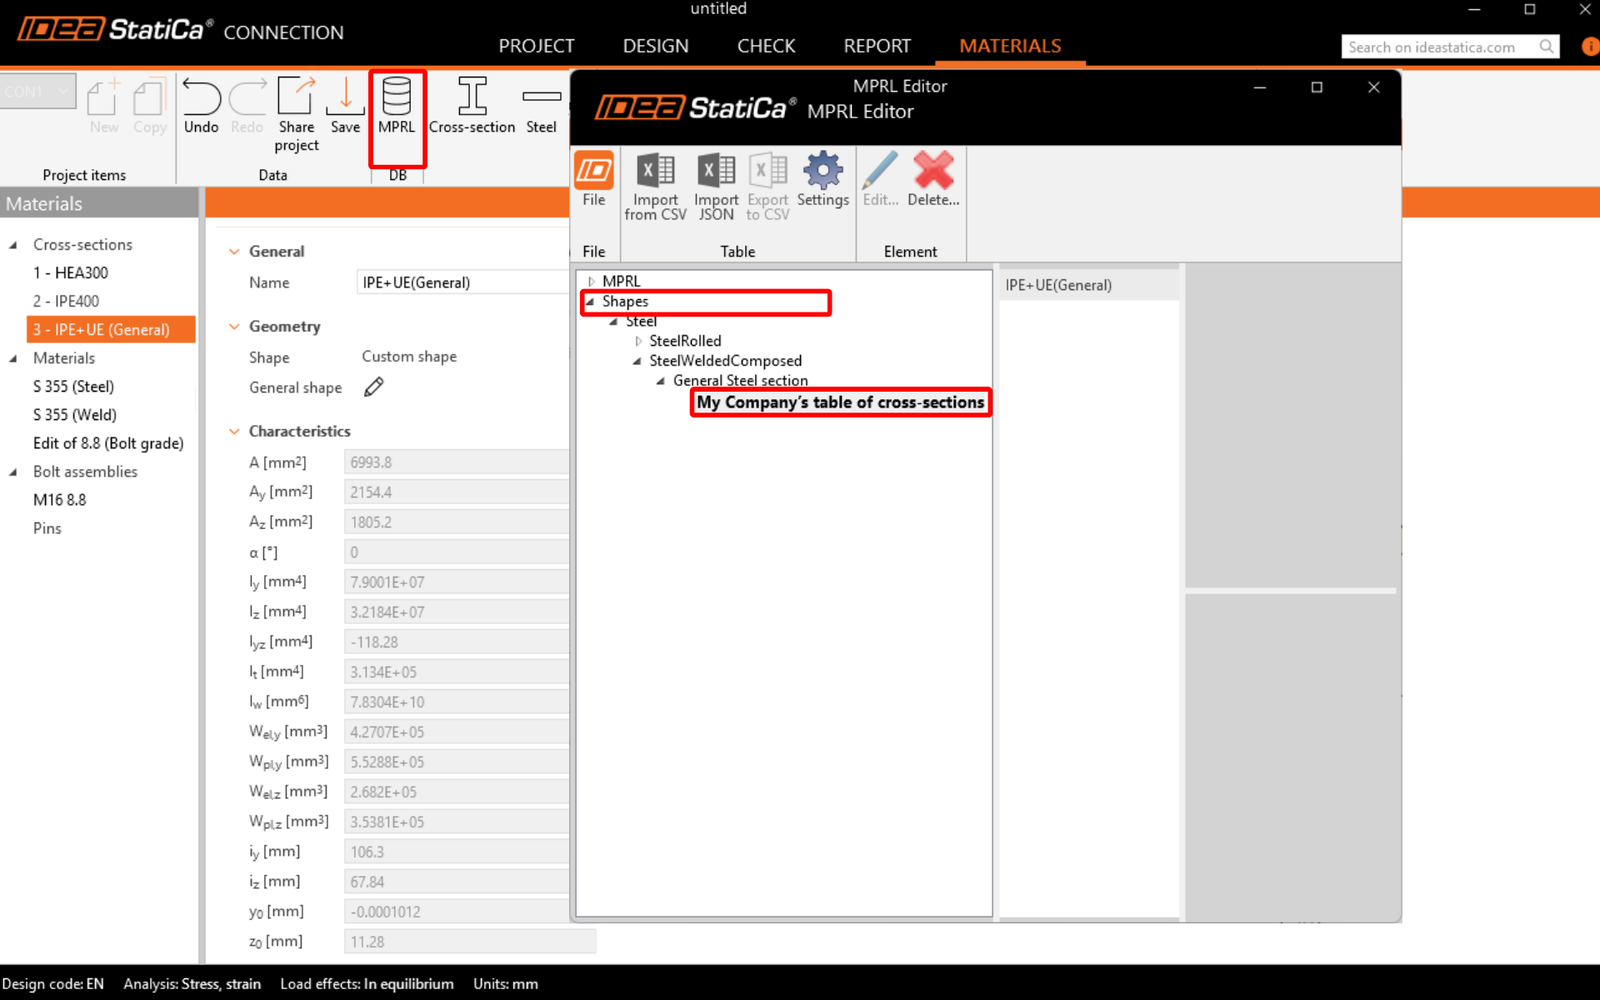
New user-defined cross-sections are stored in the dedicated folder based on their type under the Shape section.
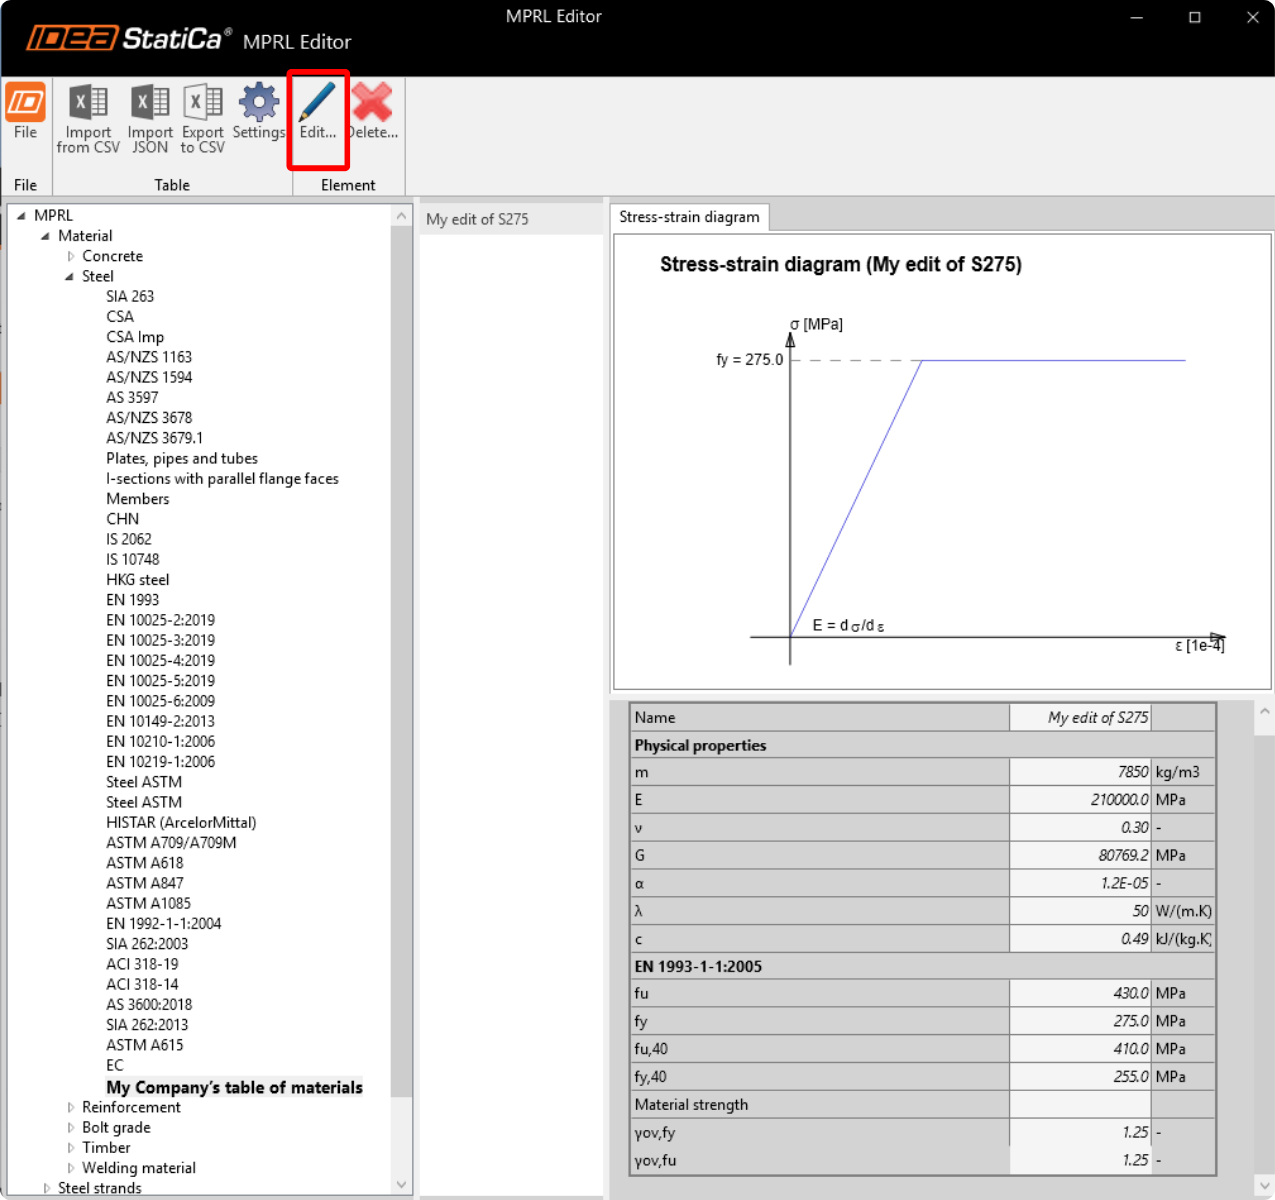
Materials and cross-sections saved in MPRL can also be edited inside the MPRL Editor using the Edit command. Always confirm saving the data after making a change or closing the MPRL Editor.
Known limitations of saving cross-sections into the MPRL
- Saving the compounded (paired) sections: 2I, 2Uc, 2Uo, 2Lt, 2Lu, Box 2i, Box 2U, Box 2L, Box 4L is not available at the moment.
The suggested workaround is to build these as a general steel cross-section. - Saving concrete sections is not available at the moment
- Saving the custom cross-section created in the Cross-section editor into MPRL is possible only since Idea StatiCa version 25.0.3
Exporting and importing materials from/to the MPRL
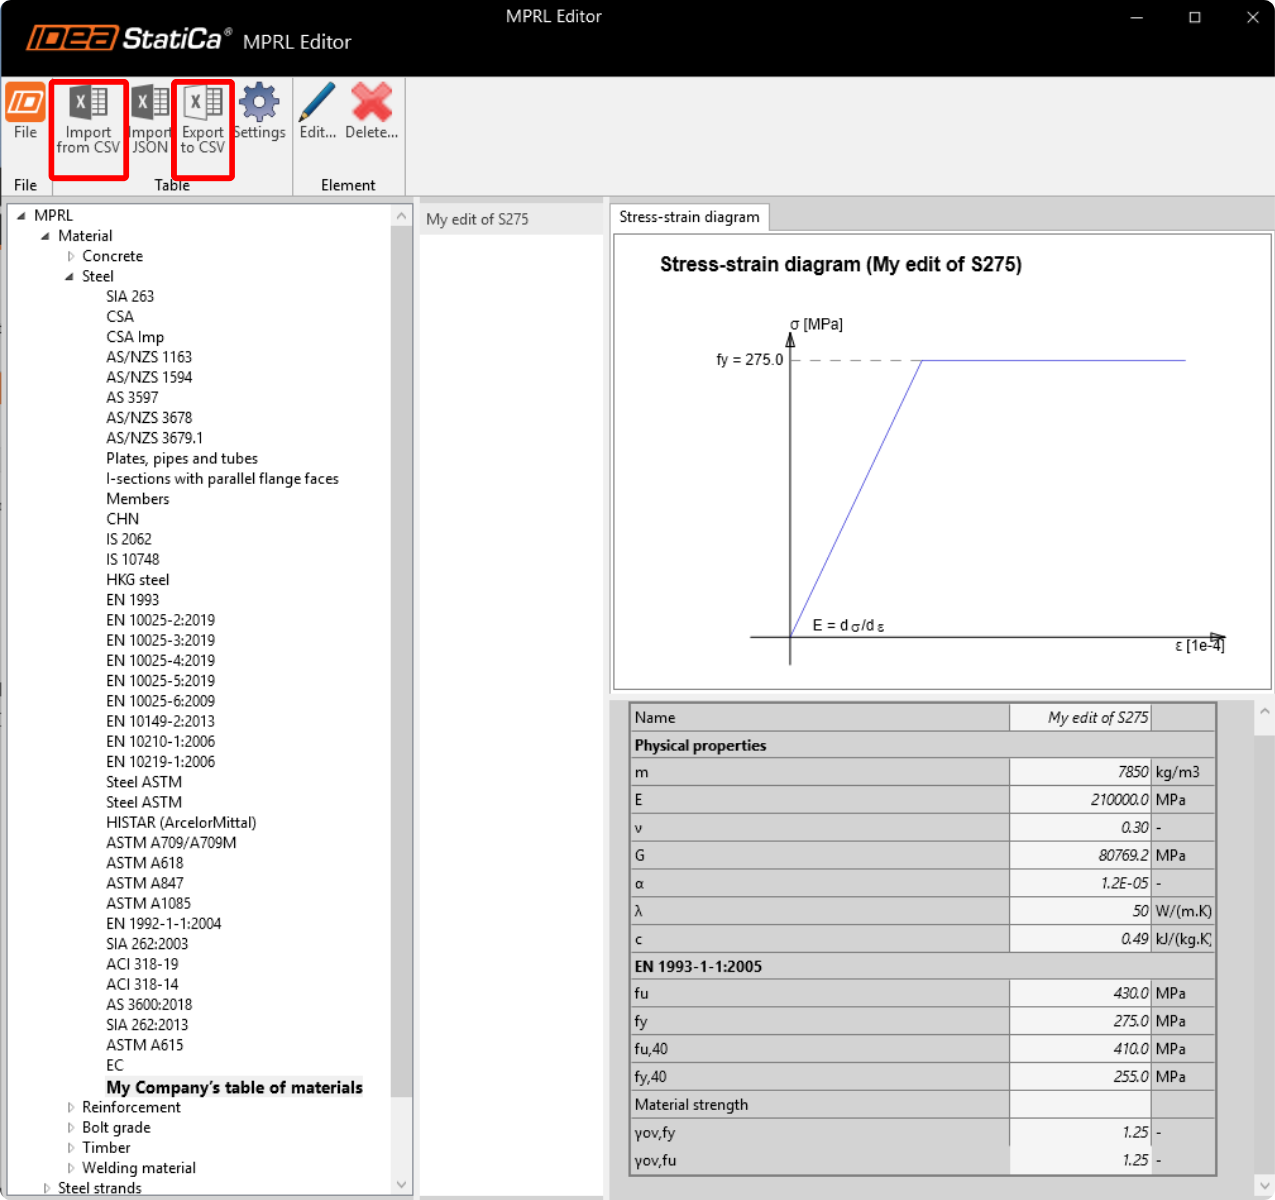
You can easily share your custom materials, bolts, concrete, and reinforcement with colleagues by exporting a table from your MPRL. Simply click on the Export to CSV button in the top ribbon of the MPRL Editor and save the CSV file.
Everybody can now import your custom materials by sharing this CSV file. To do that, use the Import from CSV button.
Watch the webinar recording to see it in action:
Exporting and importing cross-sections from/to the MPRL
Direct cross-section export/import is currently unavailable.
To share your whole custom shapes library, copy the library file user_mprl.sqlite from the following folder directly to the corresponding directory on another computer:
C:\Users\"yourusername"\AppData\Roaming\IDEA_RS\UserMprl\v3
Path shortcut: %AppData%\IDEA_RS\UserMprl\v3\