ETABS BIM link pro analýzu boulení ocelových prvků (AISC)
1 Jak aktivovat link
- Stáhněte a nainstalujte (jako správce) nejnovější verzi IDEA StatiCa
- Ujistěte se, že používáte podporovanou verzi ETABS
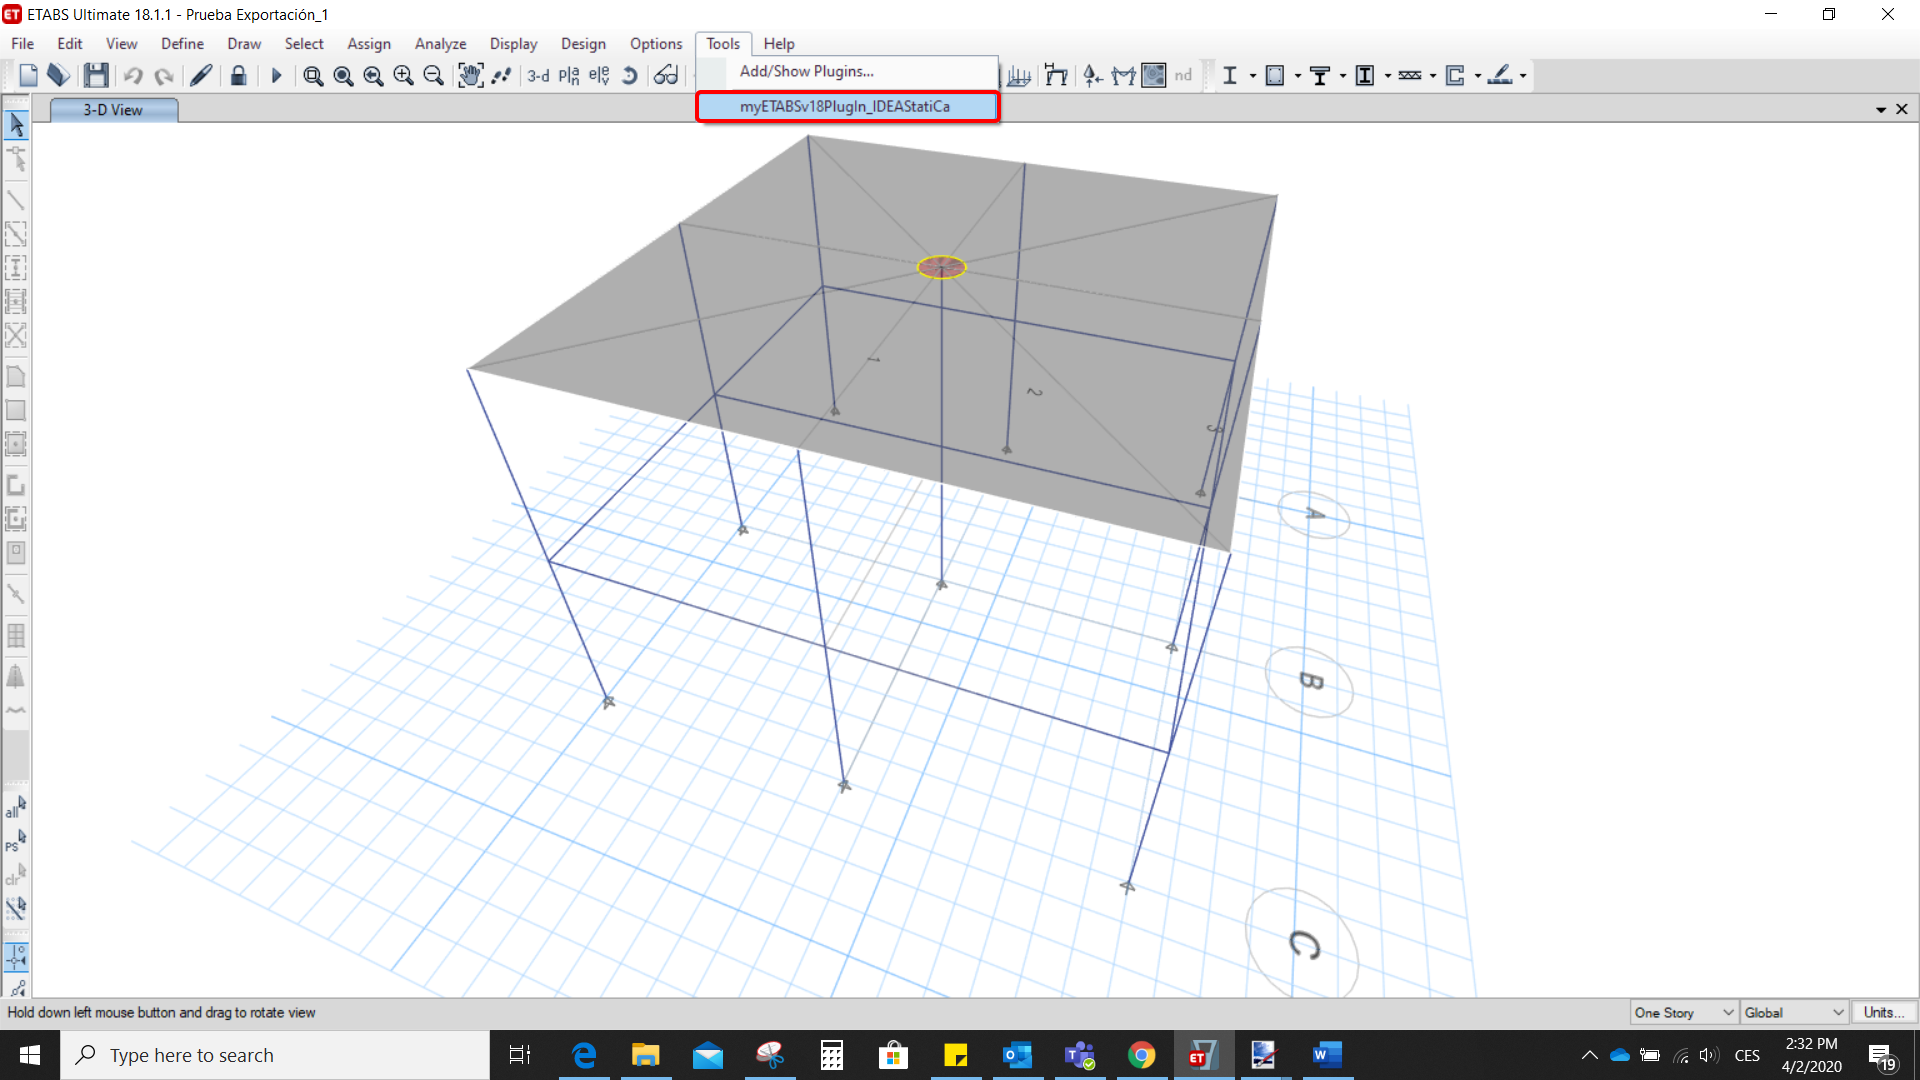
Po instalaci obou programů spusťte ETABS a klikněte na Tools > Add/Show Plugins pro otevření dialogu Plugin Manager. Tato možnost umožňuje instalovat a přidávat doplňky (programy) na příslušná místa v nabídce ETABS.
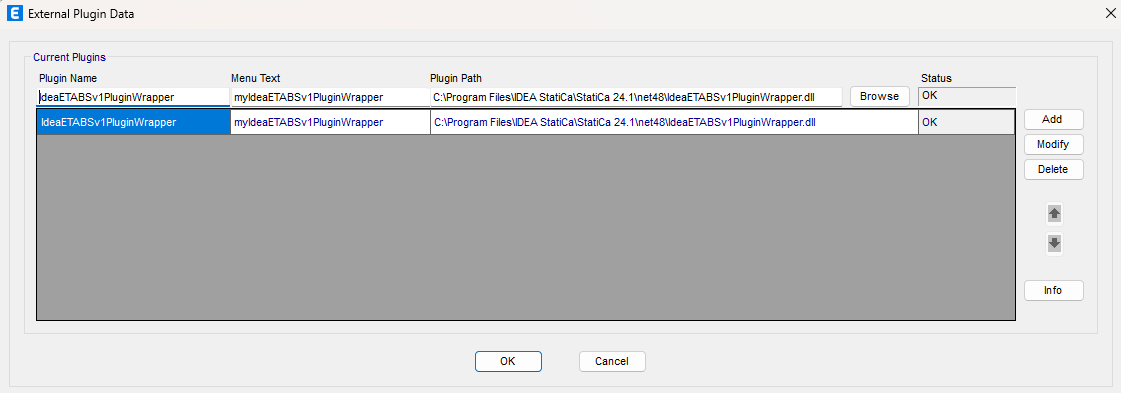
Vyhledejte
C:\Program Files\IDEA StatiCa\StatiCa 25.0\net48\IdeaETABSv1PluginWrapper.dll
(pro starší verze IDEA StatiCa C:\Program Files\IDEA StatiCa\StatiCa 23.0\IdeaETABSv1PluginWrapper.dll
nebo C:\Program Files\IDEA StatiCa\StatiCa 22.1\ETABSv18PlugIn_IDEAStatiCa.dll).
Můžete upravit název pluginu zobrazený v rozbalovací nabídce jako IDEA StatiCa Checkbot, poté klikněte na Add.
Poznámka
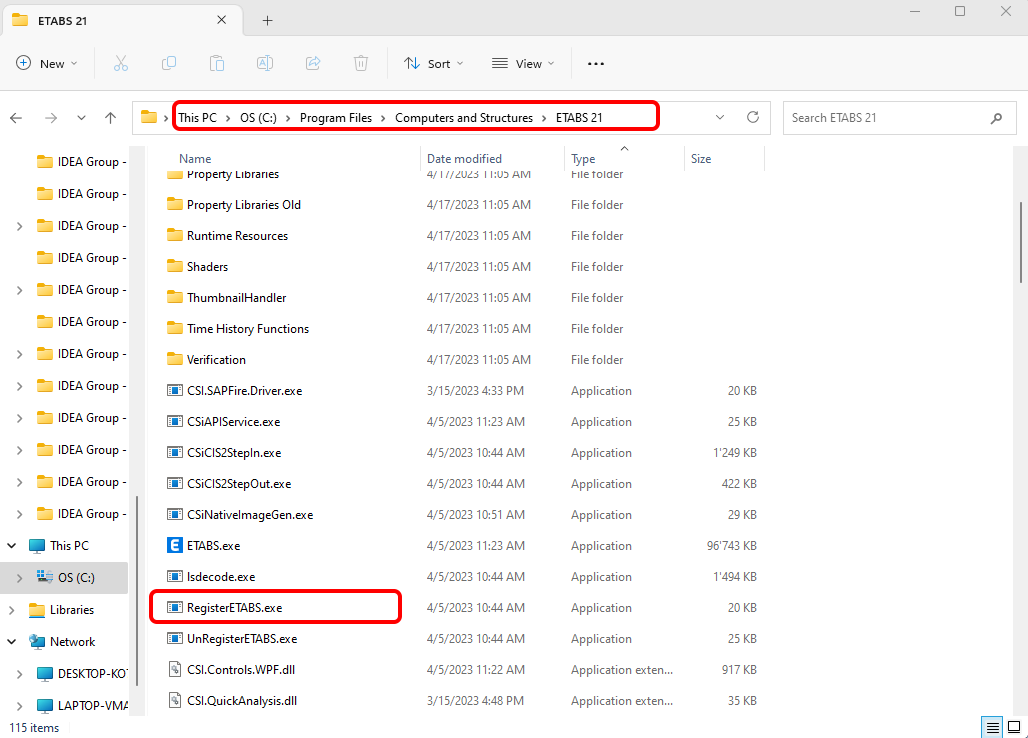
V případě, že se okno s IDEA StatiCa Checkbot nezobrazí, přejděte na C:\Program Files\Computers and Structures\ETABS 22 a spusťte jako správce soubor RegisterETABS.exe.
2 Jak používat link
Otevřete přiložený projekt v ETABS a spusťte analýzu.
Přejděte do položky nabídky Tools a spusťte exportní příkaz, který jste právě definovali.
Otevře se Checkbot a nejprve je třeba zvolit normu.

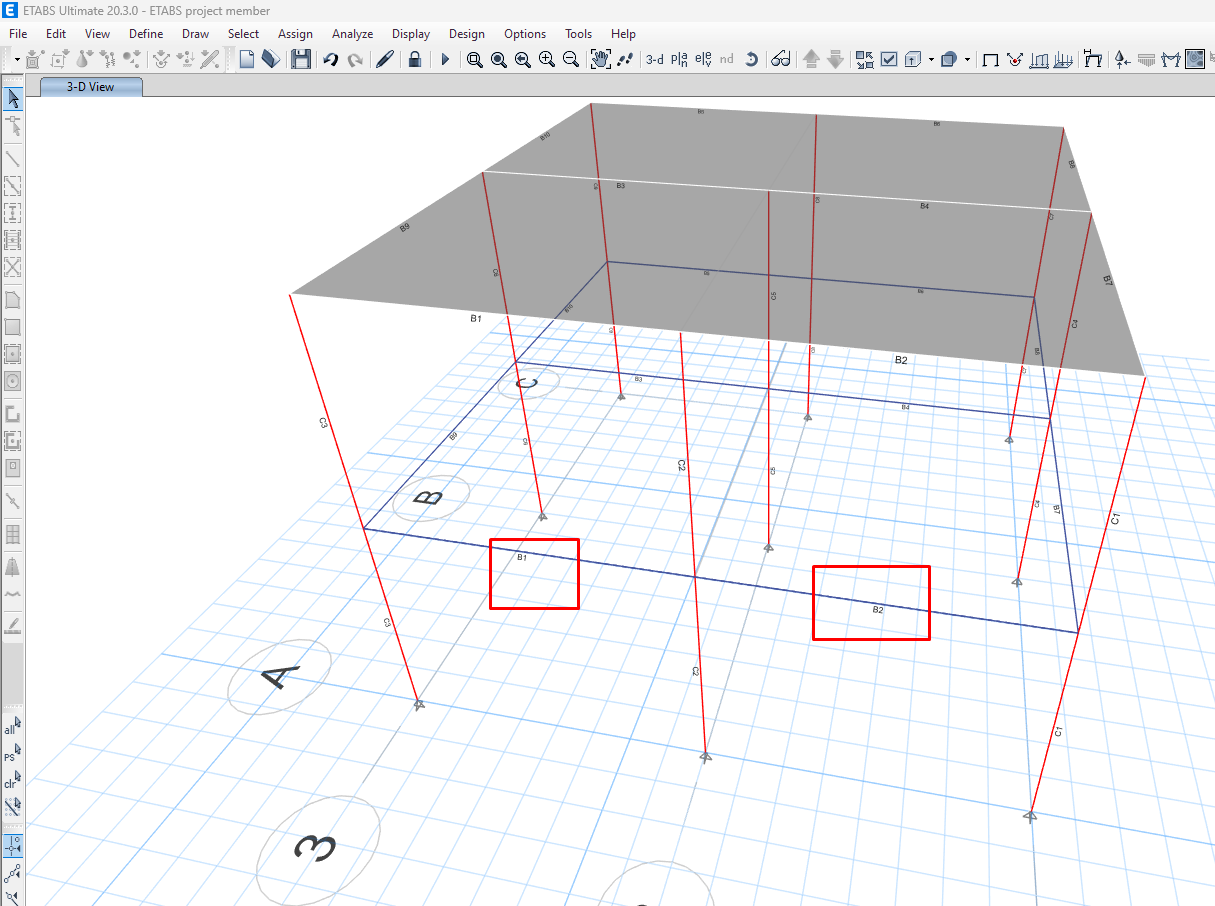
Poté můžete vybrat dva nosníky (pomocí klávesy Ctrl) zobrazené na obrázku níže v projektu ETABS pro export. Styčníky připojené k nosníkům budou automaticky exportovány také.
Pokud jsou nosníky vybrány, můžete kliknout na tlačítko Member v Checkbotu. Tím budou všechny vybrané nosníky a jejich styčníky z ETABS importovány do Checkbotu.

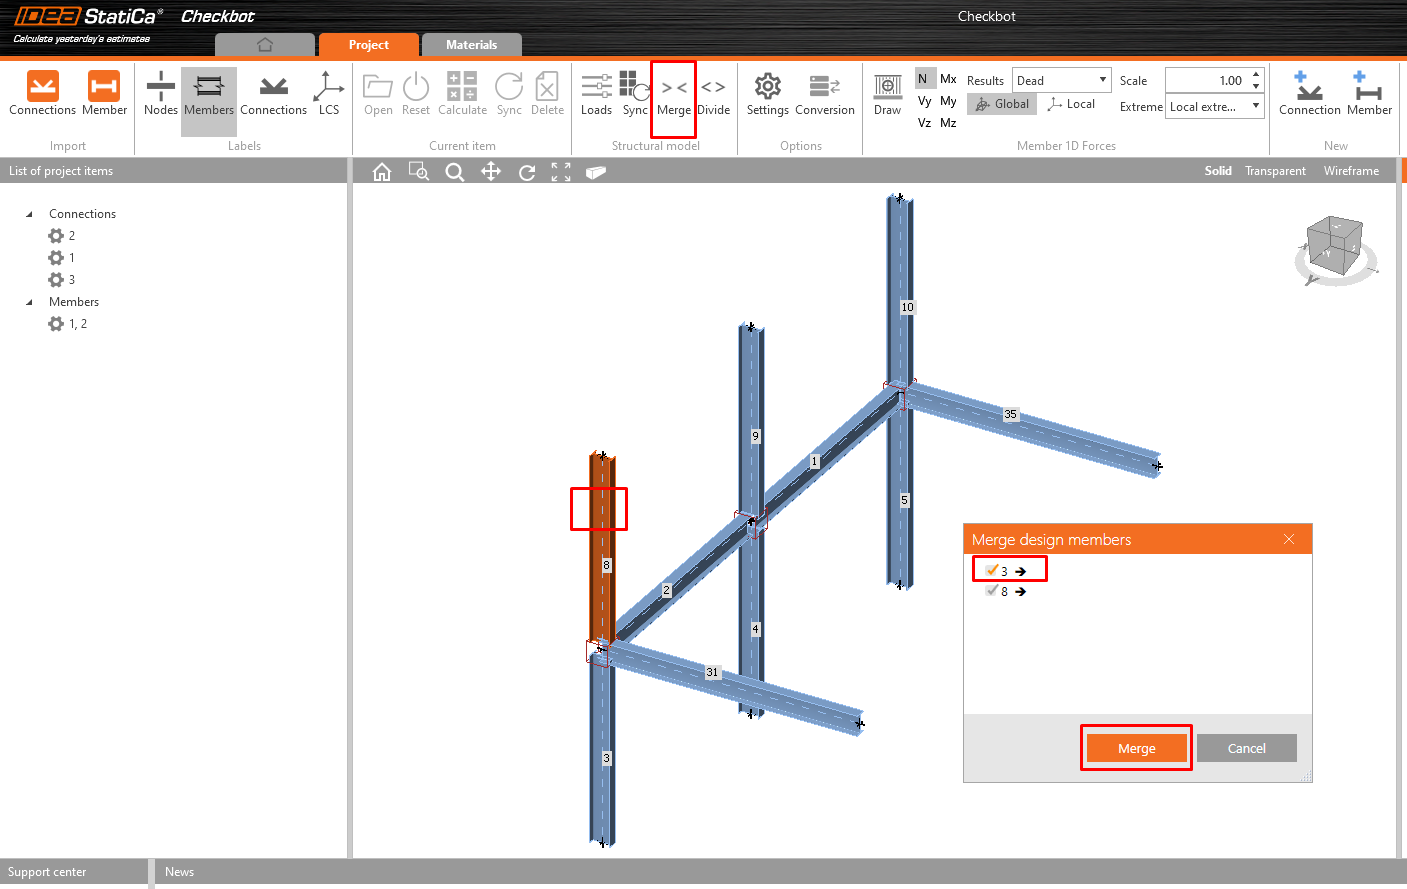
Protože sloupy jsou v tomto příkladu průběžné, musíme sloučit jejich spodní a horní části dohromady. Vyberte horní část jednoho ze sloupů a klikněte na tlačítko Merge. Proveďte to pro všechny 3 sloupy.
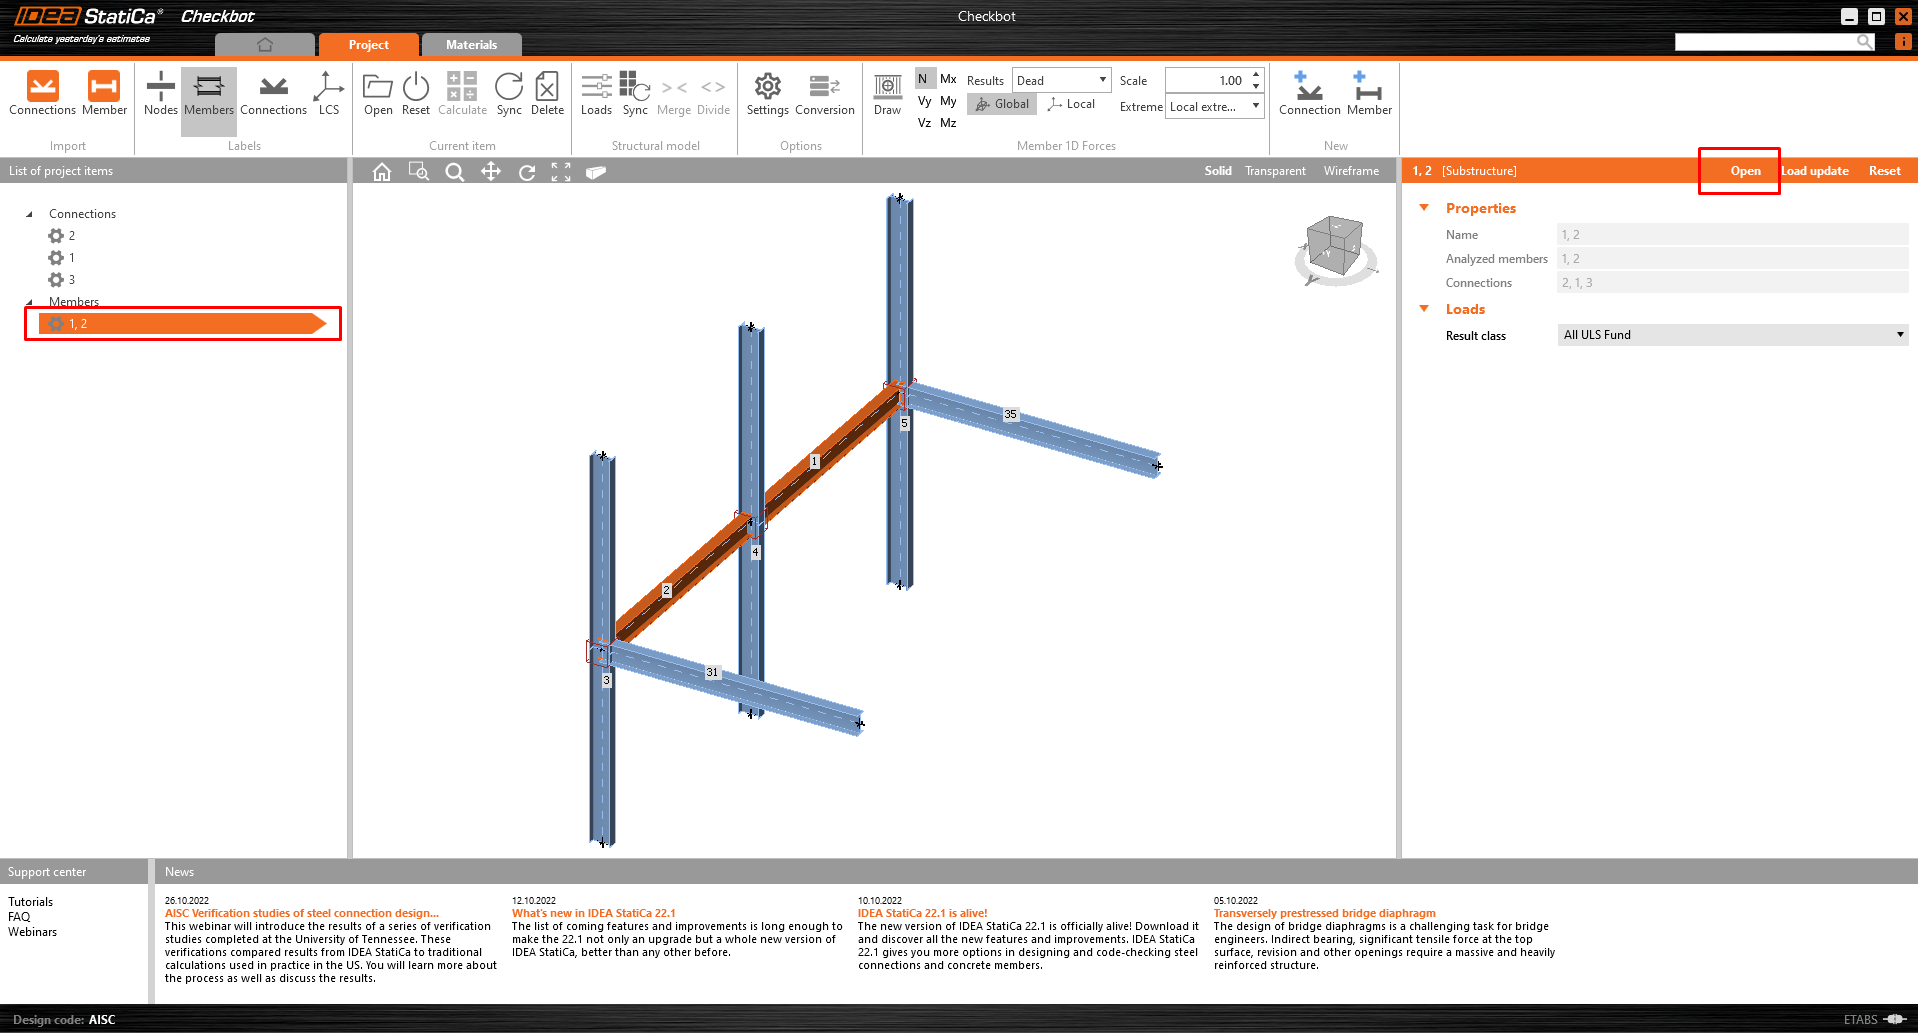
Prvek je nyní připraven k otevření v IDEA StatiCa Member pro analýzu CBFEM.
3 Návrh
Spustí se automatický přenos dat a otevře se IDEA StatiCa Member s vygenerovaným projektem. Všechny prvky a účinky zatížení byly přidány automaticky.
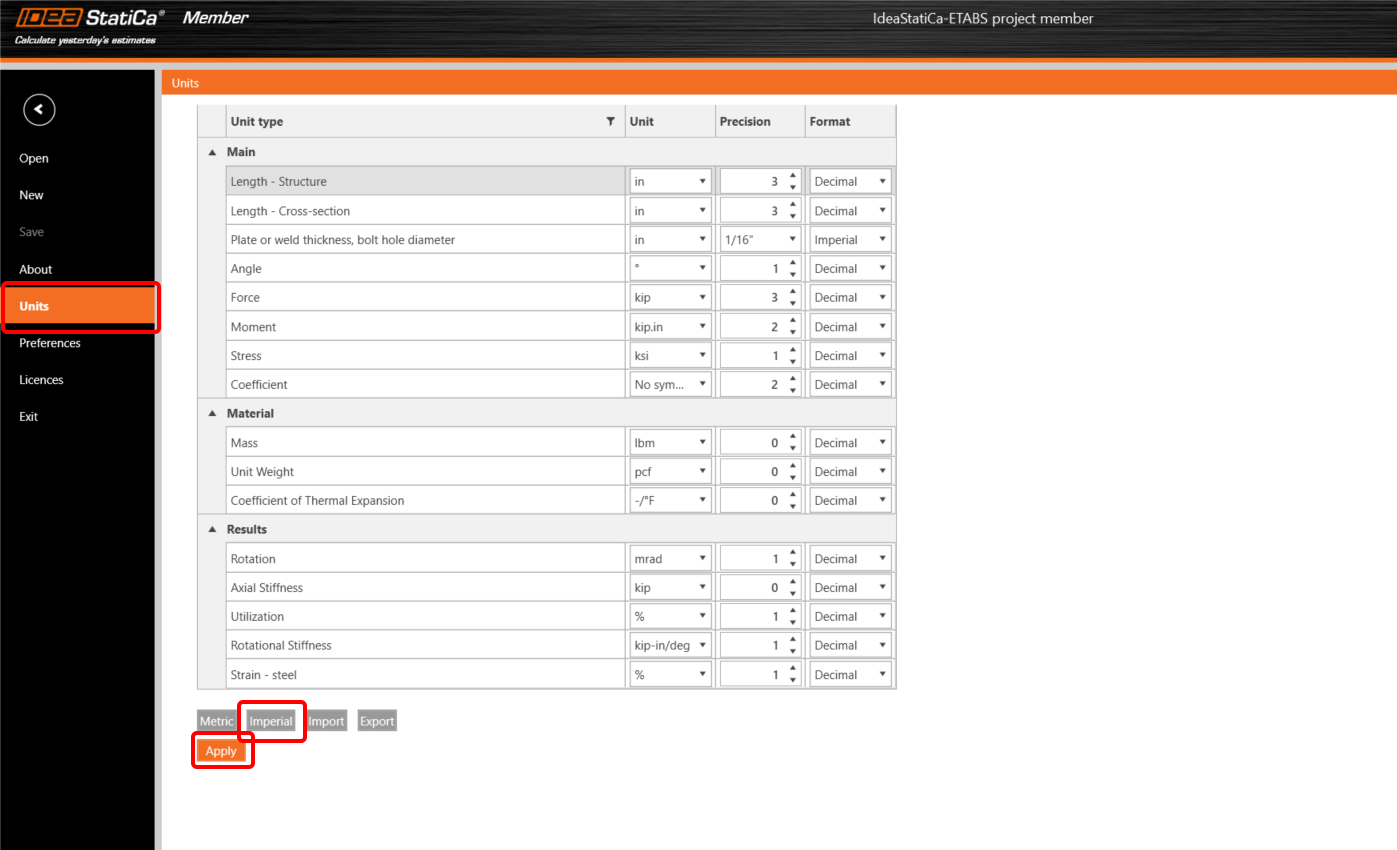
Tento návod pracuje s imperiálními jednotkami. Pokud používáte metrické jednotky, můžete je přepnout na imperiální kliknutím na Project v horním pásu karet a poté na Units v levém menu, nebo si přečtěte tento článek.
Abychom získali analýzu prvku, musíme nejprve navrhnout všechny styčníky podél prvku. Můžete začít s uzlem 3 kliknutím na Edit connection.

Nyní definujete sadu výrobních operací pro modelování přípoje mezi prvky. Klikněte pravým tlačítkem na prvek 2 a vyberte Connect to..

Vyberte sloup a v novém okně zvolte šablonu T endplate uniform.
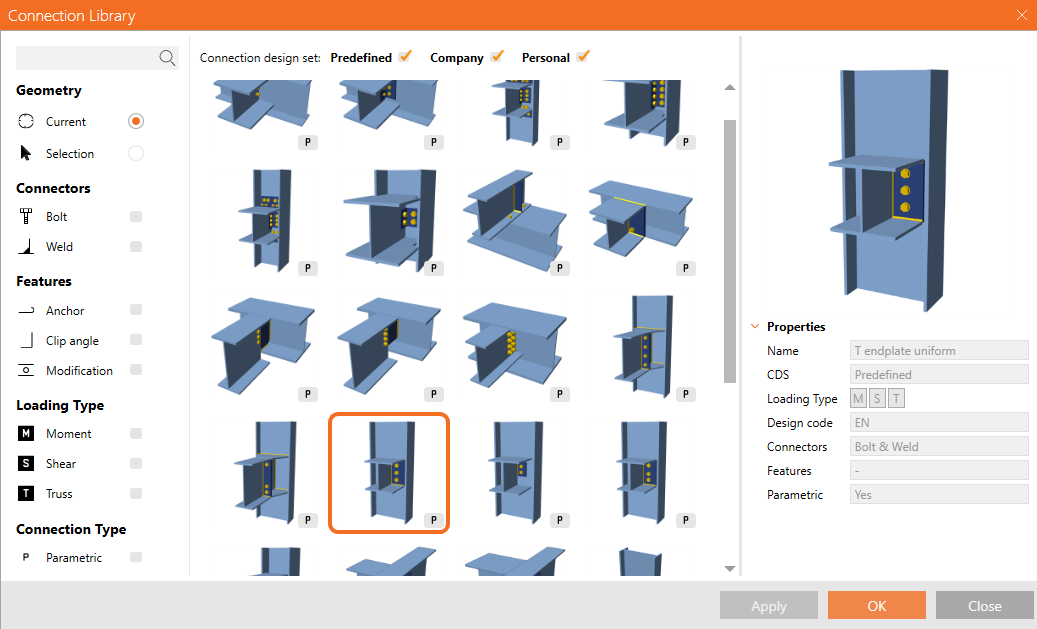
Nyní klikněte na Explode, abyste mohli použít další šablonu pro styčník.
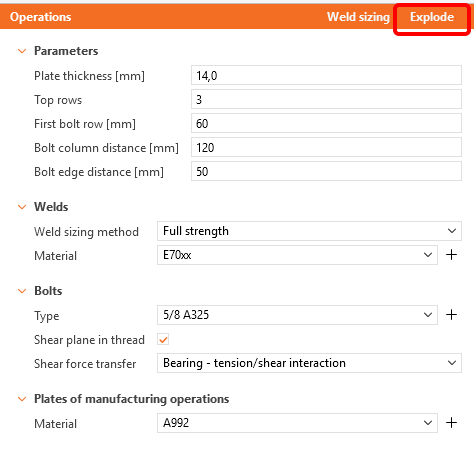
Použijte stejnou šablonu pro prvek 31.
Tato operace také přidala výztuhy ke styčníku na obou stranách. Je třeba změnit umístění pouze na Rear.
Pokud je pole šedé, nemáte povolen záložku Developer. Klikněte prosím znovu na Explode a poté změňte Location.
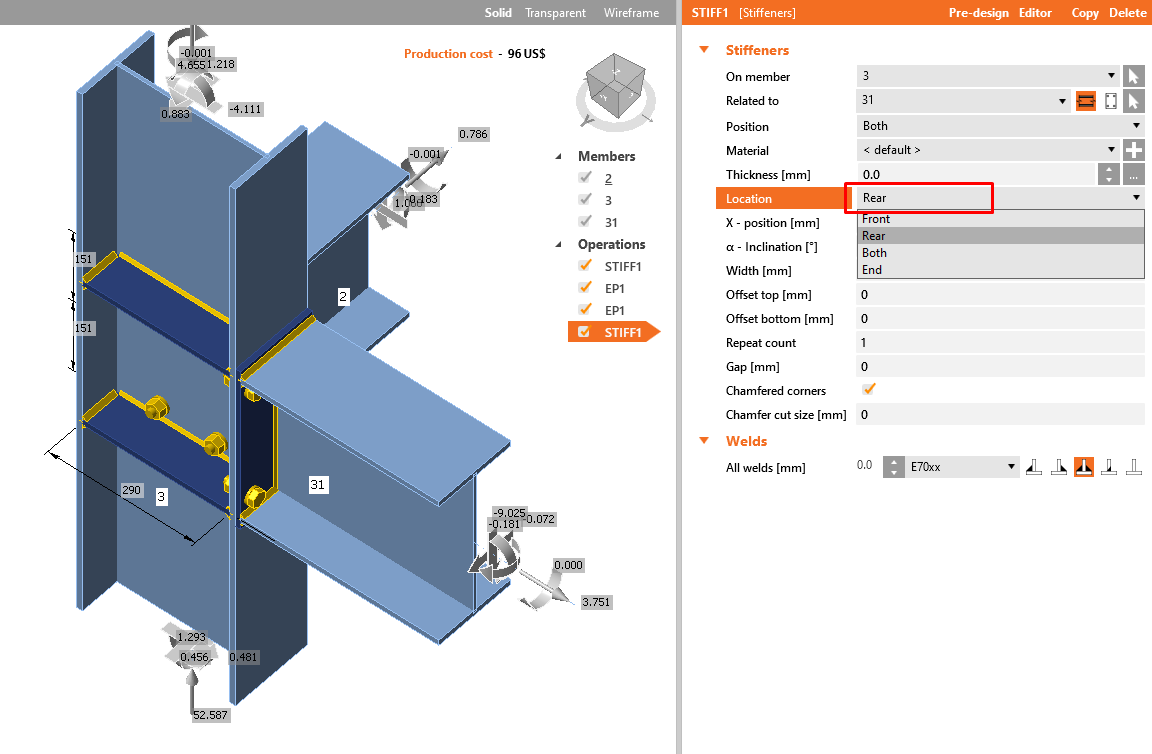
Klikněte na tlačítko Save a zavřete okno.
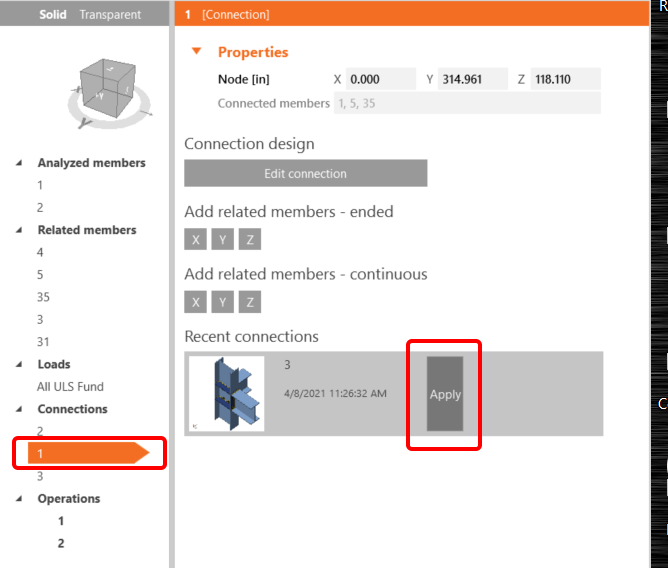
Nyní můžete použít tento navržený styčník pro uzel 1.
Pro střední styčník použijte operaci Clip angle jak je znázorněno na následujícím obrázku.


Pro dokončení našeho prvku musíme přidat otvory do stojiny podél obou nosníků. Klikneme na položku 1 pod Operations a vybereme New operation a poté Openings. Nastavíme hodnoty podle obrázku.


Totéž provedeme pro prvek 2.

4 Posouzení
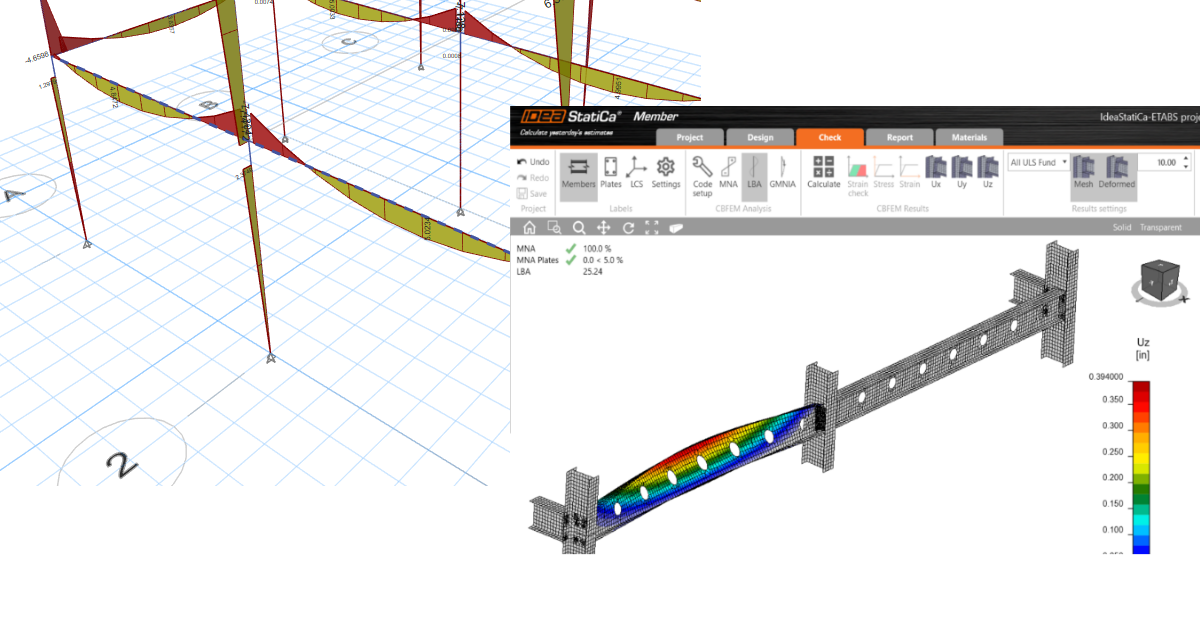
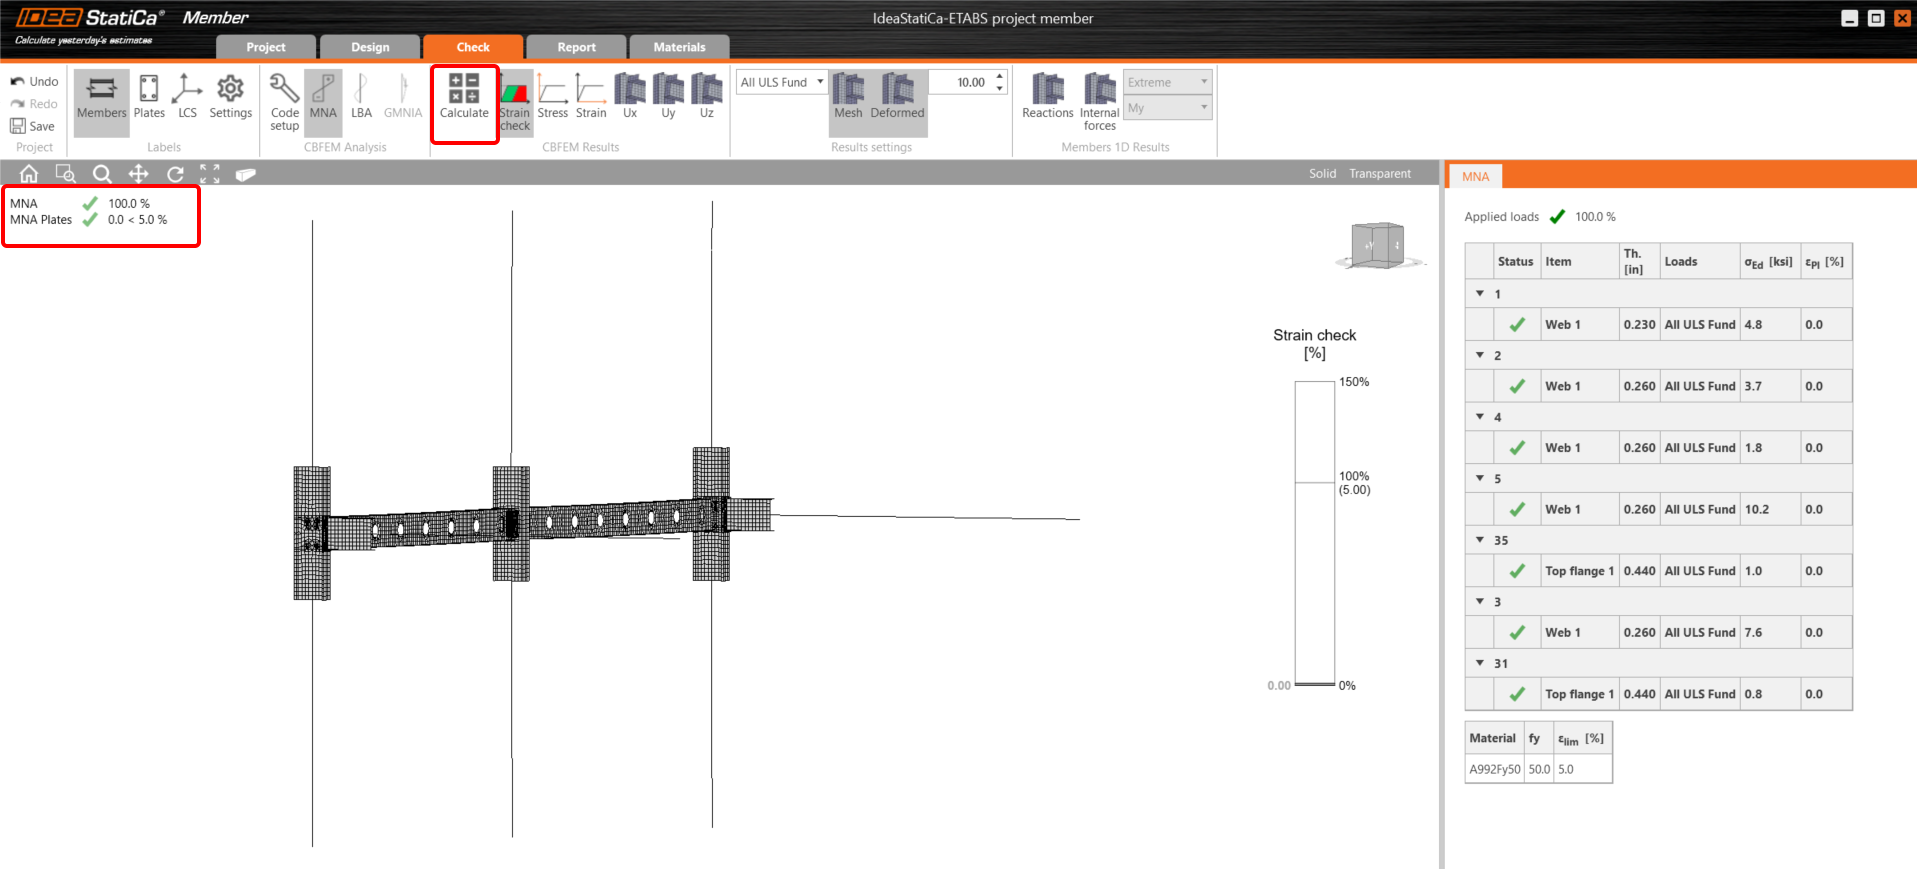
Materiálově nelineární analýza založená na CBFEM je spuštěna ikonou Calculate v horním pásu karet. Analytický model je automaticky vygenerován, výpočet je proveden a můžeme zkontrolovat výsledky.
Pokud chcete LBA – lineární analýzu boulení, musíte vybrat Check v horním pásu karet a kliknout na LBA.

Jak vidíte, výsledek této analýzy je větší než 15, takže není nutné pokračovat s GMNIA (geometricky a materiálově nelineární analýzou). Další informace naleznete v článku o imperfekcích nebo v teoretickém pozadí.
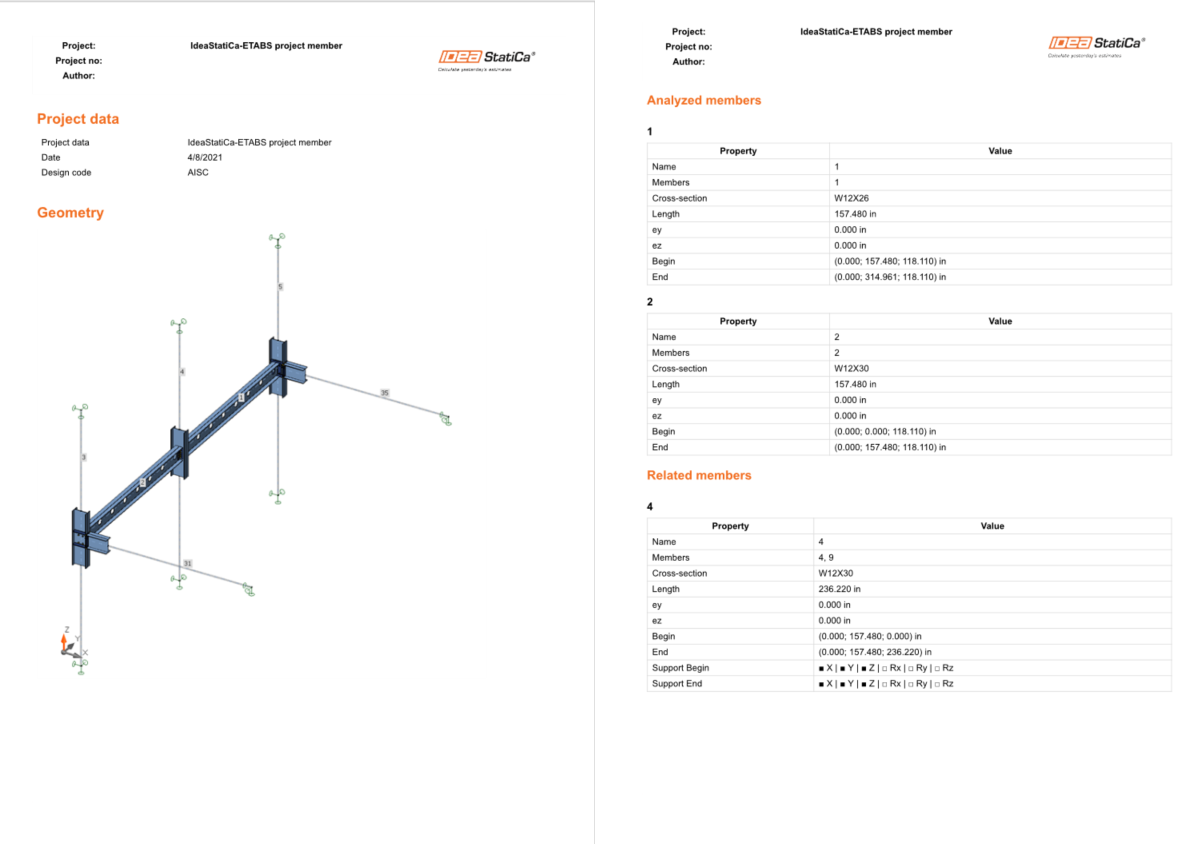
5 Protokol
Nakonec přejdeme na záložku Report. IDEA StatiCa nabízí plně přizpůsobitelný protokol pro tisk nebo uložení v editovatelném formátu.
Chcete zlepšit své dovednosti? Navštivte náš Campus
Přiložené soubory ke stažení
- ETABS project member.zip (ZIP, 127 kB)