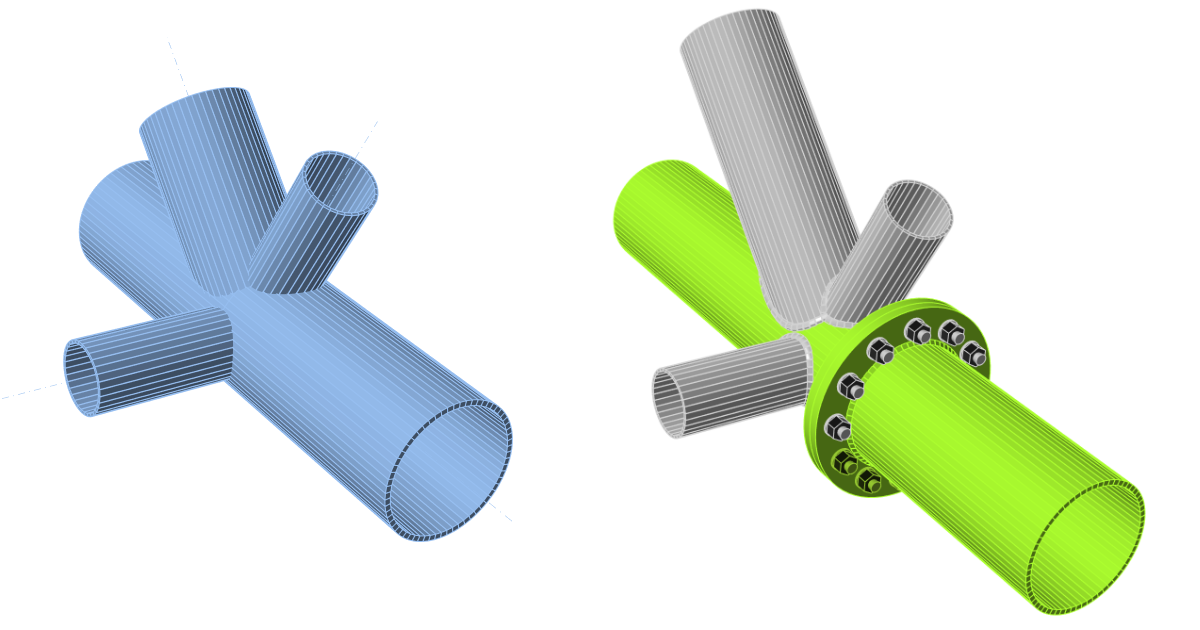
Progettazione del collegamento di un telaio 3D tubolare (EN)
1 Nuovo progetto
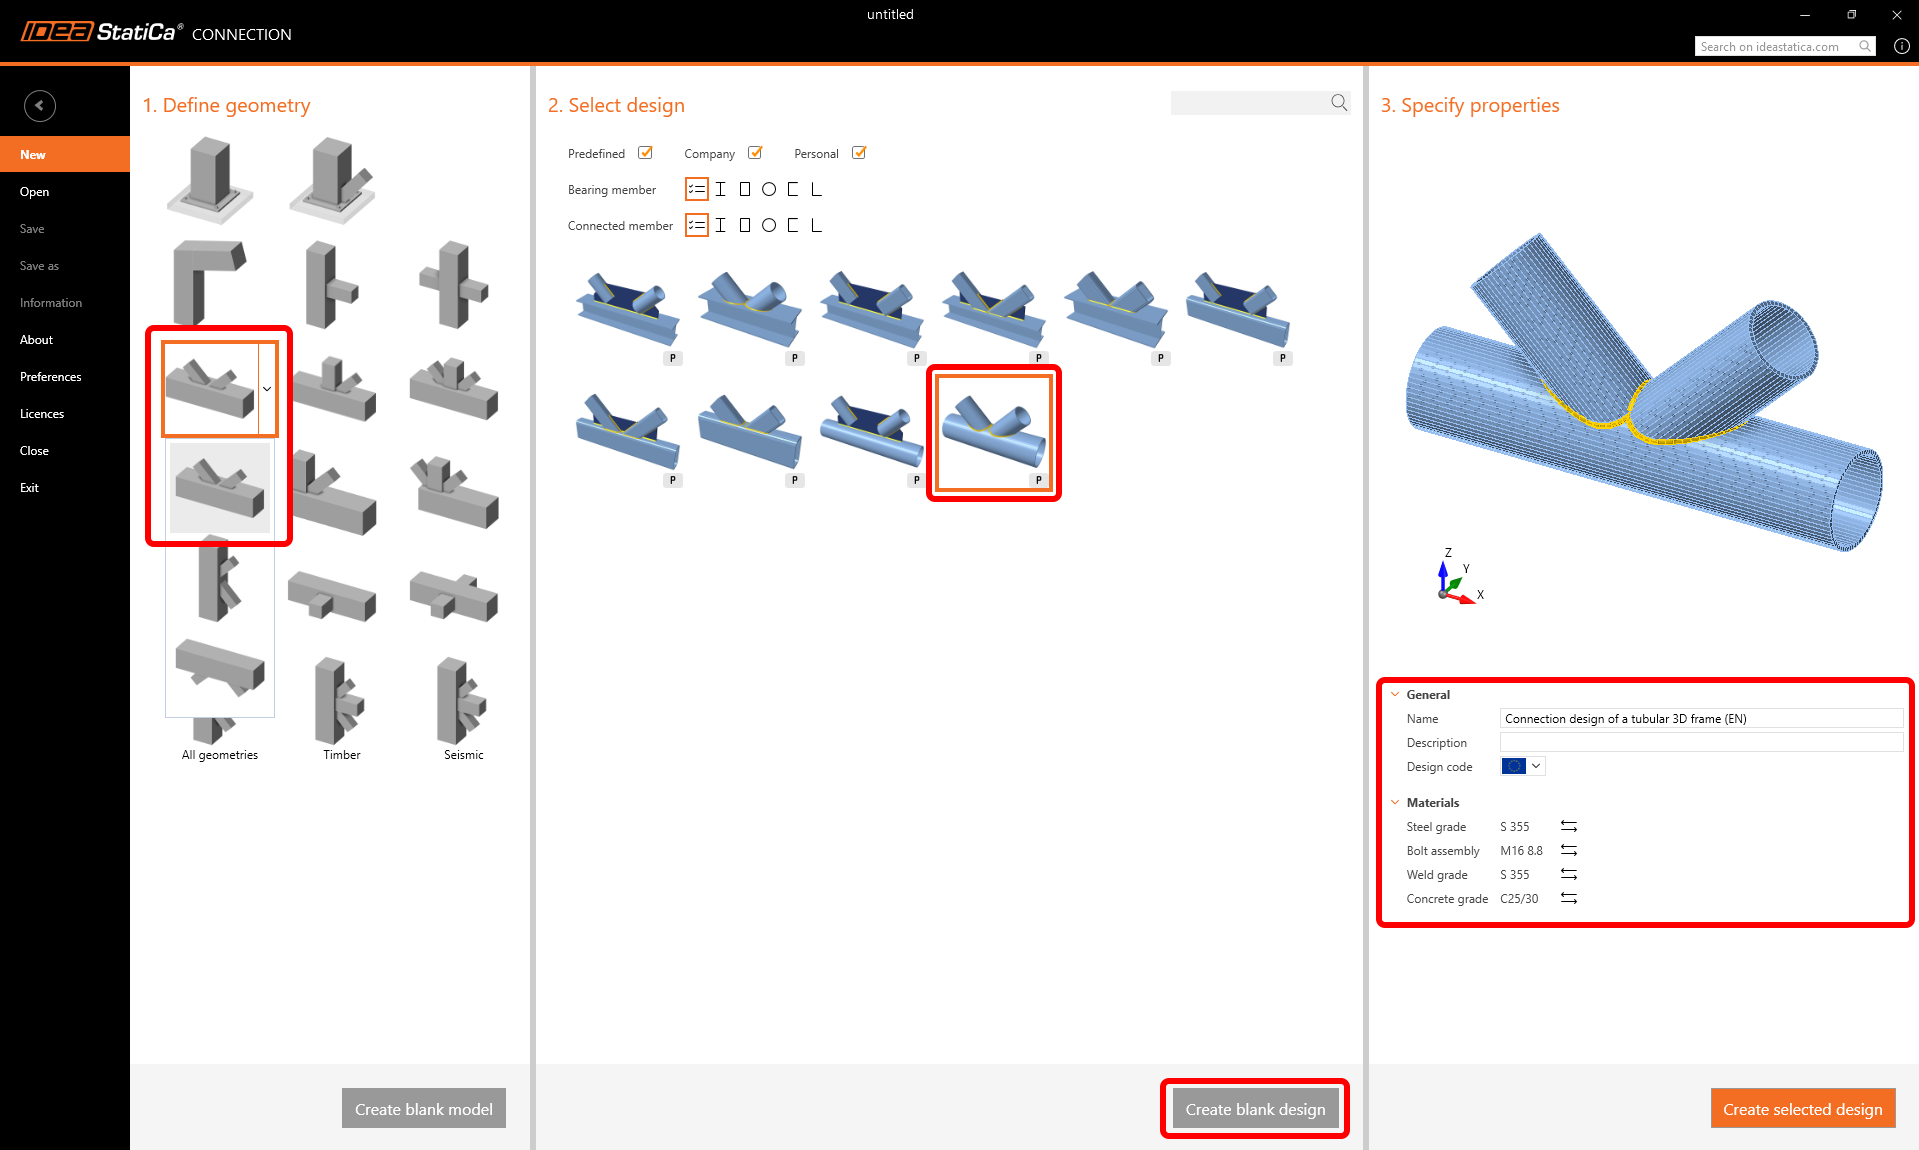
Avviamo l'applicazione IDEA StatiCa Connection (scarica la versione più recente). Crea un nuovo progetto selezionando il modello più vicino alla progettazione richiesta. Seleziona il grado di acciaio desiderato (S355) e il codice di progetto (EN). Puoi anche inserire il nome e la descrizione del progetto.
Poiché non esiste un modello adatto direttamente, utilizzeremo il progetto vuoto con sola geometria predefinita. Pertanto, premi il pulsante Crea progetto vuoto.
2 Geometria
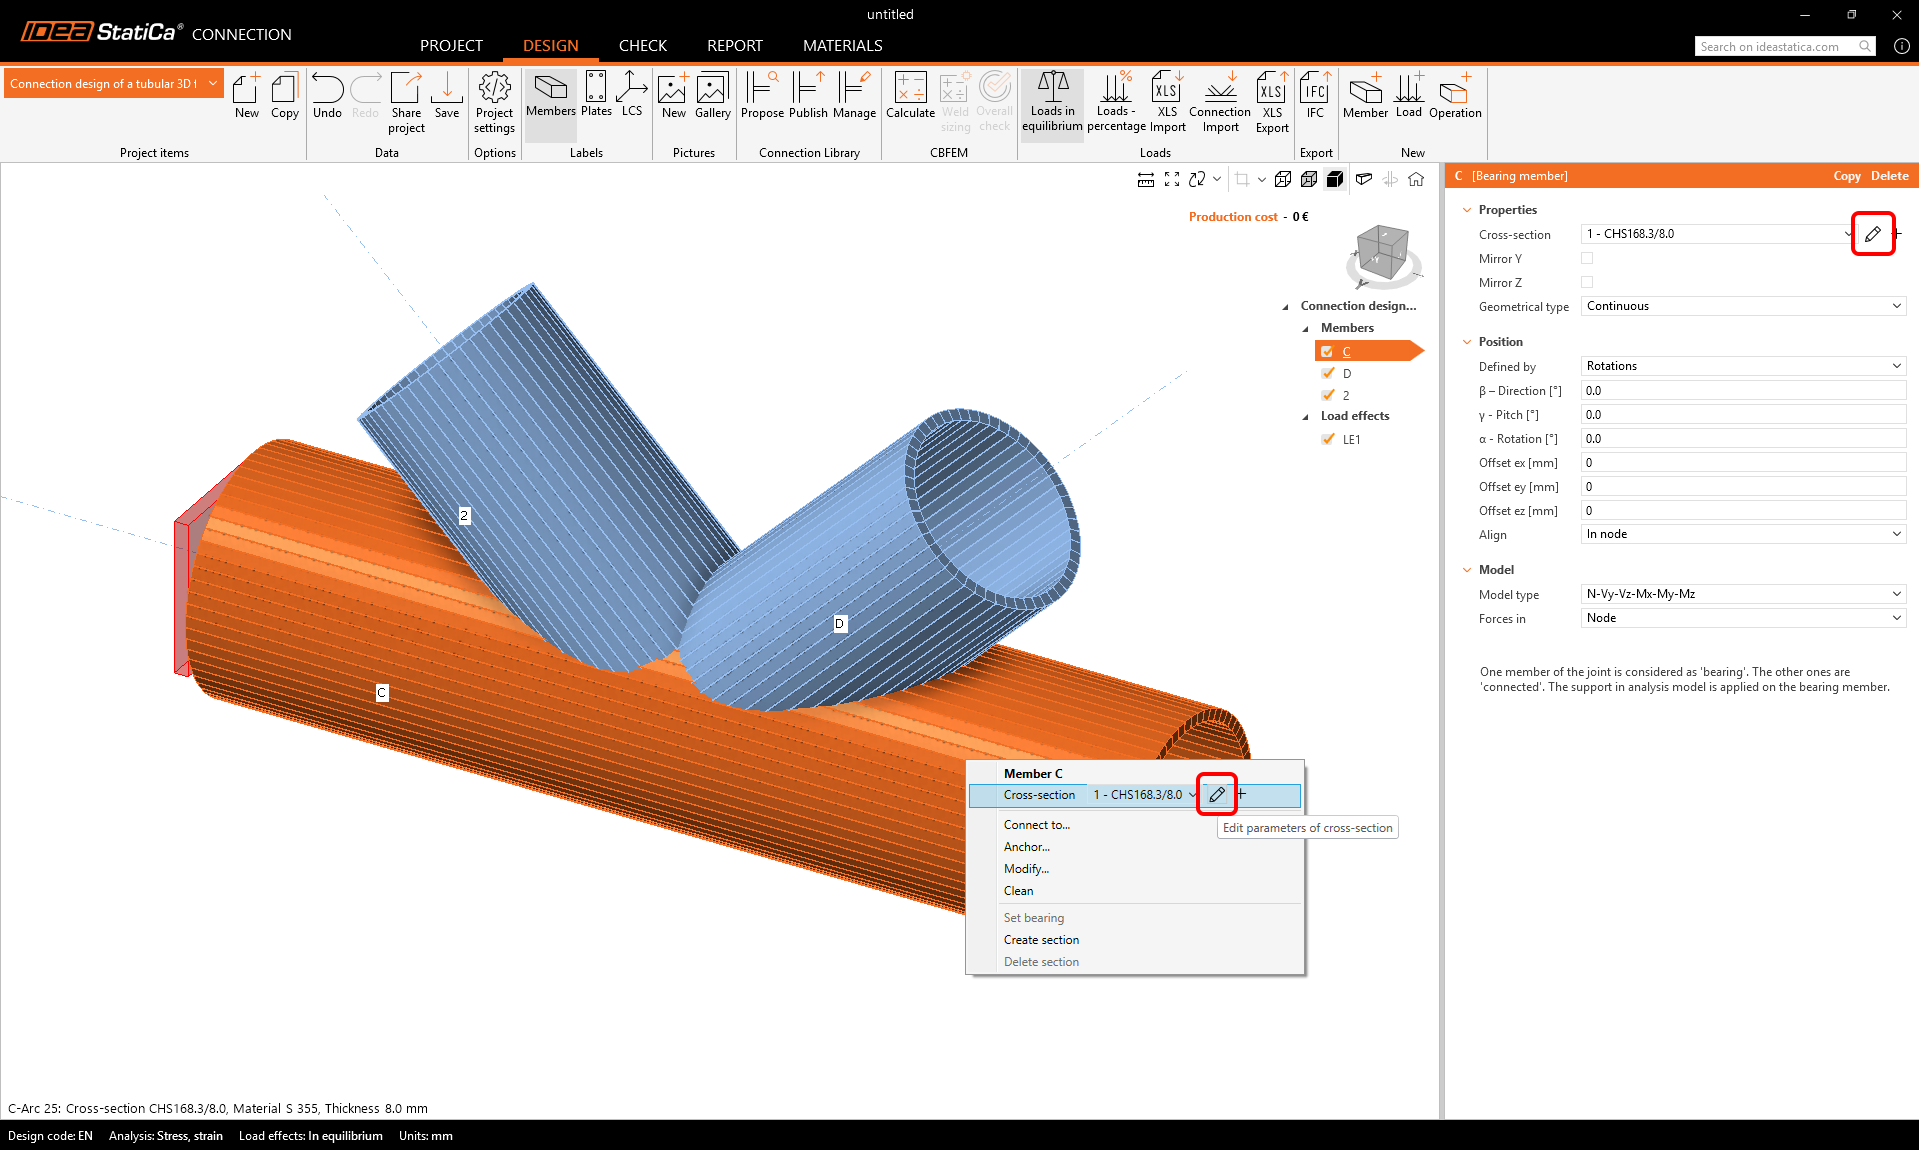
- Inizia con la modifica della geometria del giunto. Il clic con il tasto destro del mouse sulla trave continua nella scena 3D (o tramite il pulsante nell'elenco delle proprietà) apre il menu contestuale con tutte le azioni disponibili per gli elementi. Usa il pulsante a matita per modificare la sezione trasversale esistente.
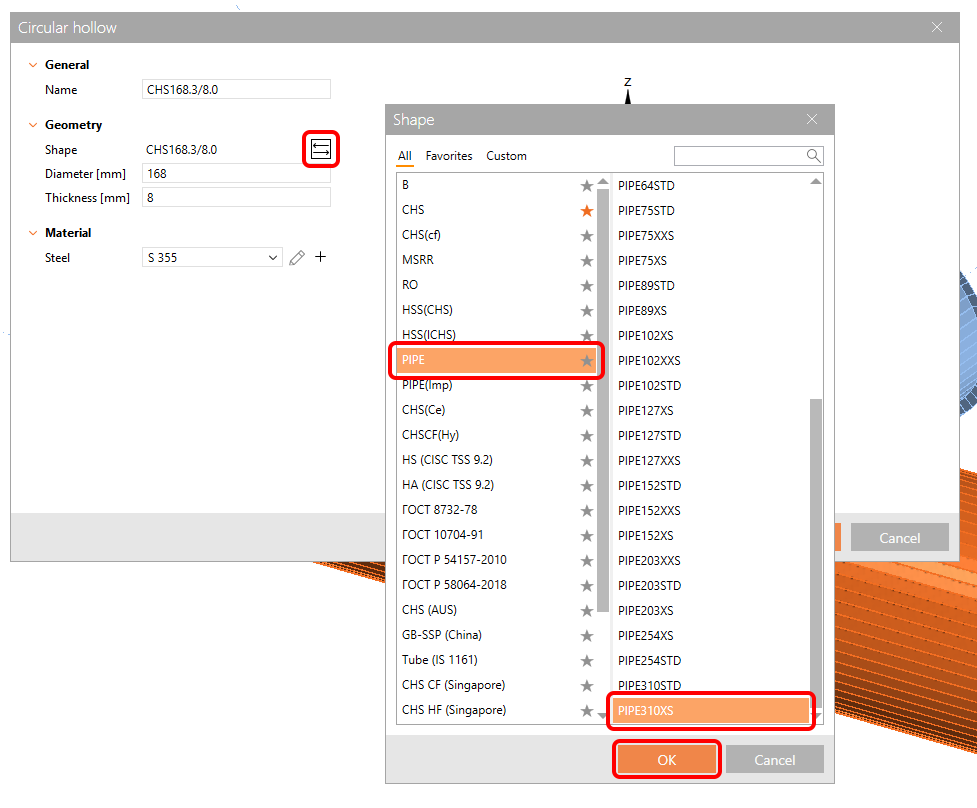
Apri la libreria e seleziona la sezione trasversale PIPE310XS. Conferma con OK.
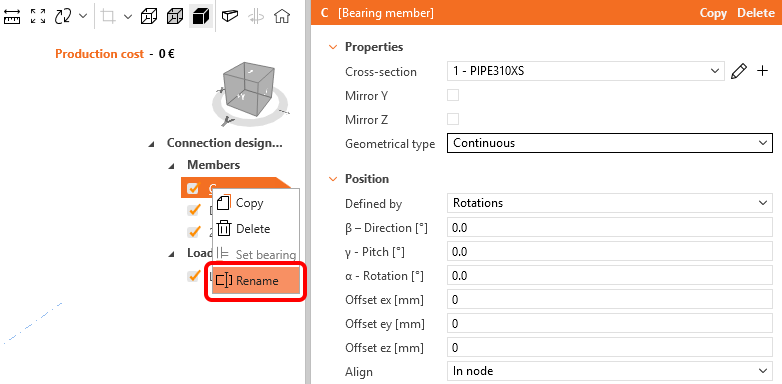
Cambia il nome dell'elemento in C1 usando il tasto destro del mouse.
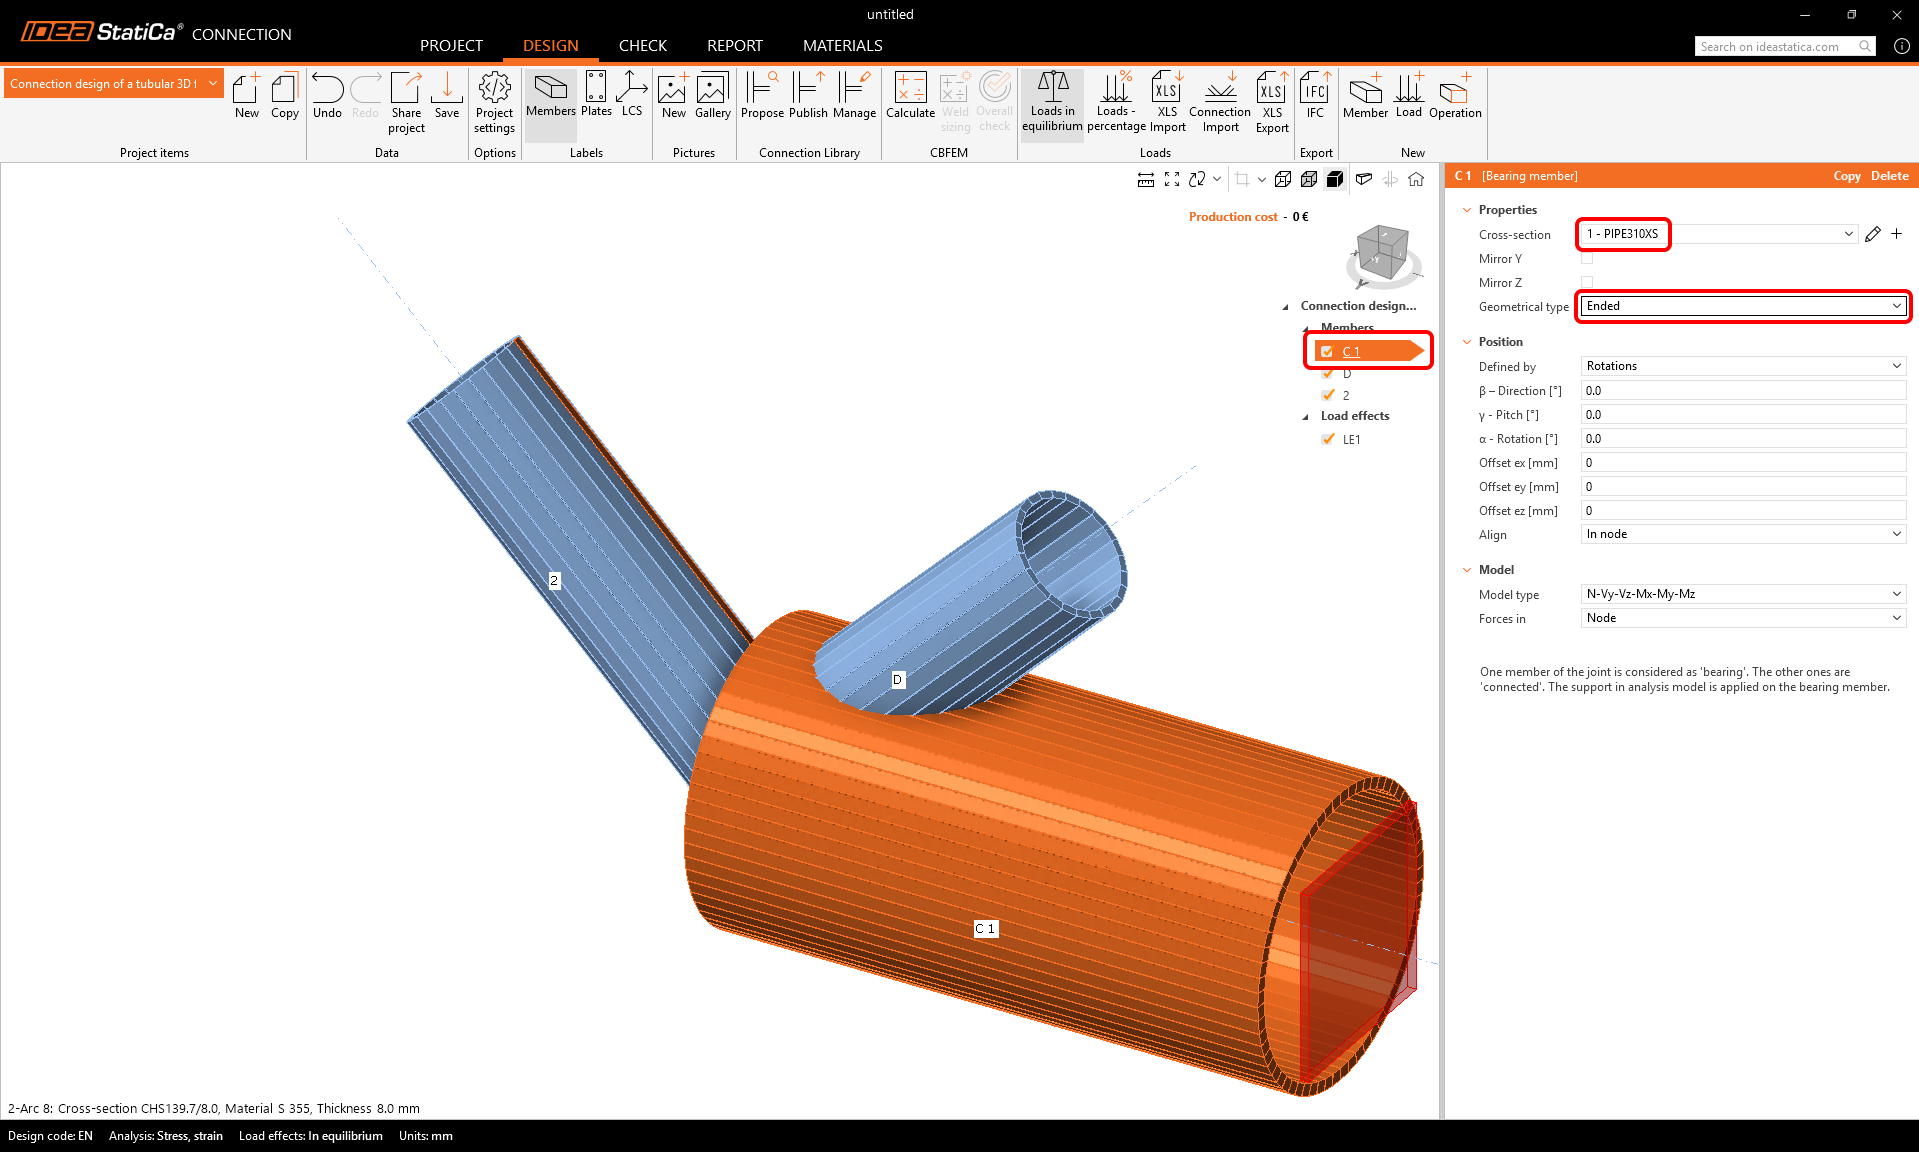
E cambia il tipo geometrico dell'elemento C1 da continuo a terminato.
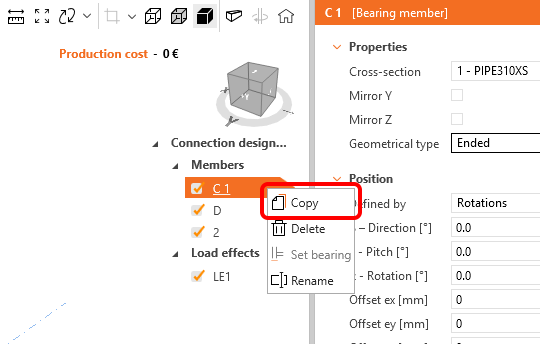
Sfrutta l'elemento già preparato e copialo: fai clic con il tasto destro del mouse sull'elemento C1 nell'elenco delle entità e seleziona il comando Copia.
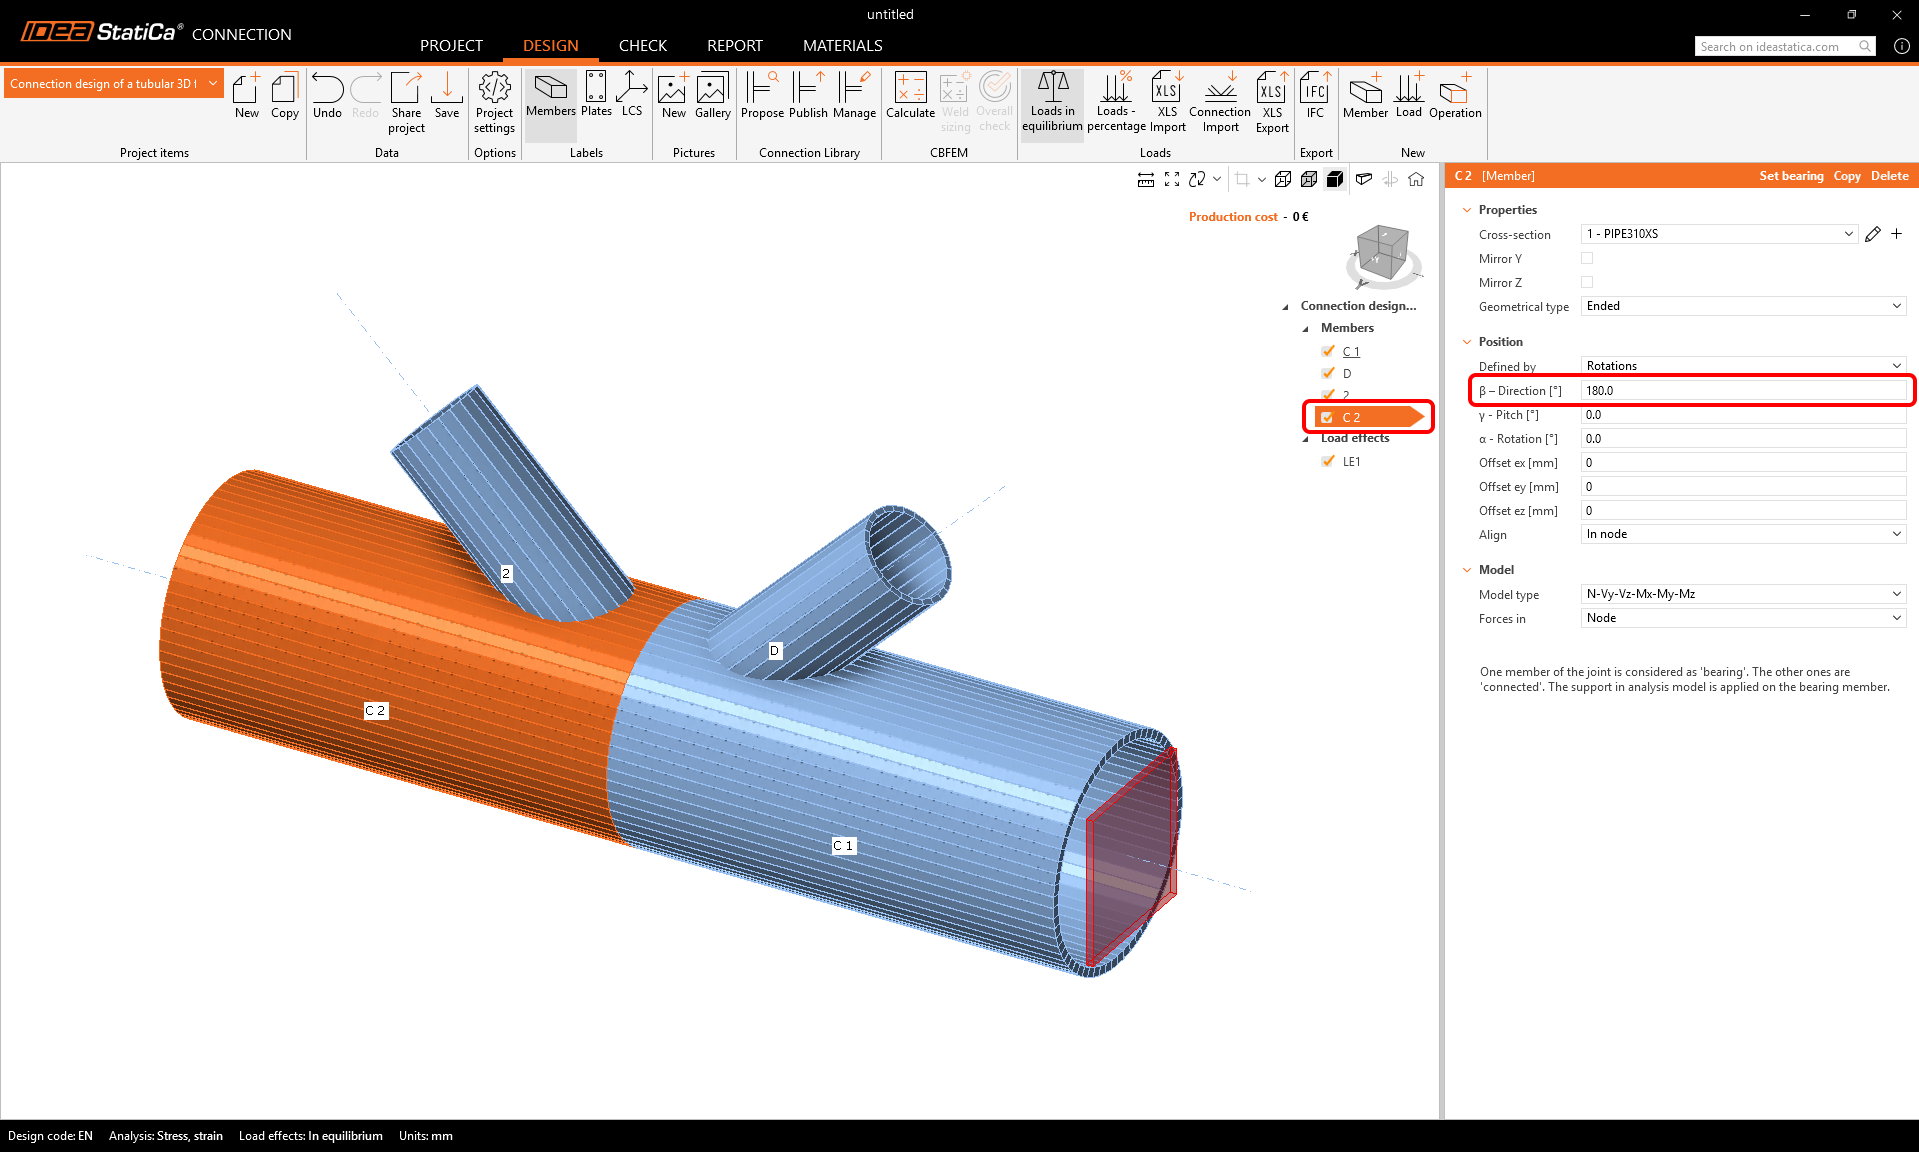
Rinomina il nuovo elemento aggiunto in C2 e imposta la sua direzione (beta) a 180°.
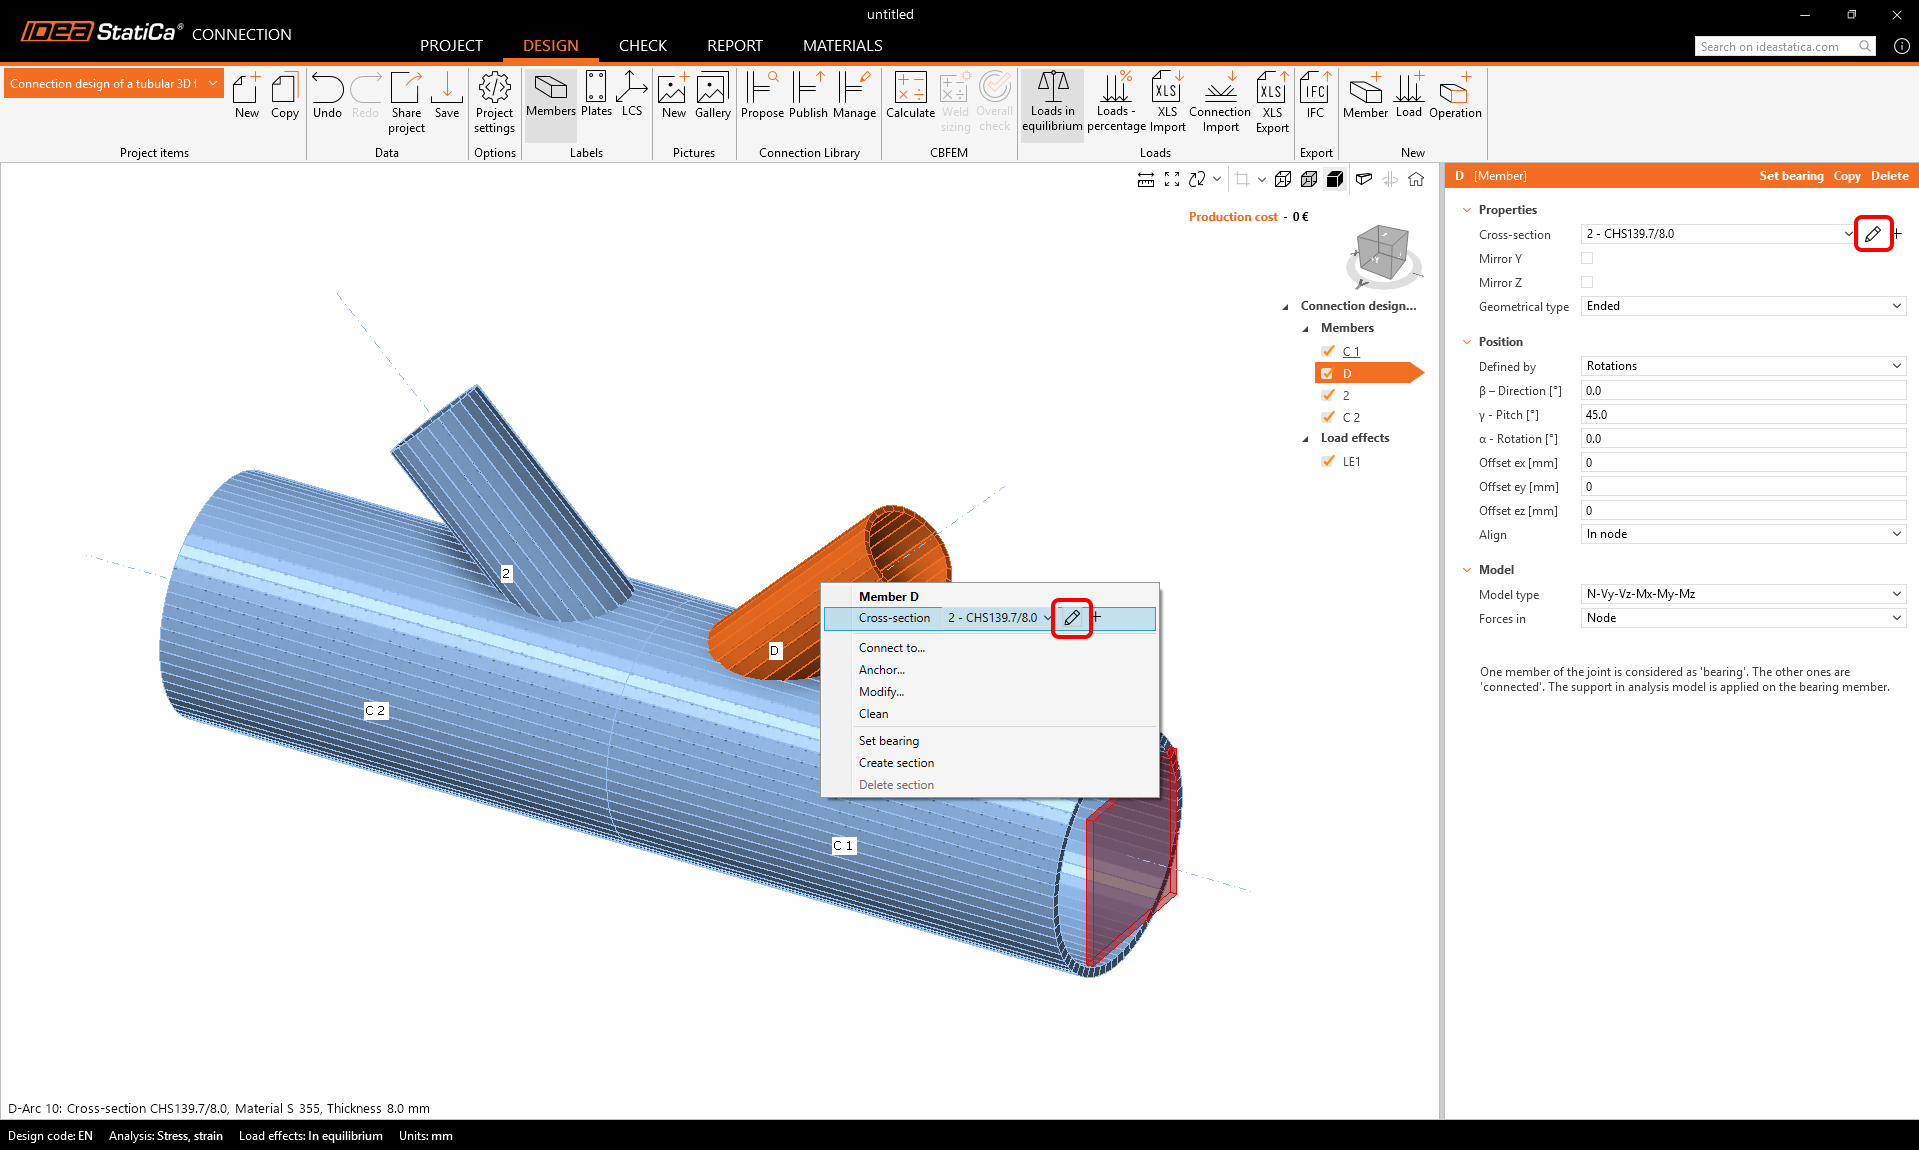
Procedi con la modifica della sezione trasversale sulle diagonali.
Fai clic con il tasto destro del mouse sull'elemento D nella finestra 3D e scegli la matita per cambiare la dimensione della sezione trasversale. Seleziona la sezione trasversale PIPE 152STD.
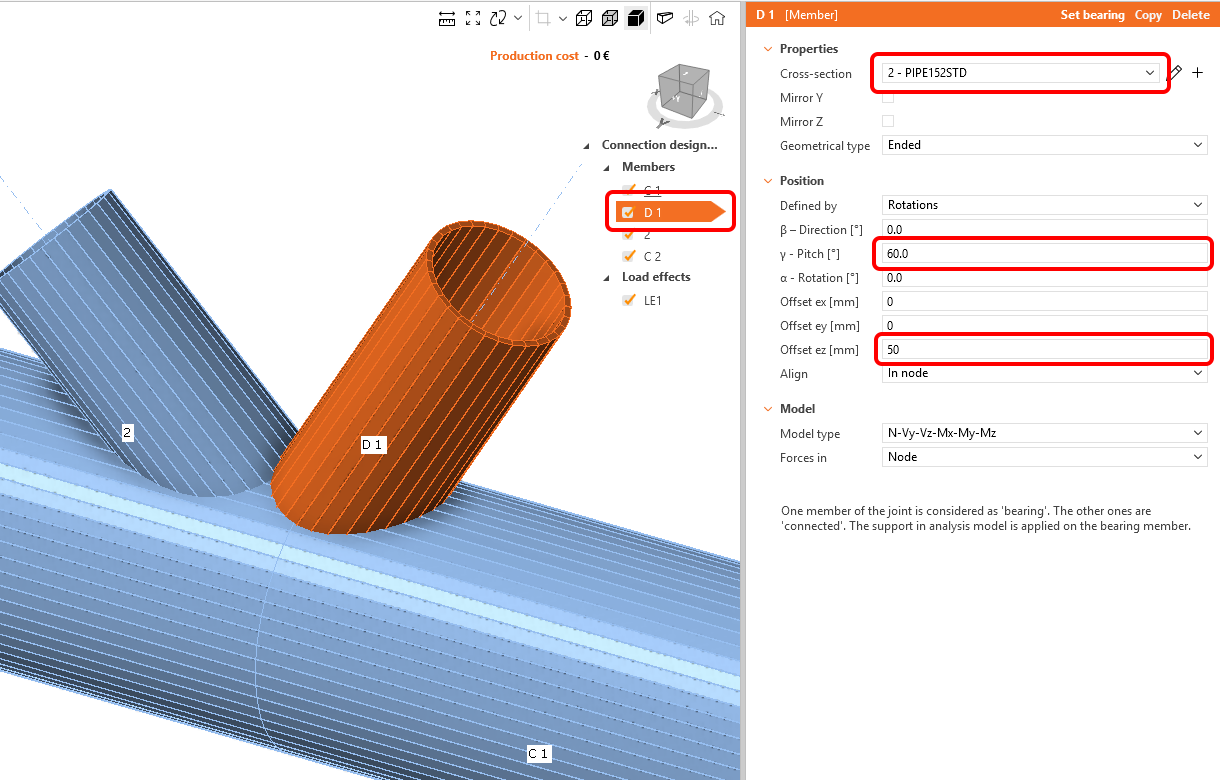
Rinomina l'elemento in D1 e modifica le sue proprietà come mostrato nella figura seguente.
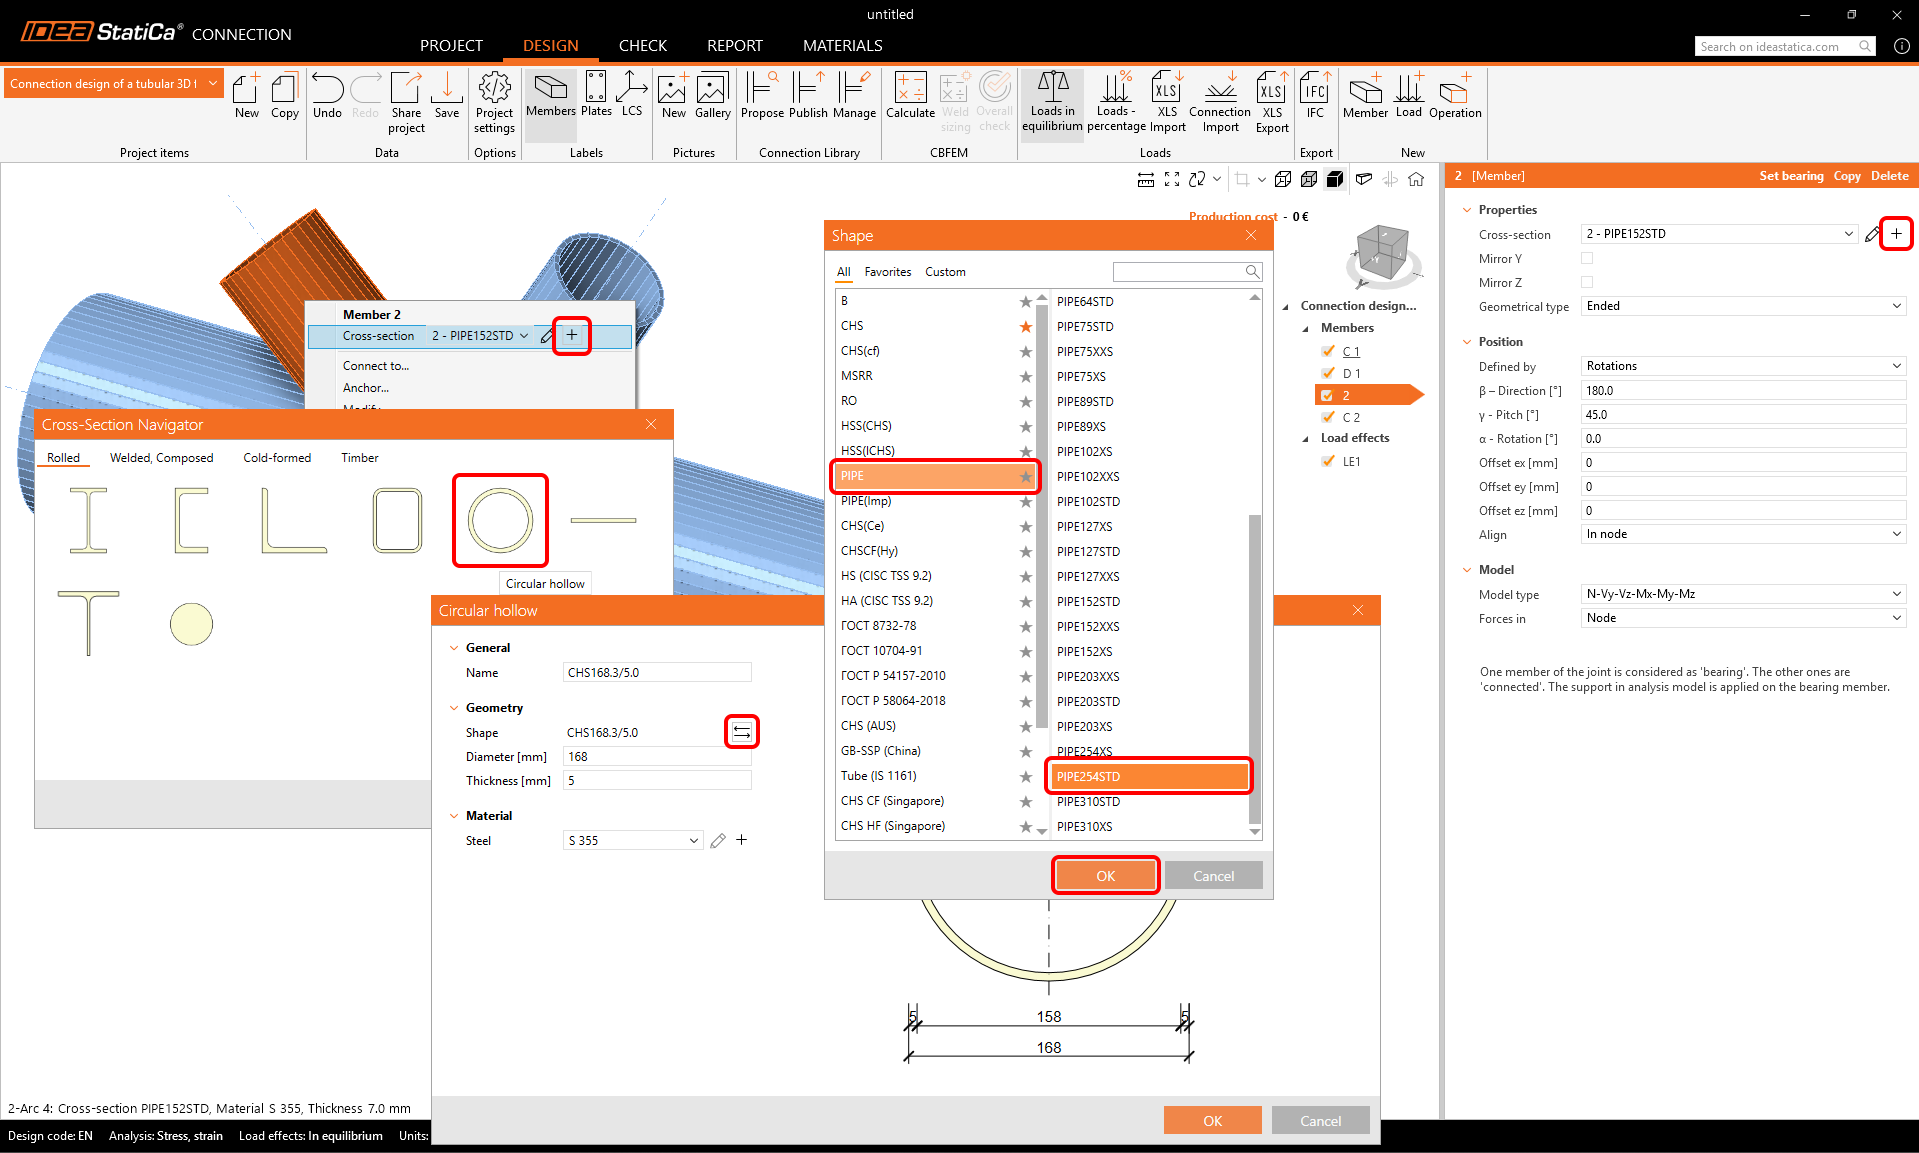
Procedi con il secondo elemento diagonale. Usa il pulsante più per definire una nuova sezione trasversale e scegli PIPE 254STD dalla libreria.
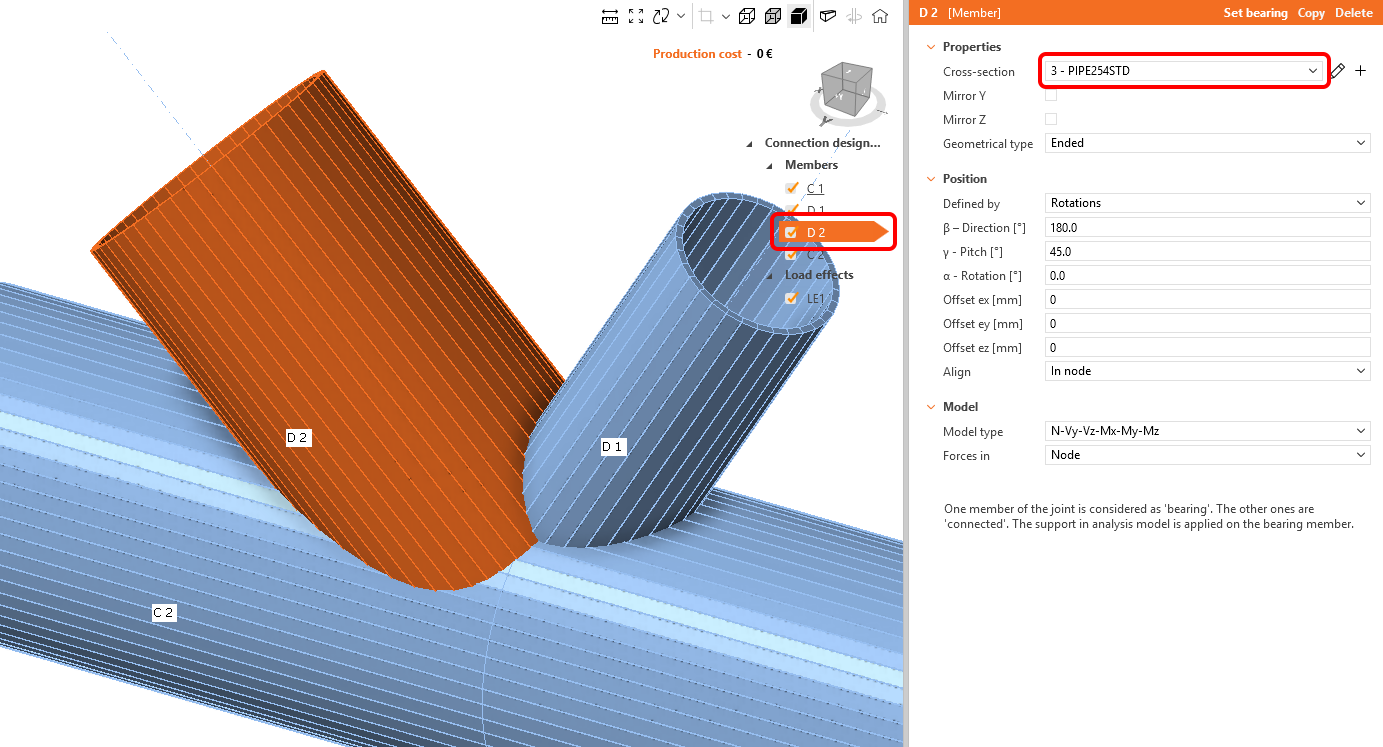
Cambia il nome dell'elemento in D2.
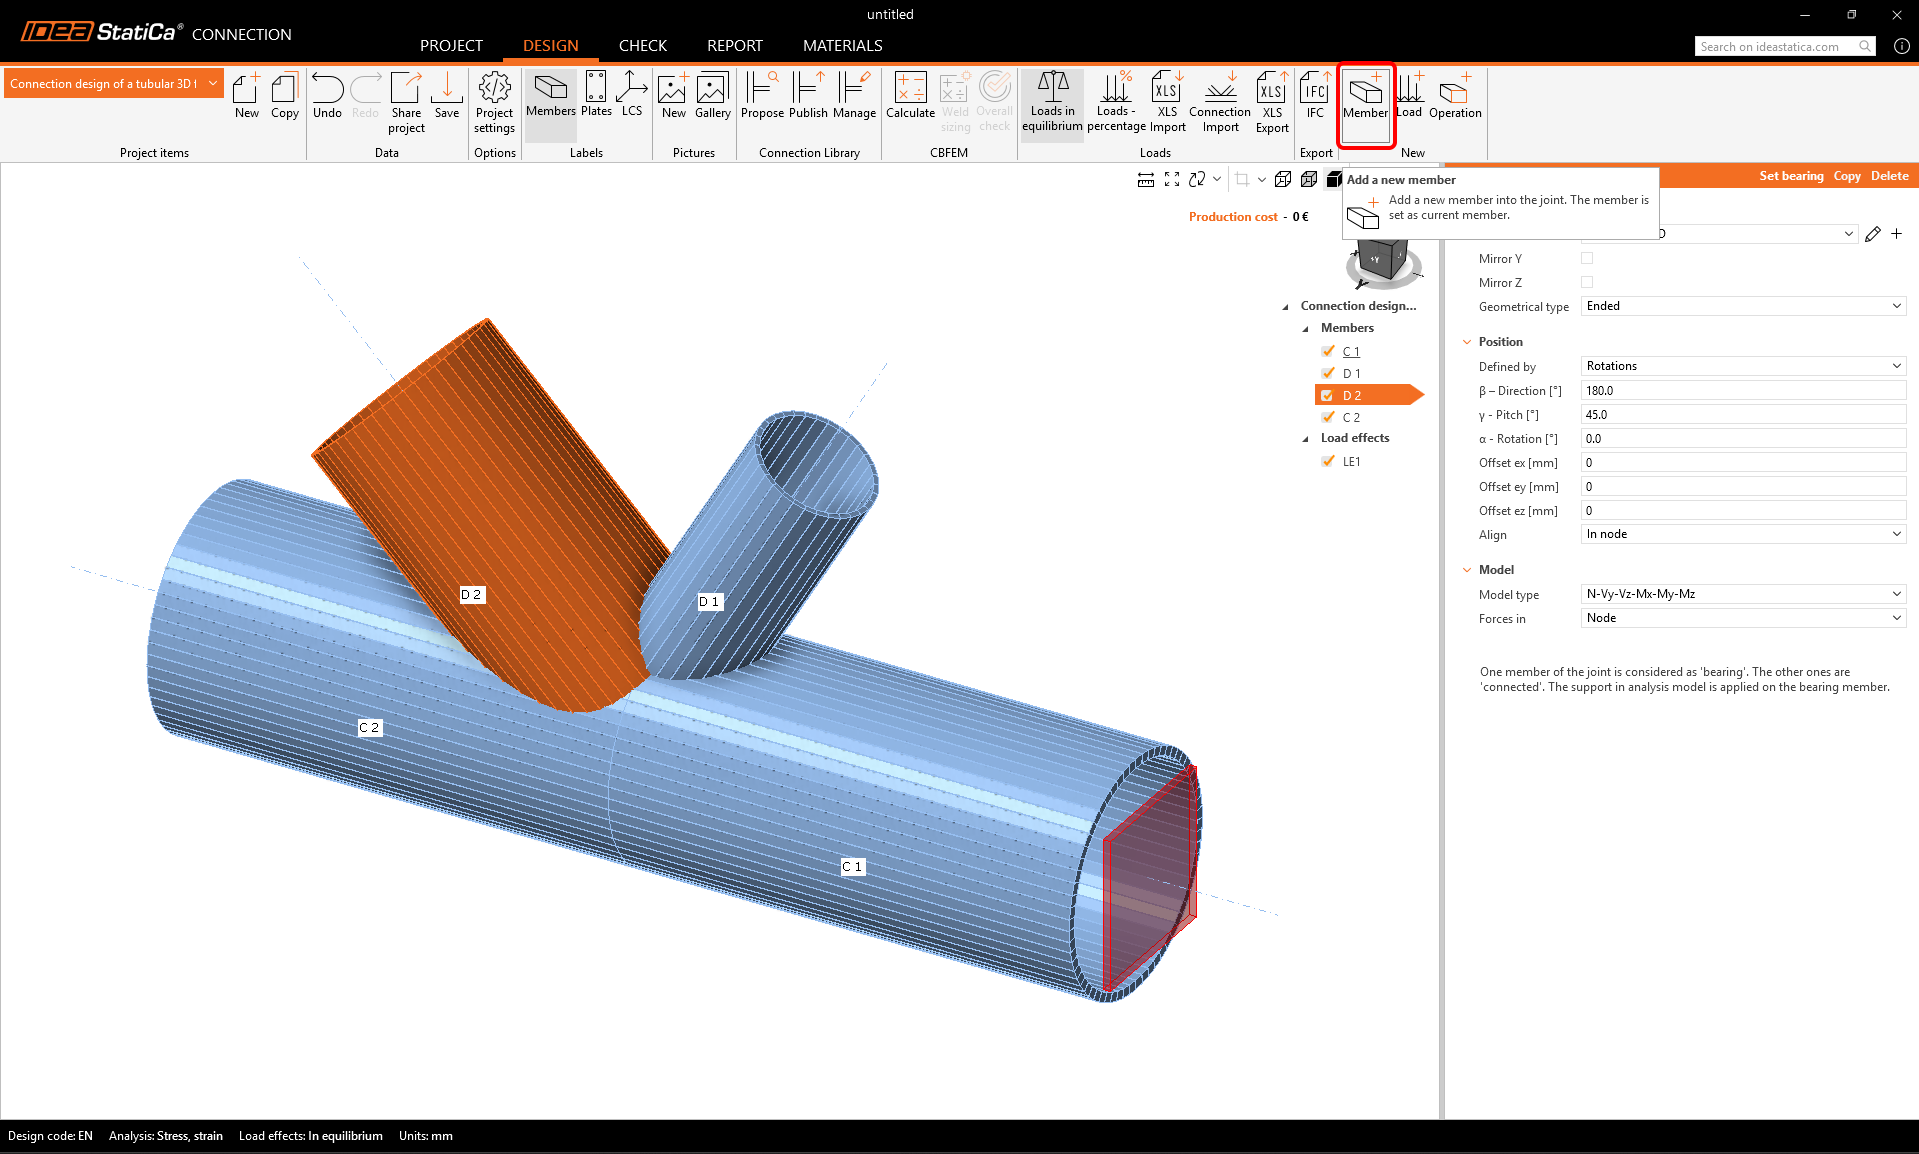
Ora aggiungi un altro elemento – puoi farlo usando il nuovo pulsante Member dalla barra multifunzione superiore.
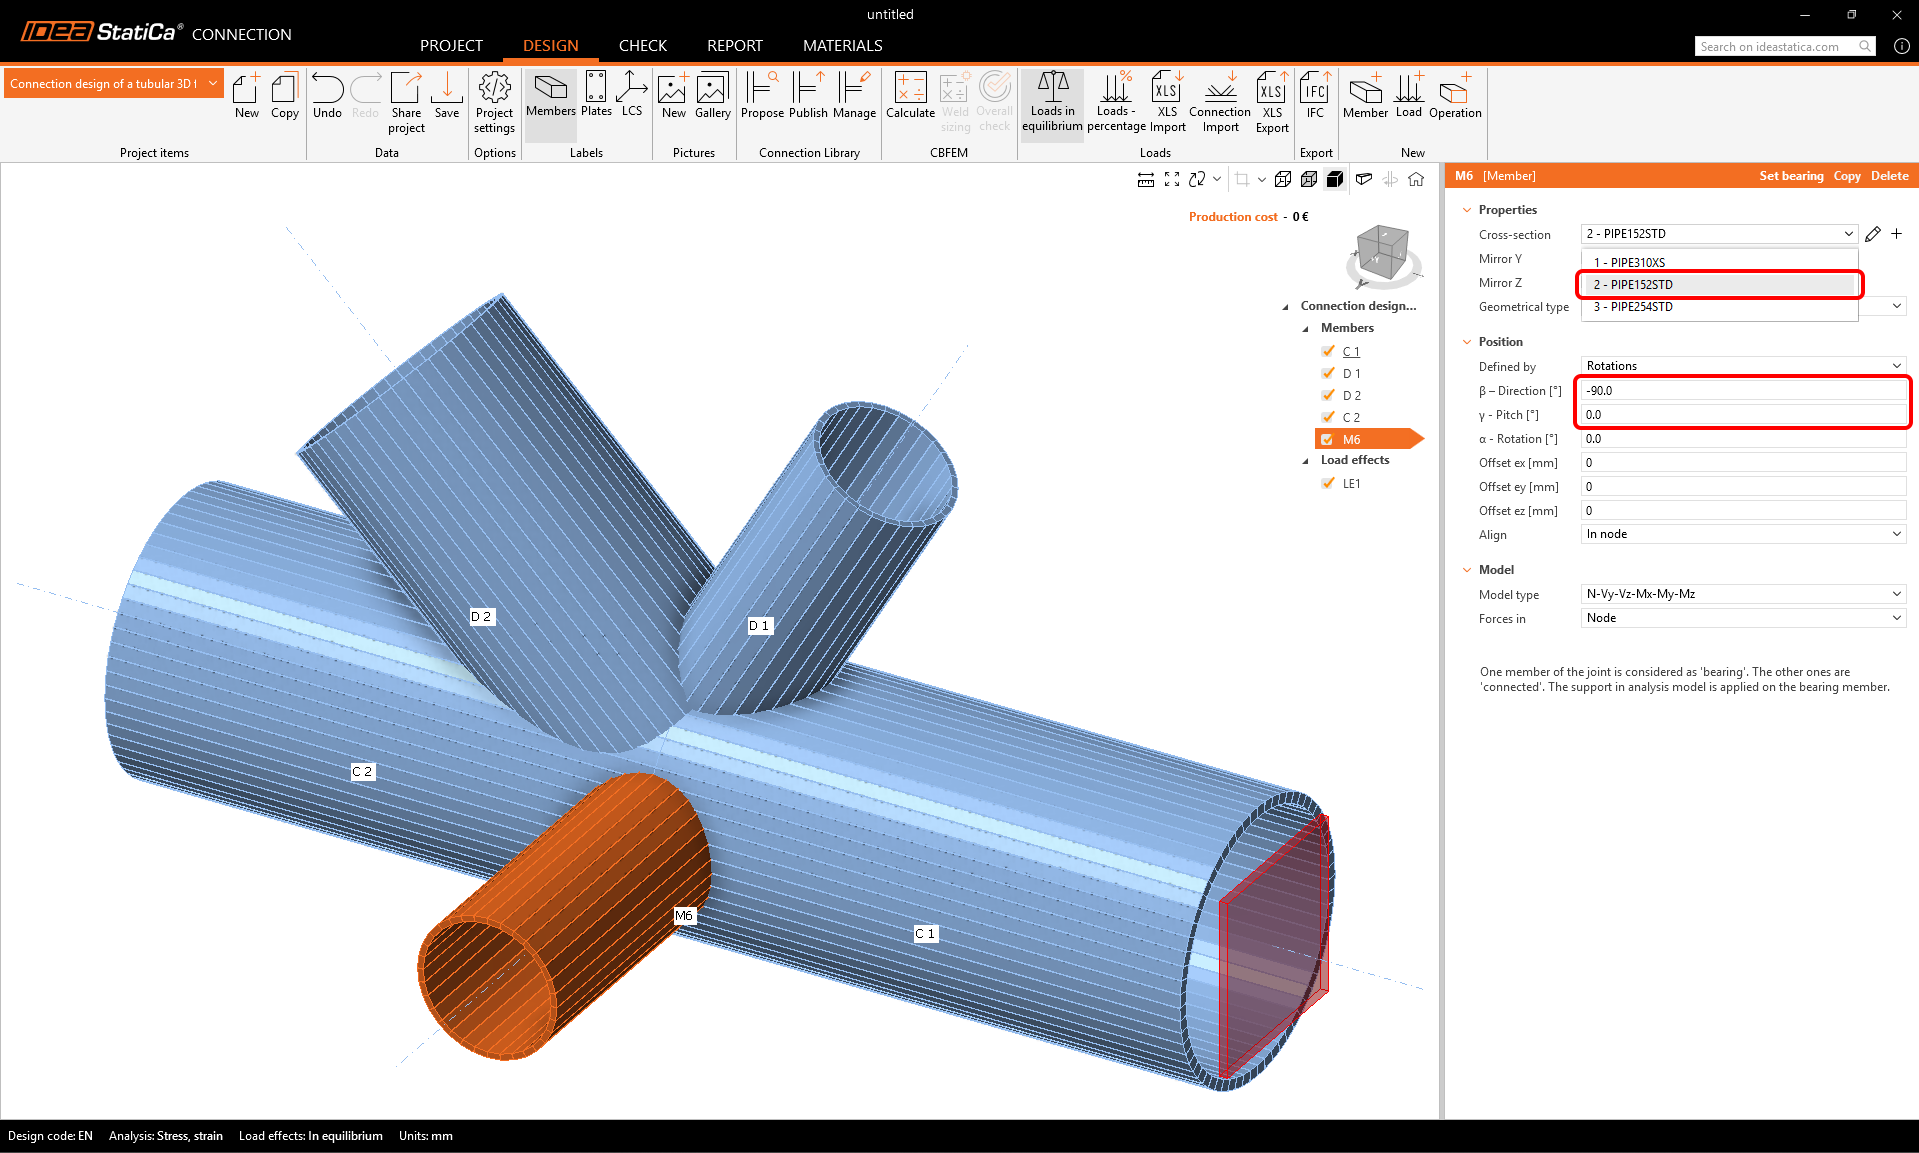
Ora puoi modificare le proprietà del nuovo elemento M6: sezione trasversale: PIPE 152STD, direzione beta = -90°, inclinazione gamma = 0.
3 Effetti del carico
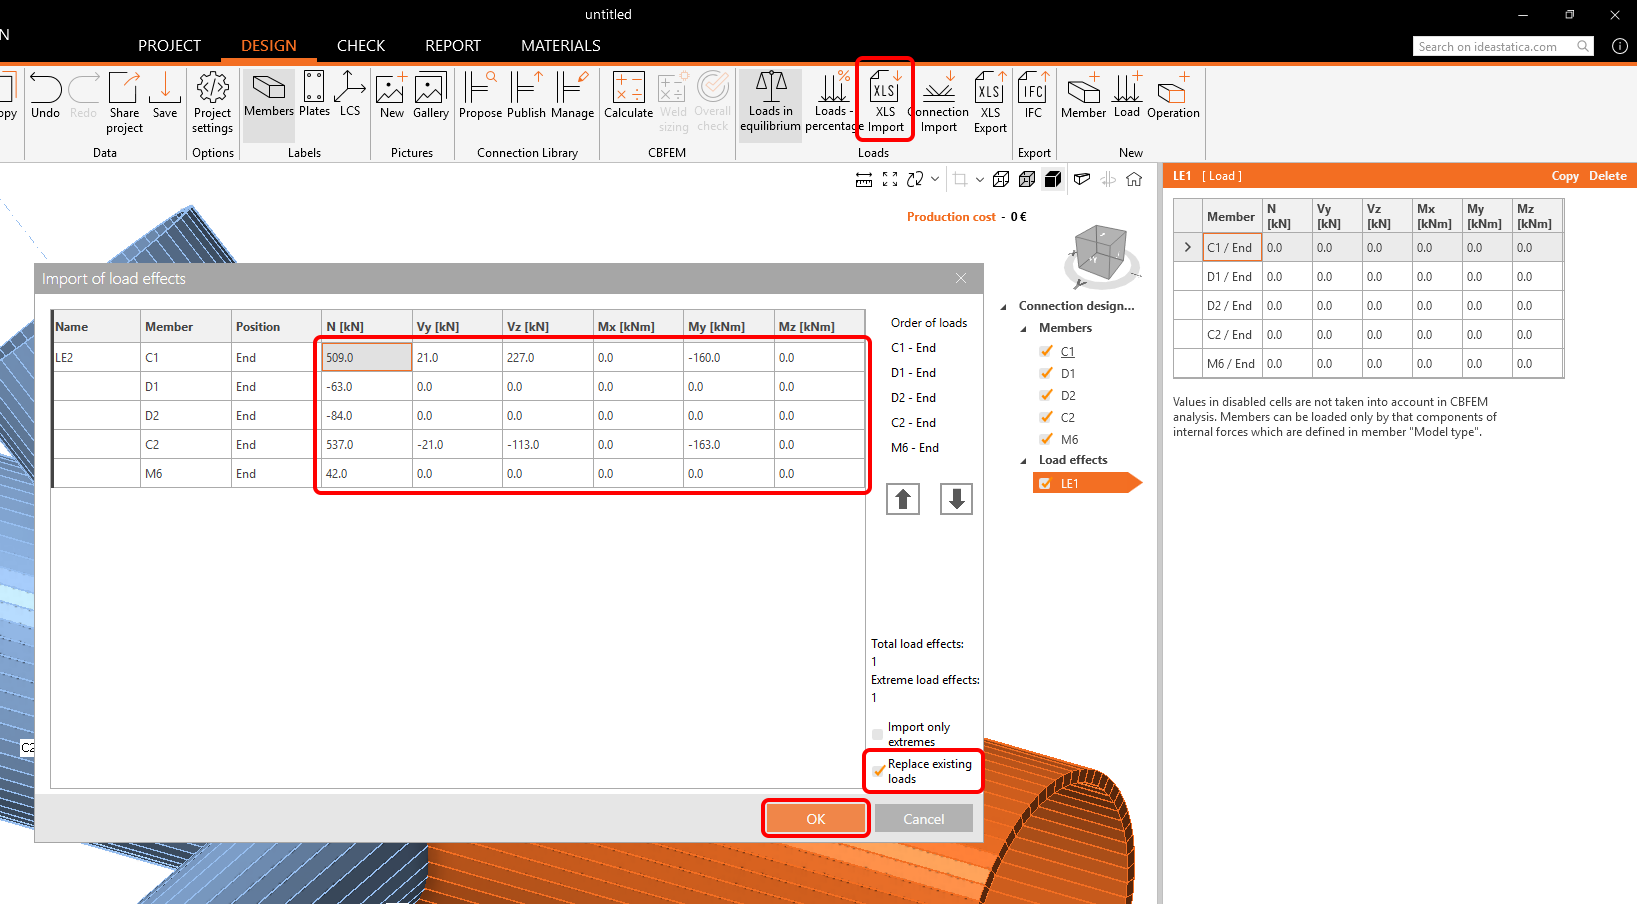
Continua con gli Effetti del carico. Un effetto del carico è stato aggiunto automaticamente. È necessario inserire tutte le forze interne nella tabella. L'opzione Carichi in equilibrio è attivata automaticamente. Puoi inserire i valori manualmente oppure usare il copia+incolla dei valori dalla tabella seguente.
Copia i valori da qui:
| N [kN] | Vy [kN] | Vz [kN] | Mx [kNm] | My [kNm] | Mx [kNm] |
| 509 | 21 | 227 | 0 | -160 | 0 |
| -63 | 0 | 0 | 0 | 0 | 0 |
| -84 | 0 | 0 | 0 | 0 | 0 |
| 537 | -21 | -113 | 0 | -163 | 0 |
| 42 | 0 | 0 | 0 | 0 | 0 |
Incolla i valori usando il pulsante Importa XLS. Seleziona la casella Sostituisci carichi esistenti.
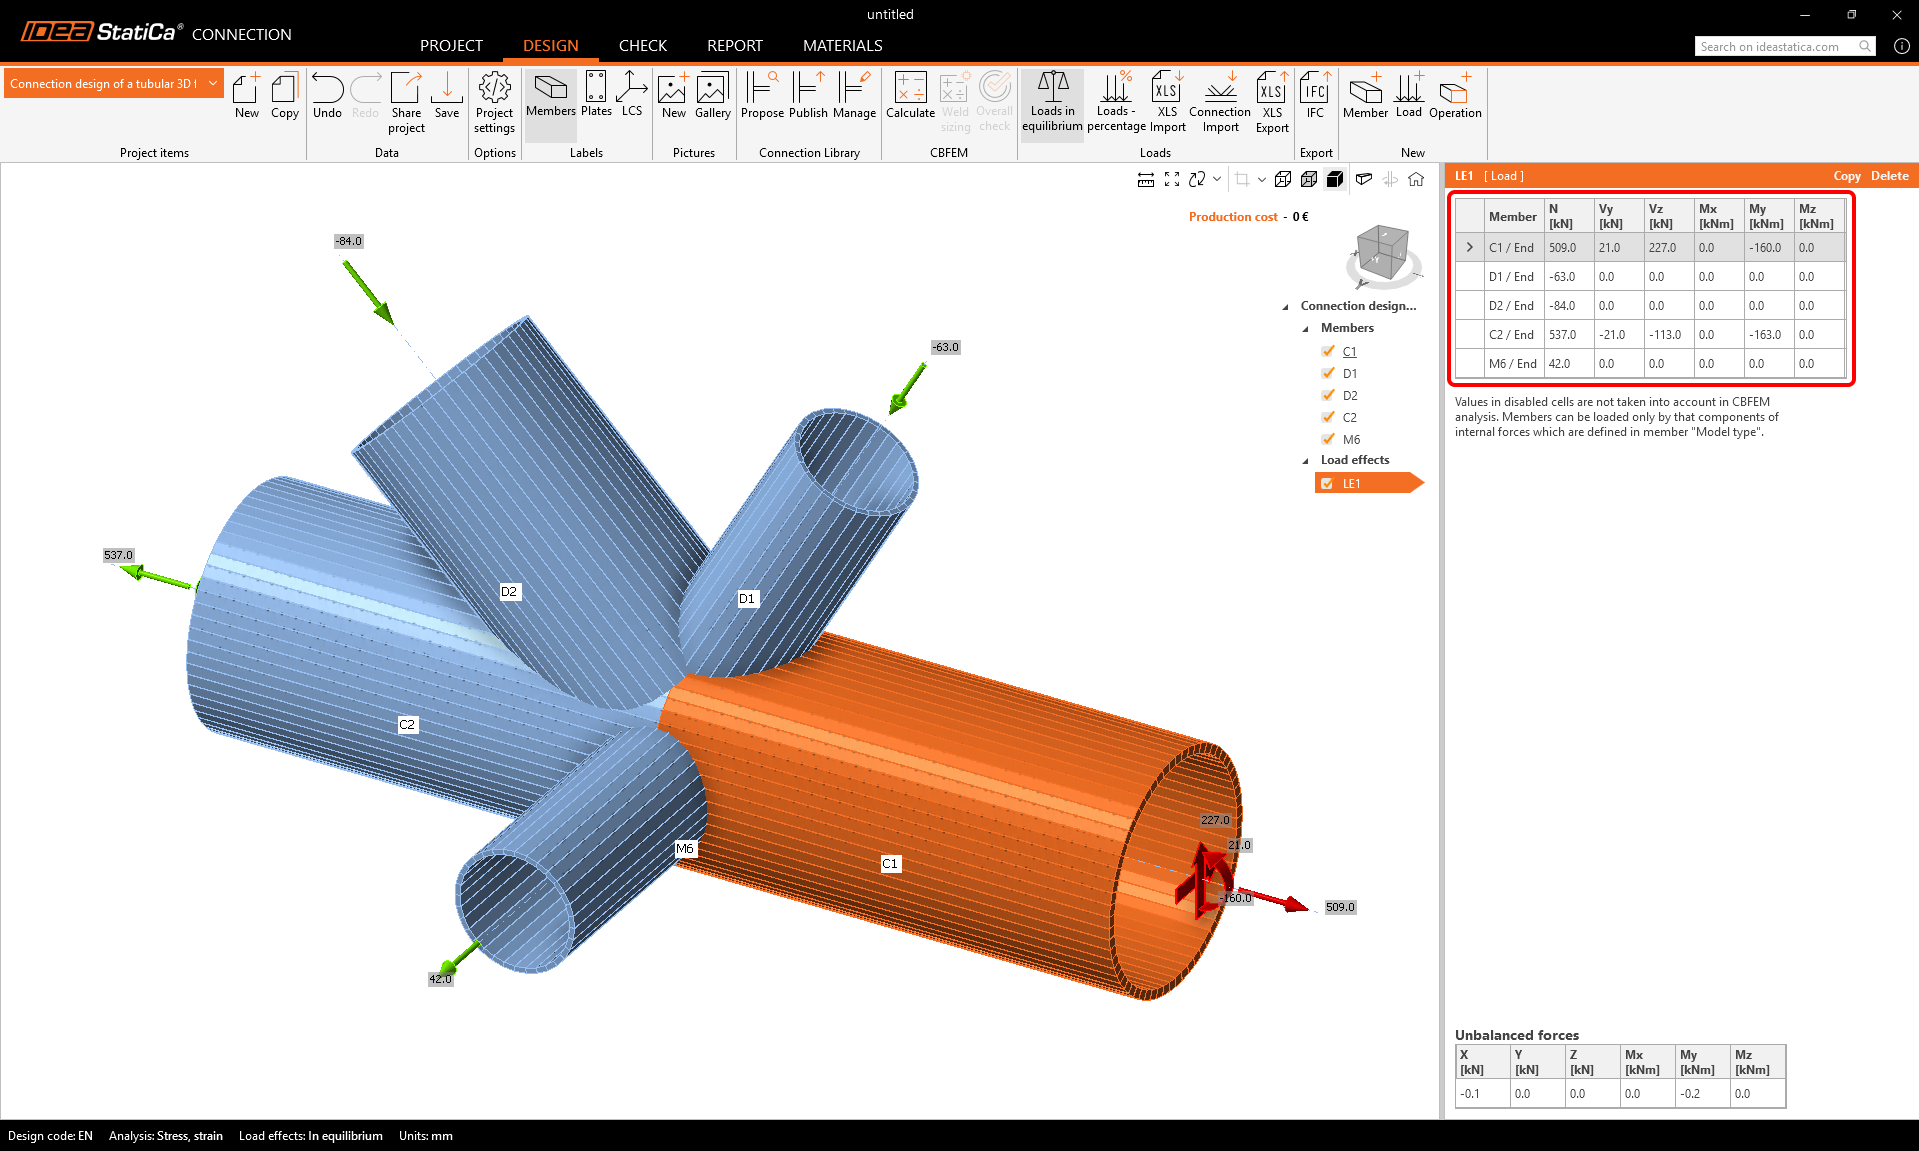
Le forze sono state applicate al modello ed è pronto per essere progettato.
4 Progettazione
Combineremo il modello dalla Connection Library con ulteriori operazioni di lavorazione.
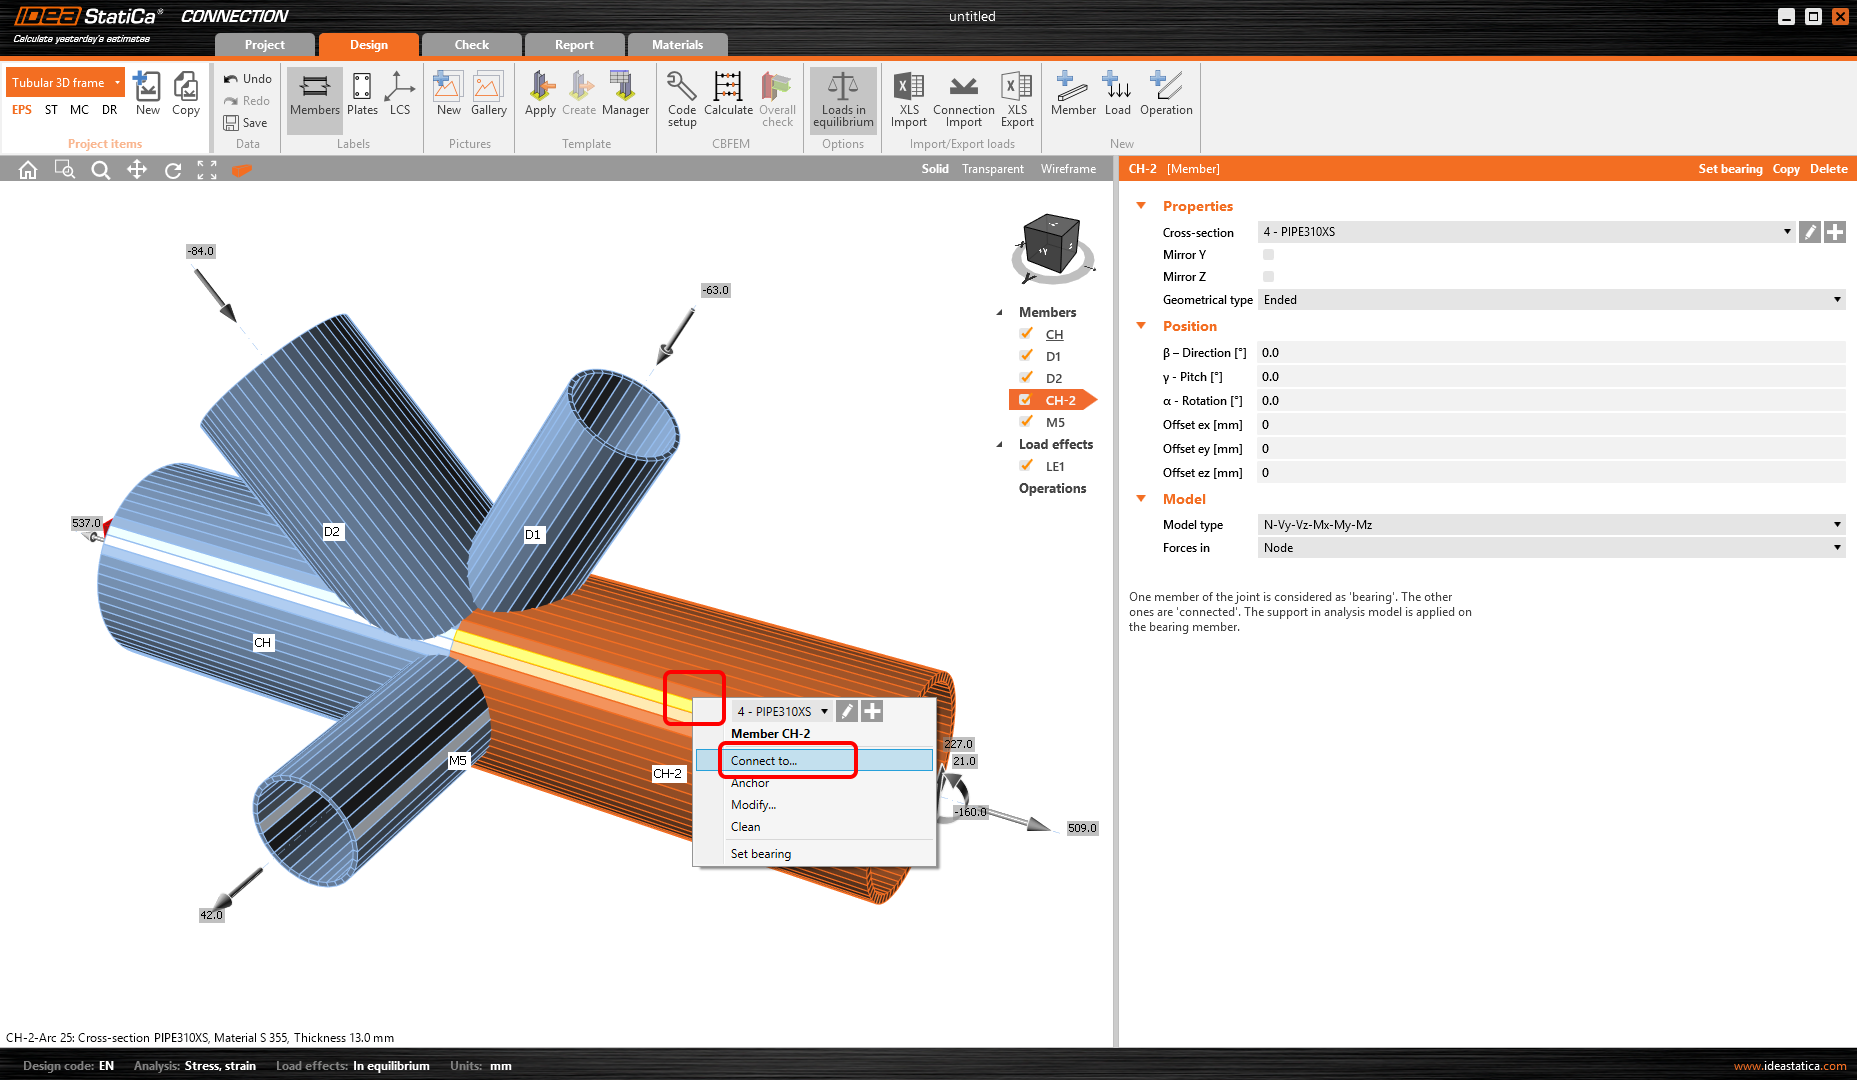
Inizia con il clic del tasto destro del mouse sull'elemento C1 nella scena 3D. Scegli il comando Collega a dal menu contestuale.
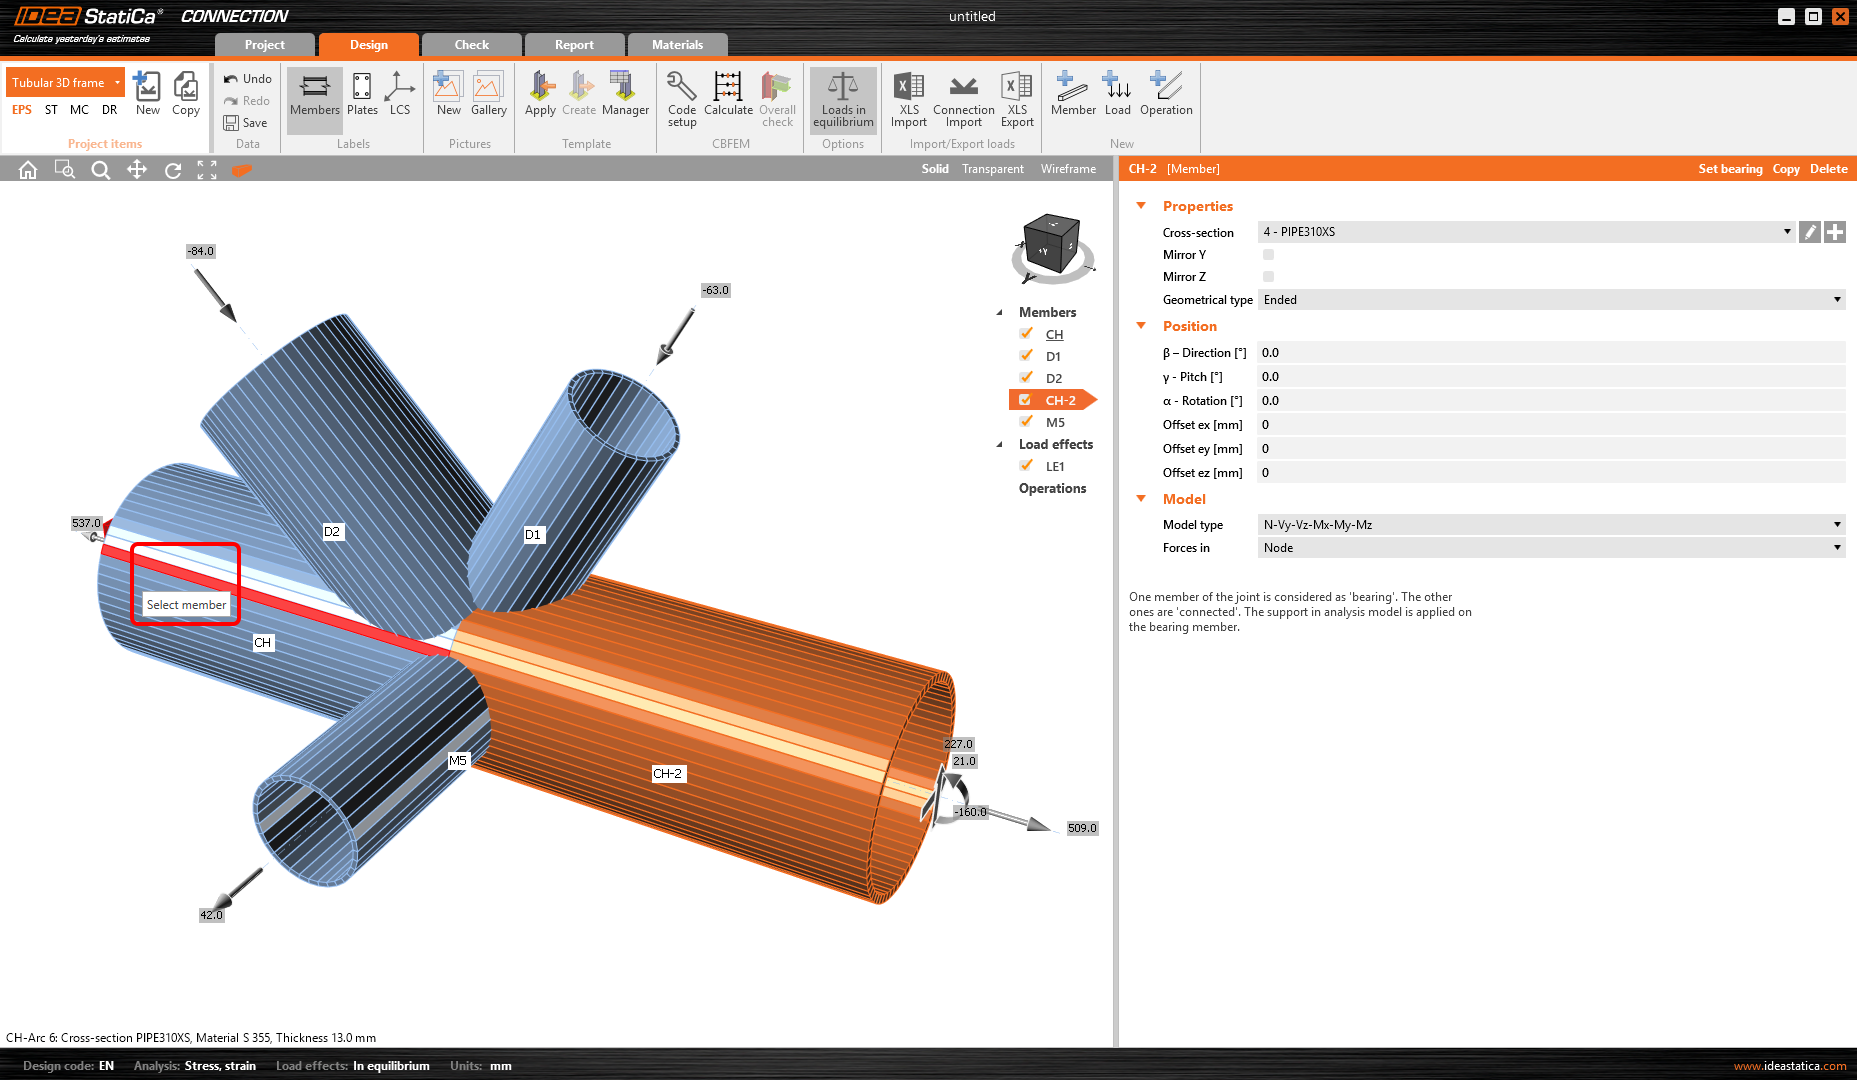
Ora scegli il secondo elemento a cui collegarsi (elemento C2).
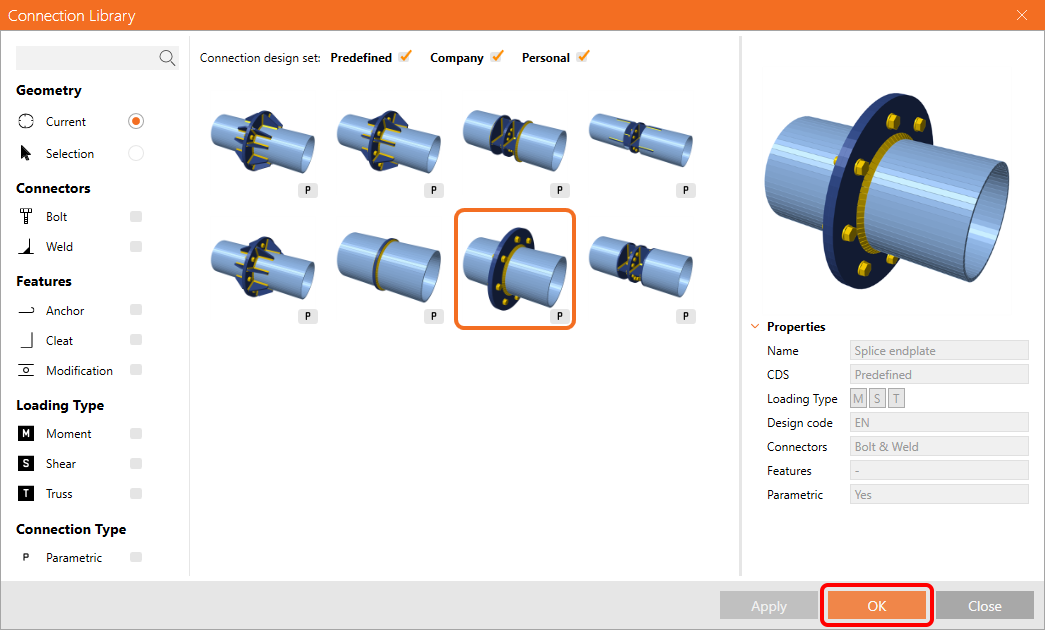
Si apre la Connection Library con i modelli adatti tra cui scegliere. Seleziona il modello parametrico come di seguito:
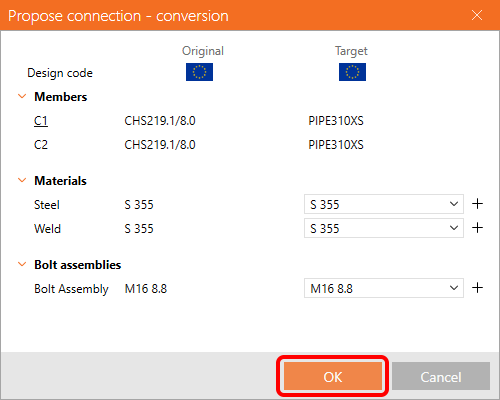
Conferma il materiale nella tabella di conversione.
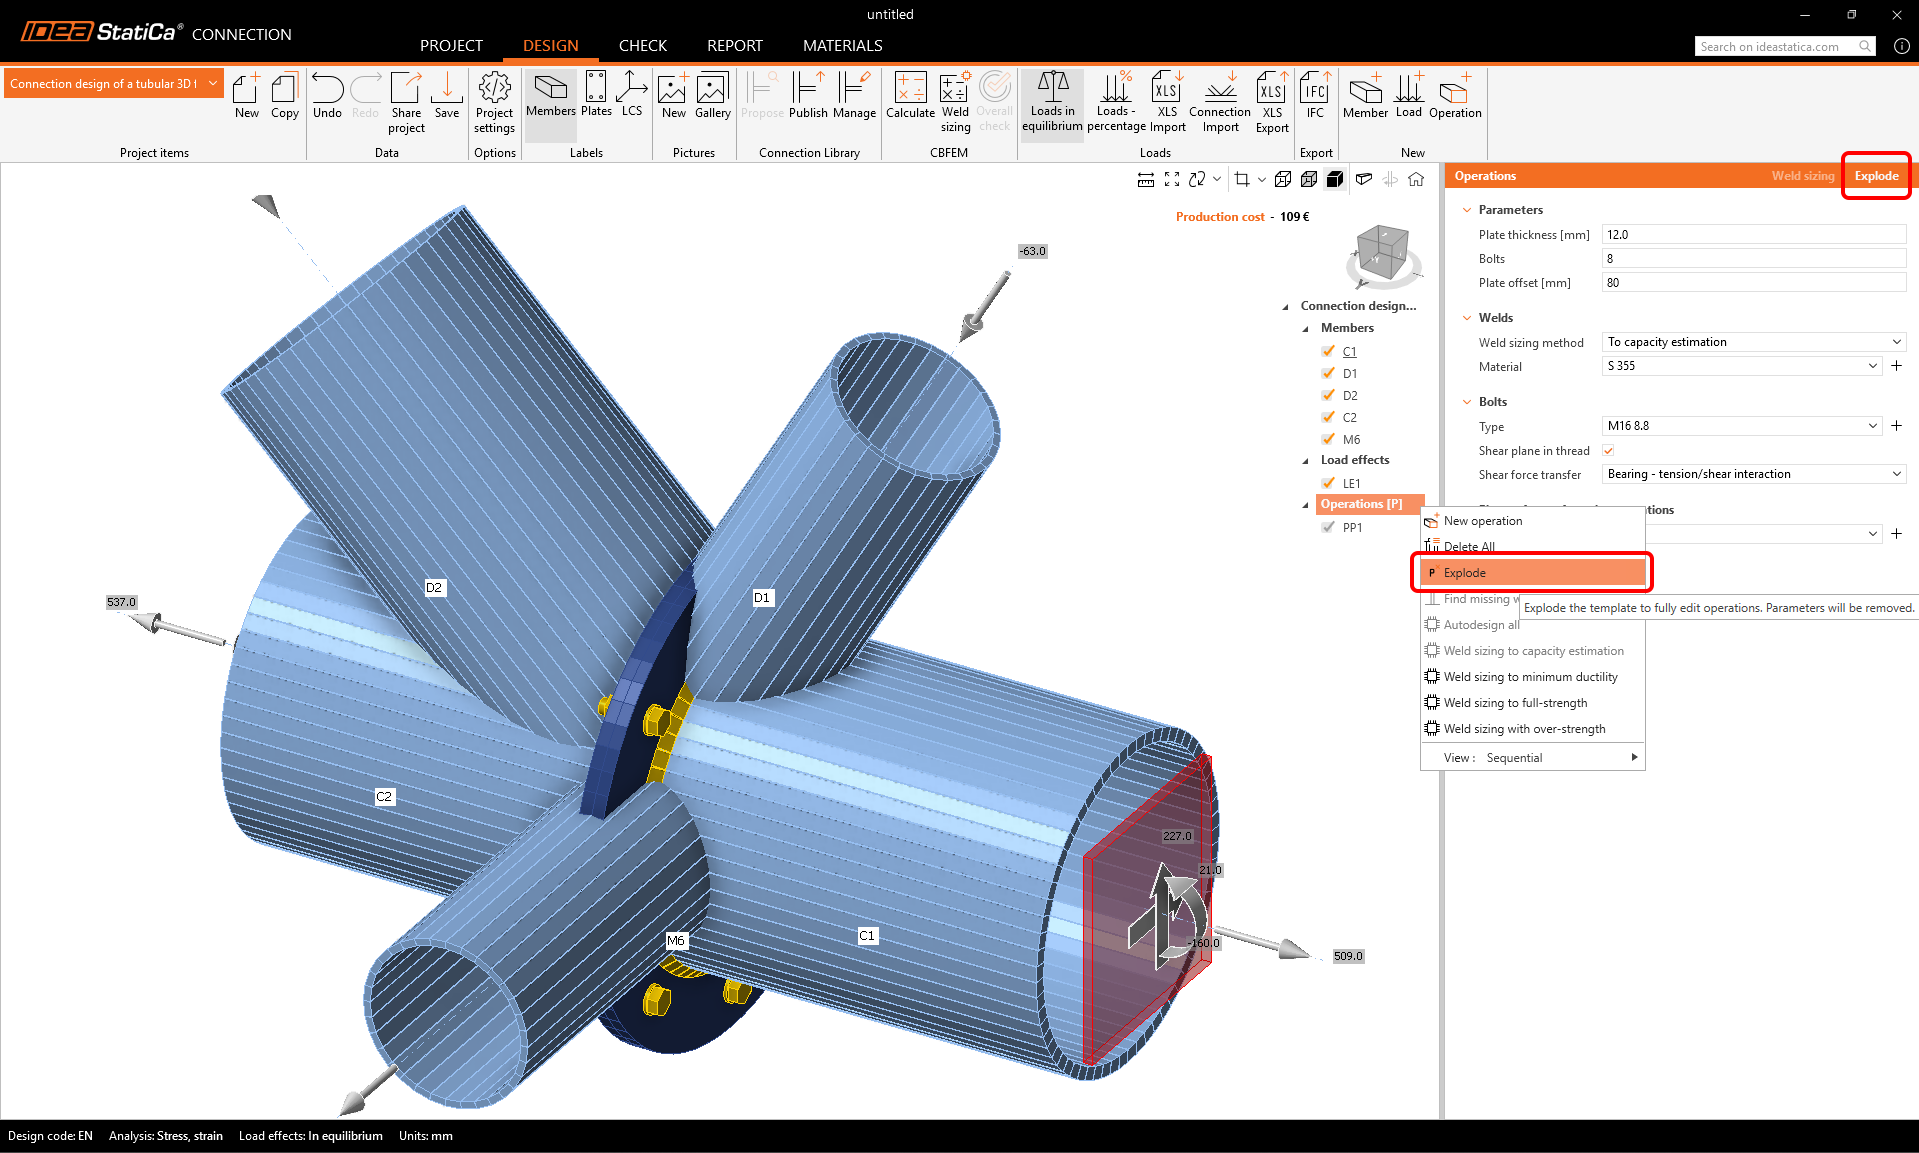
Il modello è stato applicato e puoi vedere la piastra d'estremità PP1. Poiché è necessario regolare più parametri di quanti il modello parametrico consenta, esploderemo il modello.
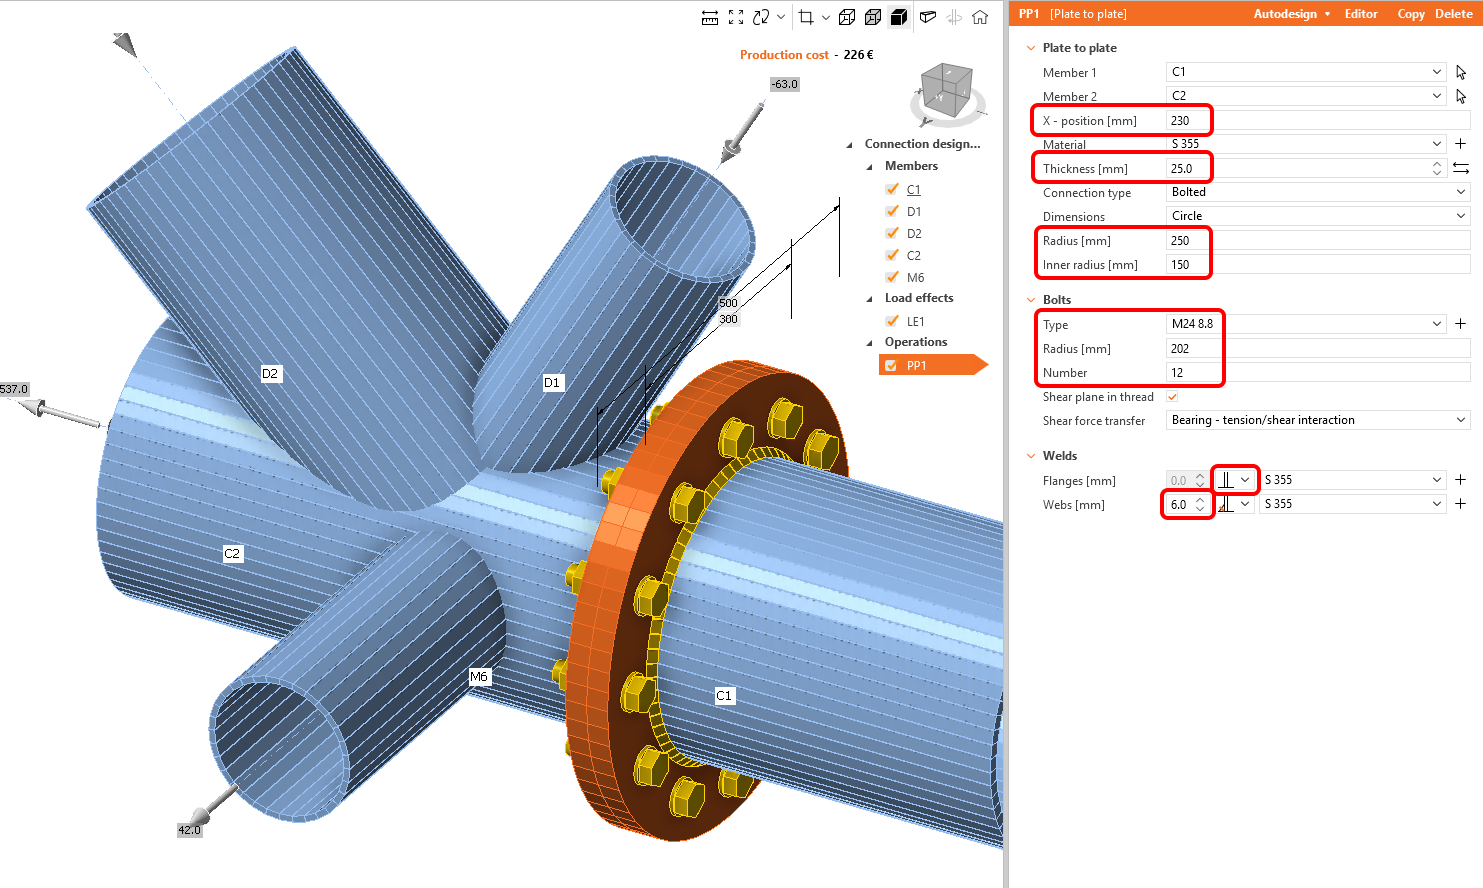
Definisci le proprietà dell'operazione di lavorazione PP1 come nella figura seguente.
Collega gli altri elementi tramite il Taglio dalla libreria delle operazioni nella barra multifunzione superiore.

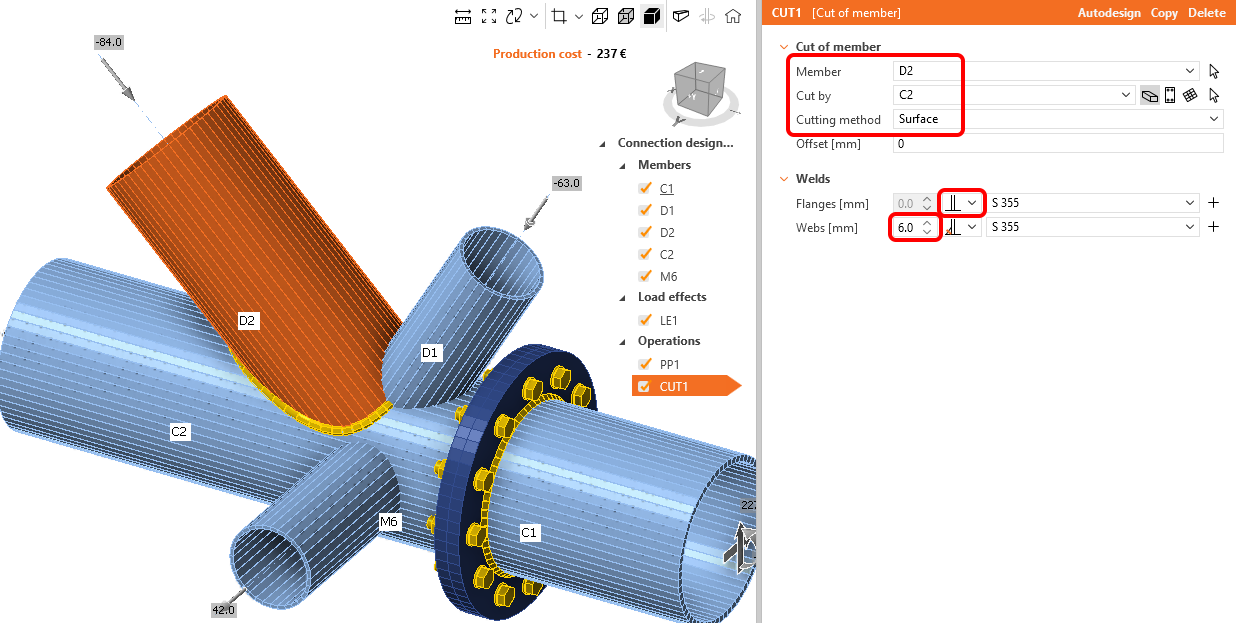
Modifica le proprietà dell'operazione CUT1. Segui la figura seguente:
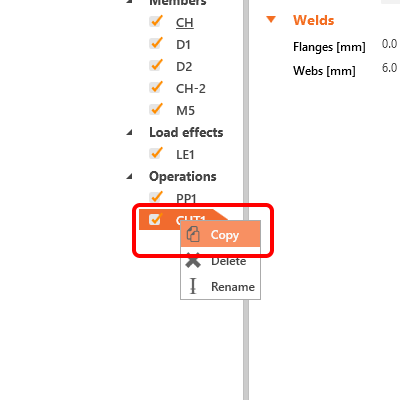
Ora puoi sfruttare l'operazione già definita e crearne una copia facendo clic con il tasto destro del mouse e scegliendo il comando Copia.
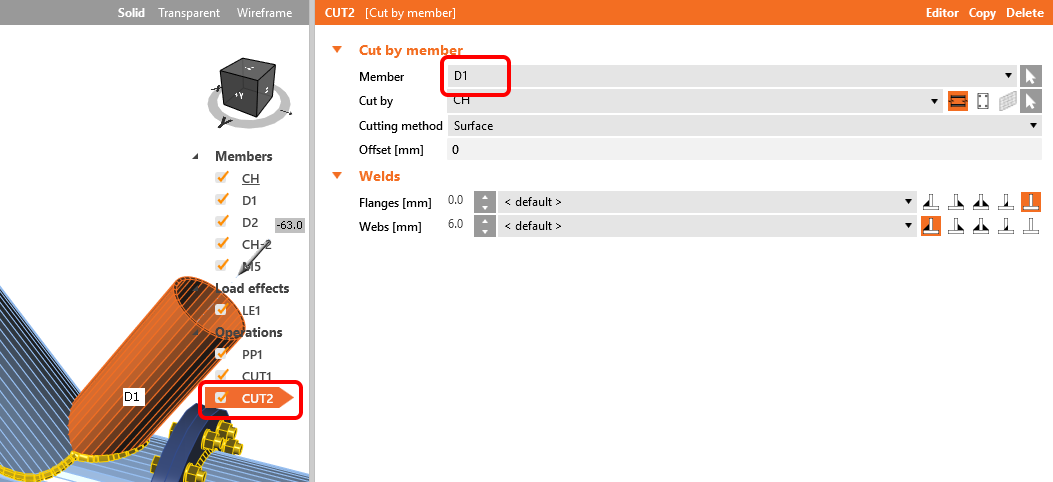
Modifica le proprietà dell'operazione CUT2 seguendo la figura seguente:
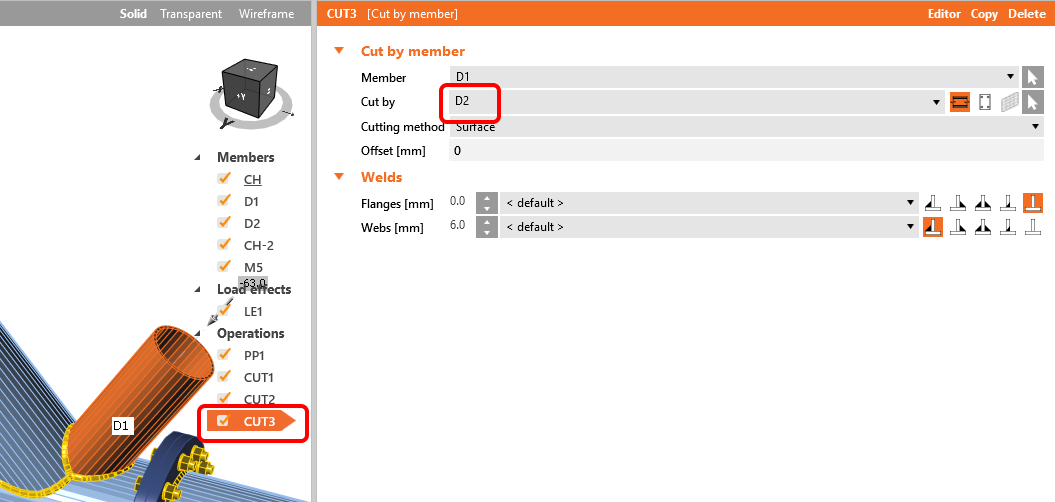
Copia l'operazione di lavorazione CUT2 e modifica le proprietà di CUT3 seguendo la figura:
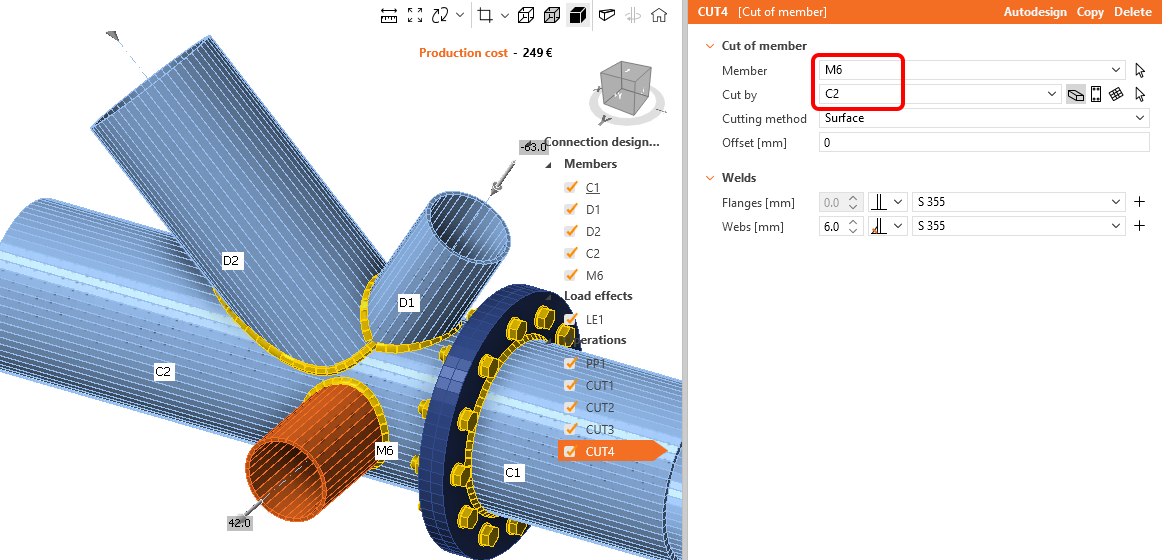
L'ultimo passo nella progettazione del giunto è copiare CUT3. Modifica le proprietà di CUT4 seguendo la figura seguente:
Il modello è completo e pronto per essere calcolato.
5 Calcolo e verifica
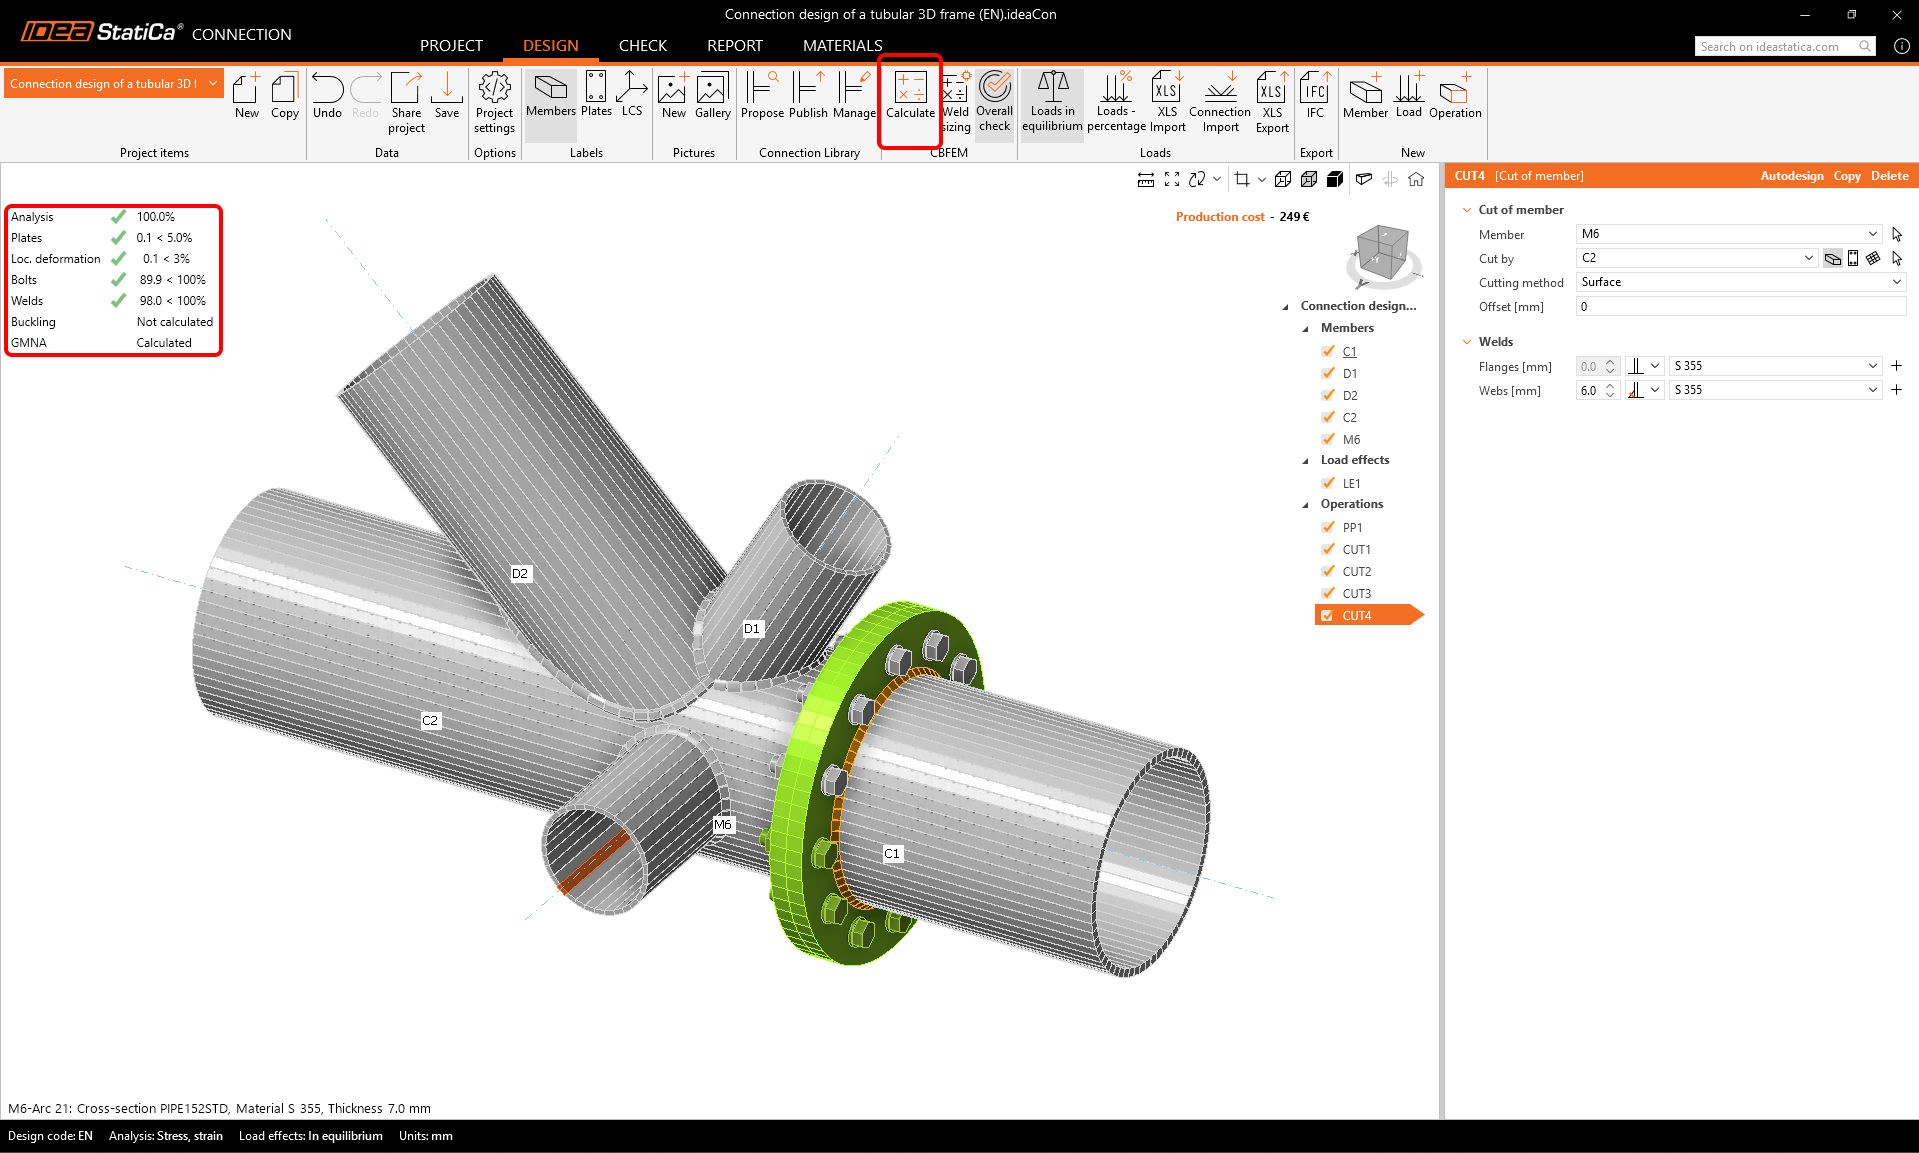
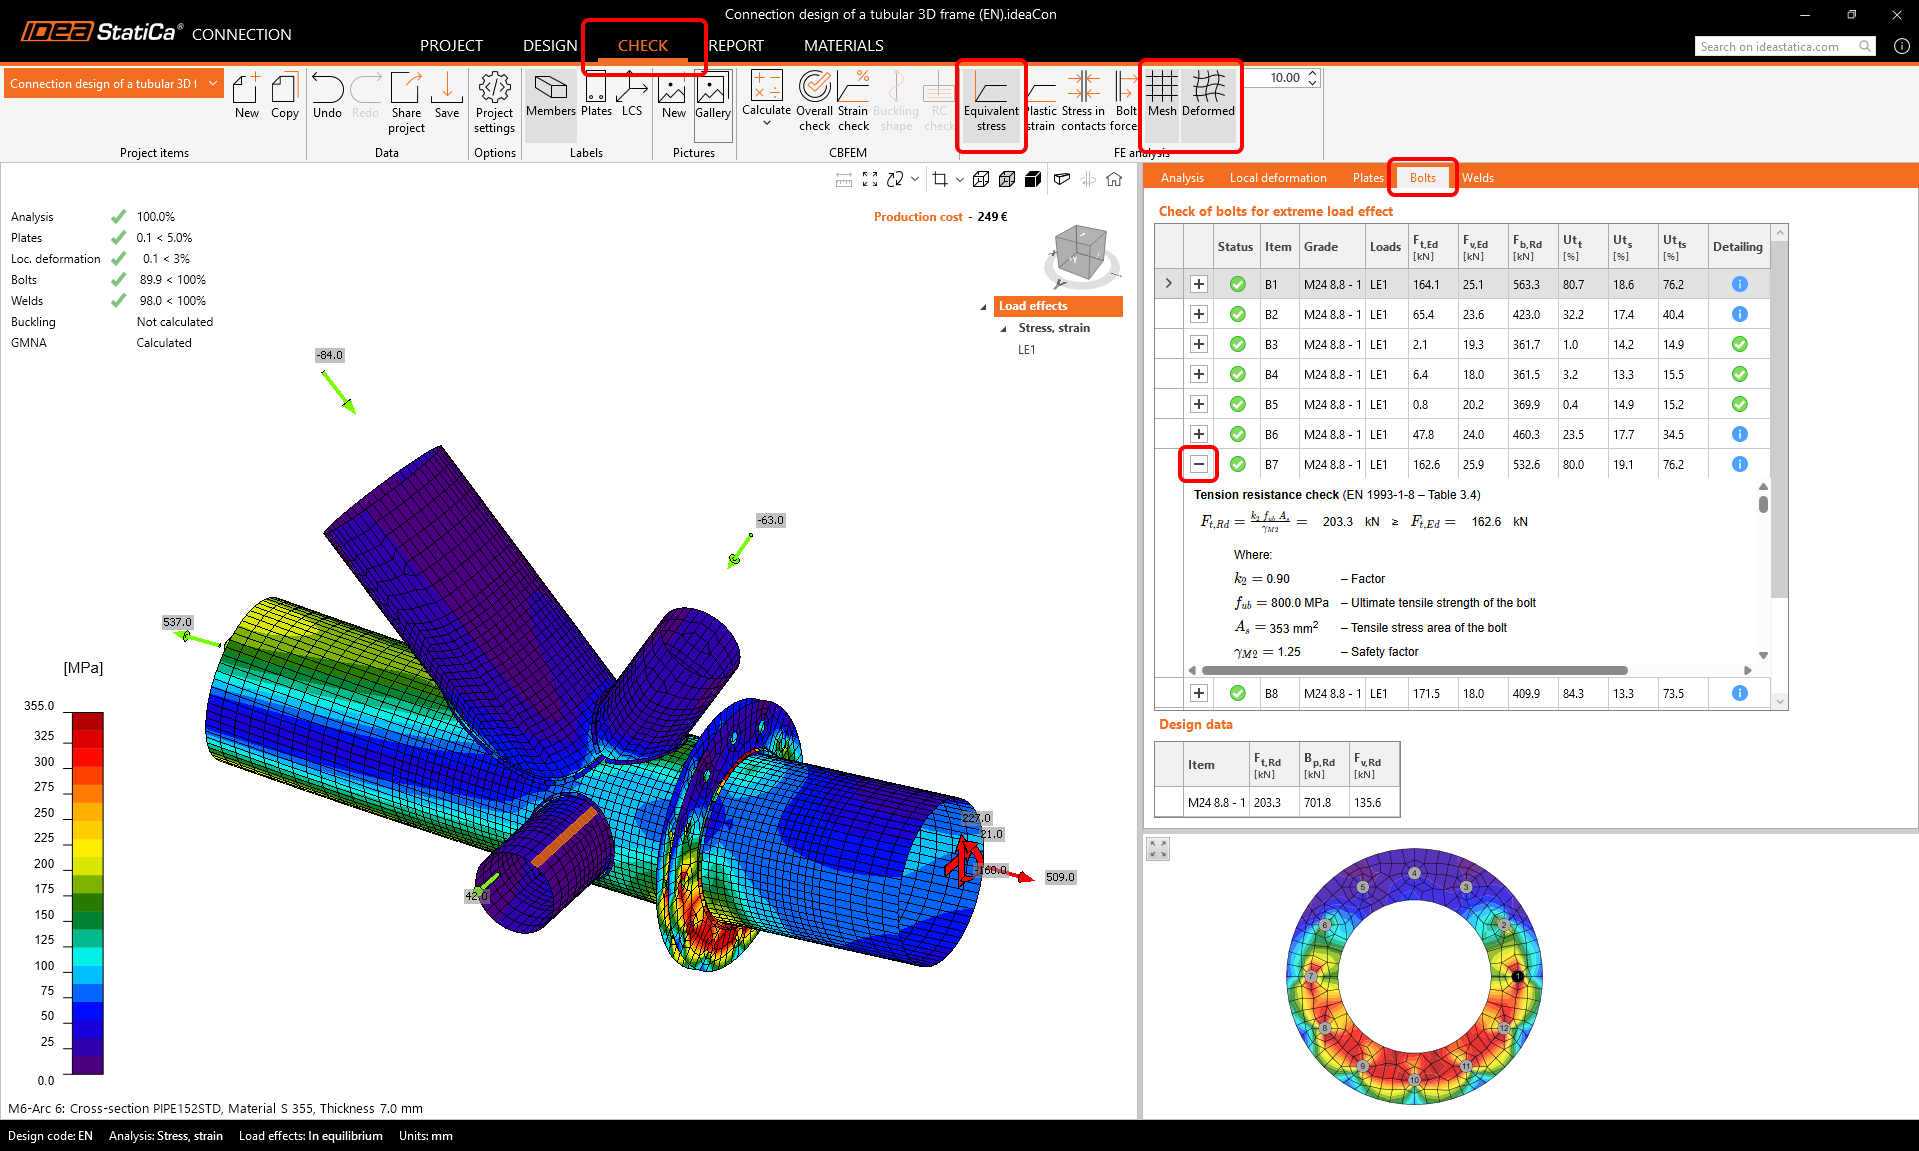
Avvia l'analisi facendo clic su Calcola nella barra multifunzione. Il modello di analisi viene generato automaticamente, il calcolo basato su CBFEM viene eseguito e possiamo vedere la verifica complessiva visualizzata insieme ai valori di base dei risultati della verifica.
Scegli la scheda Verifica e attiva la visualizzazione Tensione equivalente, Rete e Modello deformato. Puoi consultare i risultati dettagliati, ad esempio per i Bulloni; per vedere i risultati dettagliati, ad esempio per il bullone B7, espandi la riga.
6 Relazione
Infine, vai alla scheda Relazione e premi Genera. IDEA StatiCa offre una relazione completamente personalizzabile da stampare o salvare in formato modificabile.

Hai progettato, ottimizzato e verificato normativamente un giunto strutturale in acciaio secondo l'Eurocodice (EN).