
Parametrický návrh v IDEA StatiCa Connection – Trubkový přípoj
Vytvoření modelu
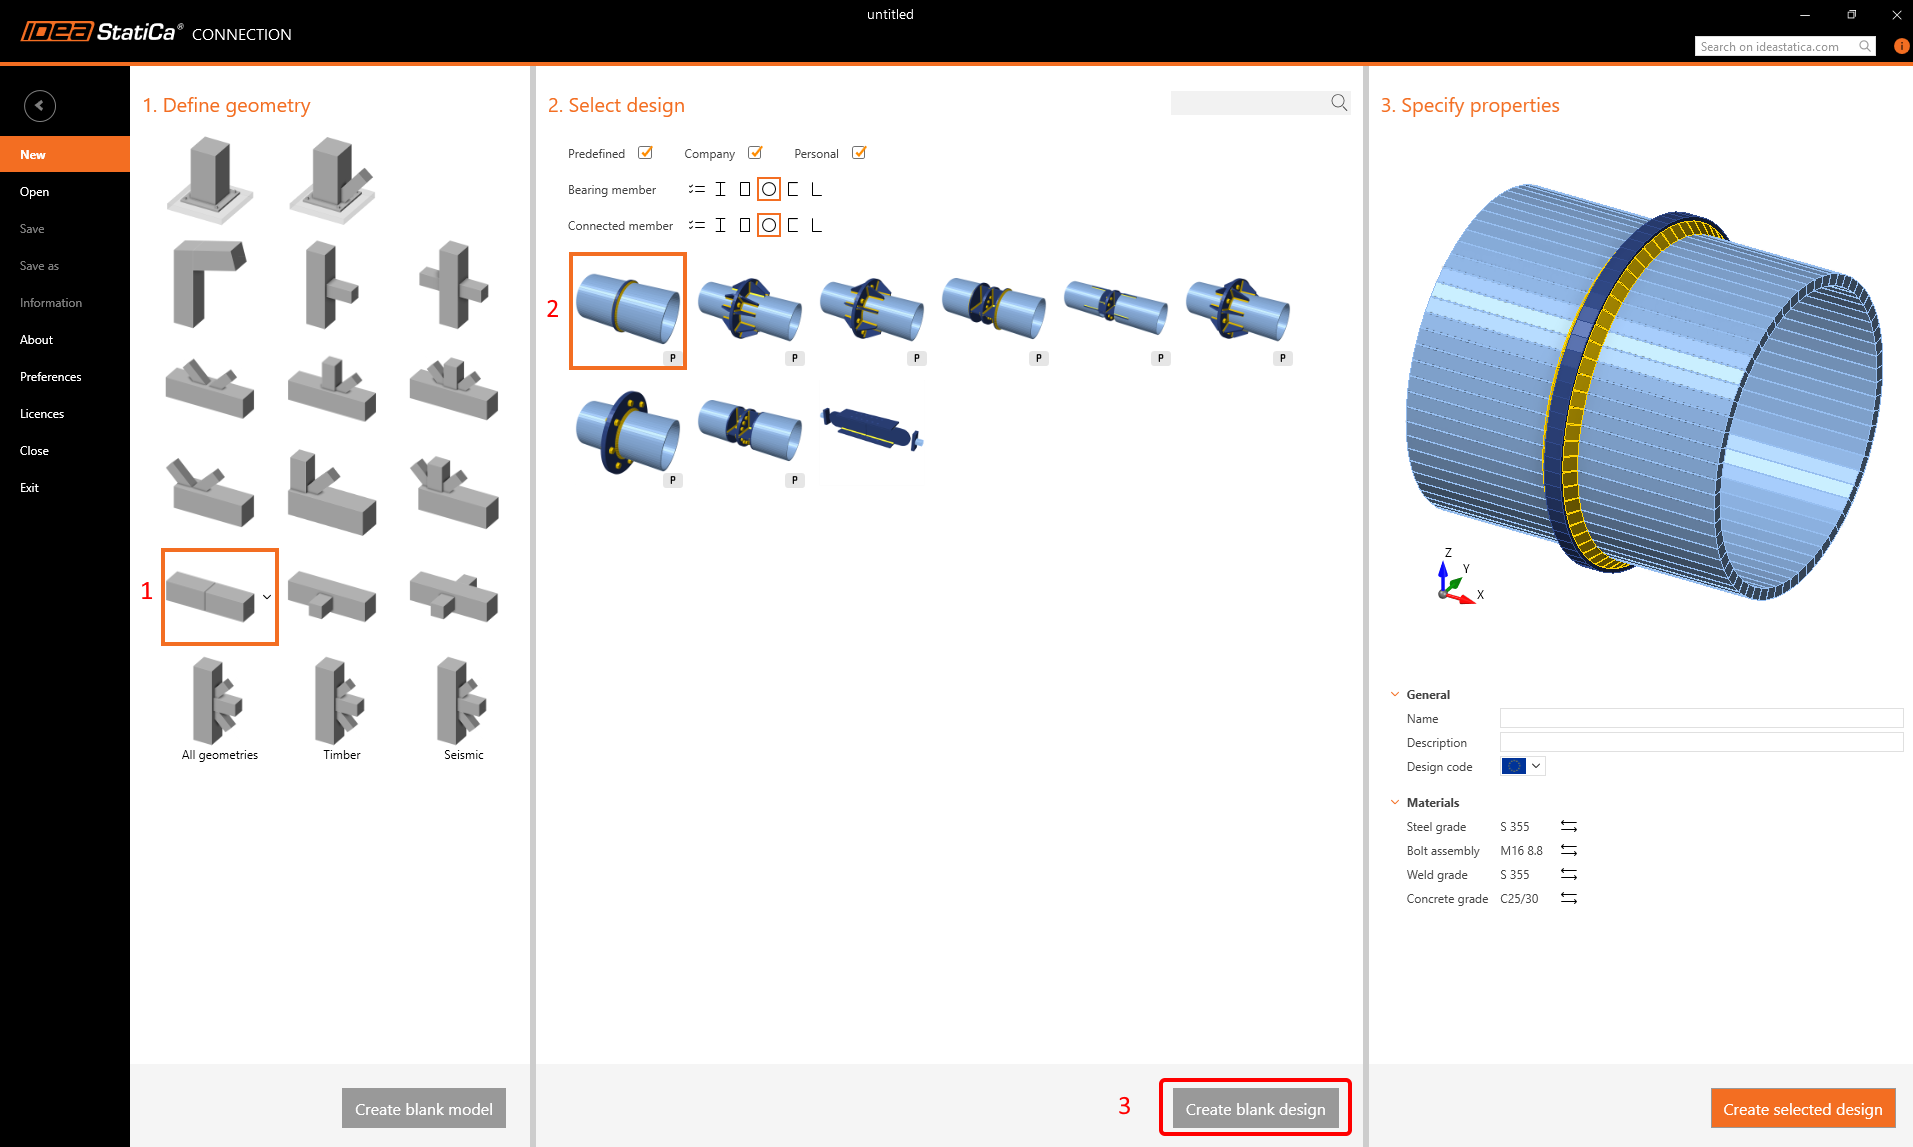
Spusťte aplikaci Connection a zvolte následující šablonu a počáteční parametry (klikněte na Blank design):
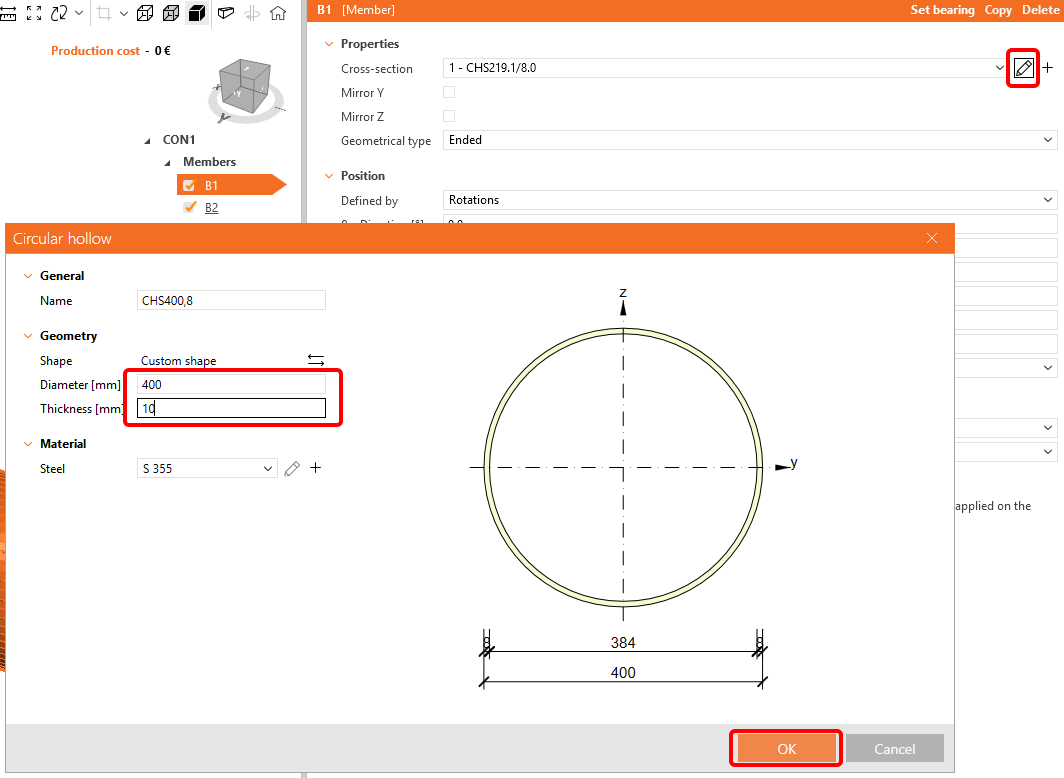
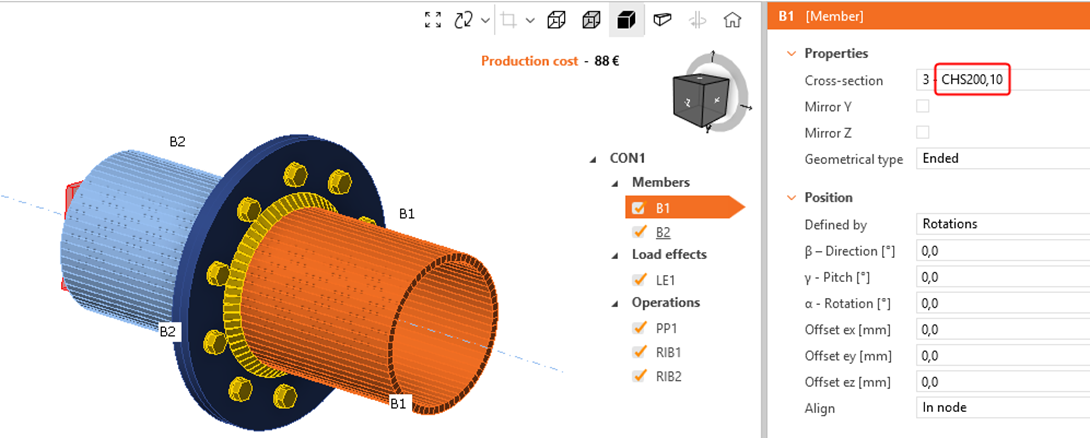
Změňte rozměry průřezu pro B1 a B2 na d = 400 mm a t = 10 mm:
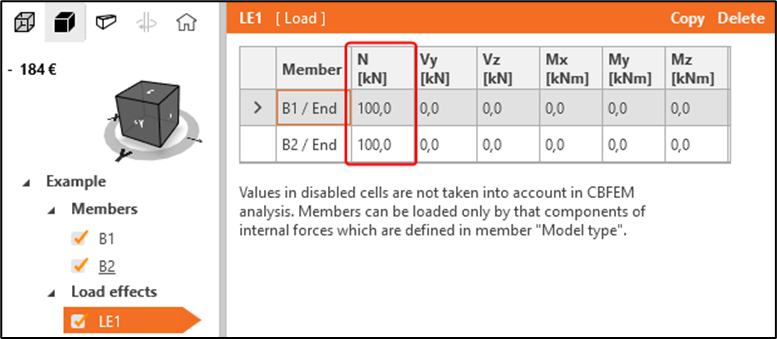
Přejděte na LE1 a upravte následovně:
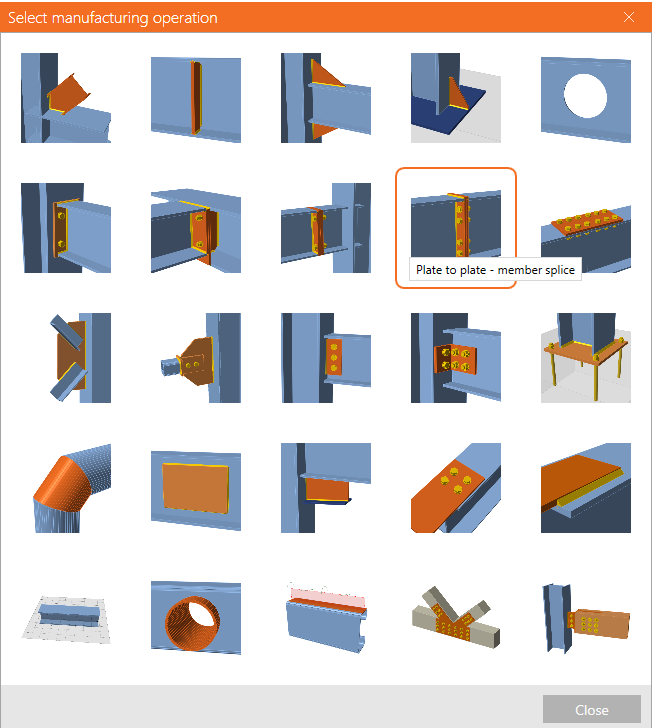
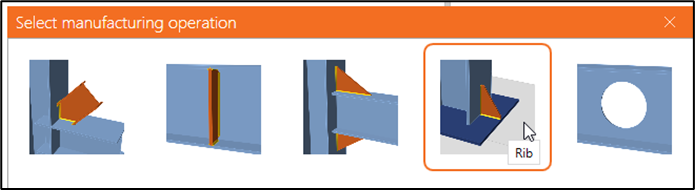
Přidejte novou operaci Plate to Plate a změňte hodnoty podle obrázku:

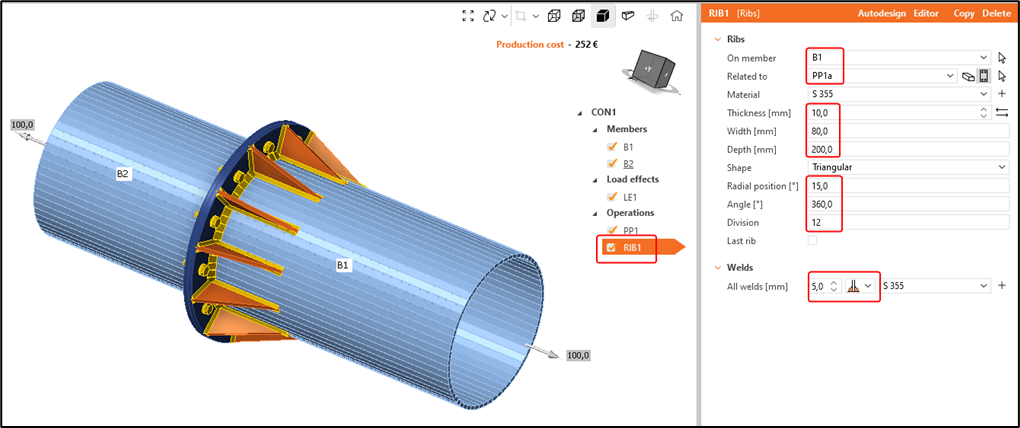
Přidejte novou operaci Rib pro prvek B1 a PP1a:
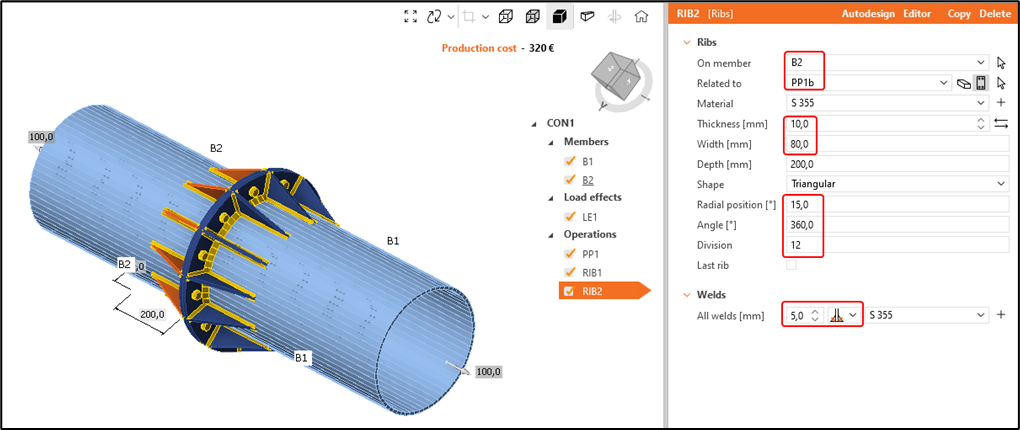
Zkopírujte operaci RIB1 a vytvořte RIB2 a aplikujte ji na B2 a PP1b:
Počáteční model je nyní dokončen. Vypadá jako poměrně jednoduchý model s několika operacemi a není na něm nic špatného. Zkuste však zjistit, jak dlouho trvá vytvoření jiné varianty přípoje, kde:
- Průměr trubky = 350 mm
- Počet šroubů = 8
- Délka žeber = 175 mm (polovina průměru trubky)
Vnitřní poloměr kruhové příruby by měl odpovídat vnitřnímu poloměru trubky, zatímco vnější poloměr by měl zůstat o 80 mm větší než vnější poloměr trubek. Žebra by měla být vždy umístěna uprostřed mezi šrouby.
Jak jste si možná všimli, i když se zdá, že jde o rychlou úpravu, modelování 1 nové varianty může trvat několik minut. Pokud chcete modelovat mnoho variant rychleji, tento přístup může být příliš časově náročný.
Karta Developer
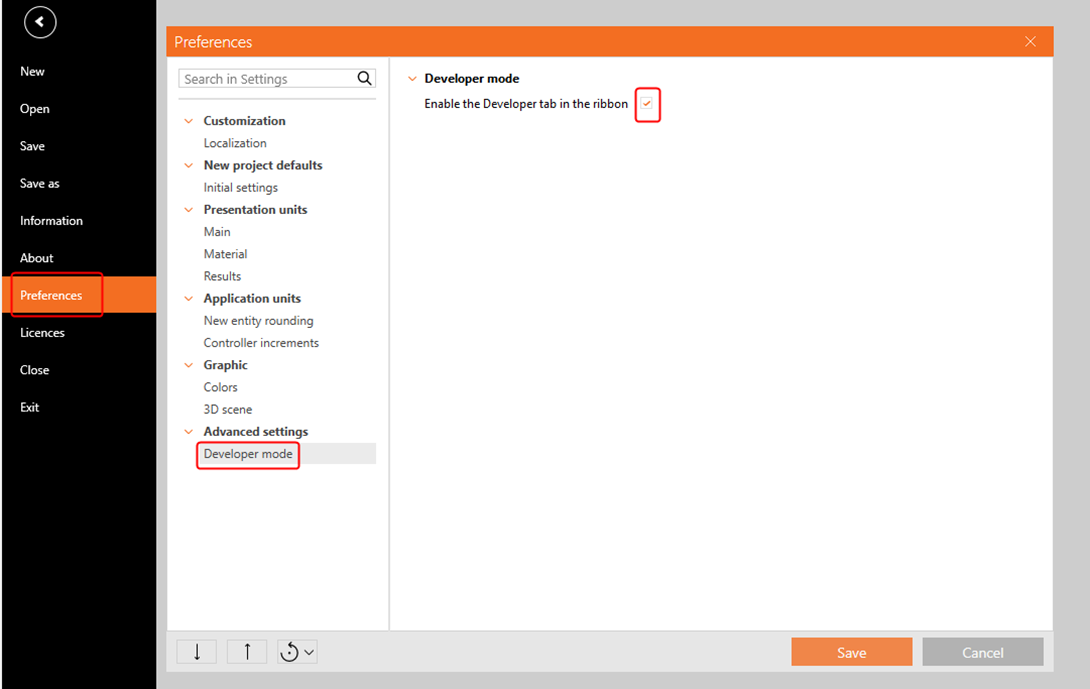
Pro urychlení práce vytvoříme parametrický model a parametrickou šablonu. Přejděte na:
Karta Project -> Preferences -> Advanced settings -> Developer mode a povolte kartu Developer:
Vytvoření parametrů a parametrické šablony
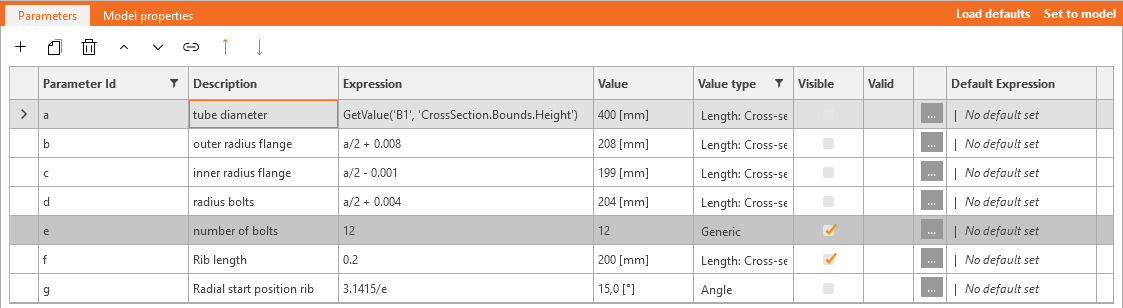
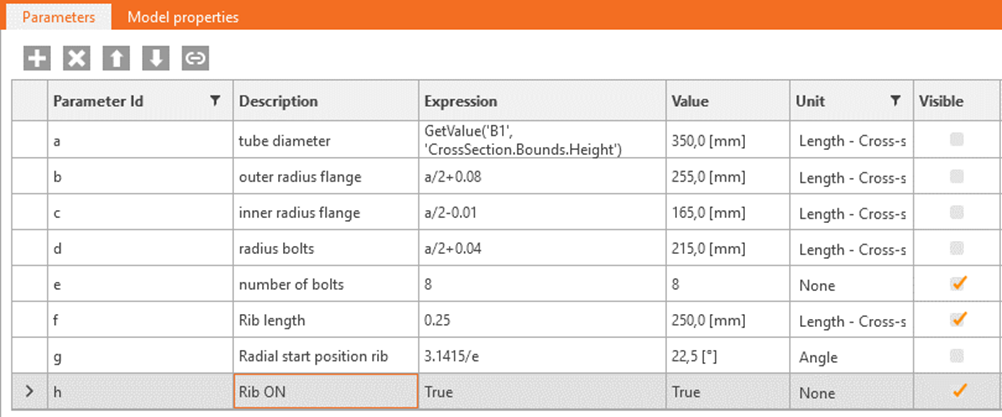
Přejděte na kartu Developer a vytvořte 7 nových parametrů, přiřaďte jim parametr Id od „a" do „g". Každému parametru lze přiřadit popis a výraz. Tímto způsobem lze určité parametry vzájemně provázat. Nastavte správnou jednotku pro každý parametr:
| a | průměr trubky | GetValue('B1', 'CrossSection.Bounds.Height') |
| b | vnější poloměr příruby | a/2 + 0.08 |
| c | vnitřní poloměr příruby | a/2 - 0.01 |
| d | poloměr šroubů | a/2 + 0.04 |
| e | počet šroubů | 12 |
| f | délka žebra | 0.2 |
| g | Radiální počáteční poloha žebra | 3.1415/e |
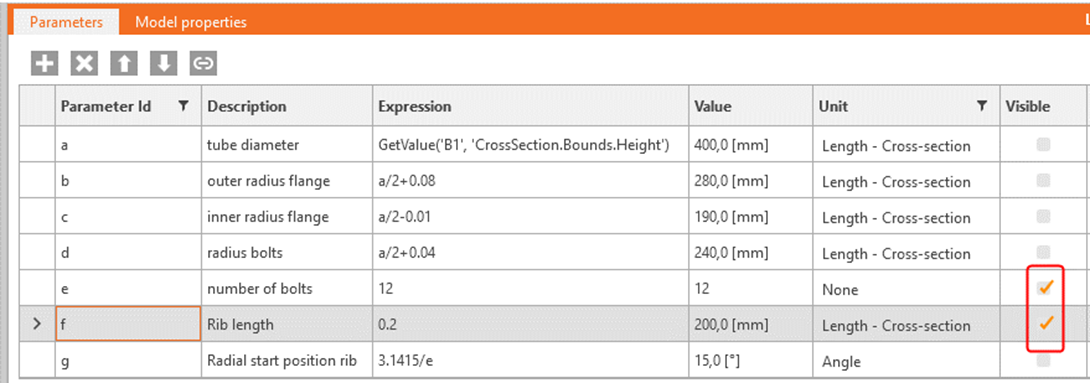
Chcete-li vytvořit parametrickou šablonu, vyberte parametry, které mají být definovány uživatelem (a a e), a nastavte je na Visible:
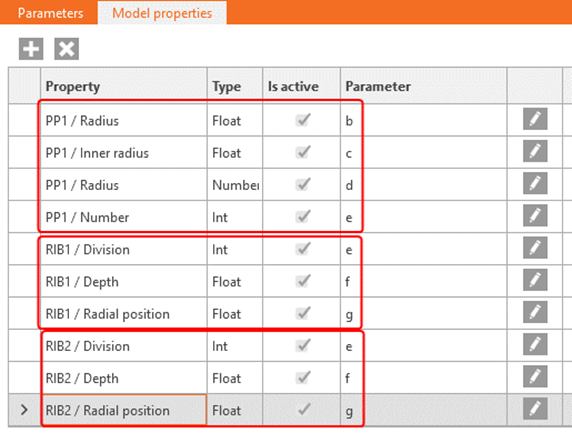
Nyní přiřaďte příslušné parametry ke konkrétním vlastnostem modelu:
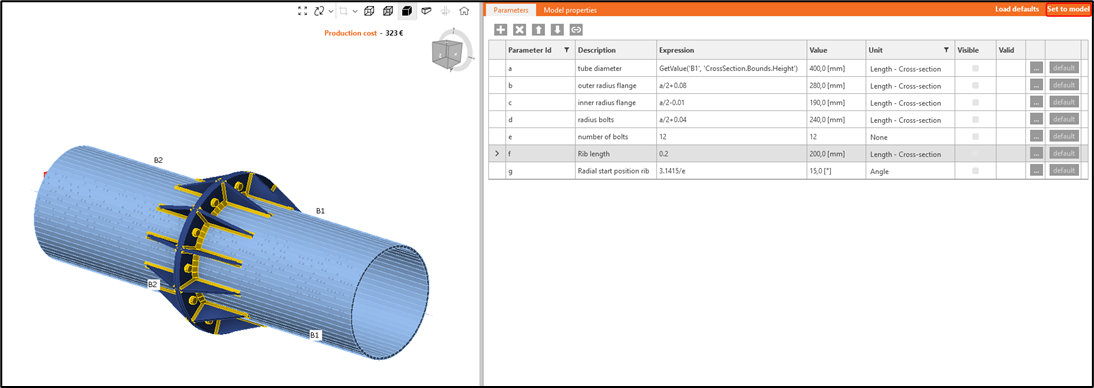
Klikněte na „Set to model" a sledujte, jak se Přípoj mění na základě vstupních parametrů:
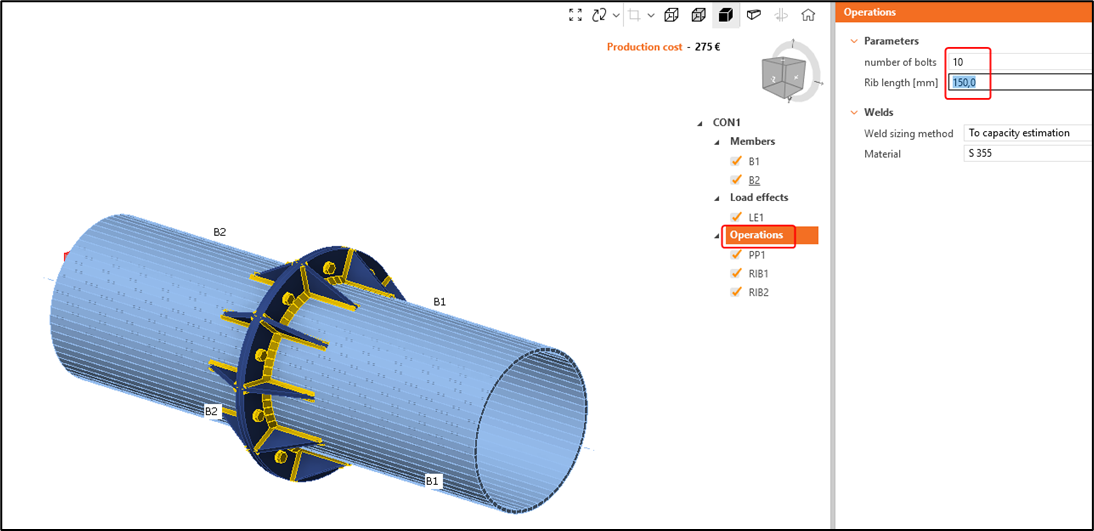
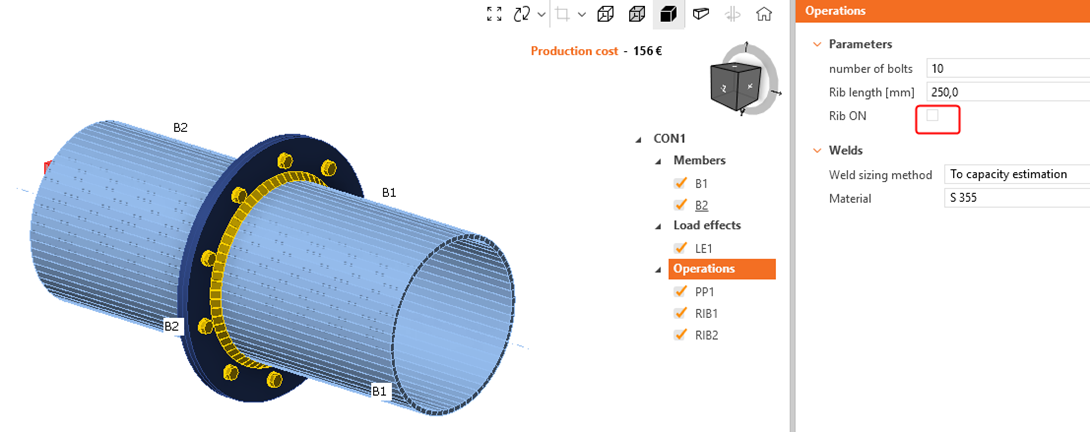
Přejděte zpět na kartu Design a klikněte na Operations. Zde najdete parametry, které byly nastaveny jako viditelné. Parametry můžete změnit a stisknout Enter – model se odpovídajícím způsobem aktualizuje.
Lze také použít logické operátory. Vytvořte nový parametr h s popisem „Rib ON" a jako výraz zadejte „True". Nastavte jej také na Visible:
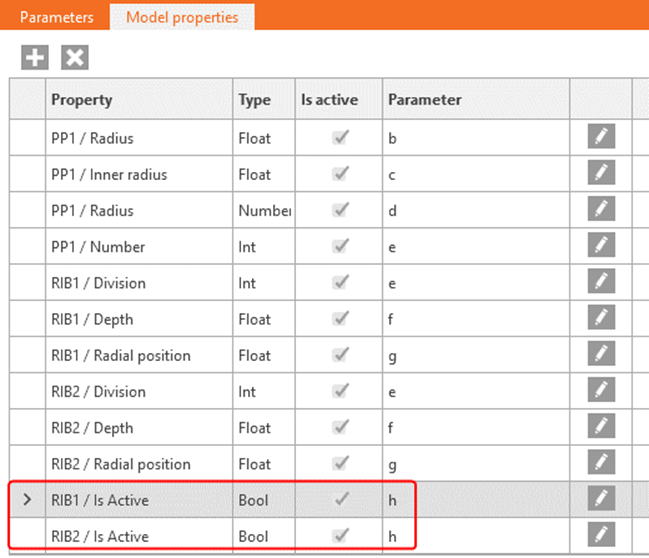
Propojte tento parametr s vlastností modelu RIB1 / Is Active a RIB2 / Is Active:
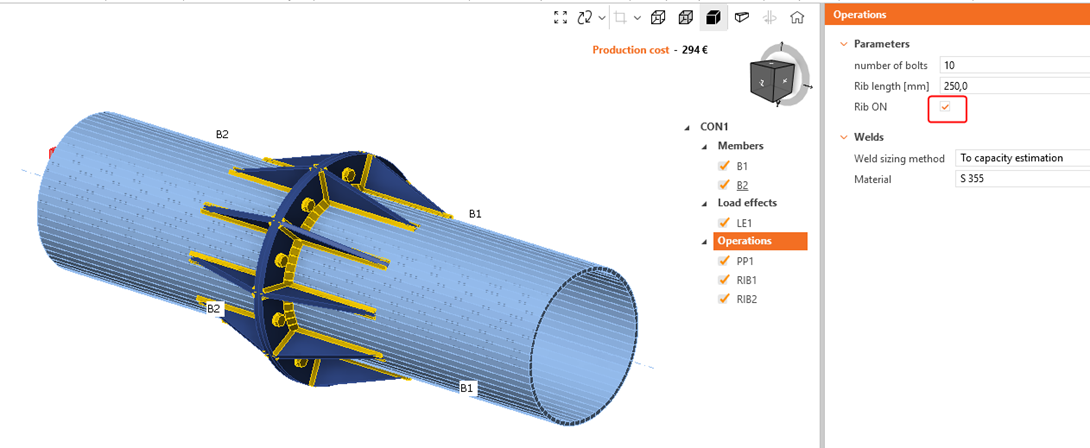
Sledujte rozdíl při zapnutí a vypnutí v parametrické šabloně:
Alternativou je použití podmínek if/then ve výrazu:
| h | Rib ON | if(a>0.3,True,False) |
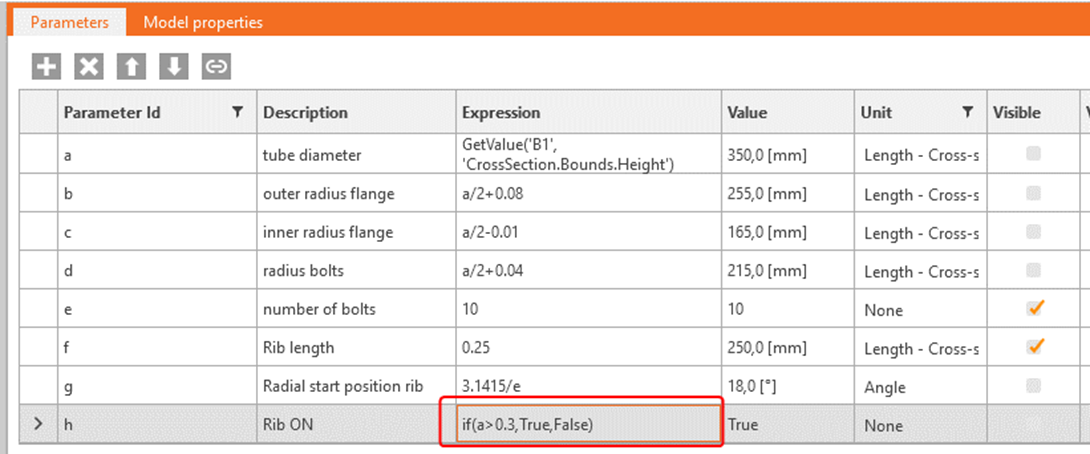
Zvolení menšího průměru trubky < 300 mm by mělo deaktivovat žebra:
Níže je zobrazen dokončený model.
Absolvováním tohoto kurzu jste získali dovednosti pro využití parametrů a provádění základních úkolů souvisejících s parametry.
Přiložené soubory ke stažení
- tubular.ideaCon (IDEACON, 126 kB)