
Conception structurelle exploitant la Connection Library (EN)
1 Nouveau projet
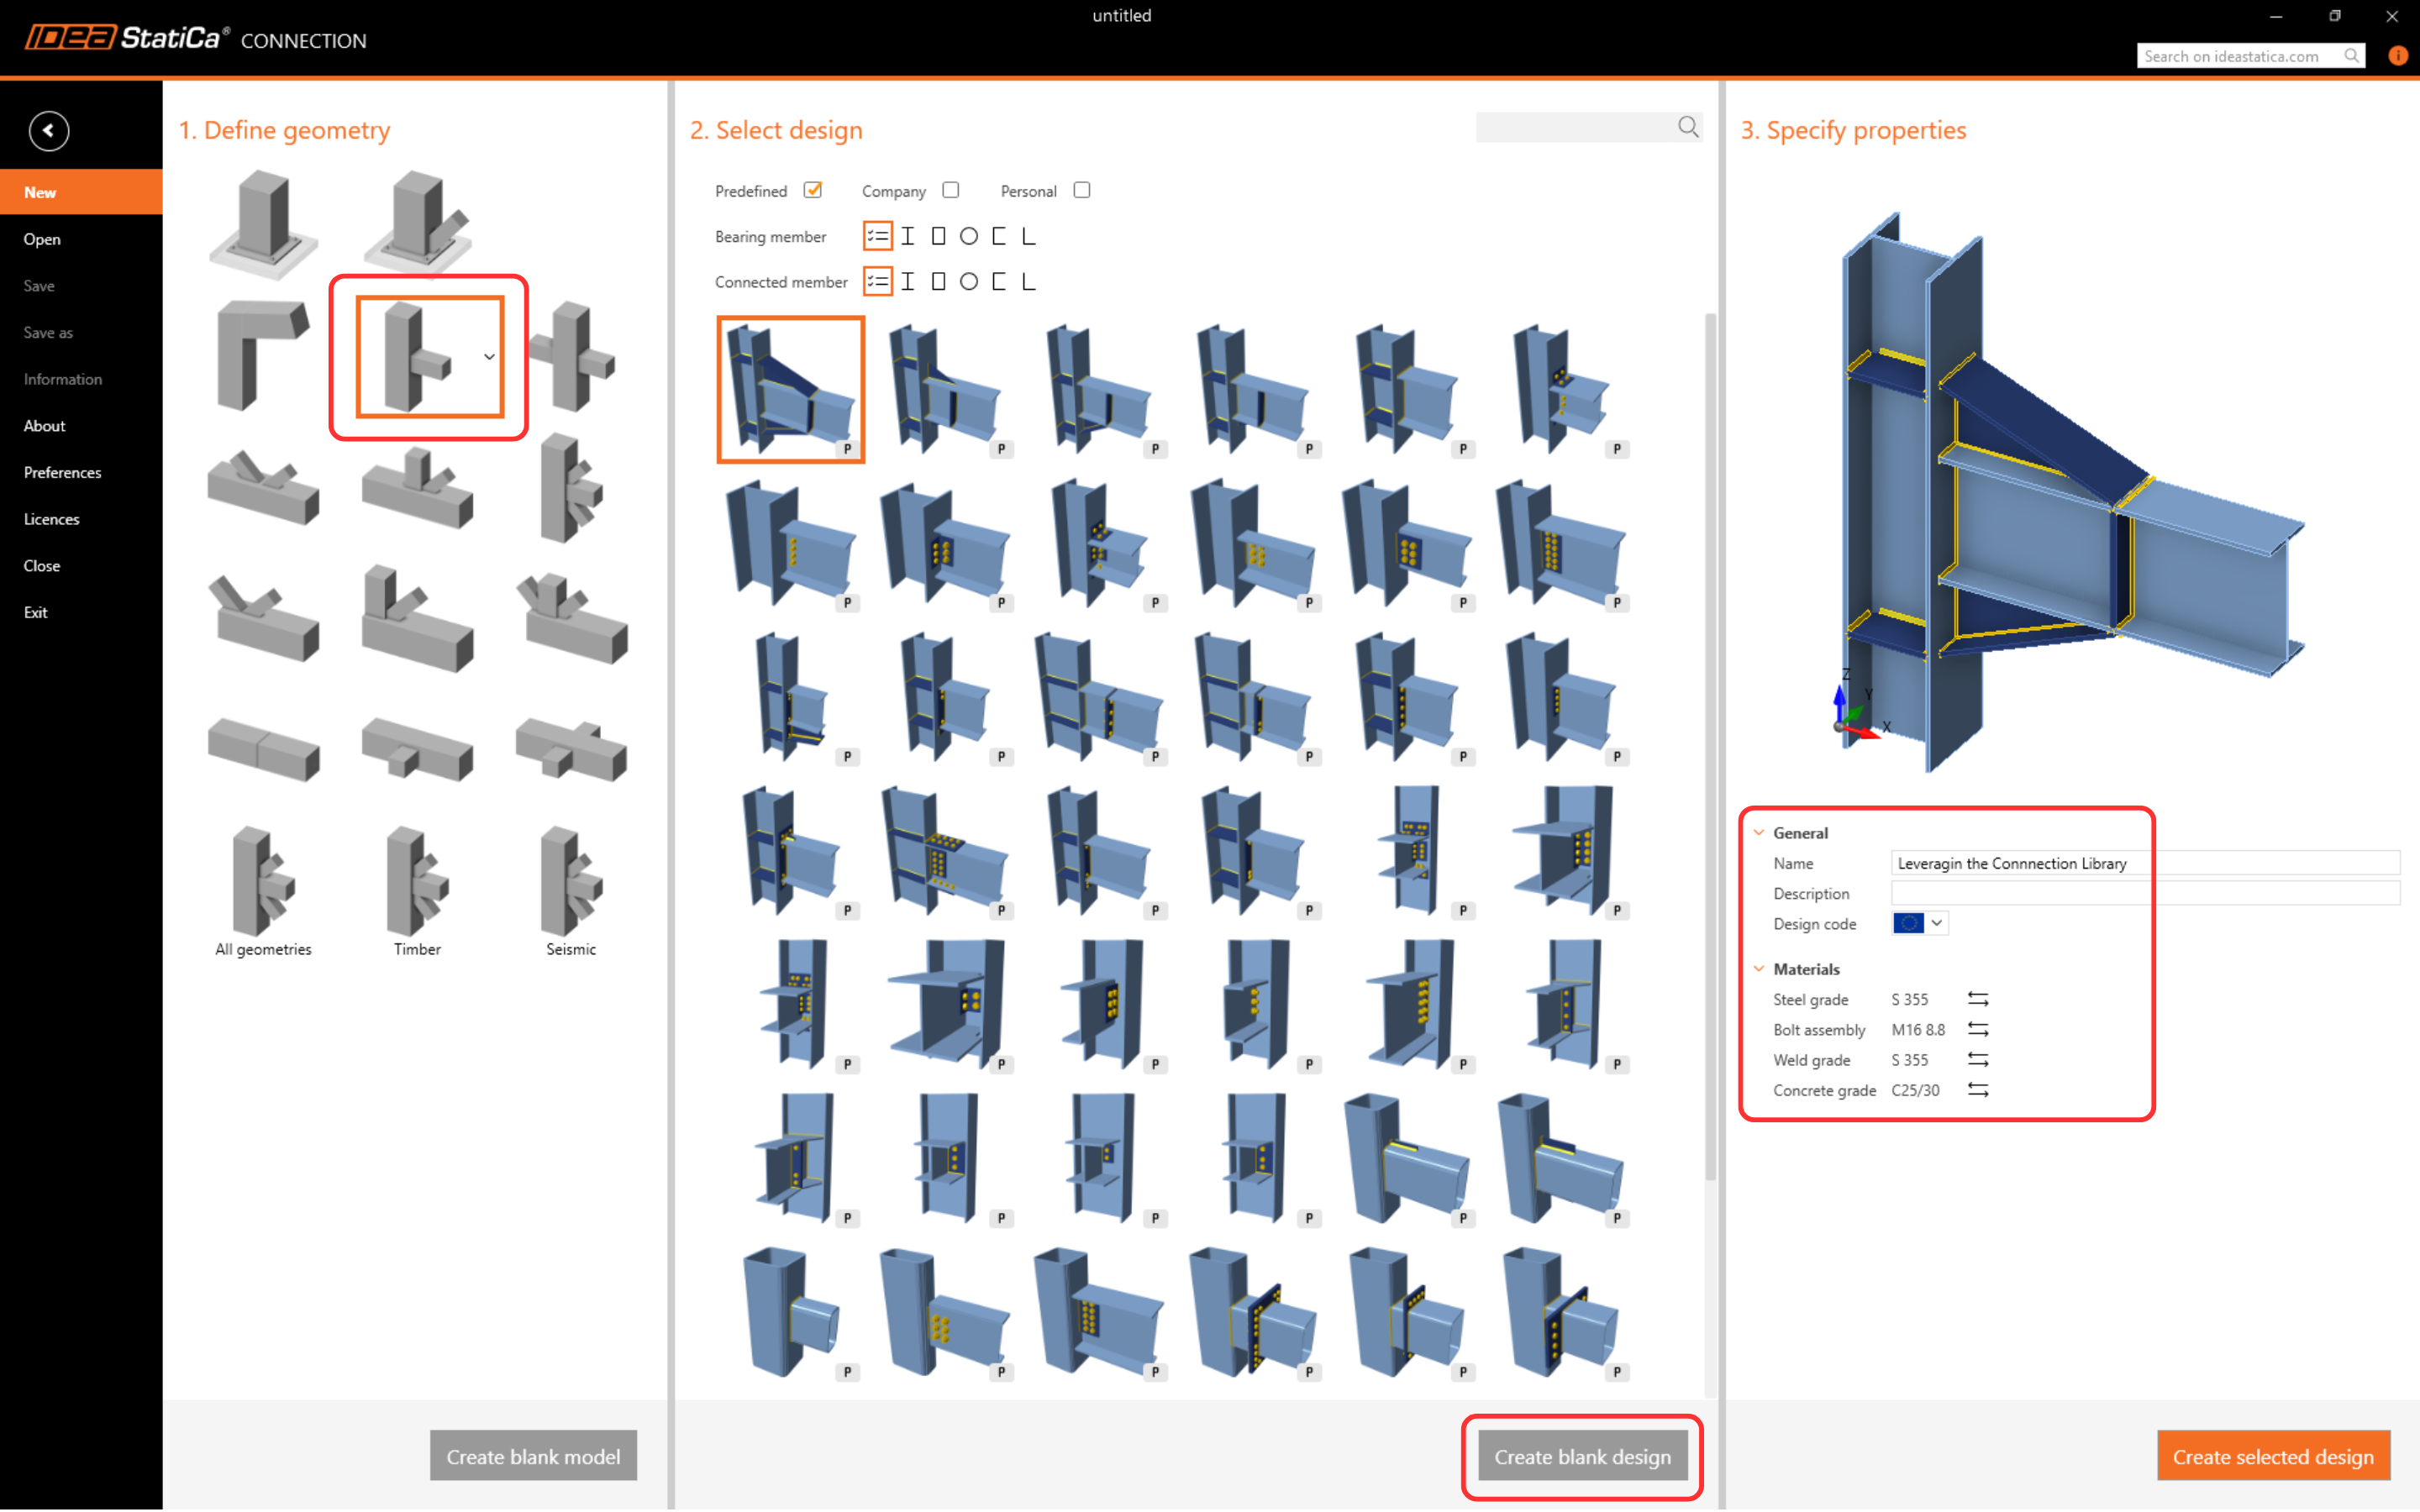
Lançons IDEA StatiCa et sélectionnons l'application Connection (télécharger la dernière version). Créez une nouvelle conception vierge en sélectionnant la géométrie souhaitée. Renseignez le nom, choisissez le code de calcul et les propriétés de matériaux par défaut.
2 Création d'un nouveau modèle
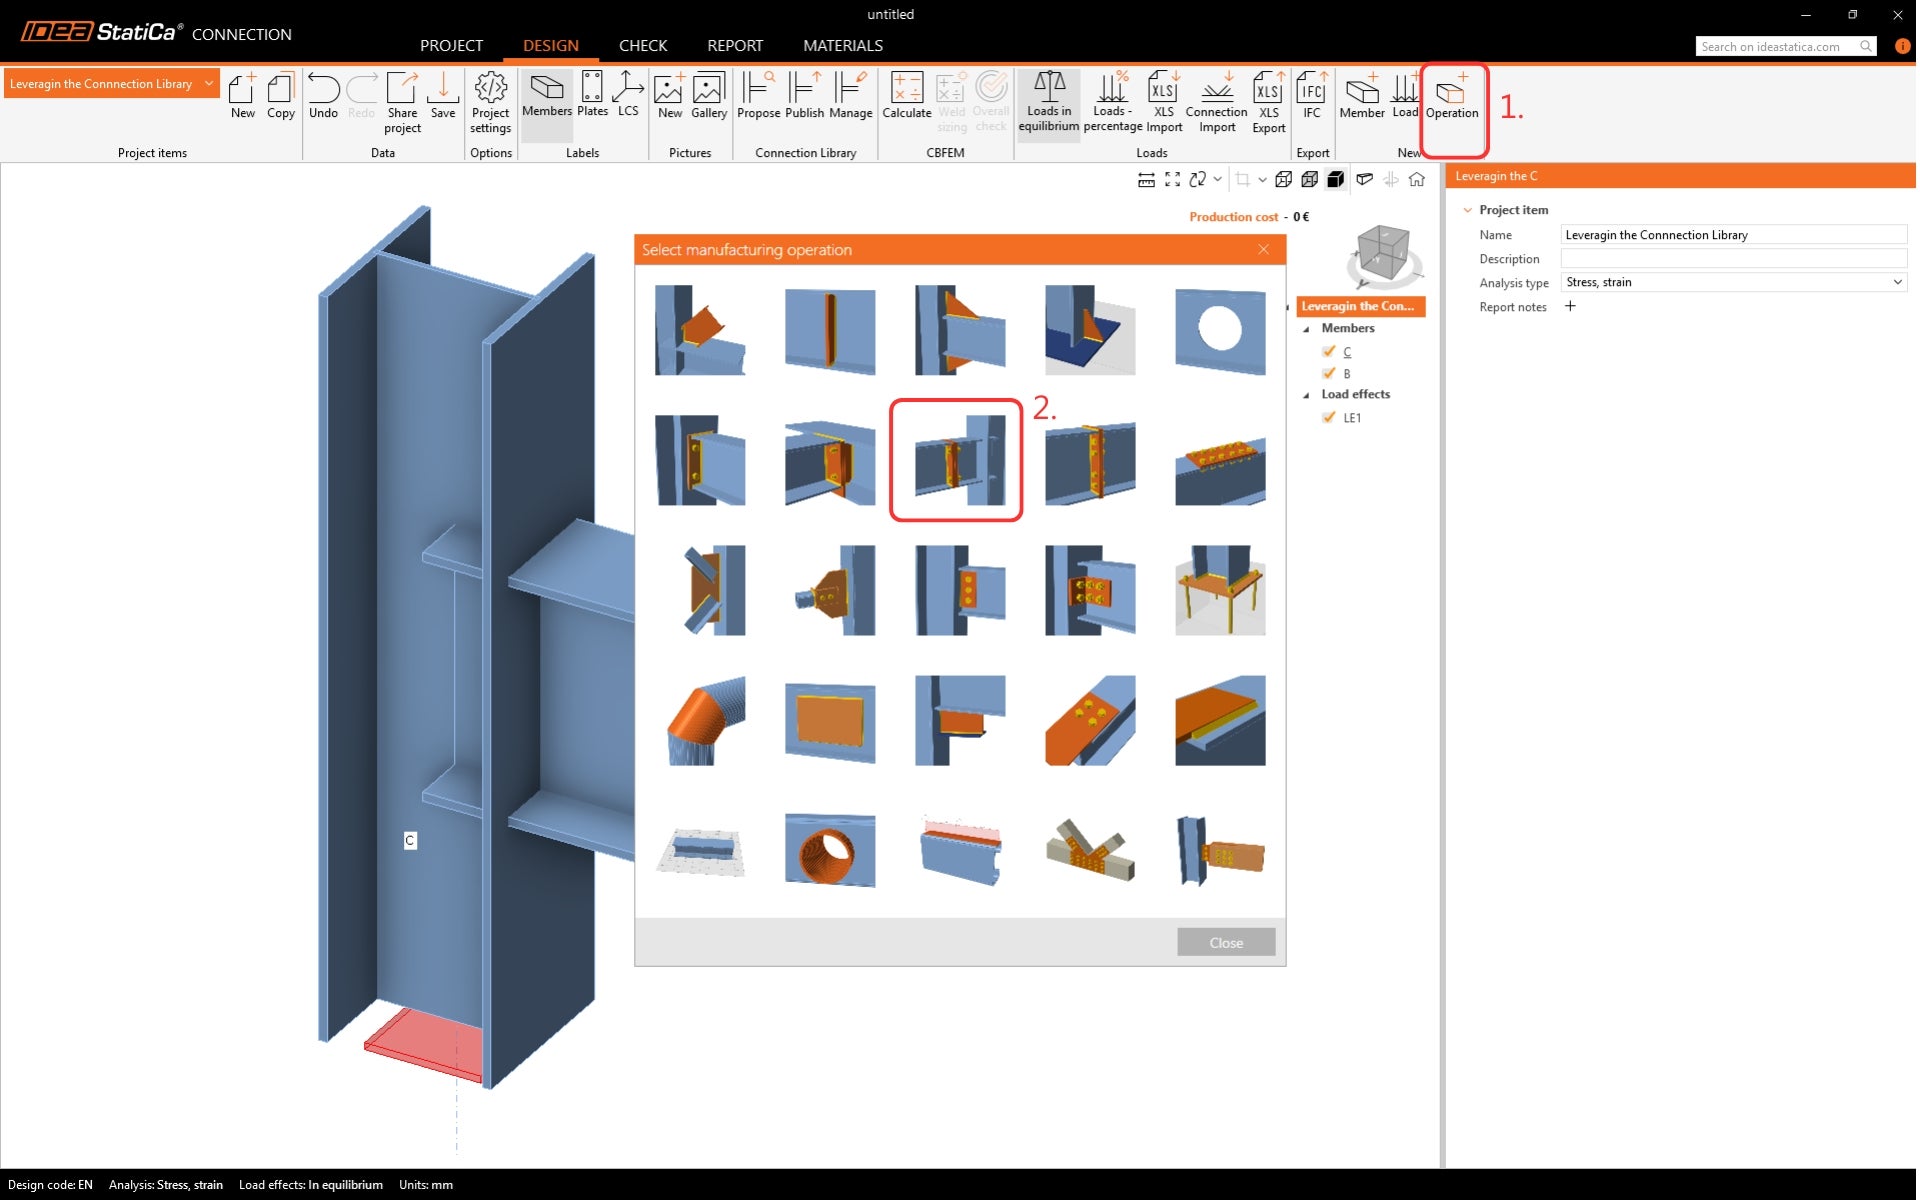
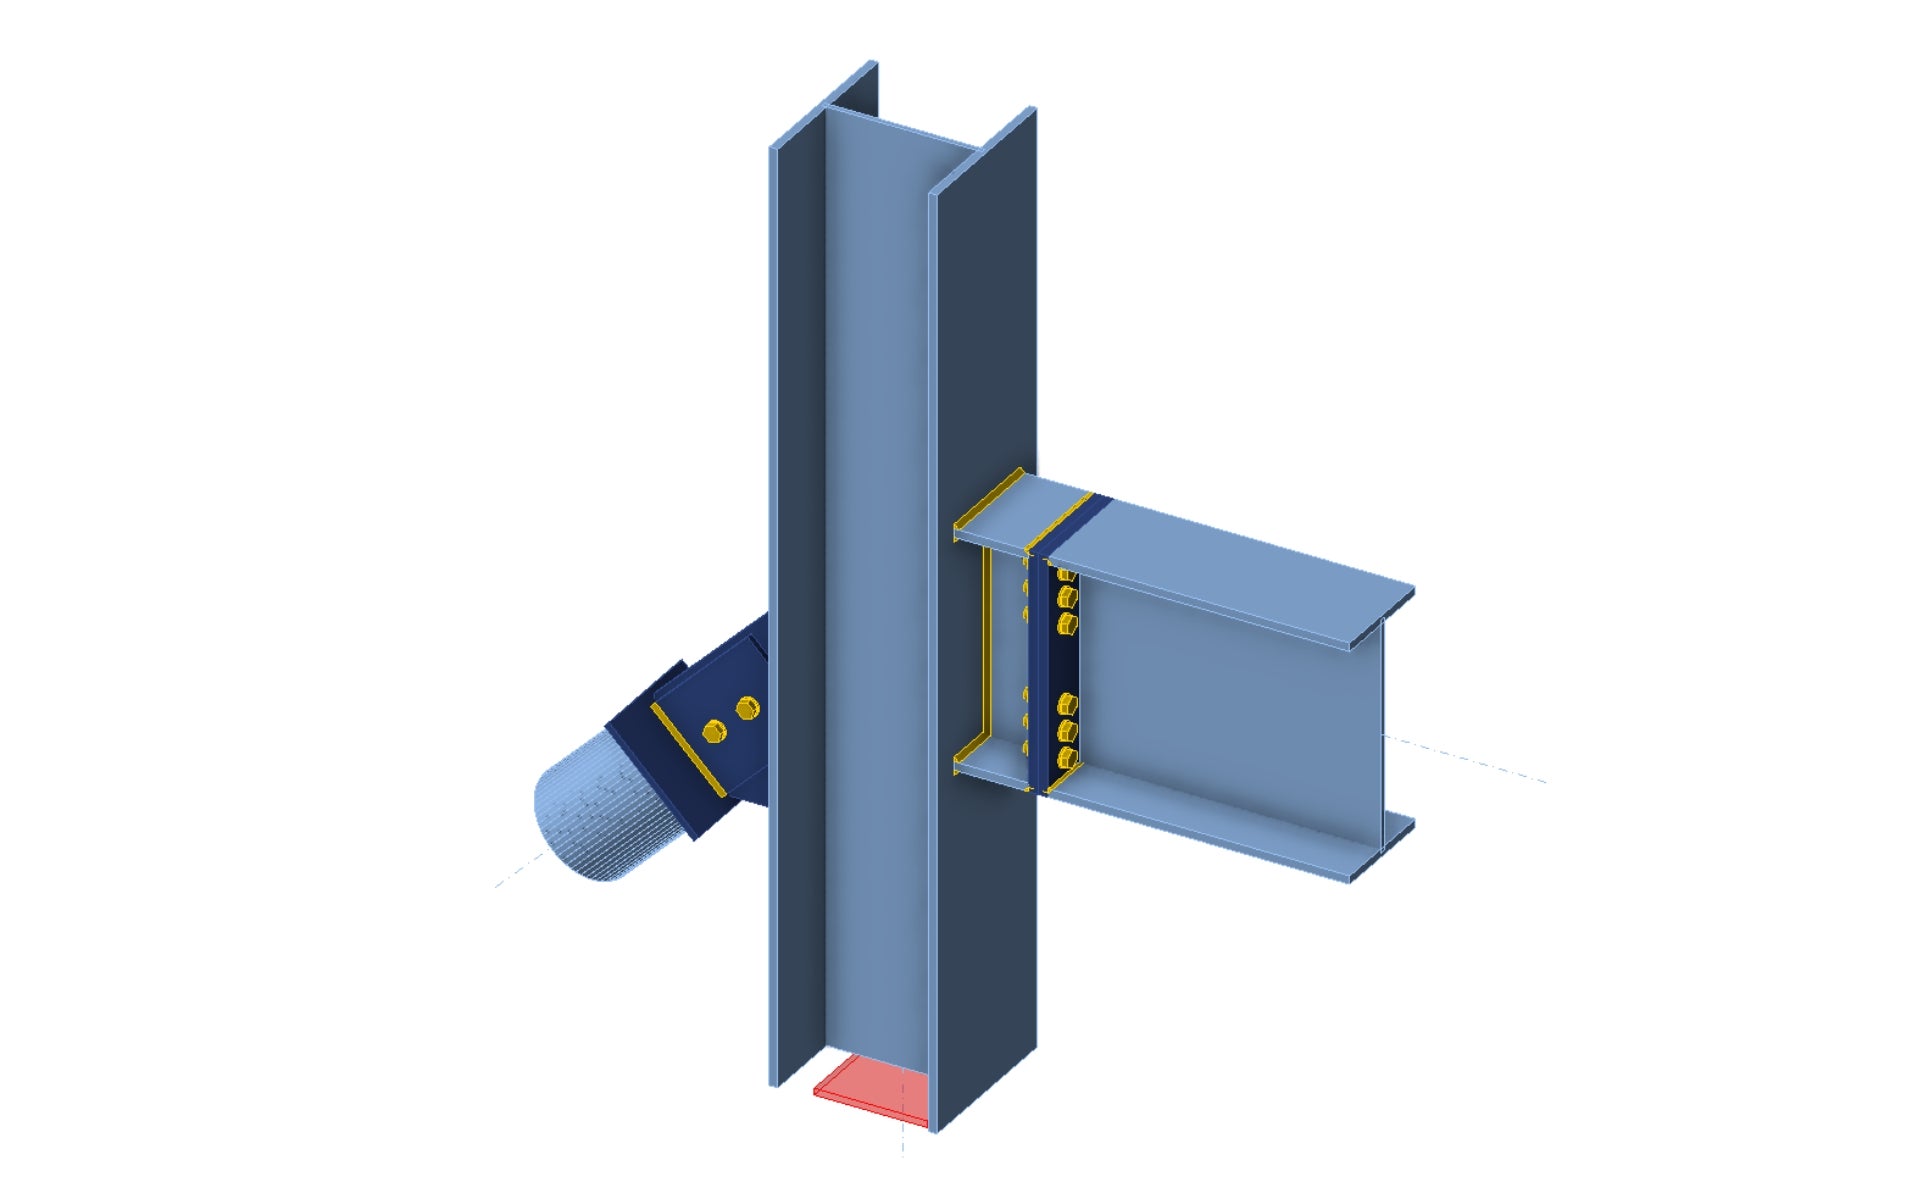
Créons une conception pouvant être enregistrée comme modèle. Cliquez sur Opération dans le ruban et trouvez l'opération de fabrication Stub - plate to plate.
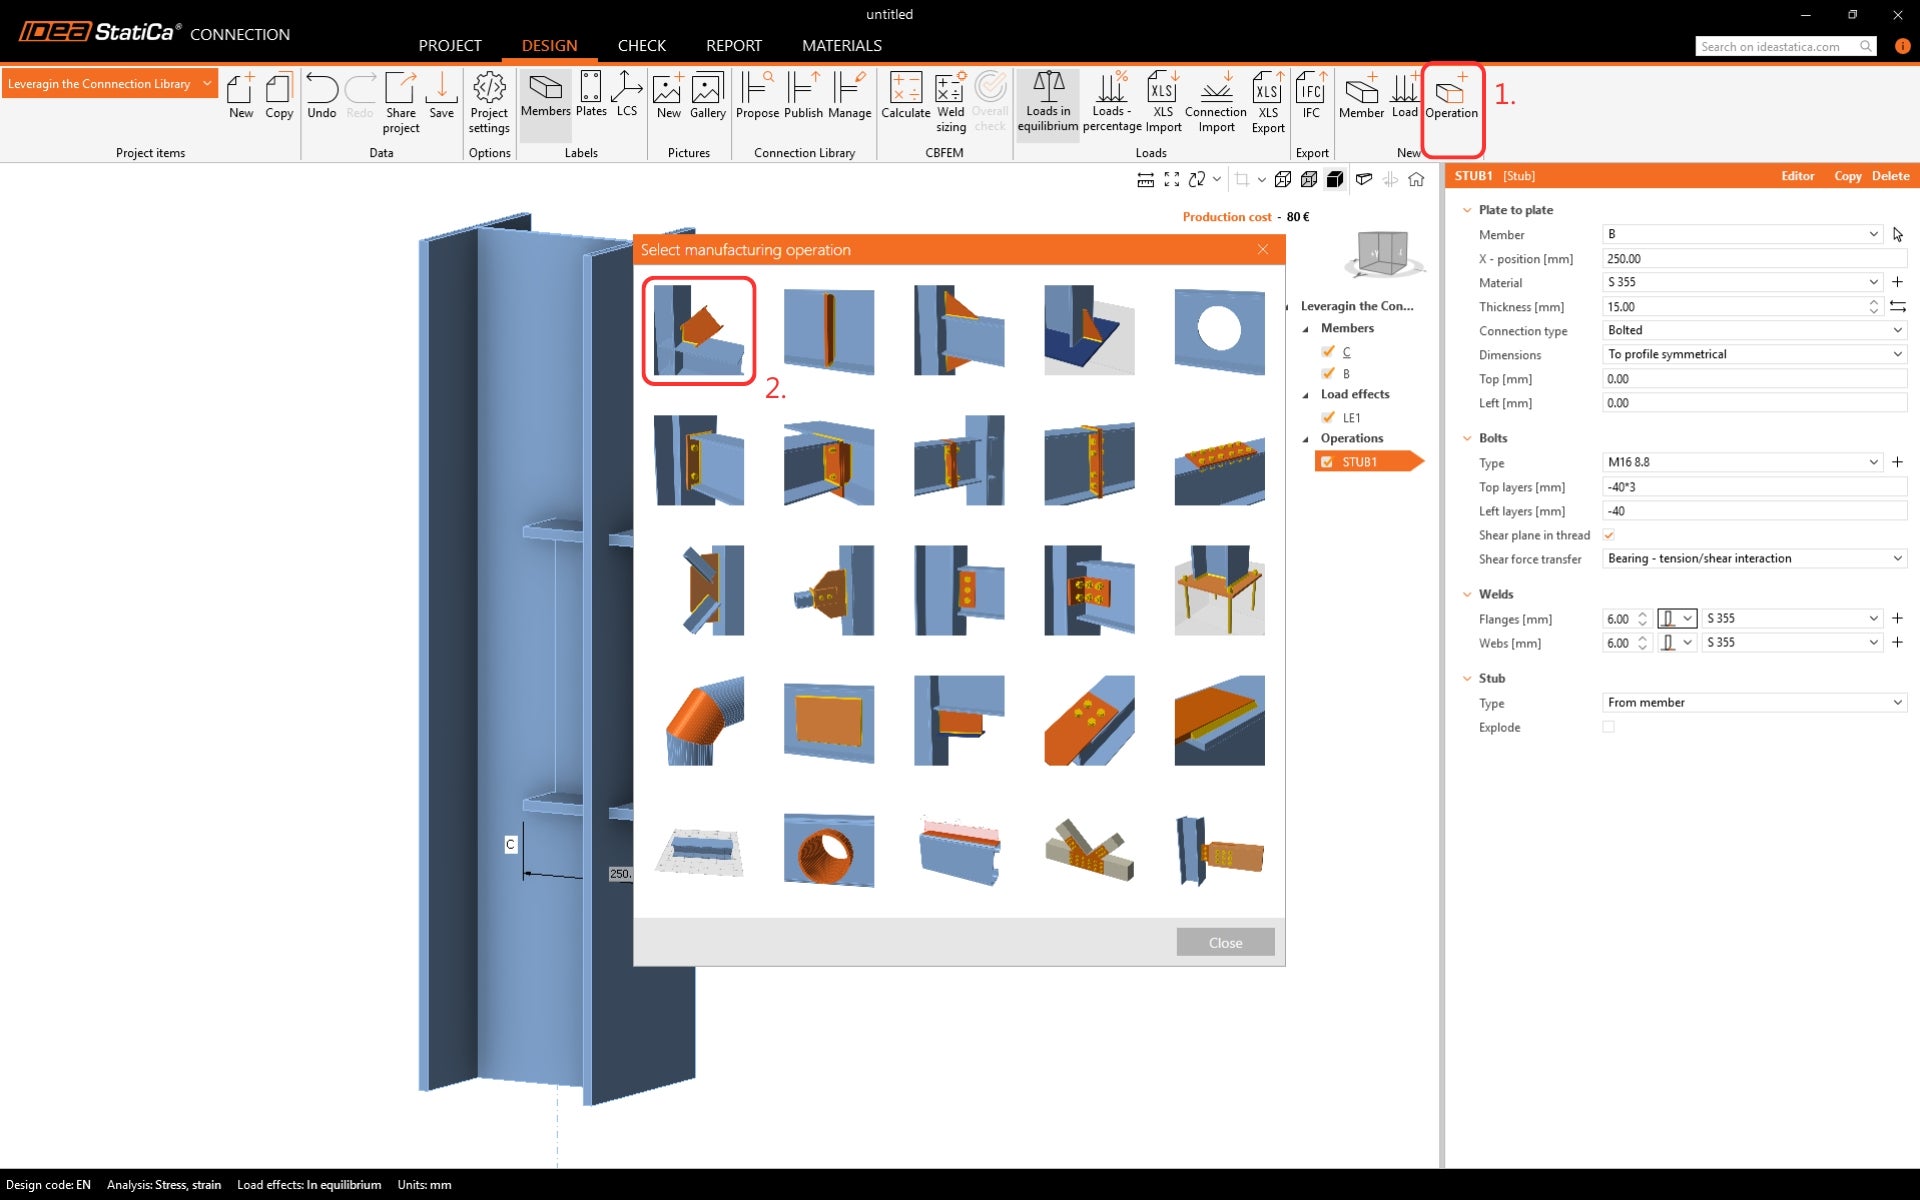
Modifiez les soudures dans l'opération. Sélectionnez les soudures à pénétration partielle (PJP) et modifiez la taille.

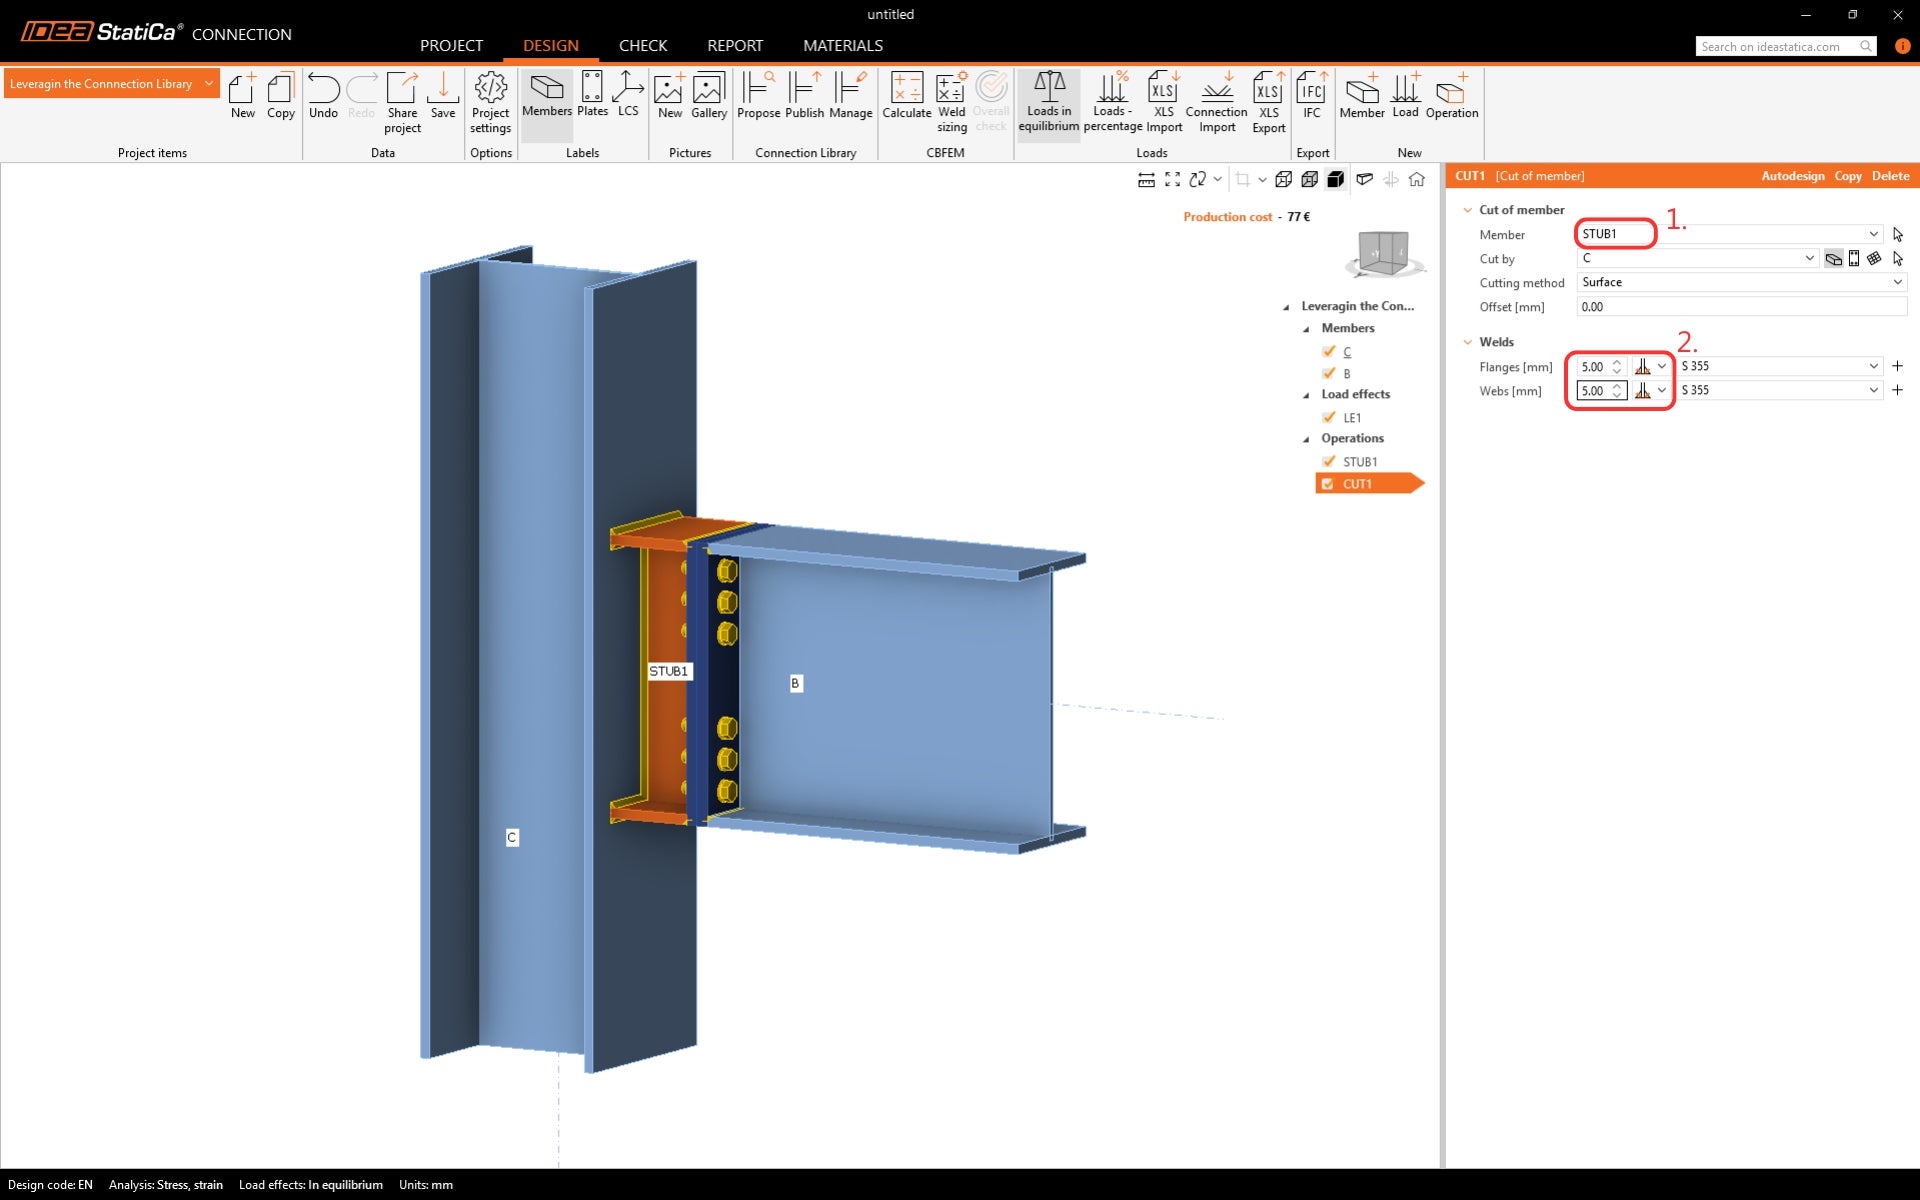
Ajoutez une autre opération - Coupe.
Modifiez l'élément à couper en STUB1 et les soudures.
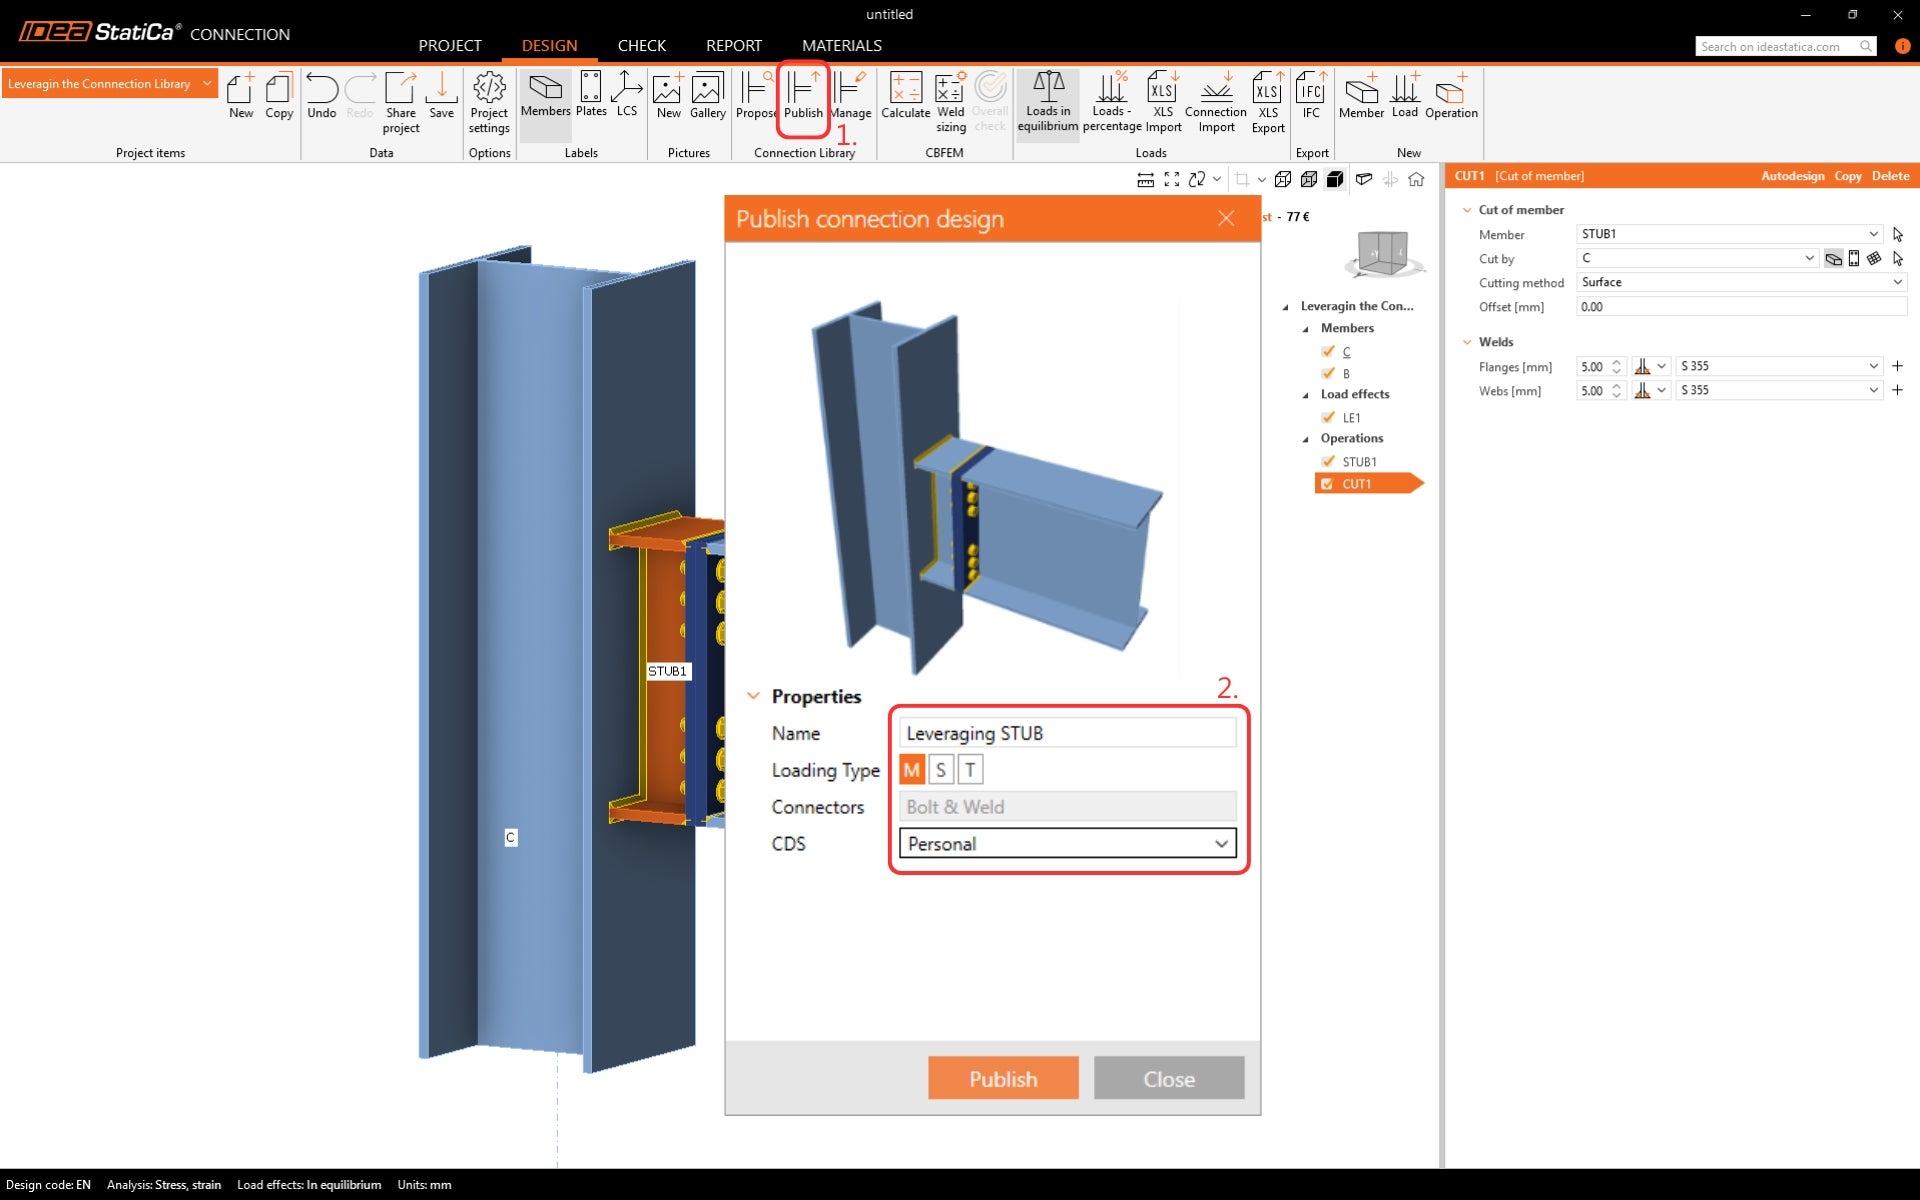
Cette conception est fréquemment utilisée ; elle peut donc être enregistrée dans la Connection Library. Cliquez sur le bouton Publier dans le ruban. Définissez le nom, le type de chargement et l'ensemble de conceptions d'assemblage (CDC) dans lequel le modèle sera stocké. Types de CDC :
- Entreprise - tous les utilisateurs disposant de la licence d'entreprise pourront y accéder, tandis qu'un utilisateur d'une autre entreprise ne pourra pas voir, utiliser ou accéder à ces éléments de conception.
- Personnel - disponible uniquement pour l'auteur de la conception.
2 Application d'un modèle depuis la Connection Library
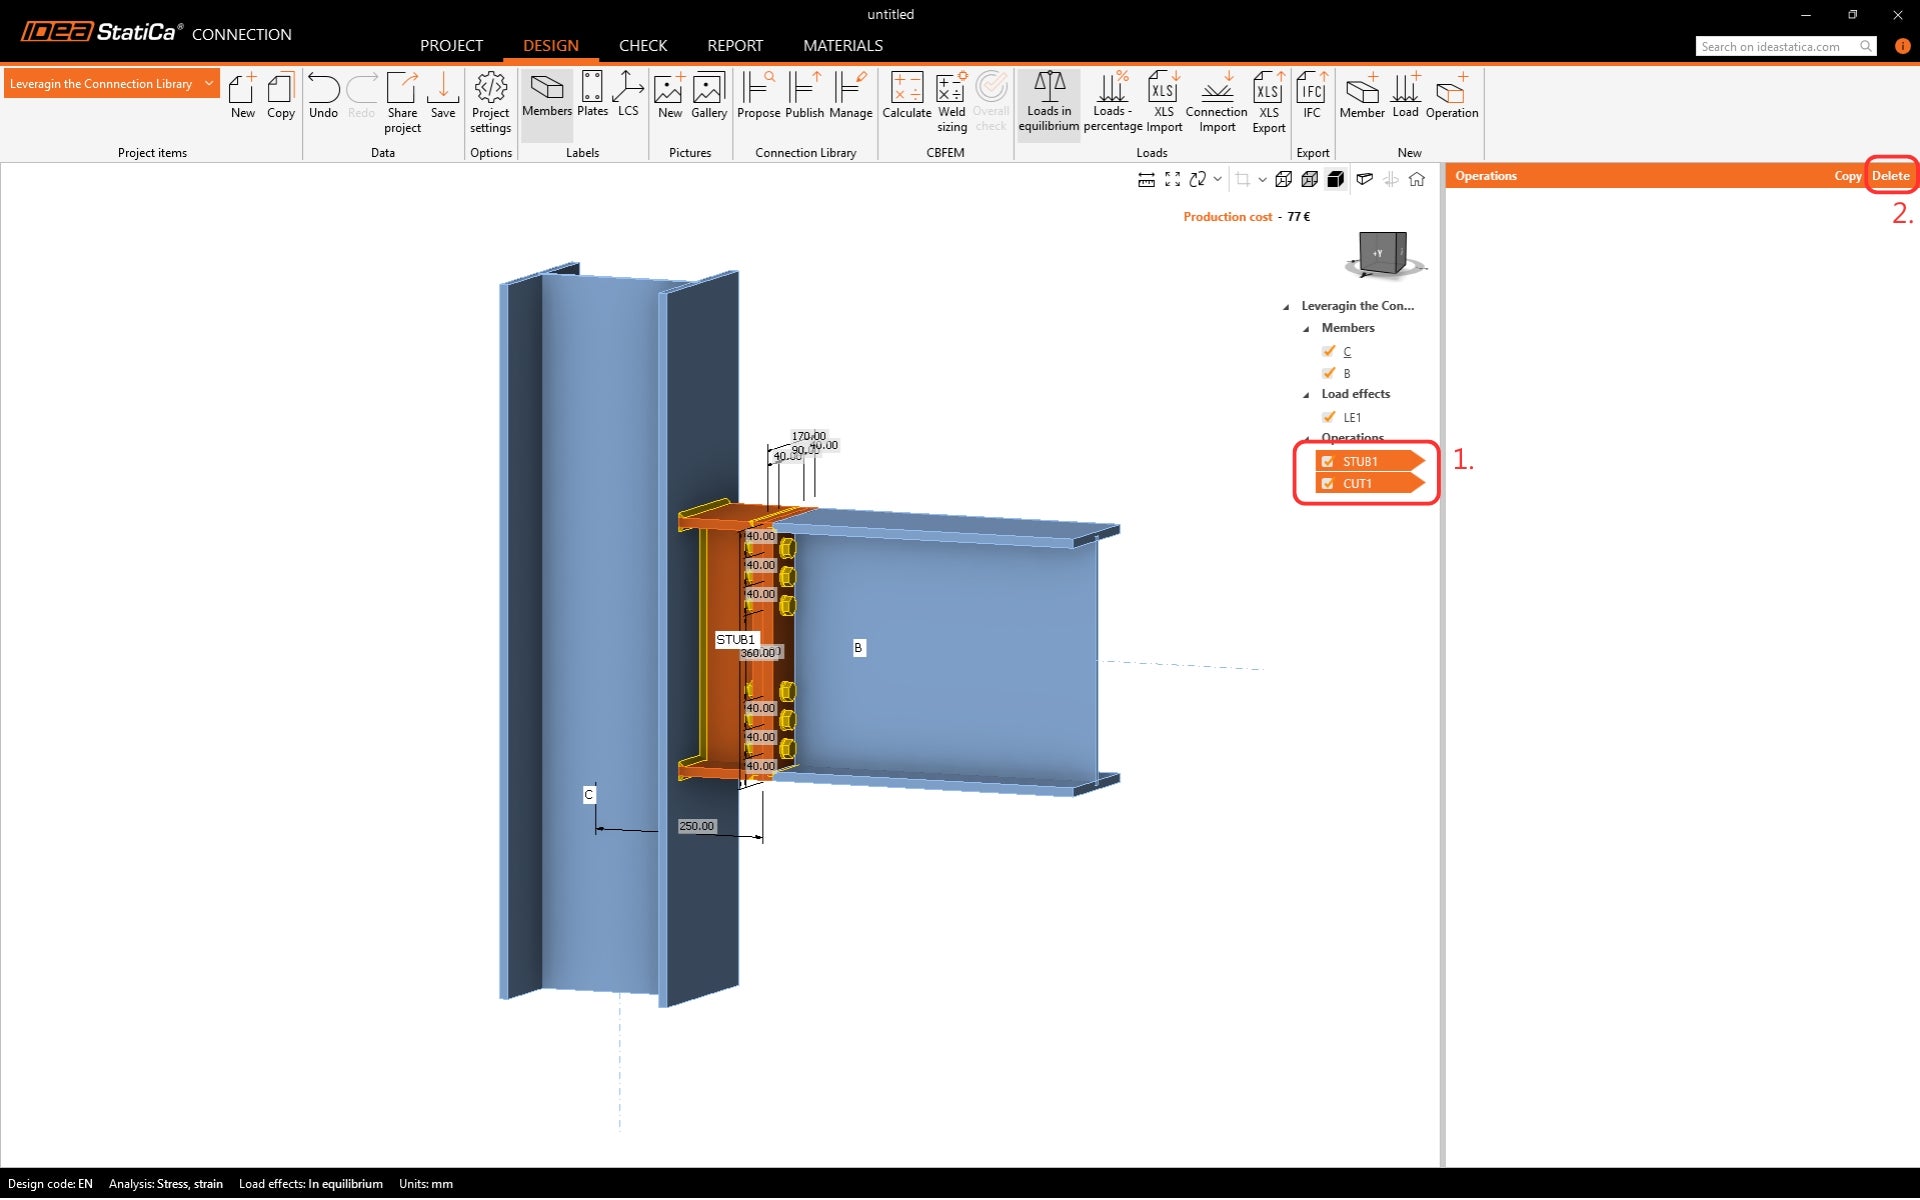
Commencez par supprimer les opérations dans le modèle.
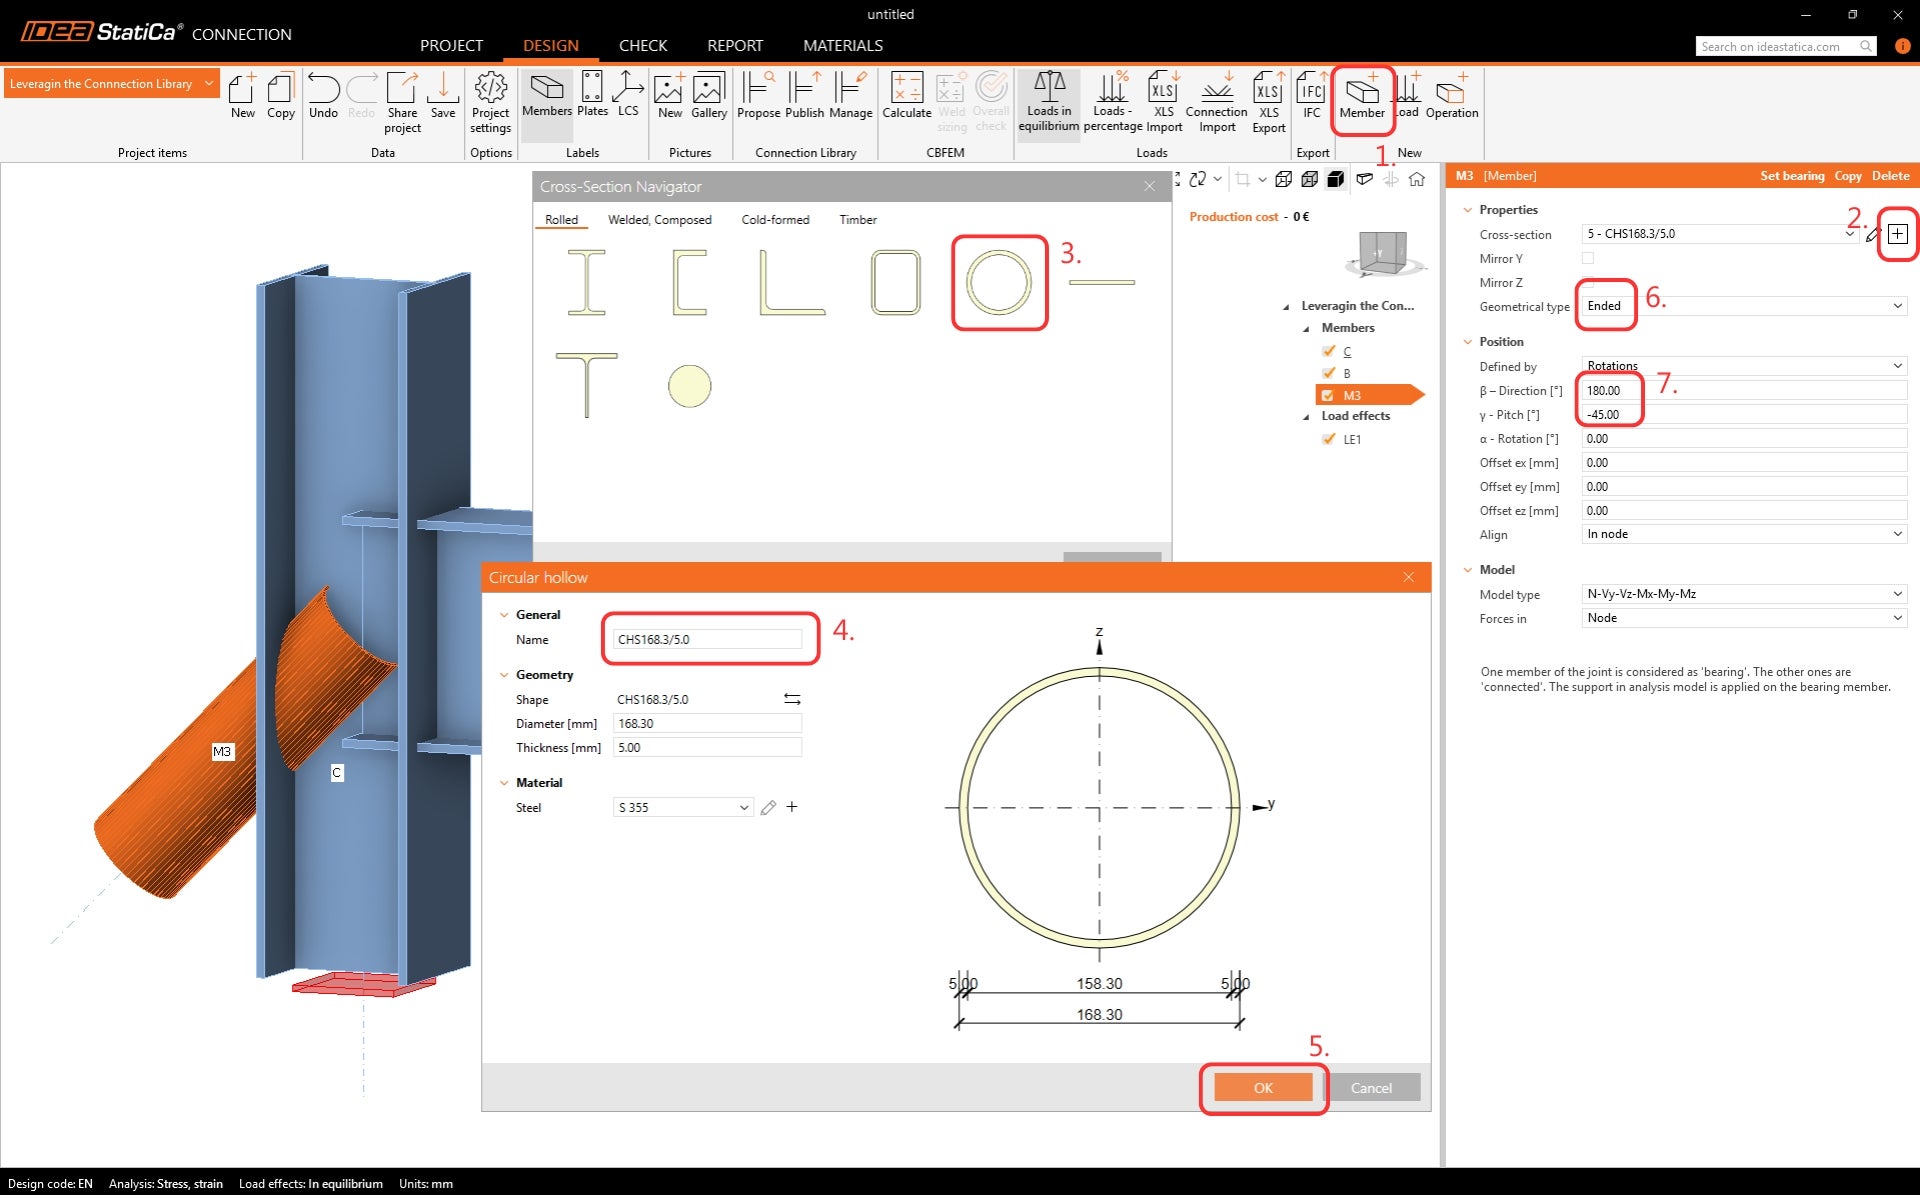
Ajoutez un élément supplémentaire à la conception.
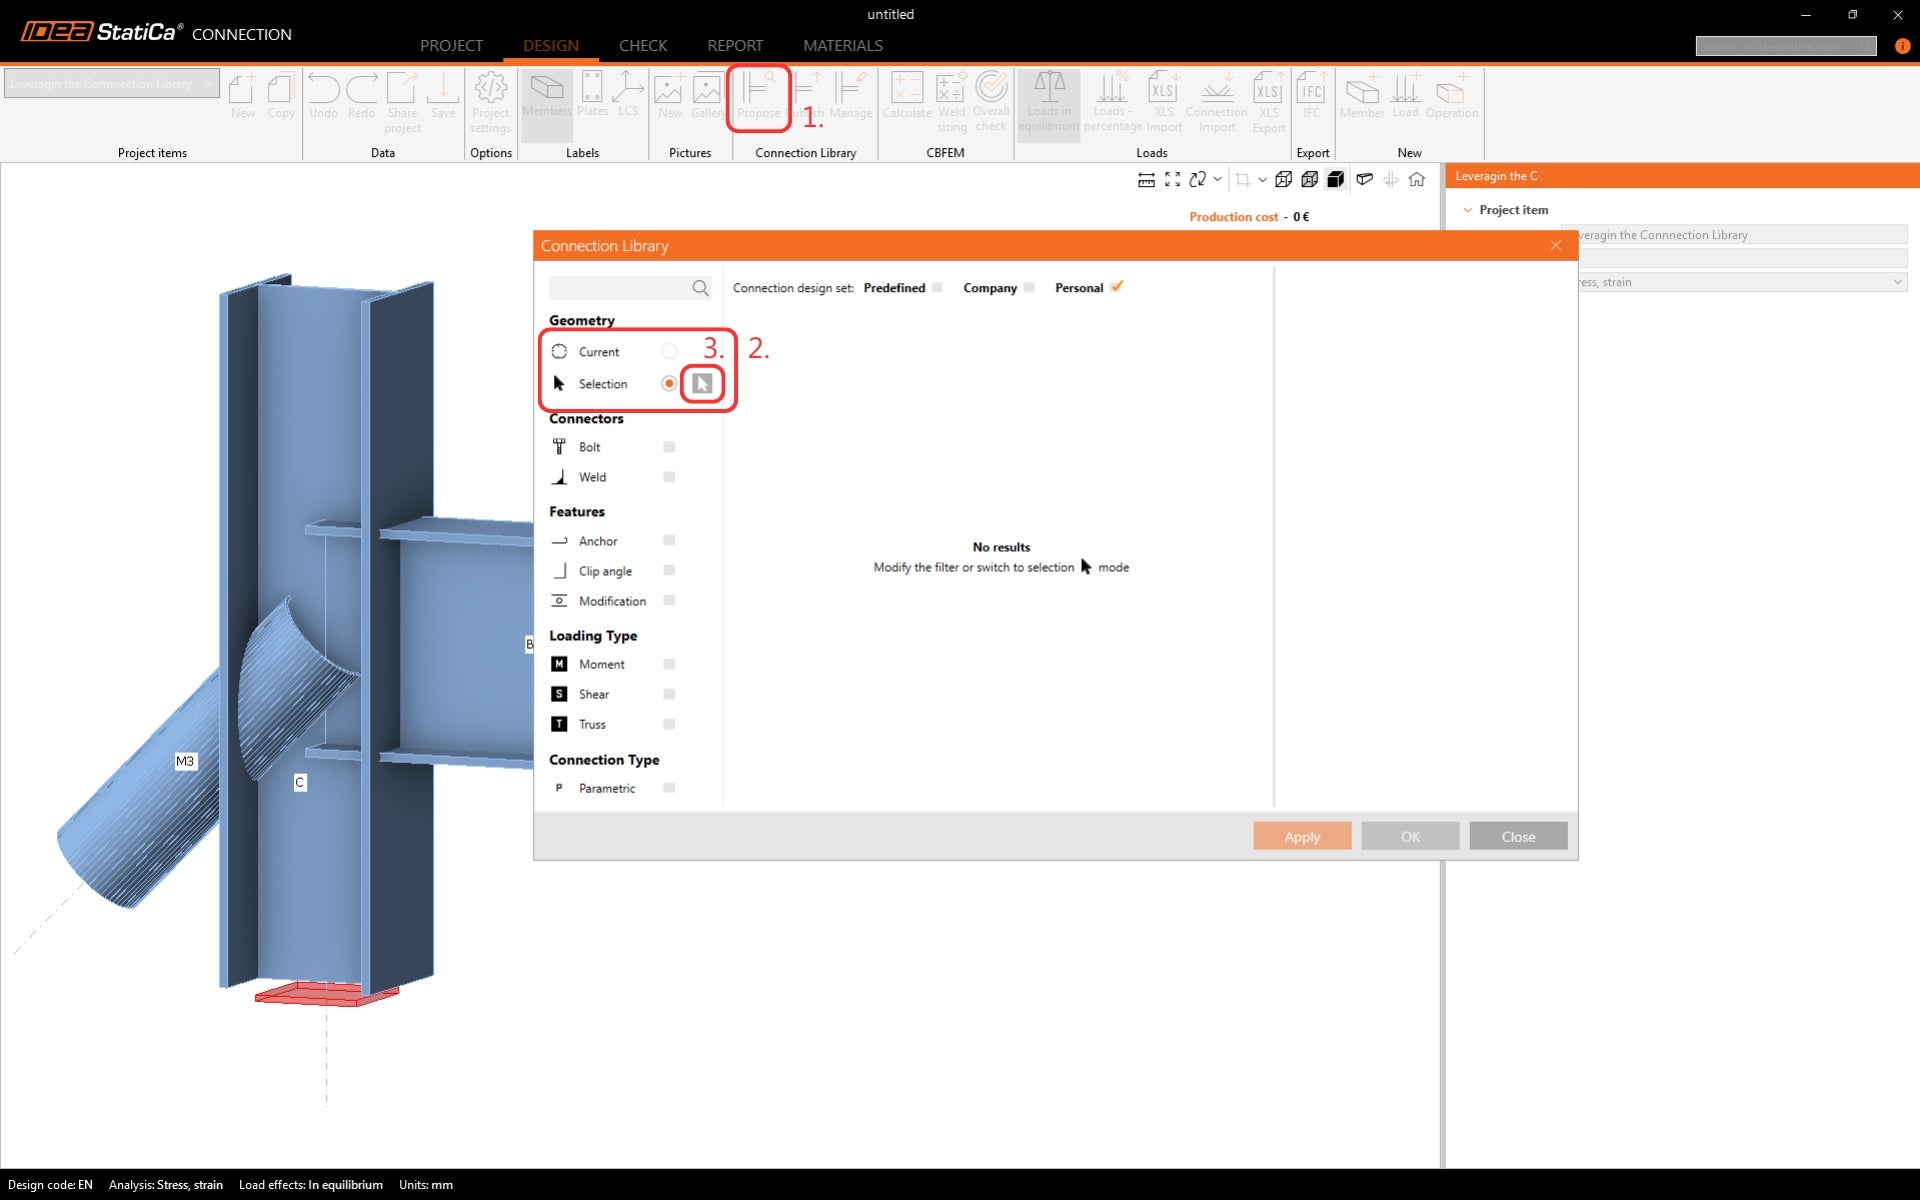
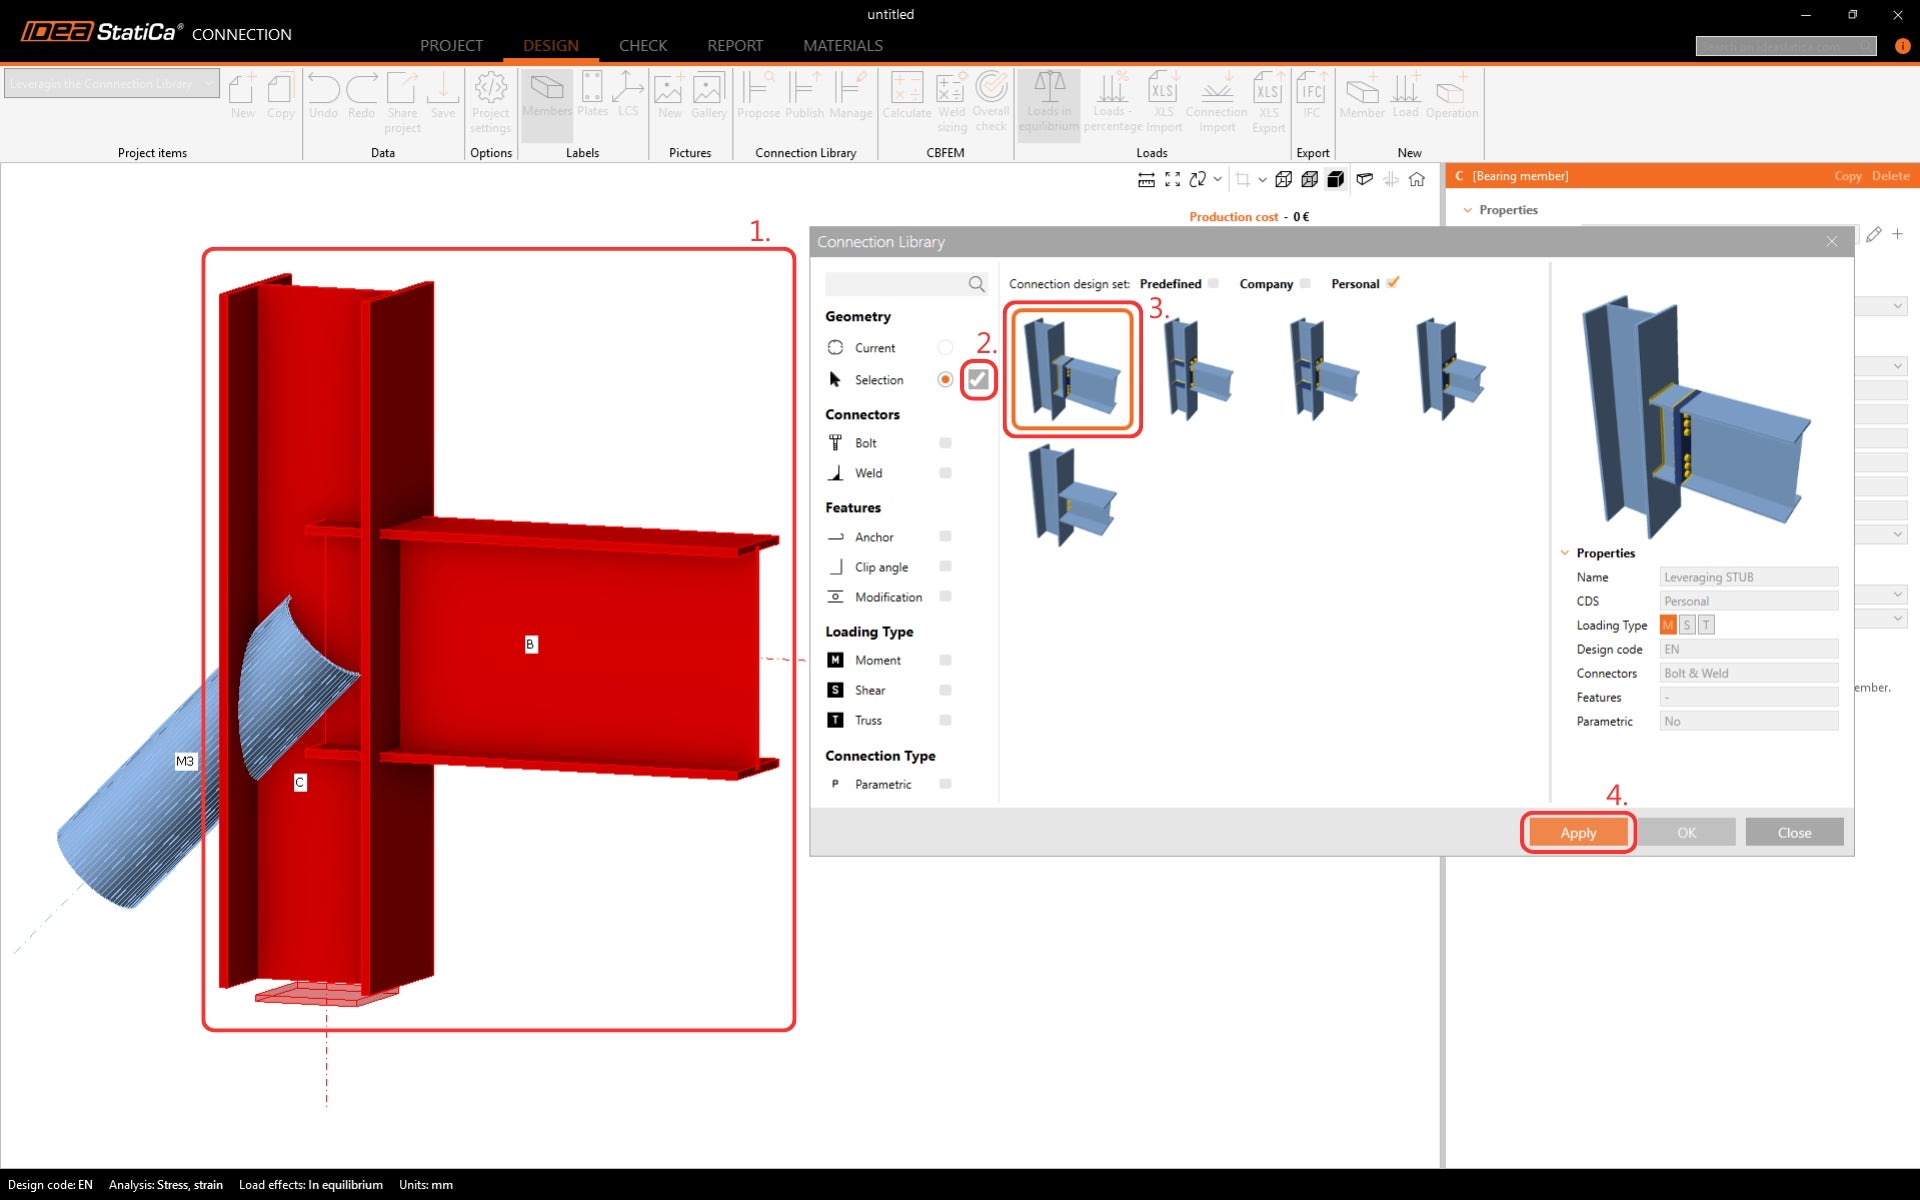
Utilisons maintenant la Connection Library plutôt que de recourir à nouveau aux opérations individuelles. Cliquez sur le bouton Proposer dans le ruban. Aucune conception n'est disponible pour la géométrie actuelle. Passez en mode Sélection et cliquez sur la Flèche.
En maintenant la touche Contrôle de votre clavier enfoncée, sélectionnez les éléments B et C. Confirmez la sélection en cliquant sur le bouton Valider. Les modèles de conception adaptés à la géométrie sélectionnée sont affichés. Affinez la sélection des modèles en ne sélectionnant que l'ensemble de conceptions d'assemblage Personnel. Appliquez le modèle.
La conception est appliquée au modèle exactement telle qu'elle a été enregistrée dans la Connection Library. Pour finaliser la conception, ajoutez une opération individuelle pour l'élément diagonal, car il n'est pas inclus dans le modèle.
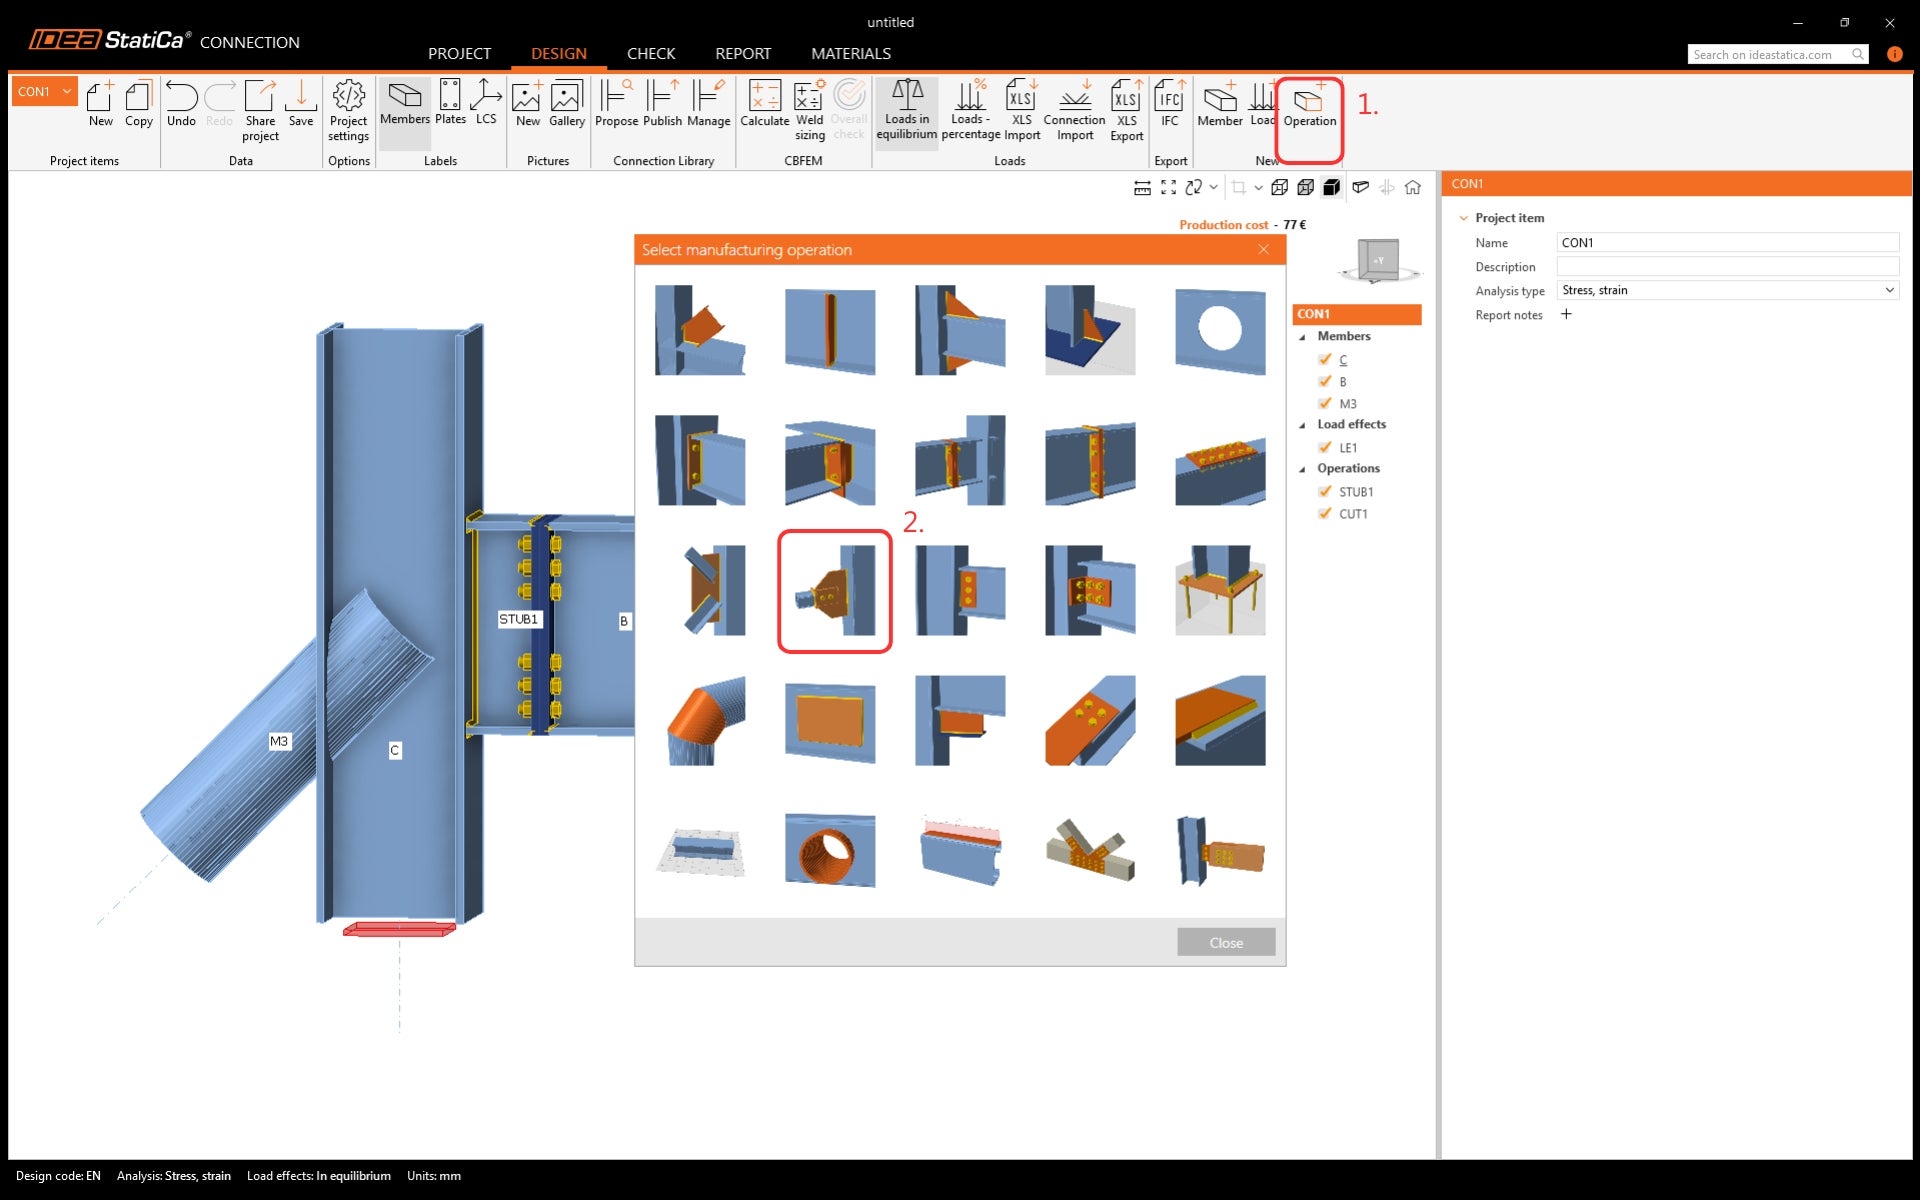
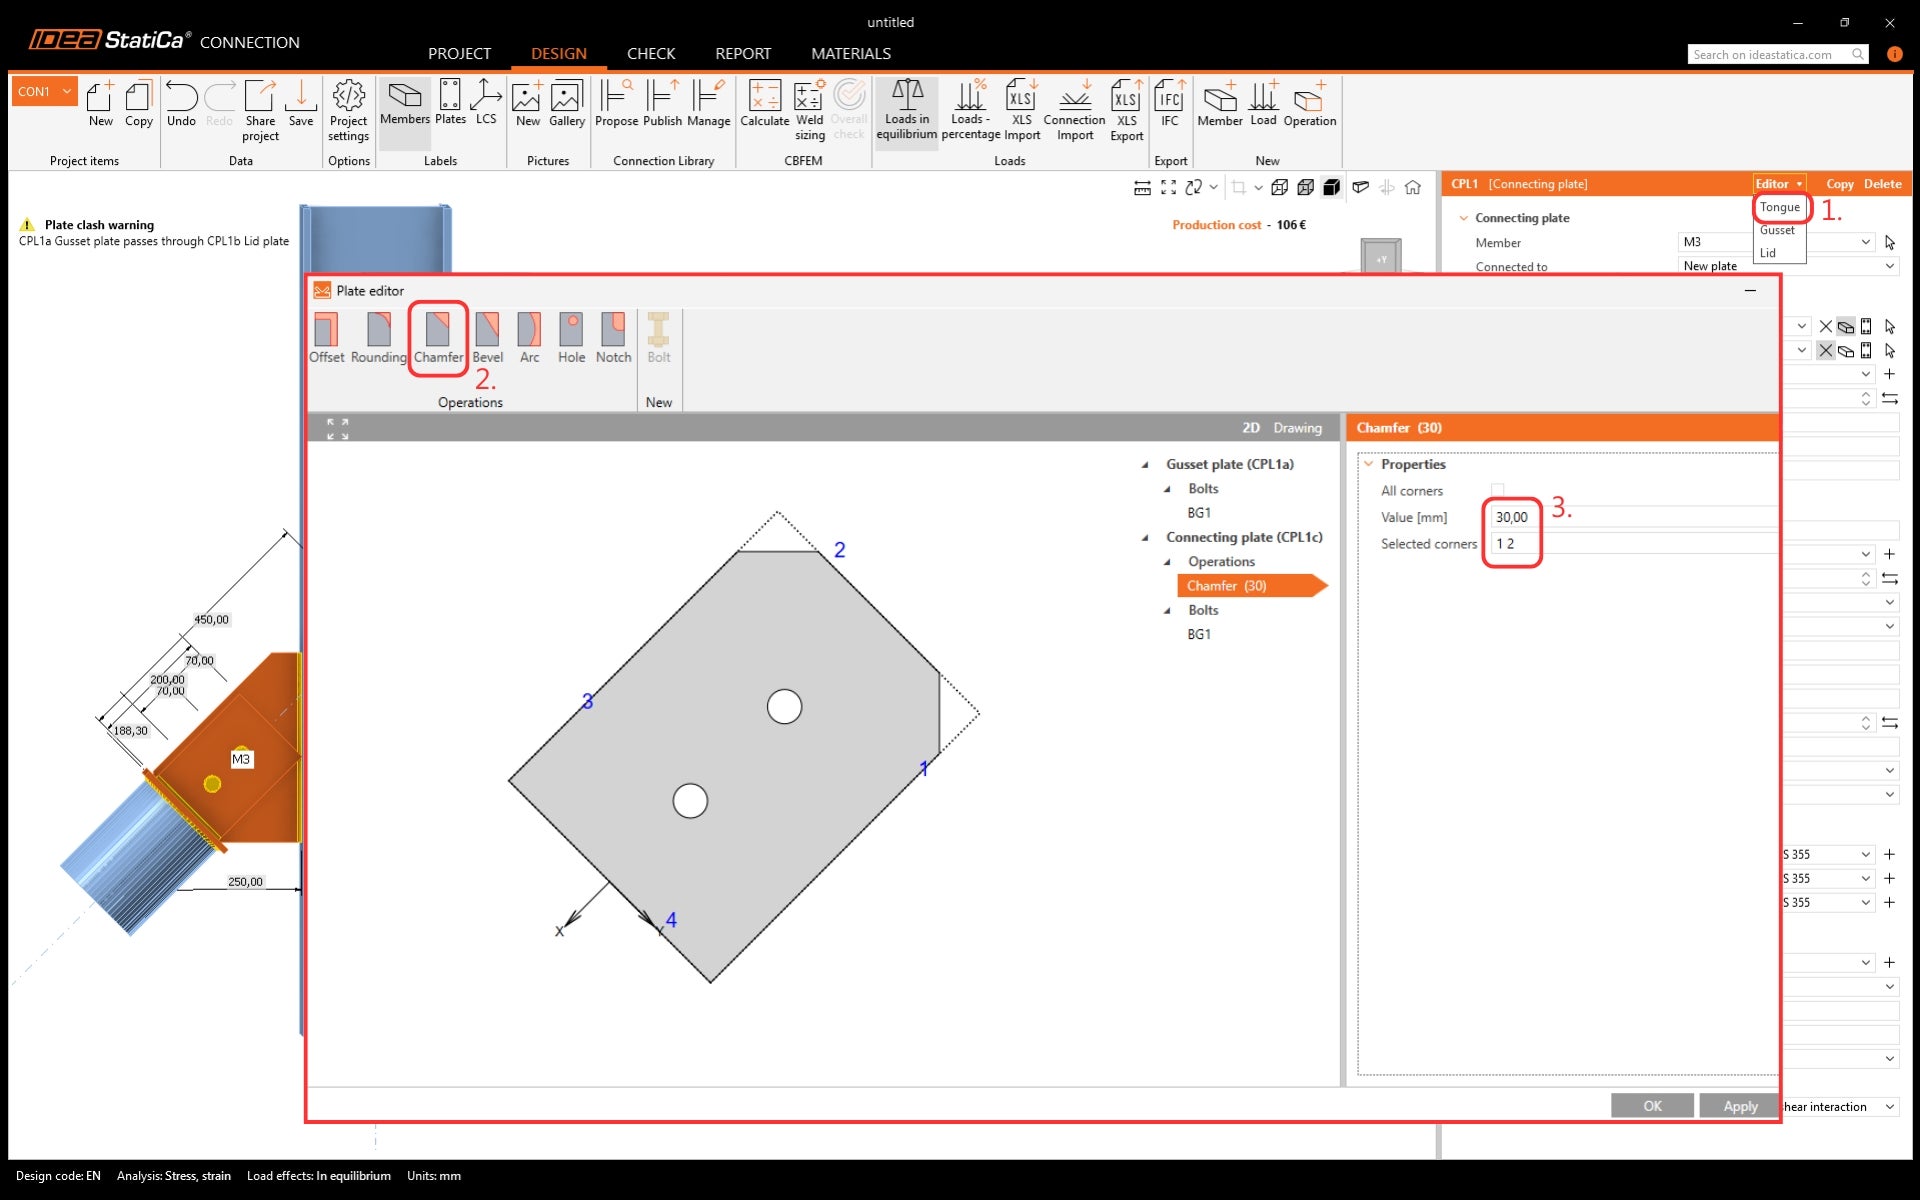
Modifiez l'opération conformément à l'image ci-dessous.
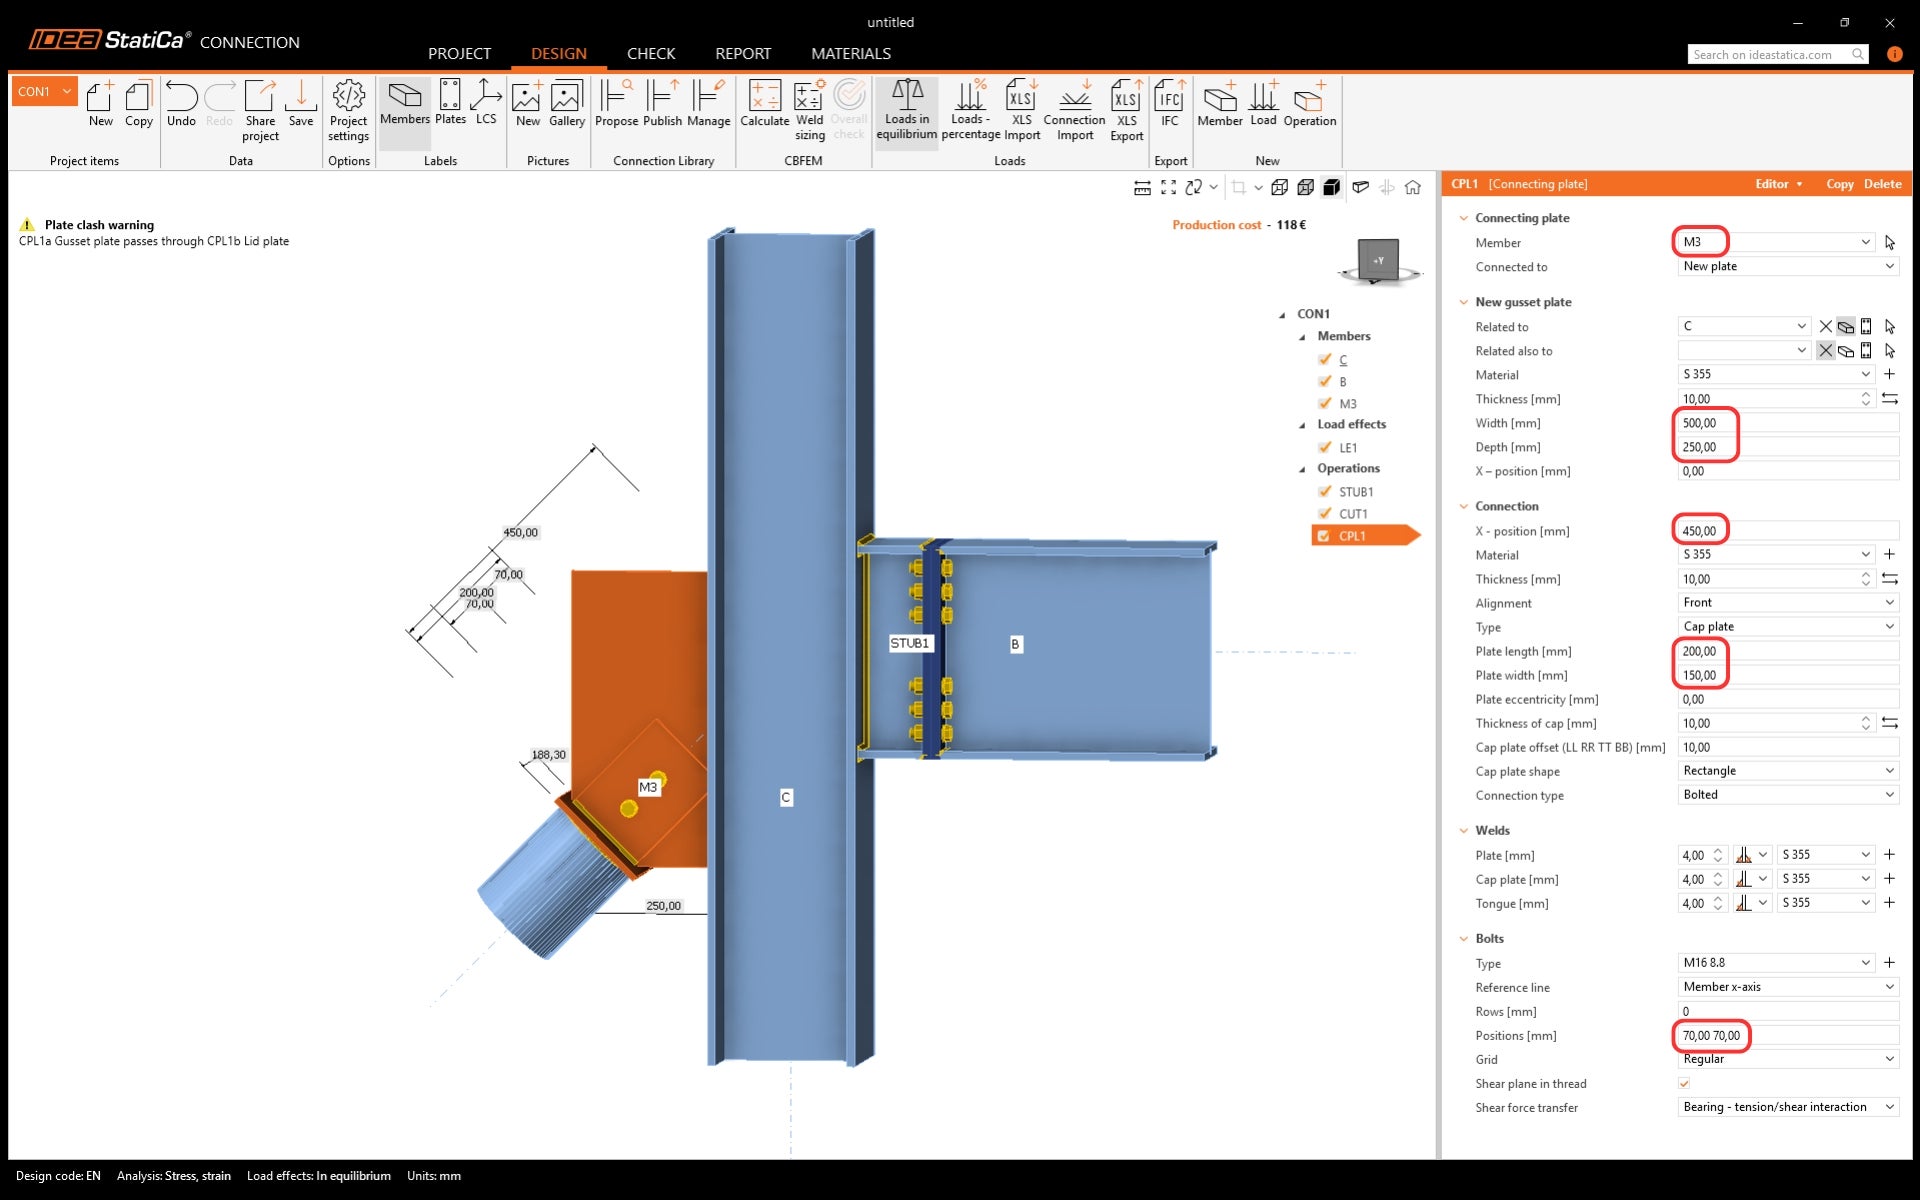
Modifiez le gousset pour lui donner une forme appropriée dans l'éditeur de plaques.
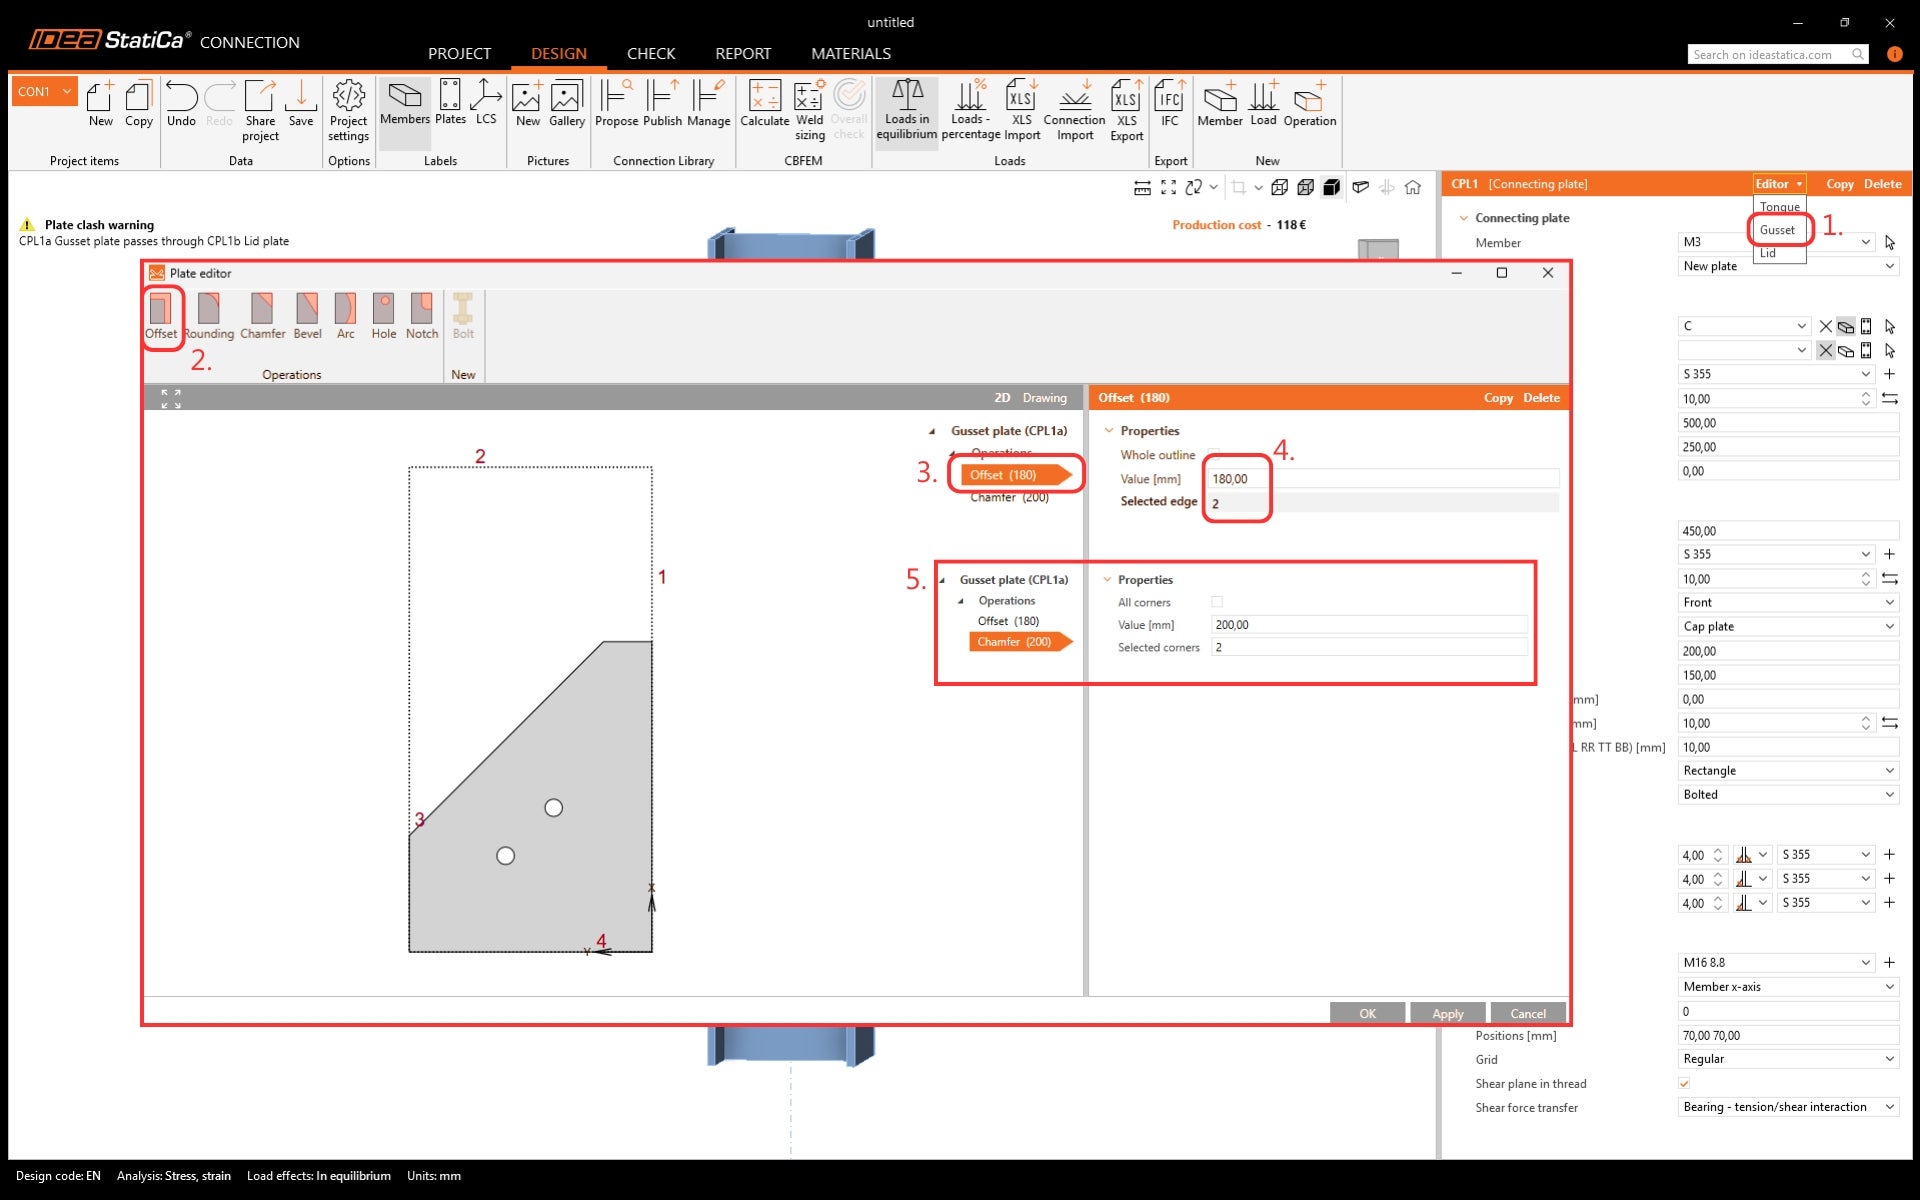
Faites de même pour couper les coins de la plaque langue.
La conception est maintenant terminée. Elle peut être publiée dans la Connection Library ou simplement utilisée pour lancer l'analyse et obtenir les résultats. Pour cela, les effets de charge doivent être définis.
Exploitez dès maintenant la puissance de la Connection Library.
Consultez les articles connexes ci-dessous.