Enlace BIM de AxisVM para el diseño estructural de vigas de hormigón (EN)
Observación
El enlace a la aplicación Beam solo es posible con la versión 24.1.2 de IDEA y anteriores.
1 Cómo activar el enlace
- Instale la última versión de IDEA StatiCa, obténgala en Descargas
- Asegúrese de que está utilizando una versión compatible de AxisVM – las actualizaciones se publican en la sección BIM
Tras la instalación de ambos programas, ejecute IDEA StatiCa y comience con el elemento BIM. En el asistente BIM continúe con el elemento Activar su enlace BIM... Durante el proceso aparece la notificación "Ejecutar como administrador". Confírmelo con el botón Sí.

Seleccione el software para integrar el enlace BIM de IDEA StatiCa, haga clic en el botón Instalar y compruebe el estado de instalación.

2 Cómo utilizar el enlace
Abra el proyecto adjunto en AxisVM y ejecute el análisis lineal.

Seleccione la viga a exportar y acceda a la pestaña Plugins e inicie IDEA StatiCa Beam

Cree un Nuevo proyecto haciendo clic en el botón ECEN.

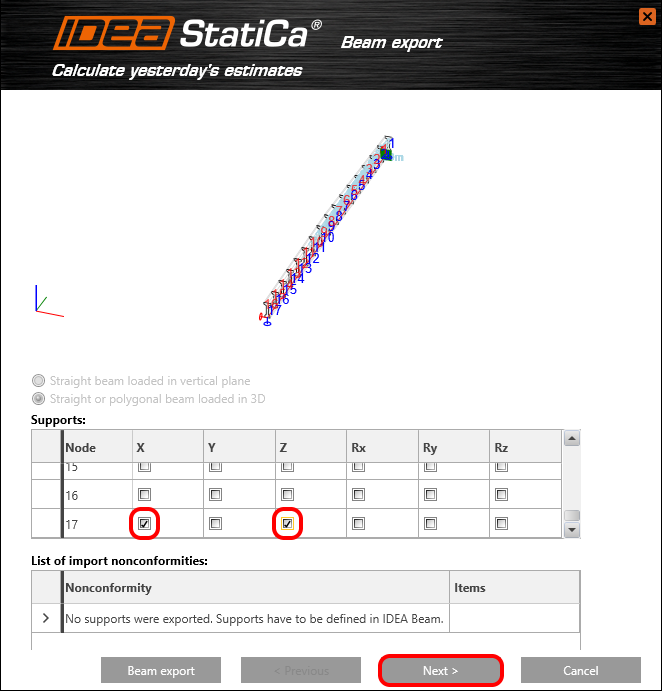
El asistente de importación se inicia automáticamente y continúa haciendo clic en Siguiente.

Ahora defina los apoyos. Comenzamos con la definición del apoyo en el nodo 1 de la siguiente manera:

El segundo apoyo articulado se colocará en el nodo 17.
Configure una viga de hormigón prefabricada que será pretensada y armada.

Configure el cálculo del peso propio según la sección transversal y mantenga el valor de las demás cargas en cero.

Añada todos los casos de carga variables que provienen del proyecto de AxisVM. Los esfuerzos internos se cargarán como fuerzas definidas por el usuario.

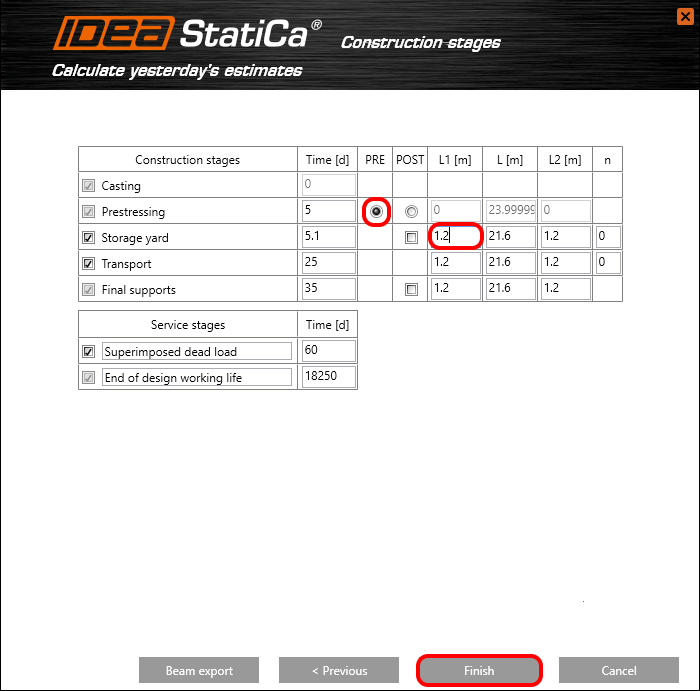
Las fases de construcción son un paso realmente importante para el análisis de la viga. Para el pretensado en la fase de construcción seleccionamos la opción PRE (pretensado). Durante el almacenamiento en obra y posteriormente, las siguientes fases cambiarán las distancias de apoyo. Establezca la distancia desde el borde izquierdo de la viga en 1,2 m. La posición derecha del apoyo L2 se establecerá de la misma manera y la distancia central se recalcula automáticamente.
Finalmente, finalice el asistente haciendo clic en Finalizar.
Se inicia la transferencia automática de datos y se lanza IDEA StatiCa Beam con el proyecto generado.
3 Datos del proyecto
Establezca la Alineación de la viga y la Posición del apoyo en la Superficie inferior.

4 Fuerzas definidas por el usuario
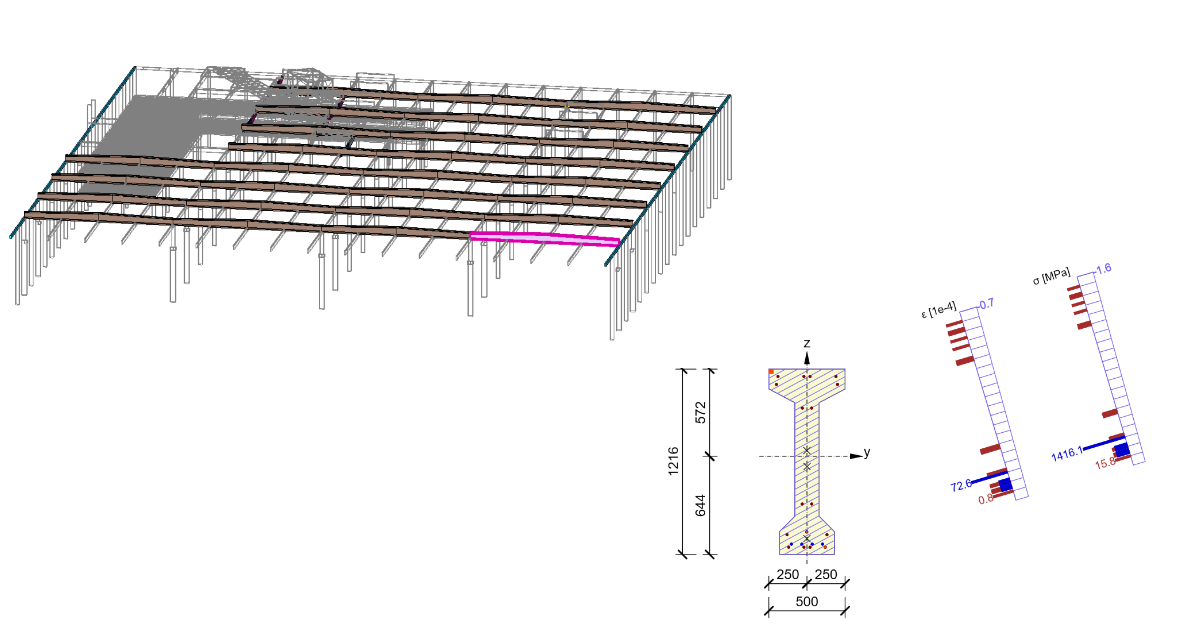
Los casos de carga variables se exportan a IDEA Beam como Fuerzas definidas por el usuario. Por ejemplo, observe la forma del momento flector para el caso de carga vítr +y.

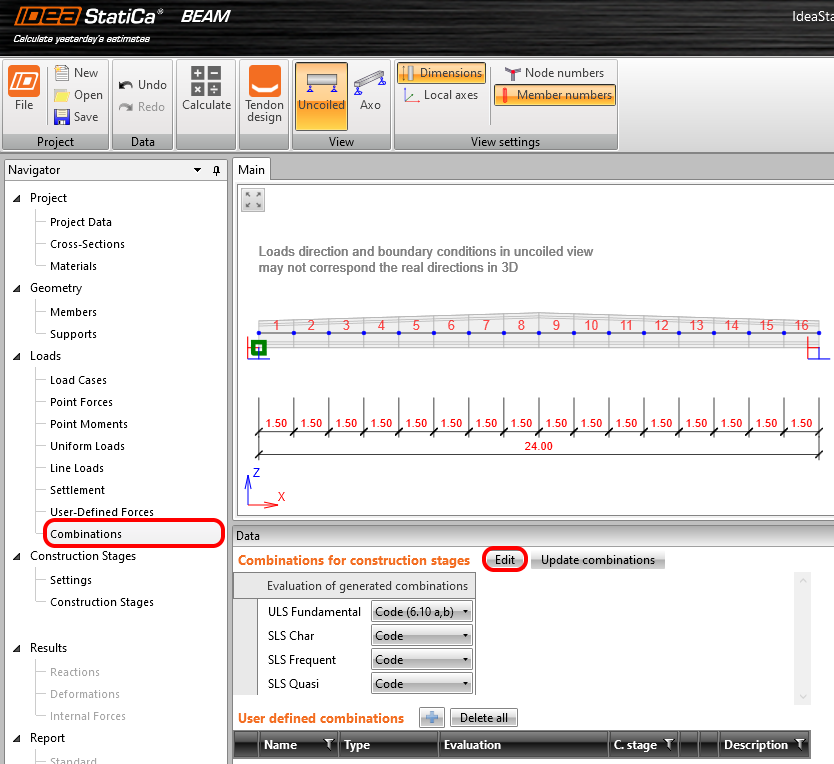
5 Combinaciones
Definamos combinaciones que estarán compuestas por casos de carga permanentes y variables. Haga clic en el botón Editar.
Añadimos todos los casos de carga variables asignados a LG2 (grupo de carga 2) a la fase Fin de la vida útil de diseño. Todos los casos de carga de este grupo se añadirán a las combinaciones de ELU y ELS.

6 Diseño de tendones
Activamos todas las Fases de construcción y ejecutamos el Diseño de tendones para definir la geometría de los tendones y el efecto del pretensado sobre la viga.

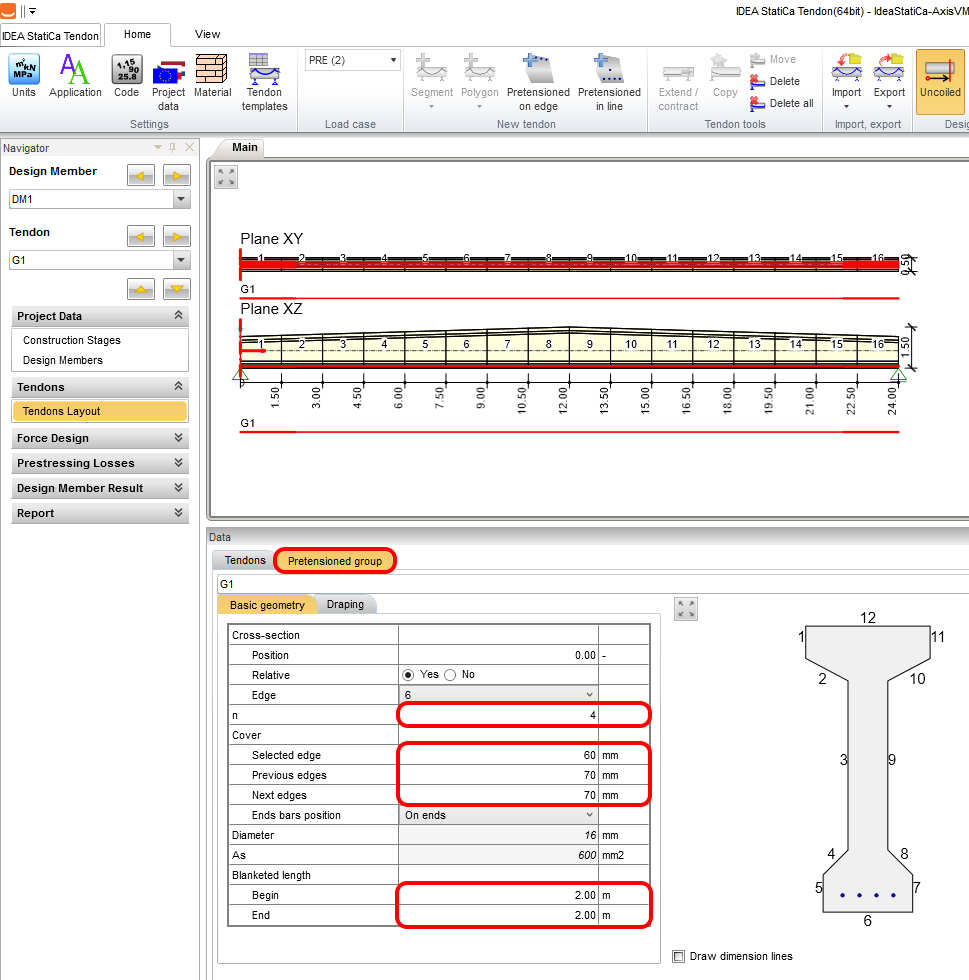
Introduzca el primer grupo de tendones G1 haciendo clic en el icono Tendones pretensados en borde.

Defina 4 tendones en el borde 6 y establezca el recubrimiento de la siguiente manera. Para una viga pretensada es habitual reducir el momento flector al inicio y al final de la viga. La longitud de envoltura se establecerá en 2 m desde ambos lados.
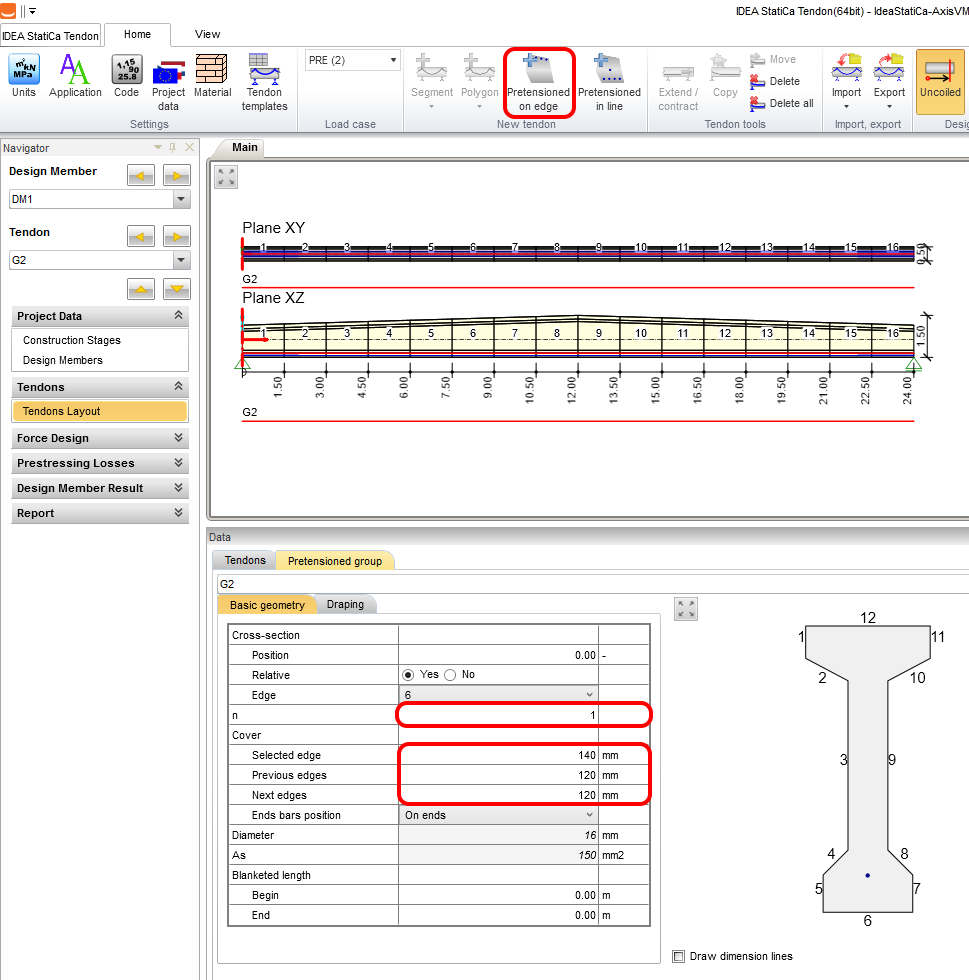
De la misma manera, creamos un segundo grupo de tendones G2. Establezca 1 tendón en el borde y cambie el recubrimiento.
Ejecute el análisis para obtener los resultados de las pérdidas a corto y largo plazo.

Tras el análisis, cambie al grupo de tendones G1 para investigar el efecto de la longitud de envoltura sobre los tendones y la verificación de tensiones. Cierre el diseñador de tendones con Salir.

Ejecute el análisis para obtener los resultados de reacciones, deformaciones y esfuerzos internos.

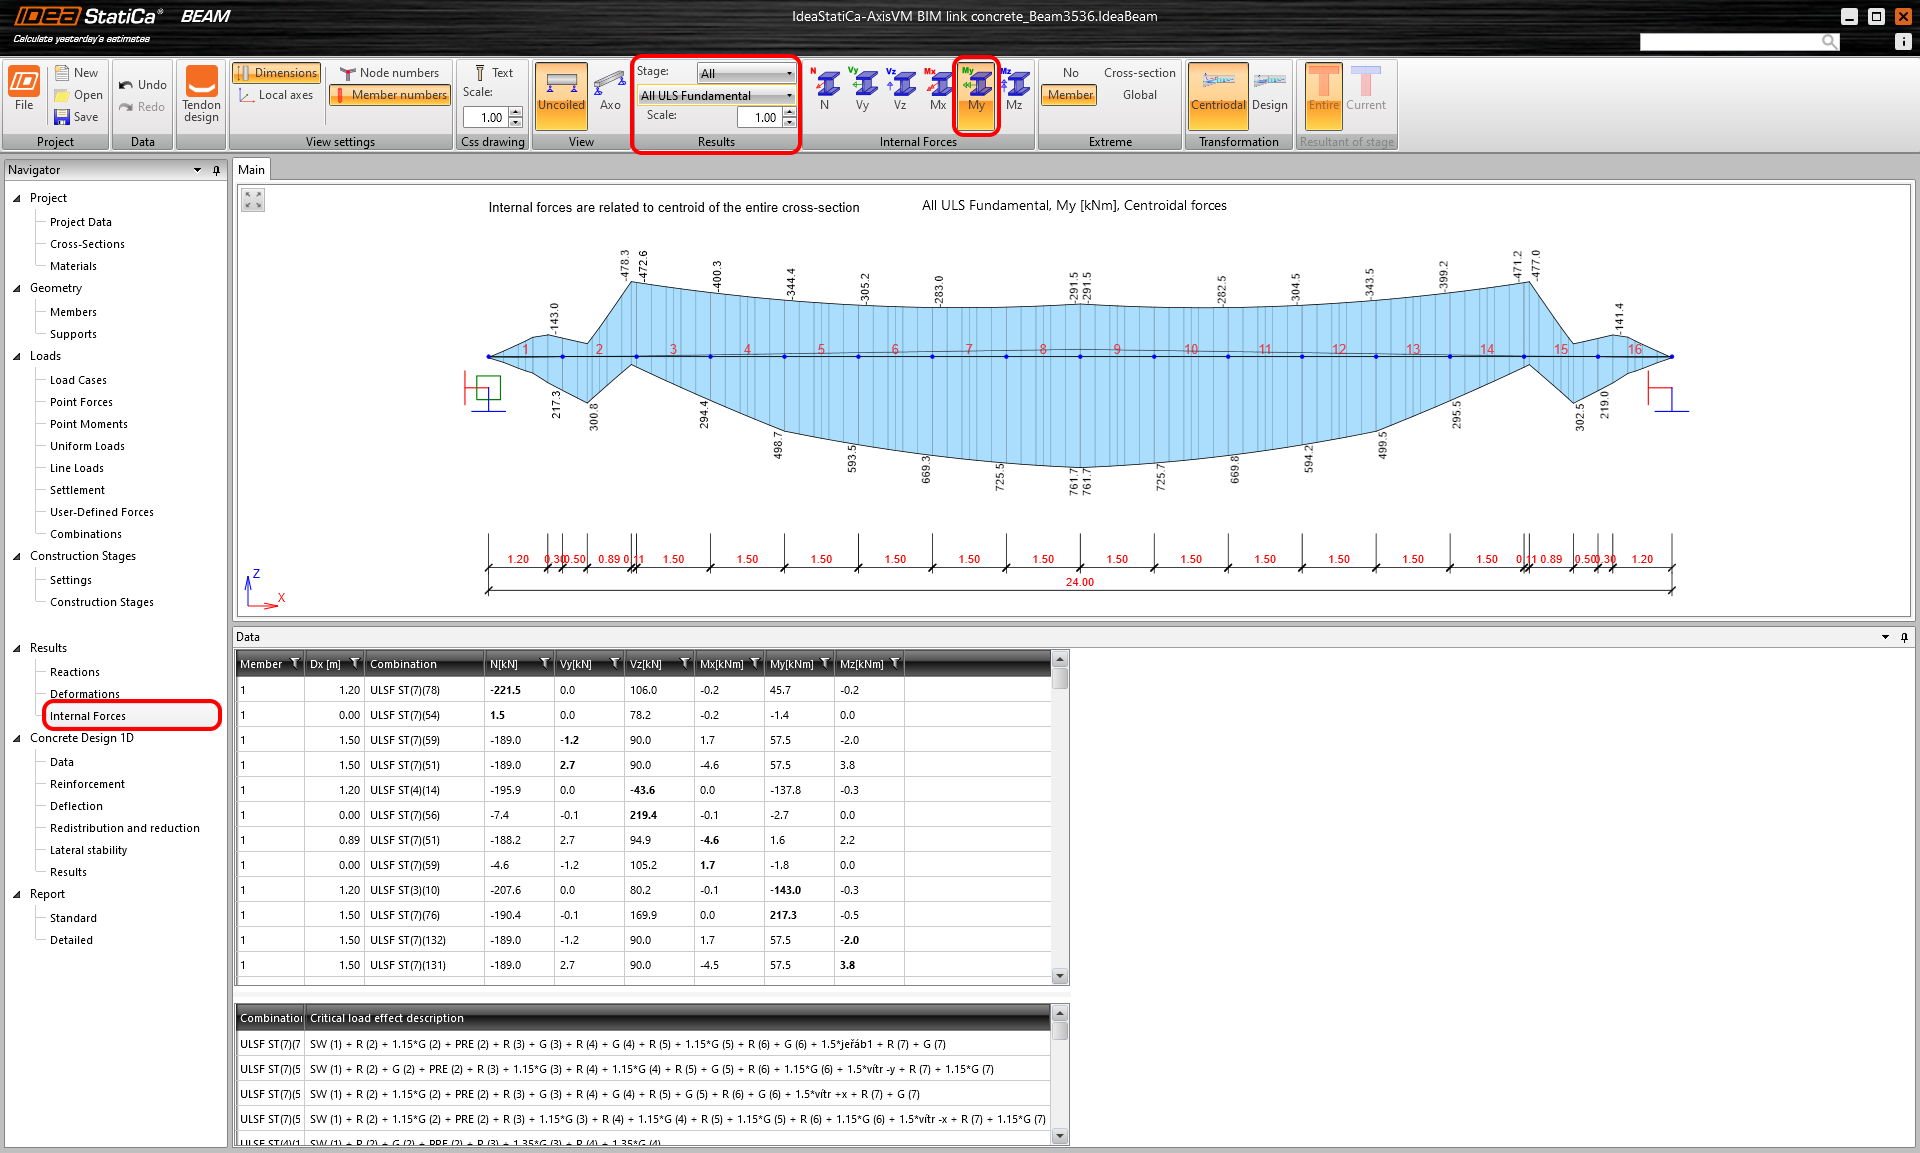
7 Esfuerzos internos
Muestre las envolventes de las combinaciones, incrementos de los casos de carga permanentes, fluencia y retracción, y casos de carga variables para cada fase de construcción.
8 Datos
Para la viga se establecerá solo una clase de exposición y se deseleccionará la opción Cloruros. Las verificaciones restantes de Detallado y Estabilidad lateral no serán evaluadas.

9 Armadura
La viga fue dividida en muchas zonas que fueron adoptadas a partir de la división de la viga. Aplique el botón Detallado para armar las zonas.

Aplique la primera plantilla de armadura y mantenga la configuración predeterminada.
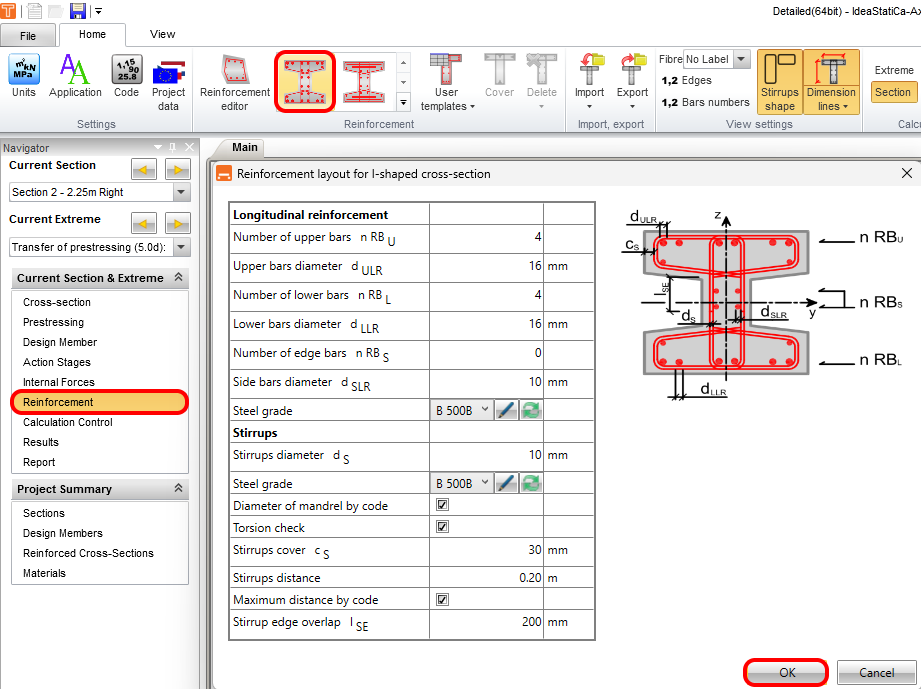
Indicamos el estribo principal para torsión y cortante y comprobamos si este estribo está activo en el cortante y la torsión. Los demás estribos están inactivos.

Copie la armadura a todas las Secciones transversales armadas con forma idéntica. Esta funcionalidad facilita el proceso de armado.

Ejecute el Cálculo para comprobar los resultados de todas las zonas.

Las secciones transversales están armadas.

10 Deformación
Controle la deformación a corto y largo plazo según el tiempo efectivo. Comprobemos la deformación para el Tiempo efectivo de 28 días. Observe la deformación a corto plazo y los incrementos debidos a la fluencia y retracción y la carga variable al final de la vida útil de diseño para el tiempo seleccionado.

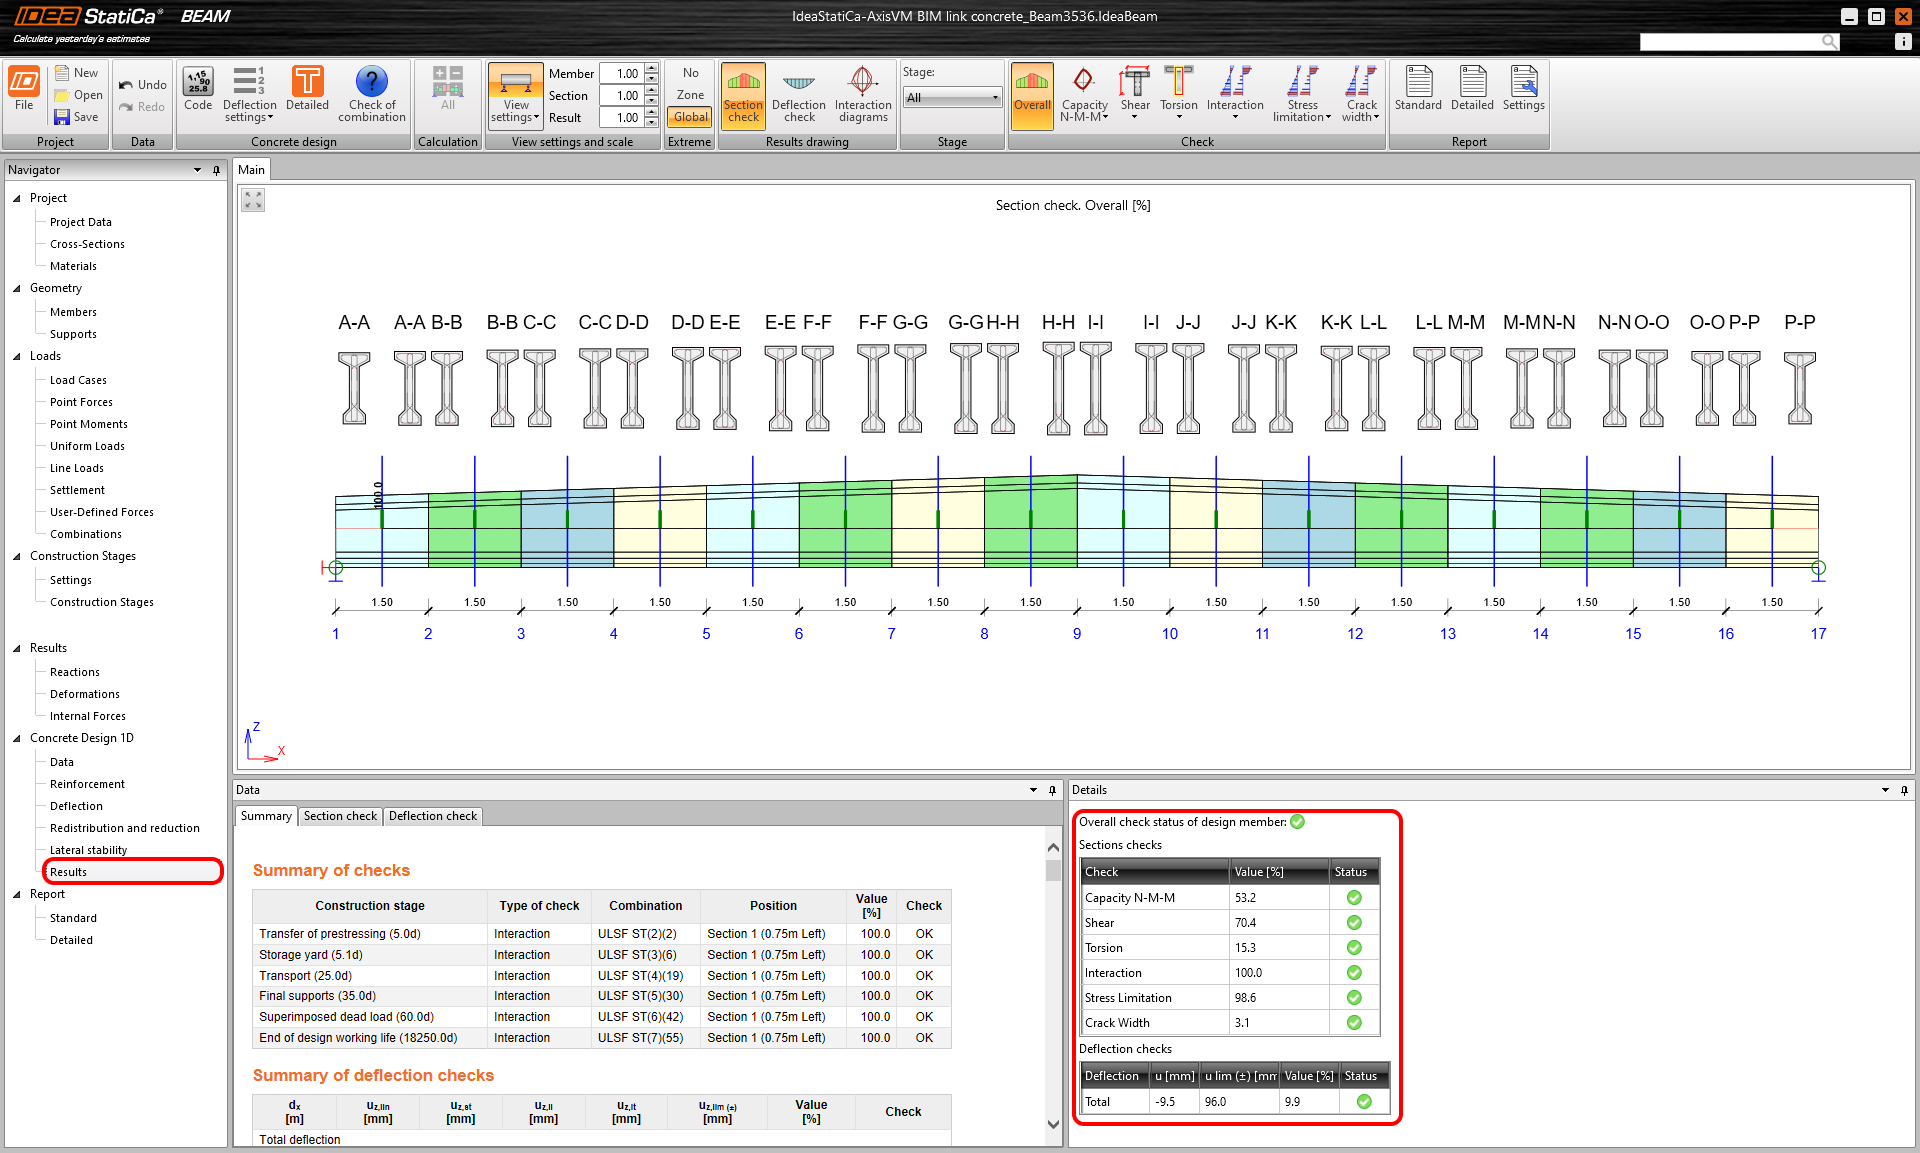
11 Resultados
Ejecute el análisis haciendo clic en la pestaña Resultados. Tras el análisis aparecerá la pestaña con un resumen general de los resultados con la utilización máxima para cada uno de ellos. IDEA indica la combinación y la fase de construcción que incluye la verificación con la utilización máxima.
12 Informe
Por último, vaya a la pestaña Informe. IDEA StatiCa ofrece un informe totalmente personalizable para imprimir o guardar en formato editable.


Ha diseñado, armado y realizado la verificación normativa de una viga de hormigón pretensado según el Eurocódigo utilizando el software de elementos finitos AxisVM e IDEA StatiCa.
13 Limitación conocida
Para poder recibir los esfuerzos internos del análisis no lineal en IDEA StatiCa es realmente importante respetar estas reglas.
En primer lugar, ejecute el análisis lineal.

Posteriormente, ejecute el análisis no lineal. Este proceso garantiza que recibiremos los esfuerzos internos de las combinaciones y casos de carga creados en AxisVM en IDEA StatiCa.
