Normové posouzení desky pomocí skořepinového prvku v RCS (EN)
1 Projekt v aplikaci MKP
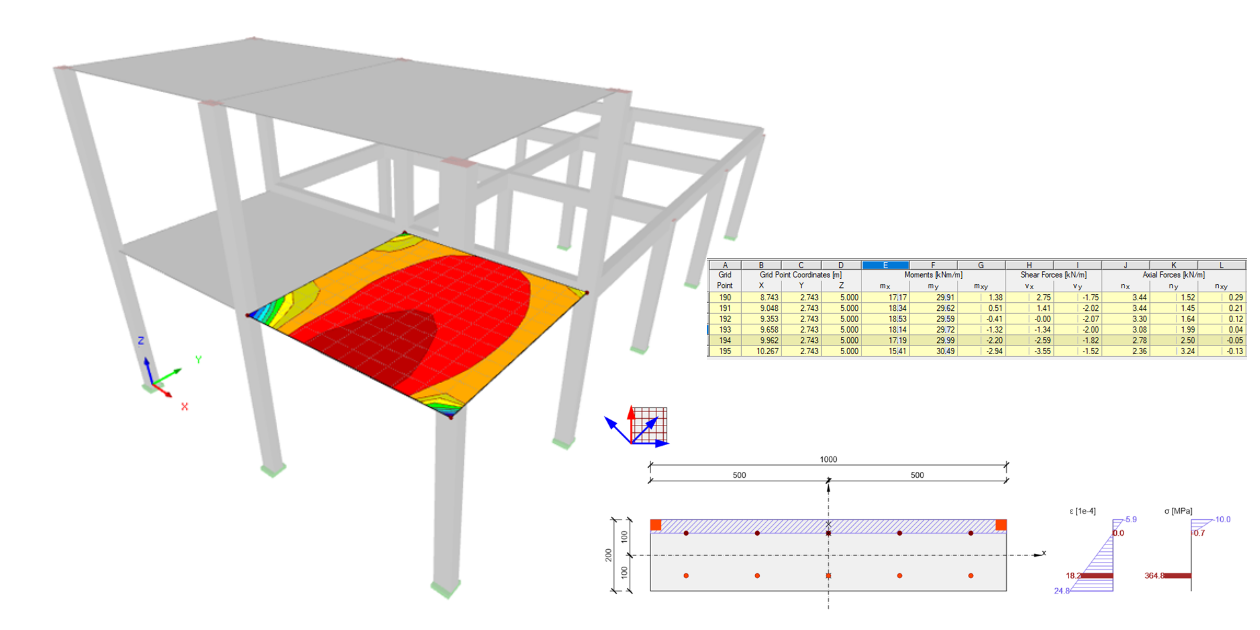
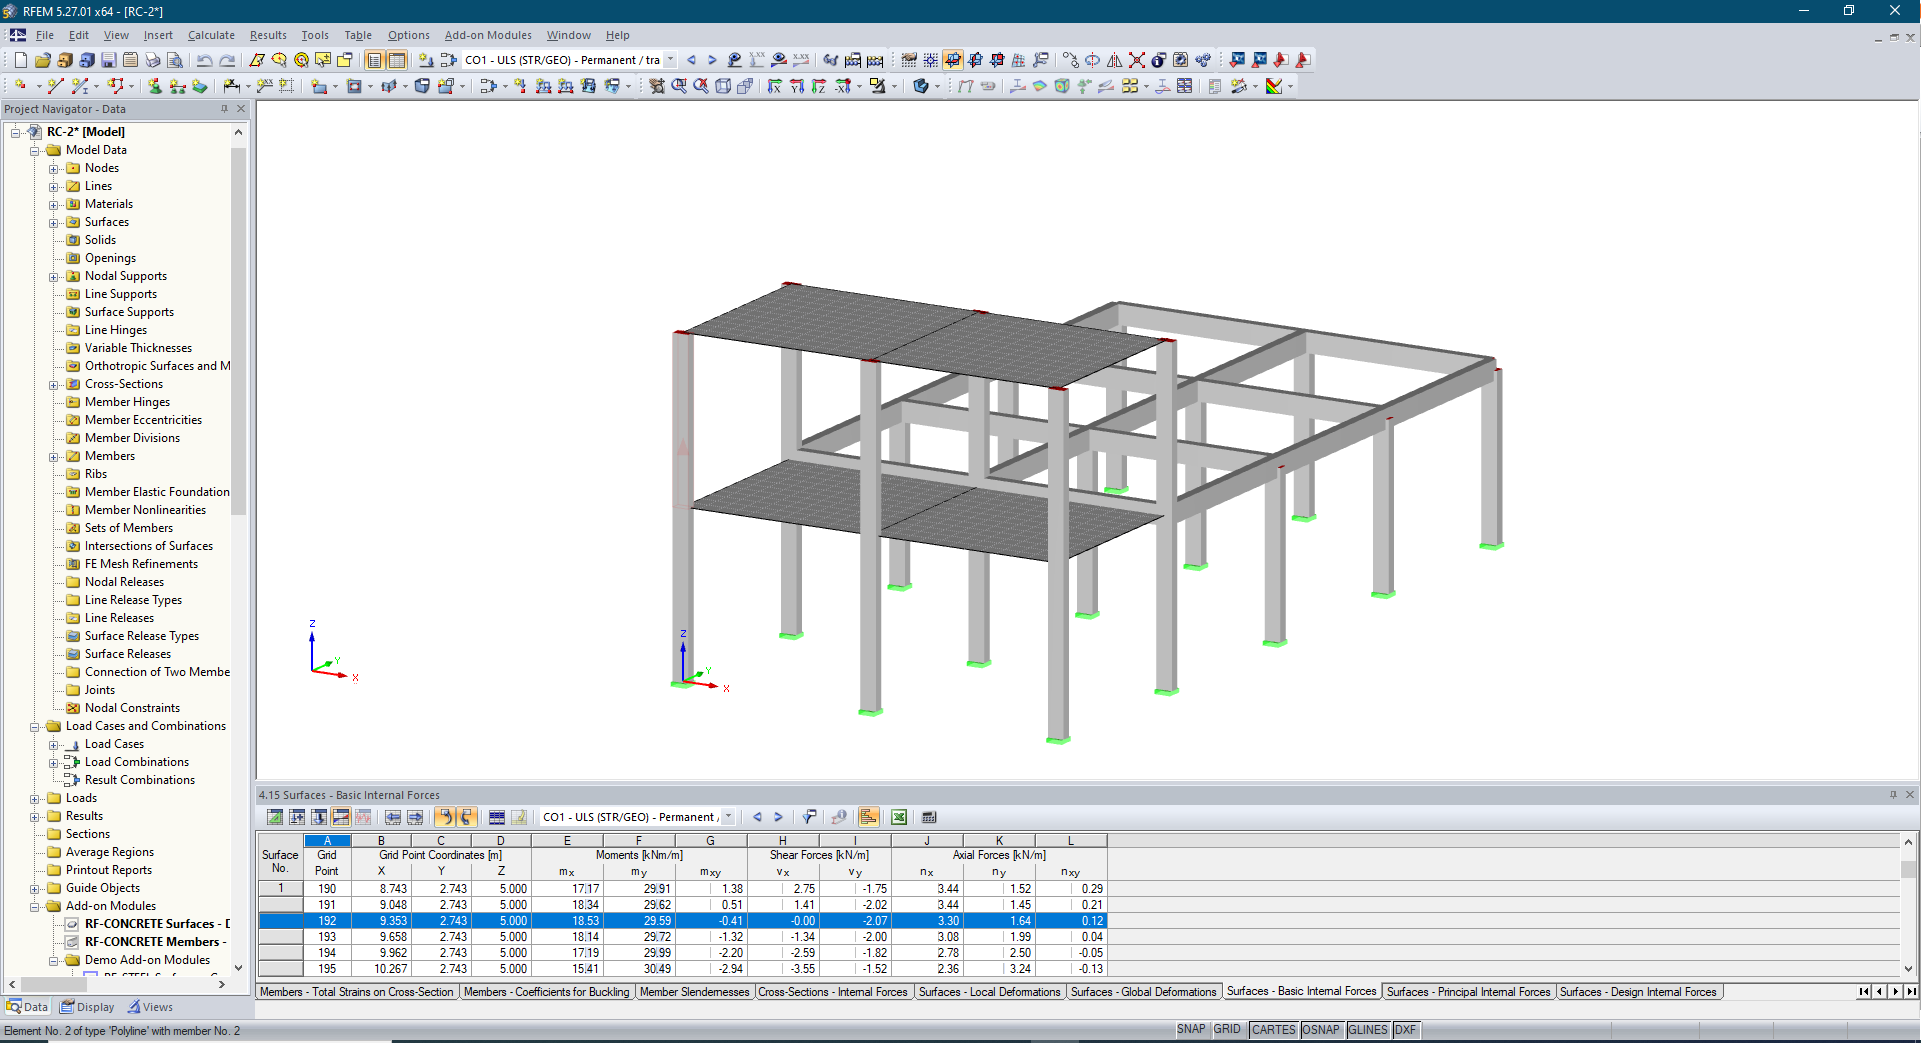
Model MKP se skládá z 1D a 2D prvků(skořepina).
Pro zjednodušení. Najdete zde jednu kombinaci pro MSÚ a dvě pro MSP.
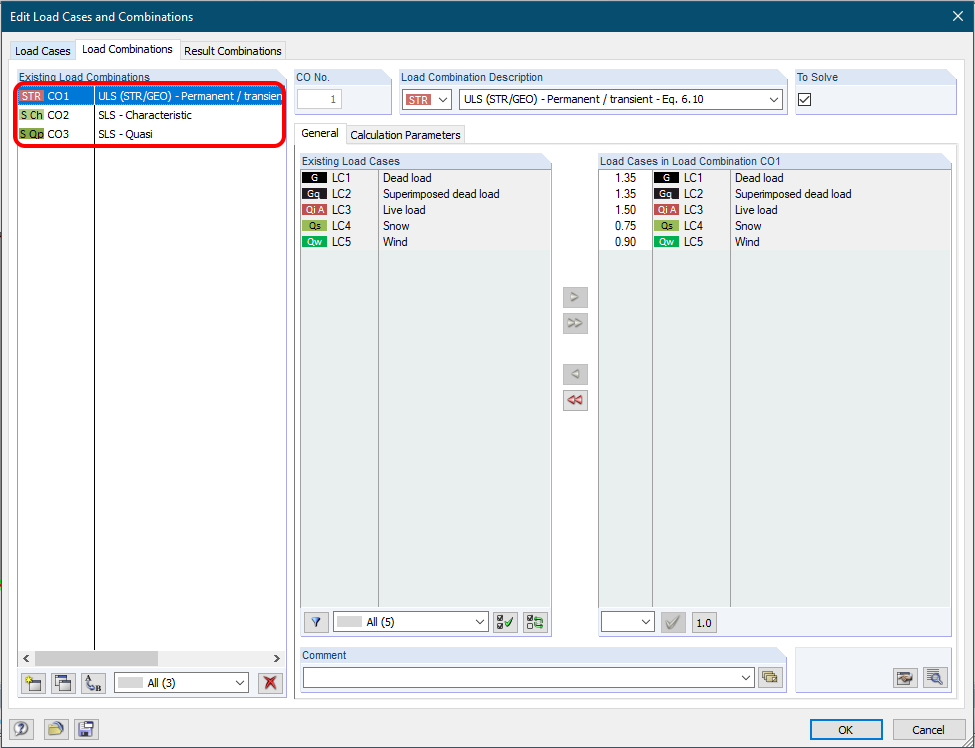
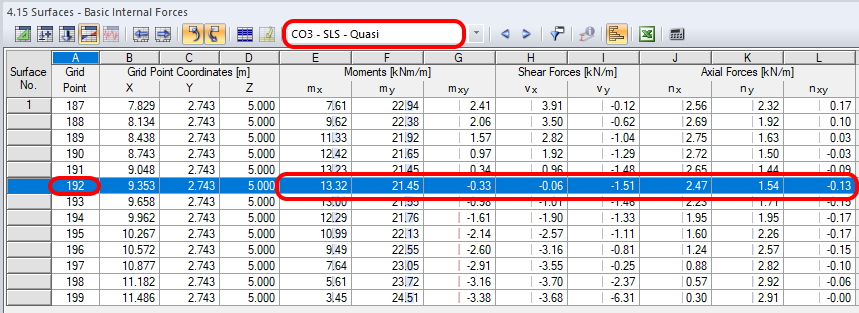
Normové posouzení bude provedeno v uzlovém bodě 192. Vnitřní síly z kombinace MSÚ CO1 jsou obsaženy ve výsledcích postprocessingu.

Charakteristická kombinace - CO2.

Kvazistálá kombinace CO3.
2 Nový projekt
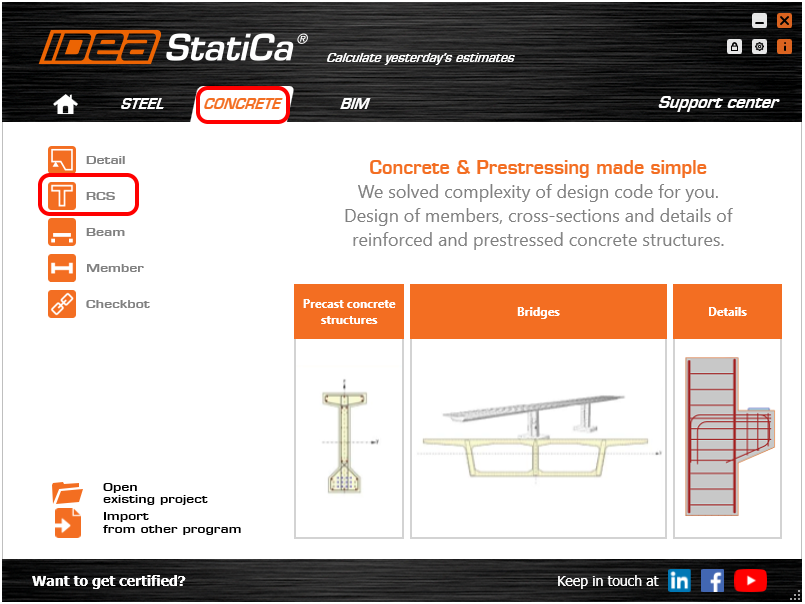
Spusťte aplikaci IDEA StatiCa a přejděte do části-->Beton-->RCS.
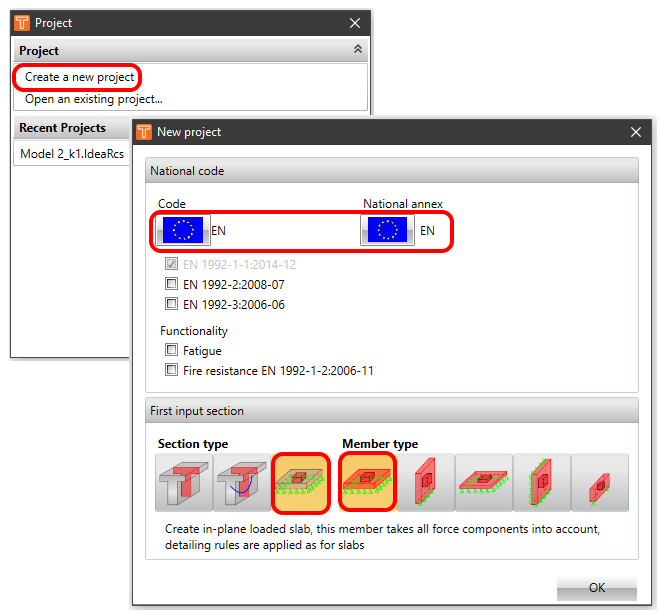
Vytvořte nový projekt-->Vyberte Eurocode--> Typ průřezu 2D-->Typ prvku skořepina. Toto nastavení zajišťuje kompatibilitu s vaším modelem MKP, kde je použit 2D skořepinový prvek.
3 Průřez
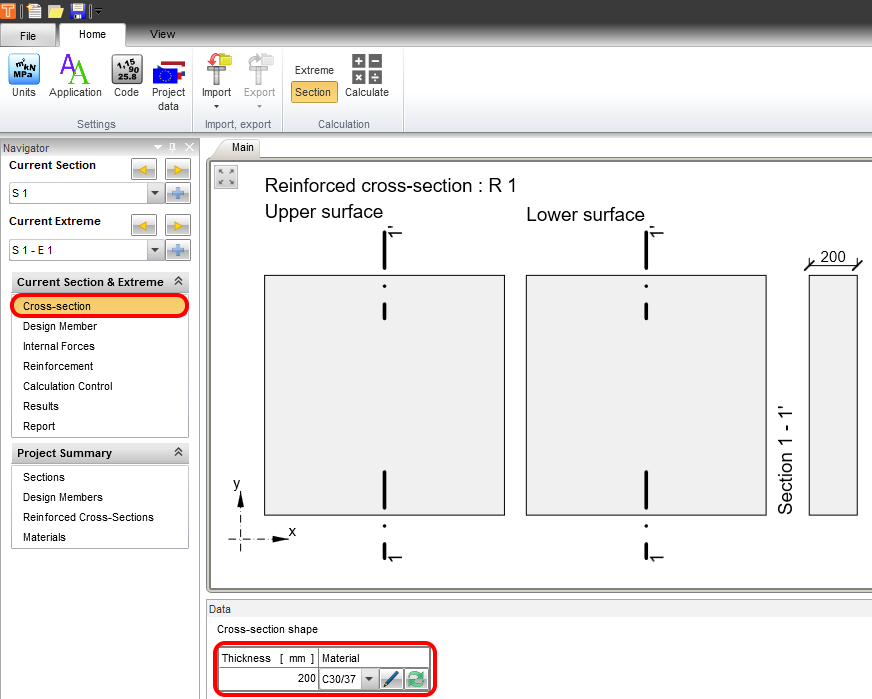
Definujte tloušťku 200 mm a třídu betonu C30/37.
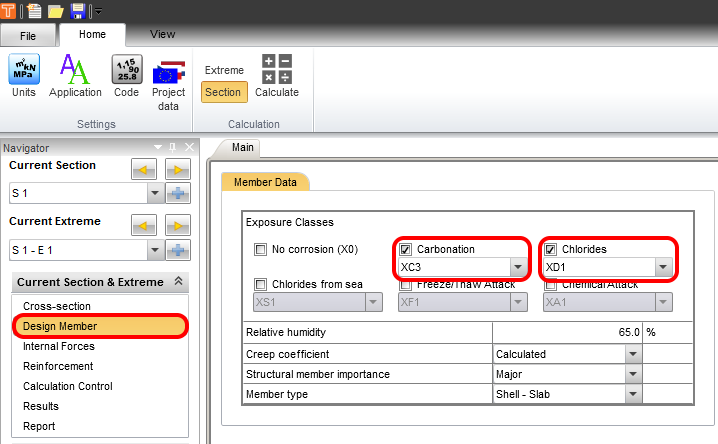
4 Návrhový prvek
Třída prostředí je nastavena jako XC3 a XD1. Toto nastavení určuje limity šířky trhlin a krytí podle normy.
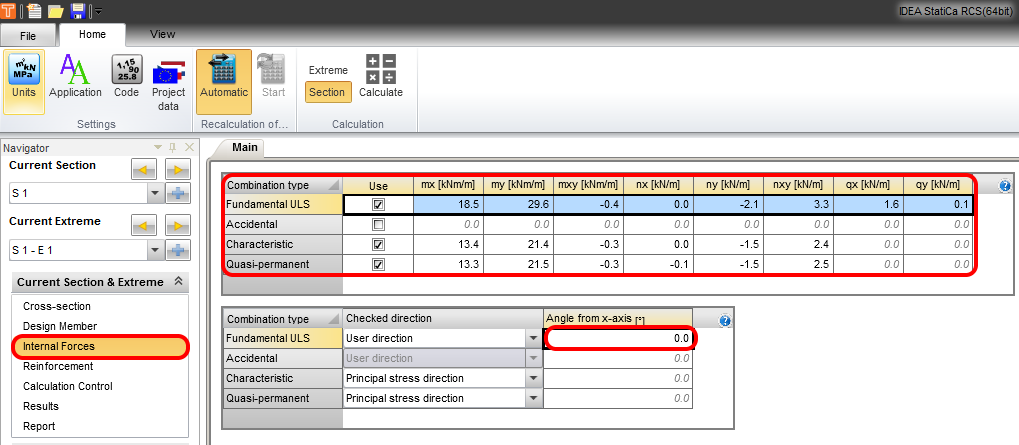
5 Vnitřní síly
Pro vyplnění záložky lze použít Kopírovat+Vložit nebo Ruční zadání. Úhel od osy x slouží k přepočtu návrhových vnitřních sil ze základních, které jsou zadány do záložky.
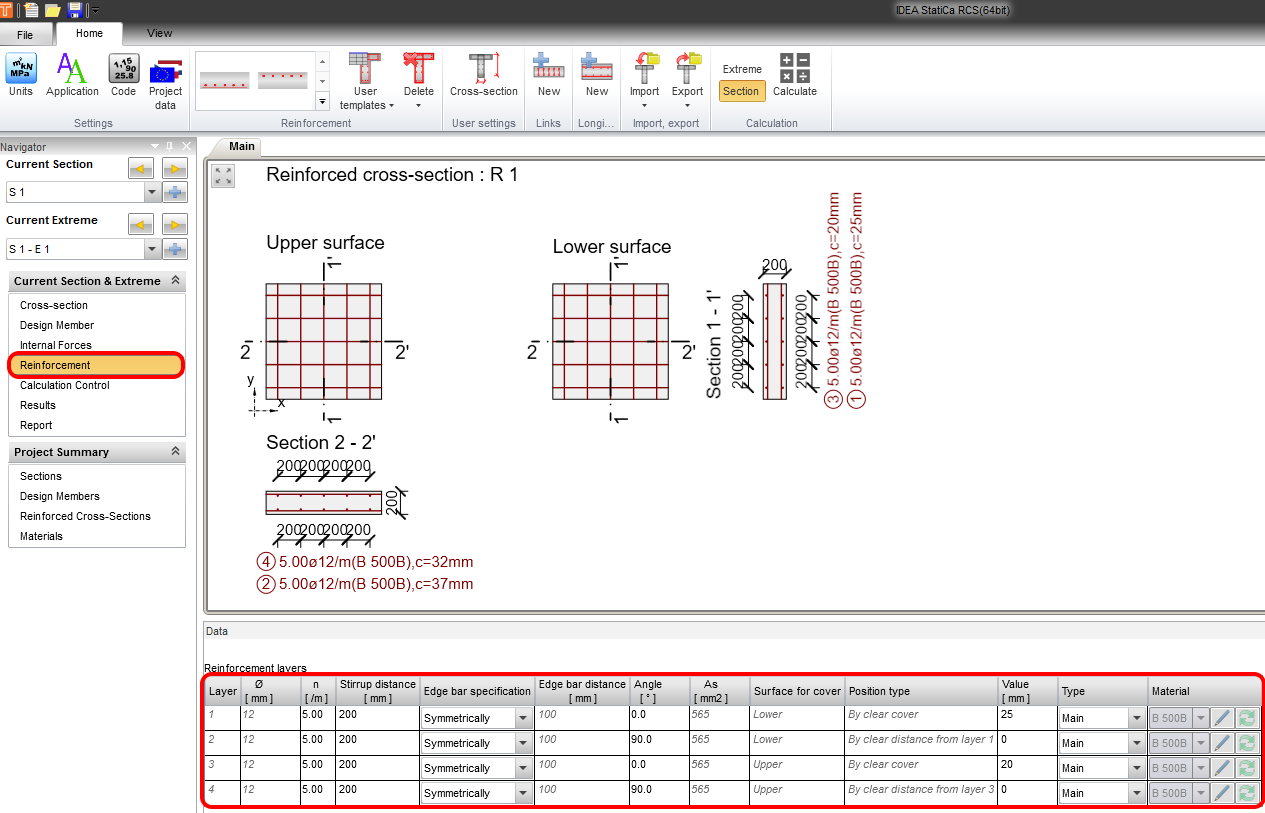
6 Vyztužení
Předdefinovaná šablona vyztužení pomáhá s rychlým předběžným návrhem. Spodní a horní vrstvy výztuže definujte podle níže uvedeného obrázku.
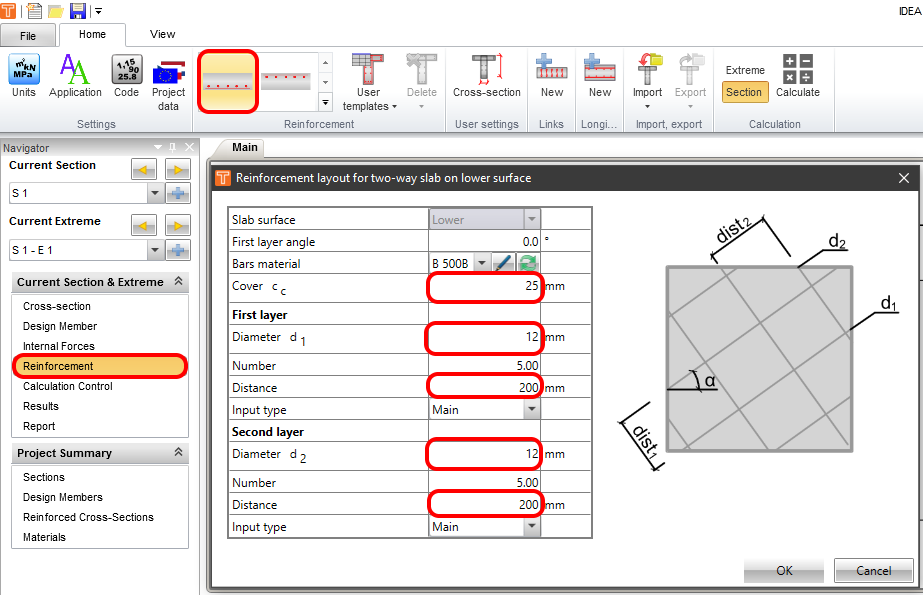
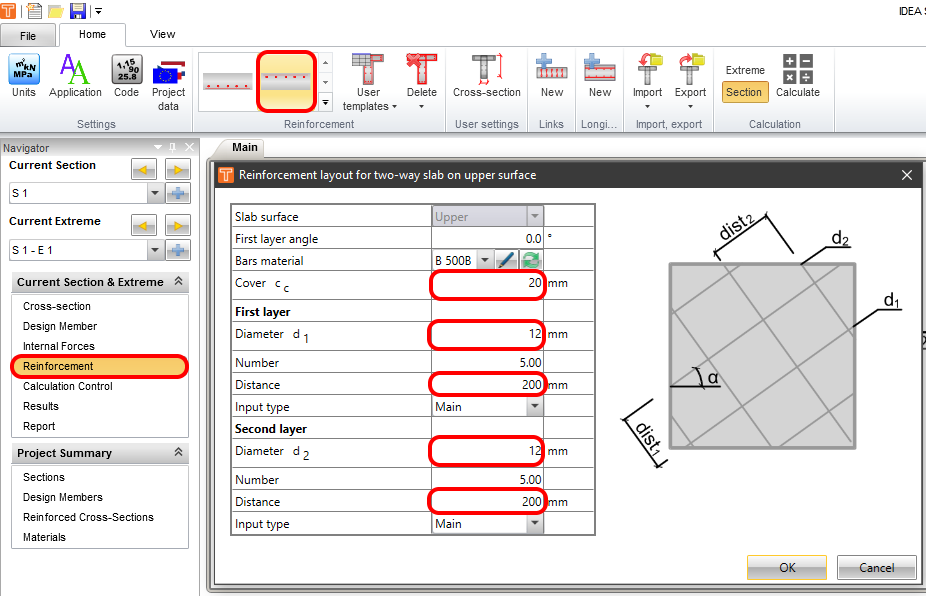
Souhrnný přehled navrženého rozmístění výztuže, průměrů a vzdáleností.
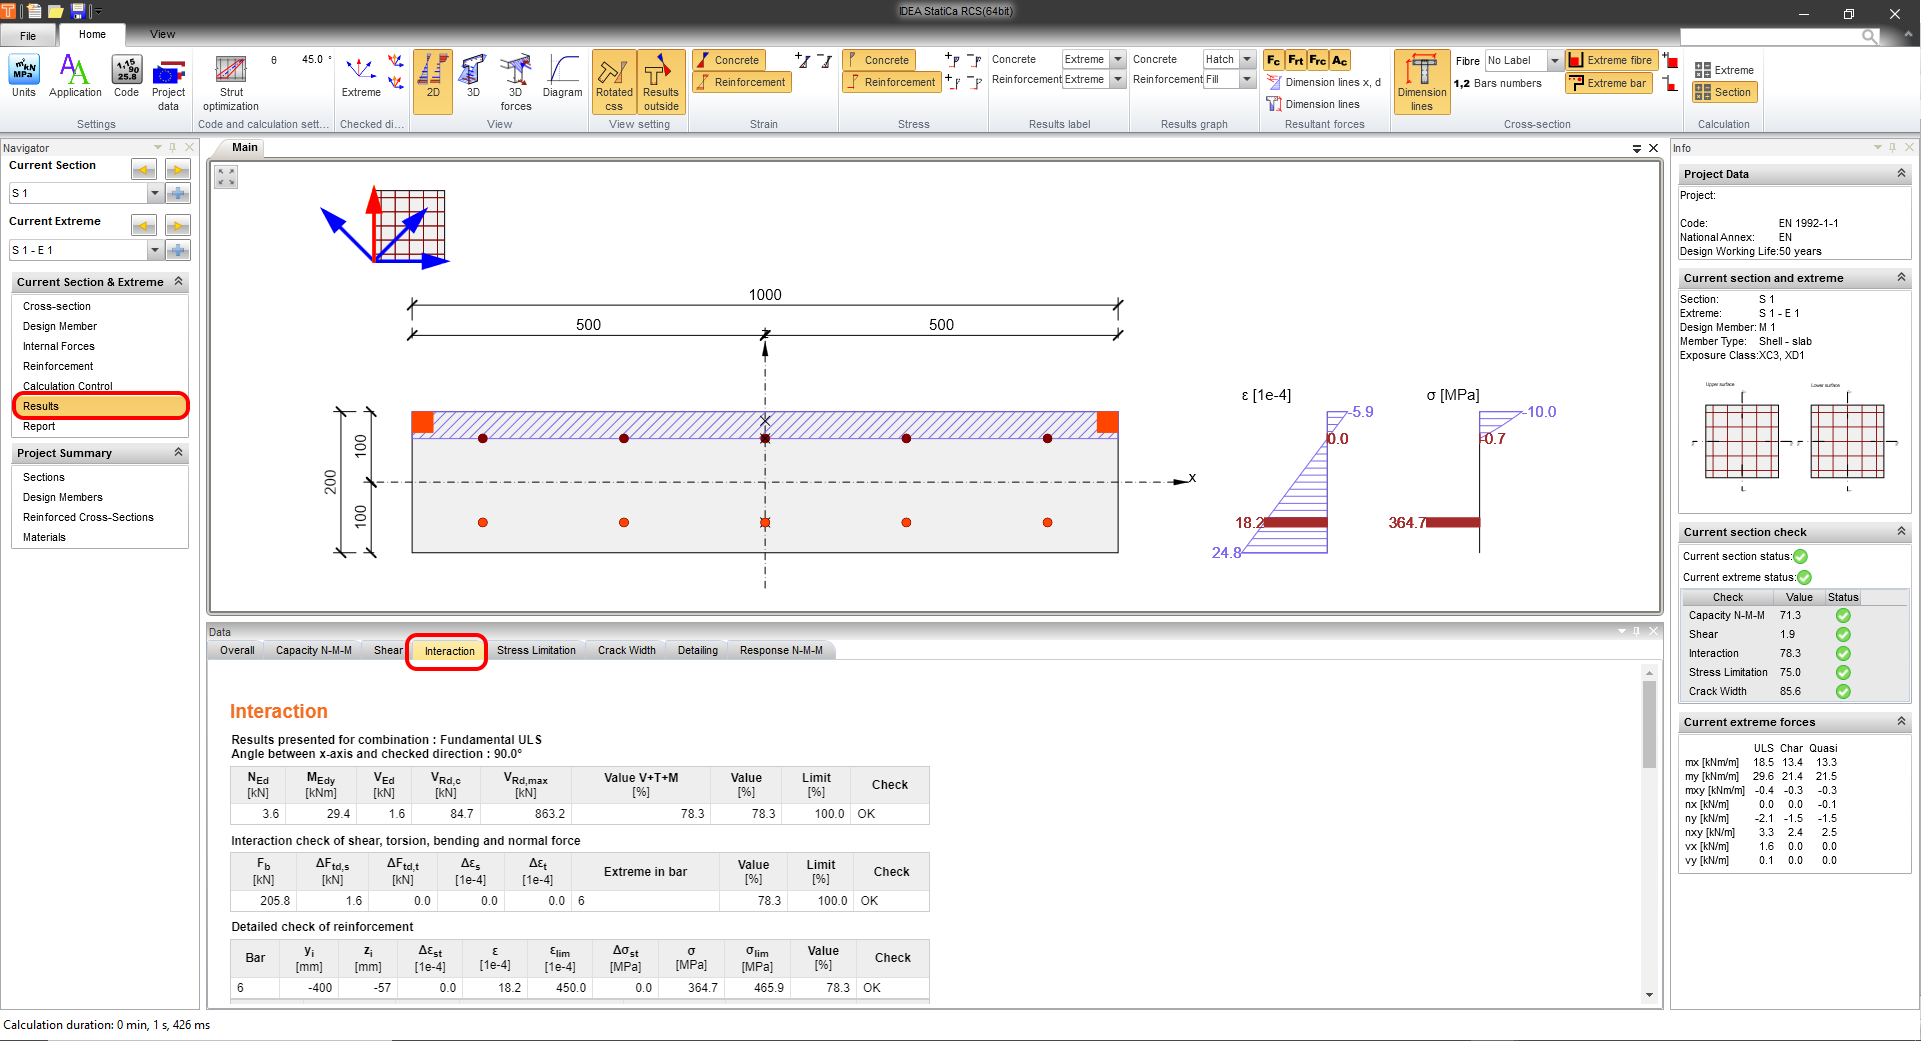
7 Výsledky
Výsledky pro MSÚ a MSP lze zobrazit velmi podrobně. Aktivní červená šipka označuje směr pohledu. Přerozdělení napětí a přetvoření po výšce zobrazuje chování analyzovaného prvku.
Šířka trhlin – zobrazené výsledky pro MSP.

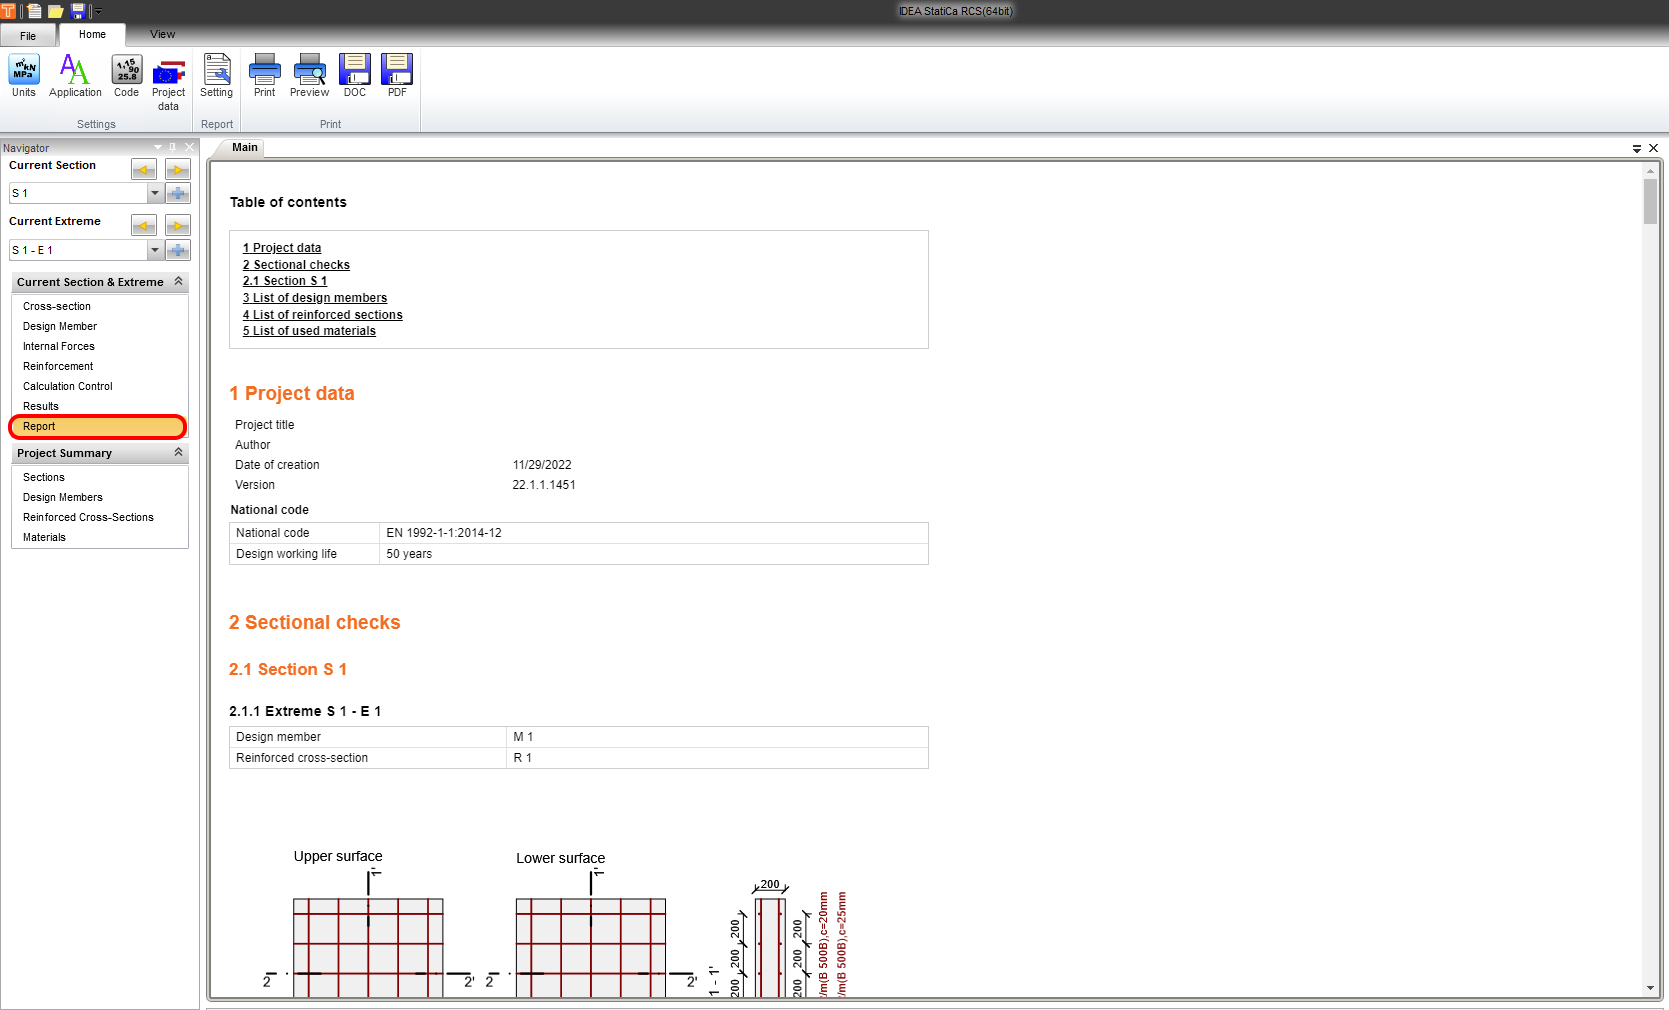
8 Protokol
Nakonec přejděte na Náhled/Tisk protokolu. IDEA StatiCa nabízí plně přizpůsobitelný protokol pro tisk nebo uložení v editovatelném formátu.