How to combine Tekla Structures and SAP2000 for steel connection design (EN)
1 How to activate the link
- Install the latest version of IDEA StatiCa
- Make sure you are using a supported version of Tekla Structures
- Make sure you are using a supported version of SAP2000
- Make sure you have both links activated – there are separate tutorials for this, both for SAP2000 and Tekla Structures.
2 How to use the link (SAP2000)
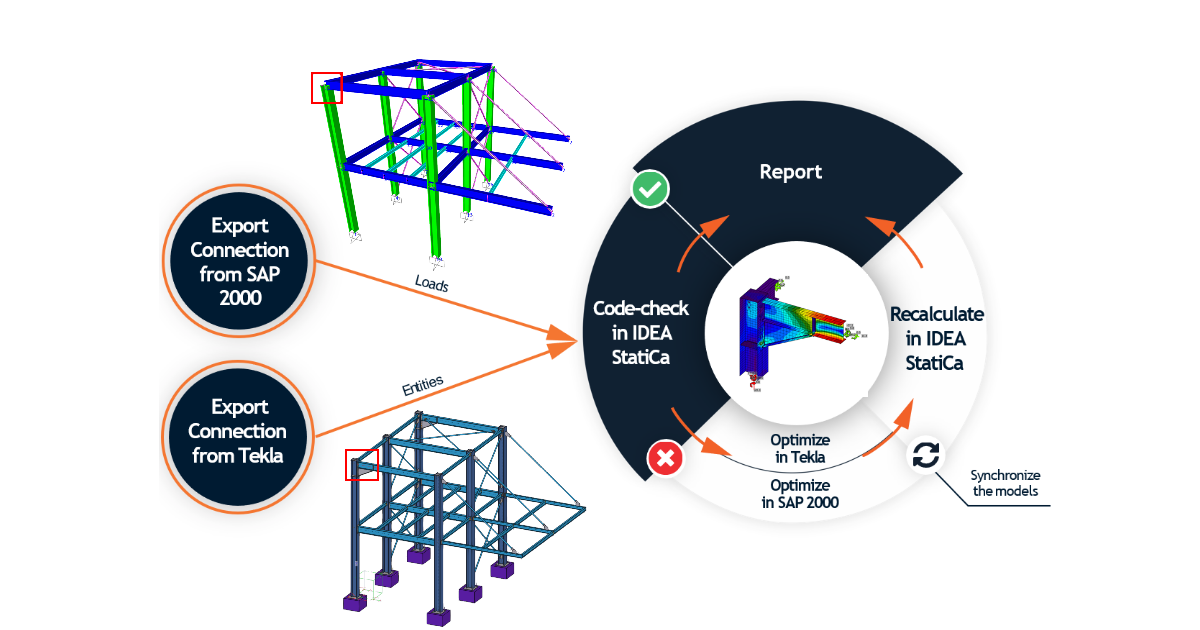
You can operate the models using the Checkbot application which is a BIM tool for exporting, managing, recalculating, or synchronizing all connection items or member items. It is launched directly in Tekla Structures, SAP2000, etc. The Checkbot provides commands for further processing of the imported items.
- Open the attached project in SAP2000 and run the analysis to get the results.
- Select the desired connection with corresponding members in the model.
- Go to the menu item Tools and choose IDEA StatiCa Checkbot.
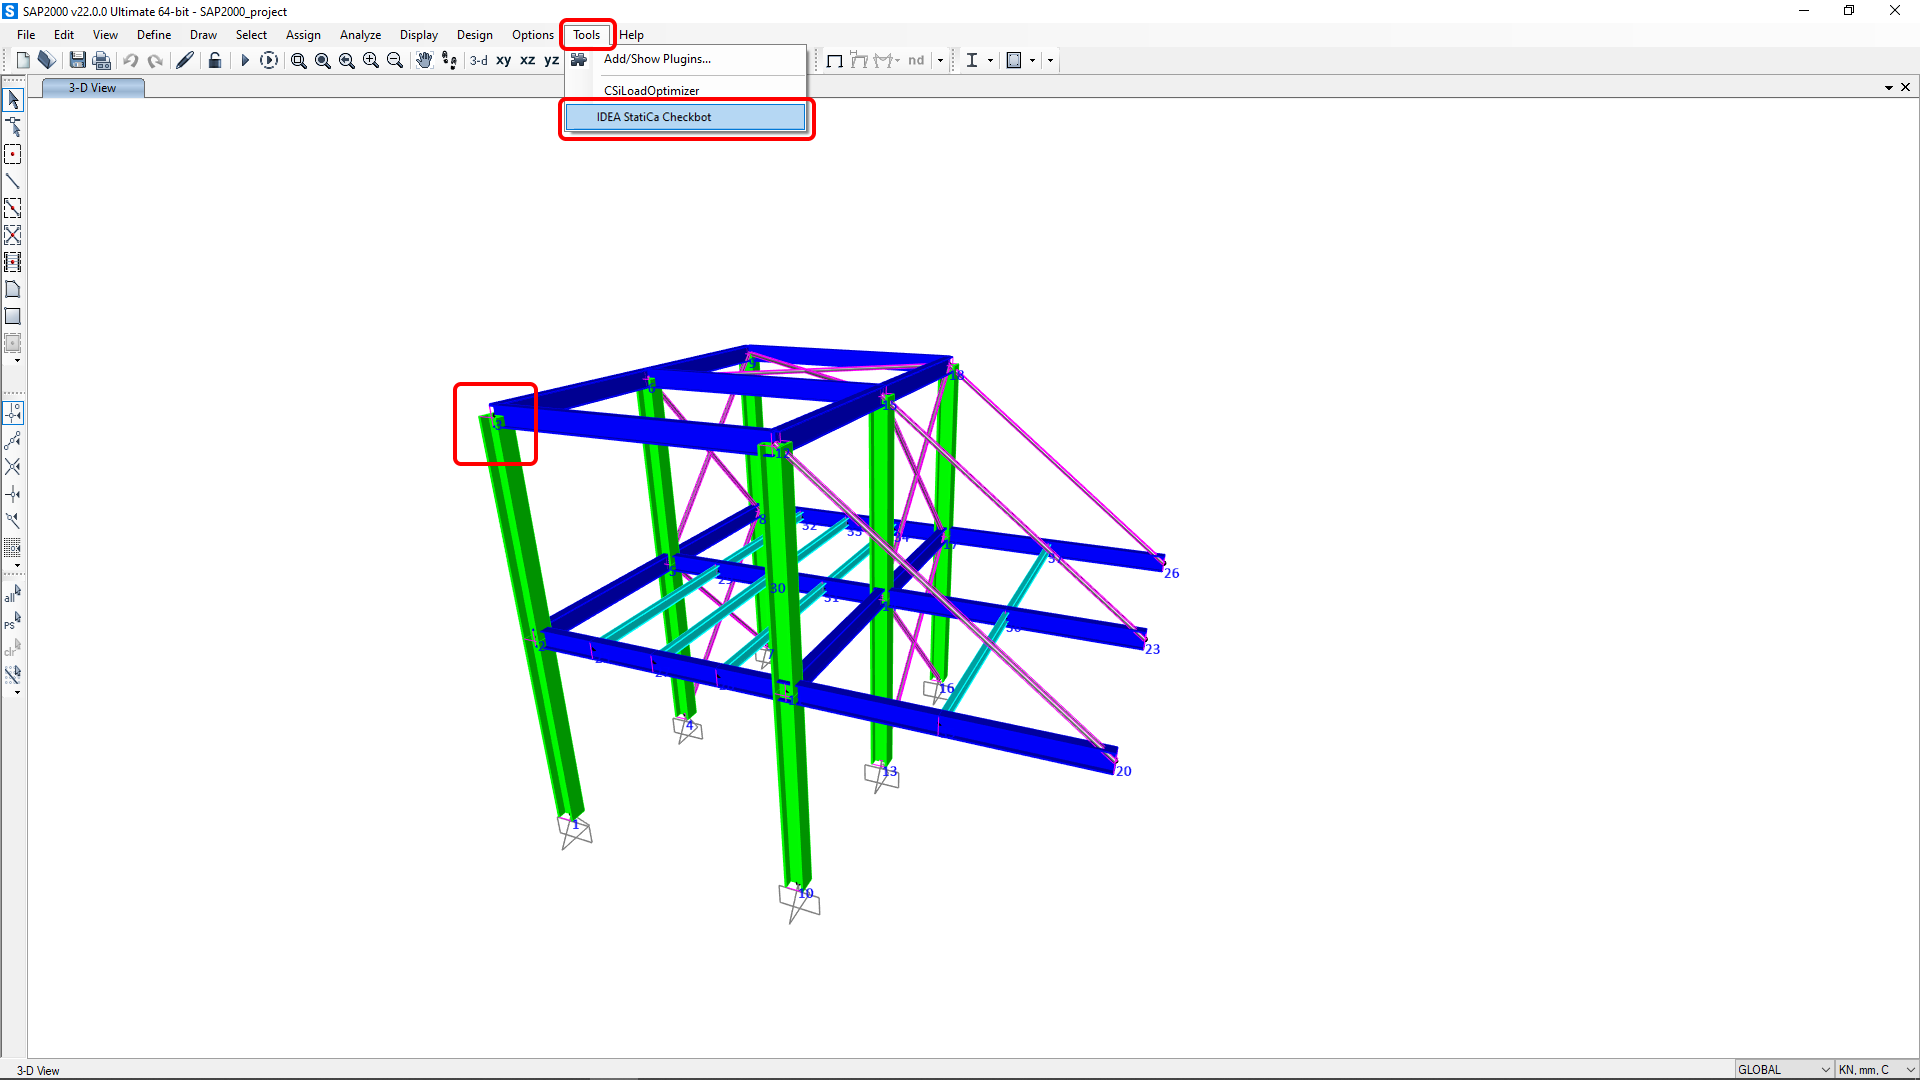
When you create a new project in Checkbot, a folder containing data for IDEA StatiCa models is created next to the original CAD/FEA project folder/file.
The Checkbot appears and you can select the Design code (EN).

Confirm the import by clicking Connection.

Click Open and the IDEA StatiCa Connection application window automatically appears with the imported connection.

All members, loads, cross-sections, etc. were added automatically. Save and close the IDEA StatiCa Connection app and follow the next steps.

To find out more about the BIM link with SAP2000, go to the BIM link tutorial for SAP2000 (or another tutorial for the software you use).
3 How to use the link (Tekla Structures)
You can proceed and export the same joint model from Tekla Structures to import the connection design including cross-sections, plates, bolts, welds, etc.
Open the attached project in Tekla Structures, created in the environment Default (Trimble Downloads). Then go to the IDEA StatiCa tab in the top ribbon and start the Checkbot from the ribbon menu.
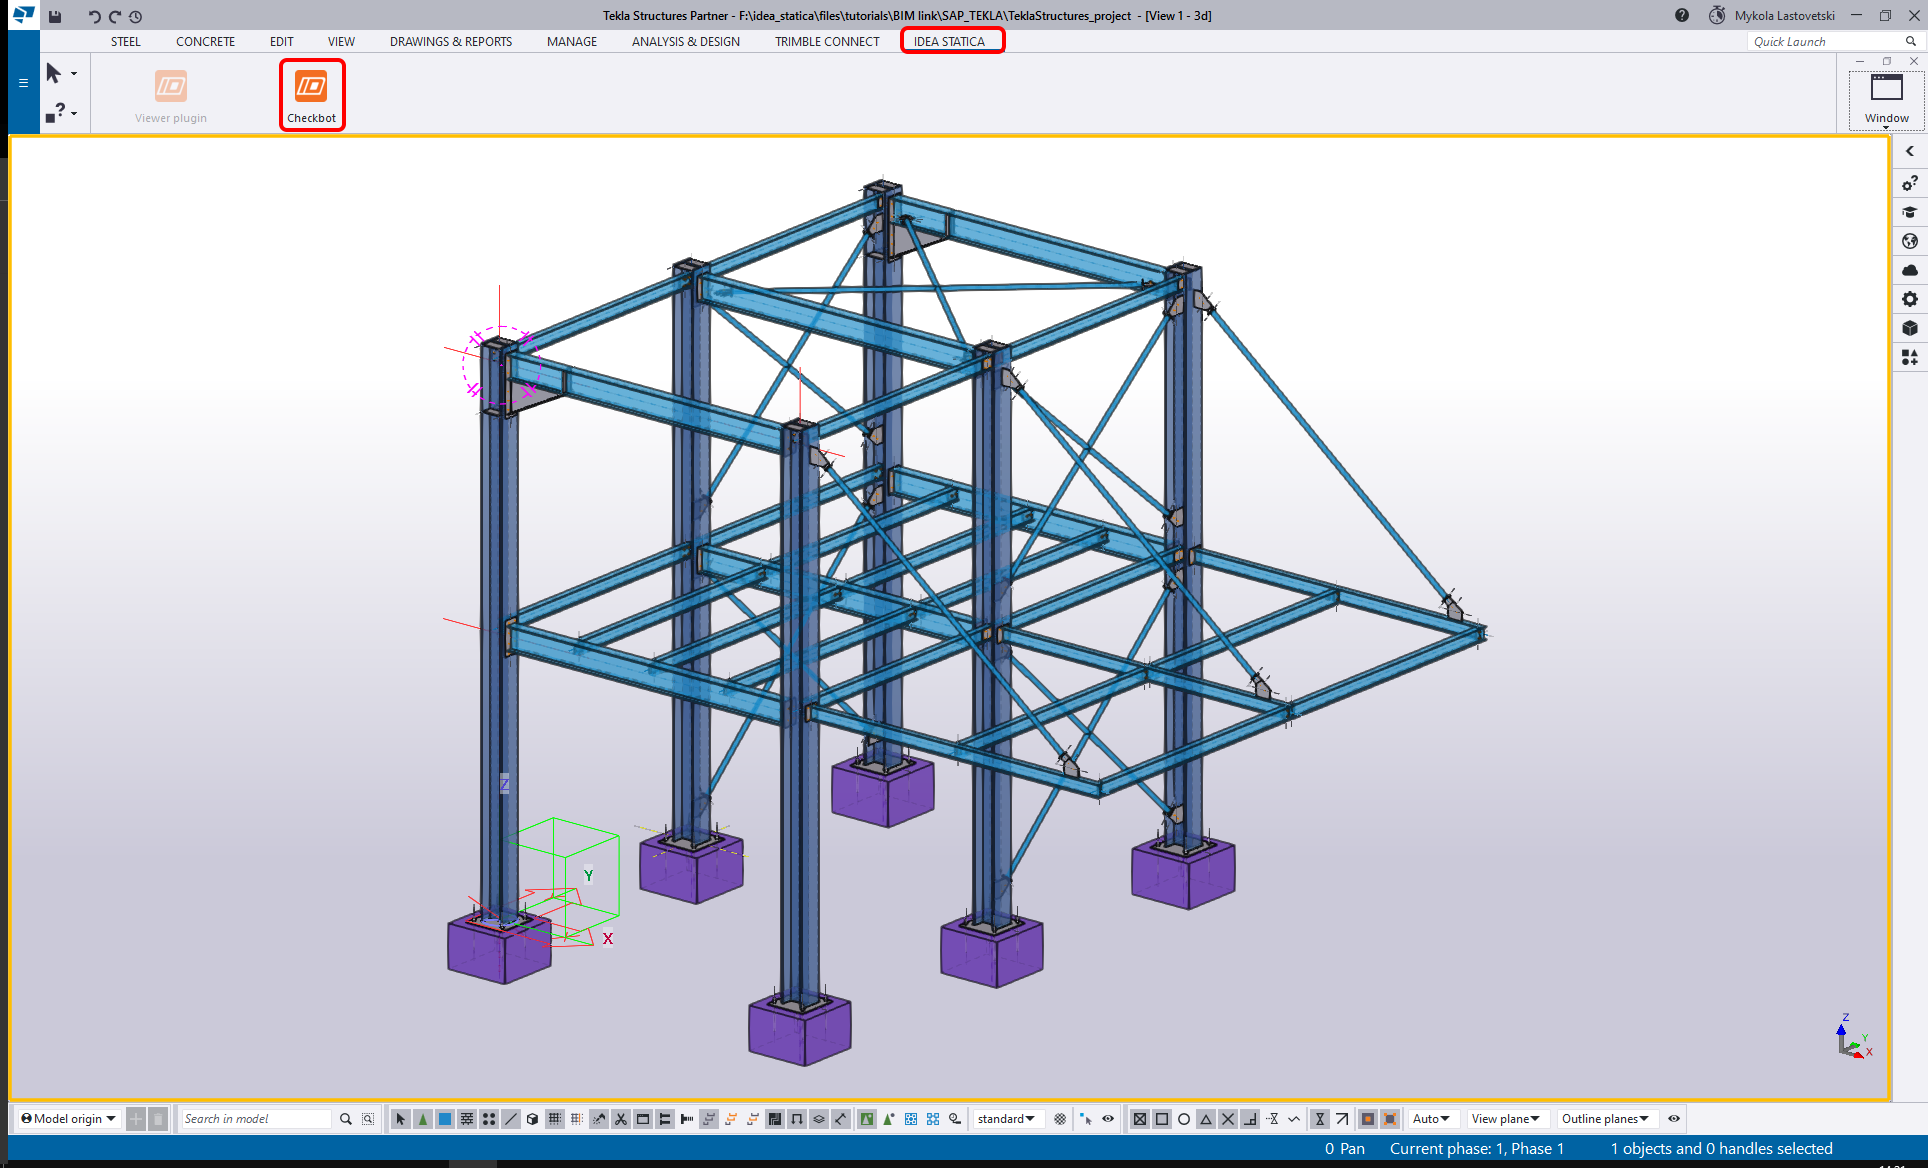
You can proceed with selecting the EN code and confirm with the Create Project button to start the BIM import process.

Start the import from a CAD application by clicking the One command.

The joint has to be selected. First, select the node which will represent the structural node of the joint.
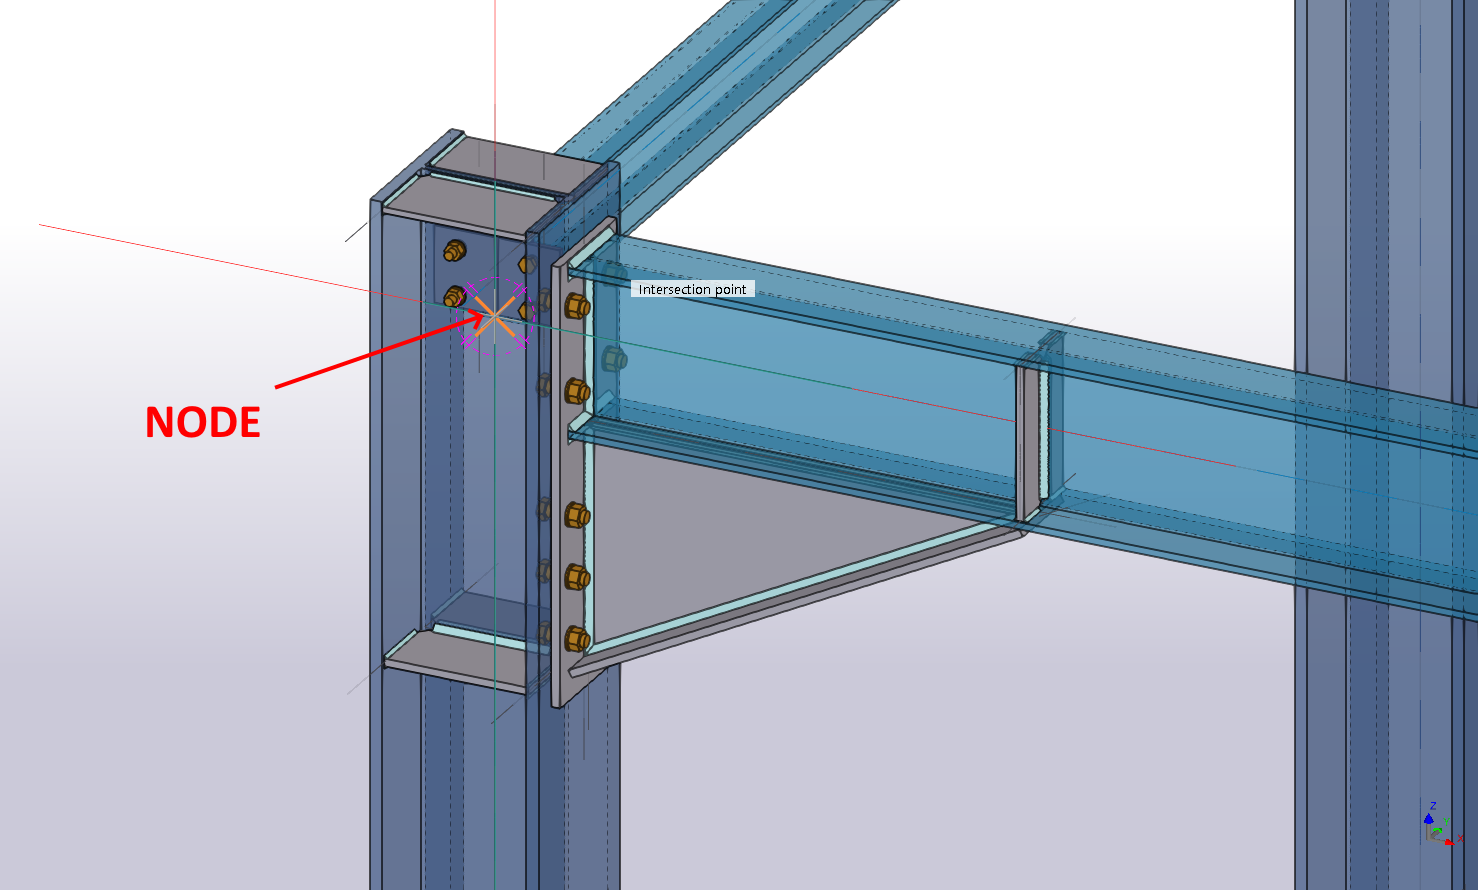
In the next step, select the members. The first chosen member will be set as the bearing one (which can be changed later on). When all members all selected, confirm with the spacebar.
At last, select all the remaining entities of the connection such as plates, bolts, and welds, and confirm with the spacebar.
The Checkbot imports the connection and adds it to the list. In this view, you can only see the approximate geometry of the connection.
Click Open to open the joint model in the IDEA StatiCa Connection app.

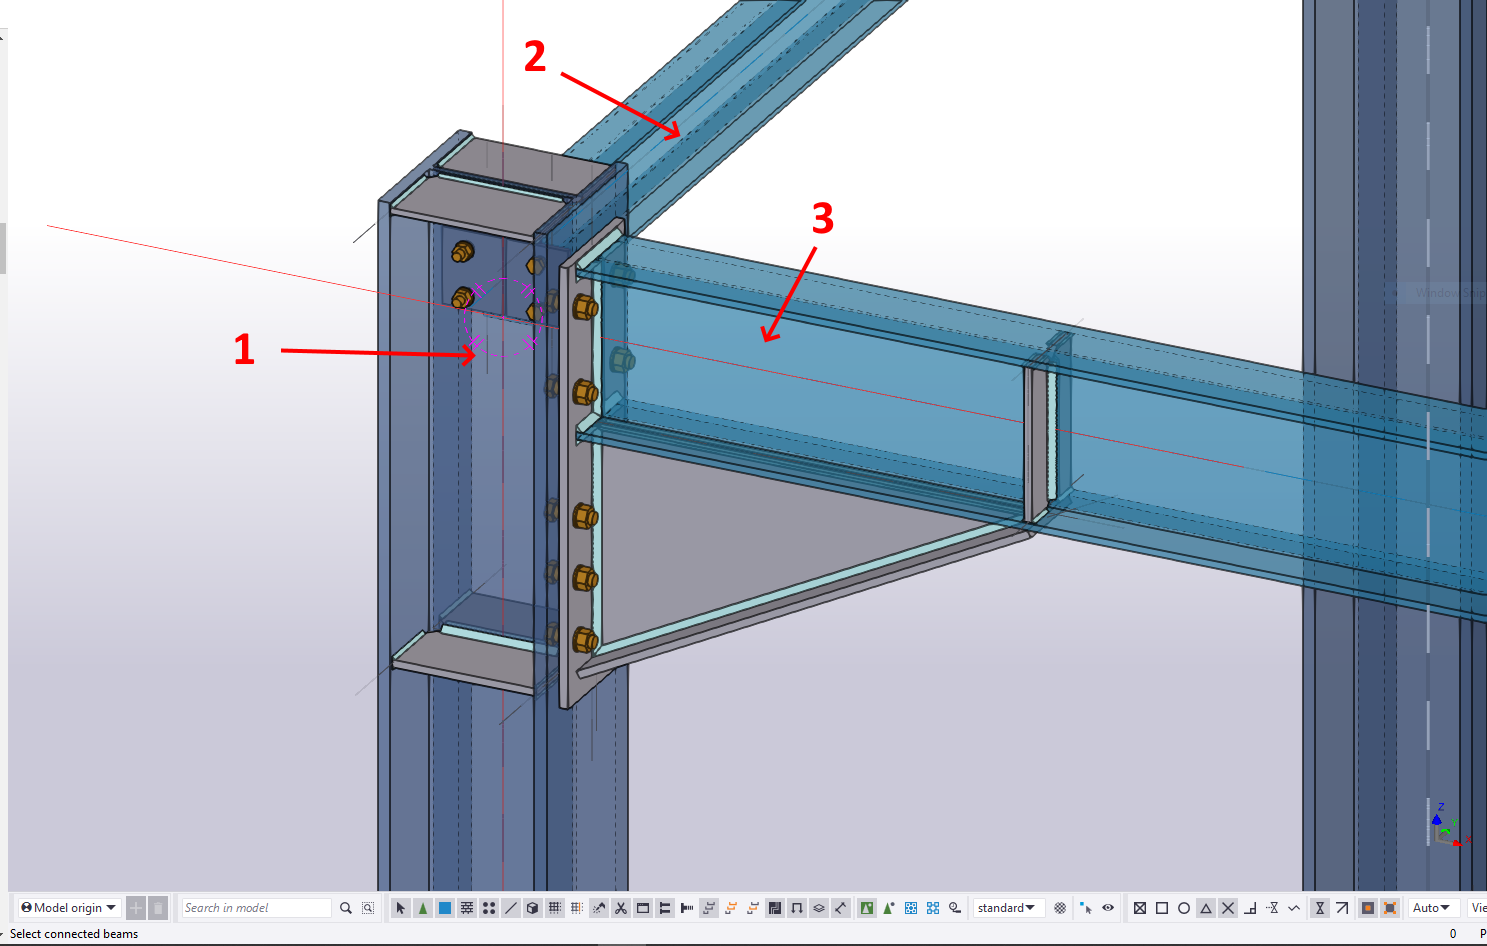
All members, plates, welds, etc. have been imported.

To find out more about the BIM link with Tekla Structures, go to the BIM link tutorial for Tekla Structures.
4 How to combine the models (Tekla Structures and SAP2000)
You can merge the designed connection model from Tekla Structures with the internal forces imported from a SAP2000 structural model.
Keep your connection model imported from Tekla Structures open (you can open it again any time in the Checkbot in Tekla Structures).

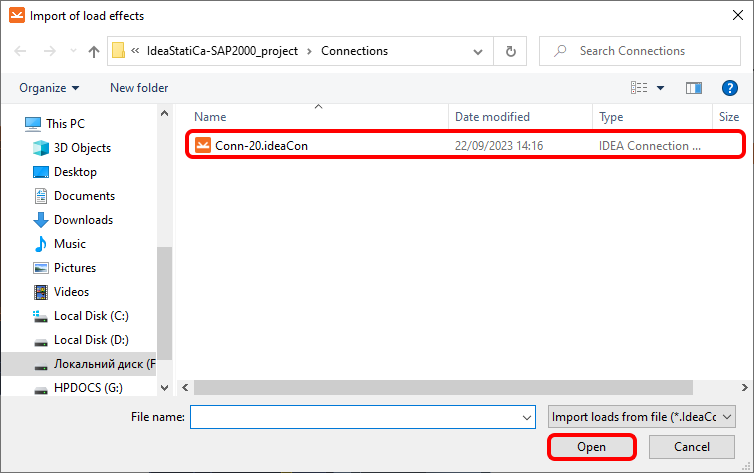
Select the Connection import command and find a path to the previously exported SAP2000 connection model (it is saved on the disk next to your SAP2000 project file in the subfolder Connections).
Load effects were imported and fit the appropriate members (the loads are balanced and the joint is in equilibrium).

If needed, you can now modify further the connection model (change settings, add some operations, etc.). However, we recommend that you do not do this and make adjustments to the source software models and then synchronize them in Checkbot to update the imported models in IDEA StatiCa.
6 Calculation and Check
You can start the analysis by clicking Calculate. The analysis model is automatically generated, the calculation is performed and you can see the Overall check displayed together with basic values of check results.

Go to the display tab Check and there activate Equivalent stress and Mesh model view from the ribbon to get a full picture of what is happening in the joint. To explore the detailed results for Bolts, expand bolt B3 details by clicking the plus icon.

7 Report
Next, go to the tab Report. IDEA StatiCa offers a fully customizable report to print out or save in an editable format.

You have combined joint form Tekla Structures and SAP2000 and code-checked a structural steel joint according to EN.
8 Synchronize models
The design process is an iterative way how to arrange the structure parts and load effects in a way the code-check is fulfilled. Usually, it takes a few changes along the whole process. Take advantage of the Synchronization function for the current item and update your previously imported models with all the changes done in the source software models. Find out more about the synchronization in the separate tutorials both for SAP2000 (Chapter 6) and Tekla Structures (Chapter 7) as well as any other supported FEM/CAD software.
When merging models in IDEA StatiCa, both of them have to be synchronized separately in each Checkbot within each source software model and the Connection import command has to be used again to update the load effect in the merged connection model.