Collegamento API Grasshopper – ottimizzazione parametrica di una saldatura di collegamento (03) versione 24
Grasshopper - Installazione del Plugin
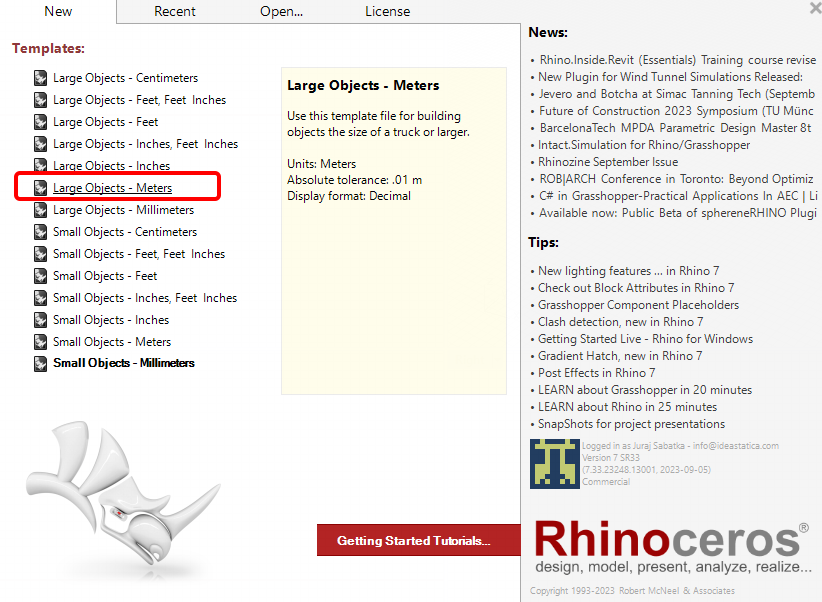
È possibile ottenere una versione di prova di Rhino3d e Grasshopper dal sito web di Rhino3d. Avviare Rhinoceros e selezionare il modello con Meters:
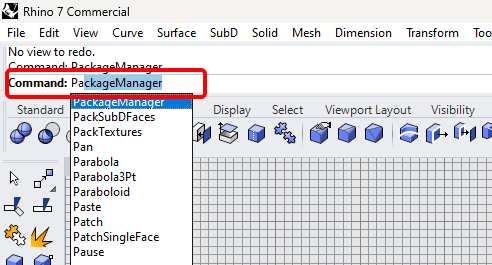
Nella riga di comando, inserire "Package Manager":
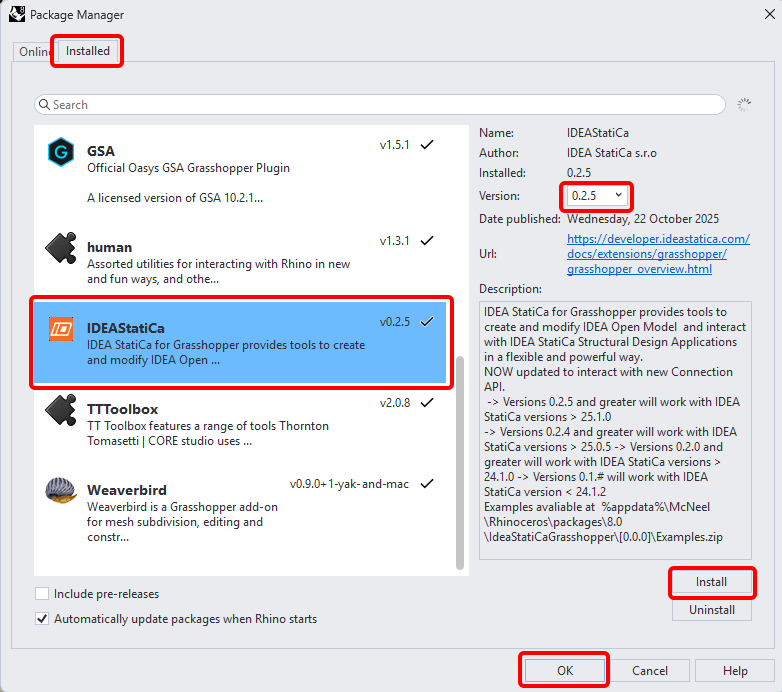
Apparirà una nuova finestra; selezionare IDEAStatiCa e fare clic su Install. Il plugin verrà scaricato e installato. Per diventare attivo, è necessario riavviare Rhinoceros.
Per avviare Grasshopper con il plugin IDEA StatiCa, selezionare Tools / Grasshopper nella scheda Rhinoceros.
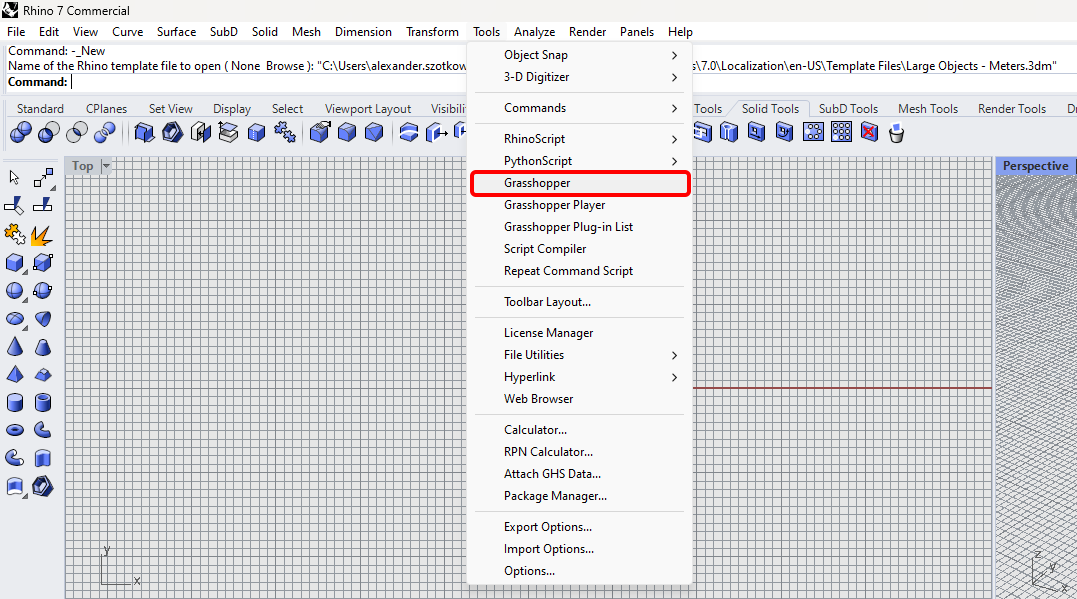
Come si può vedere, il plugin è già incorporato.

Per informazioni sui componenti e i comandi del plugin IDEA StatiCa per Grasshopper, consultare l'articolo Descrizione dei componenti del plugin Grasshopper.
Plugin Anemone
Poiché Grasshopper non può lavorare con i cicli, è necessario installare un altro plugin in grado di gestirli. In questo esempio utilizzeremo Anemone, che consente di creare cicli in Grasshopper.

Nota: posizionare il file .gha nelle librerie di Grasshopper, fare clic con il tasto destro su Proprietà, selezionare la casella "Sblocca", premere Applica, chiudere tutto e riavviare Rhino.
IDEA StatiCa Connection – Progettazione di un giunto e impostazione dei parametri
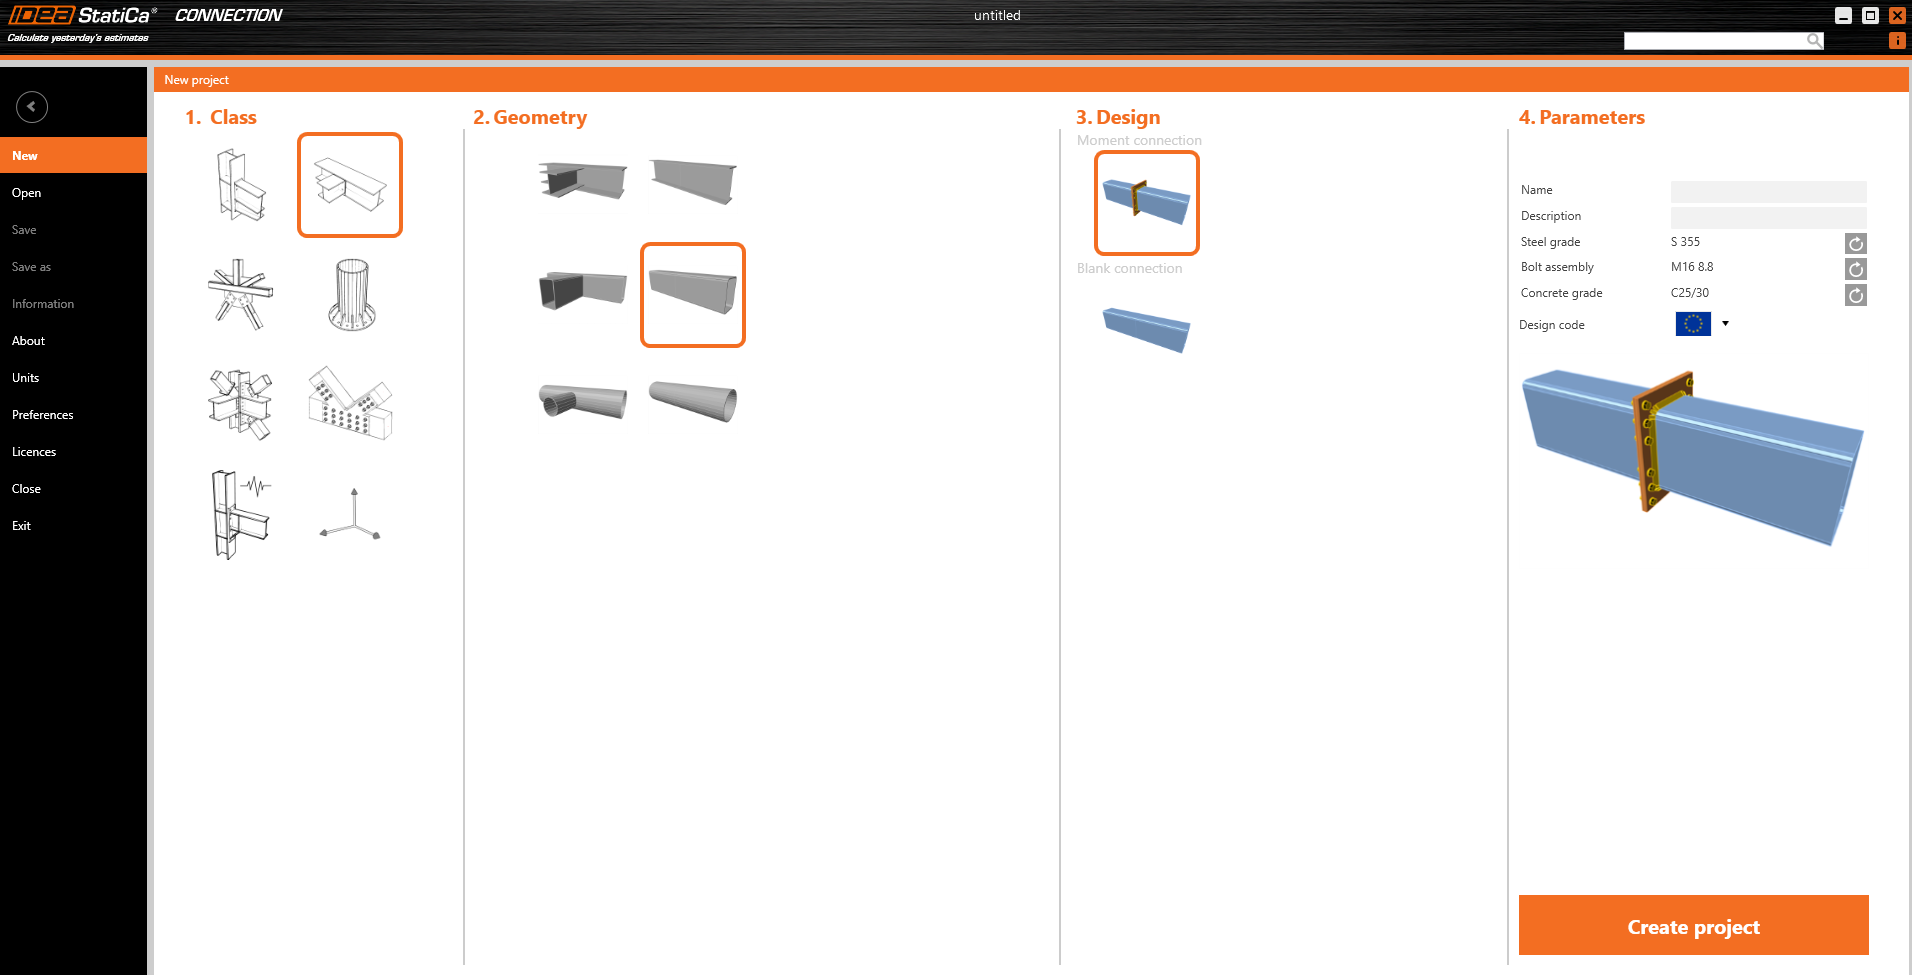
Per l'esempio, si creerà un semplice collegamento a momento utilizzando un modello:
Per poter lavorare con i parametri, è necessario abilitare la scheda Sviluppatore in Preferenze / Impostazioni avanzate:

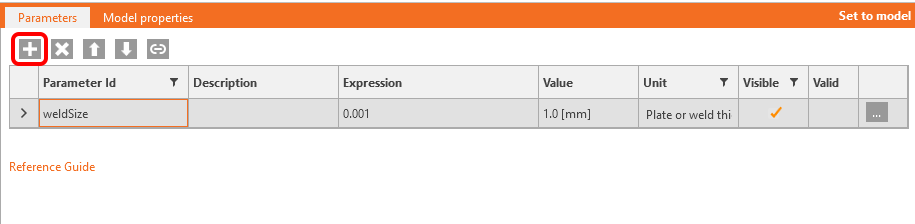
Ora è necessario impostare il parametro per le saldature. Fare clic sul pulsante più nella scheda Sviluppatore e modificare il testo come indicato nell'immagine:
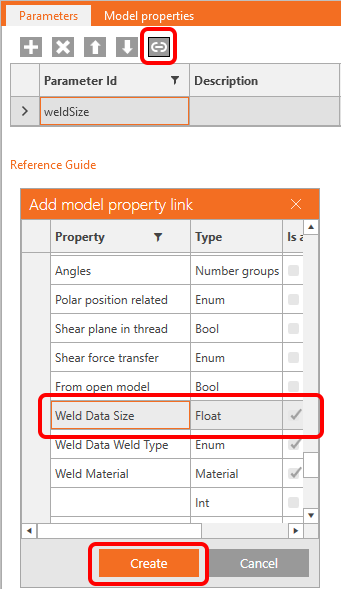
Per collegare questo parametro alle saldature appropriate, fare clic sul pulsante collegamento e selezionare il campo proprietà come mostrato nell'immagine seguente:
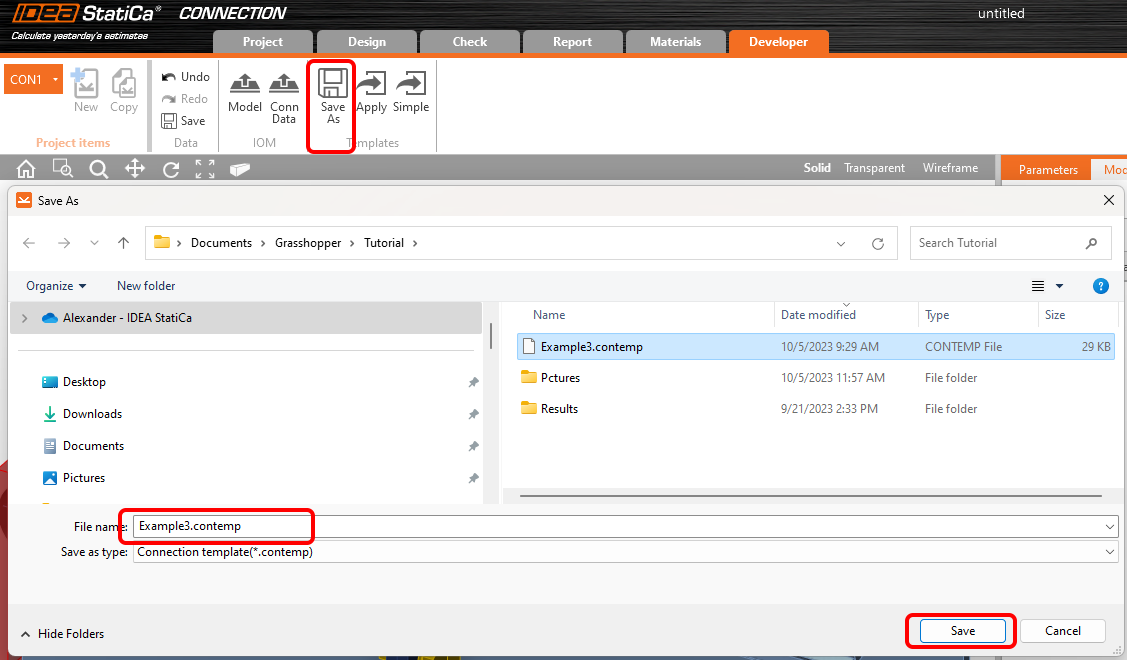
Ora è possibile salvare questo giunto con l'operazione e il parametro in un modello denominato Example3.contemp tramite il pulsante Salva con nome.
Chiudere il file e aprire un nuovo file, questa volta senza operazioni di modello:

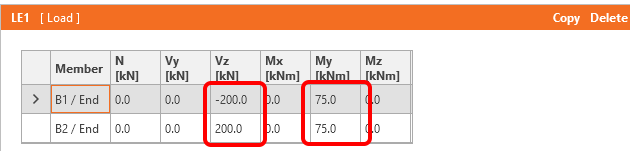
Andare su Effetti dei carichi e modificare i carichi come indicato nell'immagine seguente:
Ora salvare questo file con il nome Example3.ideaCon.
Grasshopper - Unione dei file *ideaCon e *contemp, determinazione dello spessore della saldatura.
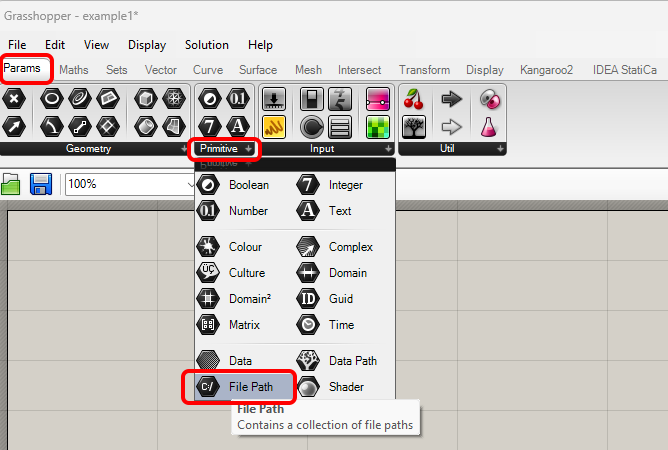
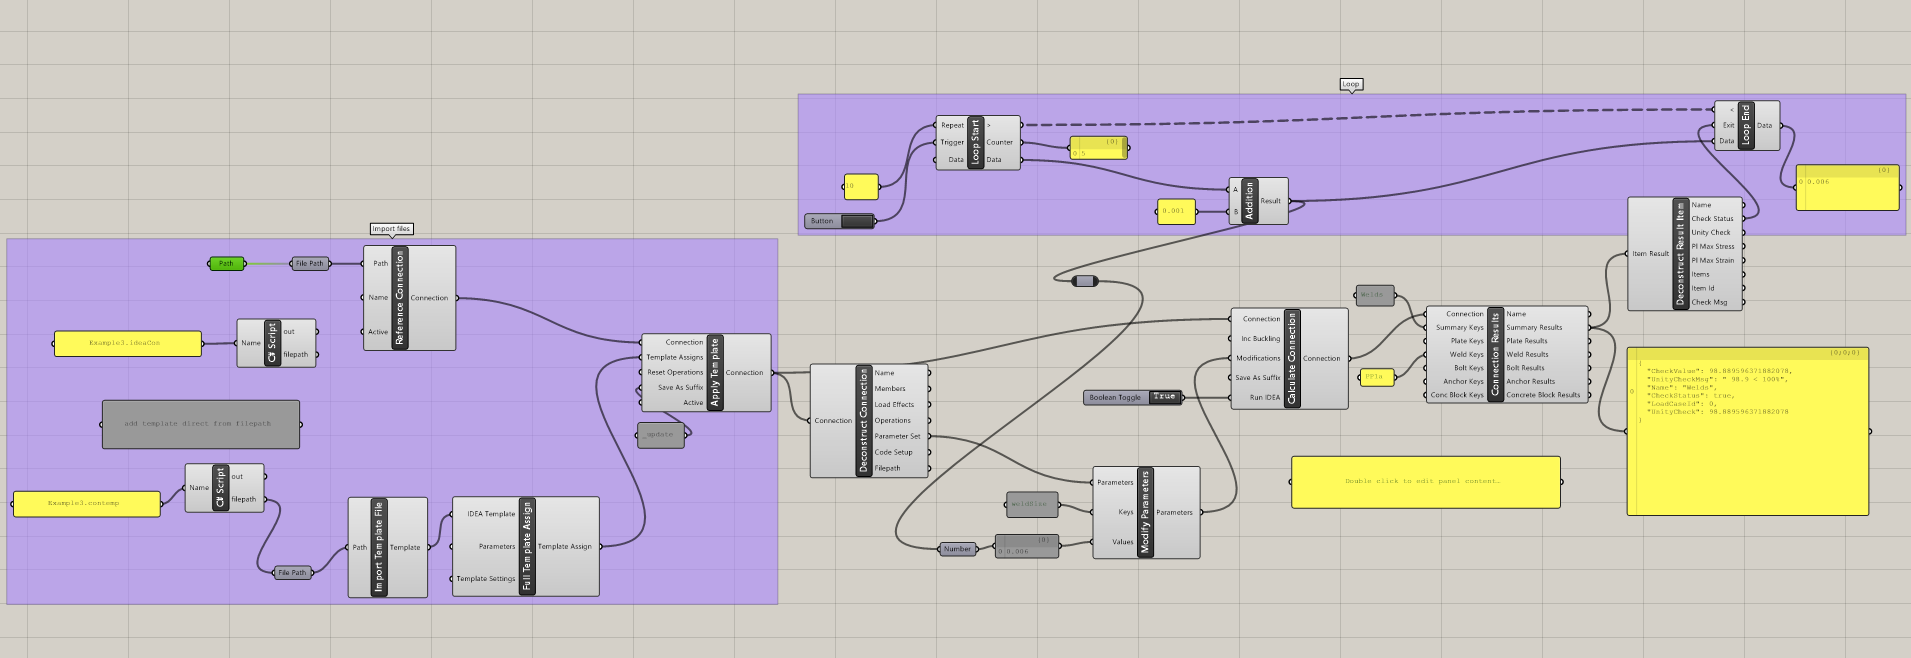
Creare un nuovo documento e aggiungere i seguenti componenti per unire i file *.ideaCon e *.contempt. Selezionare la scheda Params nella barra multifunzione superiore e posizionare il componente File Path sul Canvas.
Fare clic con il tasto destro sul componente e selezionare il file Example3.ideaCon salvato in precedenza.
Nota: Se si apre il file allegato, è necessario modificare questo percorso di conseguenza.
In alternativa, è possibile utilizzare i componenti Params / Panel e Maths / C# Script per importare i file Example3.contemp e Example3.ideaCon.
Ora collegare i seguenti componenti al canvas come mostrato nell'immagine.
Importazione file:
IDEA StatiCa / Connection / Reference Connection
IDEA StatiCa / Connection / Import Template file
IDEA StatiCa / Connection / Full Template Assign
IDEA StatiCa / Connection / Apply Template (per creare il file di risultato Example3_update.ideaCon)
Calcolo e risultati:
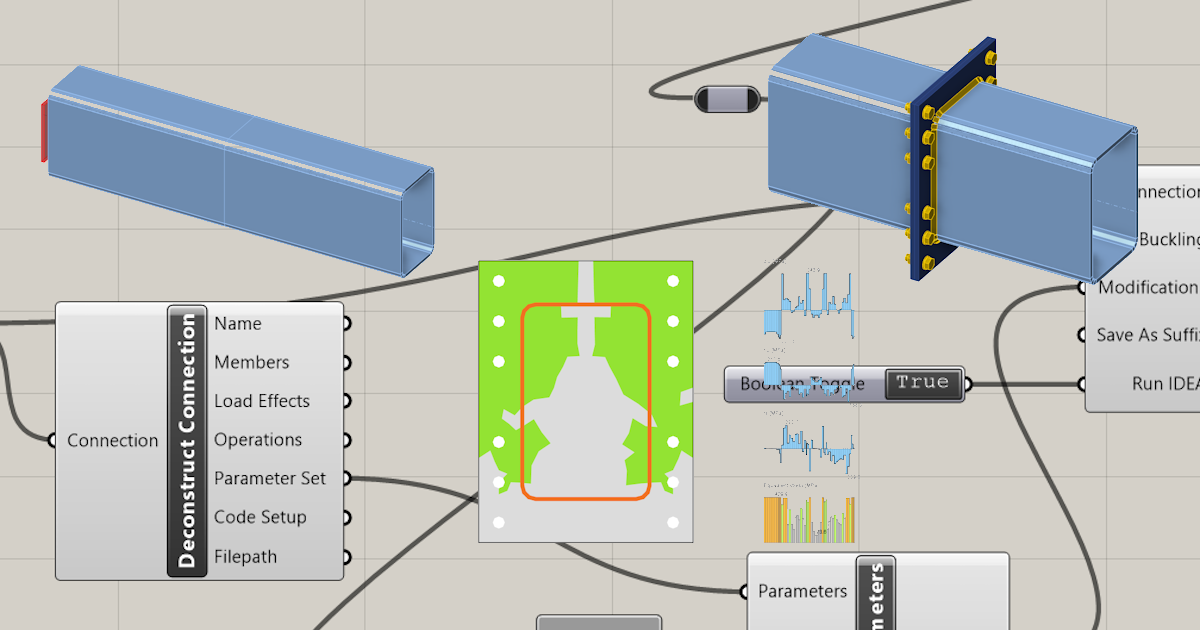
IDEA StatiCa / Connection / Deconstruct Connection
IDEA StatiCa / Connection / Modify Parameters
IDEA StatiCa / Connection / Calculate Connection
IDEA StatiCa / Connection / Connection Results
IDEA StatiCa / Connection / Deconstruct Result Items
Componenti Anemone per l'iterazione della dimensione della saldatura:
Anemone / Class / Loop Start
Anemone / Class / Loop End
Params / Maths / Operators / Addition
Si utilizza il componente Params / Input / Button per avviare l'iterazione.
L'iterazione viene eseguita dieci volte a partire da 0,001 m con un incremento di 1 mm fino a quando il valore CheckStatus diventa True.
Interpretazione dei risultati
Per questo specifico collegamento, si otterranno risultati soddisfacenti utilizzando
- Spessore della saldatura 6 mm
Esempi più complessi sono disponibili nel PC nella directory
"%appdata%\McNeel\Rhinoceros\packages\7.0\IDEAStatiCa\0.1.1\Examples.zip"
Download allegati
- Example3.zip (ZIP, 65 kB)