Grasshopper API-koppeling – parametrische optimalisatie van een verbindingslas (03) versie 24
Grasshopper - Installatie van de plugin
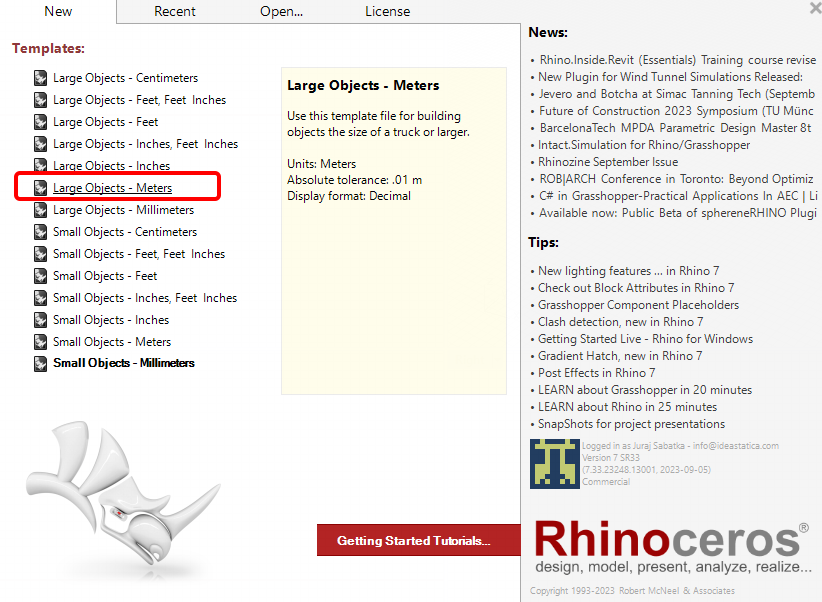
Je kunt een proefversie van Rhino3d en Grasshopper downloaden via de Rhino3d website. Start Rhinoceros en selecteer de template met Meters:
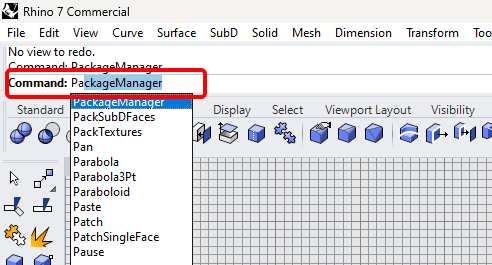
Voer in de command regel "Package Manager" in:
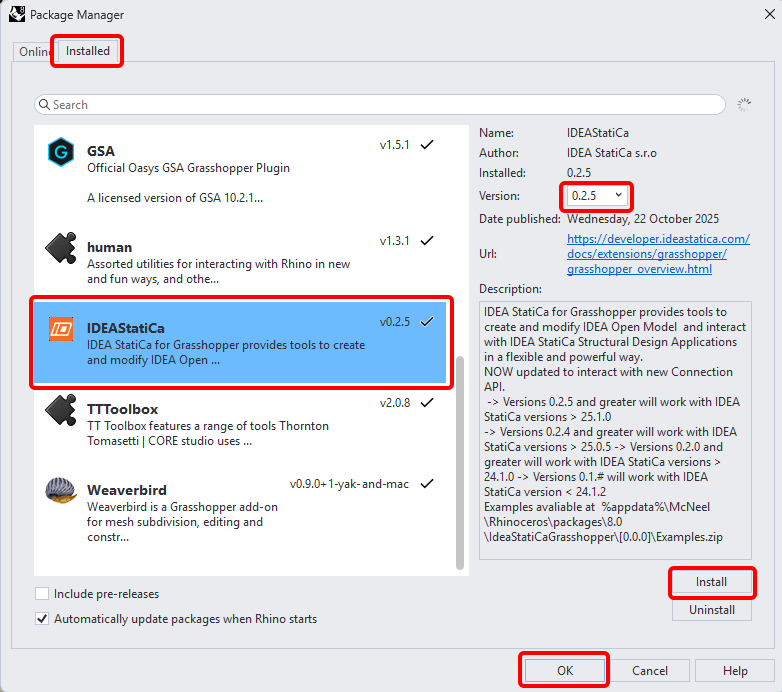
Een nieuw venster verschijnt; selecteer IDEAStatiCa en klik op Install. De plugin wordt gedownload en geïnstalleerd. Om actief te worden, is een herstart van Rhinoceros noodzakelijk.
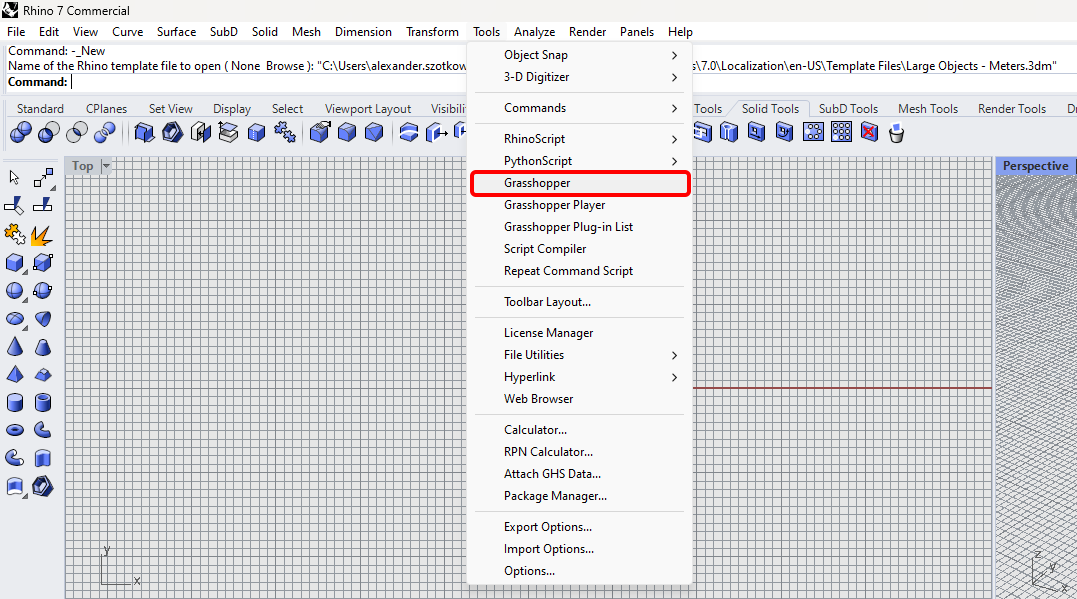
Om Grasshopper te starten met de IDEA StatiCa plugin, selecteer Tools / Grasshopper in het Rhihoceros tabblad.
Zoals u kunt zien, is de plugin nu beschikbaar.

Leer meer over de componenten en opdrachten in de IDEA StatiCa-plugin voor Grasshopper in het artikel Beschrijving van Grasshopper-plug-incomponenten.
Anemone plugin
Omdat Grasshopper niet met lussen kan werken, moet u een andere plugin installeren die dit wel kan. In dit voorbeeld gebruiken we Anemone, waarmee u lussen kunt maken in Grasshopper.

Opmerking: plaats het .gha-bestand in de Grasshopper-bibliotheken, klik met de rechtermuisknop op eigenschappen, vink het vakje "deblokkeren" aan, druk op toepassen, sluit alles en herstart Rhino.
IDEA StatiCa Connection – Ontwerp van een verbinding en parameters instellen
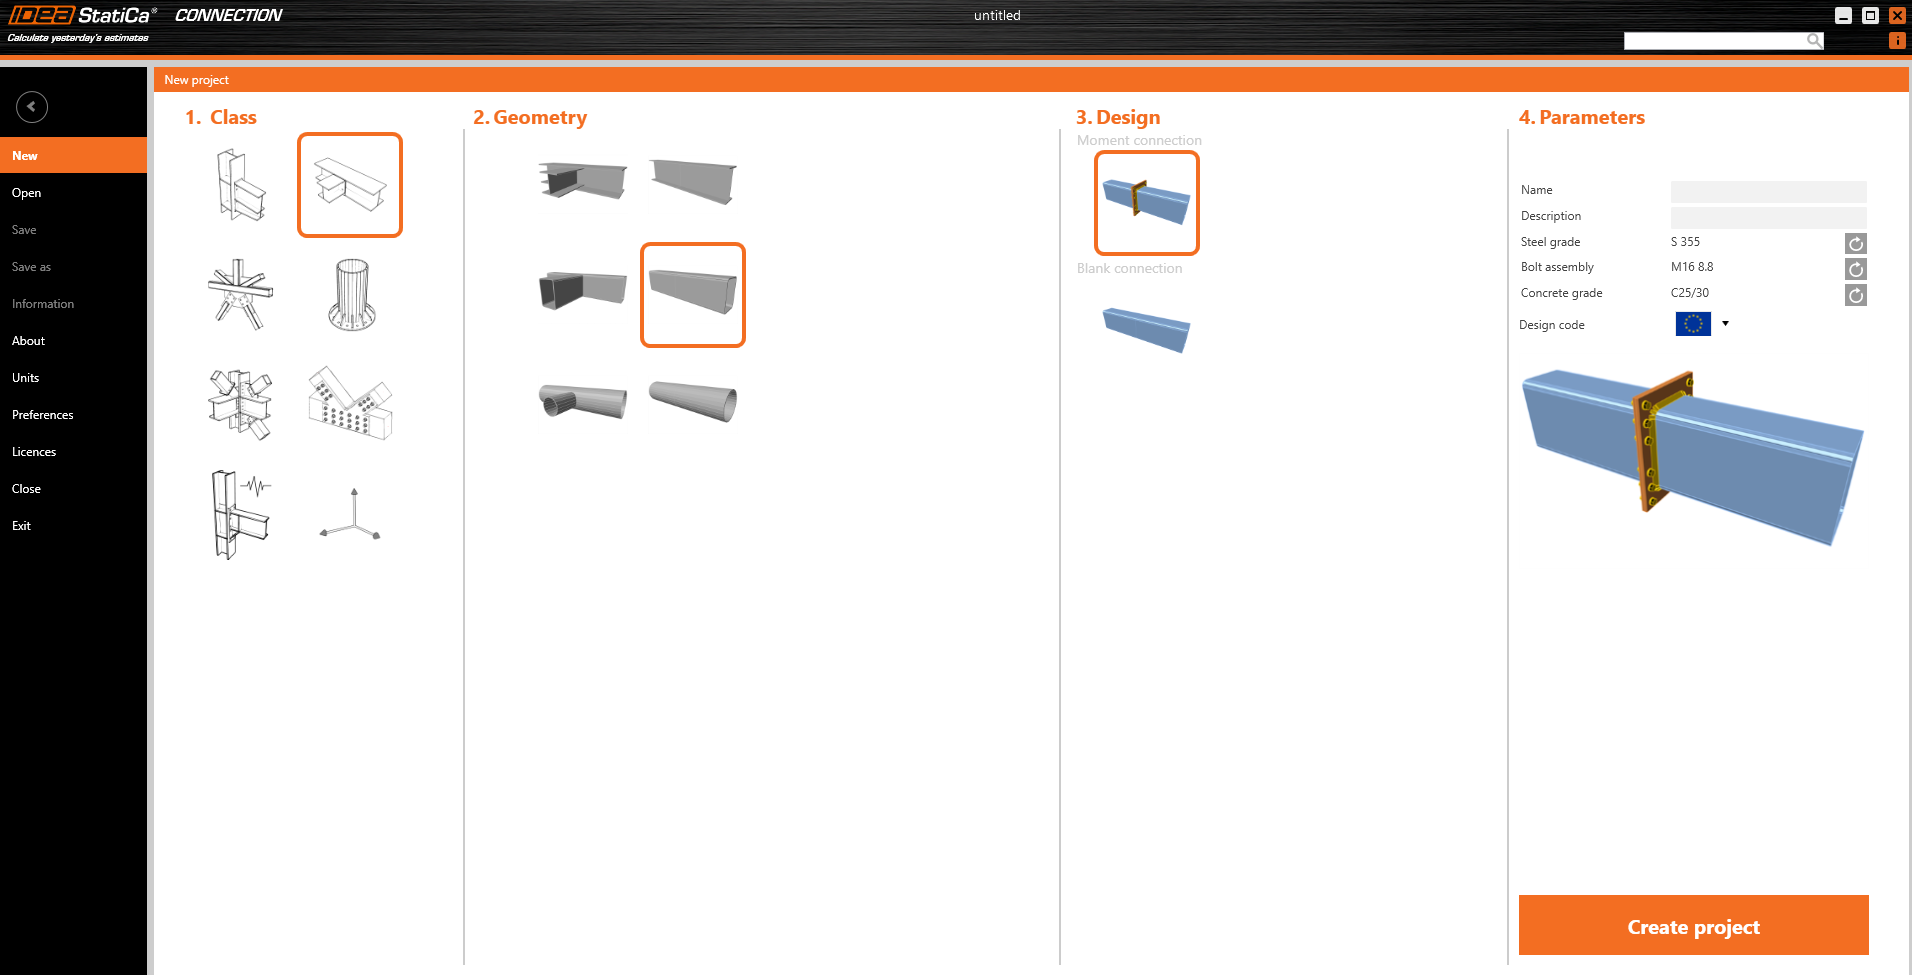
Voor het voorbeeld maakt u een eenvoudige momentverbinding met behulp van een template:
Om met parameters te kunnen werken, is het noodzakelijk het tabblad Ontwikkelaar in te schakelen via Voorkeuren / Geavanceerde instellingen:

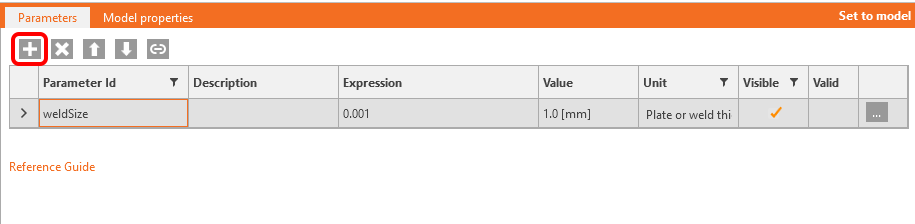
Nu moet u de parameter voor lassen instellen. Klik op de knop plus in het tabblad Ontwikkelaar en wijzig de tekst volgens de afbeelding:
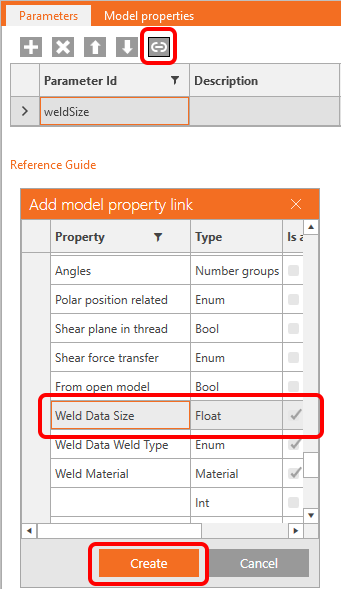
Om deze parameter te koppelen aan de bijbehorende lassen, klikt u op de knop koppeling en selecteert u het eigenschapsveld zoals weergegeven in de volgende afbeelding:
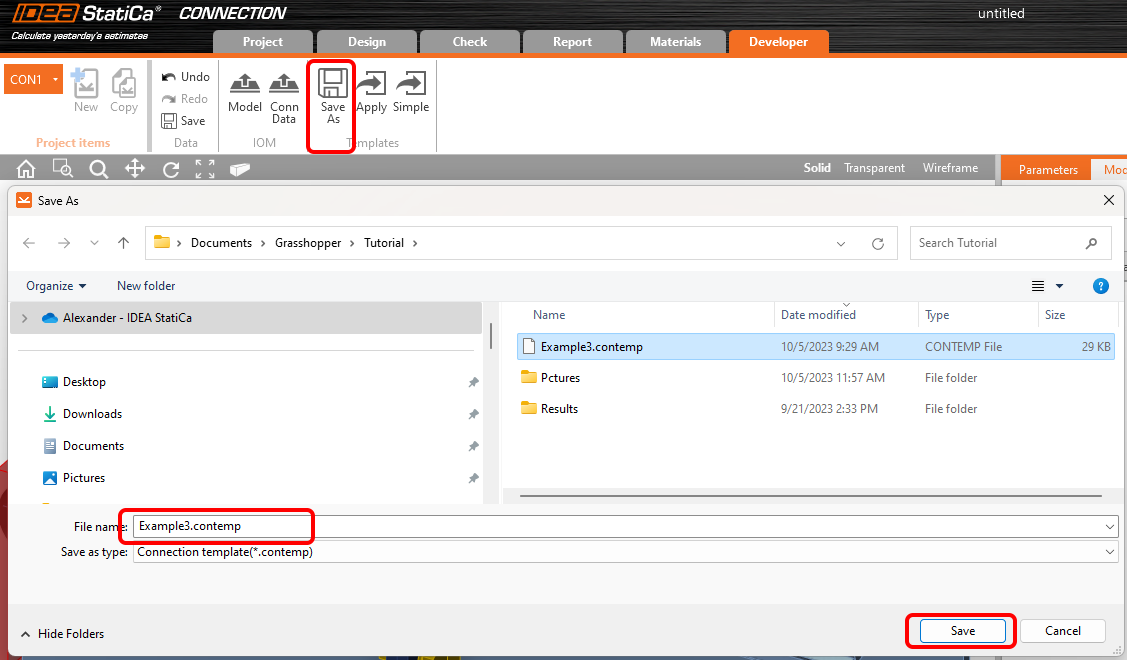
Nu kunt u deze verbinding met de bewerking en de parameter opslaan als een template met de naam Example3.contemp via de knop Opslaan als.
Sluit het bestand en open een nieuw bestand, nu zonder template-bewerkingen:

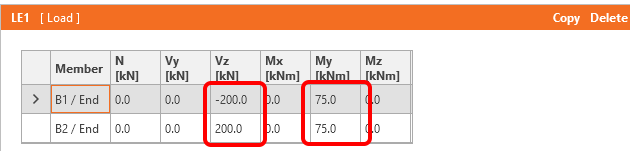
Ga naar de Belastingseffecten en wijzig de belastingen volgens de volgende afbeelding:
Sla dit bestand nu op onder de naam Example3.ideaCon.
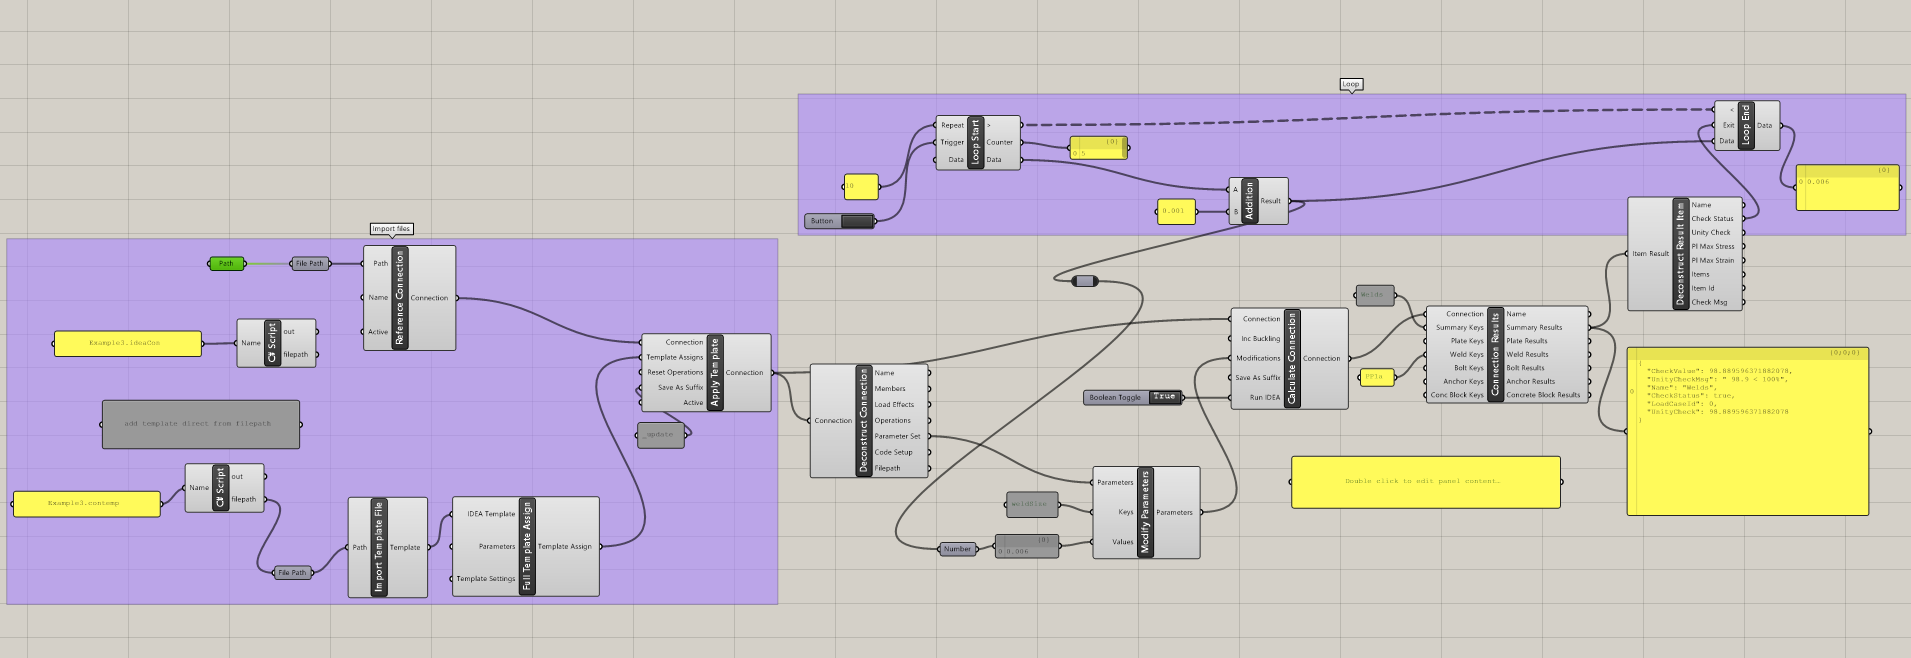
Grasshopper - Samenvoegen van de *ideaCon- en *contemp-bestanden, bepalen van de lasdikte.
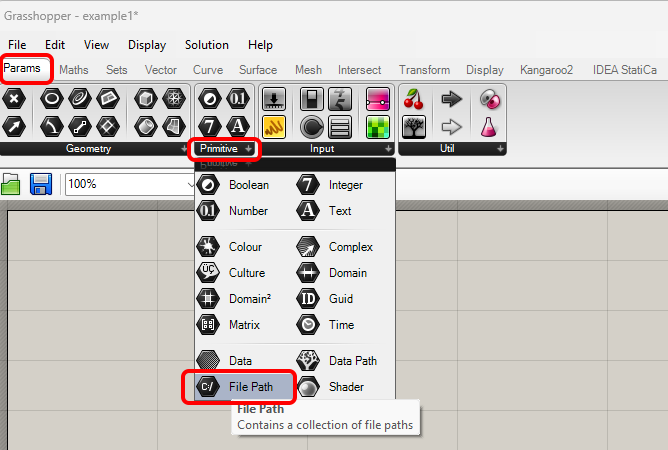
Maak een nieuw document en voeg de volgende componenten toe om de *.ideaCon- en *.contempt-bestanden samen te voegen. Selecteer het tabblad Params in het bovenste lint en plaats de component File Path op het canvas.
Klik met de rechtermuisknop op de component en selecteer het bestand Example3.ideaCon dat we eerder hebben opgeslagen.
Opmerking: Als u het bijgevoegde bestand opent, moet u dit pad dienovereenkomstig aanpassen.
U kunt ook de componenten Params / Panel en Maths / C# Script gebruiken om de bestanden Example3.contemp en Example3.ideaCon te importeren.
Verbind nu de volgende componenten met het canvas zoals weergegeven in de afbeelding.
Bestand importeren:
IDEA StatiCa / Connection / Reference Connection
IDEA StatiCa / Connection / Import Template file
IDEA StatiCa / Connection / Full Template Assign
IDEA StatiCa / Connection / Apply Template (voor het aanmaken van een resultaatbestand Example3_update.ideaCon)
Berekening en resultaten:
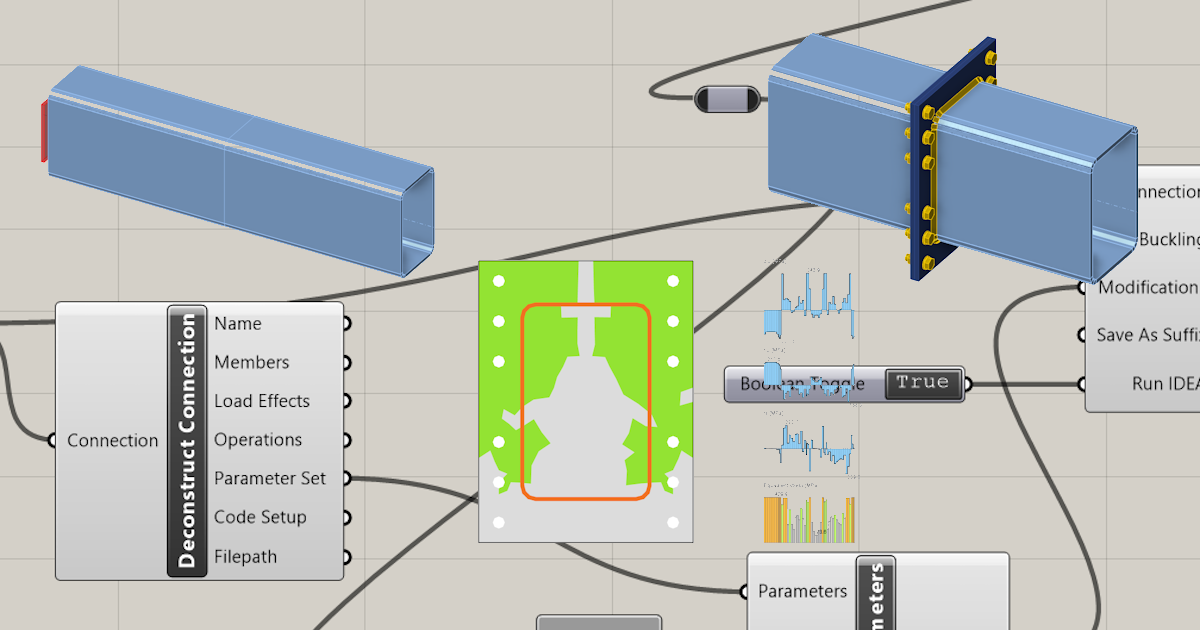
IDEA StatiCa / Connection / Deconstruct Connection
IDEA StatiCa / Connection / Modify Parameters
IDEA StatiCa / Connection / Calculate Connection
IDEA StatiCa / Connection / Connection Results
IDEA StatiCa / Connection / Deconstruct Result Items
Anemone-componenten voor het itereren van de lasafmeting:
Anemone / Class / Loop Start
Anemone / Class / Loop End
Params / Maths / Operators / Addition
We gebruiken de component Params / Input / Button om de iteratie te starten.
De iteratie wordt tien keer uitgevoerd vanaf 0,001 m met een stap van 1 mm totdat de waarde CheckStatus True wordt.
Interpretatie van de resultaten
Voor deze specifieke verbinding verkrijgt u bevredigende resultaten met
- Lasdikte 6 mm
Meer complexe voorbeelden zijn te vinden op uw pc in de map
"%appdata%\McNeel\Rhinoceros\packages\7.0\IDEAStatiCa\0.1.1\Examples.zip"
Toegevoegde downloads
- Example3.zip (ZIP, 65 kB)