
Kapcsolat oktatóanyag - Csöves 3D keret (AISC)
1 Új projekt
Kezdje az IDEA StatiCa Connection elindításával. Hozzon létre egy új projektet a szükséges tervhez legközelebb álló sablon kiválasztásával, töltse ki a projekt nevét és leírását. A szükséges tulajdonságok megadása után erősítse meg a Create blank design gombbal.
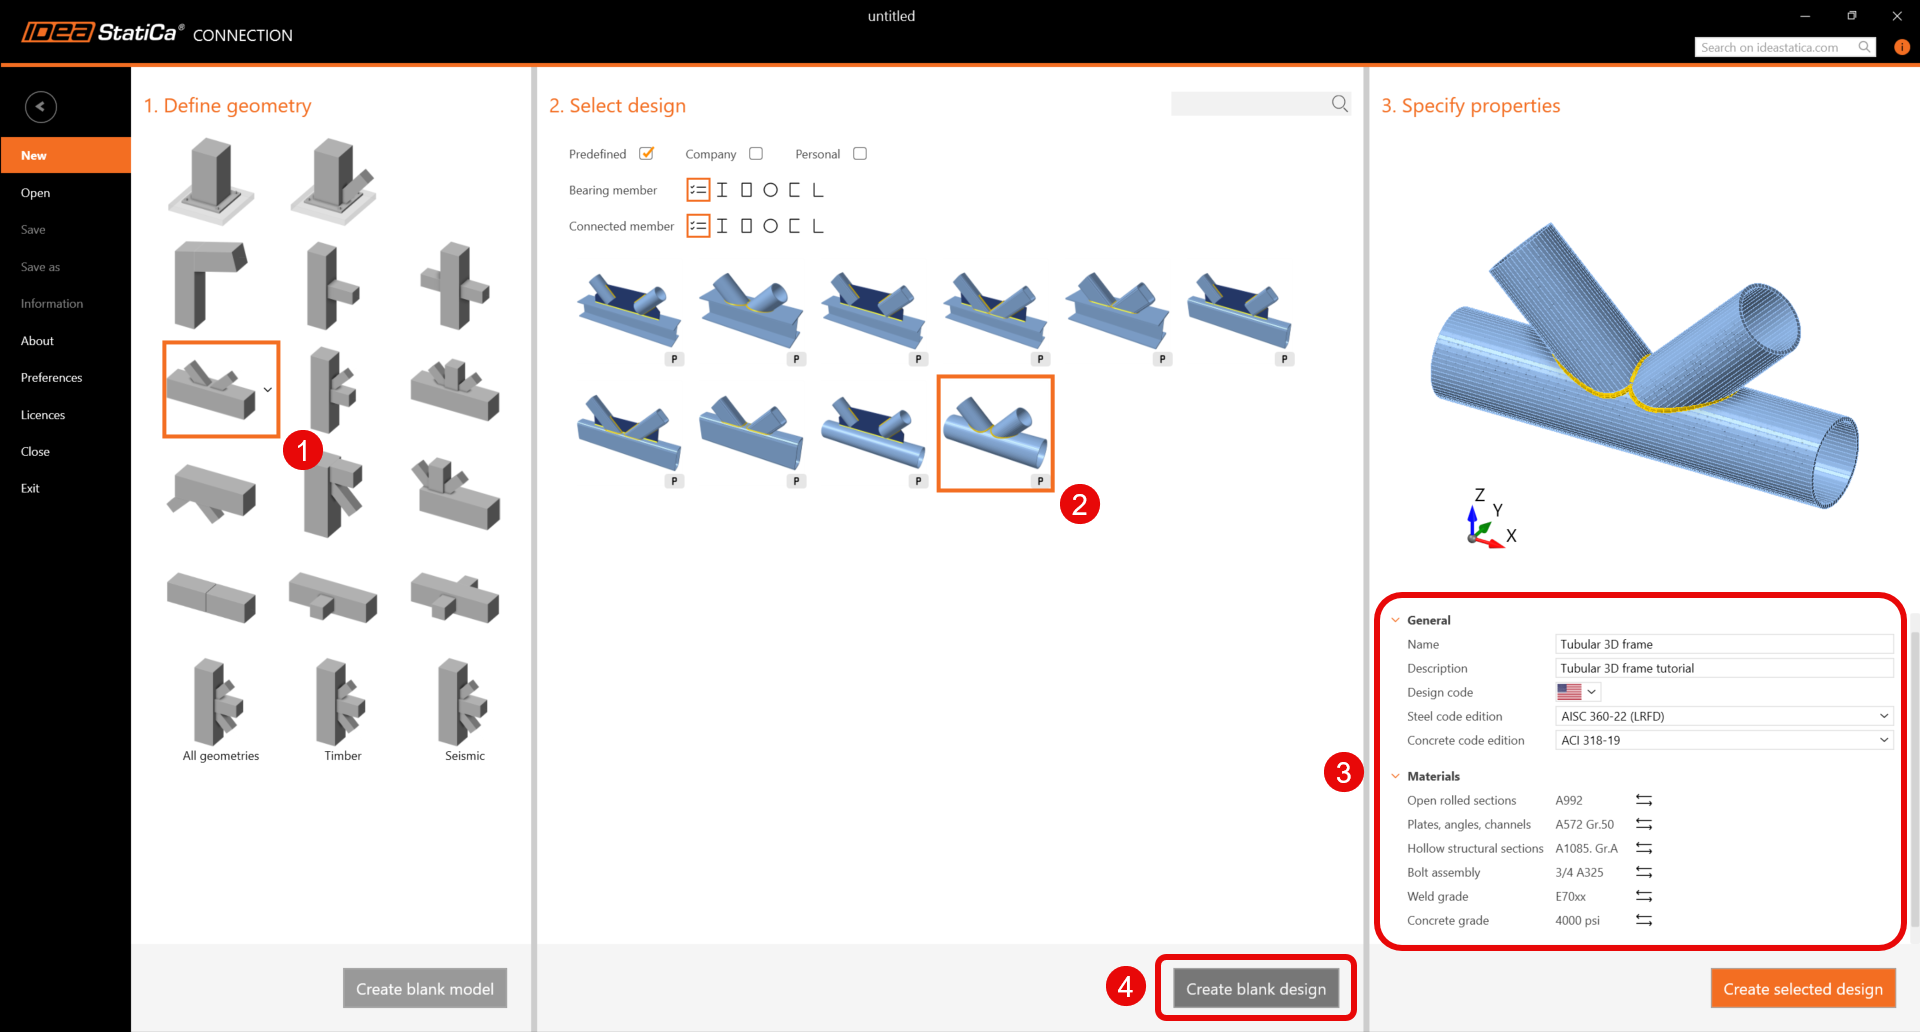
Mivel AISC szabvány szerint dolgozik, állítsa be a birodalmi mértékegységeket (lásd: Hogyan lehet megváltoztatni a mértékegységrendszert).
2 Geometria
Kezdje a csomópont geometriájának módosításával. Válassza ki a CH szerkezeti elemet, és kattintson a "+" ikonra a Keresztmetszet-navigátor megnyitásához. Válassza a Körös üreges szelvény profilt, és válassza ki a HSS12.75X.500 keresztmetszetet a megfelelő könyvtárral együtt.
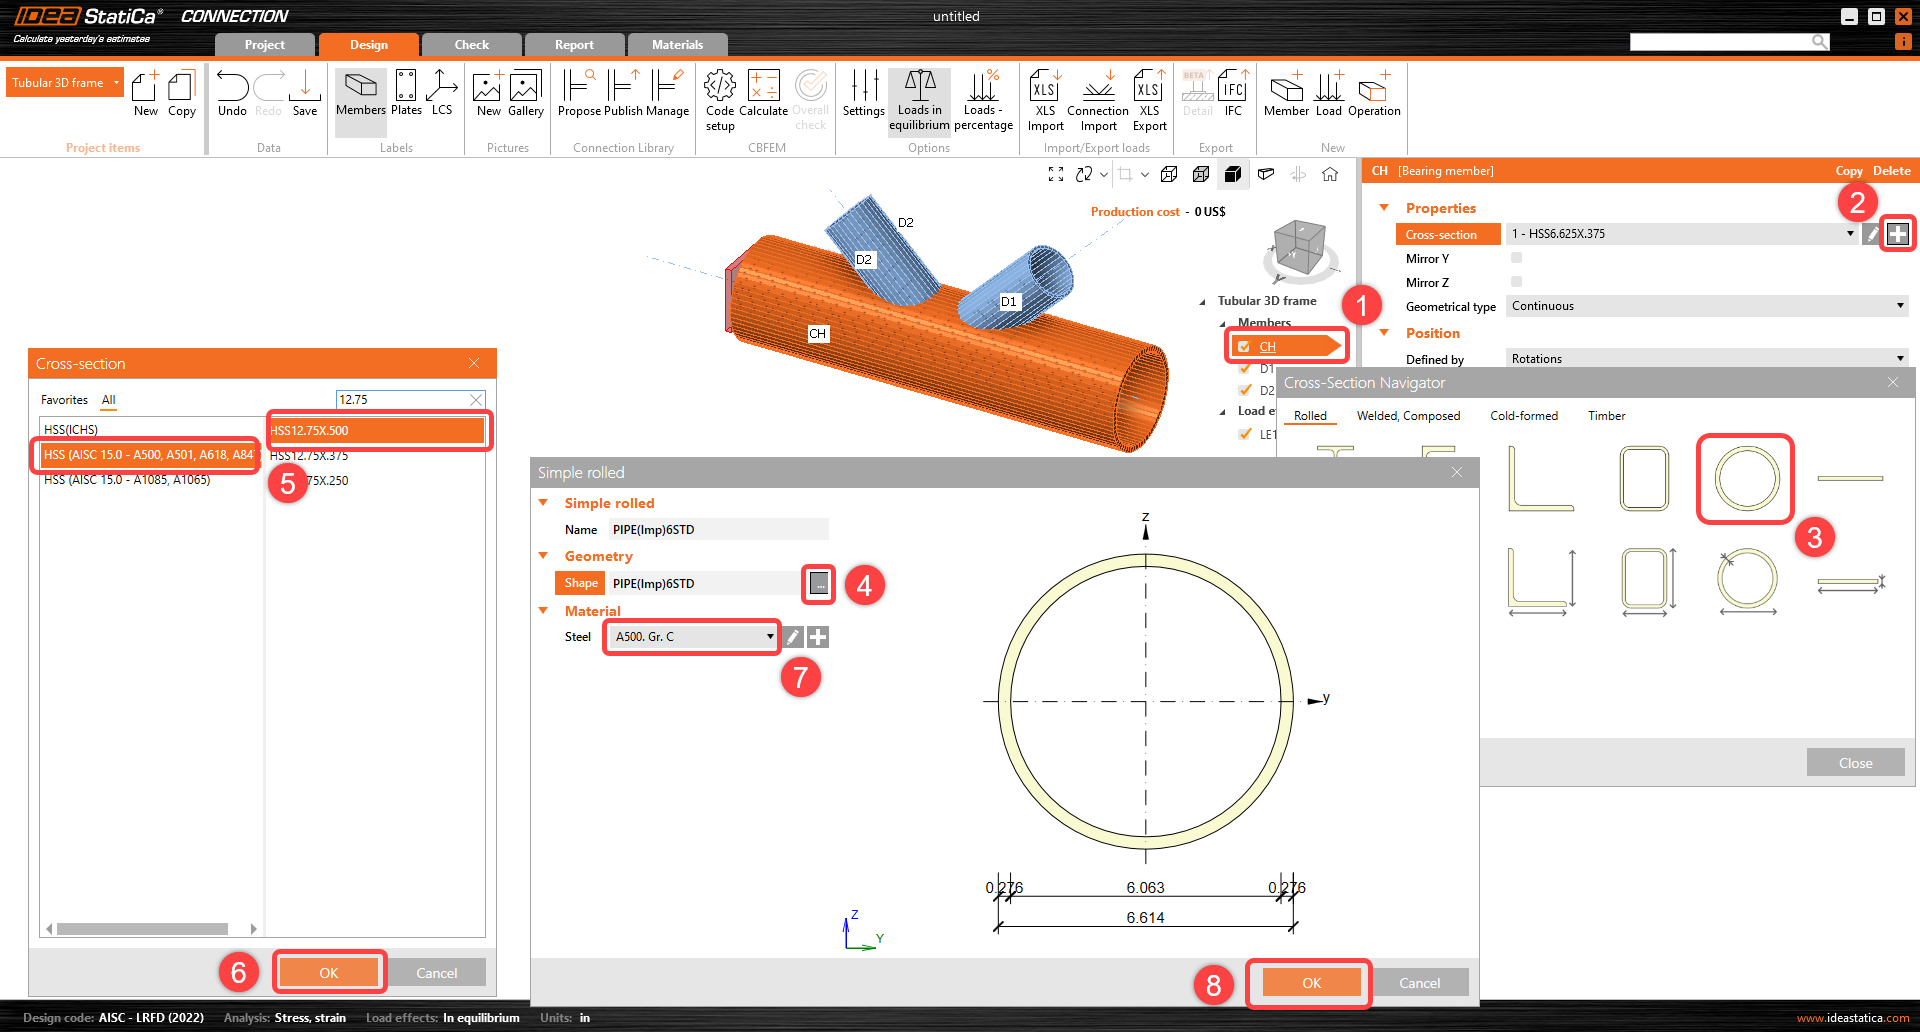
A CH szerkezeti elem tulajdonságait módosítani kell, kövesse az alábbi képet.

Használja ki az előkészített szerkezeti elemet a tulajdonságok másolásához: az elemek fájában kattintson jobb gombbal a CH szerkezeti elemre, és válassza a Másolás parancsot.
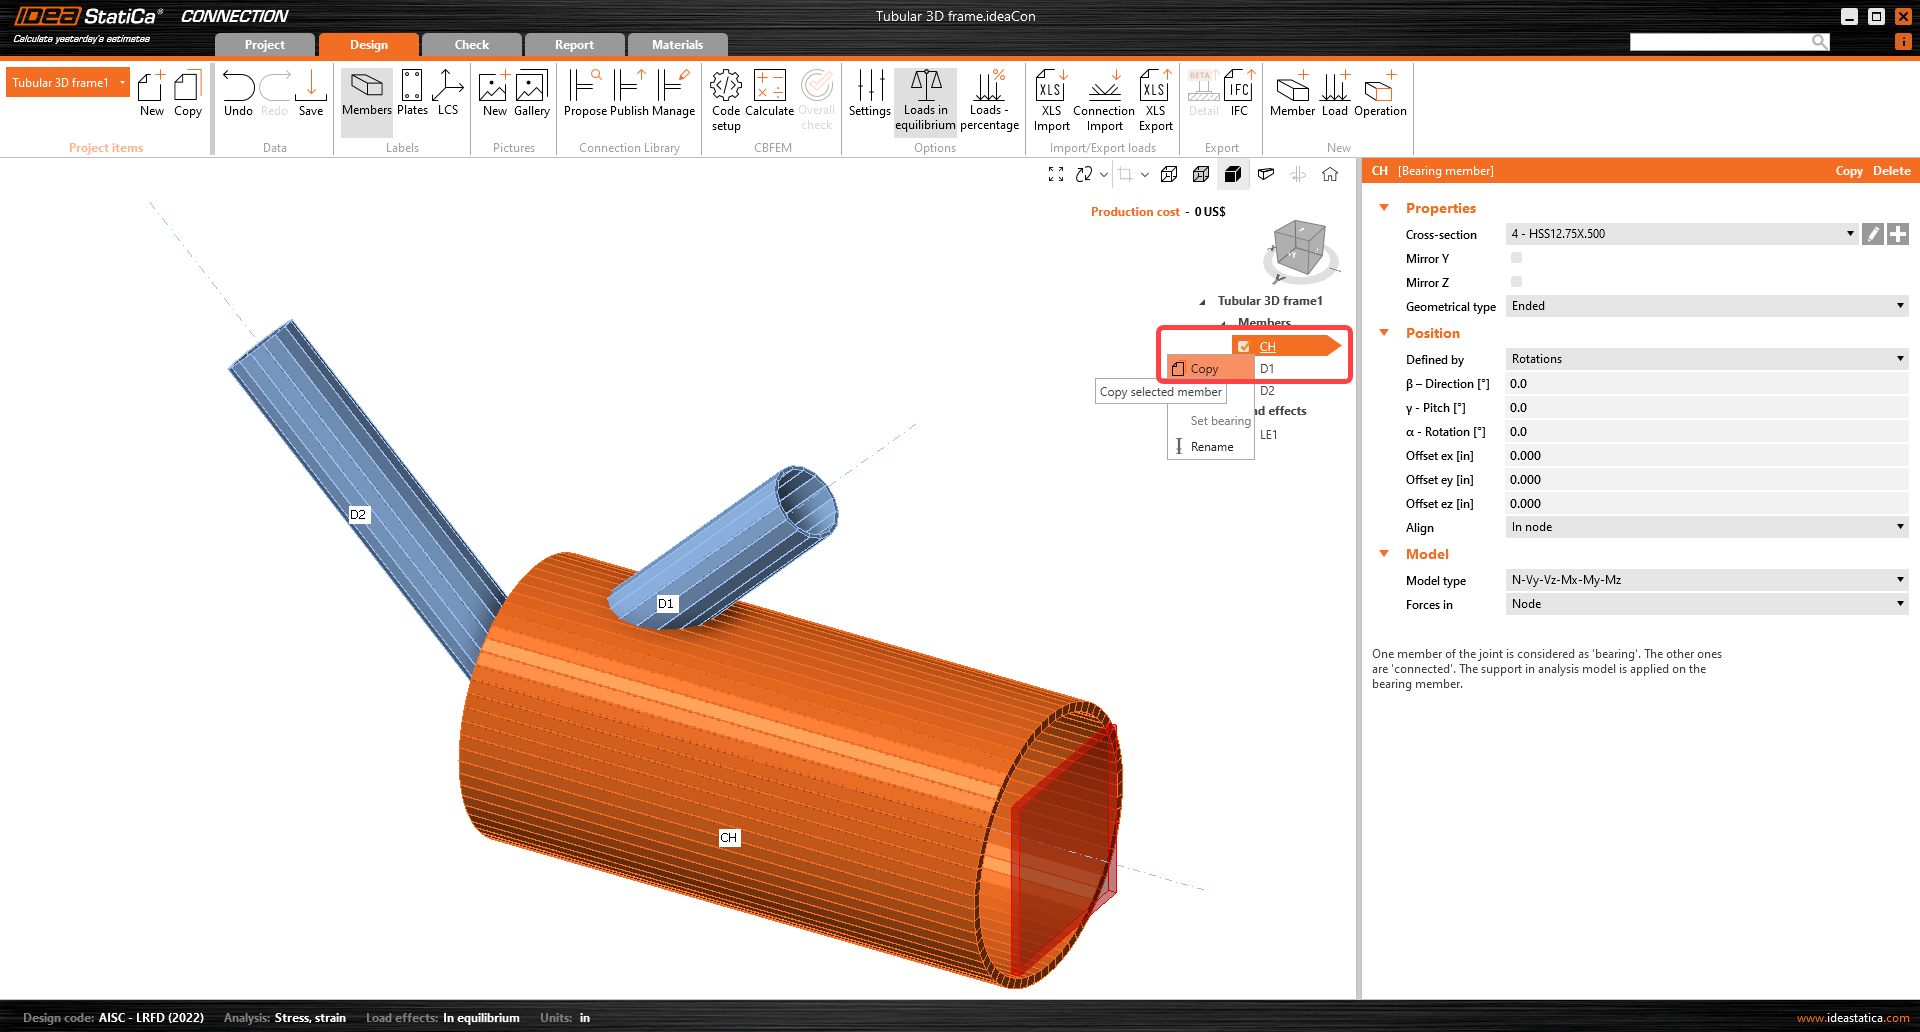
Módosítsa az M4 szerkezeti elem tulajdonságait az alábbi kép szerint.

Folytassa a D1 átlós szerkezeti elem keresztmetszetének módosításával. Ebben az esetben a HSS6.625X0.375 keresztmetszet már meg van határozva a sablonban. Válassza az első keresztmetszetet a legördülő menüből, és módosítsa a tulajdonságokat az alábbiak szerint.

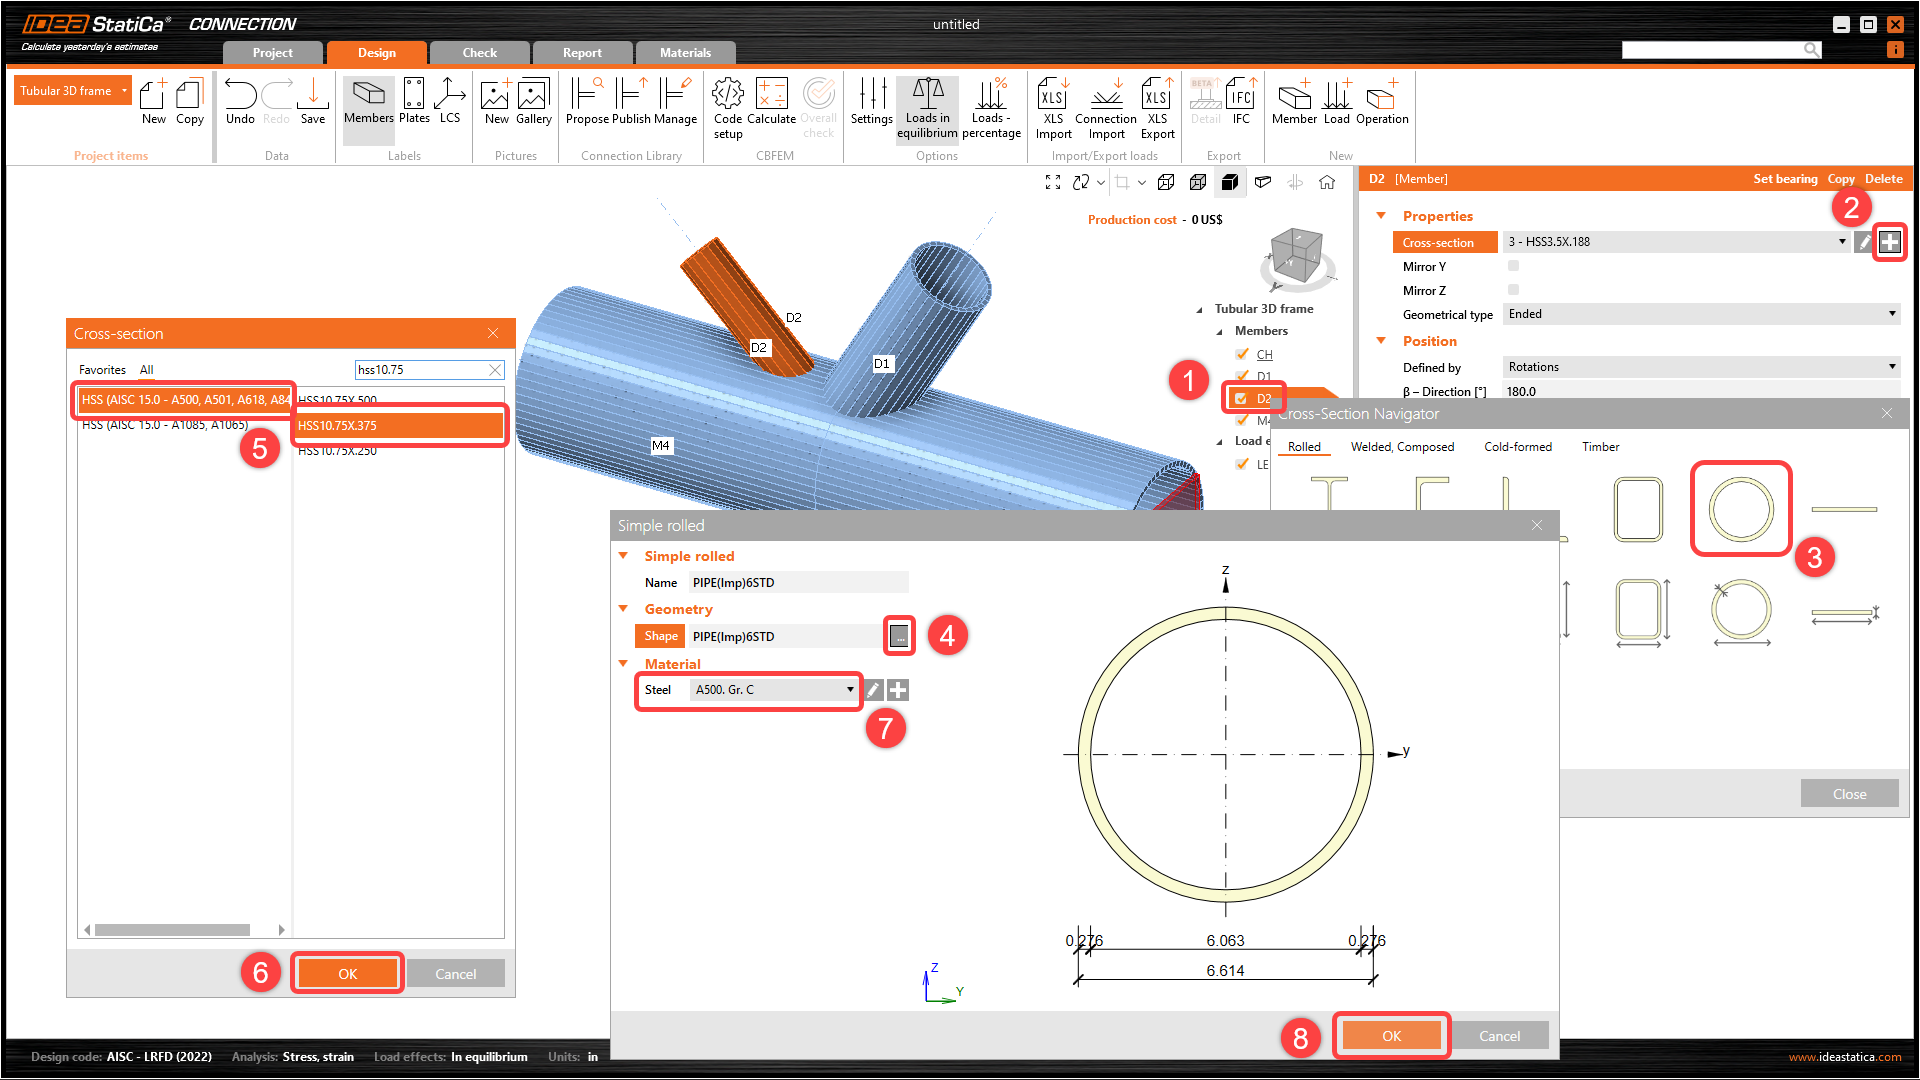
Folytassa a második D2 átlós szerkezeti elemmel, és módosítsa a tulajdonságokat az alábbi kép szerint. Az új keresztmetszet: HSS10.75X.375.
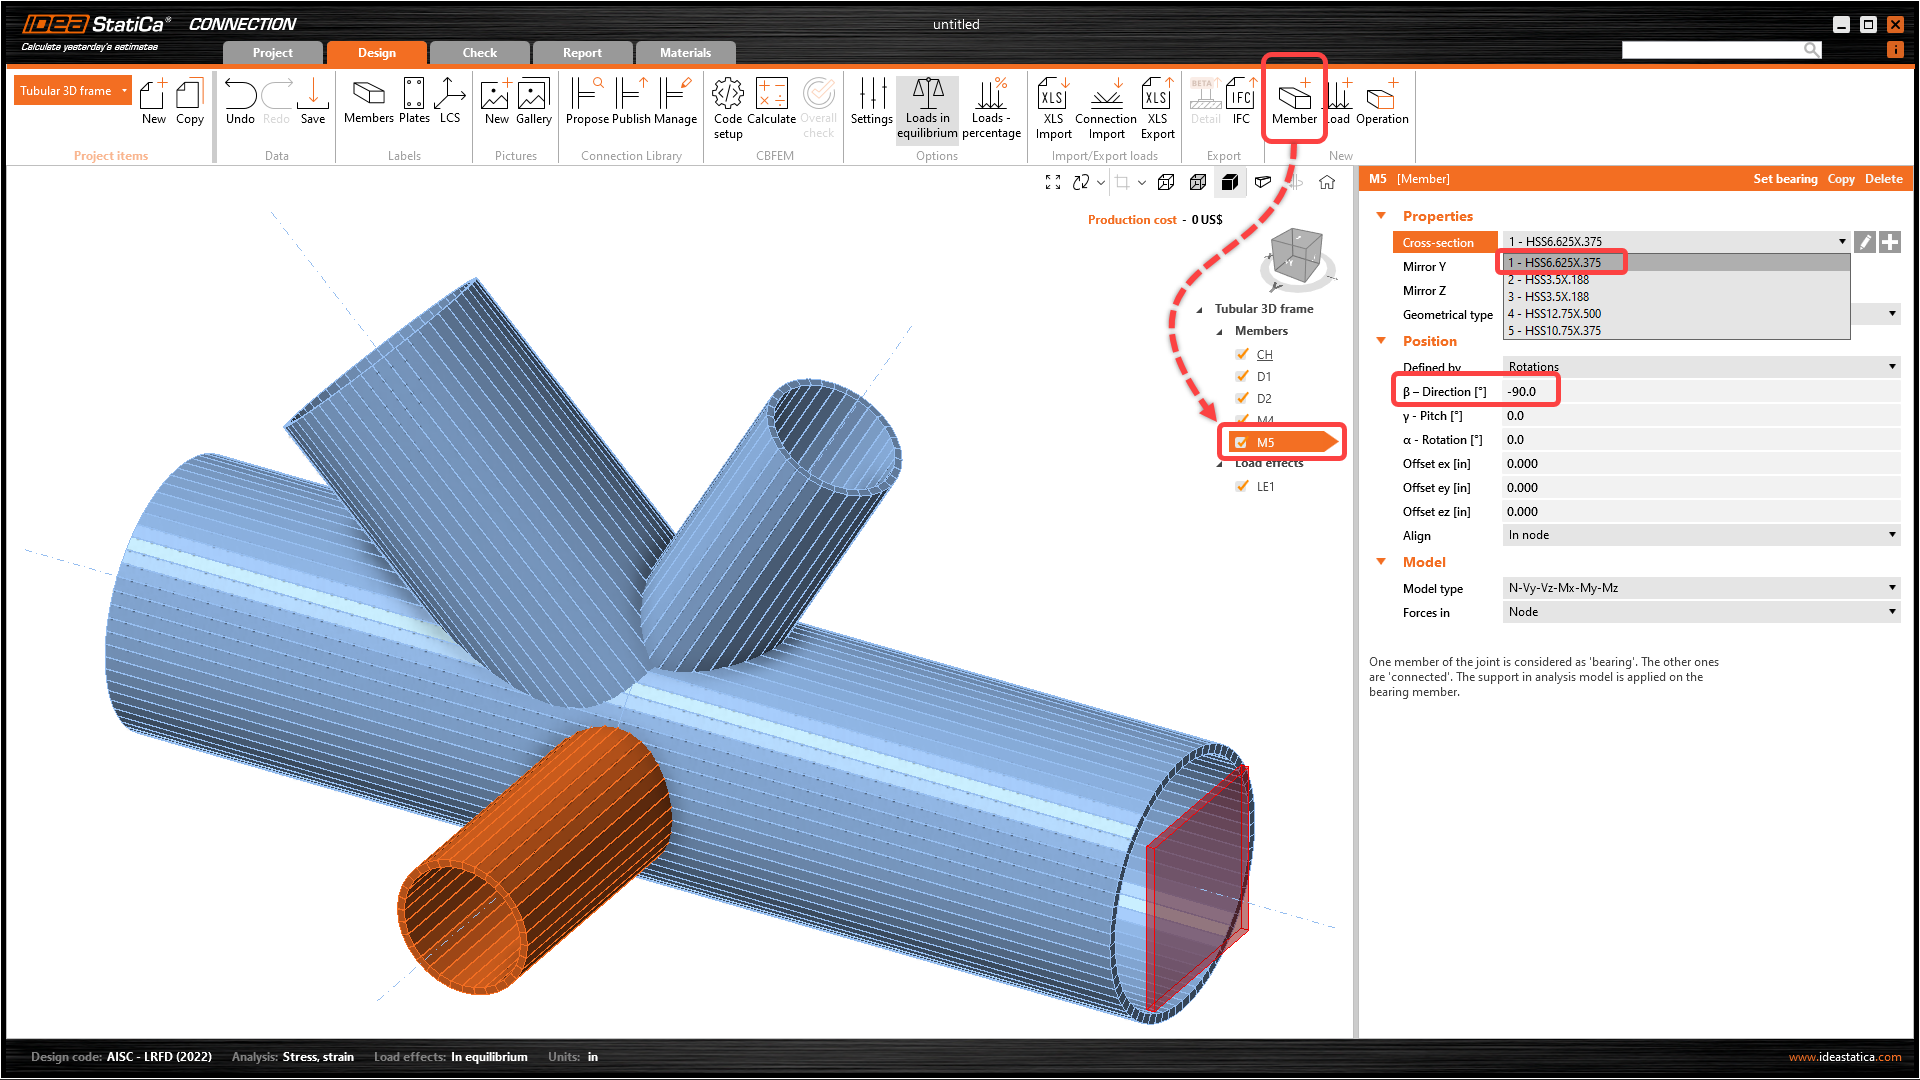
Most egy újabb szerkezeti elemet kell hozzáadnia, kattintson a felső szalagon a Szerkezeti elem lehetőségre. Módosítsa az új szerkezeti elem irányát és keresztmetszetét az alábbi képen látható módon.
3 Teherhatások
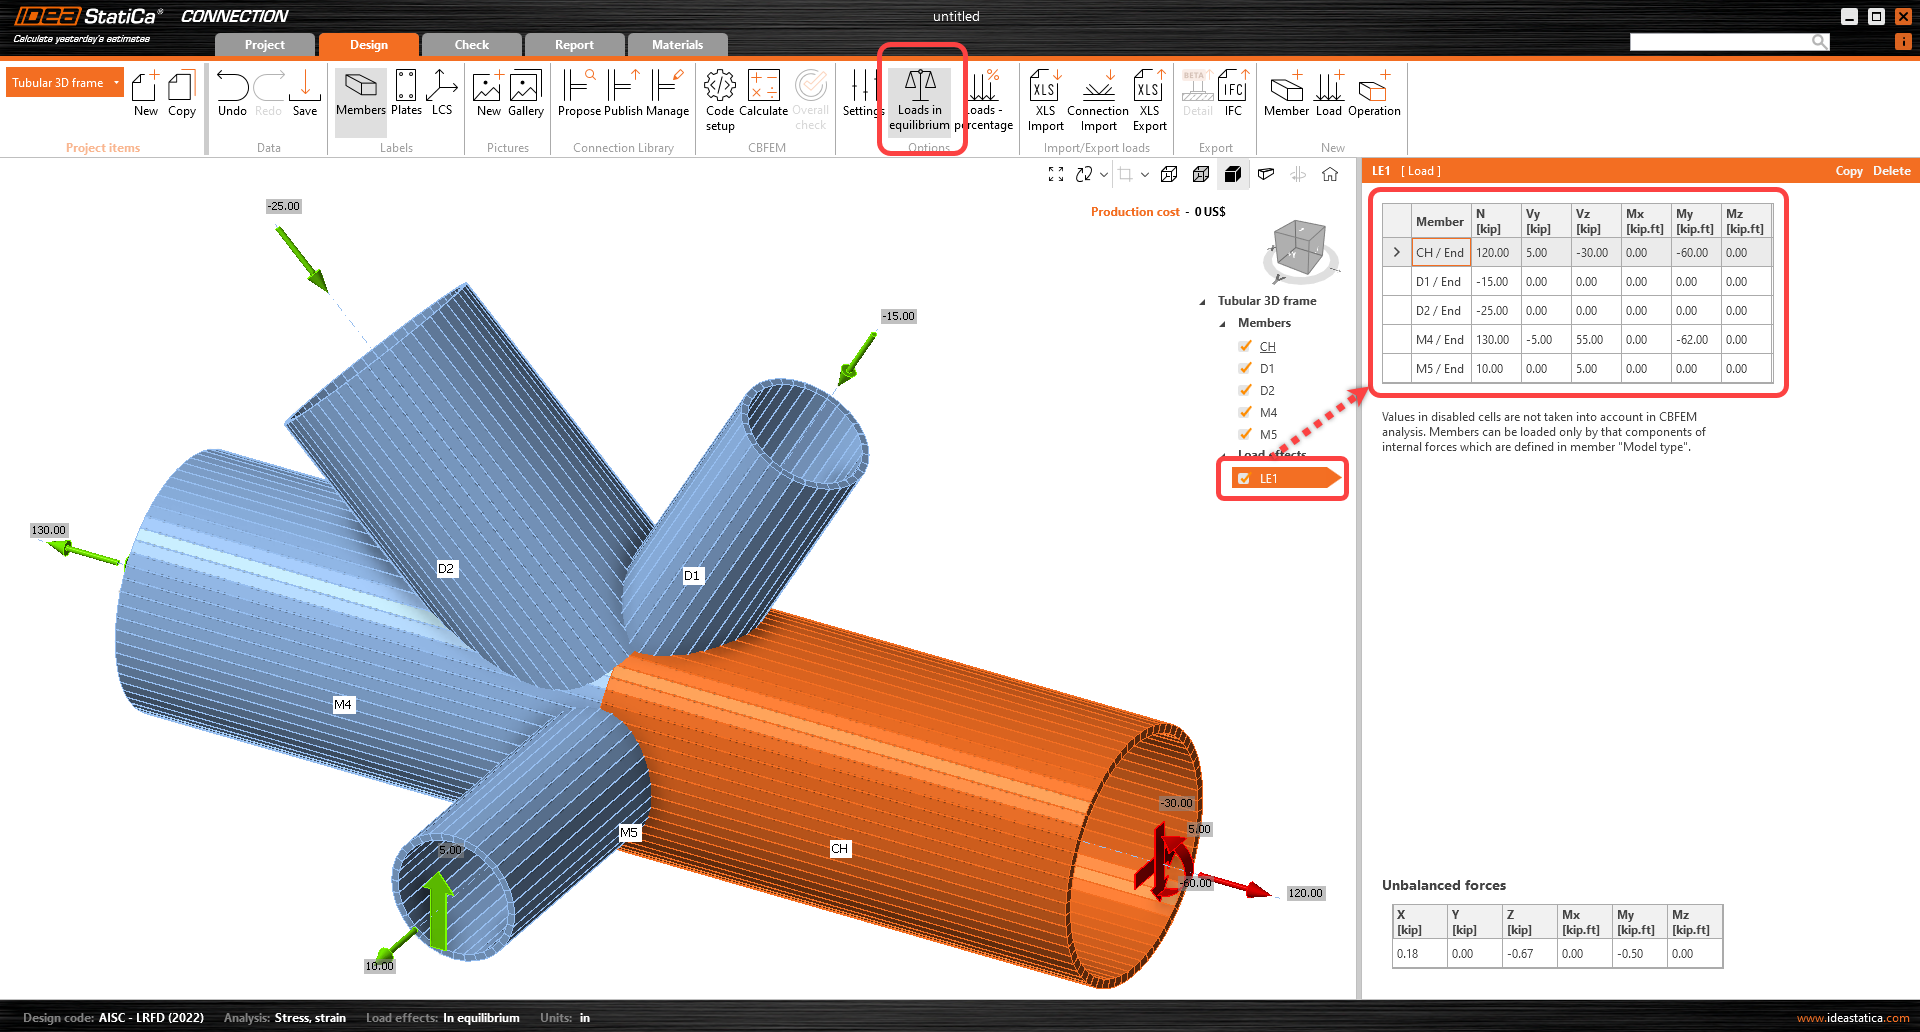
Folytathatja a Teherhatások megadásával. A varázsló automatikusan hozzáadott egy teherhatást. Az összes belső erőt a táblázatba kell bevinnie. Ne felejtse el bekapcsolni a Egyensúlyban lévő terhek parancsot a felső szalagon.
4 Tervezés
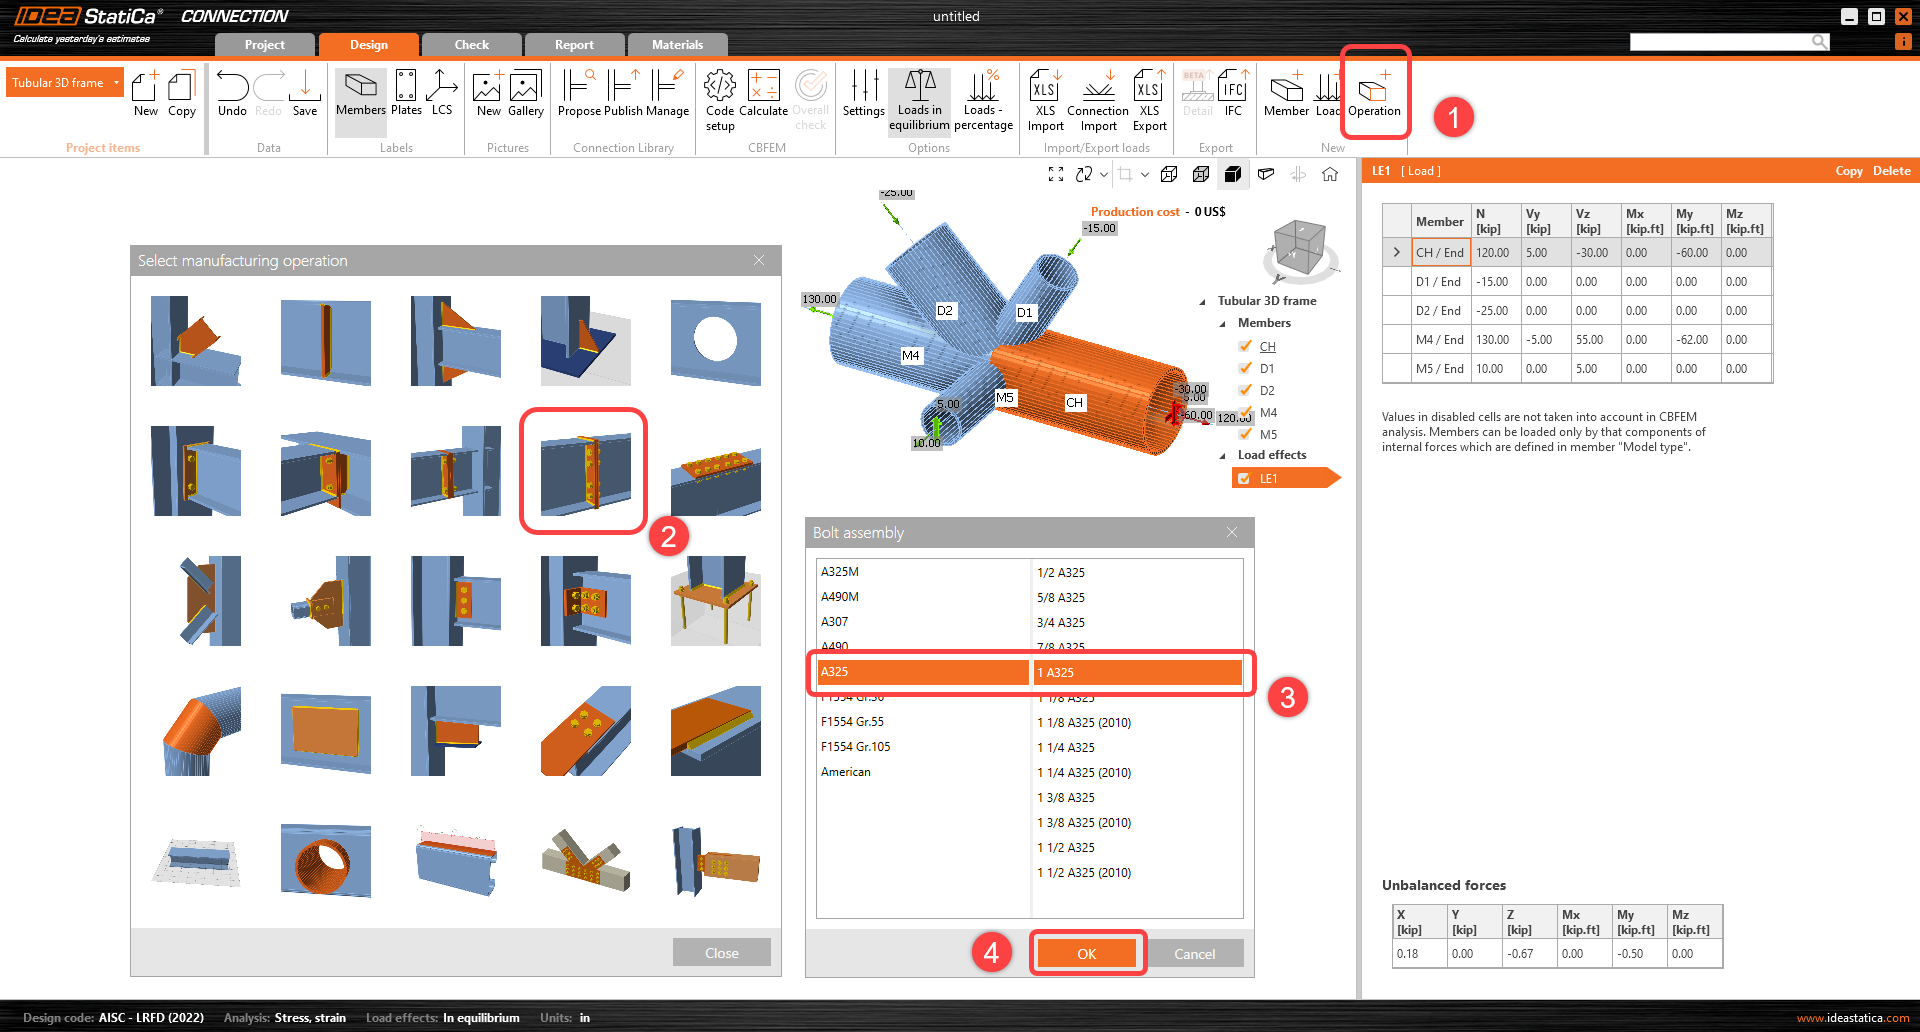
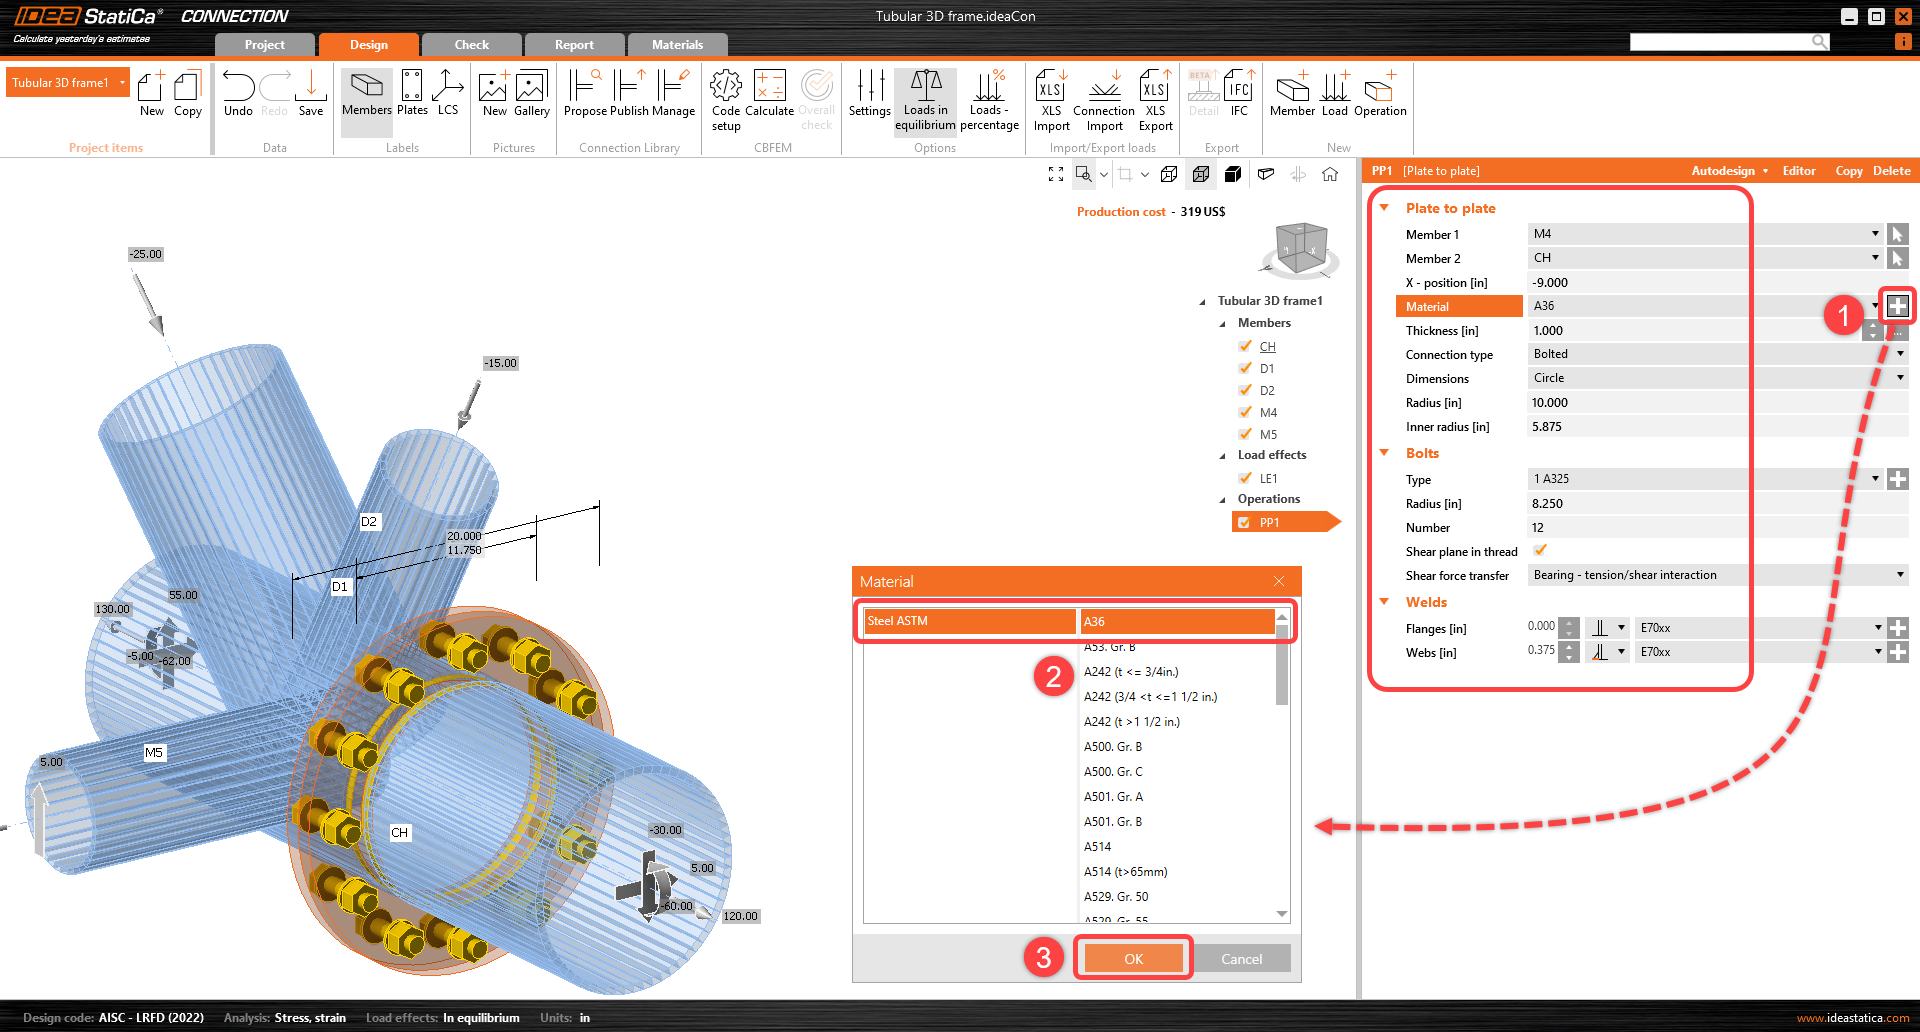
Meg kell határoznia a megfelelő gyártási műveletet. Kezdje a felső szalagon az Művelet funkció kiválasztásával. Megnyílik a Gyártási műveletek ablak az összes elérhető művelettel. Válassza a Lemez lemezhez műveletet, és módosítsa a tulajdonságokat az alábbi képen látható módon.
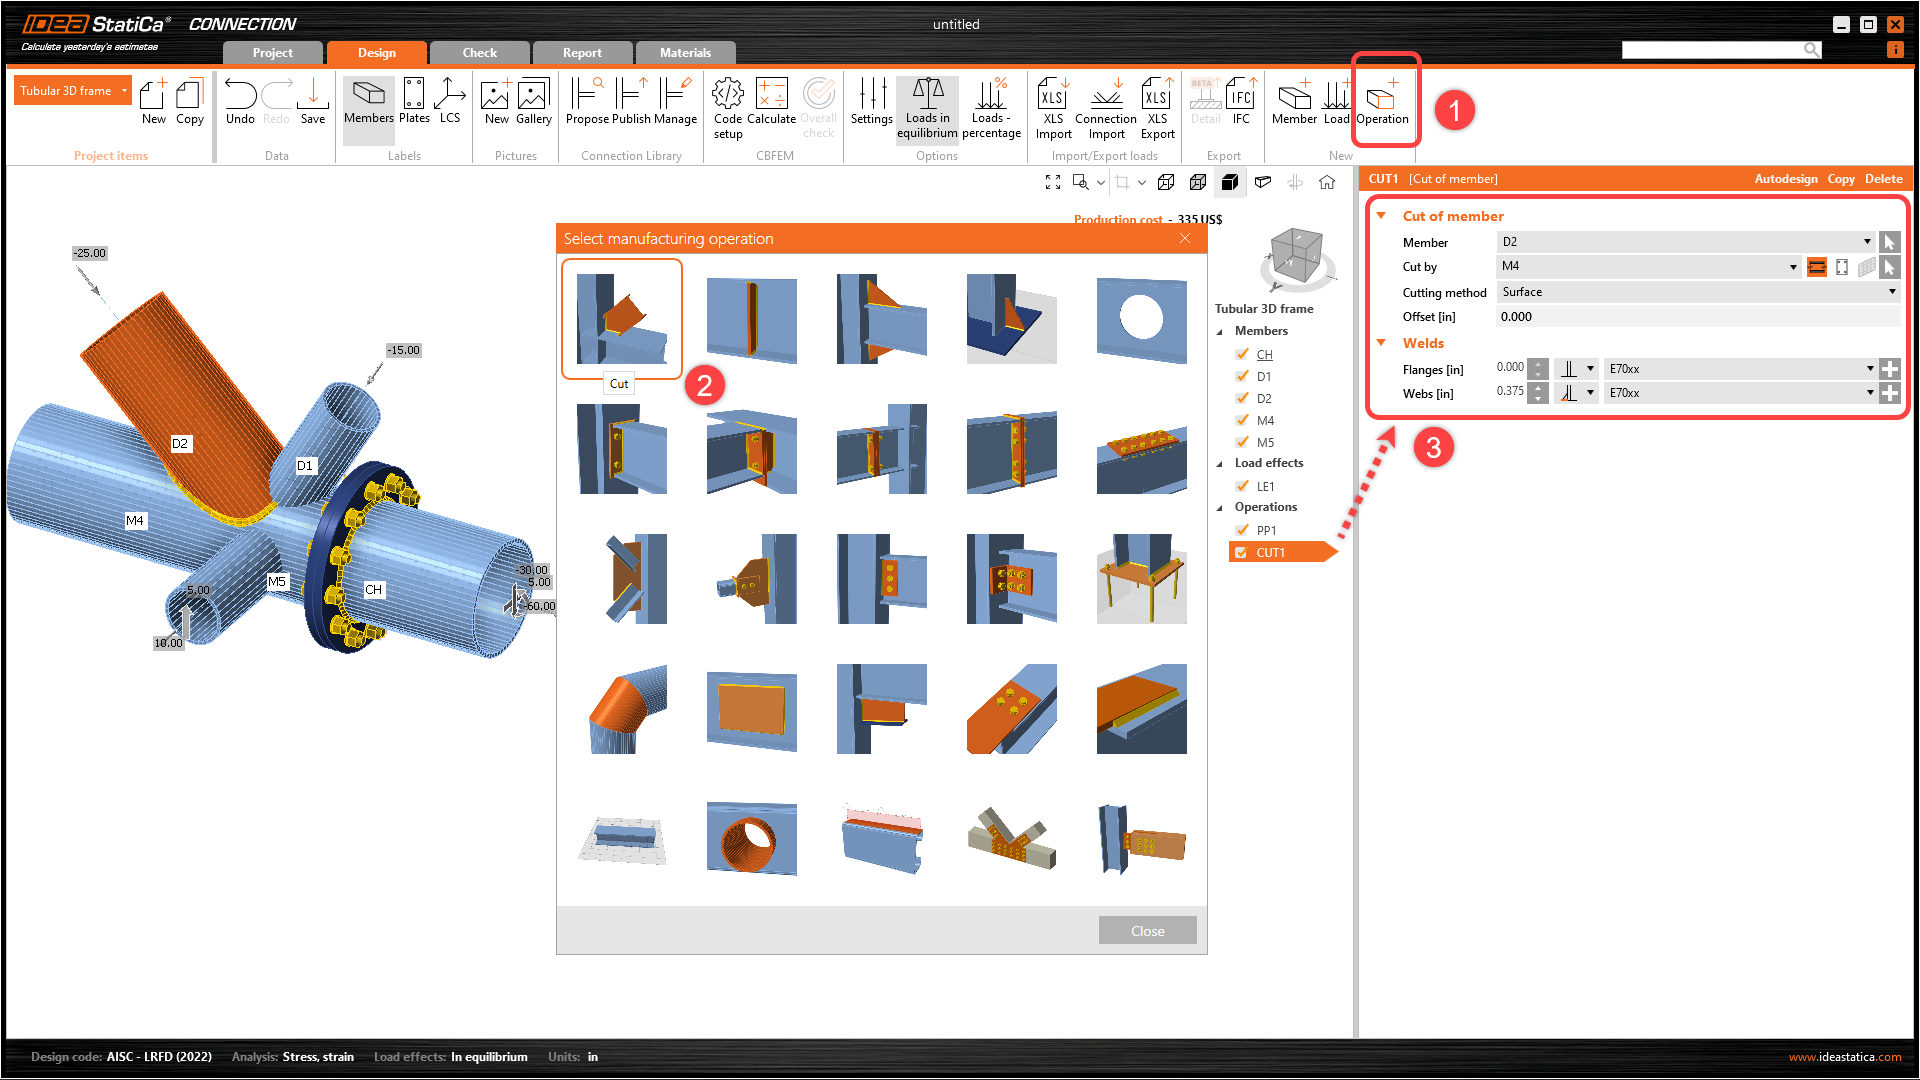
Most csatlakoztassa a többi szerkezeti elemet a Vágás gyártási műveletekkel. Adjon hozzá egy új műveletet a felső szalagon az Művelet funkcióval a D2 szerkezeti elem vágásához. Módosítsa a CUT1 művelet tulajdonságait az alábbi kép szerint.
Használja ki a már meghatározott műveletet: kattintson jobb gombbal a CUT1 műveletre, és válassza a Másolás parancsot.

Módosítsa a CUT2 művelet tulajdonságait az alábbi kép szerint.

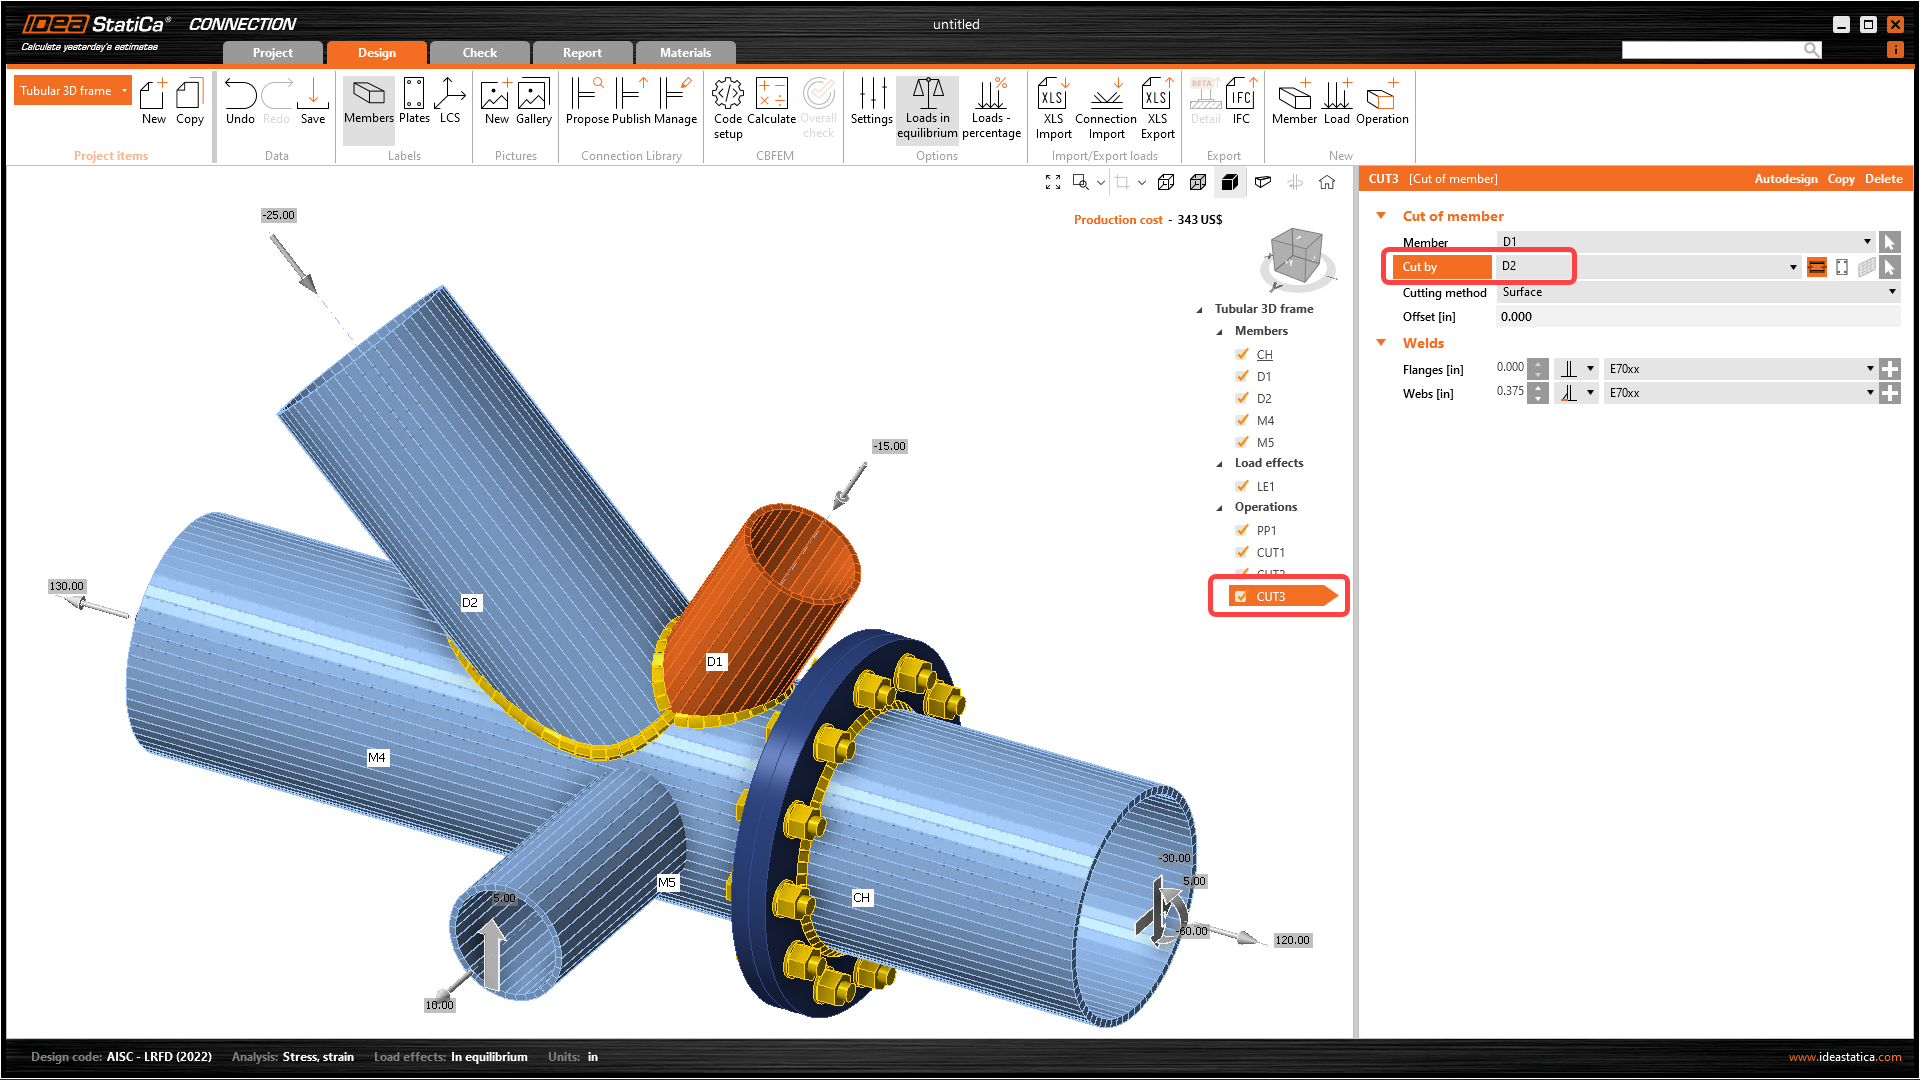
Másolja a CUT2 gyártási műveletet, és módosítsa a CUT3 gyártási művelet tulajdonságait az alábbi kép szerint.
A csomópont tervezésének utolsó lépése a CUT3 utolsó másolata. Módosítsa a CUT4 tulajdonságait az alábbi kép szerint.

5 Számítás és ellenőrzés
Az elemzést közvetlenül a Tervezés fülön futtathatja a Számítás paranccsal.

Egy rövid idő elteltével az eredmények összefoglalója megjelenik a 3D nézet bal felső sarkában, és beállításra kerül az Általános ellenőrzési modell nézet. Szükség esetén gyorsan finomhangolhatja a modellt, ha nem vagyunk elégedettek.

Válassza az Ellenőrzés fület, és kapcsolja be az Egyenértékű feszültség, a Háló és a Deformált modell nézetet. A Csavarok részletes eredményeit is megtekintheti – bővítsük ki a B7 csavar eredményeit.

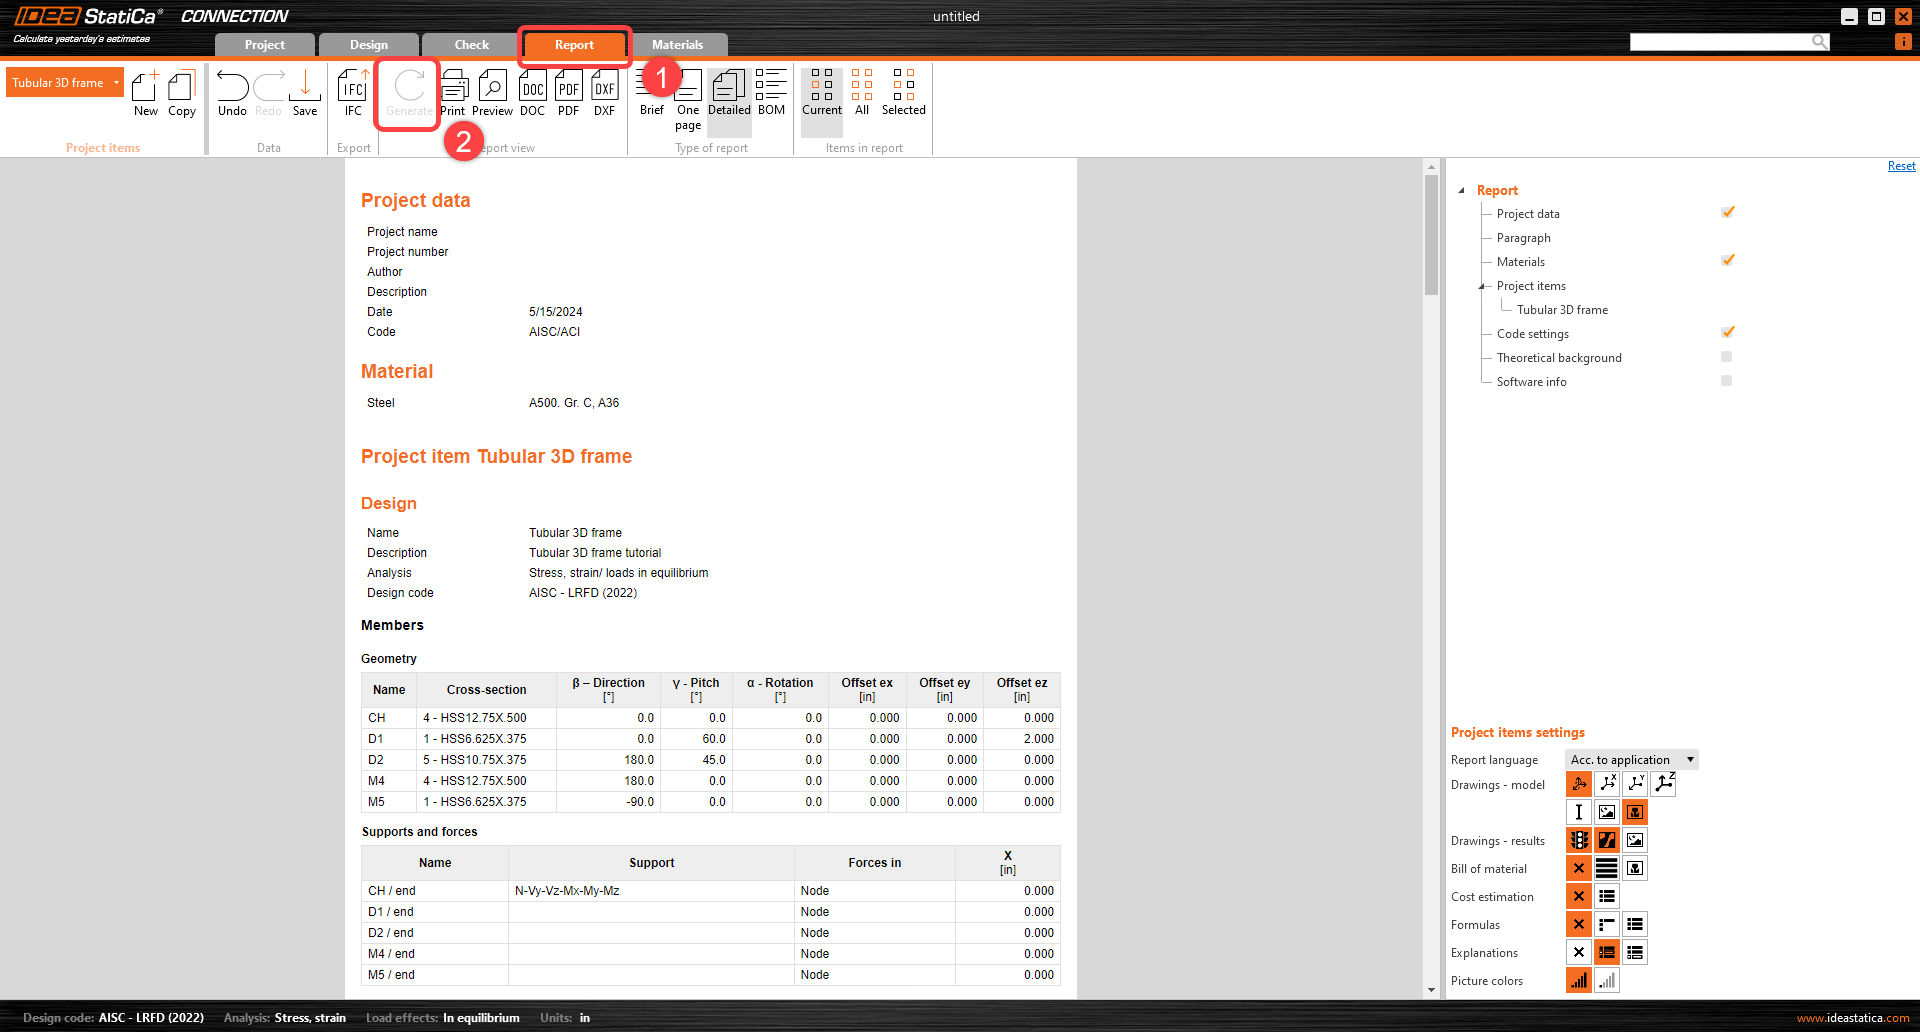
6 Jelentés
Végül lépjen a Jelentés fülre. Az IDEA StatiCa teljes mértékben testreszabható jelentést kínál nyomtatáshoz vagy szerkeszthető formátumban való mentéshez.
Megtervezte, optimalizáltaés elvégezte a szabványellenőrzést egy szerkezeti acél csomóponton az AISC szerint.