
Advance Design BIM-koppeling voor staalverbinding ontwerp (EN)
Hoe activeer je de link.
- Download en installeer de laatste versie van IDEA StatiCa
- Zorg ervoor dat u een ondersteunde versie van uw FEA/BIM-oplossing gebruikt.
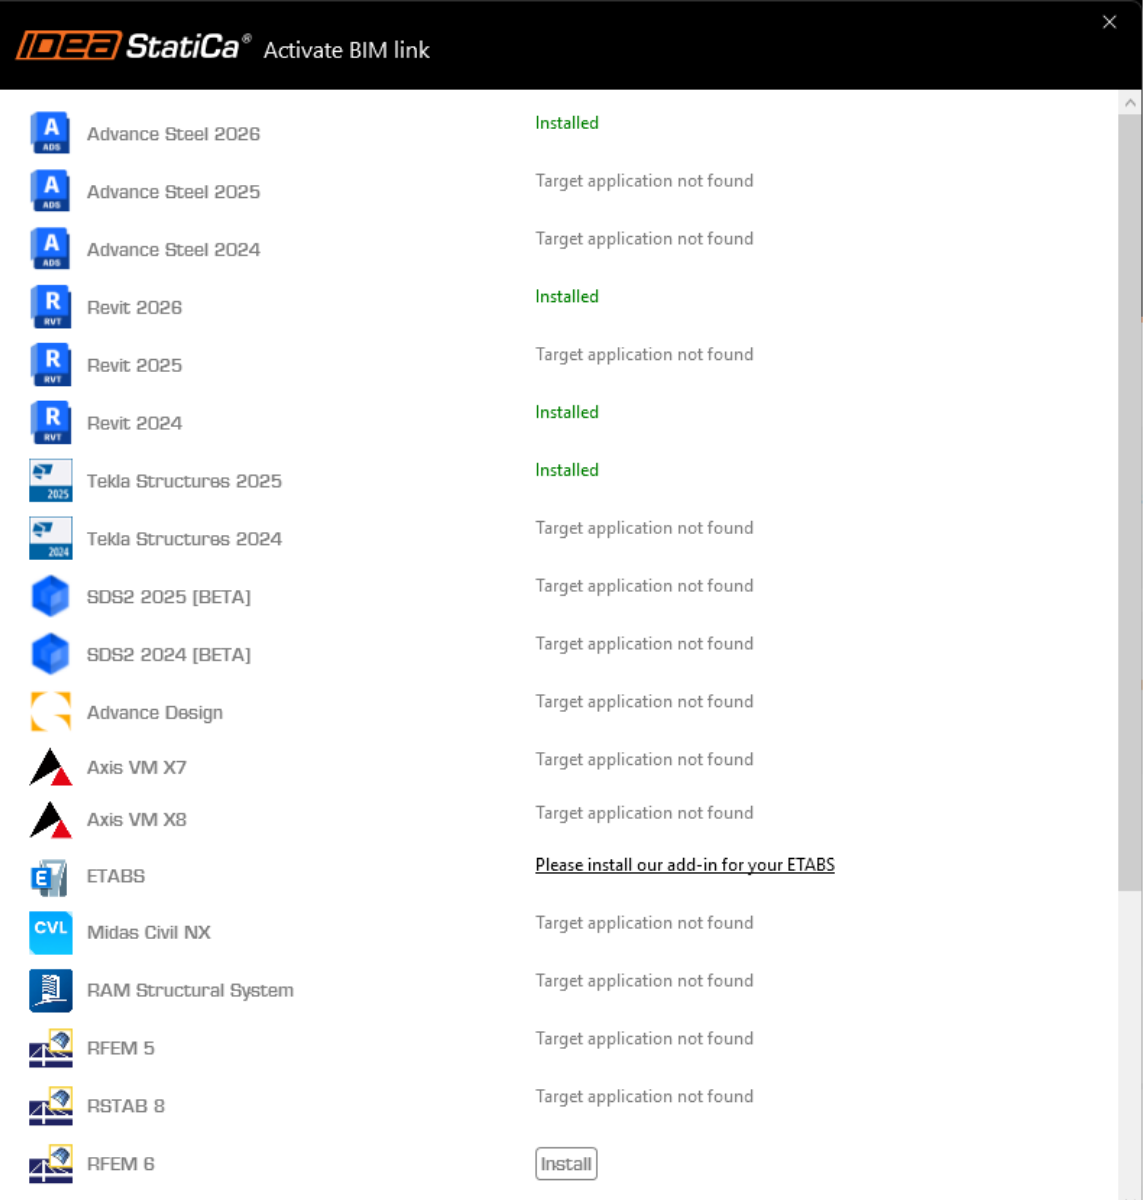
IDEA StatiCa integreert BIM-links in uw FEA/BIM-oplossingen tijdens de installatie ervan. U kunt de status controleren en meer BIM links activeren voor software die na de installering in de BIM link installer is opgenomen.
Houd er rekening mee dat sommige FEA-oplossingen extra stappen vereisen om de BIM-link met IDEA StatiCa volledig te activeren.
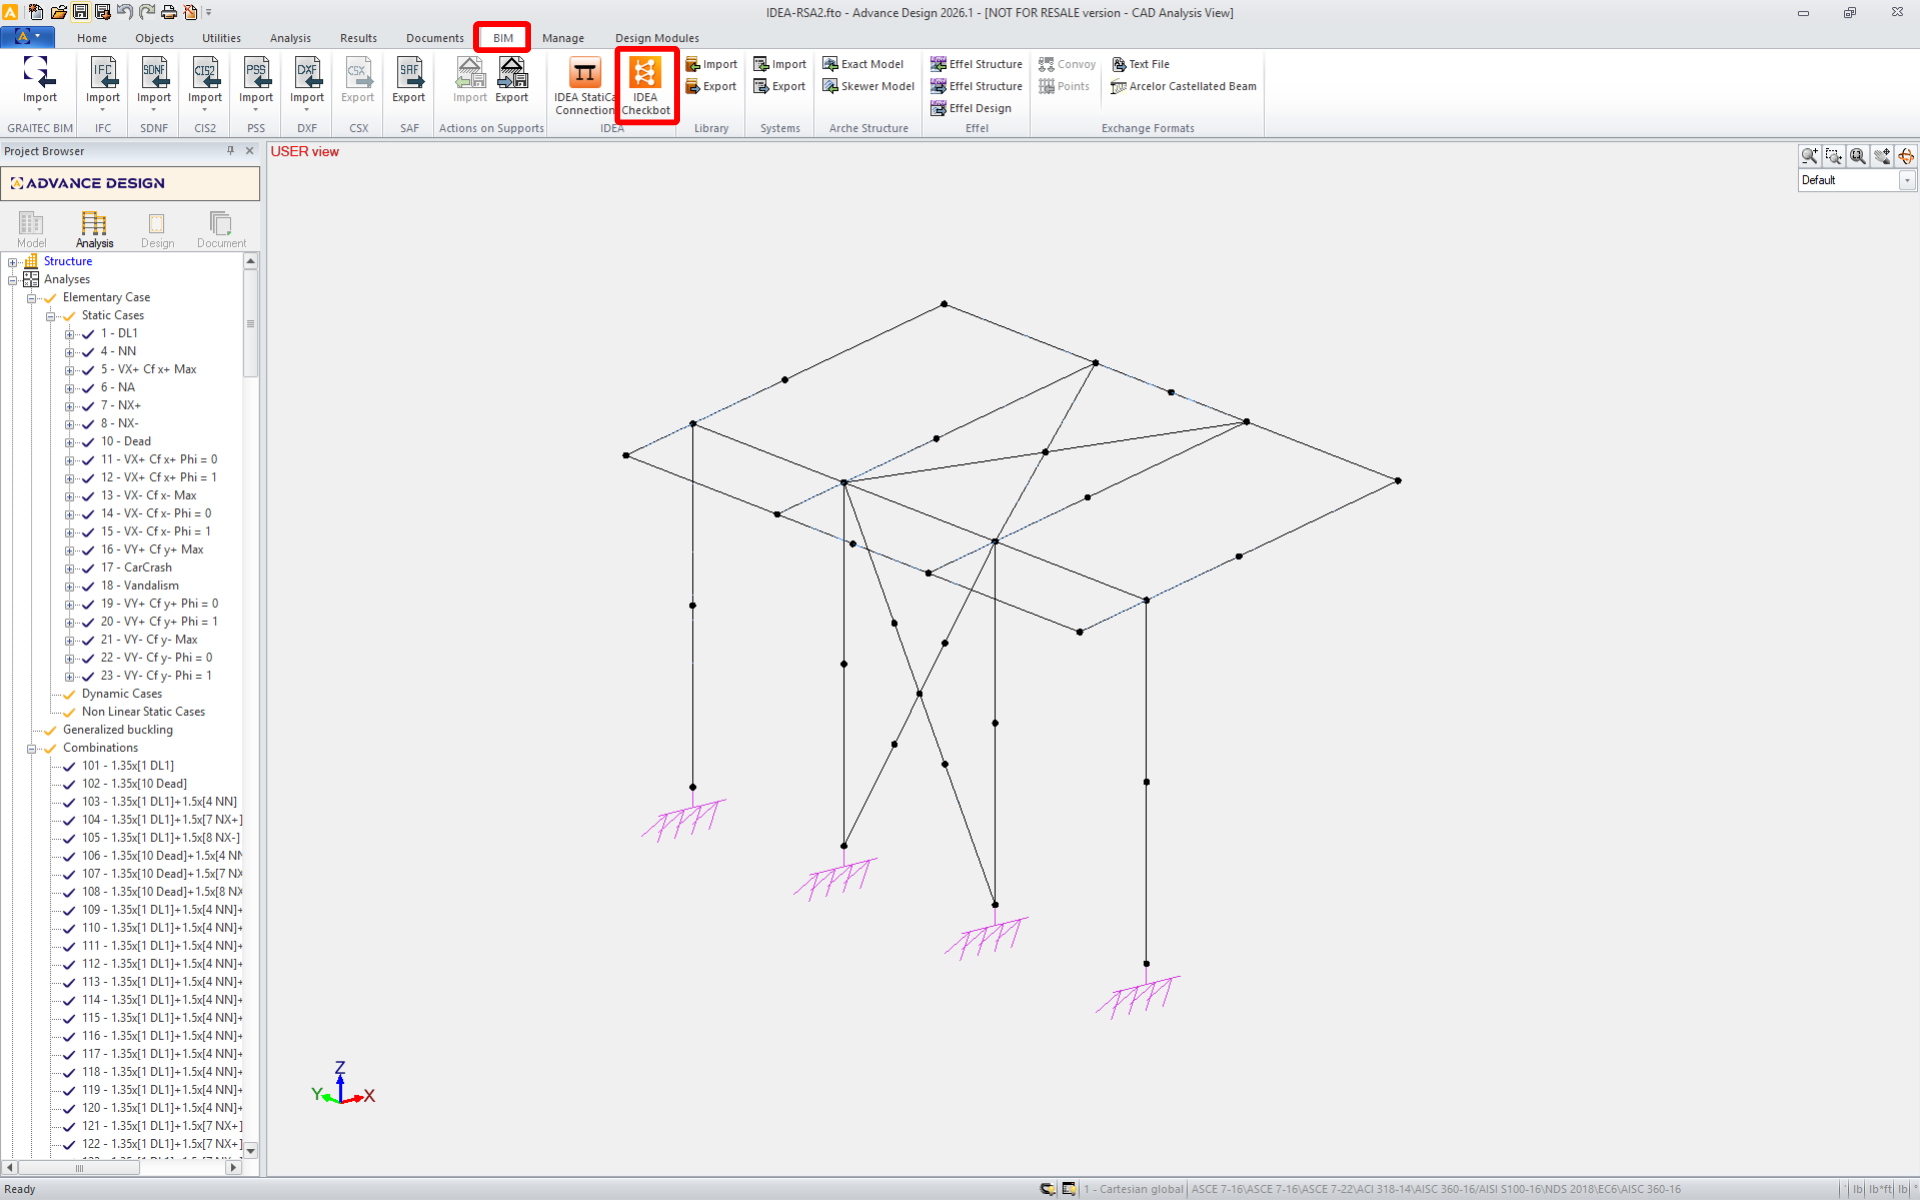
Open IDEA StatiCa en navigeer naar de BIM tab en open de BIM link installer (Activate your BIM link...).
Er kan een melding verschijnen "Wilt u toestaan dat deze app wijzigingen aanbrengt aan uw apparaat?", zo ja, bevestig dan met de Ja-knop.
De BIM-link voor de geselecteerde software (indien gevonden) wordt geïnstalleerd. Het scherm toont ook de status van andere BIM-links die mogelijk al zijn geïnstalleerd.
Hoe de koppeling te gebruiken
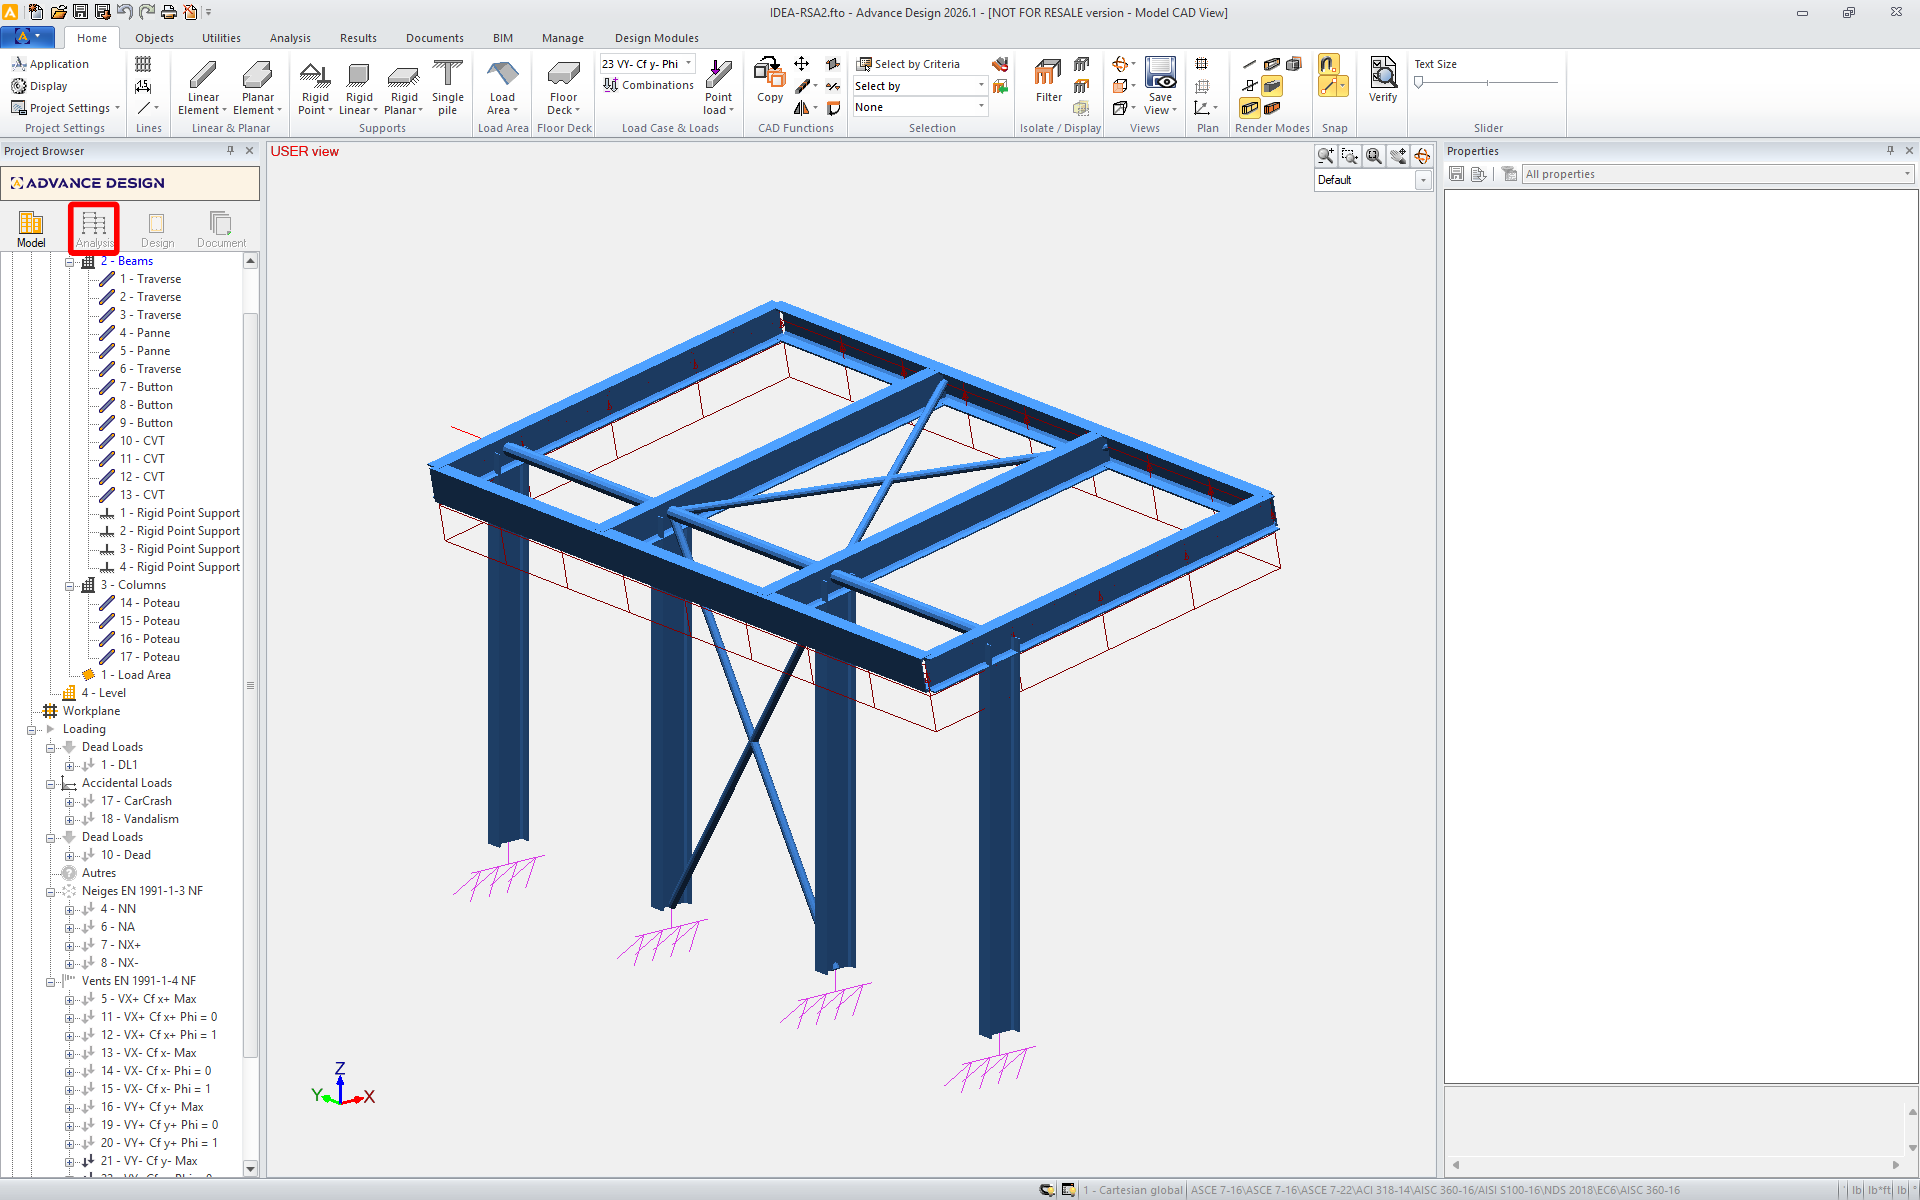
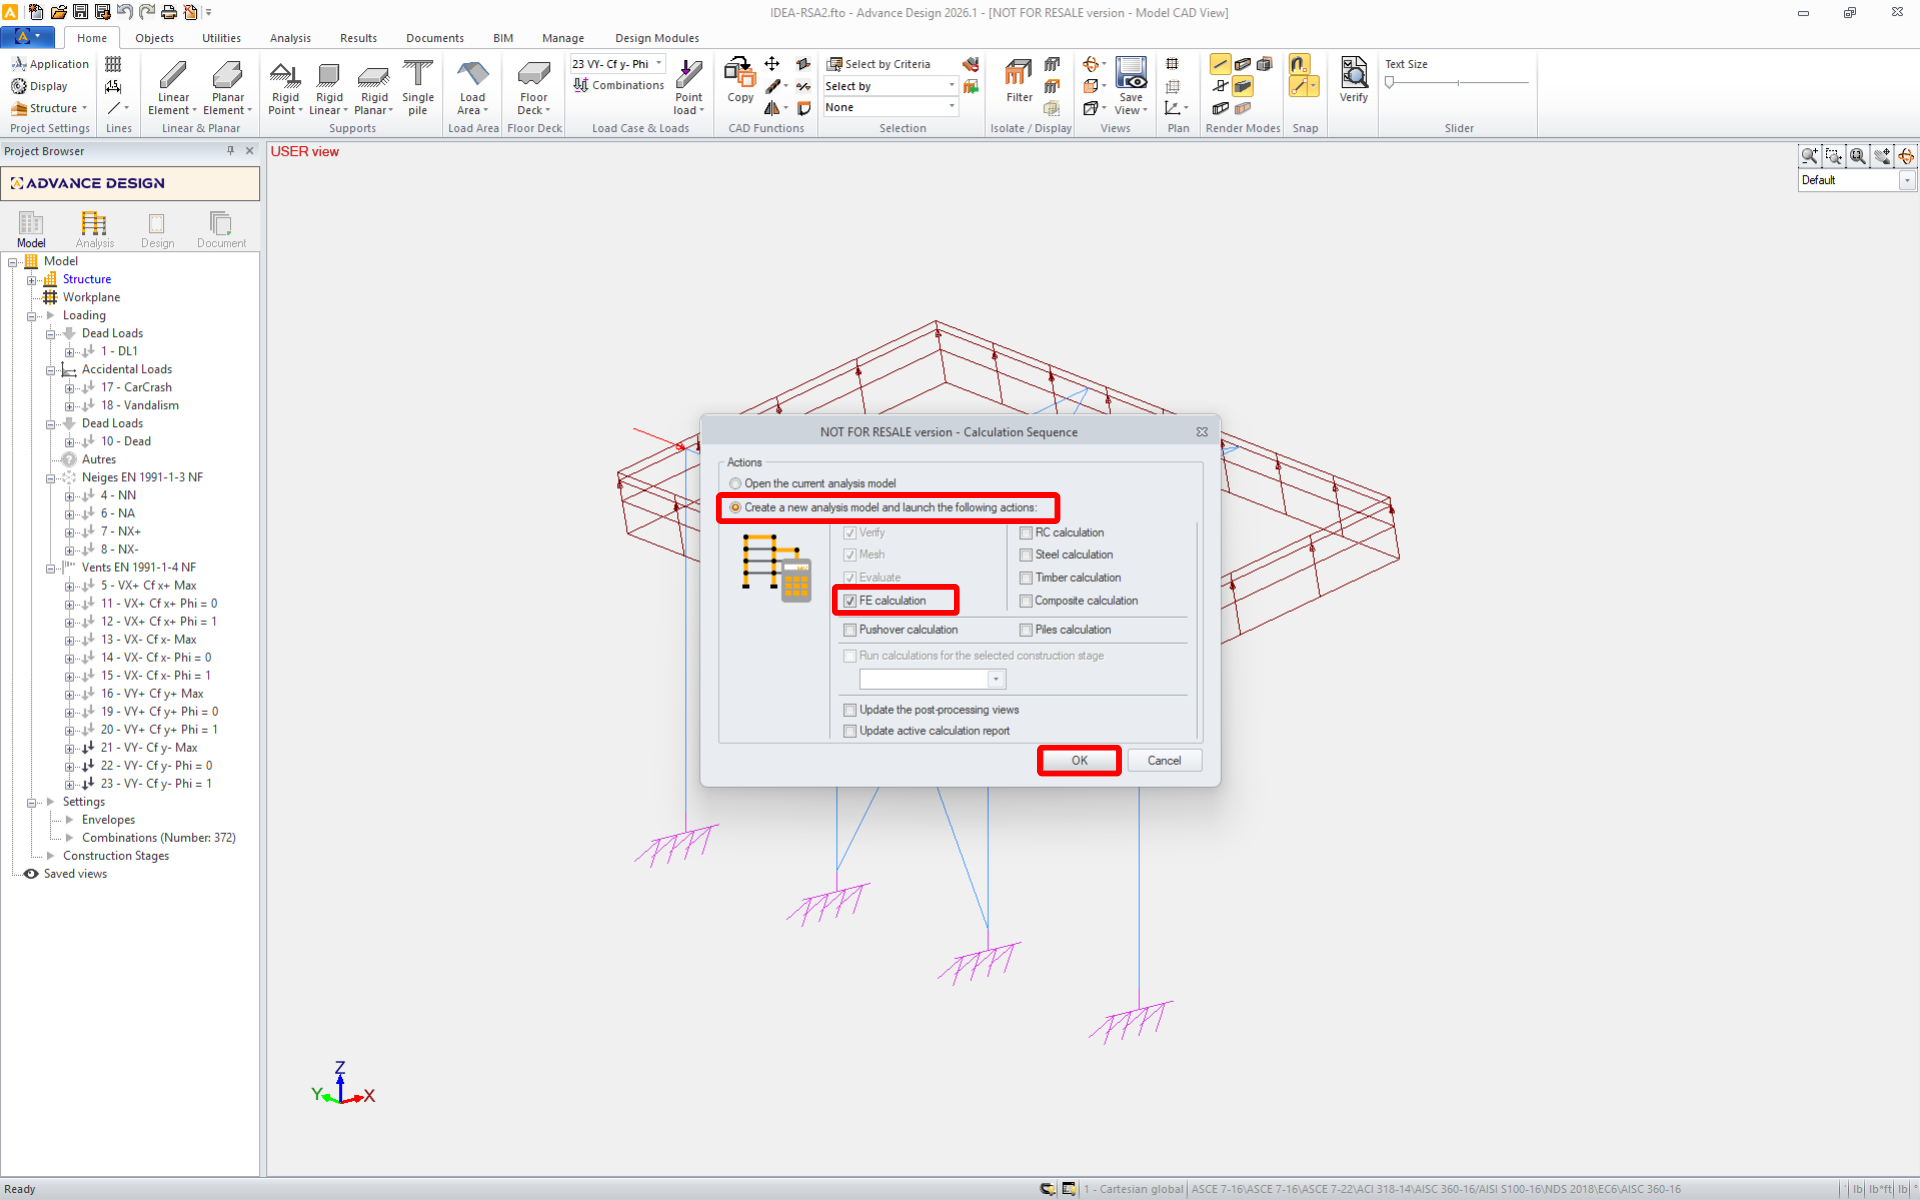
Download het bijgevoegde project, open het in Advance Design en voer de lineaire analyse uit om de inwendige krachten over de constructie te verkrijgen.
De BIM-koppeling is automatisch geïntegreerd. U kunt deze vinden in het bovenste lint onder BIM -> IDEA -> IDEA Checkbot.
Dit opent de Checkbot applicatie.
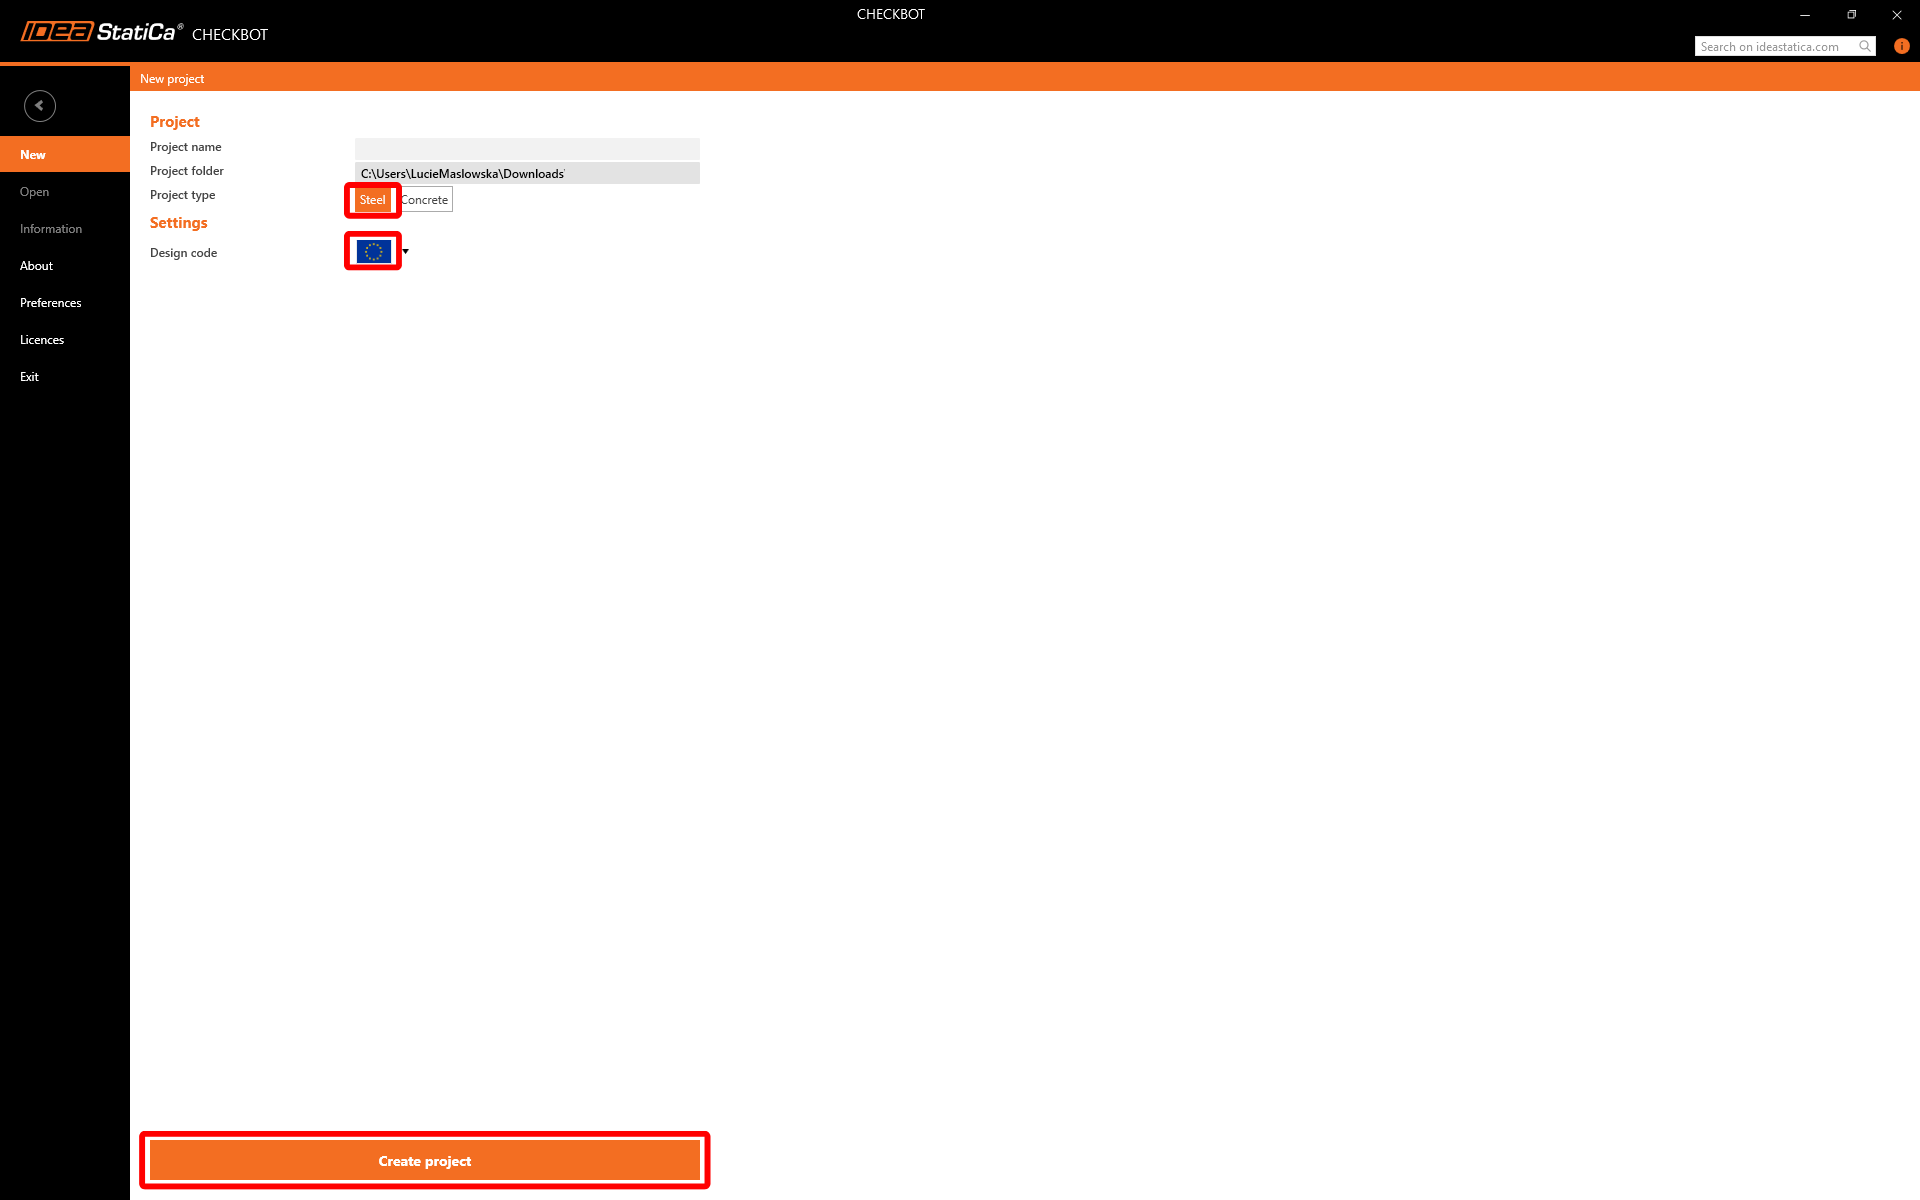
Selecteer de optie Nieuw met projecttype Staal en ontwerpnorm EN. Klik vervolgens op Project aanmaken.
Het nieuwe Checkbot-project is gereed om verbindingen te importeren.
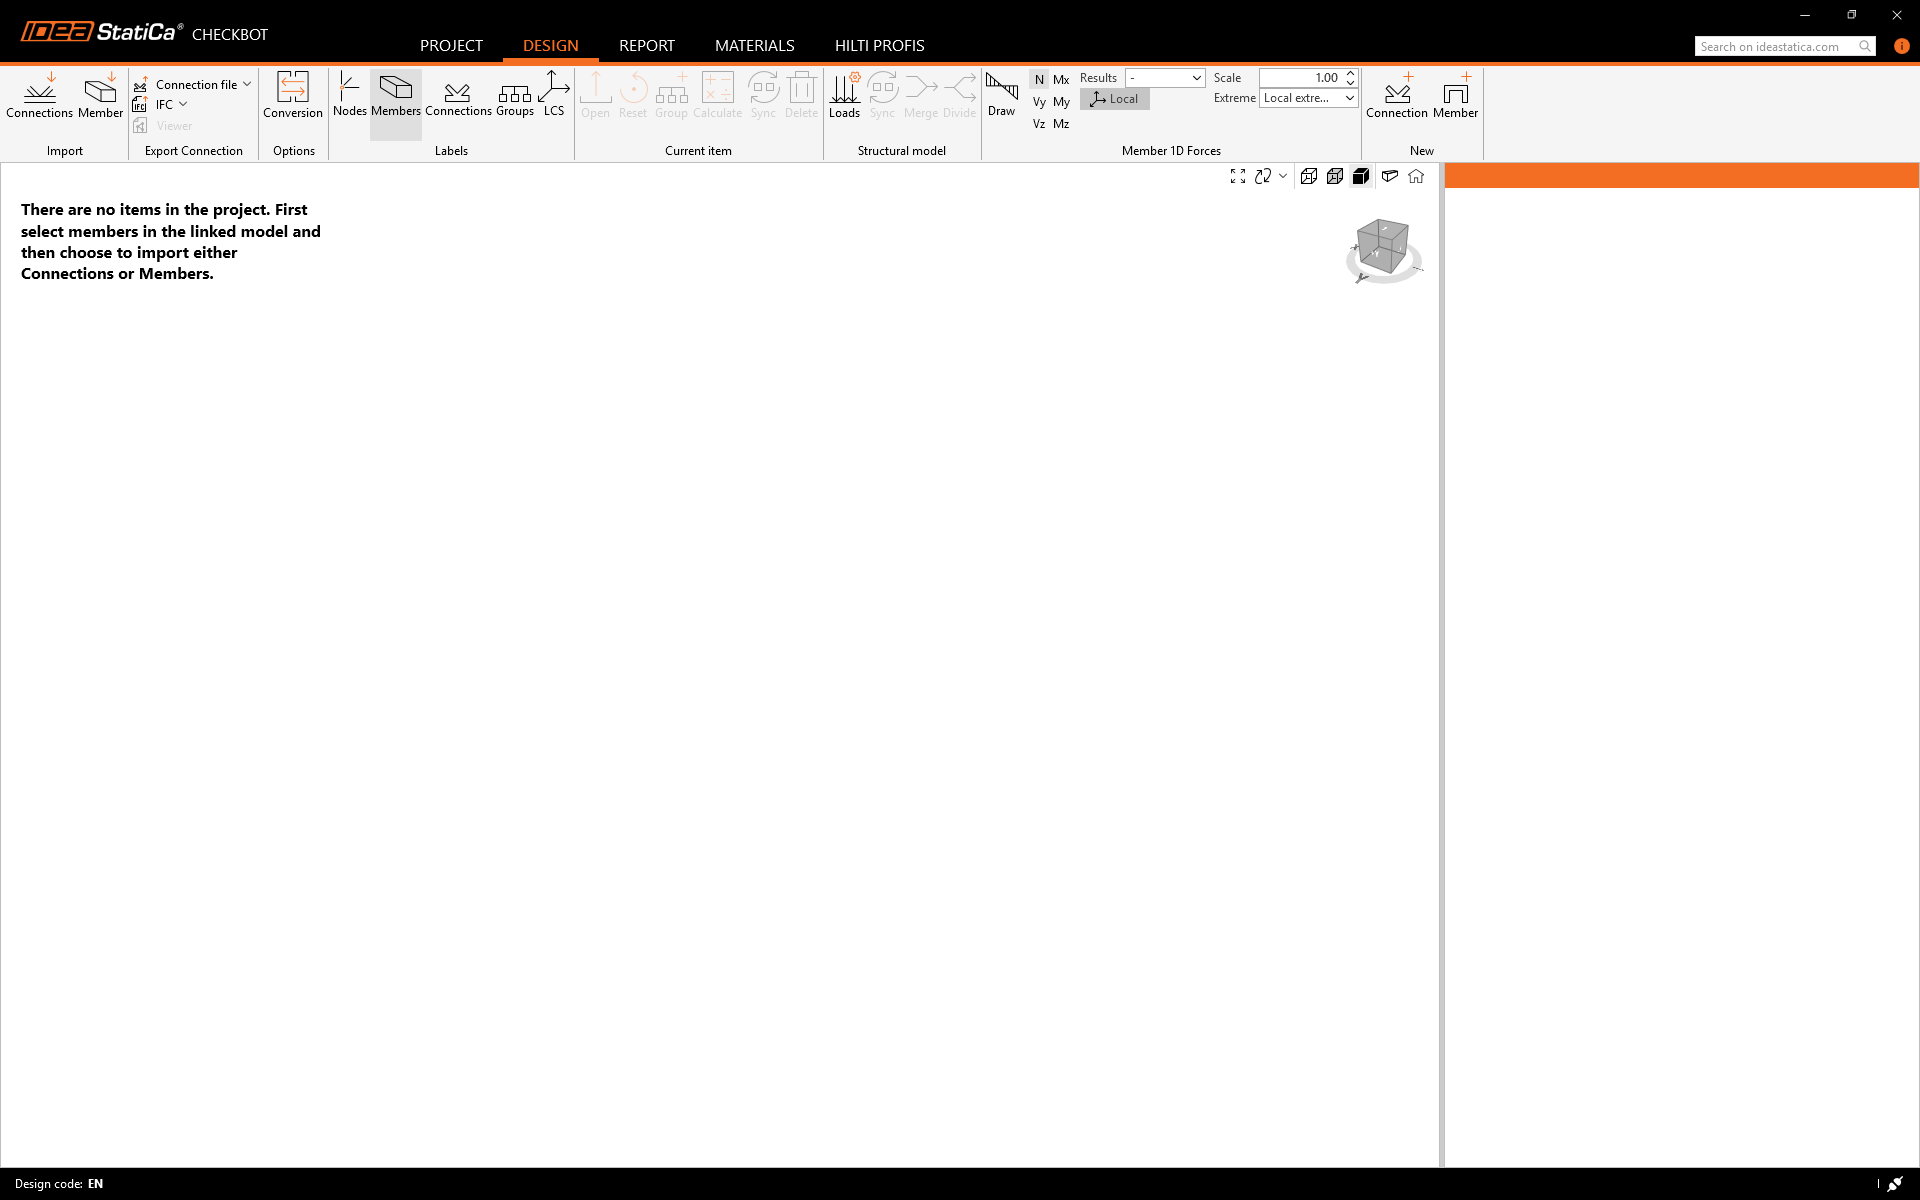
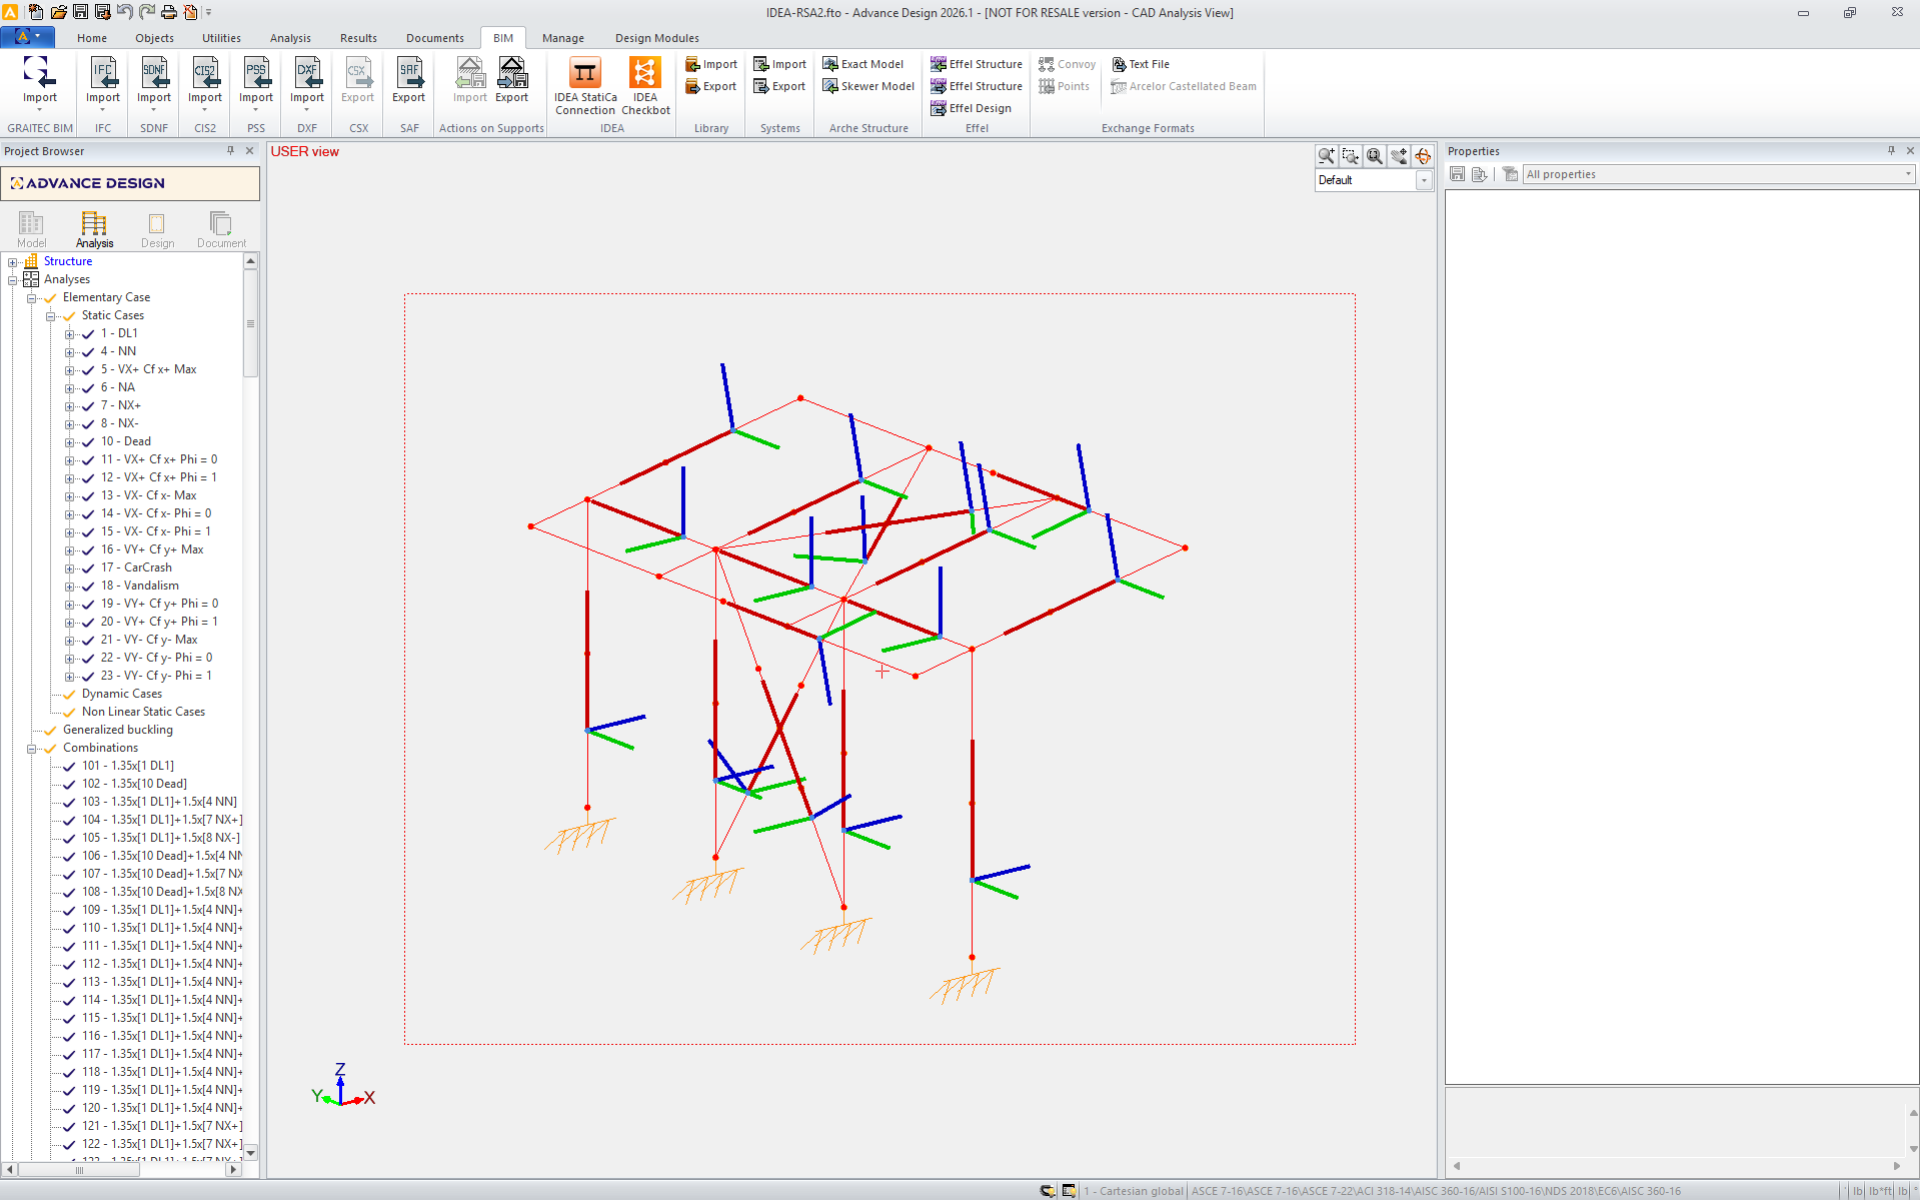
Selecteer de constructie in Advance Design en druk op Verbindingen in de Checkbot.
Tijdens het importeren kan een Conversie-dialoogvenster verschijnen als sommige doorsneden niet automatisch worden herkend. Wijs handmatig de juiste materialen of profielen toe om verder te gaan.
Opmerking: Checkbot onthoudt uw toewijzing. Toekomstige importen van elementen met identieke parameters worden automatisch herkend, waardoor deze stap wordt overgeslagen.

Ga verder met het importeren om de constructie en belastingseffecten over te brengen naar Checkbot, waarbij de oorspronkelijke coördinaten, oriëntaties en doorsneden behouden blijven. Opmerking: De knoop- en staafnummering kan afwijken van uw EEM-model.
De groeperingsfunctionaliteit maakt automatisch groepen van verbindingen aan op basis van typologie en/of doorsneden. Elke groep wordt vertegenwoordigd door de referentieverbinding (onderstreept in de boom), die automatisch wordt aangewezen als de bovenliggende verbinding die het ontwerp voor de gehele groep bepaalt. Alle andere verbindingen worden behandeld als onderliggende verbindingen.
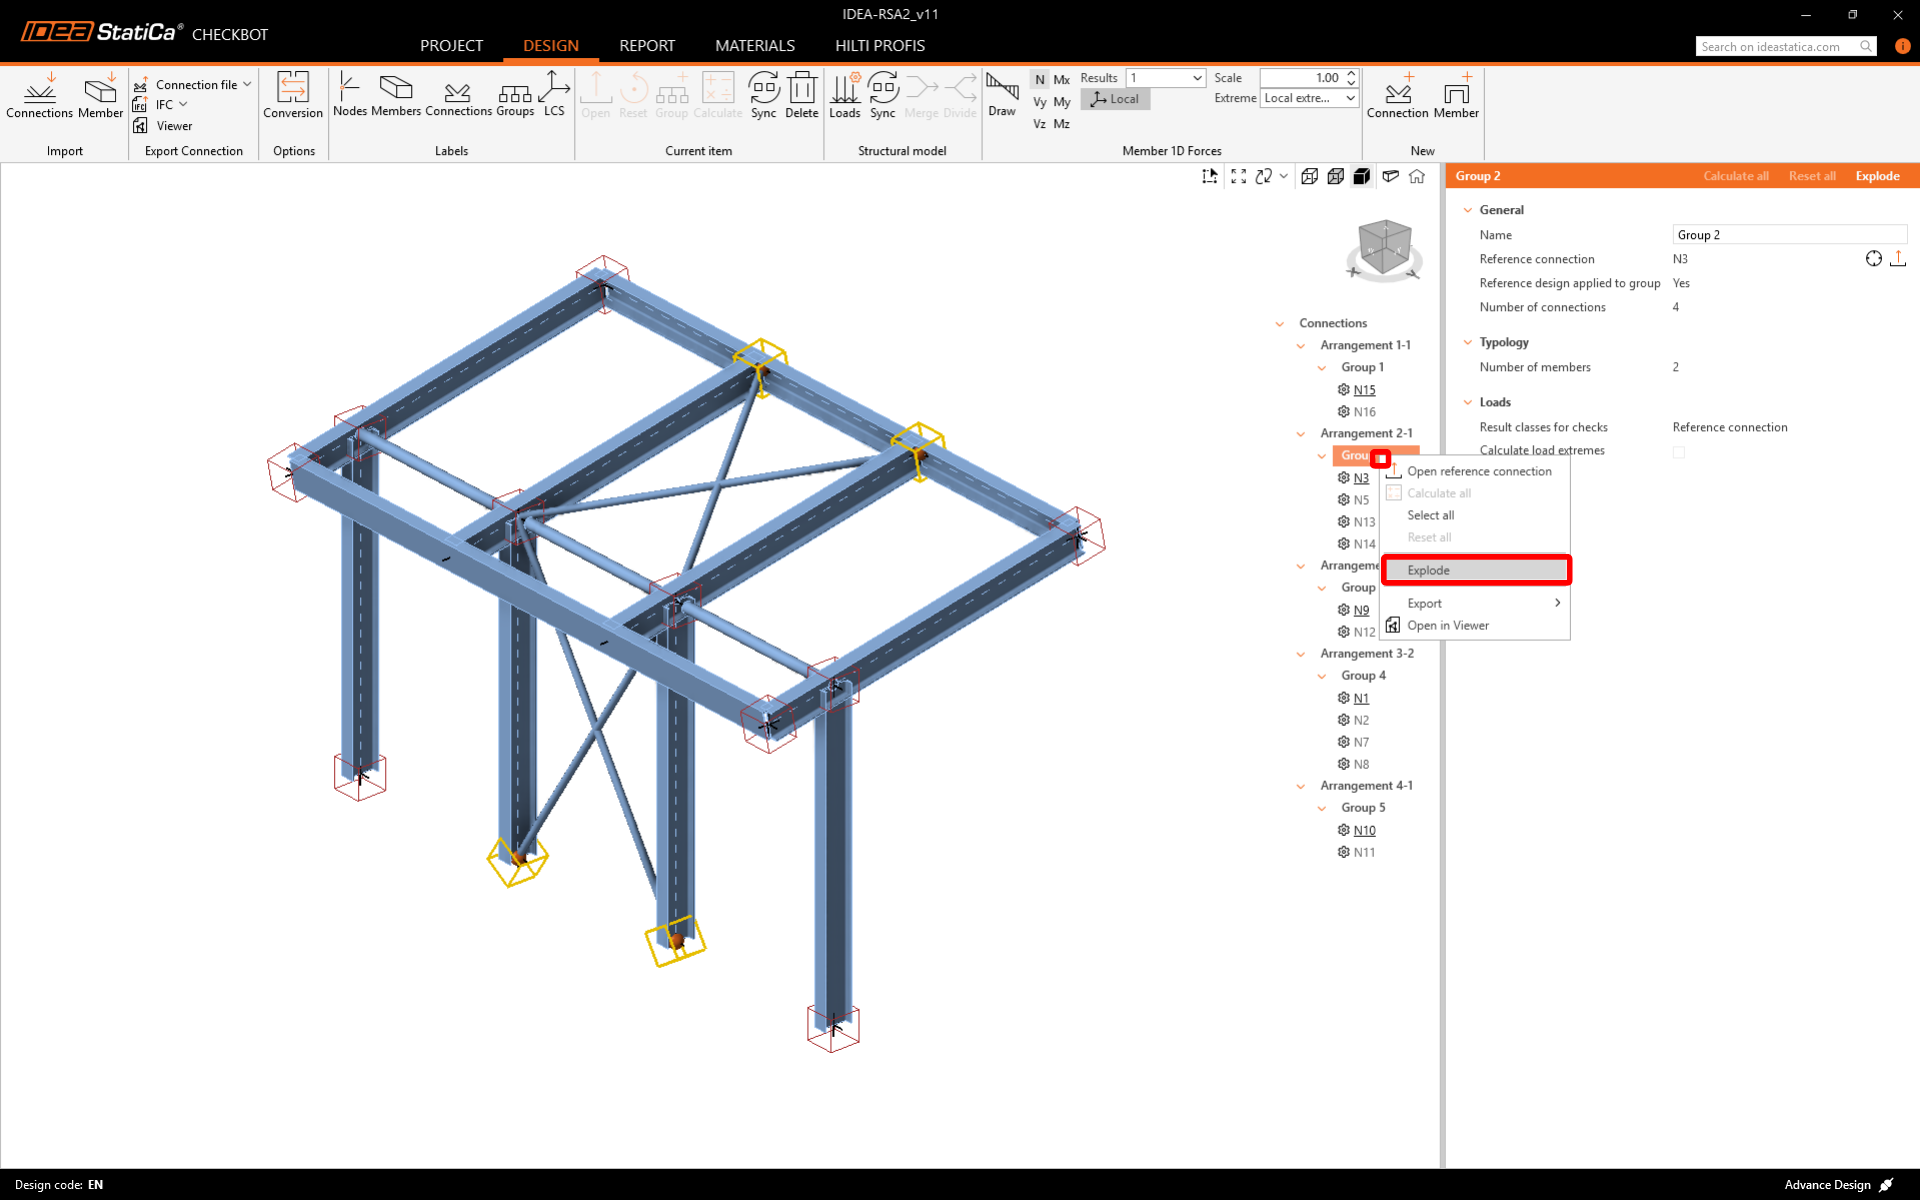
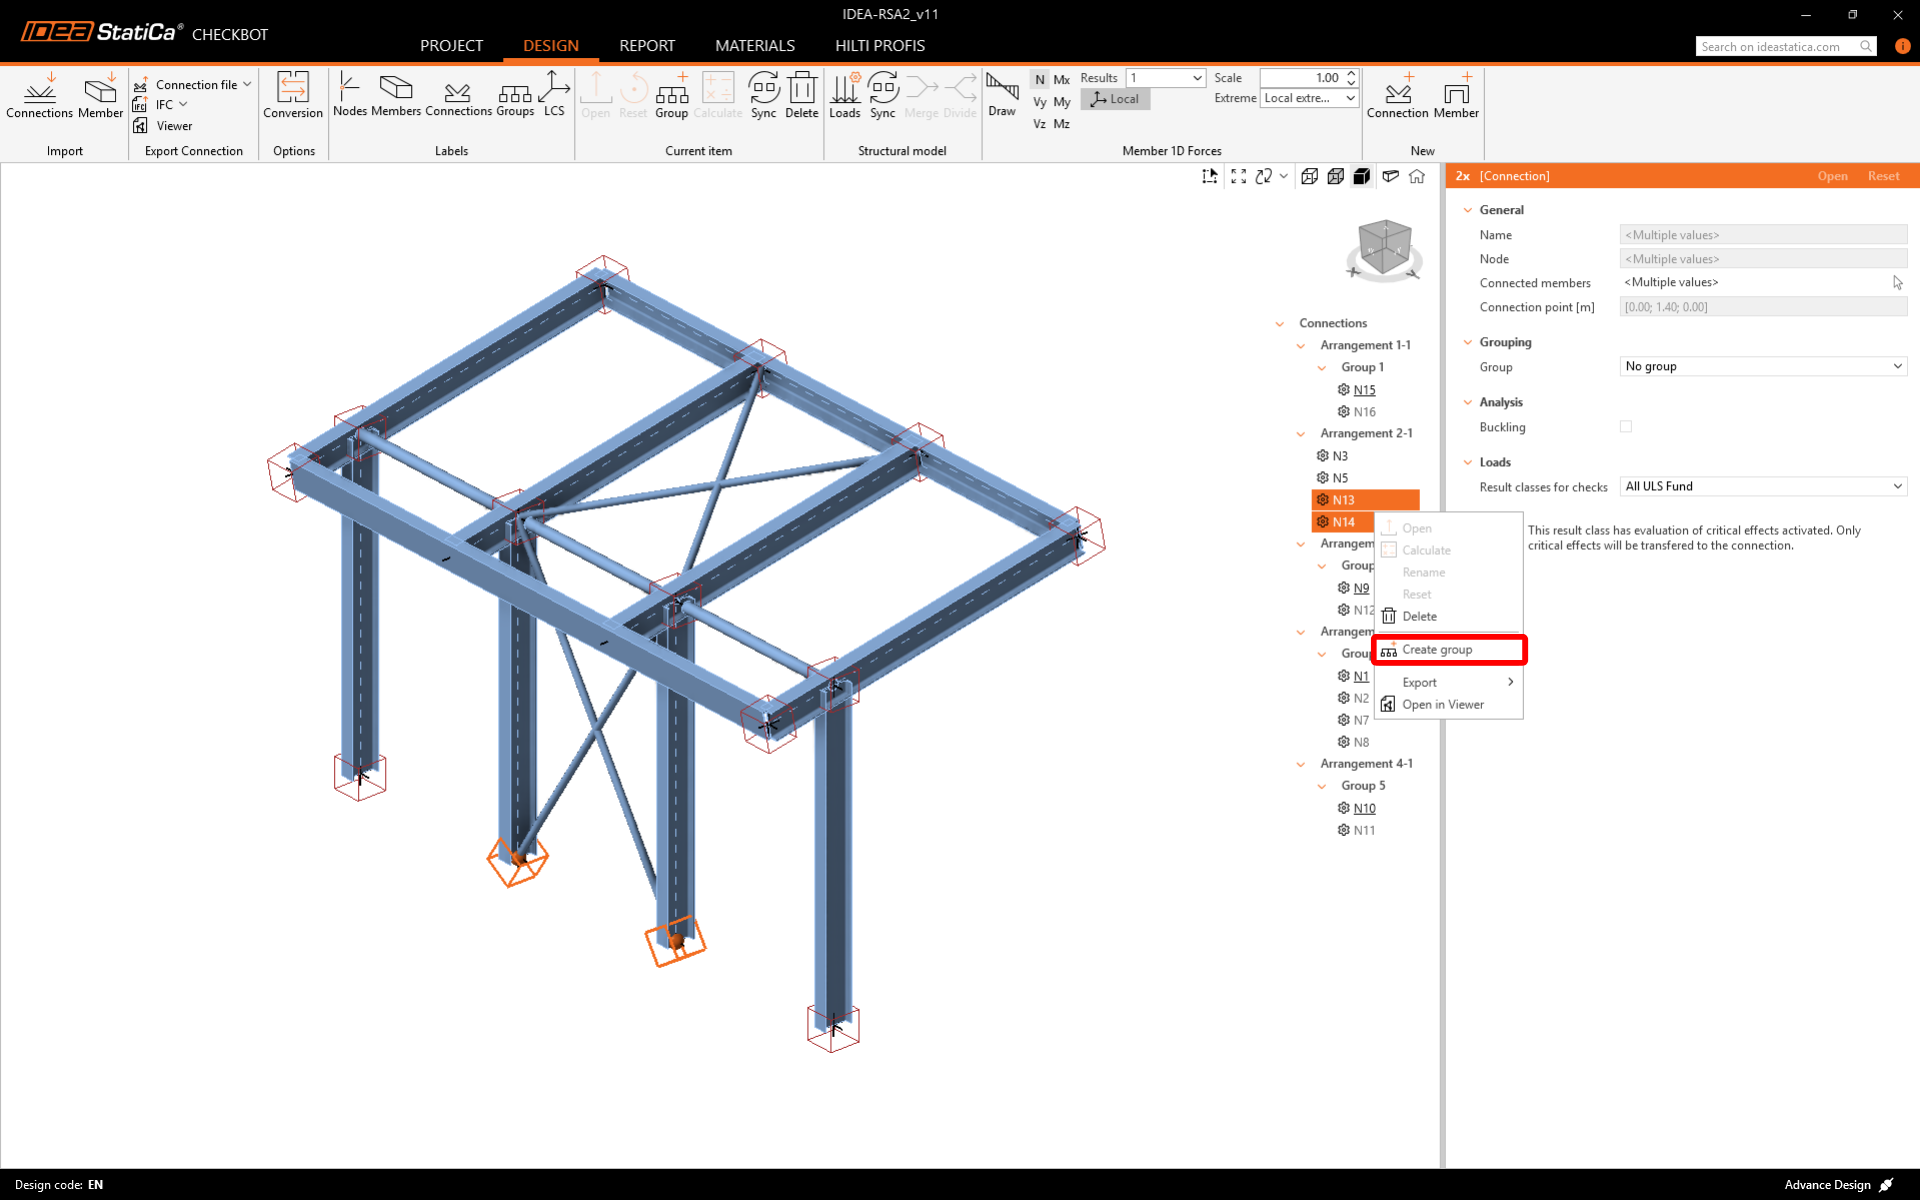
Als de groepen niet correct zijn aangemaakt, zoals in dit geval, kunt u ze Ontbinden en nieuwe aanmaken.
U kunt de geïmporteerde belastinggevallen en combinaties bekijken en aanpassen in het dialoogvenster Belastingen. Alle geïmporteerde belastinggevallen en belastingcombinaties staan aan de linkerkant vermeld, en de resultaatklassen die worden gebruikt voor de toetsingen staan in het midden. Als sommige belastinggevallen niet relevant zijn voor uw ontwerpverificatie, sluit ze dan uit door met de rechtermuisknop op de geselecteerde belastingen te klikken en ze uit de lijst met resultaatklassen te verwijderen.

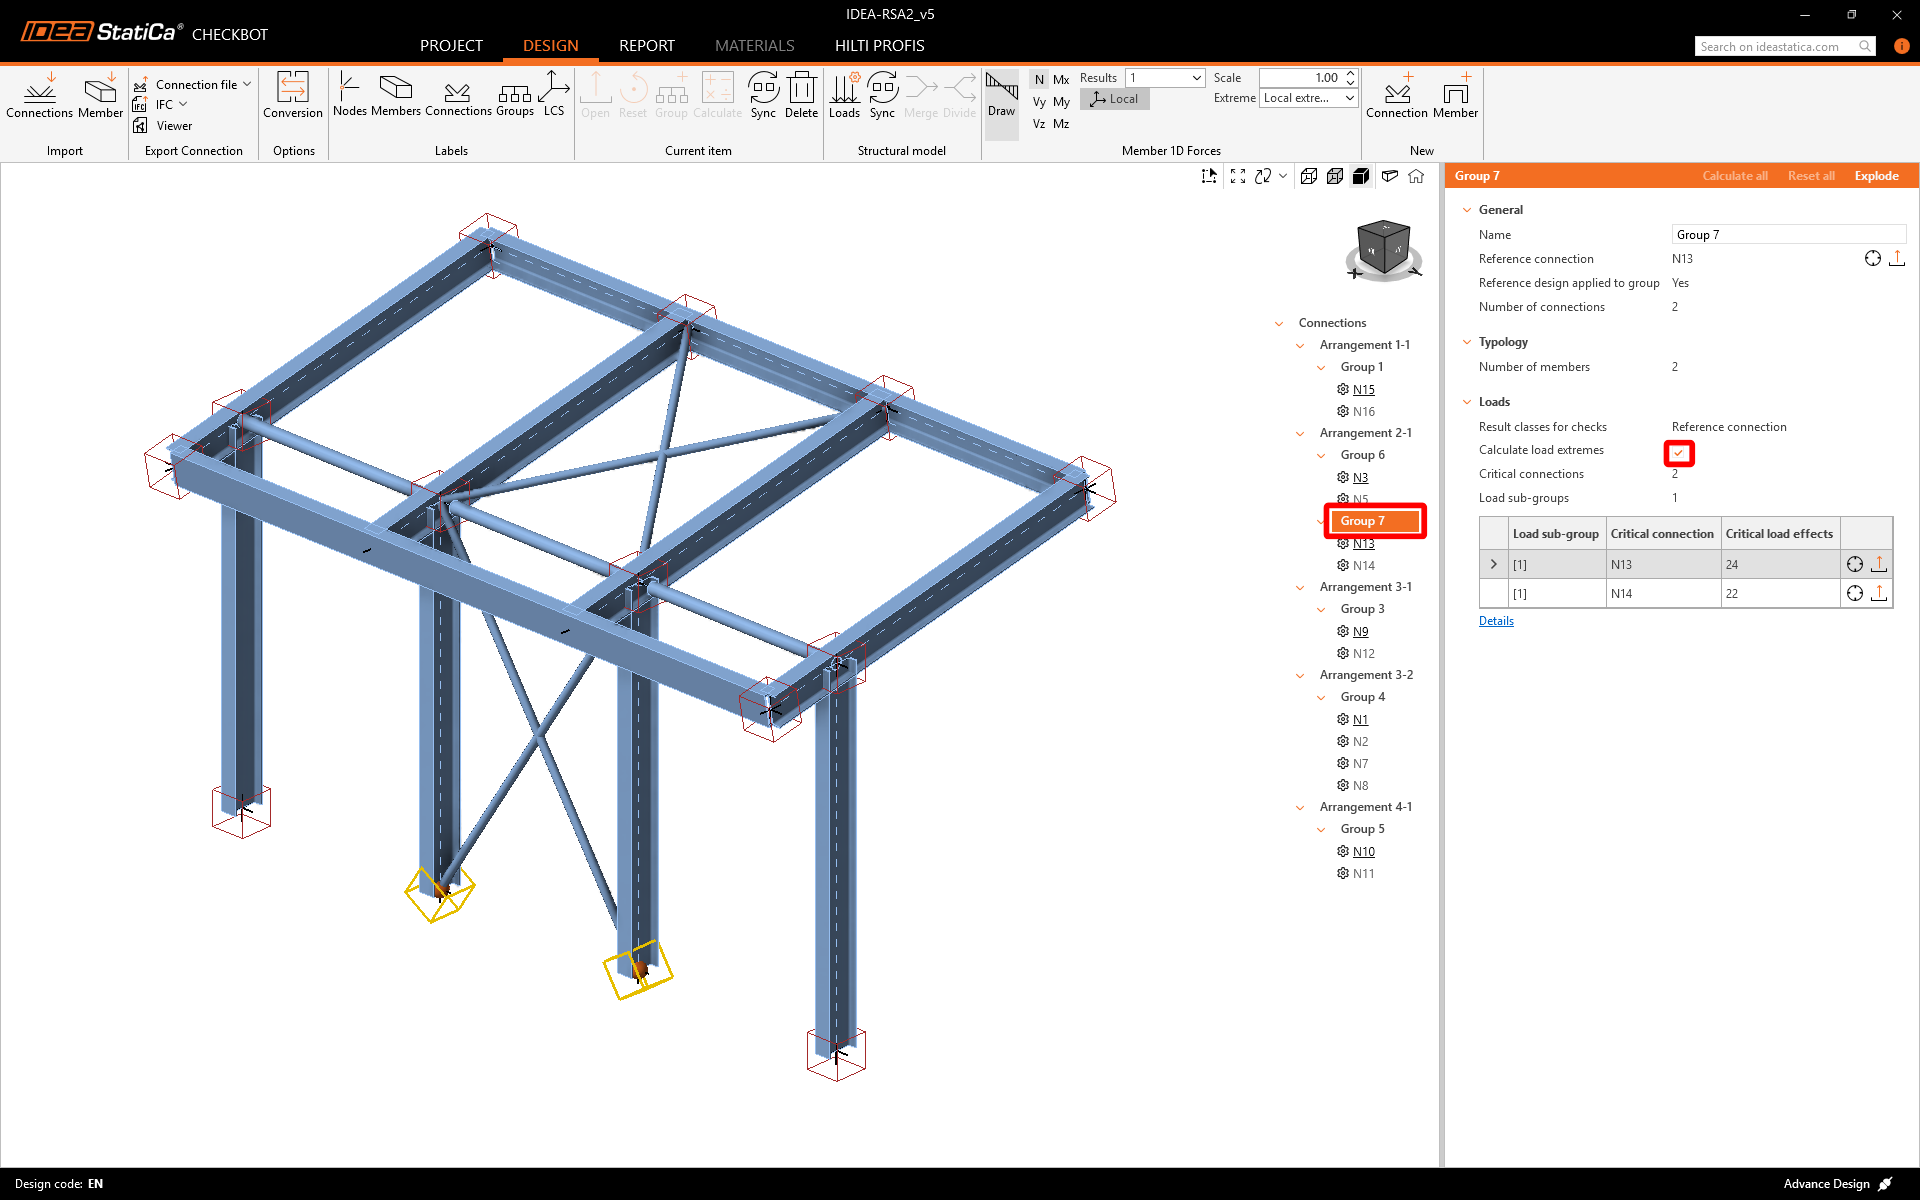
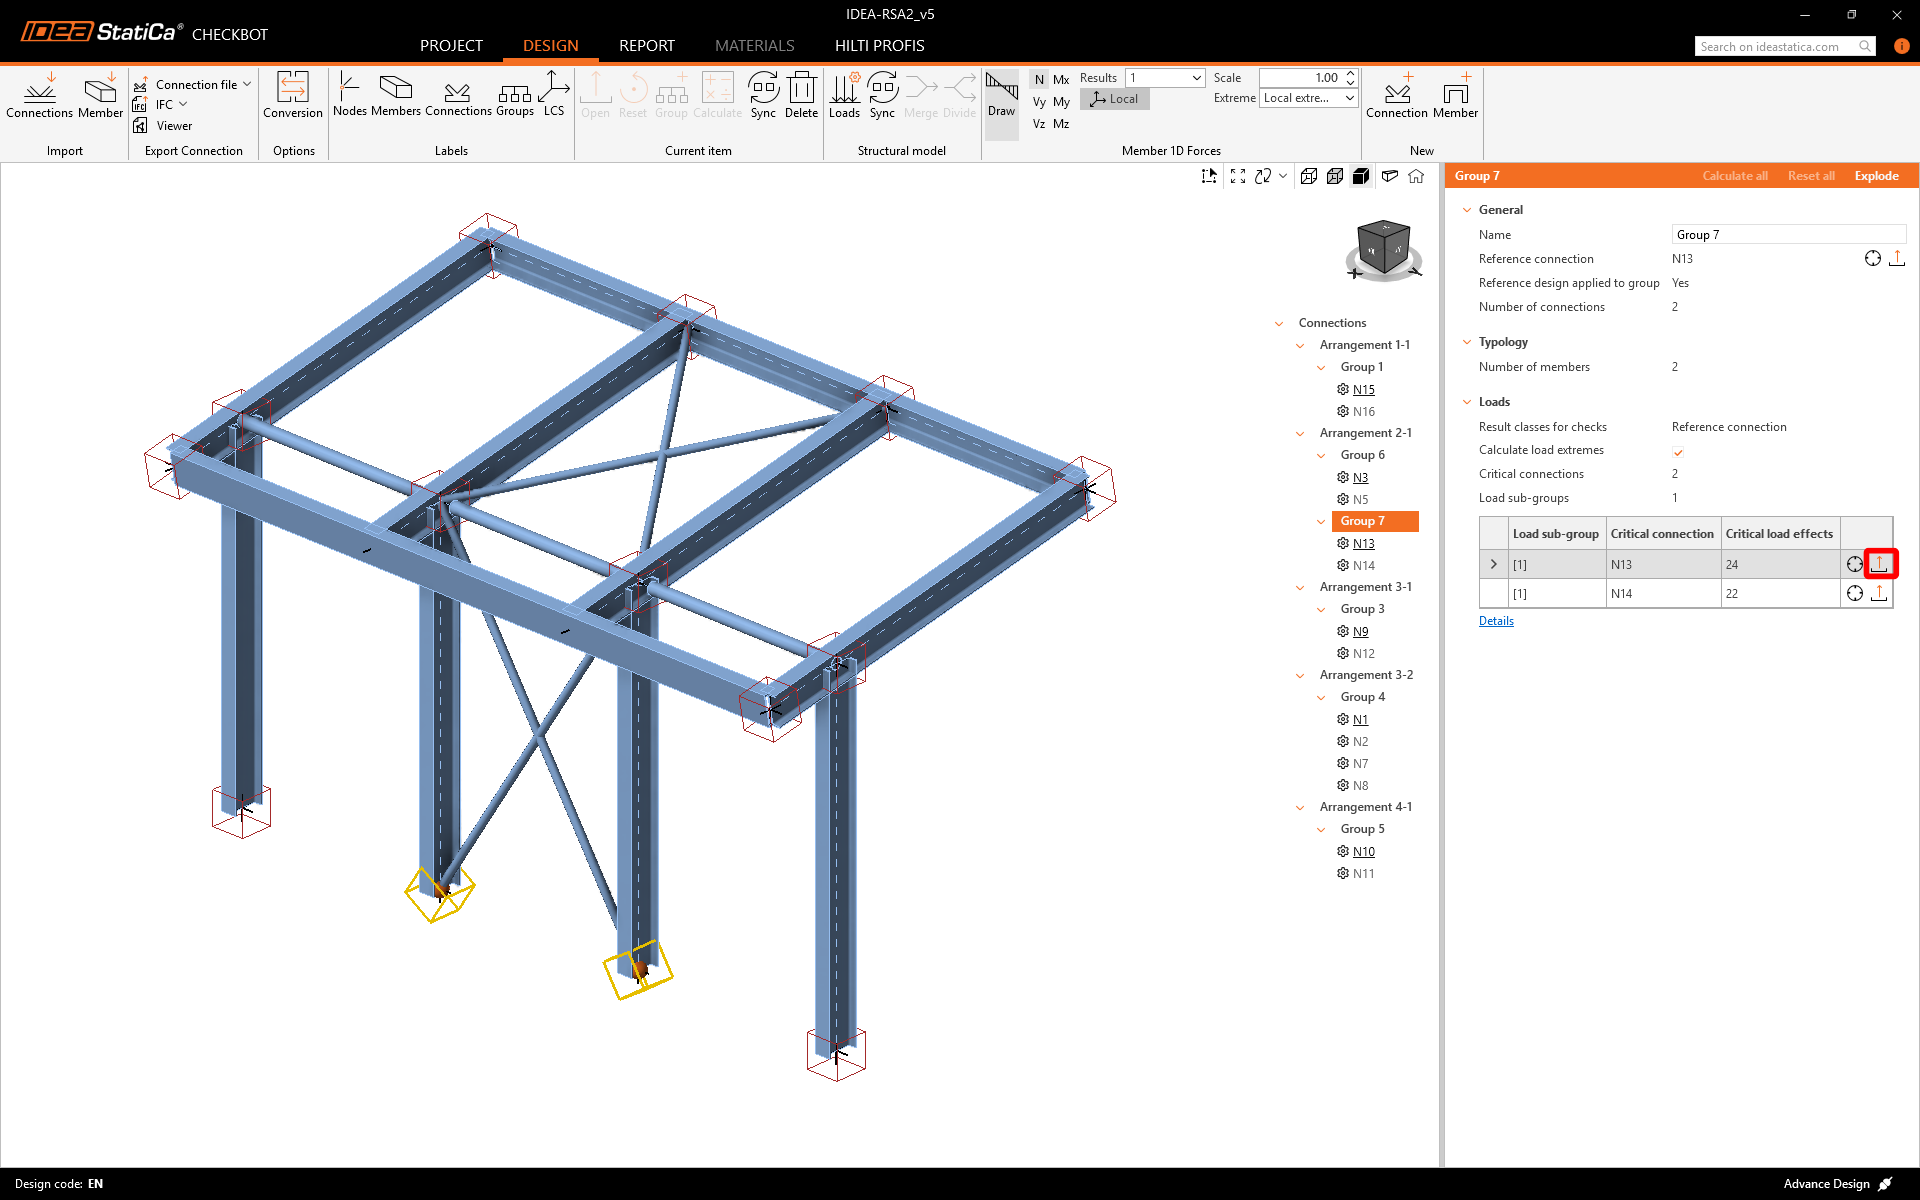
Voordat u de verbindingen ontwerpt en analyseert, kunt u Bereken belastingextremen activeren voor elke groep. Hiermee kunt u de verbindingen sneller ontwerpen en toetsen voor alleen kritieke belastingseffecten.
Ontwerp
Klik op Openen om te beginnen met ontwerpen, normtoetsing en rapportage. De geïmporteerde verbinding wordt geopend in de IDEA StatiCa Connection applicatie.
In deze tutorial gaan we de Connection Library gebruiken om een verbinding te genereren. Selecteer Voorstellen, en IDEA StatiCa zal mogelijke oplossingen aandragen voor de huidige geometrie.
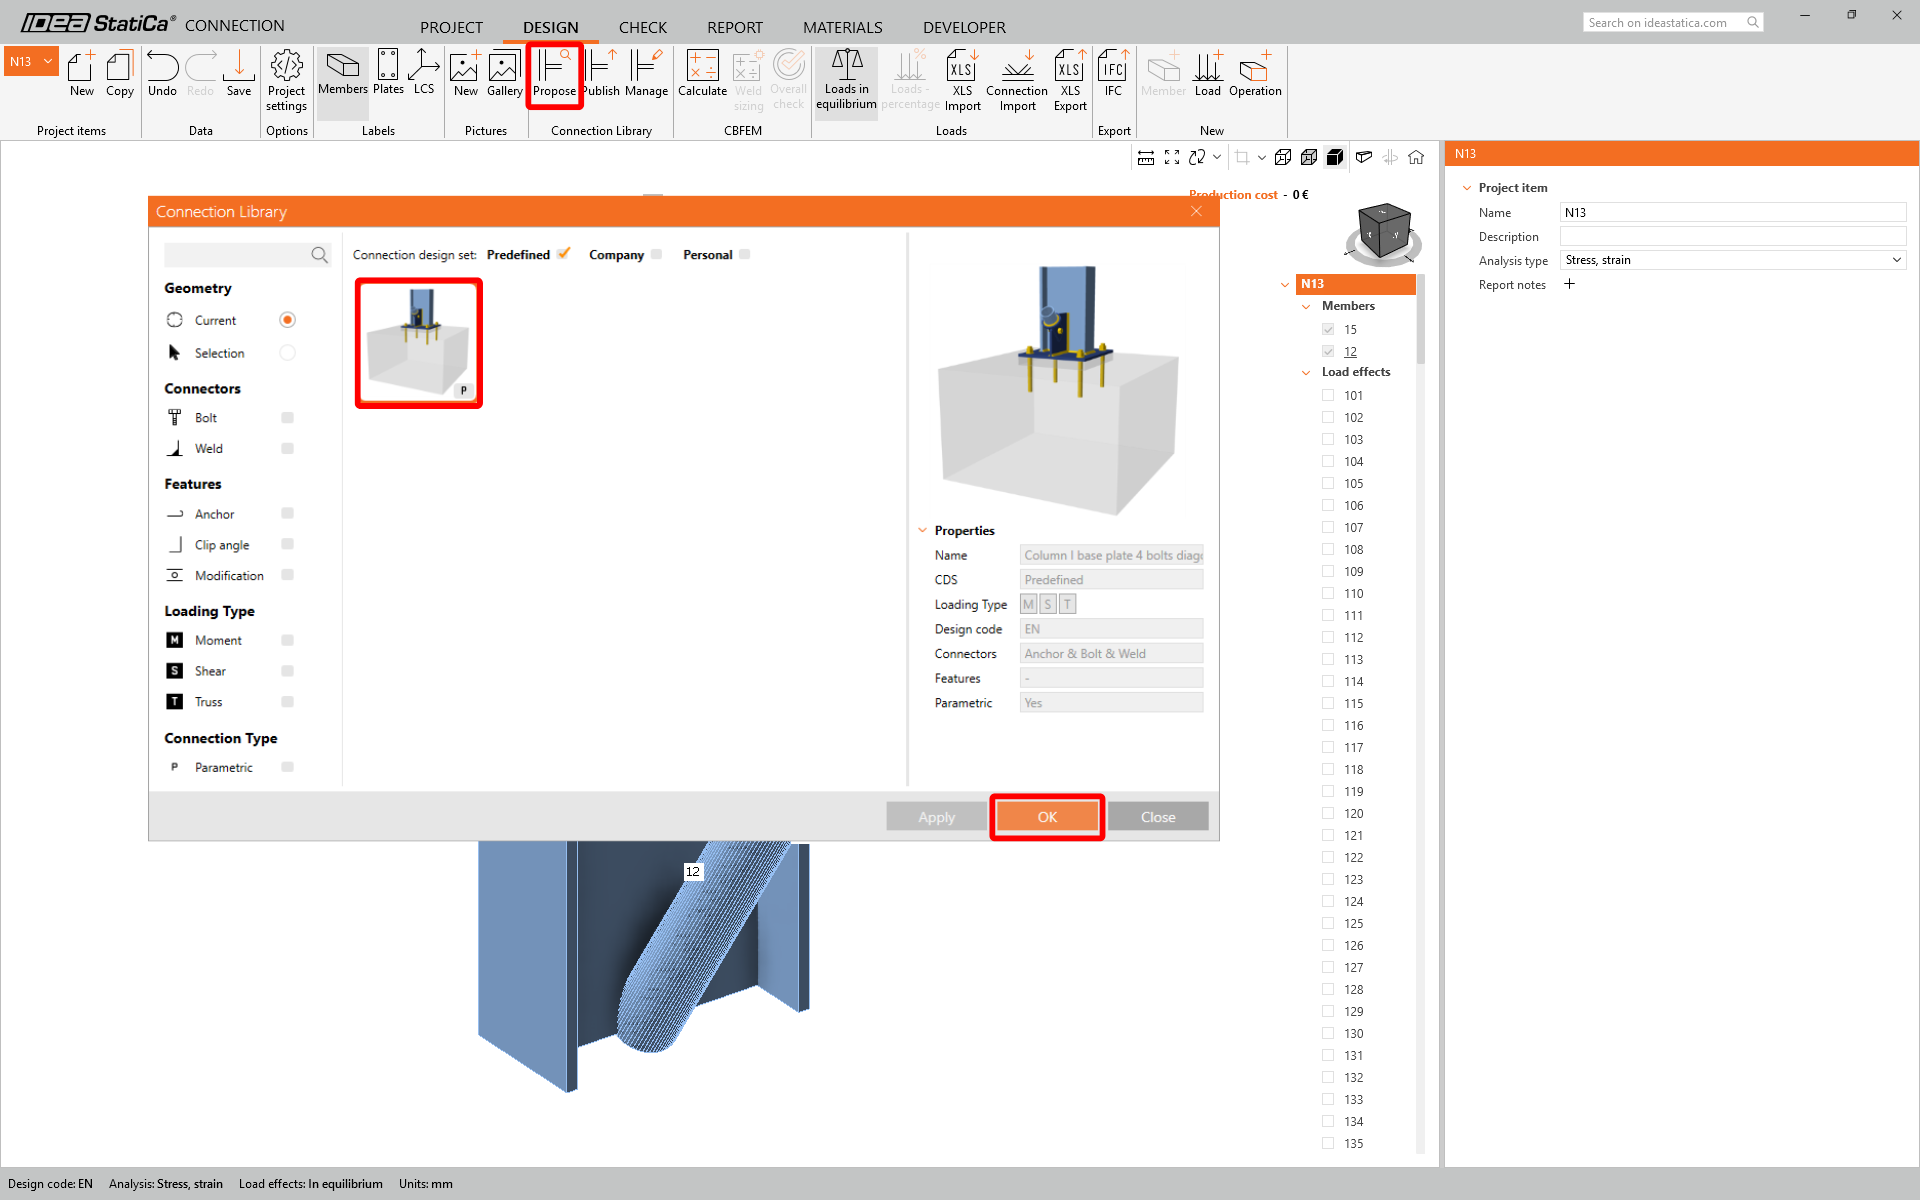
Bevestig het dialoogvenster Verbinding voorstellen - convectie

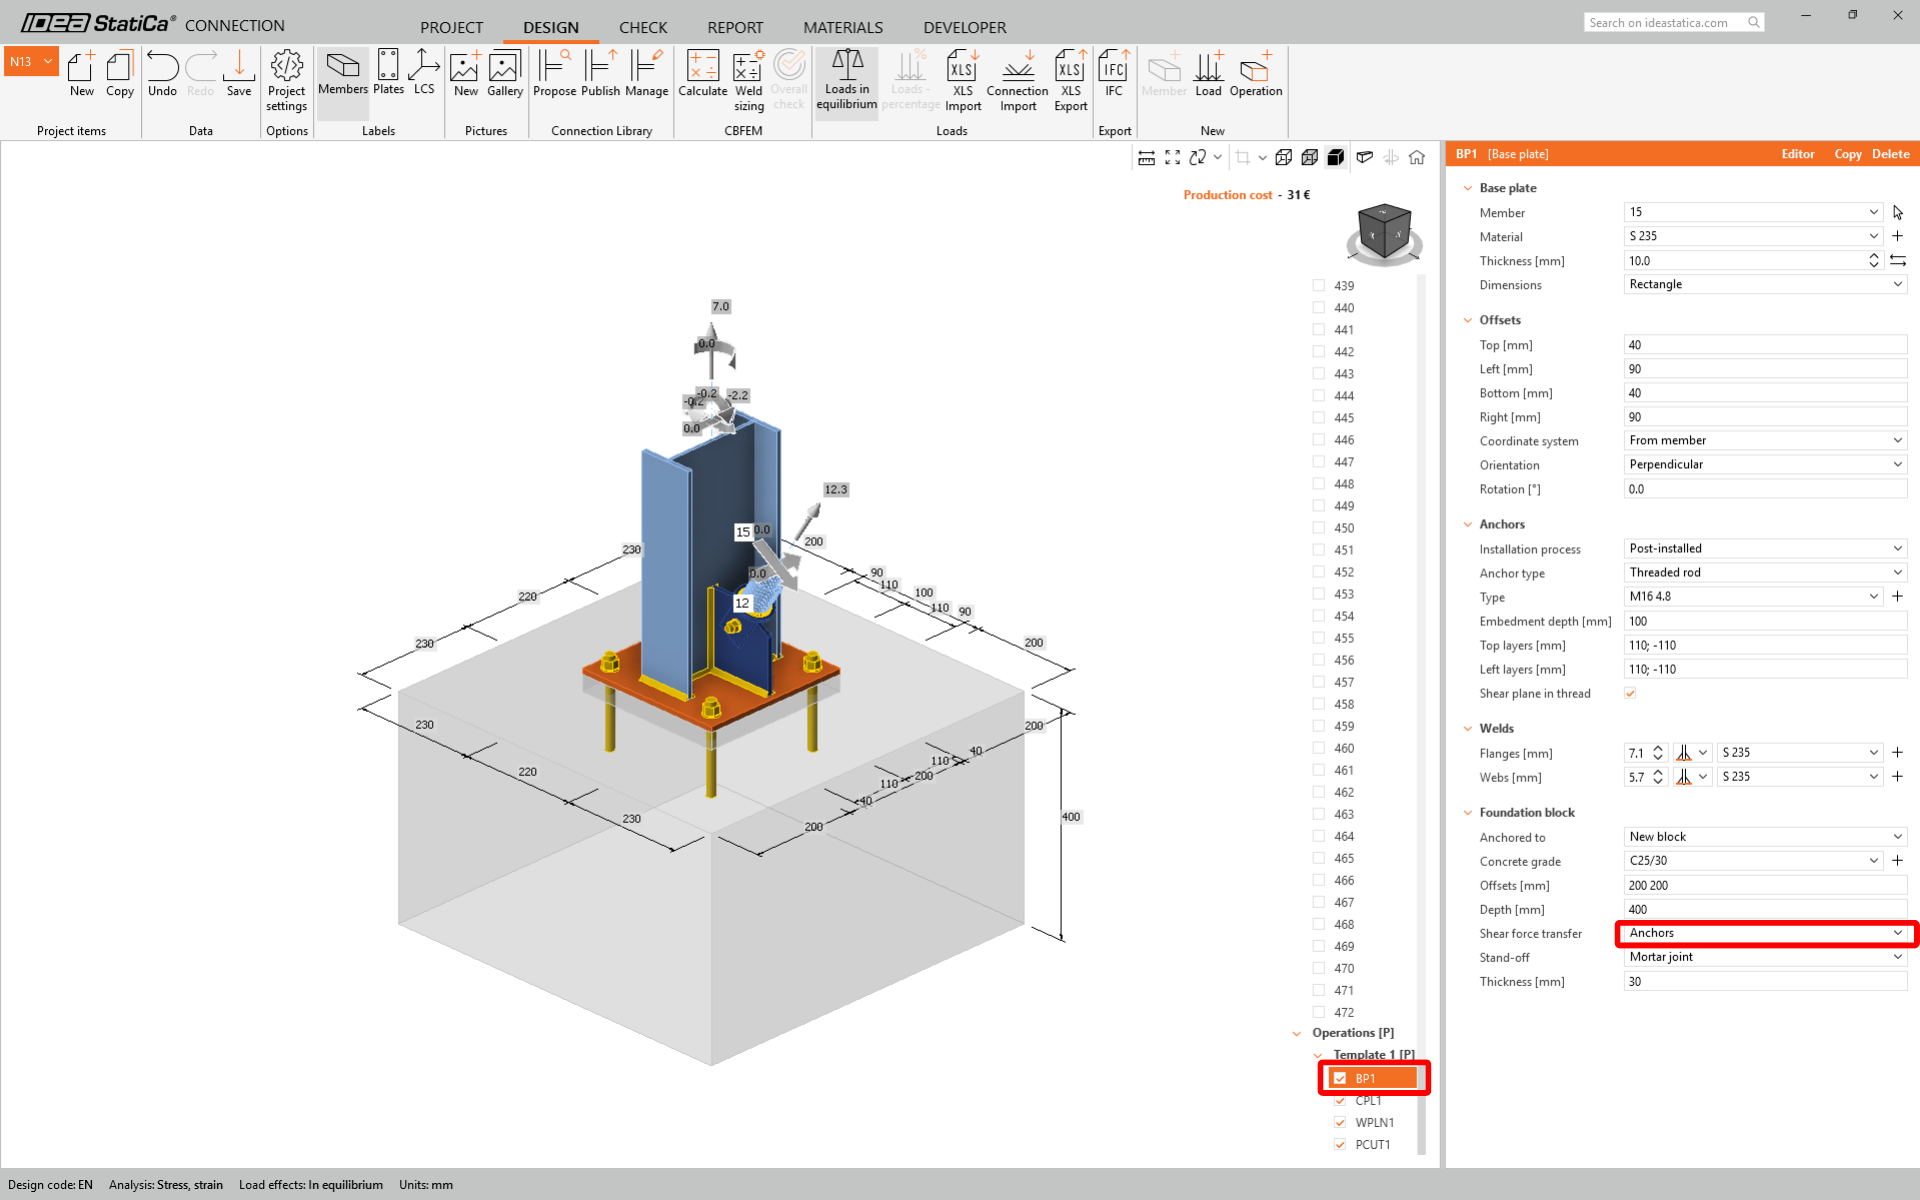
Wijzig in staaf 12 het modeltype naar N-Vy-Vz

Wijzig onder BP1 het type dwarskrachtoverdracht naar Ankers.
Normtoetsing en Rapport
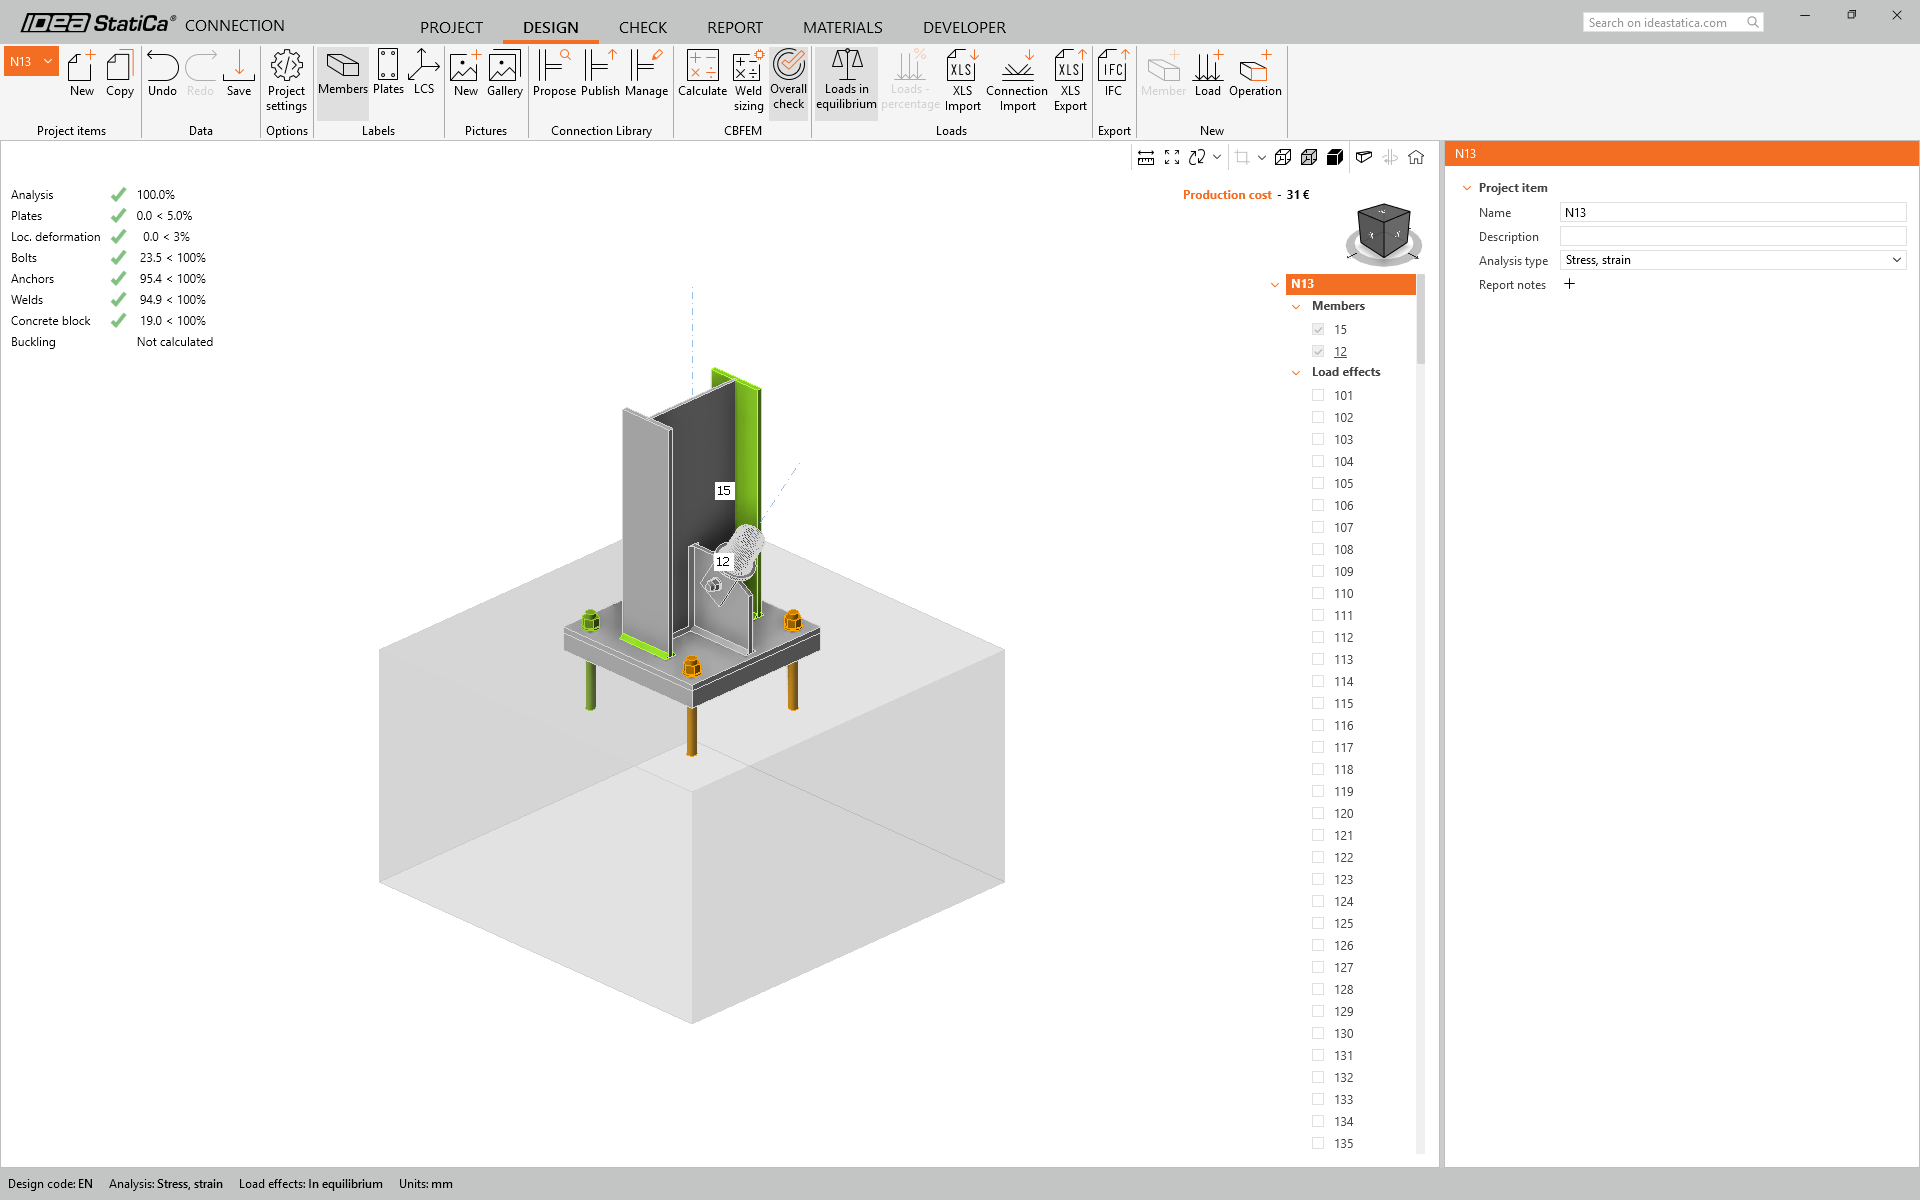
Voer nu een normtoetsing uit met het Berekenen-pictogram in het CBFEM-paneel in het bovenste lint. Binnen IDEA StatiCa Connection kunt u vele verschillende soorten analyses en normtoetsingen uitvoeren.

U kunt naar het tabblad Toetsing gaan om de resultaten in detail te bekijken voor zowel de EEM-analyse als de normtoetsingen.
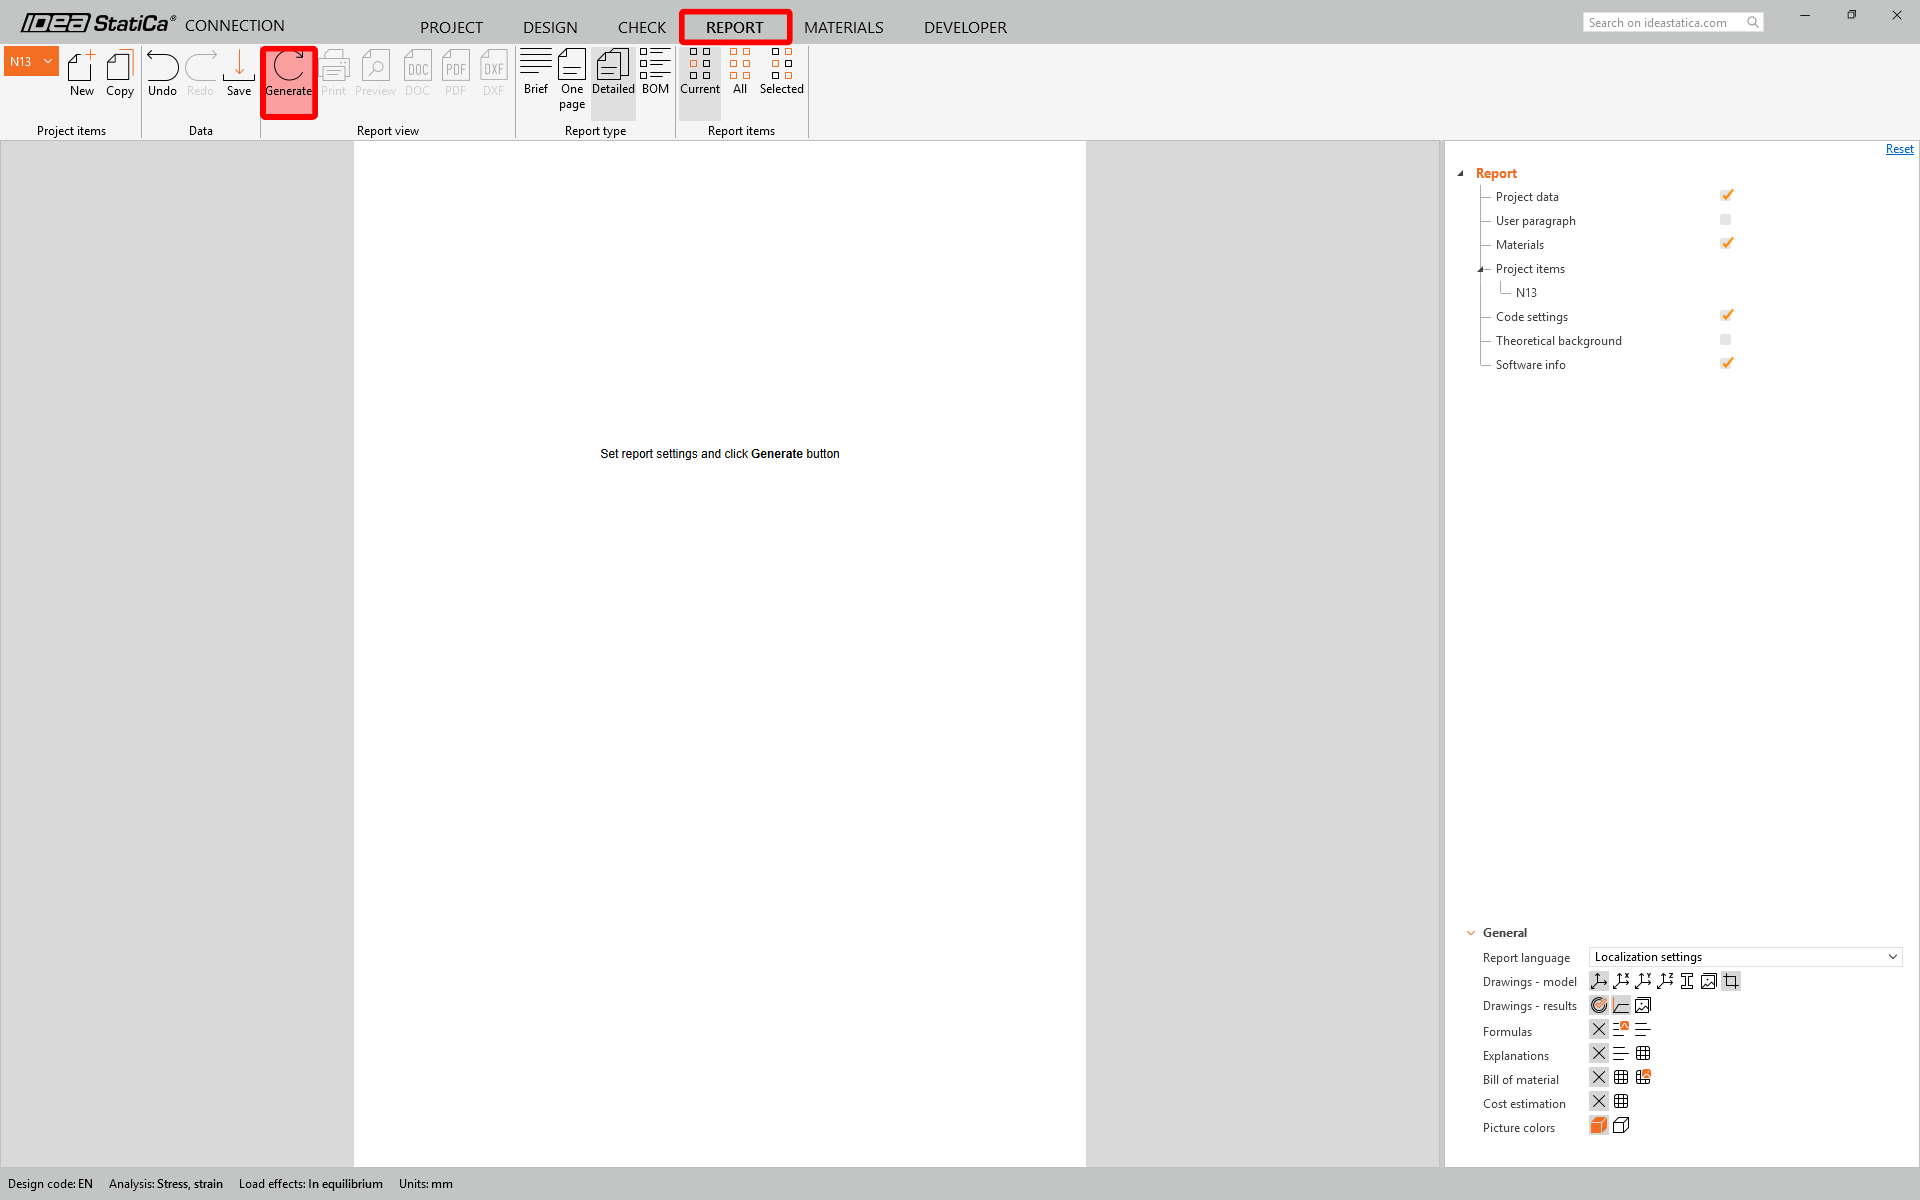
Zodra de normtoetsing is voltooid, kunt u in het tabblad Rapport het rapport aanmaken met resultaten en diagrammen voor uw verbindingsmodel.
Sla deze verbinding op en schakel terug naar het Checkbot-venster (u kunt het Connection-venster open laten).
Om de constructieve integriteit van de geïmporteerde verbindingen te verifiëren, selecteert u de gehele groep, deselecteert u Bereken belastingextremen, klikt u met de rechtermuisknop op Groep 7 en klikt u op Alles berekenen. Dit start een batchanalyse voor alle geselecteerde items.
Opmerking: Voor complexe verbindingen is het raadzaam de eindberekening uit te voeren met de volledige set belastingseffecten, om te waarborgen dat alle belastingen die zijn gedefinieerd in het globale constructiemodel duidelijk in aanmerking worden genomen.
Voor meer gedetailleerde informatie verwijzen wij u naar dit artikel.

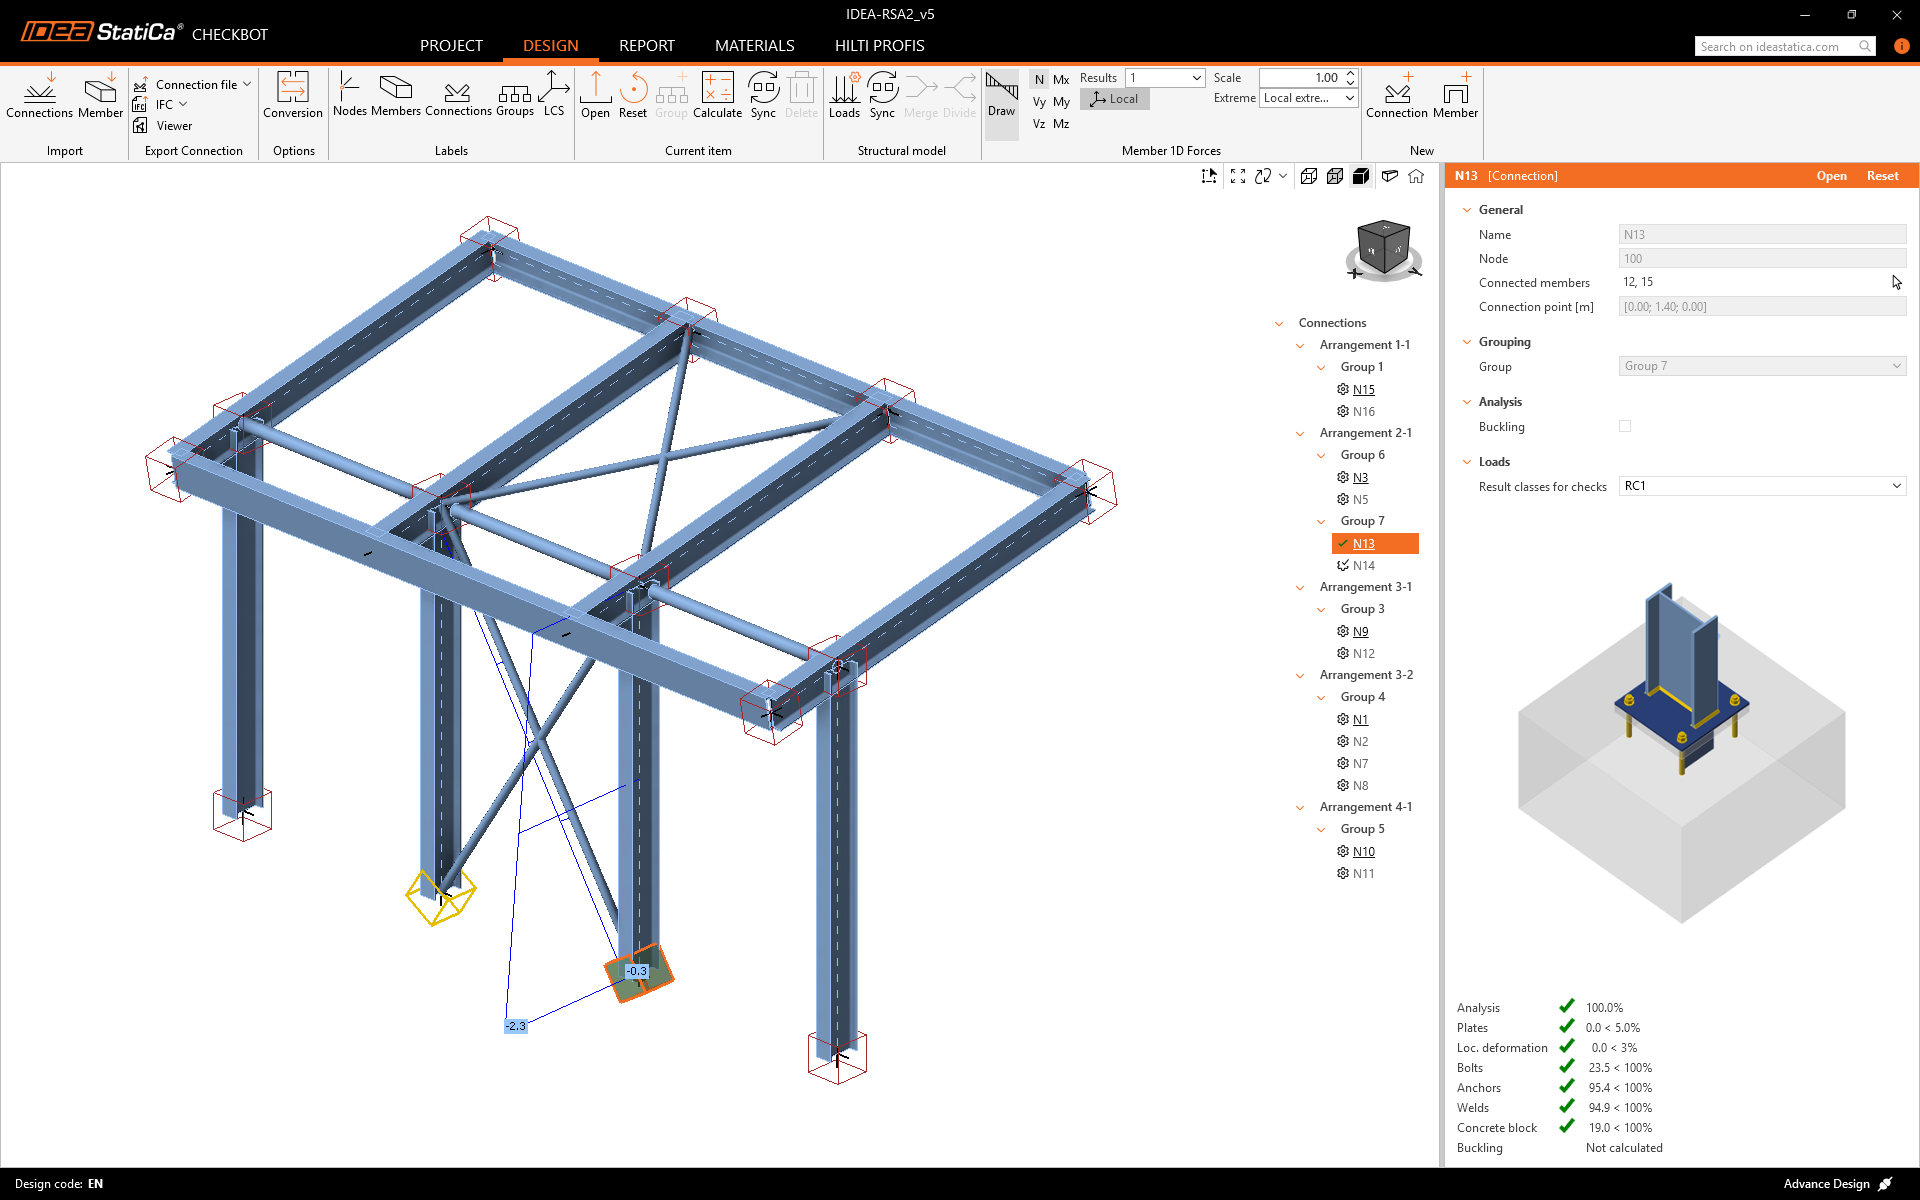
In Checkbot ziet u een groen vinkje naast de verbinding en het knoopvak gevuld met een groene kleur. Dit betekent dat de verbinding alle normtoetsingen heeft doorstaan. In het Connection-paneel kunt u ook een weergave van de verbinding en een samenvatting van de normtoetsingsresultaten zien.
U kunt zien dat slechts één verbinding de betreffende normtoetsing heeft doorstaan, terwijl de overige verbindingen nog ontworpen moeten worden.
U heeft Advance Design succesvol gekoppeld aan IDEA StatiCa Connection via Checkbot.