
Advance Design BIM-Verknüpfung für die Bemessung von Stahlanschlüssen (EN)
So aktivieren Sie den Link
- Downloaden und installieren Sie (als Administrator) die aktuelle Version von IDEA StatiCa
- Vergewissern Sie sich, dass Sie die unterstützte Version verwenden
IDEA StatiCa integriert den BIM-Link während der Installation automatisch in Ihre FEA-/BIM-Lösung. Sie können den Status überprüfen und weitere BIM-Links für nachträglich installierte Software im BIM-Link-Installer aktivieren.
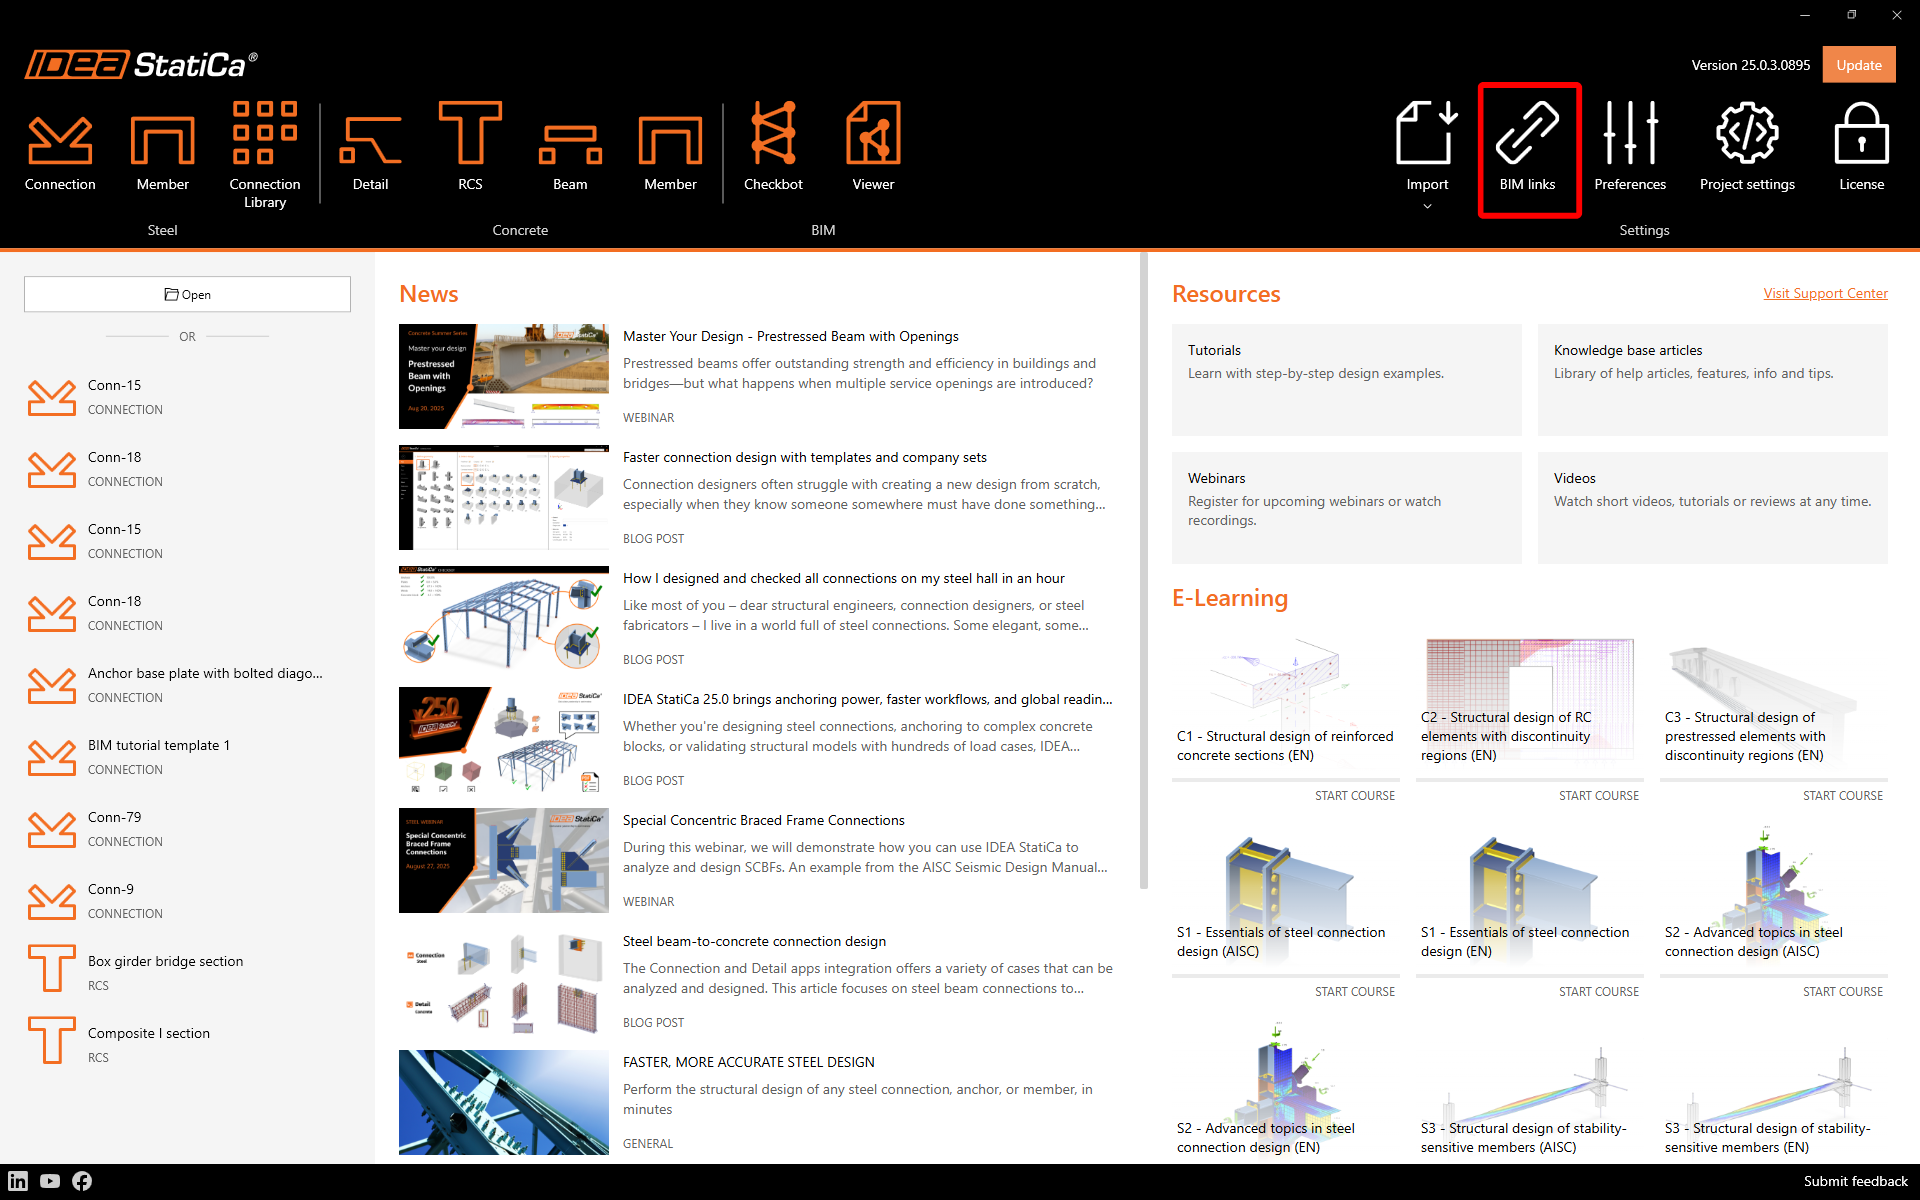
Öffnen Sie IDEA StatiCa und navigieren Sie zum Bereich BIM und öffnen Sie den BIM Link Installer. Eventuell erscheint eine Meldung Als Administrator ausführen, bitte bestätigen Sie mit Ja.
Bitte beachten Sie, dass einige FEA-Lösungen zusätzliche Schritte erfordern, um ihre BIM-Verbindung zu IDEA StatiCa vollständig zu aktivieren.
Öffnen Sie IDEA StatiCa und navigieren Sie zum Tab BIM und öffnen Sie den BIM-Link-Installer (Aktivieren deinen BIM-Link...).
Eine Benachrichtigung "Möchten Sie zulassen, dass diese Anwendung Änderungen an Ihrem Gerät vornimmt?" erscheinen, wenn ja, bestätigen Sie dies bitte mit Ja.
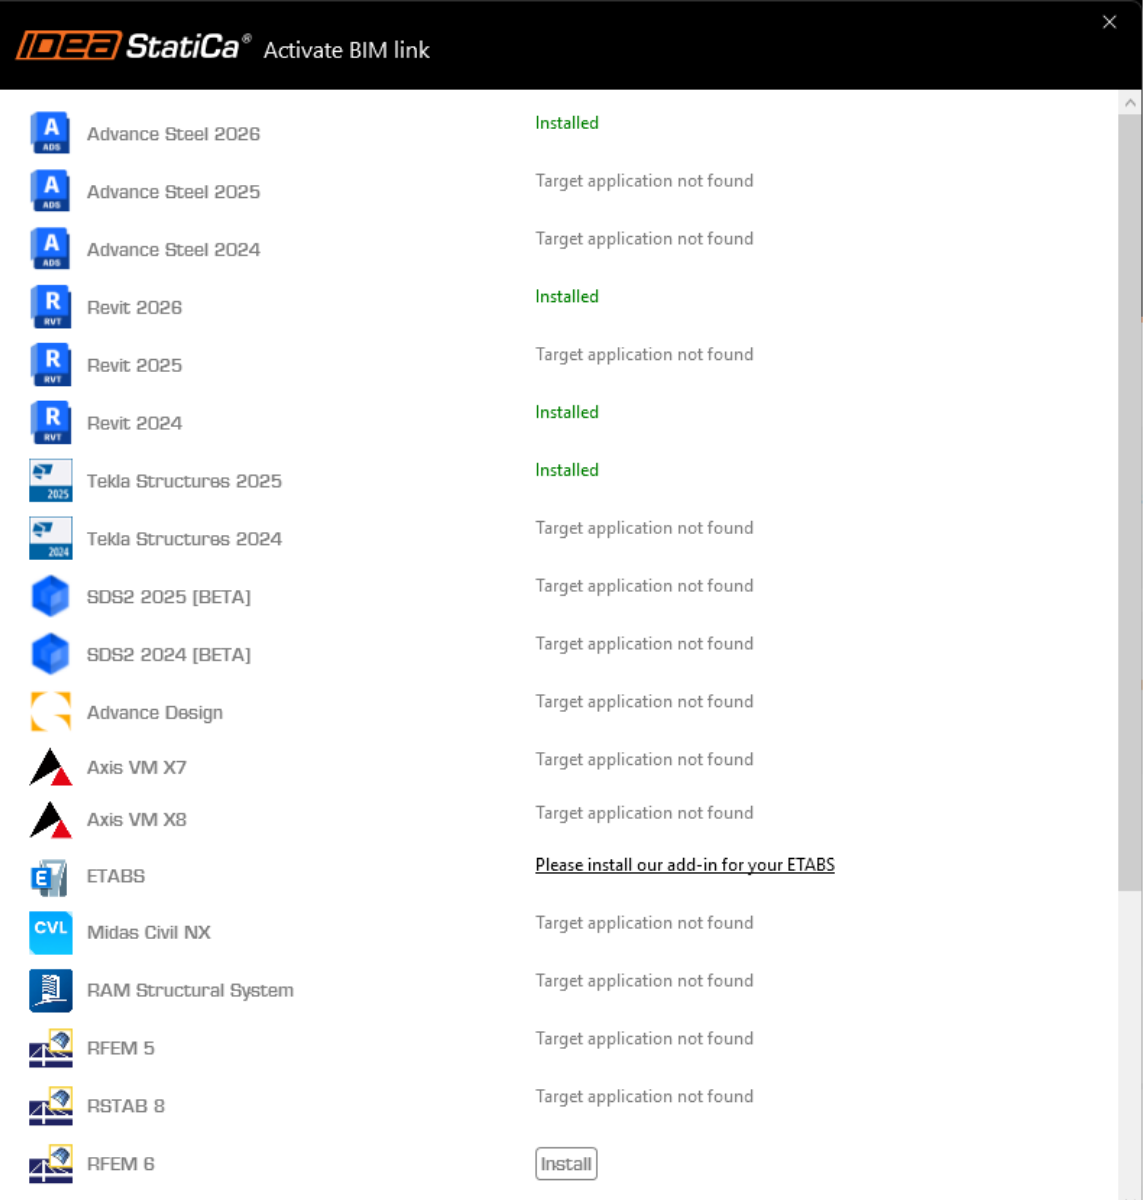
Der BIM-Link für die ausgewählte Software (falls gefunden) wird installiert. Der Bildschirm informiert Sie auch über den Status anderer BIM-Links, die möglicherweise bereits installiert wurden.
So verwenden Sie die Verknüpfung
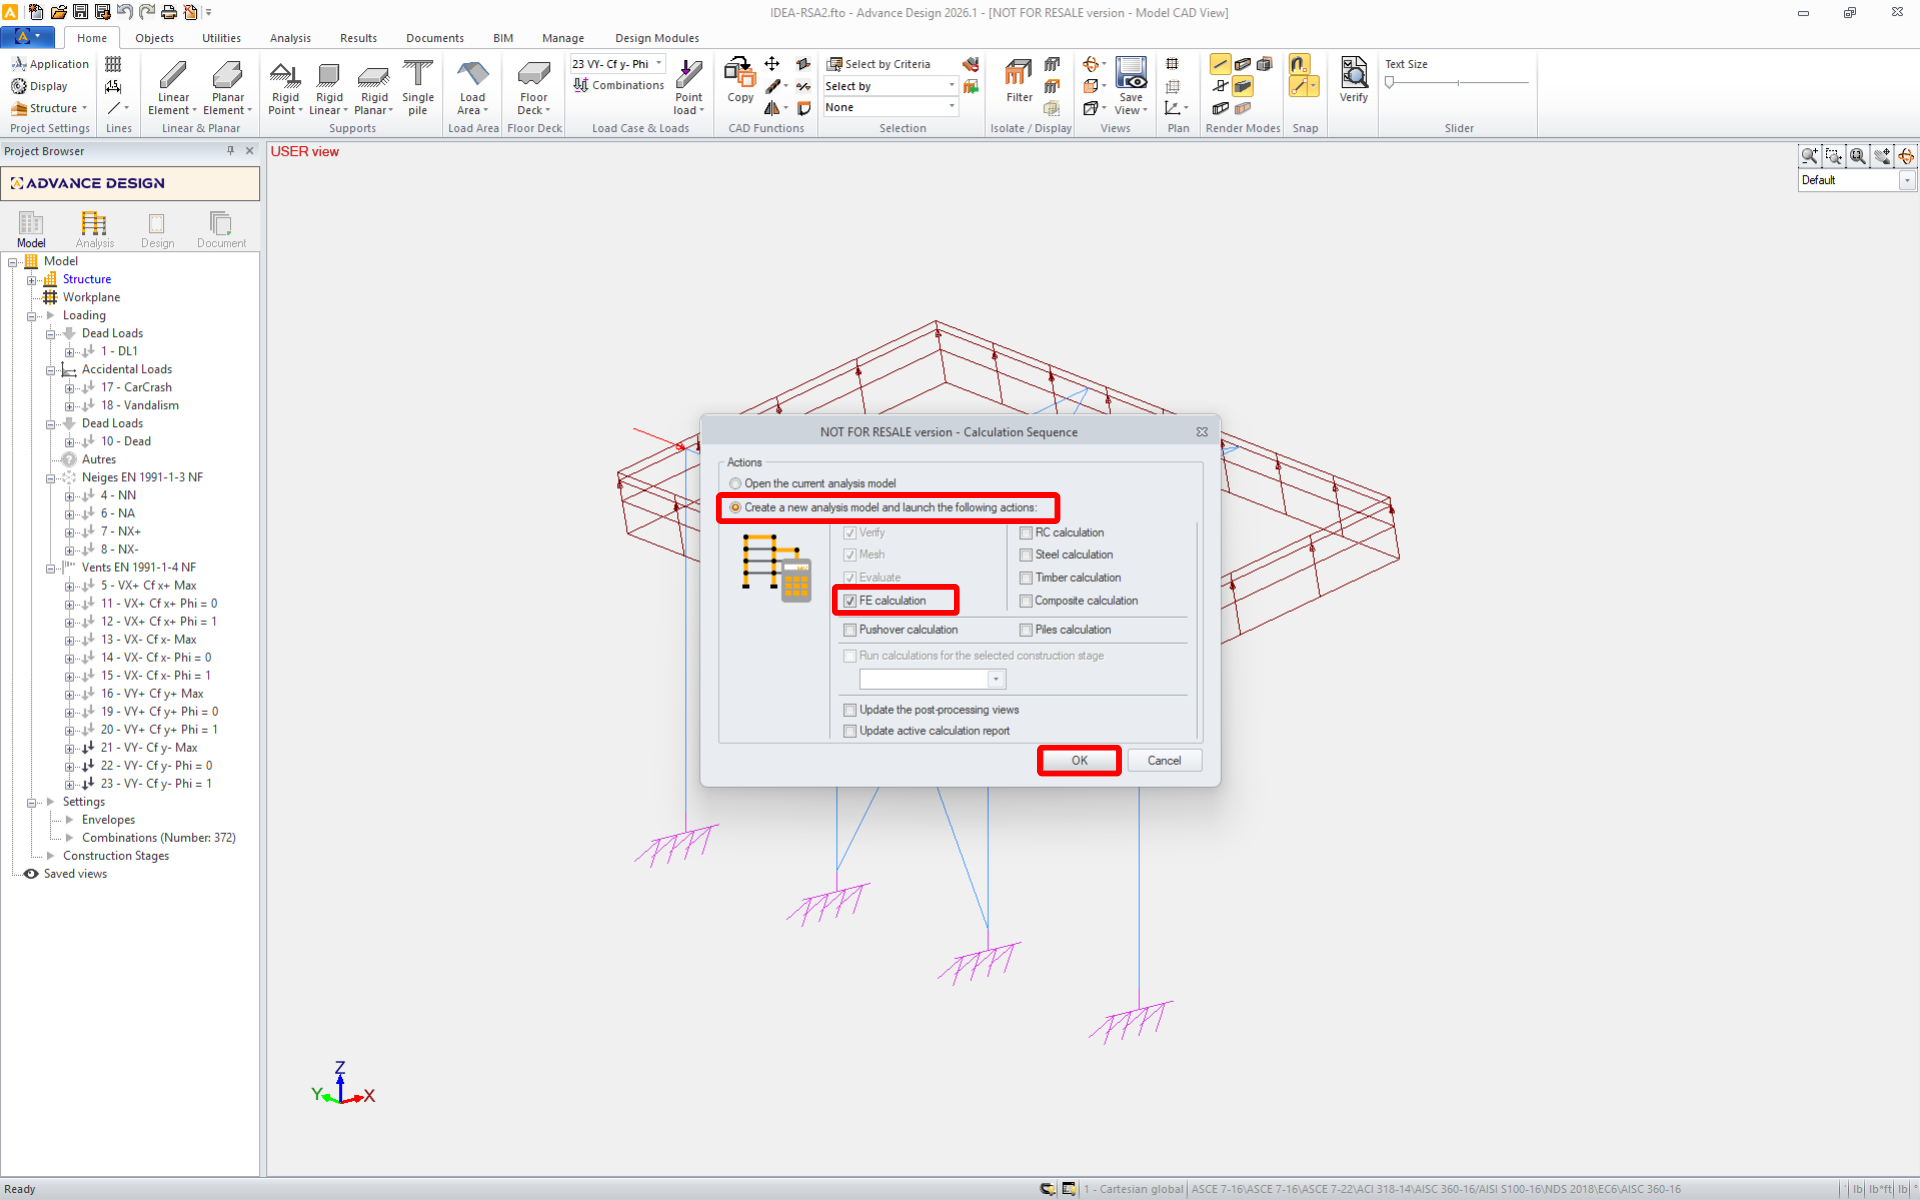
Laden Sie das beigefügte Projekt herunter, öffnen Sie es in Advance Design und führen Sie die lineare Analyse durch, um die Schnittgrößen der Struktur zu ermitteln.
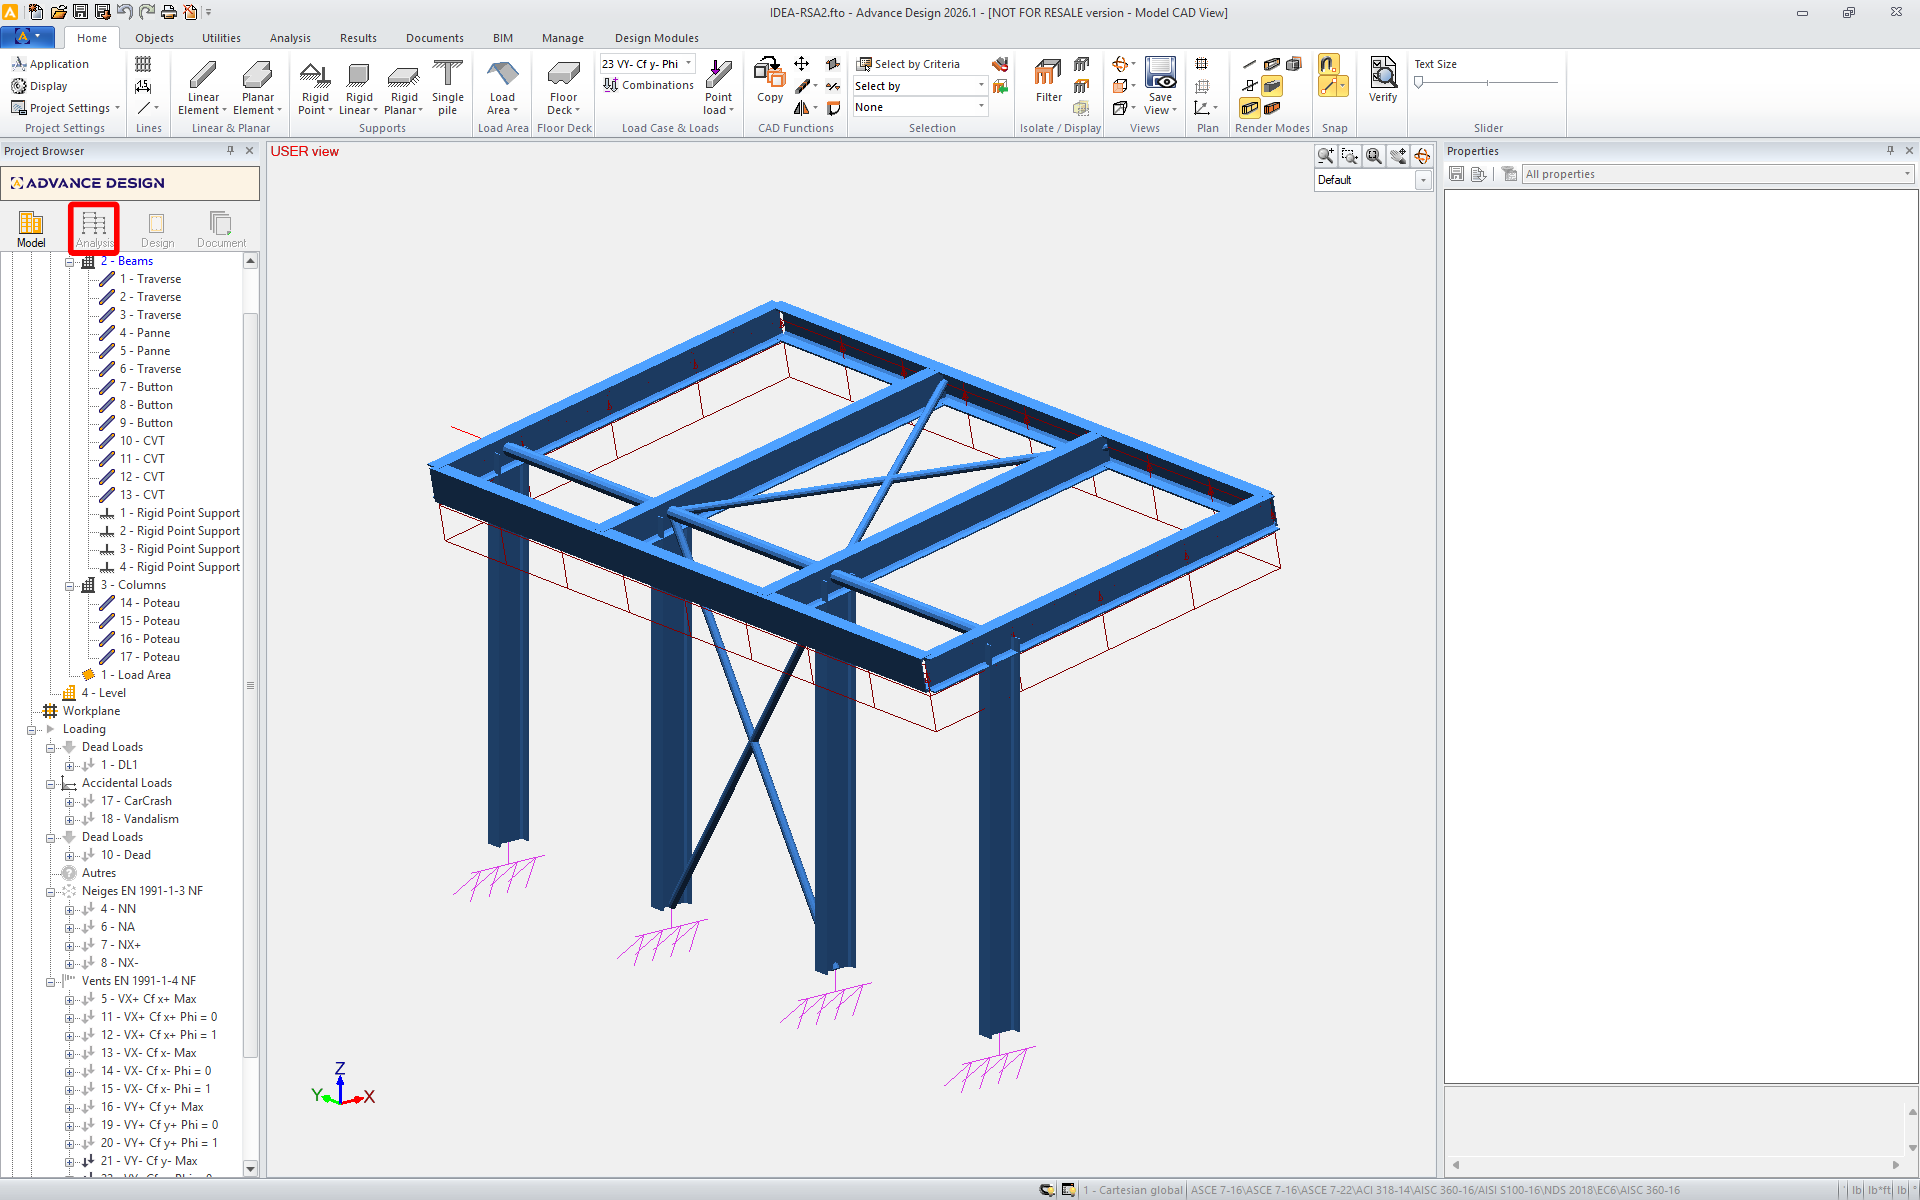
Die BIM-Verknüpfung ist automatisch integriert. Sie finden sie im oberen Menüband unter BIM -> IDEA -> IDEA Checkbot.
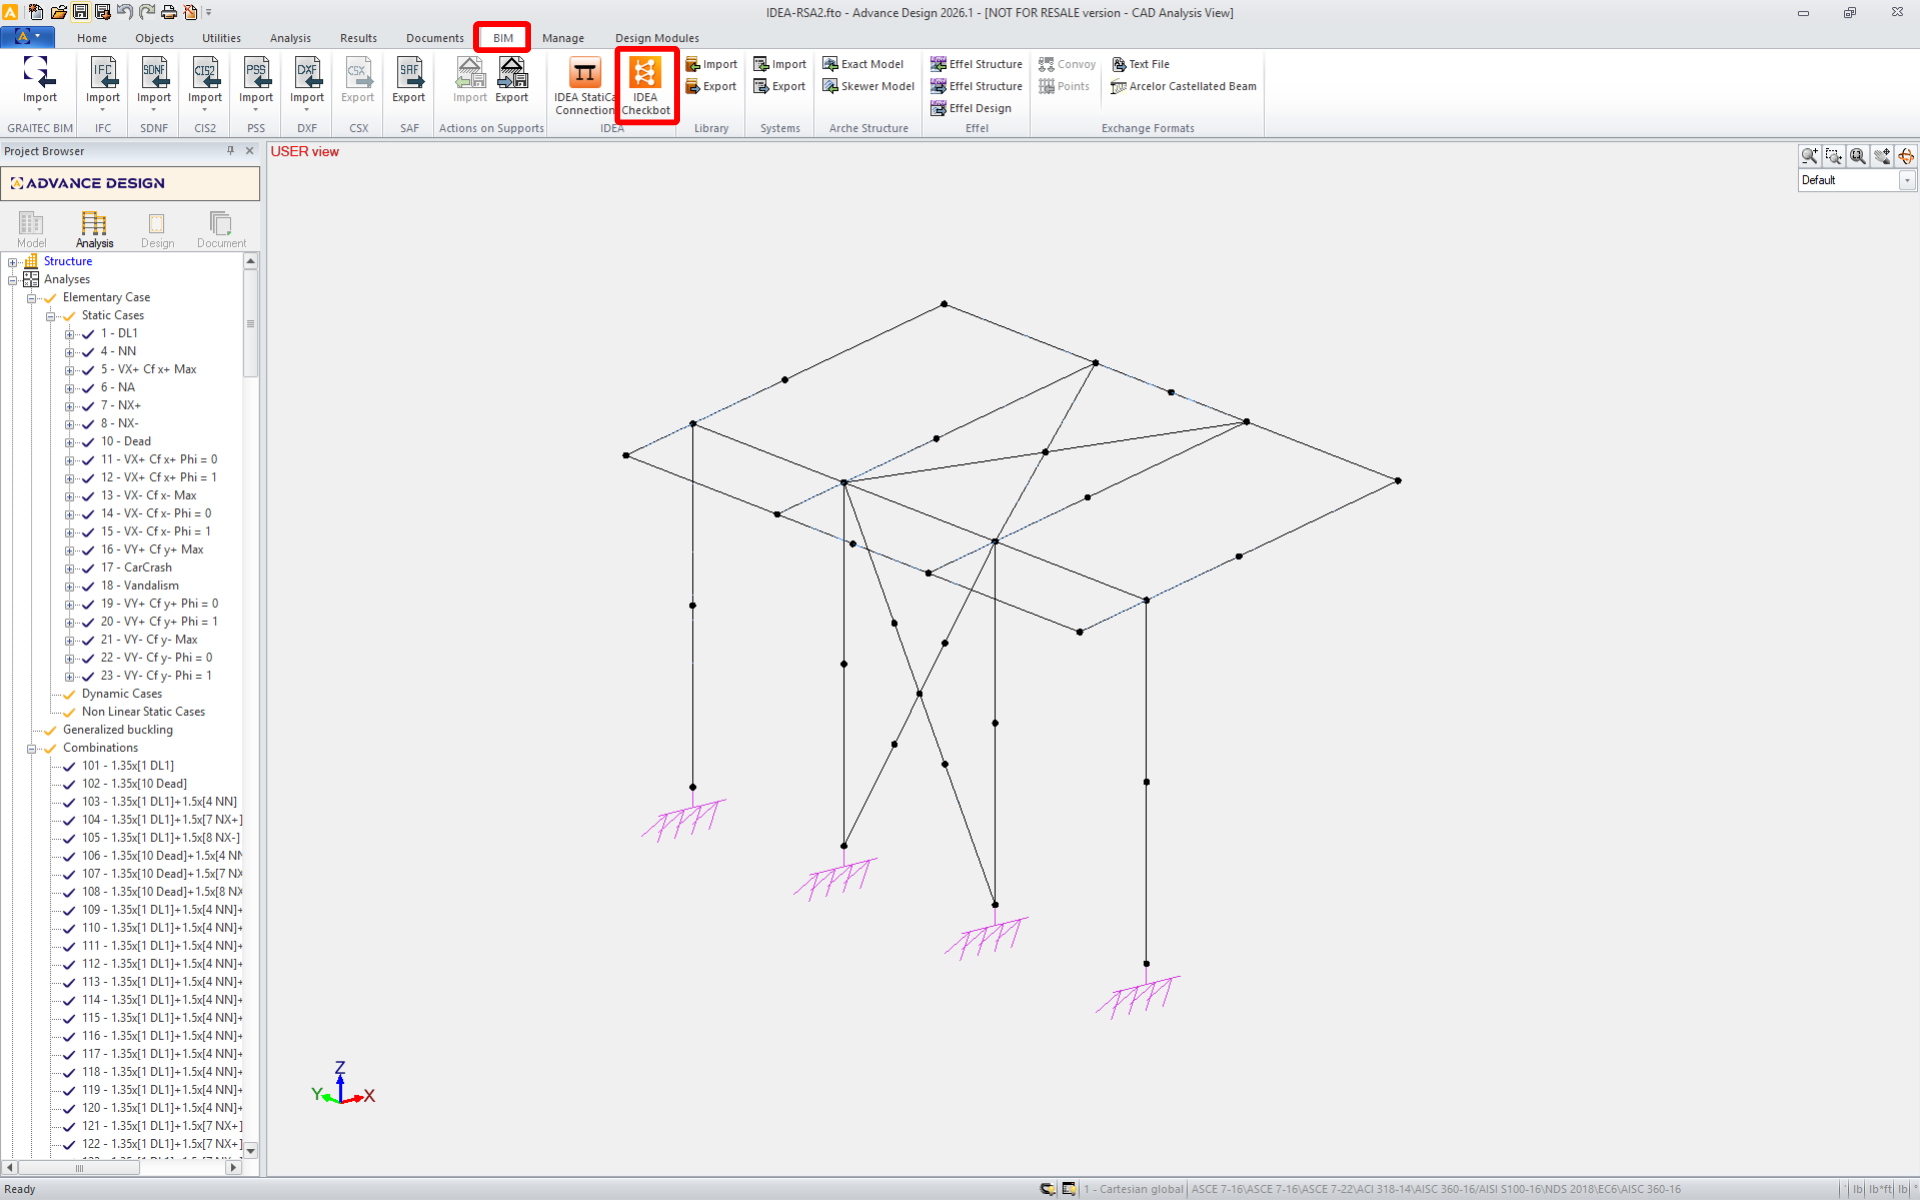
Dadurch wird die Checkbot -Anwendung geöffnet.
Wählen Sie die Option Neu mit dem Projekttyp Stahl und der Bemessungsnorm EN. Klicken Sie dann auf Projekt erstellen.
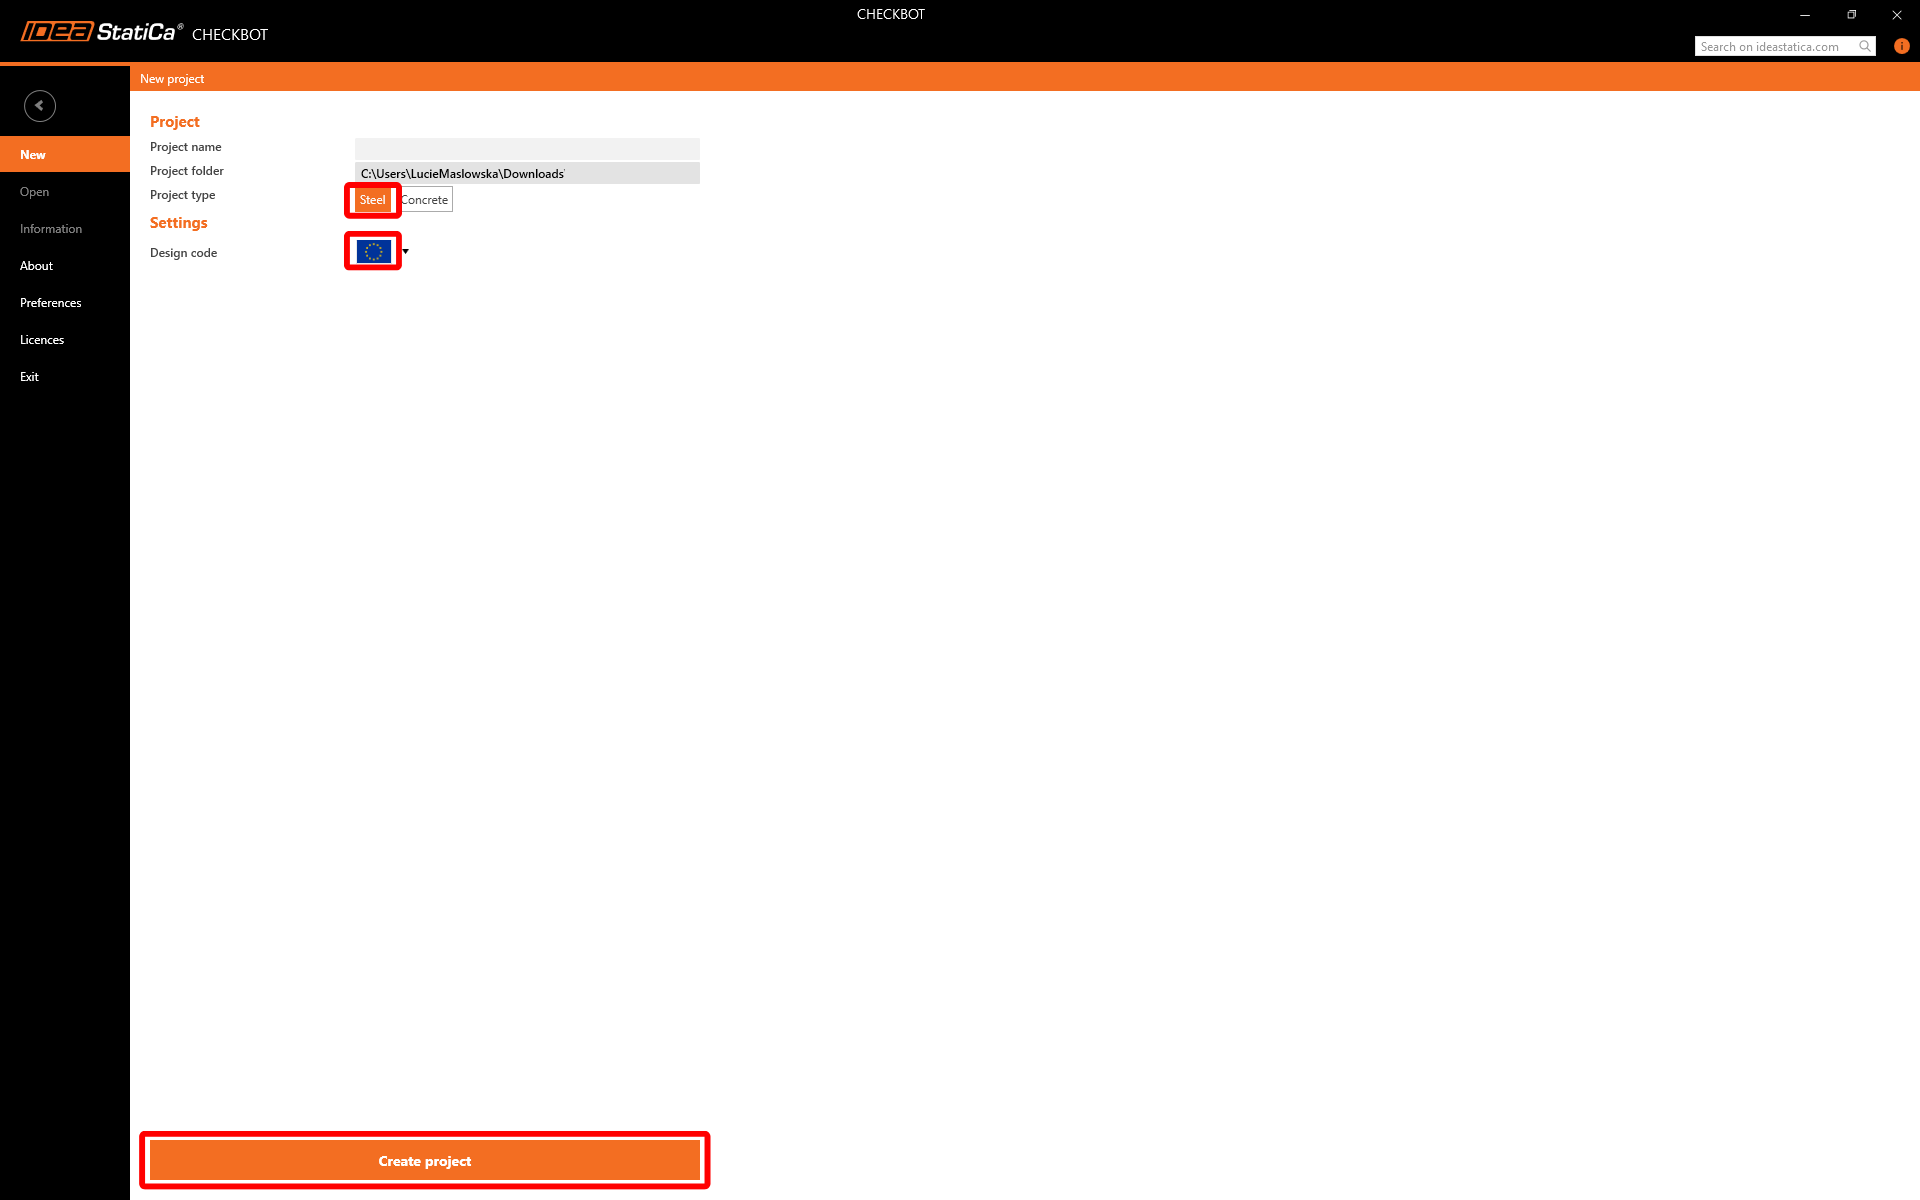
Das neue Checkbot-Projekt ist bereit, Verbindungen zu importieren.
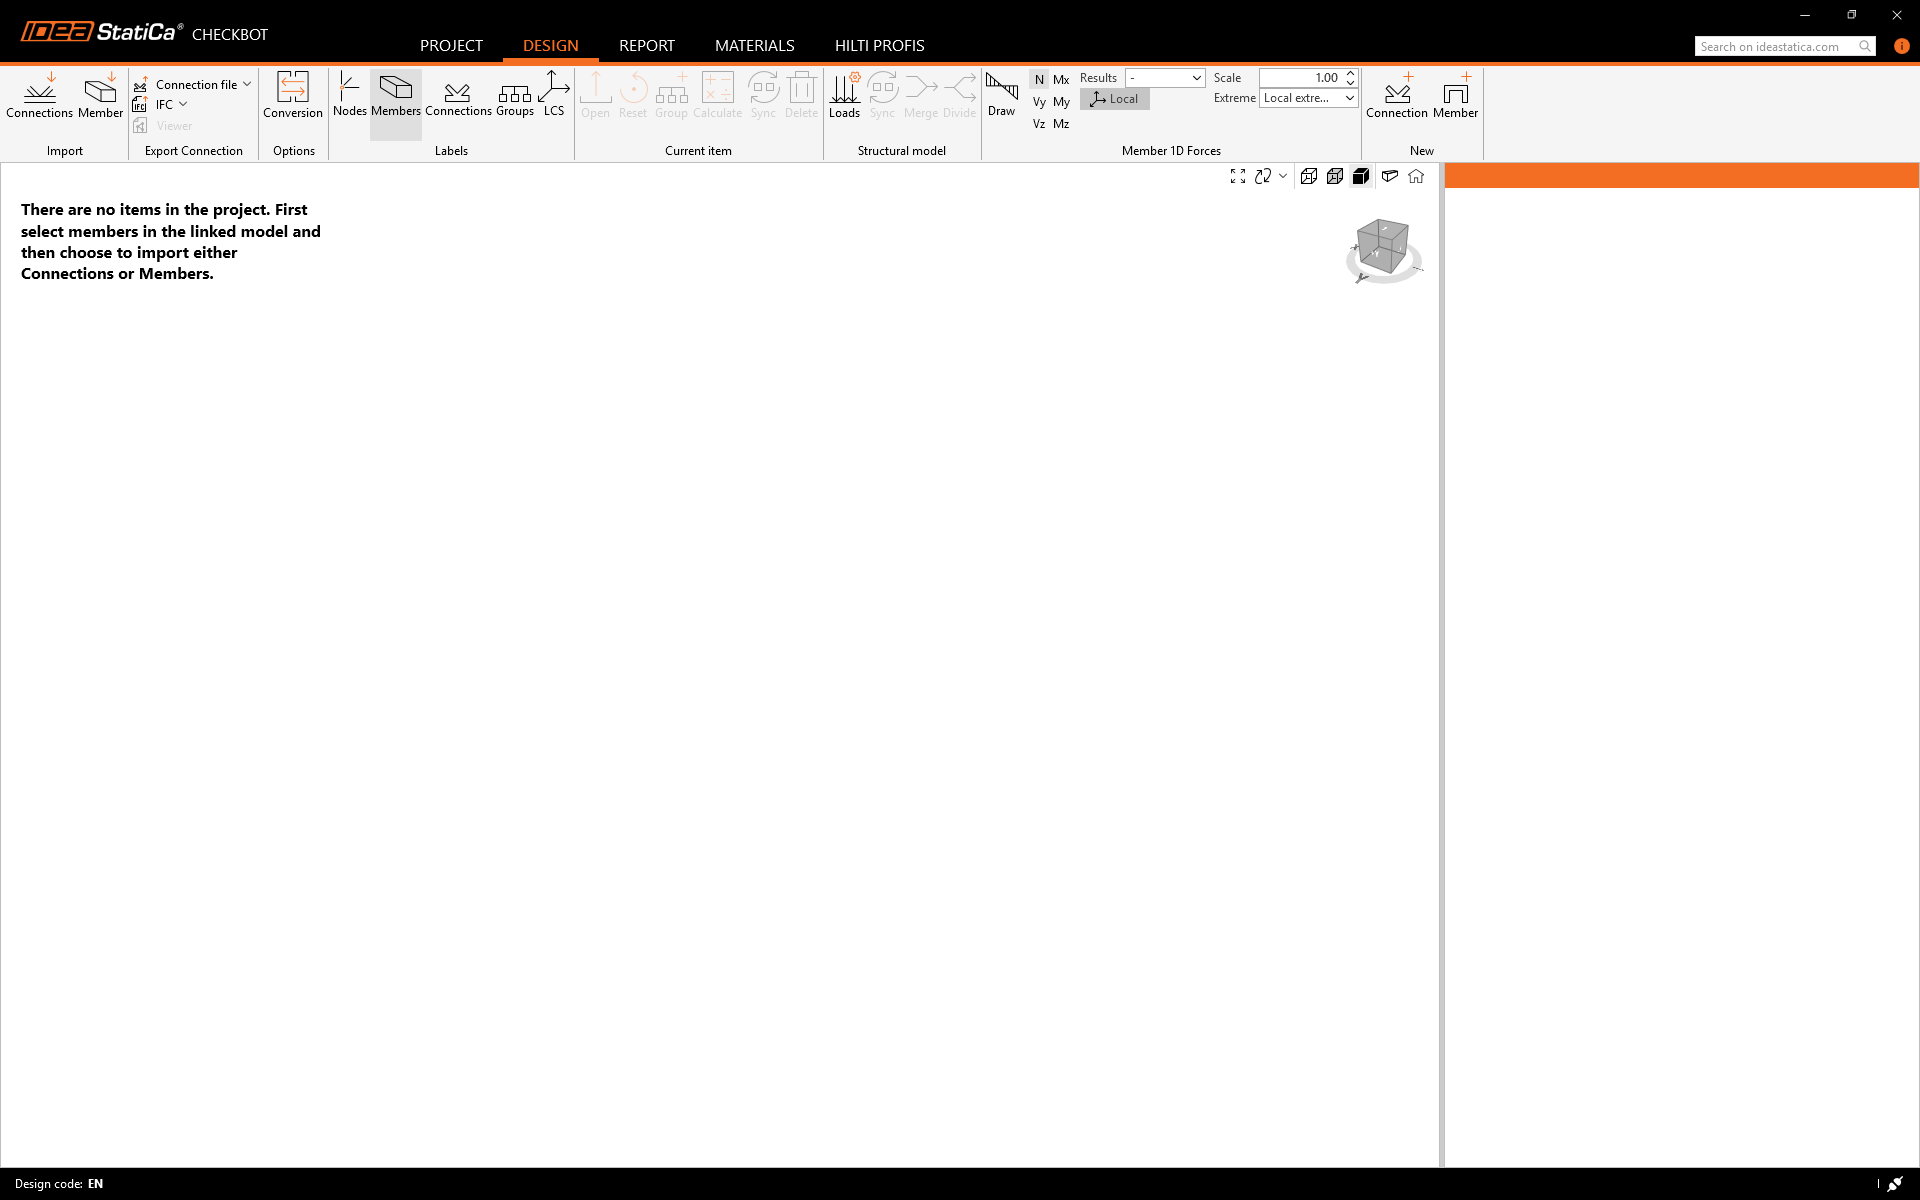
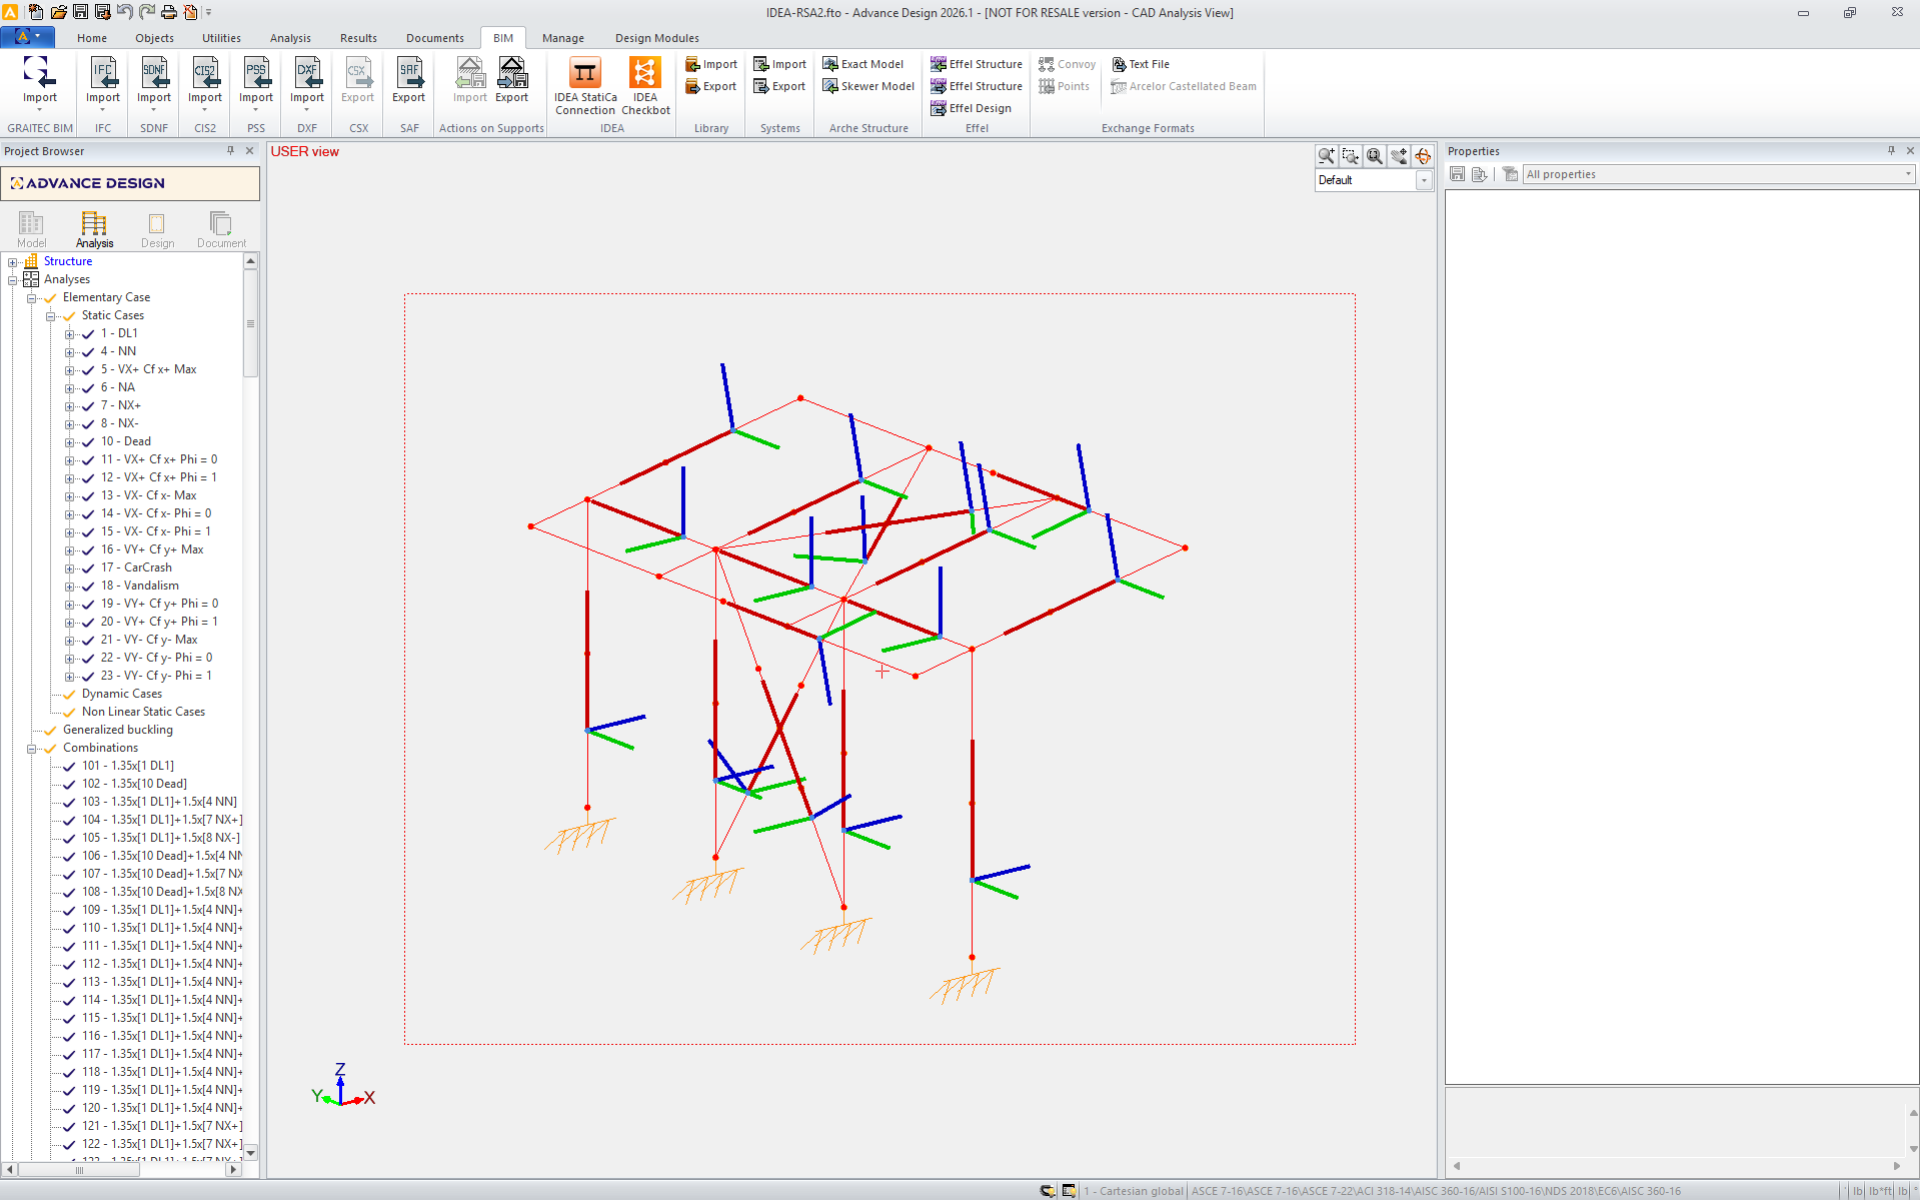
Wählen Sie die Struktur in Advance Design aus und klicken Sie im Checkbot auf Verbindungen.
Während des Imports kann ein Konvertierungs-Dialog erscheinen, wenn einige Querschnitte nicht automatisch erkannt werden. Weisen Sie die richtigen Materialien oder Profile manuell zu, um fortzufahren.
Hinweis: Checkbot speichert Ihre Zuordnung. Zukünftige Importe von Elementen mit identischen Parametern werden automatisch erkannt, sodass dieser Schritt übersprungen wird.

Fahren Sie mit dem Import fort, um die Struktur und die Lasteffekte in Checkbot zu übertragen, wobei die ursprünglichen Koordinaten, Ausrichtungen und Querschnitte erhalten bleiben. Hinweis: Die Knoten- und Bauteillnummerierung kann von Ihrem FEM-Modell abweichen.
Die Gruppierungsfunktion erstellt automatisch Gruppen von Verbindungen basierend auf Typologie und/oder Querschnitten. Jede Gruppe wird durch die Referenzverbindung (im Baum unterstrichen) repräsentiert, die automatisch als übergeordnete Verbindung festgelegt wird, die das Design für die gesamte Gruppe bestimmt. Alle anderen Verbindungen werden als untergeordnete Verbindungen behandelt.
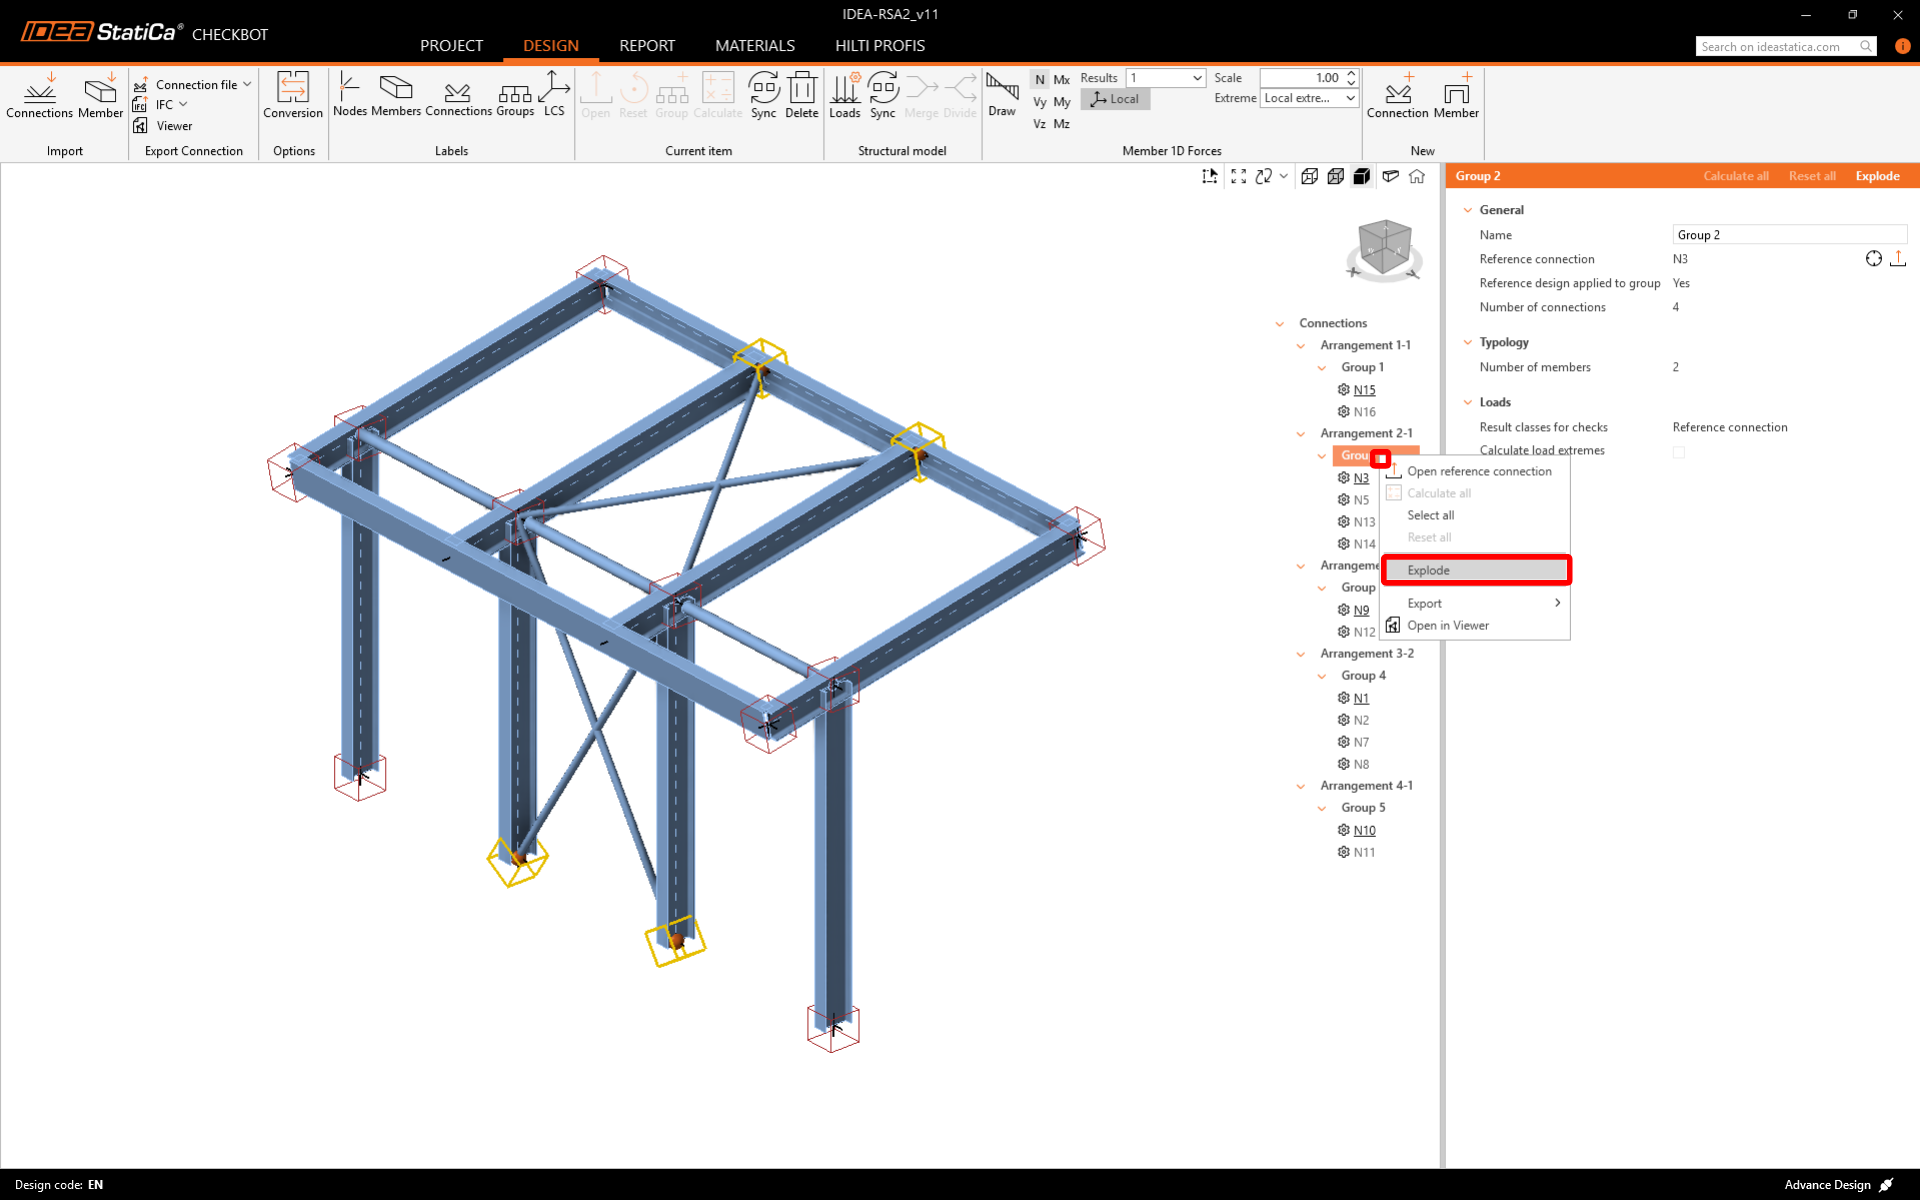
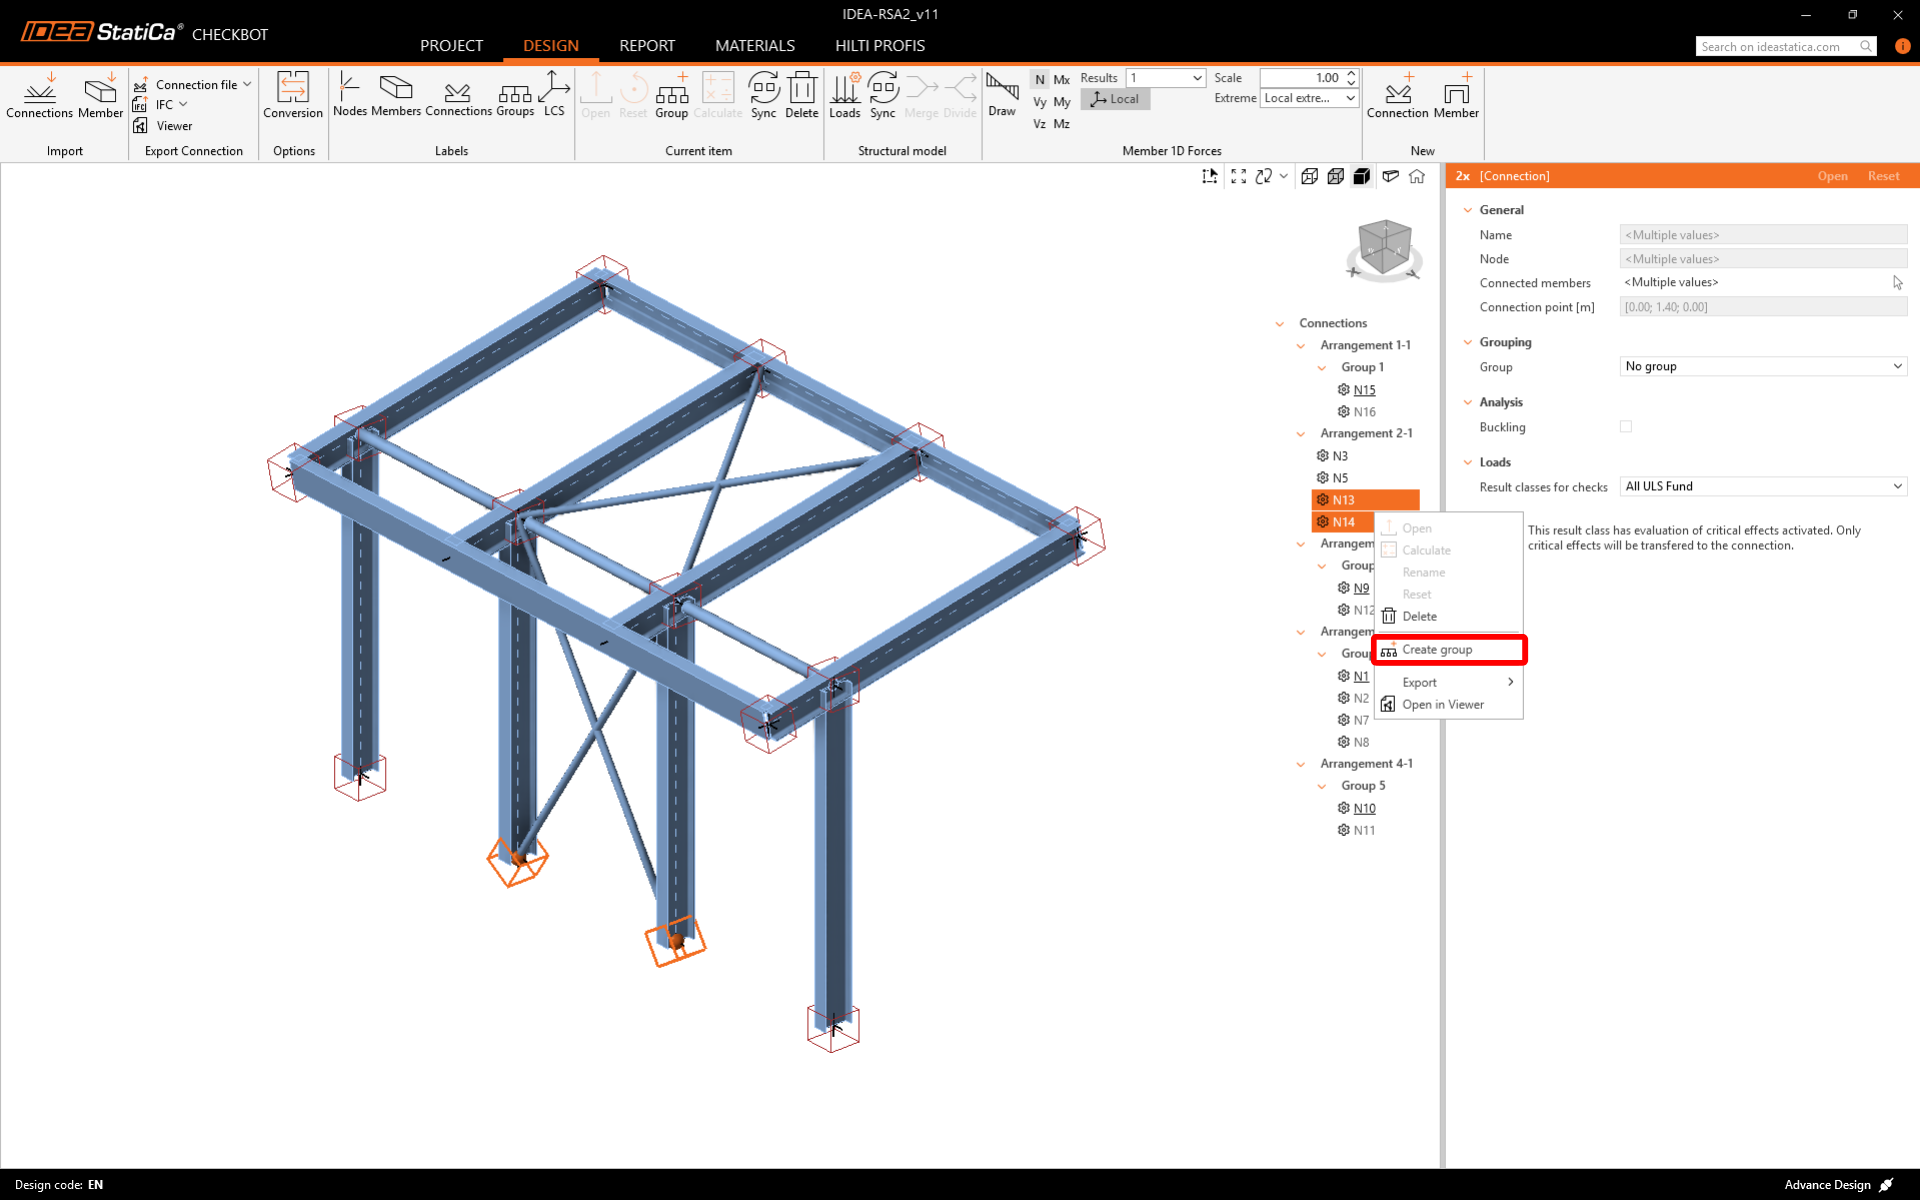
Wenn die Gruppen nicht korrekt erstellt wurden, wie in diesem Fall, können Sie sie auflösen und neue erstellen.
Sie können die importierten Lastfälle und Lastkombinationen im Dialog Lasten überprüfen und anpassen. Alle importierten Lastfälle und Lastkombinationen sind auf der linken Seite aufgeführt, und die für die Nachweise verwendeten Ergebnisklassen befinden sich in der Mitte. Wenn einige Lastfälle für Ihre Bemessungsverifikation nicht relevant sind, schließen Sie diese aus, indem Sie mit der rechten Maustaste auf die ausgewählten Lasten klicken und sie aus der Ergebnisklassenliste entfernen.

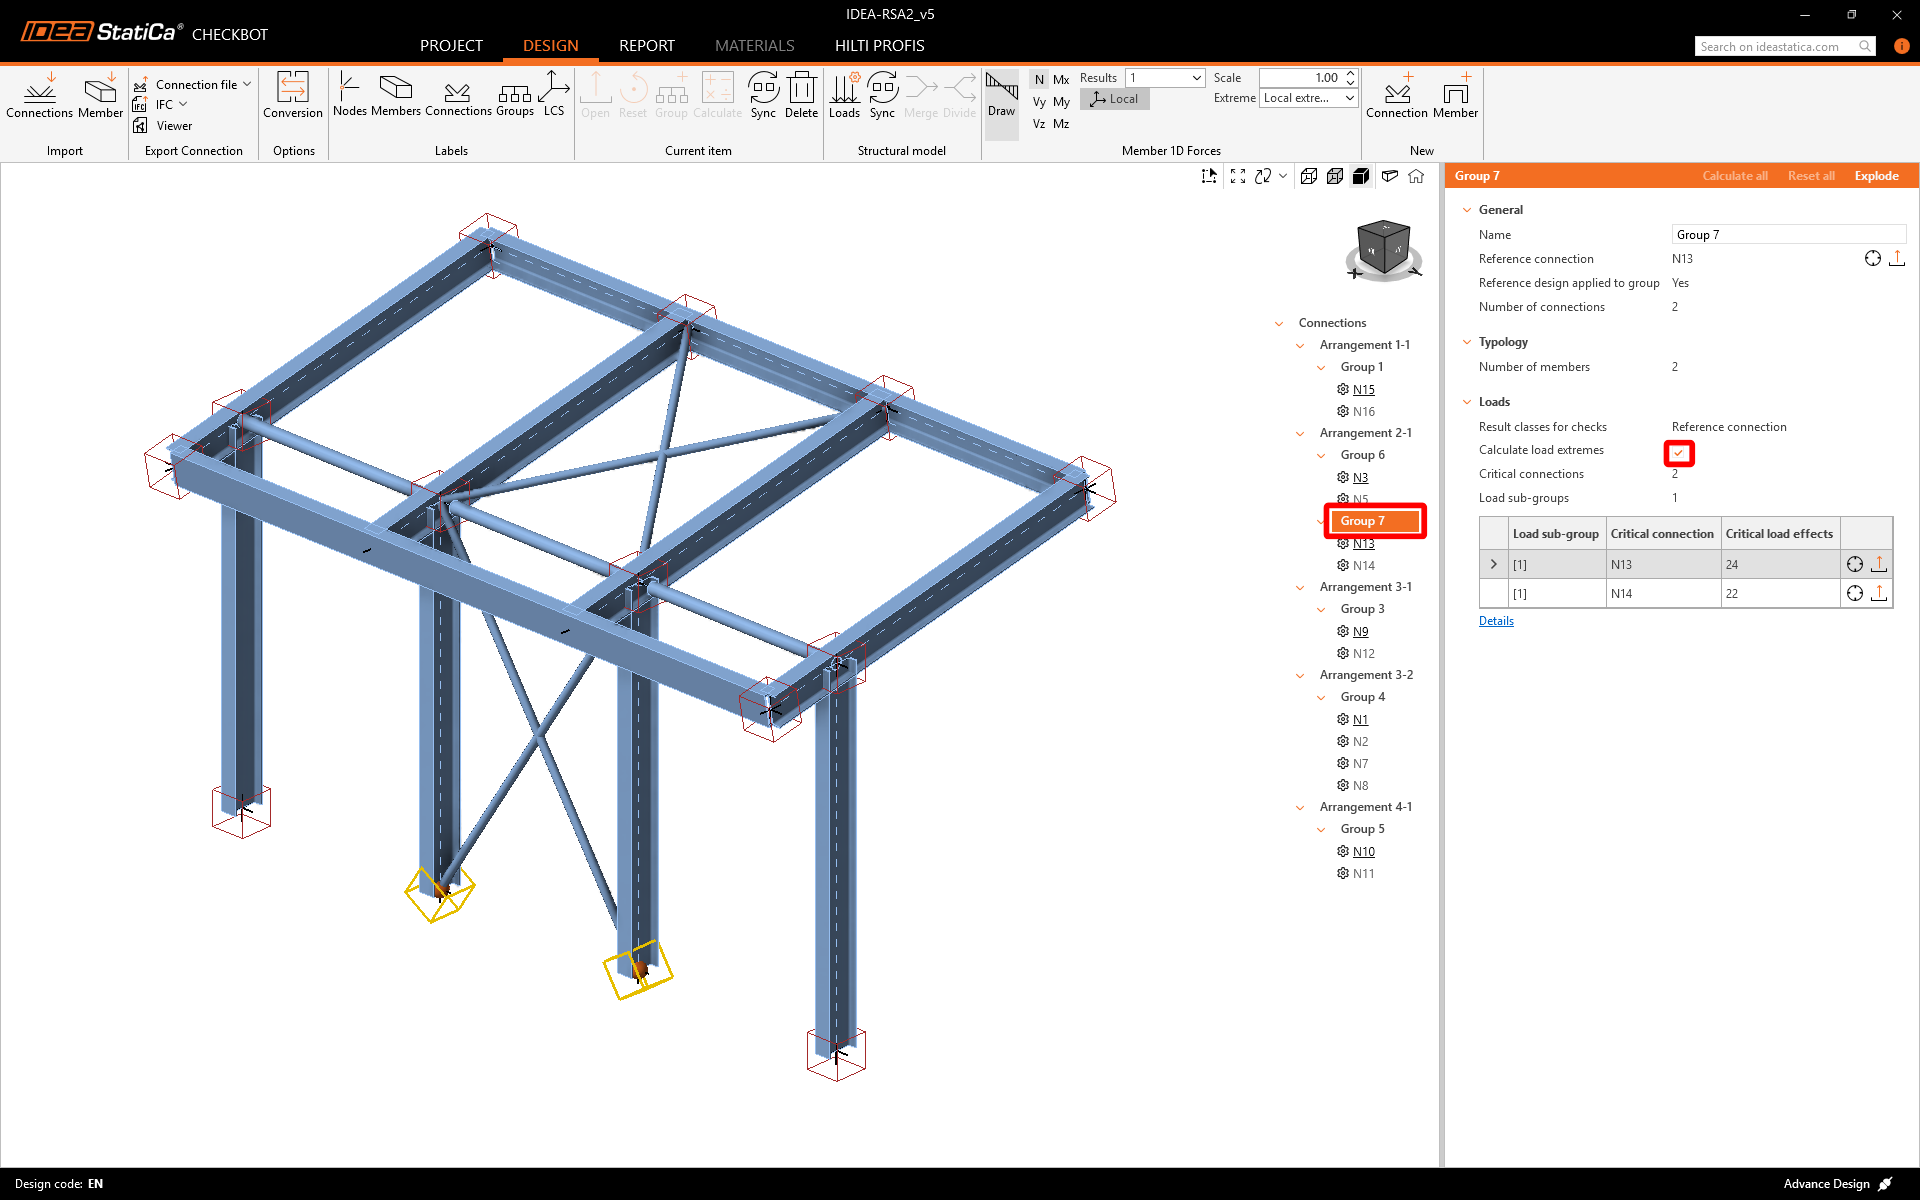
Vor der Bemessung und Analyse der Verbindungen können Sie Lastextreme berechnen für eine beliebige Gruppe aktivieren. Dadurch können Sie die Verbindungen schneller für nur maßgebende Lasteffekte bemessen und nachweisen.
Bemessung
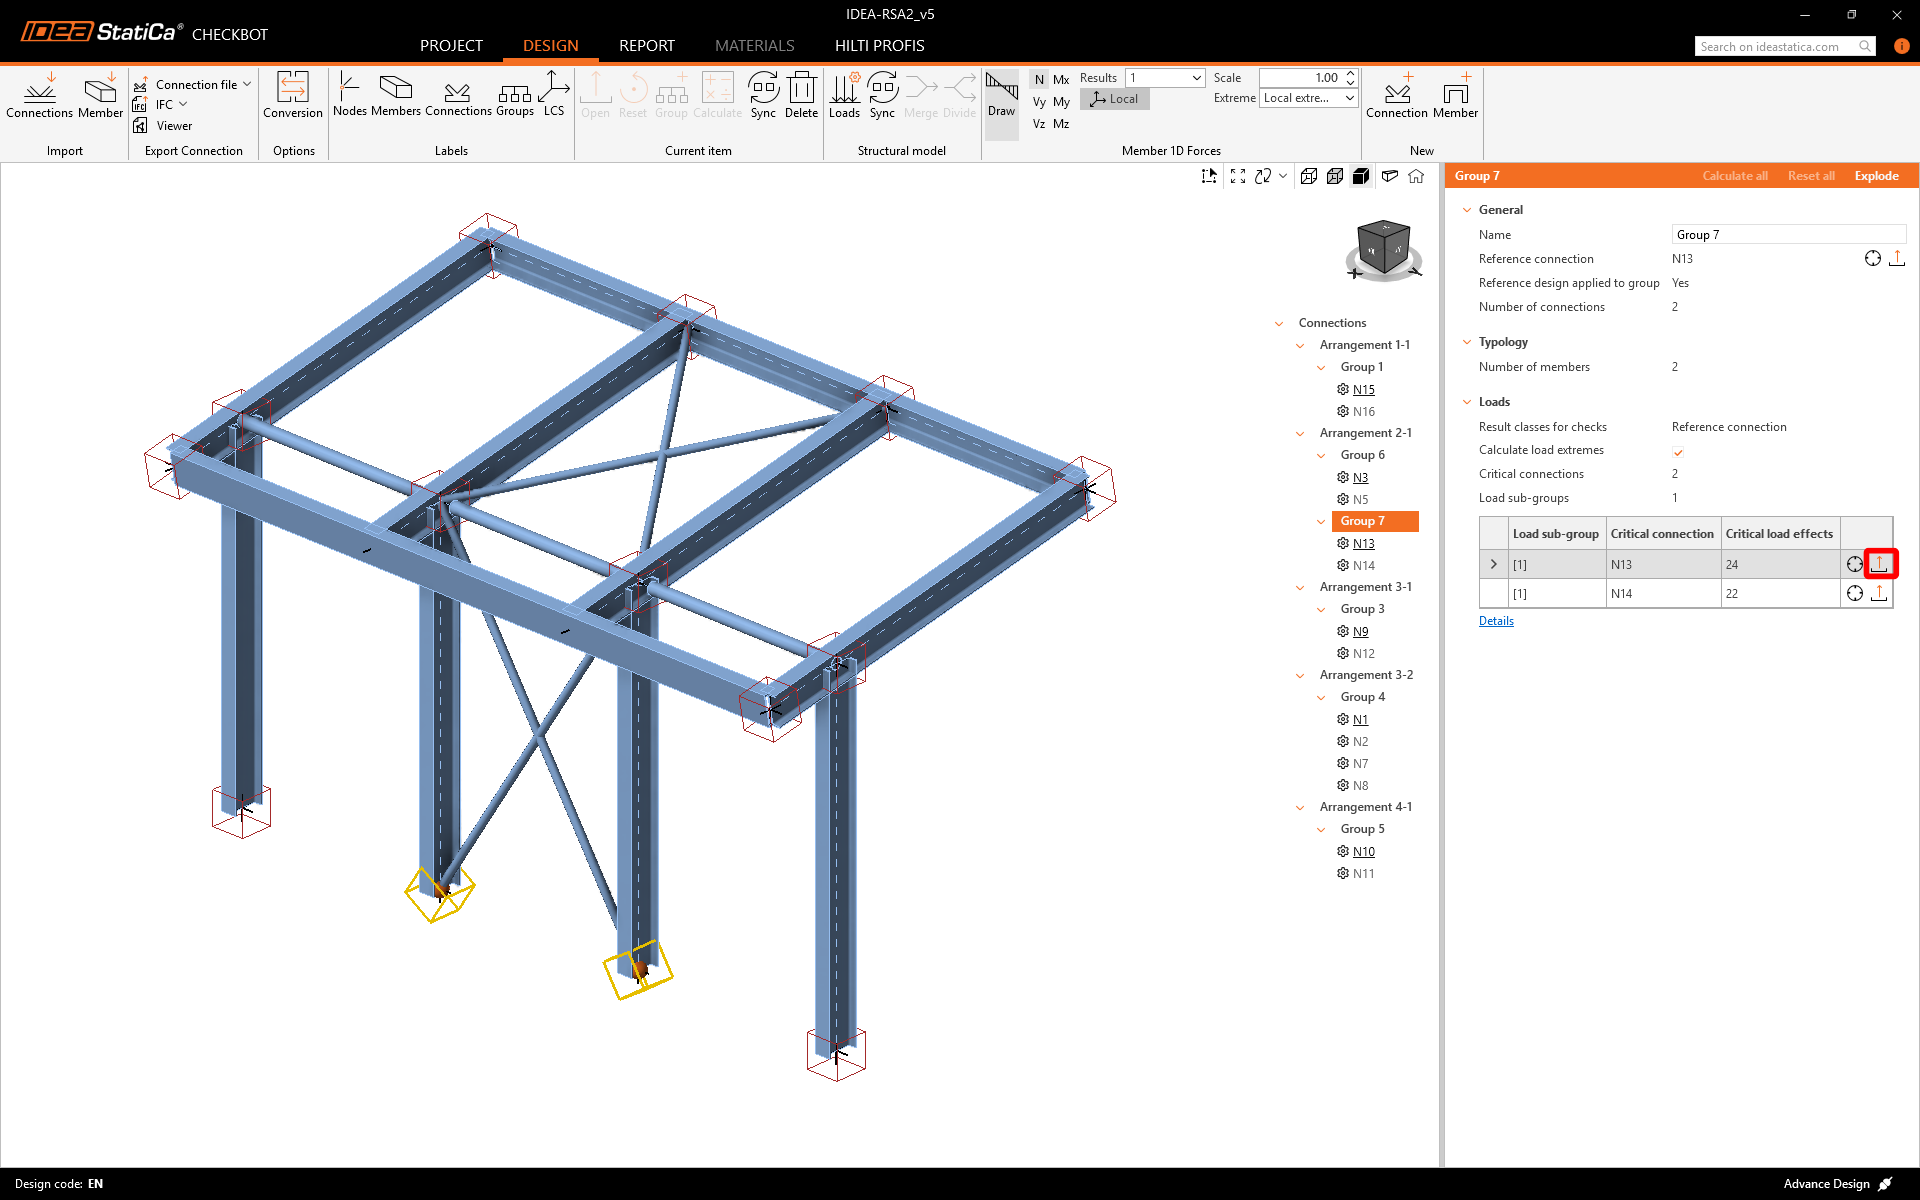
Klicken Sie auf Öffnen, um mit der Bemessung, dem Normnachweis und der Berichterstellung zu beginnen. Die importierte Verbindung wird in der IDEA StatiCa Connection-Anwendung geöffnet.
In diesem Tutorial verwenden wir die Connection Library, um eine Verbindung zu generieren. Wählen Sie Vorschlagen aus, und IDEA StatiCa schlägt mögliche Lösungen für die aktuelle Geometrie vor.
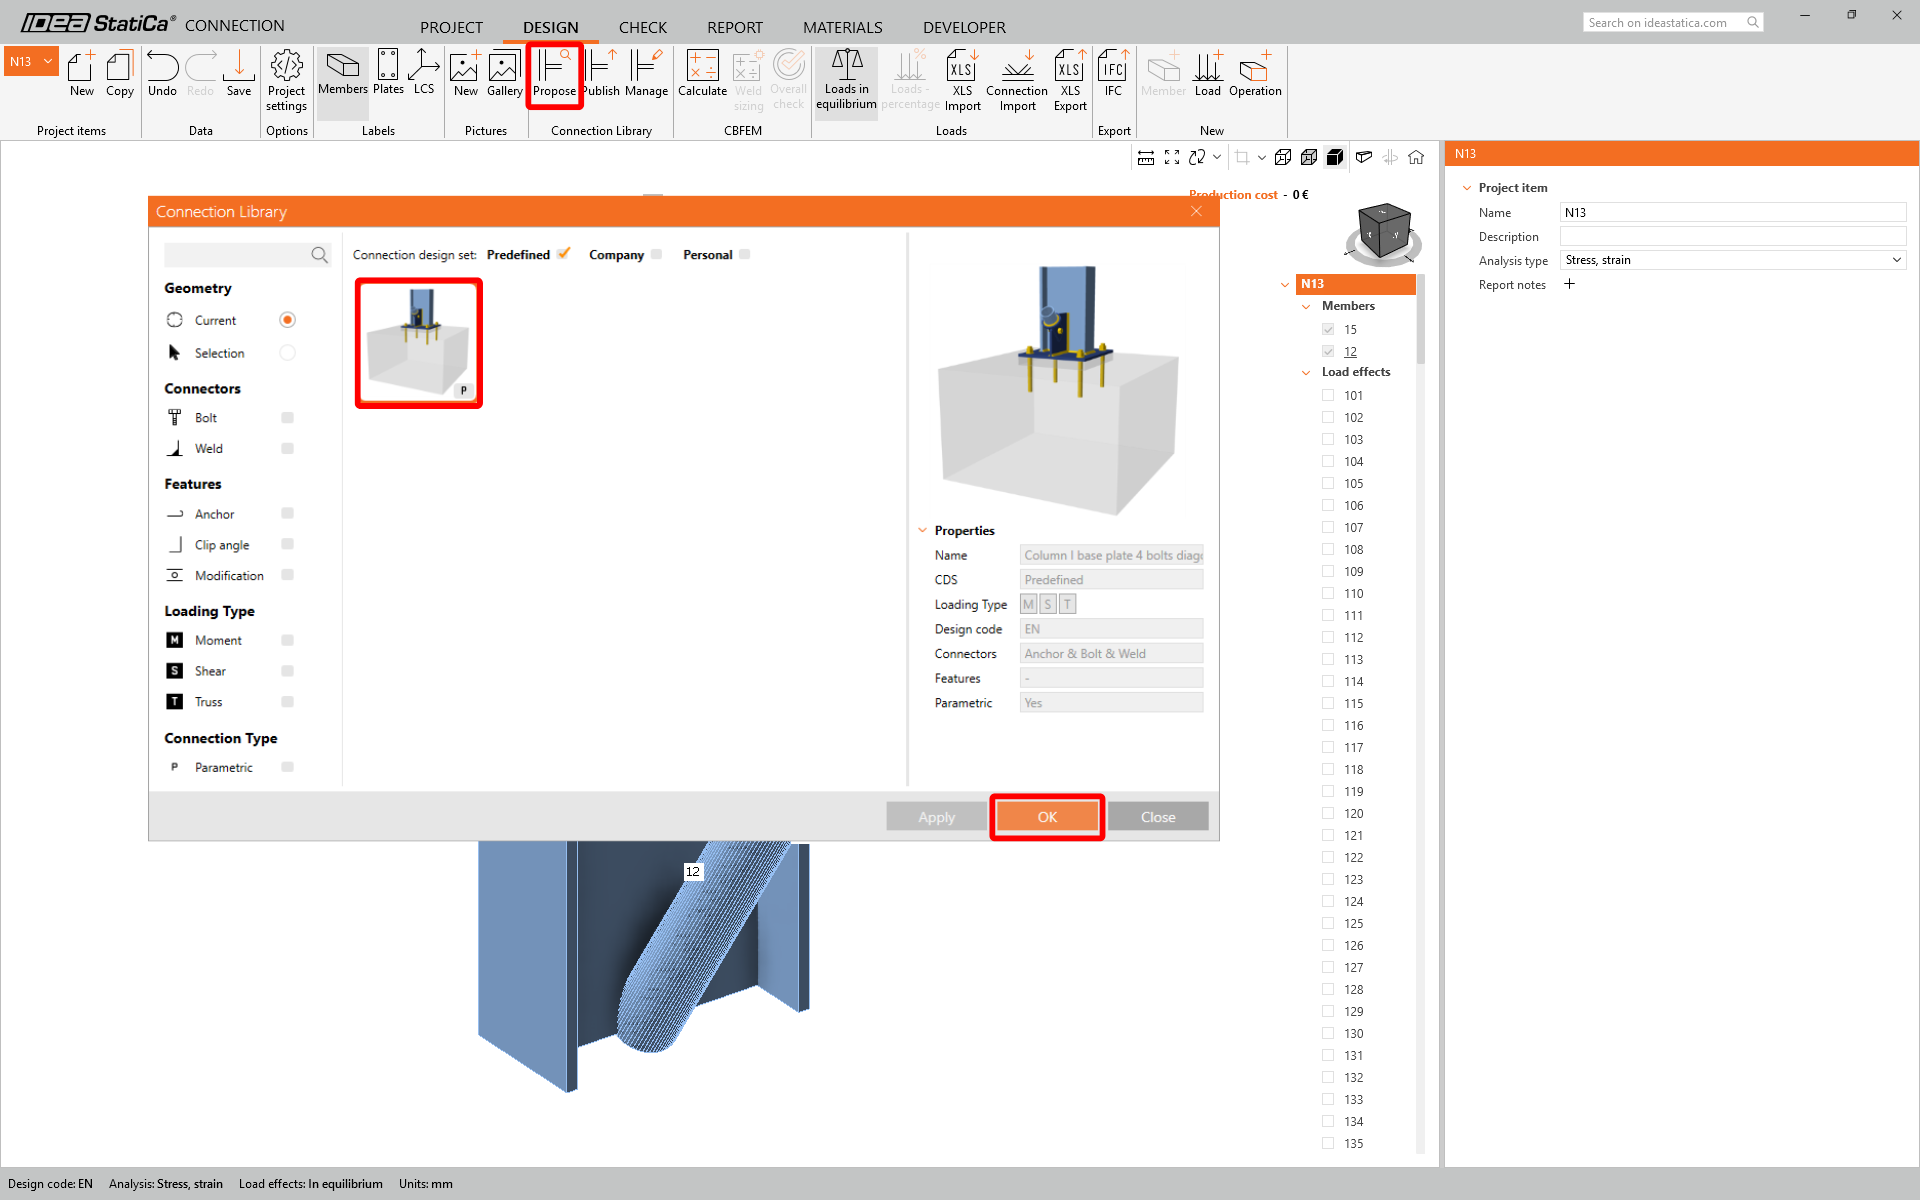
Bestätigen Sie den Dialog Verbindung vorschlagen - Konvektion

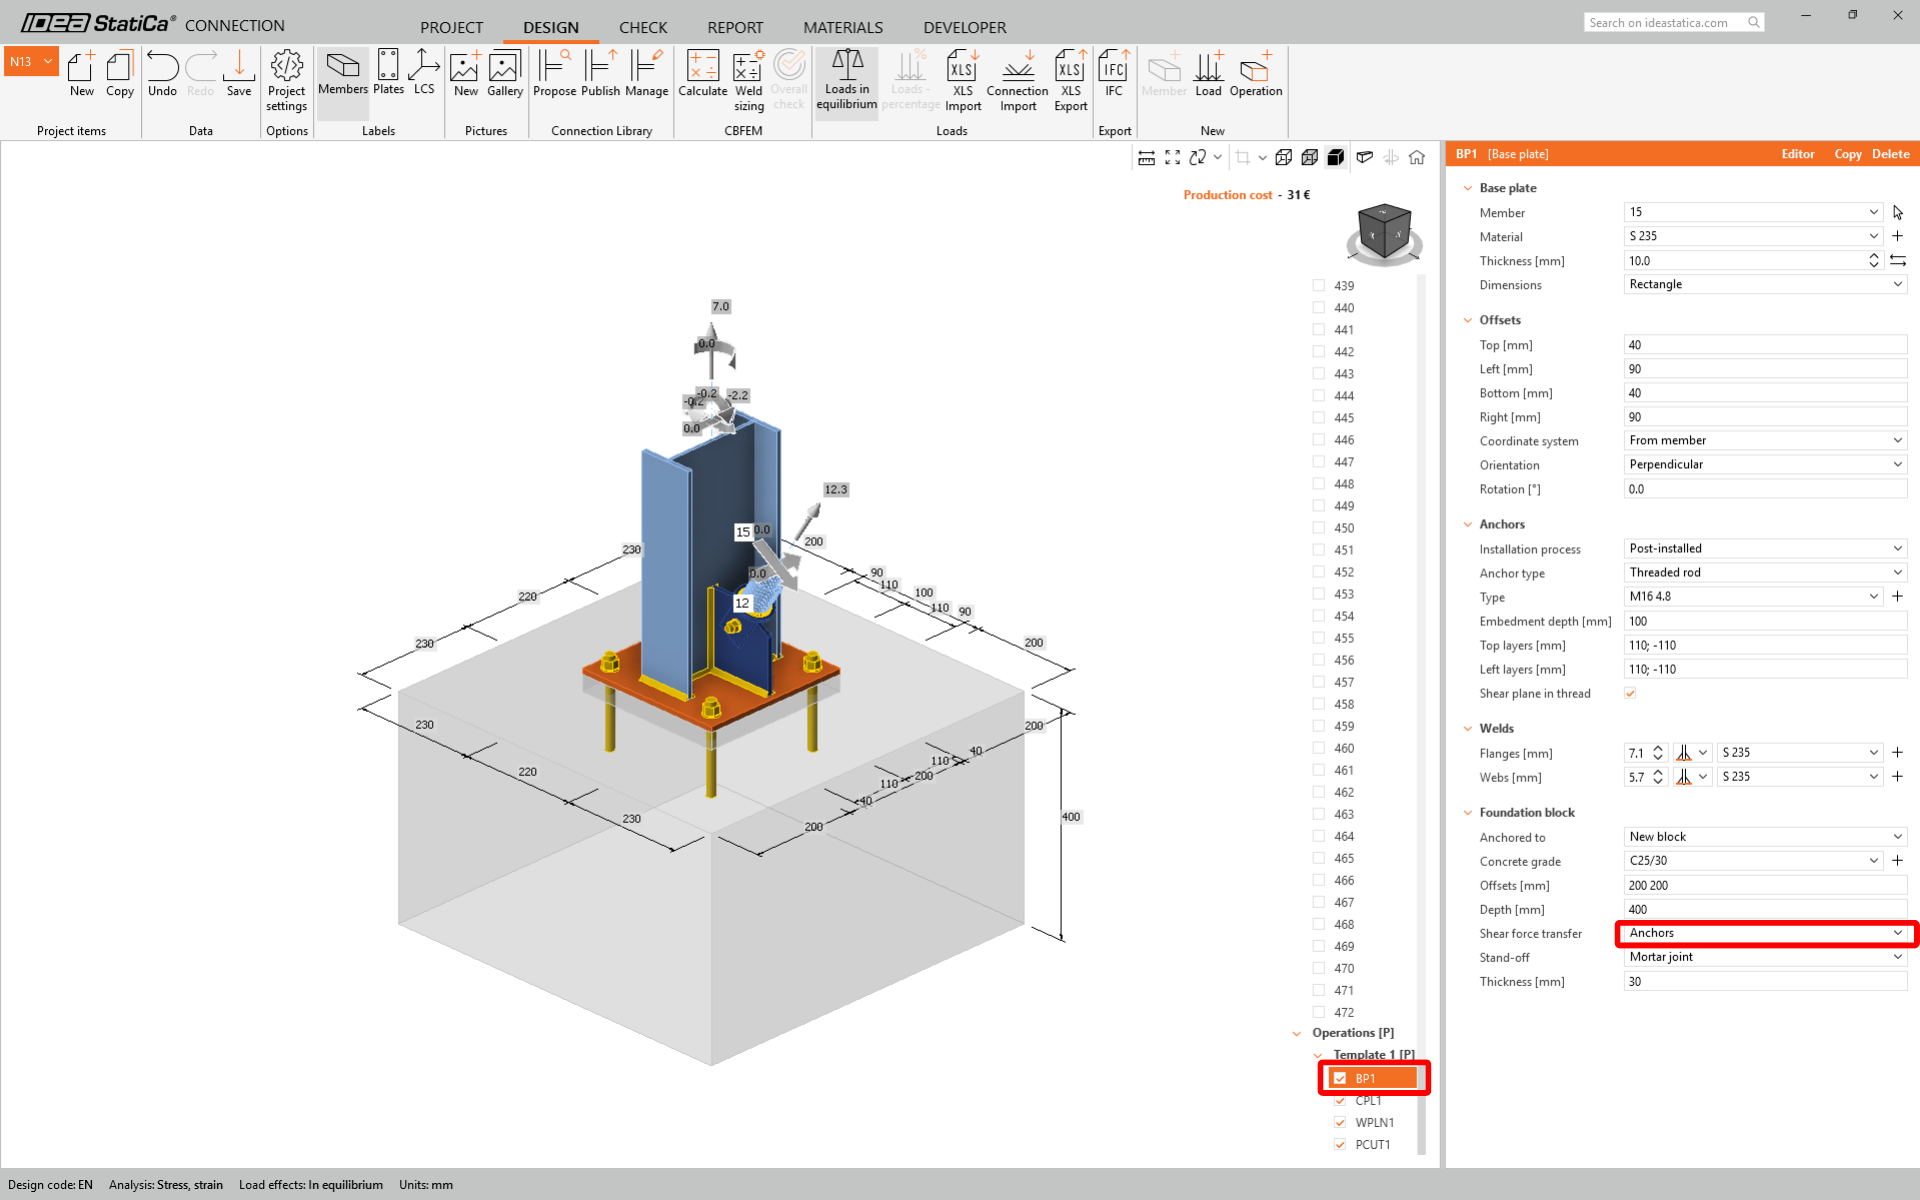
Im Bauteil 12 ändern Sie den Modelltyp auf N-Vy-Vz

Ändern Sie unter BP1 den Typ der Querkraftübertragung auf Anker.
Normnachweis und Bericht
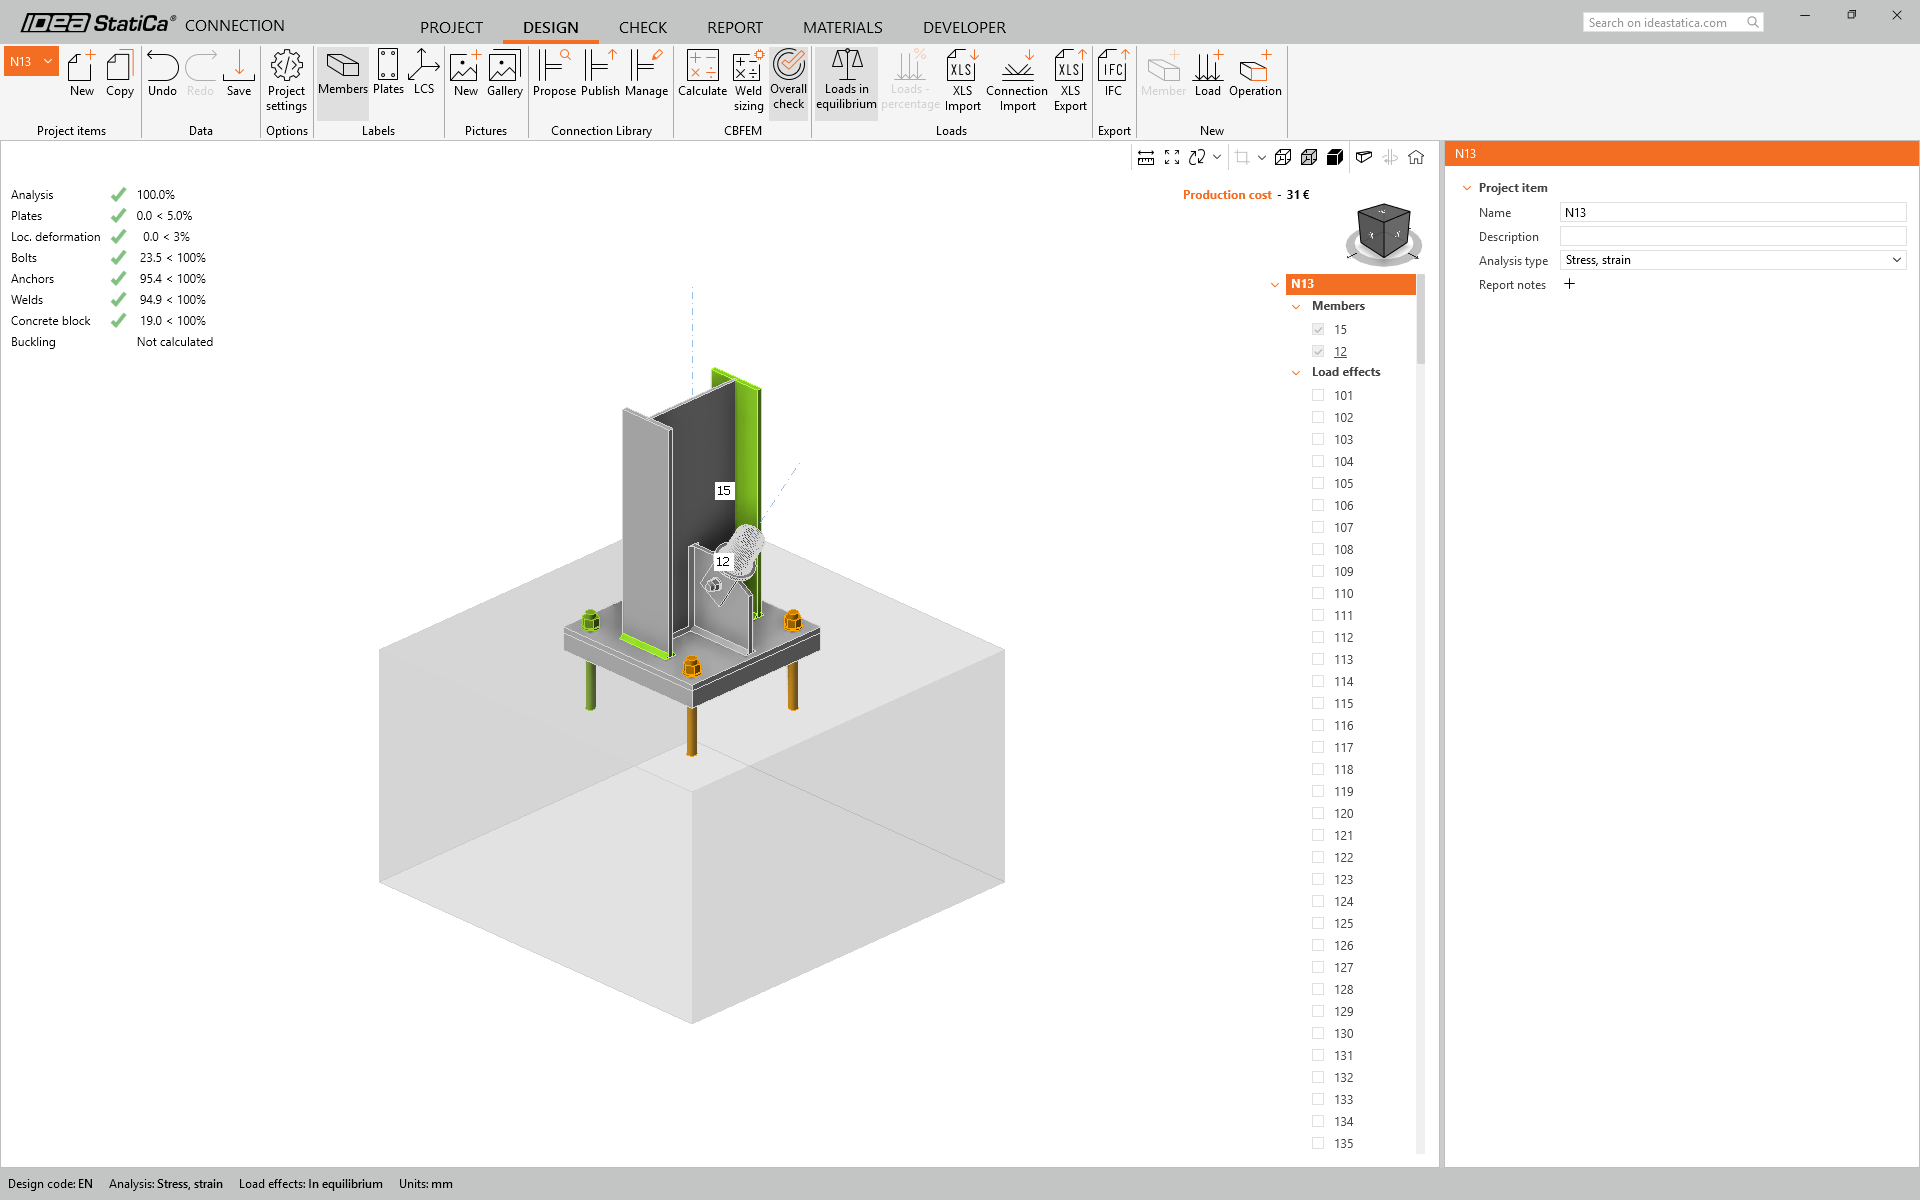
Führen Sie nun einen Normnachweis mit dem Symbol Berechnen im CBFEM-Panel im oberen Menüband durch. In IDEA StatiCa Connection können Sie viele verschiedene Analysearten und Normnachweise durchführen.

Sie können zur Registerkarte Nachweis wechseln, um die Ergebnisse sowohl der FEM-Analyse als auch der Normnachweise im Detail zu überprüfen.
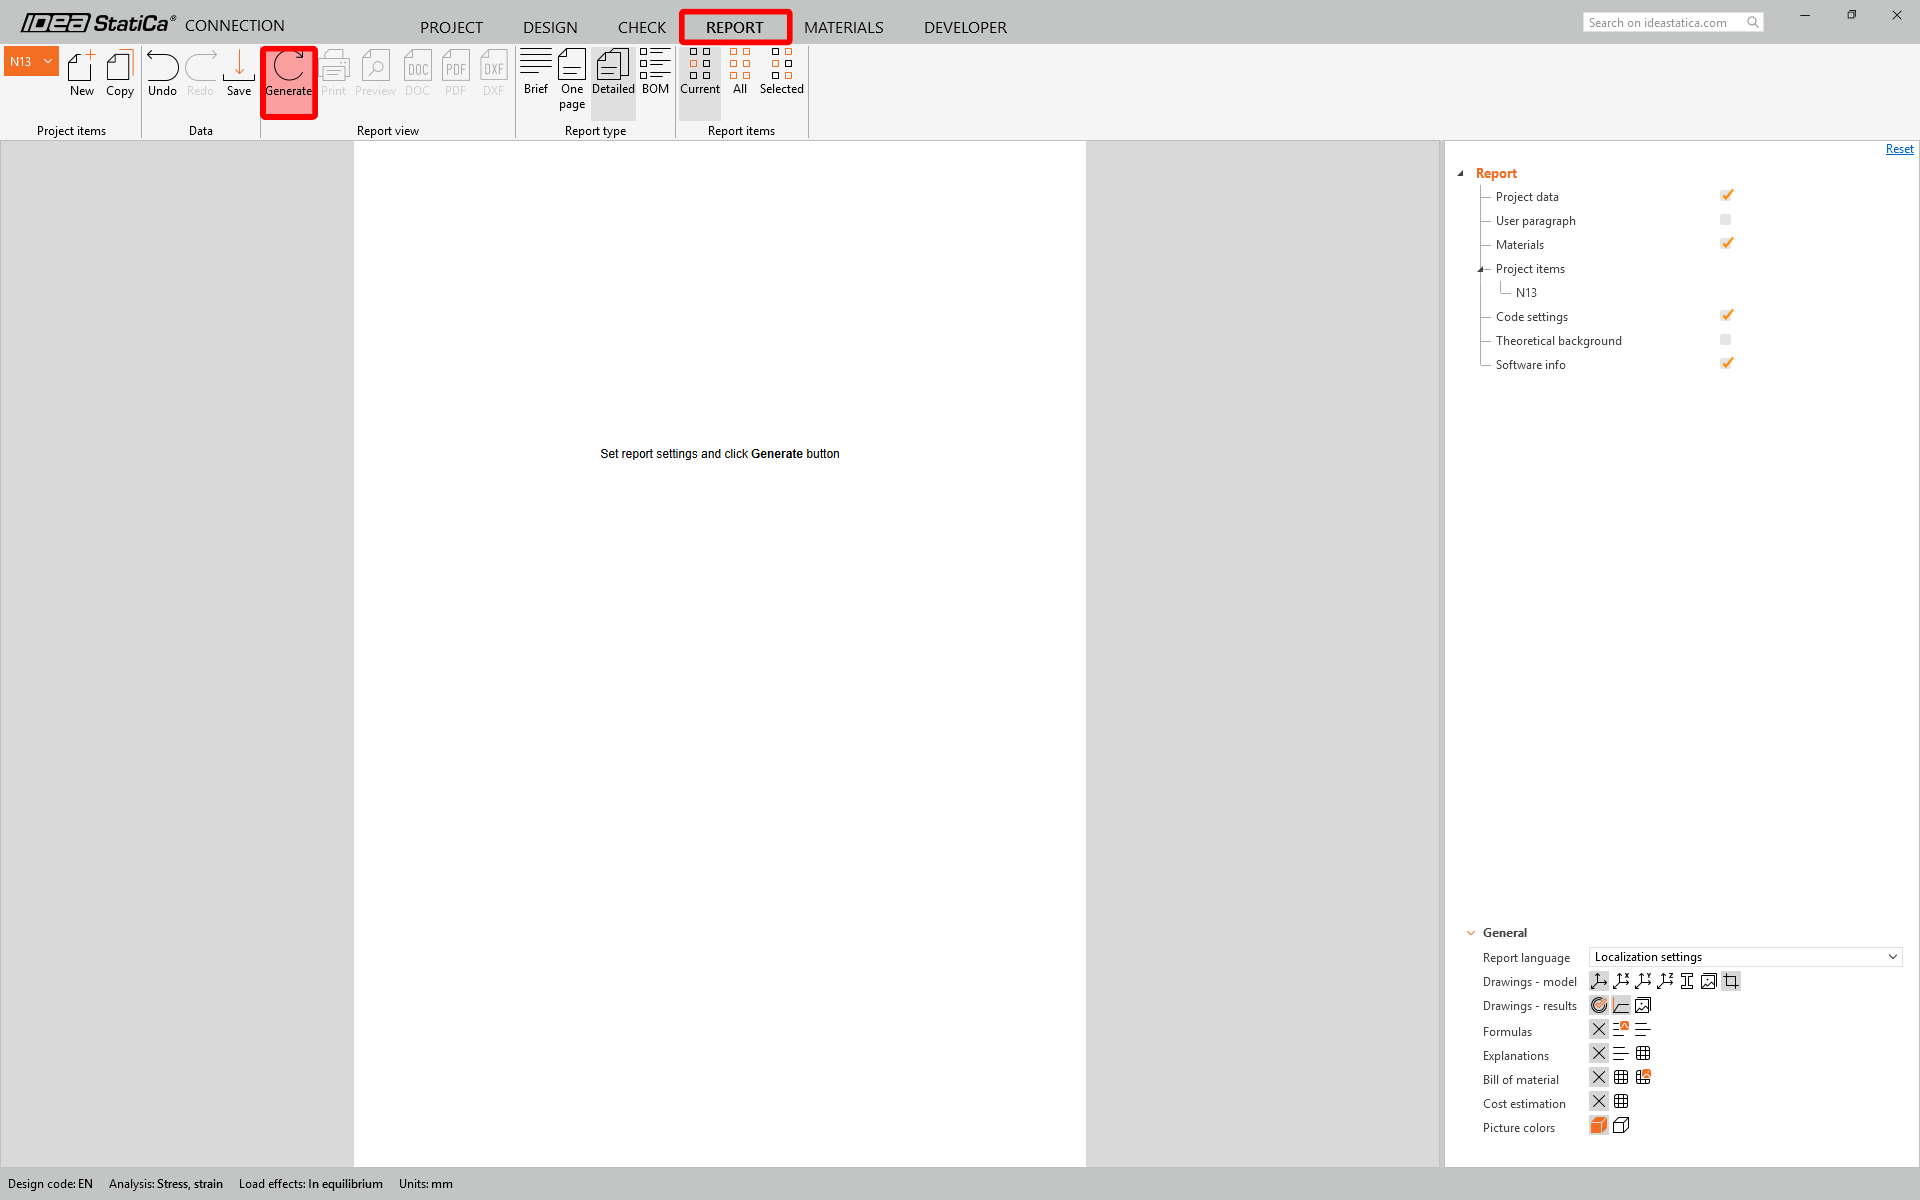
Sobald der Normnachweis abgeschlossen ist, können Sie auf der Registerkarte Bericht den Bericht mit Ergebnissen und Diagrammen für Ihr Verbindungsmodell erstellen.
Speichern Sie diese Verbindung und wechseln Sie zurück zum Checkbot-Fenster (Sie können das Connection-Fenster geöffnet lassen).
Um die tragwerksbezogene Integrität der importierten Verbindungen zu überprüfen, wählen Sie die gesamte Gruppe aus, deaktivieren Sie Lastextreme berechnen, klicken Sie mit der rechten Maustaste auf Gruppe 7 und klicken Sie auf Alle berechnen. Dadurch wird eine Stapelanalyse für alle ausgewählten Elemente gestartet.
Hinweis: Bei komplexen Verbindungen empfiehlt es sich, die abschließende Berechnung mit dem gesamten Satz von Lasteffekten durchzuführen, um sicherzustellen, dass alle im globalen Tragwerksmodell definierten Lasten eindeutig berücksichtigt werden.
Für detailliertere Informationen lesen Sie bitte diesen Artikel.

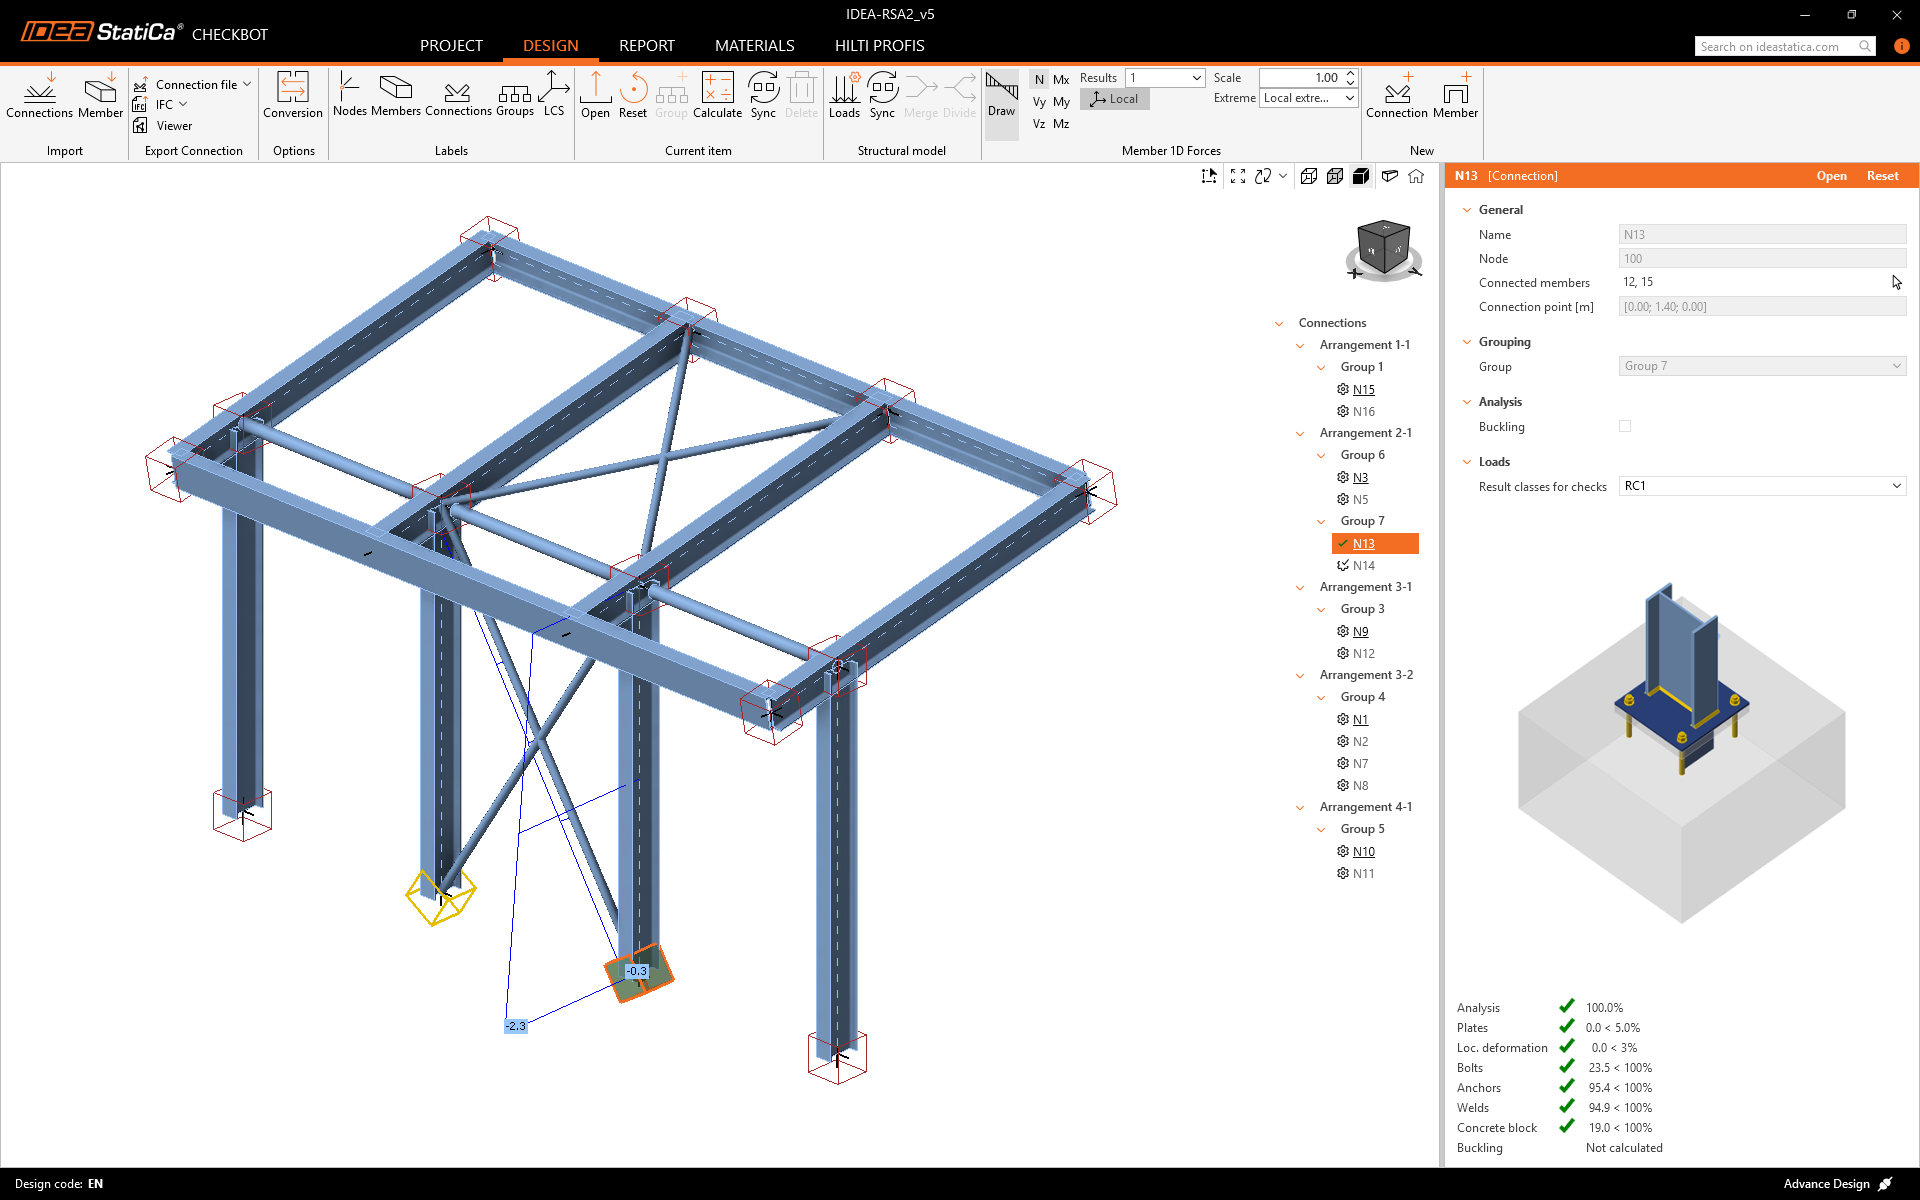
In Checkbot sehen Sie ein grünes Häkchen neben der Verbindung und das Knotenfeld ist grün ausgefüllt. Dies bedeutet, dass die Verbindung alle Normnachweise bestanden hat. Im Connection-Panel sehen Sie außerdem eine Darstellung der Verbindung sowie eine Zusammenfassung der Normnachweis-Ergebnisse.
Sie können sehen, dass nur eine Verbindung den jeweiligen Normnachweis bestanden hat, während die übrigen Verbindungen noch bemessen werden müssen.
Sie haben Advance Design erfolgreich über Checkbot mit IDEA StatiCa Connection verknüpft.