Evaluarea capacității portante a podurilor – Beam cu importul forțelor interne
1 Model
În acest tutorial, veți lucra cu un fișier deja pregătit care conține un model al unei grinzi prefabricate, care face parte dintr-un pod compozit. Începeți prin deschiderea fișierului KA61.ideaBeam disponibil în datele sursă ale tutorialului. Modelul conține toată geometria, rezemările, cazurile de încărcare de bază, etapele de construcție și armăturile pretensionate. Definirea acestor entități este lăsată pentru celelalte tutoriale. Veți utiliza fișierele XML deja create din model în Scia Engineer pentru a importa forțele interne. Doar forțele interne corespunzătoare încărcărilor mobile au fost exportate din model folosind șablonul UserDefForces.TDX pentru grinda noastră de margine. După deschiderea fișierului, puteți verifica setările anexei naționale, standardului de pod, tipului de pod și funcționalității de evaluare a capacității portante a podului.

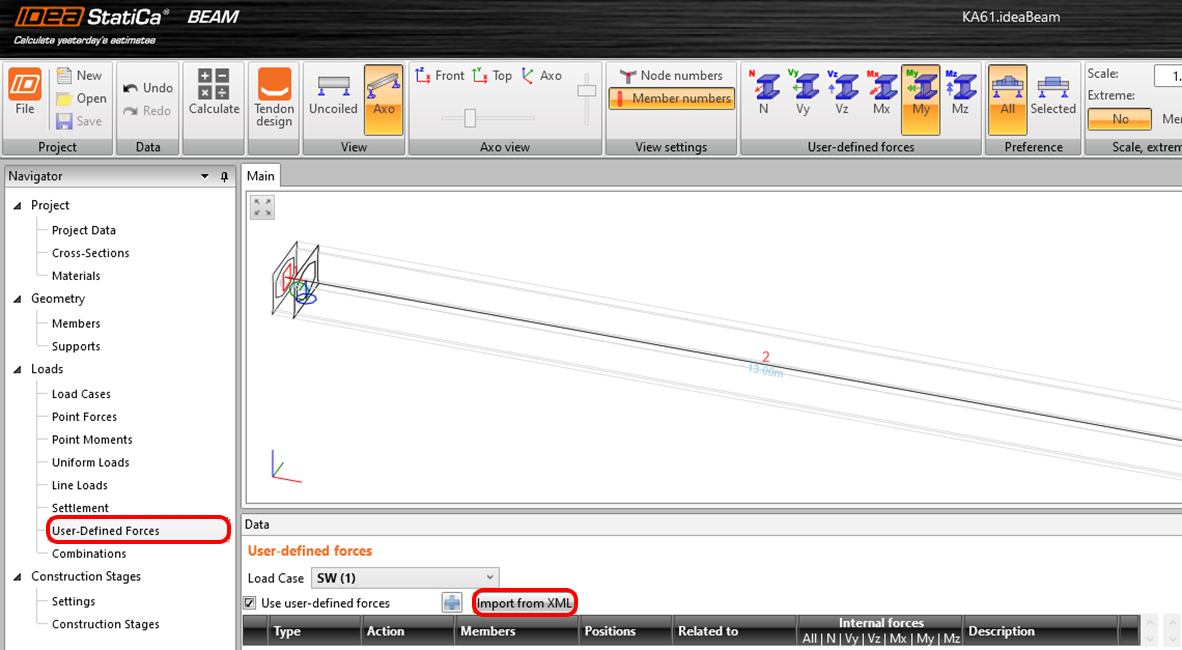
2 Import
Modelul conține cazuri de încărcare permanentă pentru o grindă. Forțele definite de utilizator vor fi utilizate pentru importul forțelor interne rămase. În general, forțele definite de utilizator pot fi importate prin copiere din Excel sau prin utilizarea unui fișier XML. Utilizați a doua abordare și faceți clic pe butonul Import from XML.
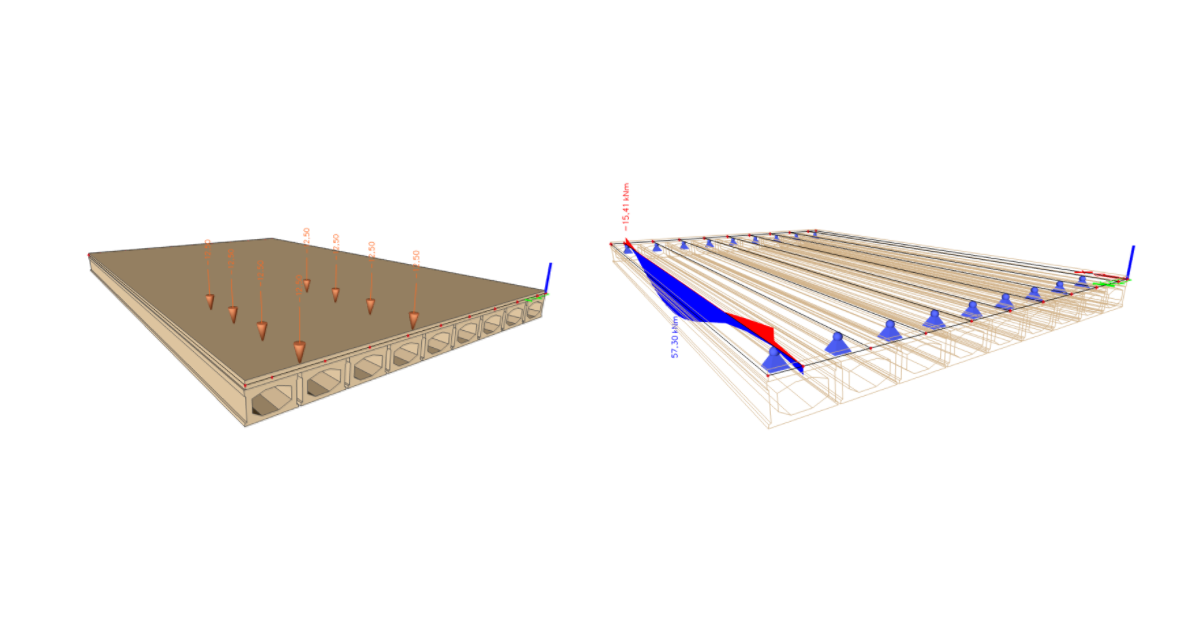
Se deschide dialogul de selectare a fișierului XML și se caută fișierul EsaResults.xml în datele sursă. Aceasta va afișa un alt dialog unde puteți seta ce se importă și cum. Modelul 3D și forțele sale încep de la începutul plăcii, care este ușor mai lungă decât grinda dumneavoastră.

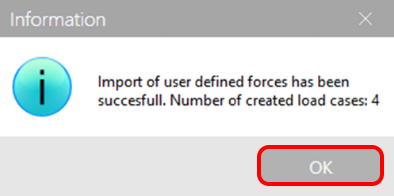
Sunteți notificat despre un import reușit prin următoarea notificare.
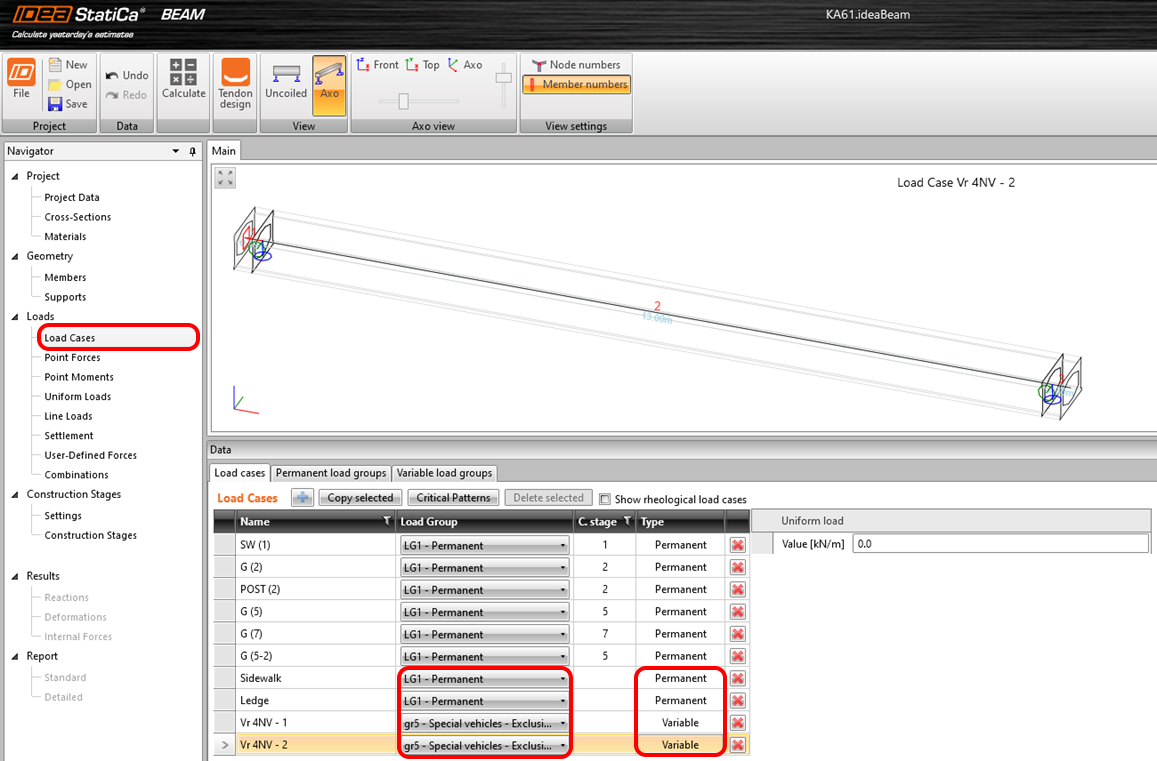
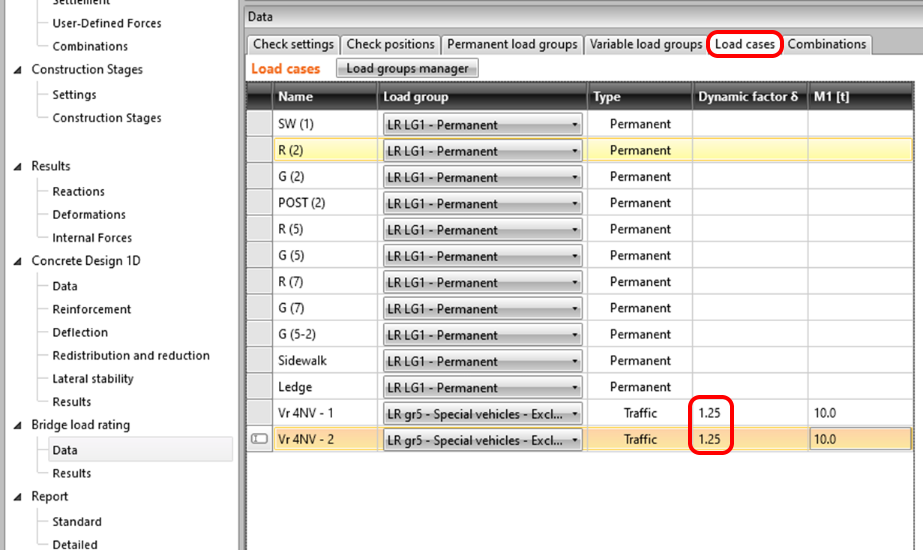
Au fost importate patru cazuri de încărcare: Ledge, Sidewalk, Vr 4NV - 1 și Vr 4NV - 2. Comutați la Cazuri de încărcare pentru a seta Tipul și Grupul de încărcare. Tipul cazului de încărcare se modifică făcând clic în coloana tabelului cazului respectiv.
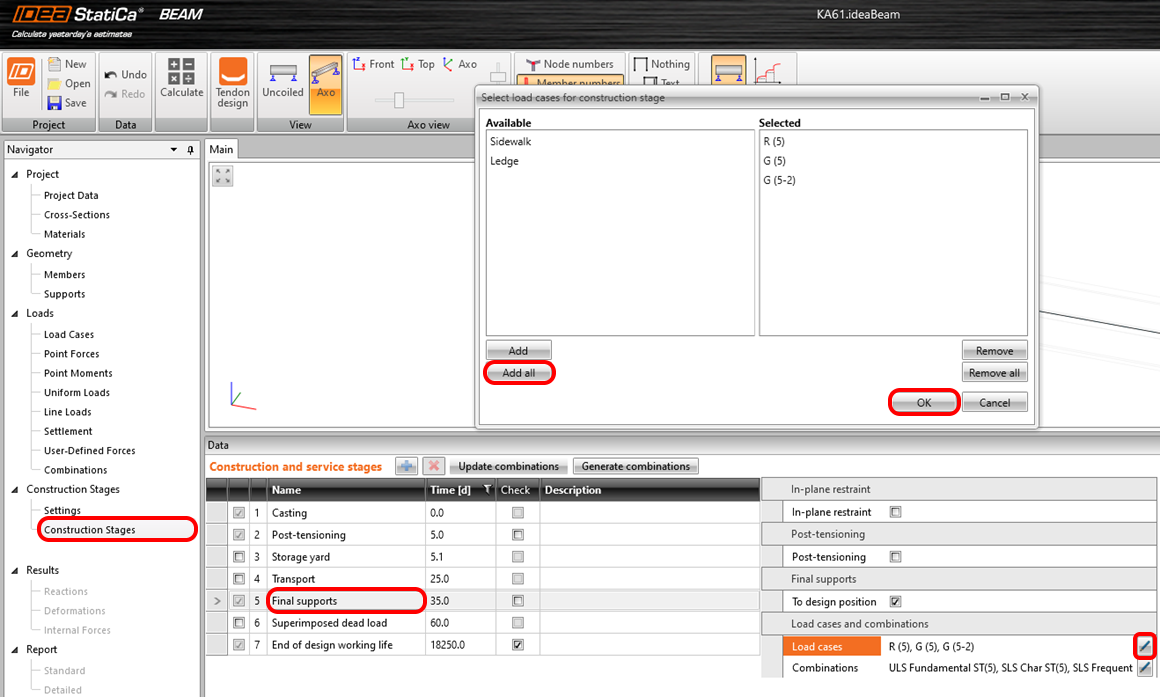
Așa cum se poate observa deja din figura anterioară, cele două cazuri importate nu sunt atribuite etapelor de construcție în care apar. Prin urmare, acestea nu ar fi luate în considerare în mod adecvat în analiza TDA. Puteți corecta acest lucru comutând la Etapele de construcție și adăugând cazurile de încărcare la etapa de rezemare finală. Cazurile de încărcare sunt adăugate folosind dialogul din figura următoare, unde adăugați ambele stări de încărcare permanentă.
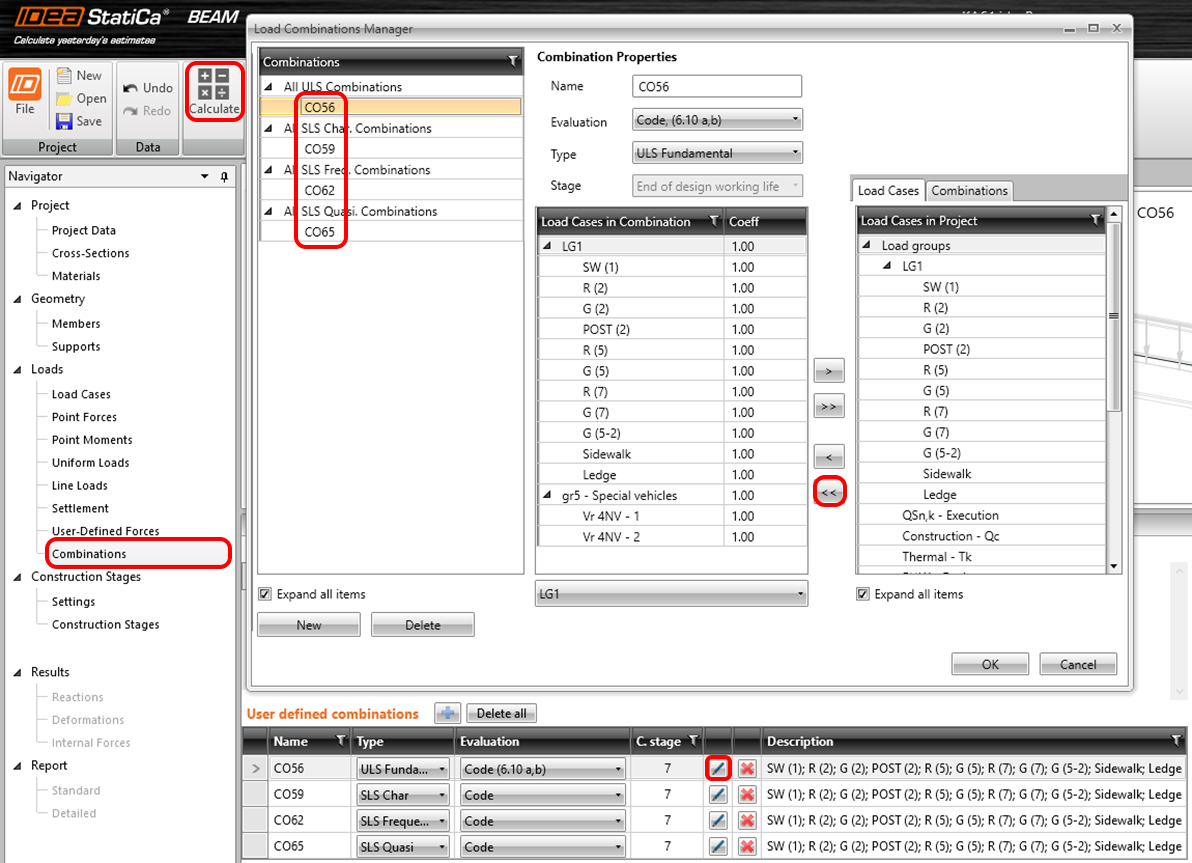
După atribuire, faceți clic pe Actualizare combinații pentru a sorta corect incrementele în toate combinațiile din model.

Această acțiune actualizează doar cazurile de încărcare permanentă în toate combinațiile relevante. Deoarece ați importat și cazuri de încărcare variabilă, trebuie să le adăugați manual.
În acest exemplu, nu veți efectua verificări standard ale betonului, ci calculul iterativ al evaluării capacității portante a podului, deci editați doar combinațiile definite de utilizator din fișier folosind pictograma creion. Repetați adăugarea tuturor cazurilor de încărcare la combinațiile CO56, CO59, CO62 și CO65 folosind butonul cu pereche de săgeți, așa cum este indicat.
Ultimul pas pe această filă este să rulați analiza TDA folosind Calculați.
3 Calculul evaluării capacității portante a podului
Comutați la Date din secțiunea de evaluare a capacității portante a podului pentru a configura calculul. Pe prima filă, setați verificările care trebuie efectuate, estimările factorului de multiplicare dacă doriți să accelerați calculul și, nu în ultimul rând, tipul de evaluare a capacității portante a podului, unde lăsați doar Rezervat.

Pe a doua filă, setați pozițiile pentru evaluarea capacității portante a podului. Modificați poziția secțiunii 2 aproape de reazem.

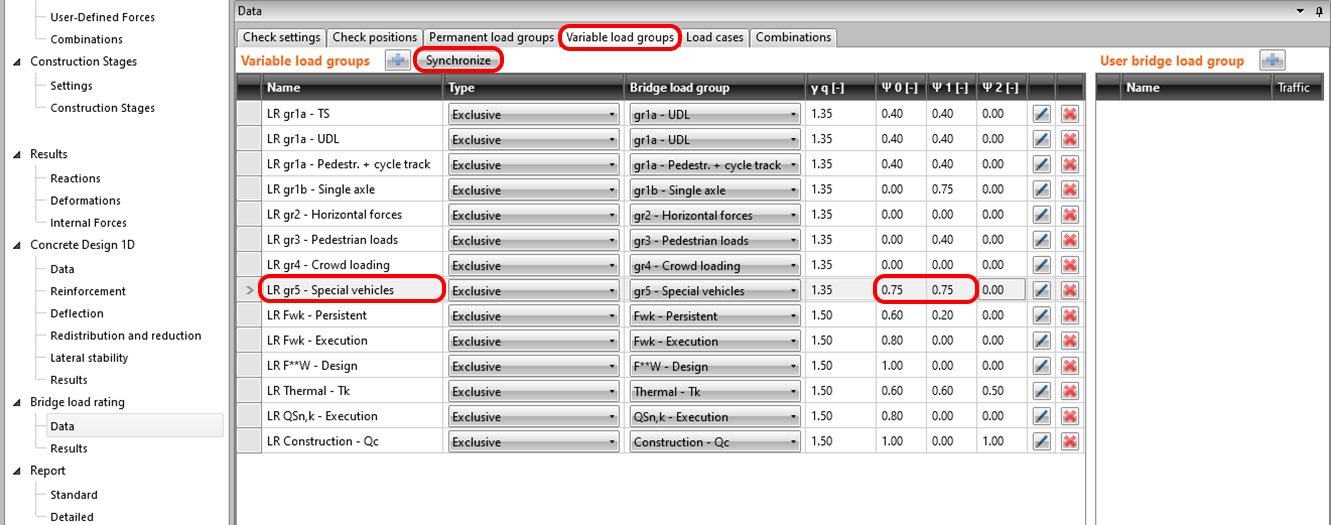
Comutați fila la Grupuri de încărcare variabilă și Sincronizați cazurile de încărcare variabilă. Apoi setați coeficienții parțiali conform standardului de capacitate portantă la 0,75.
Pe penultima pagină de setări, denumită Cazuri de încărcare, setați factorul dinamic.
Fila Combinații este utilizată pentru a genera combinații pentru tipurile individuale de evaluare a capacității portante a podului. După apăsarea butonului Generare, vor apărea doar combinațiile relevante pentru evaluarea capacității portante rezervate, datorită setărilor din fila Date. Lista rezultată a combinațiilor arată astfel:

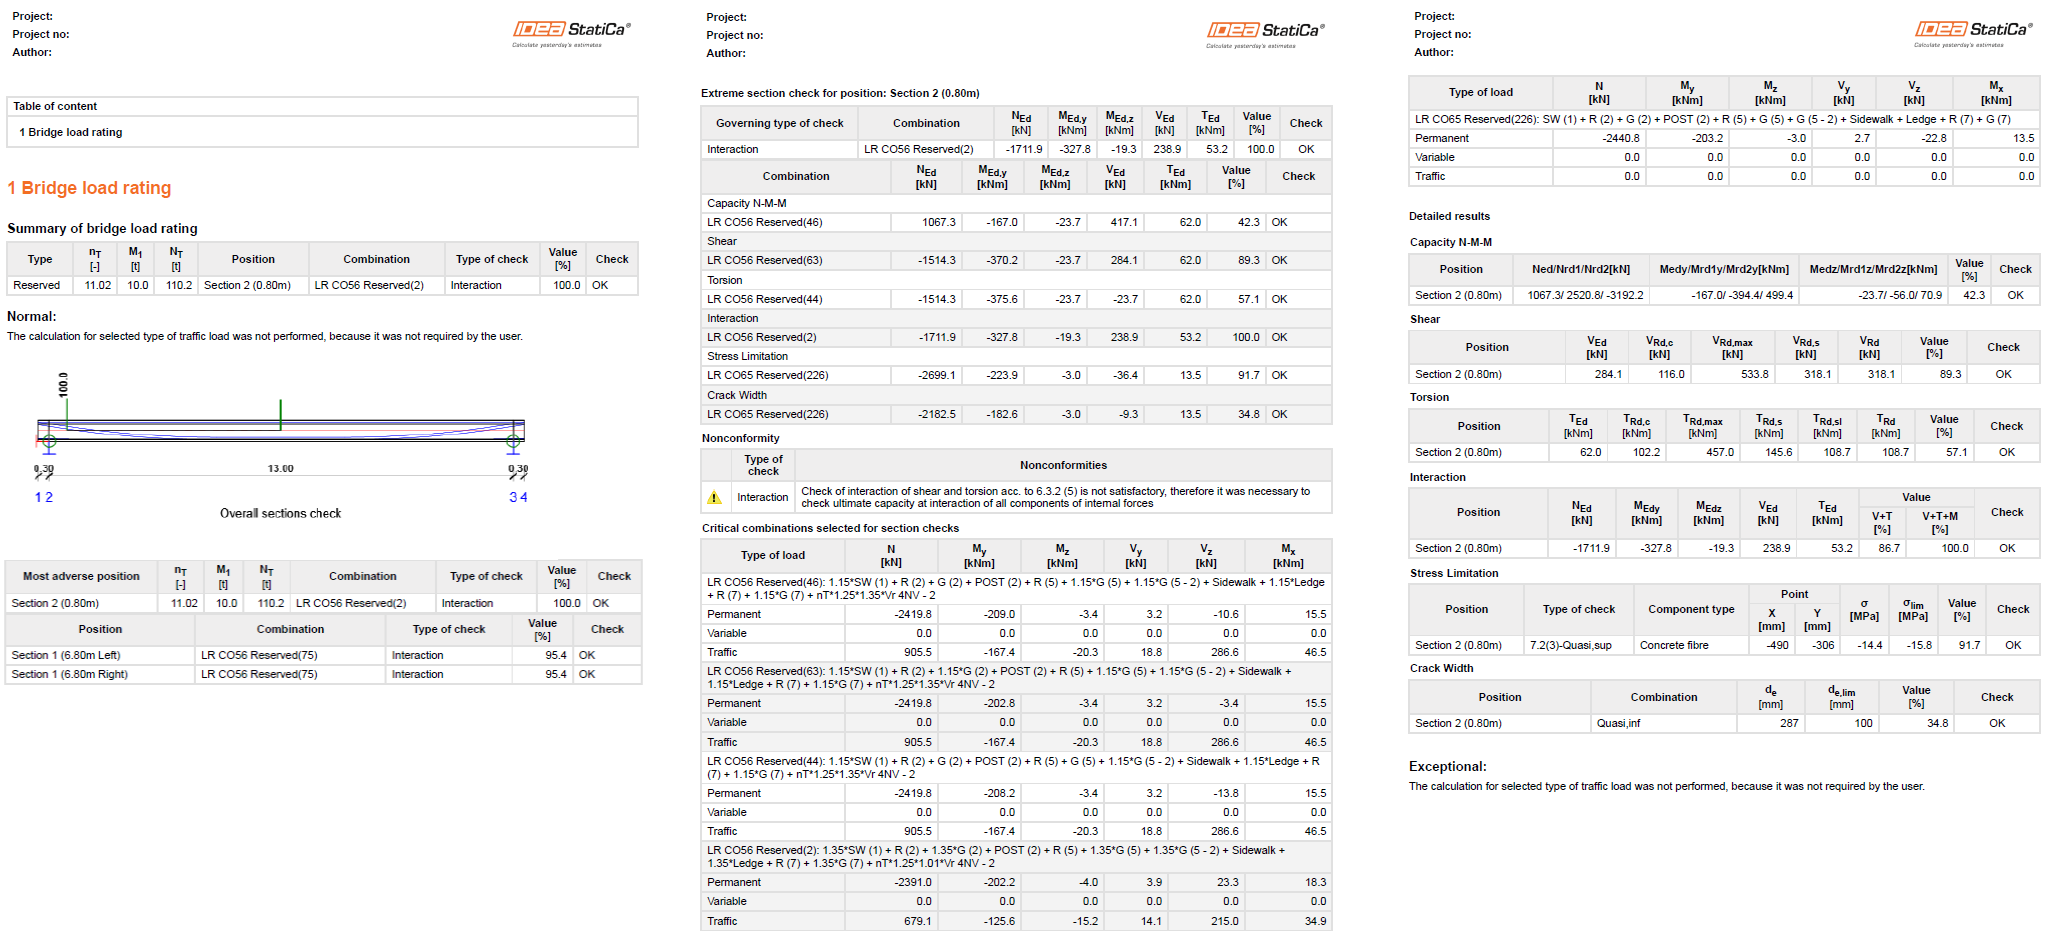
5 Rezultate
Comutați la fila Rezultate pentru a porni automat calculul iterativ. Odată finalizat, puteți vizualiza evaluarea capacității portante NT Rezervat a podului în partea dreaptă a ecranului.

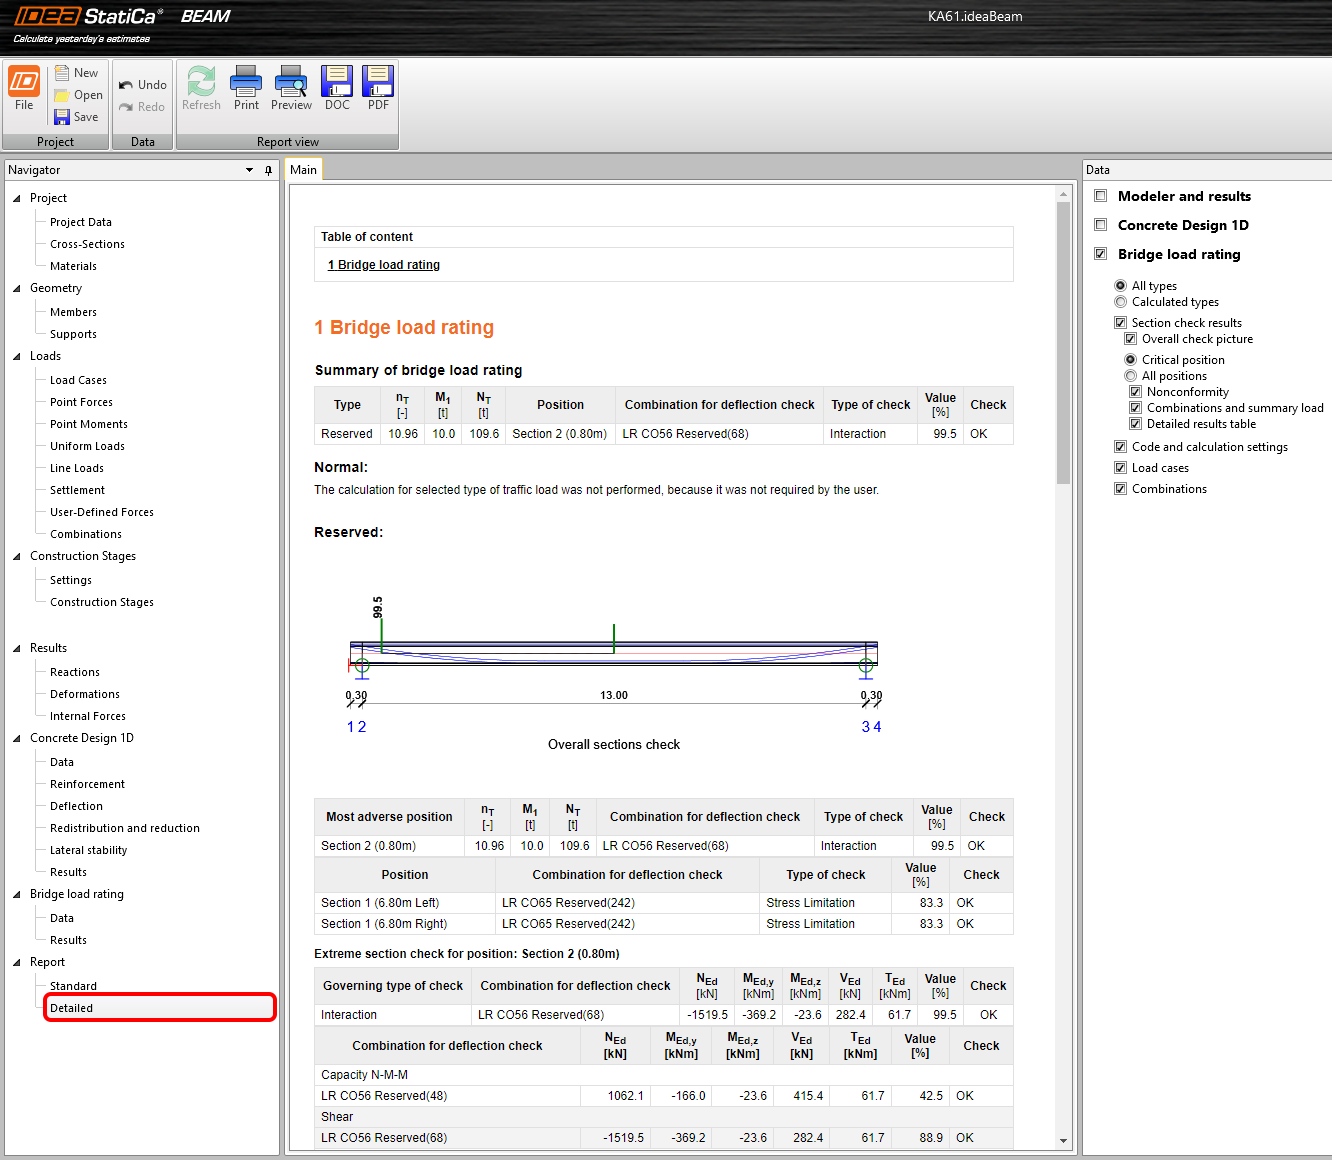
6 Raport
În ultimul pas, comutați la secțiunea Raport din fila Detail. IDEA StatiCa oferă un raport complet editabil pe care îl puteți tipări sau exporta.