Calcul structurel d'une poutre en béton armé (EN)
1 Nouveau projet
Lançons IDEA StatiCa et sélectionnons l'application Beam.
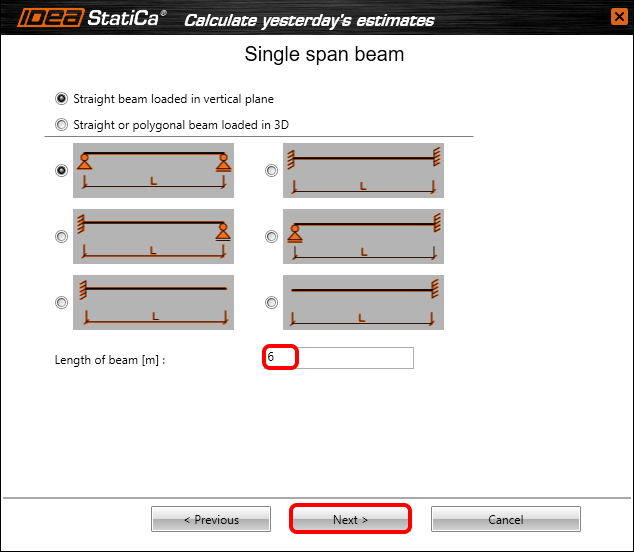
Vous créez un nouveau projet en cliquant sur Nouveau. La fenêtre Assistant s'ouvre pour accélérer la saisie. Commencez par sélectionner une poutre en béton coulé en place, de type armé, et Poutre à travée unique. Passez à l'étape suivante de l'assistant en cliquant sur Suivant.

Si ce n'est pas défini par défaut, réglez la longueur de la poutre à 6 m.
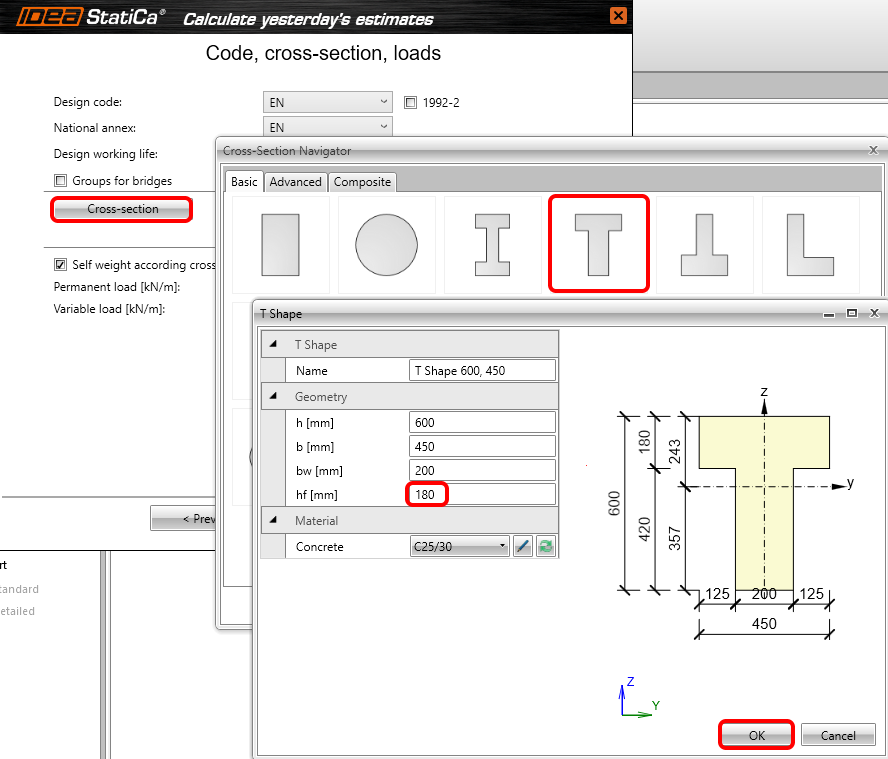
Vous devez maintenant définir un code, une annexe nationale, une section transversale et des charges. Dans cet exemple de base, vous sélectionnerez une section en T et modifierez les dimensions comme suit.
Après la saisie de la charge variable, terminez la création du modèle.

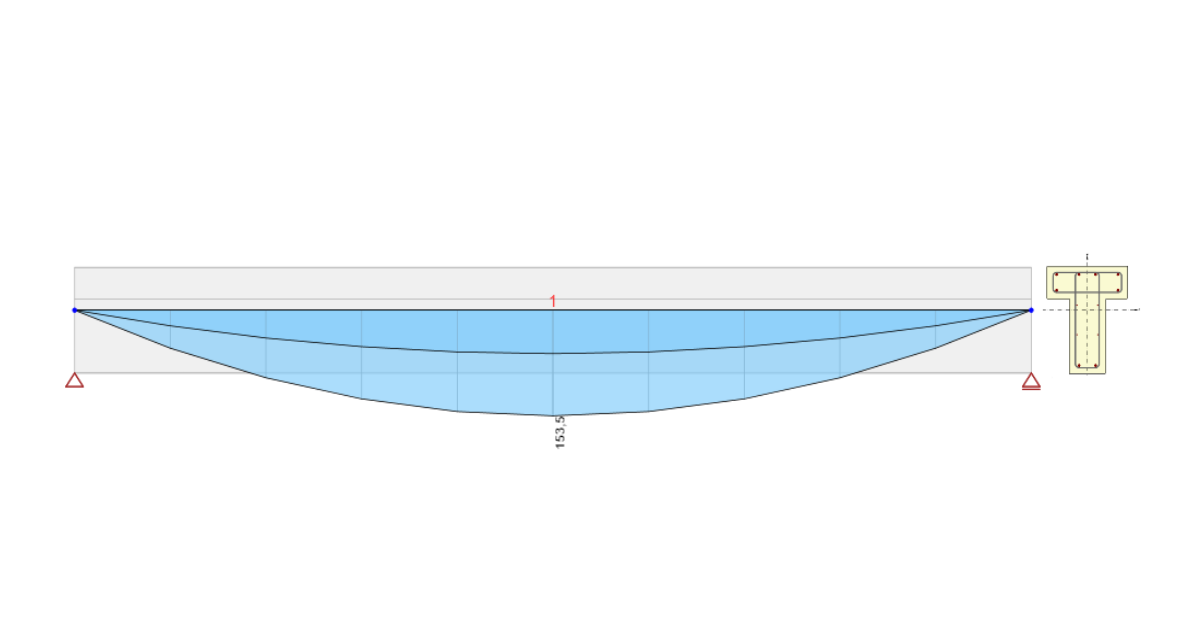
Le modèle suivant apparaîtra sur votre écran.

2 Conception
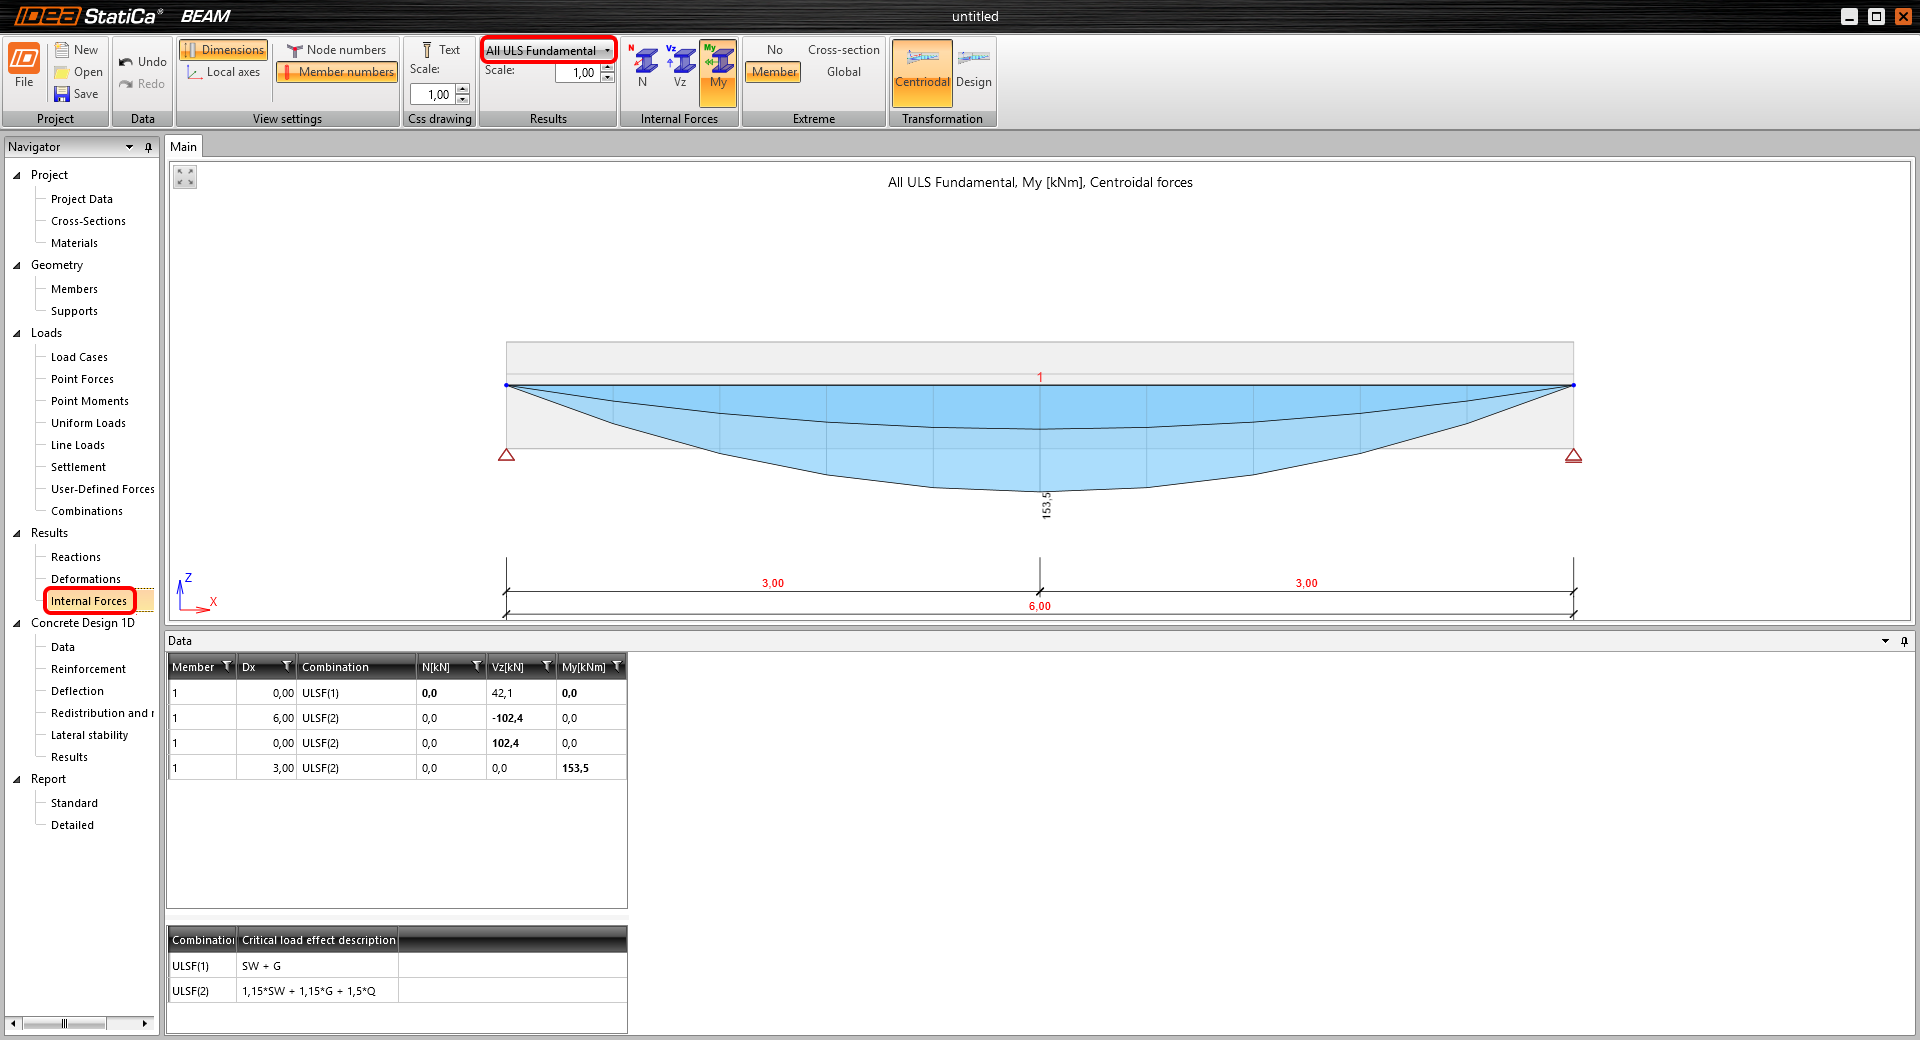
Si vous ne souhaitez pas ajouter d'autres charges, vous pouvez passer directement à l'onglet efforts intérieurs dans le navigateur. Vous pouvez parcourir tous les résultats des efforts intérieurs pour n'importe quel cas de charge ou combinaison du projet. Si vous souhaitez modifier les résultats affichés, utilisez la liste déroulante mise en évidence pour les définir comme souhaité. Vous pouvez trouver les valeurs extrêmes résumées dans le tableau avec les descriptions des combinaisons juste en dessous, afin de déterminer facilement comment les valeurs extrêmes ont été atteintes.
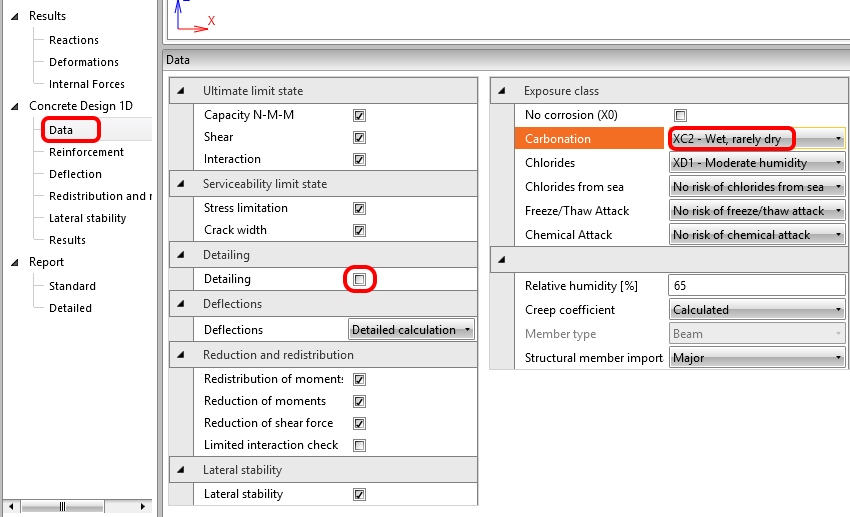
Après ces résultats, vous passez à la conception et au ferraillage effectifs de la poutre. Dans un premier temps, consultez Données, où vous pouvez définir les vérifications et calculs à effectuer, ainsi que quelques paramètres ayant un impact sur les vérifications, tels que les classes d'exposition. Modifions la classe d'exposition pour la carbonatation en XC2.
Passons maintenant au ferraillage proprement dit. Des zones de ferraillage sont définies dans la poutre et peuvent être modifiées (vous pouvez également utiliser des modèles pour celles-ci). Vous saisirez le ferraillage pour la première zone A-A en cliquant sur l'image de sa forme dans la scène.

Commencez par le premier modèle dans le ruban et saisissez les valeurs comme indiqué ici :
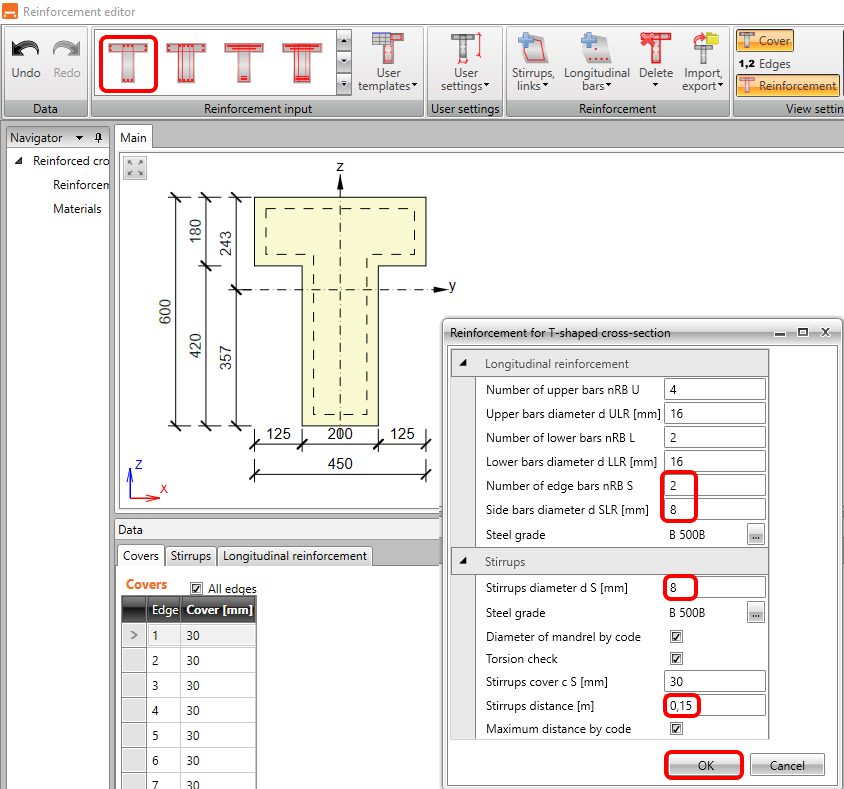
Après avoir cliqué sur OK, vous devriez voir la zone A-A ferraillée aux deux extrémités de la poutre. Terminons le travail pour la zone B-B.

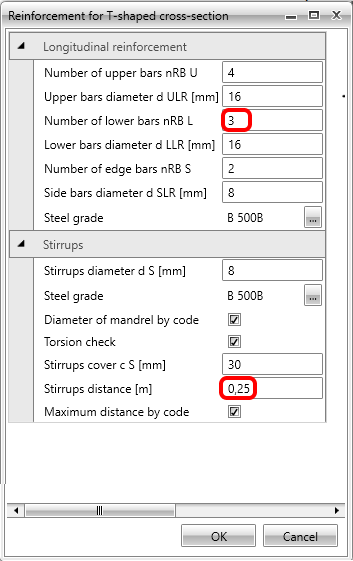
Répétez les étapes pour utiliser le modèle (il mémorise la dernière saisie) et modifiez le nombre de barres inférieures à 3 ainsi que l'espacement des étriers à 0,25 m (la valeur arrondie la plus élevée respectant les règles de disposition constructive).
Maintenant que le ferraillage est terminé, la dernière saisie requise concerne les paramètres de stabilité latérale. Renseignez les éléments suivants : la largeur de la table en compression, la hauteur en travée et la longueur de flambement pour la torsion. La vérification est disponible immédiatement.

3 Vérification
Pour lancer les vérifications, cliquez simplement sur Résultats dans le navigateur. La première chose que vous voyez après les calculs est un récapitulatif de toutes les vérifications. Le moyen le plus rapide de s'assurer que tout est correct est de regarder le côté droit de l'écran.
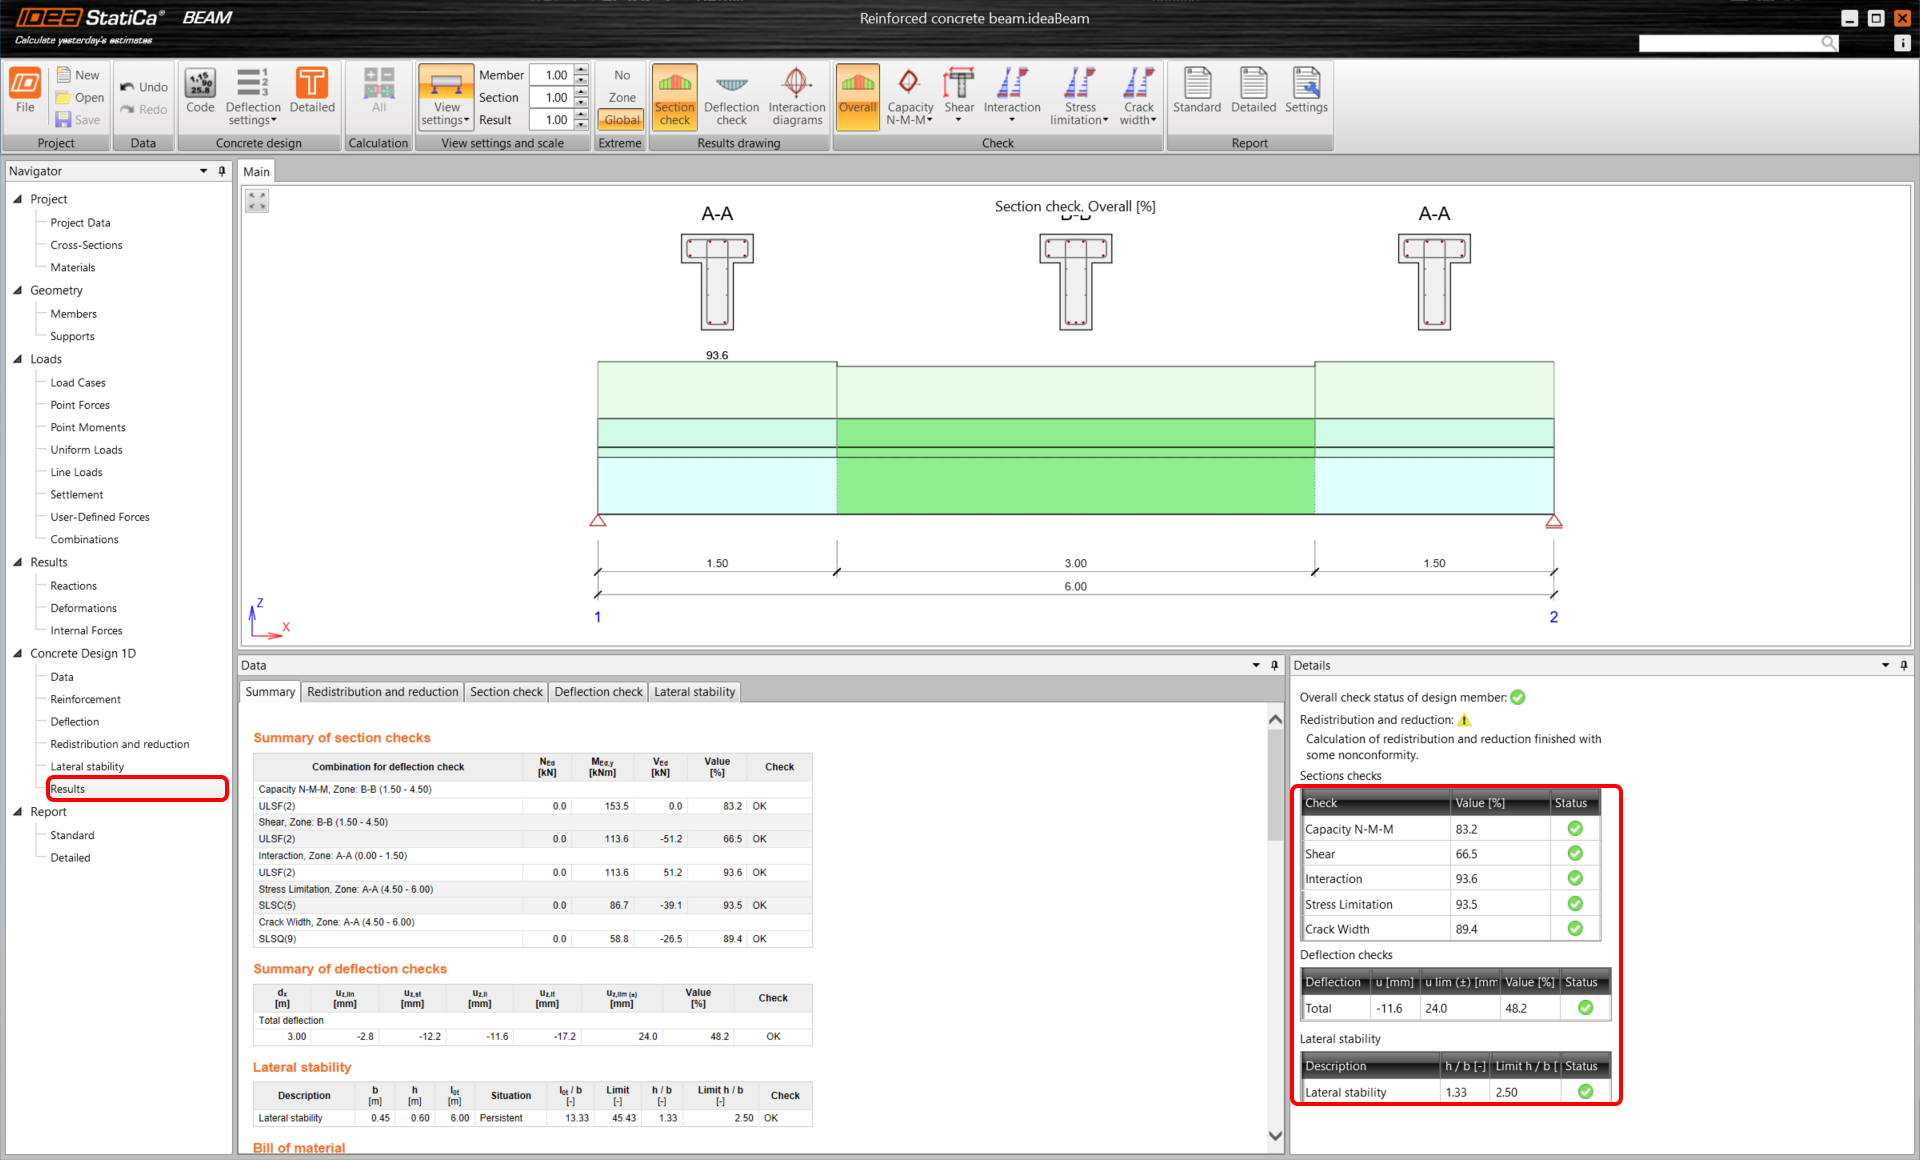
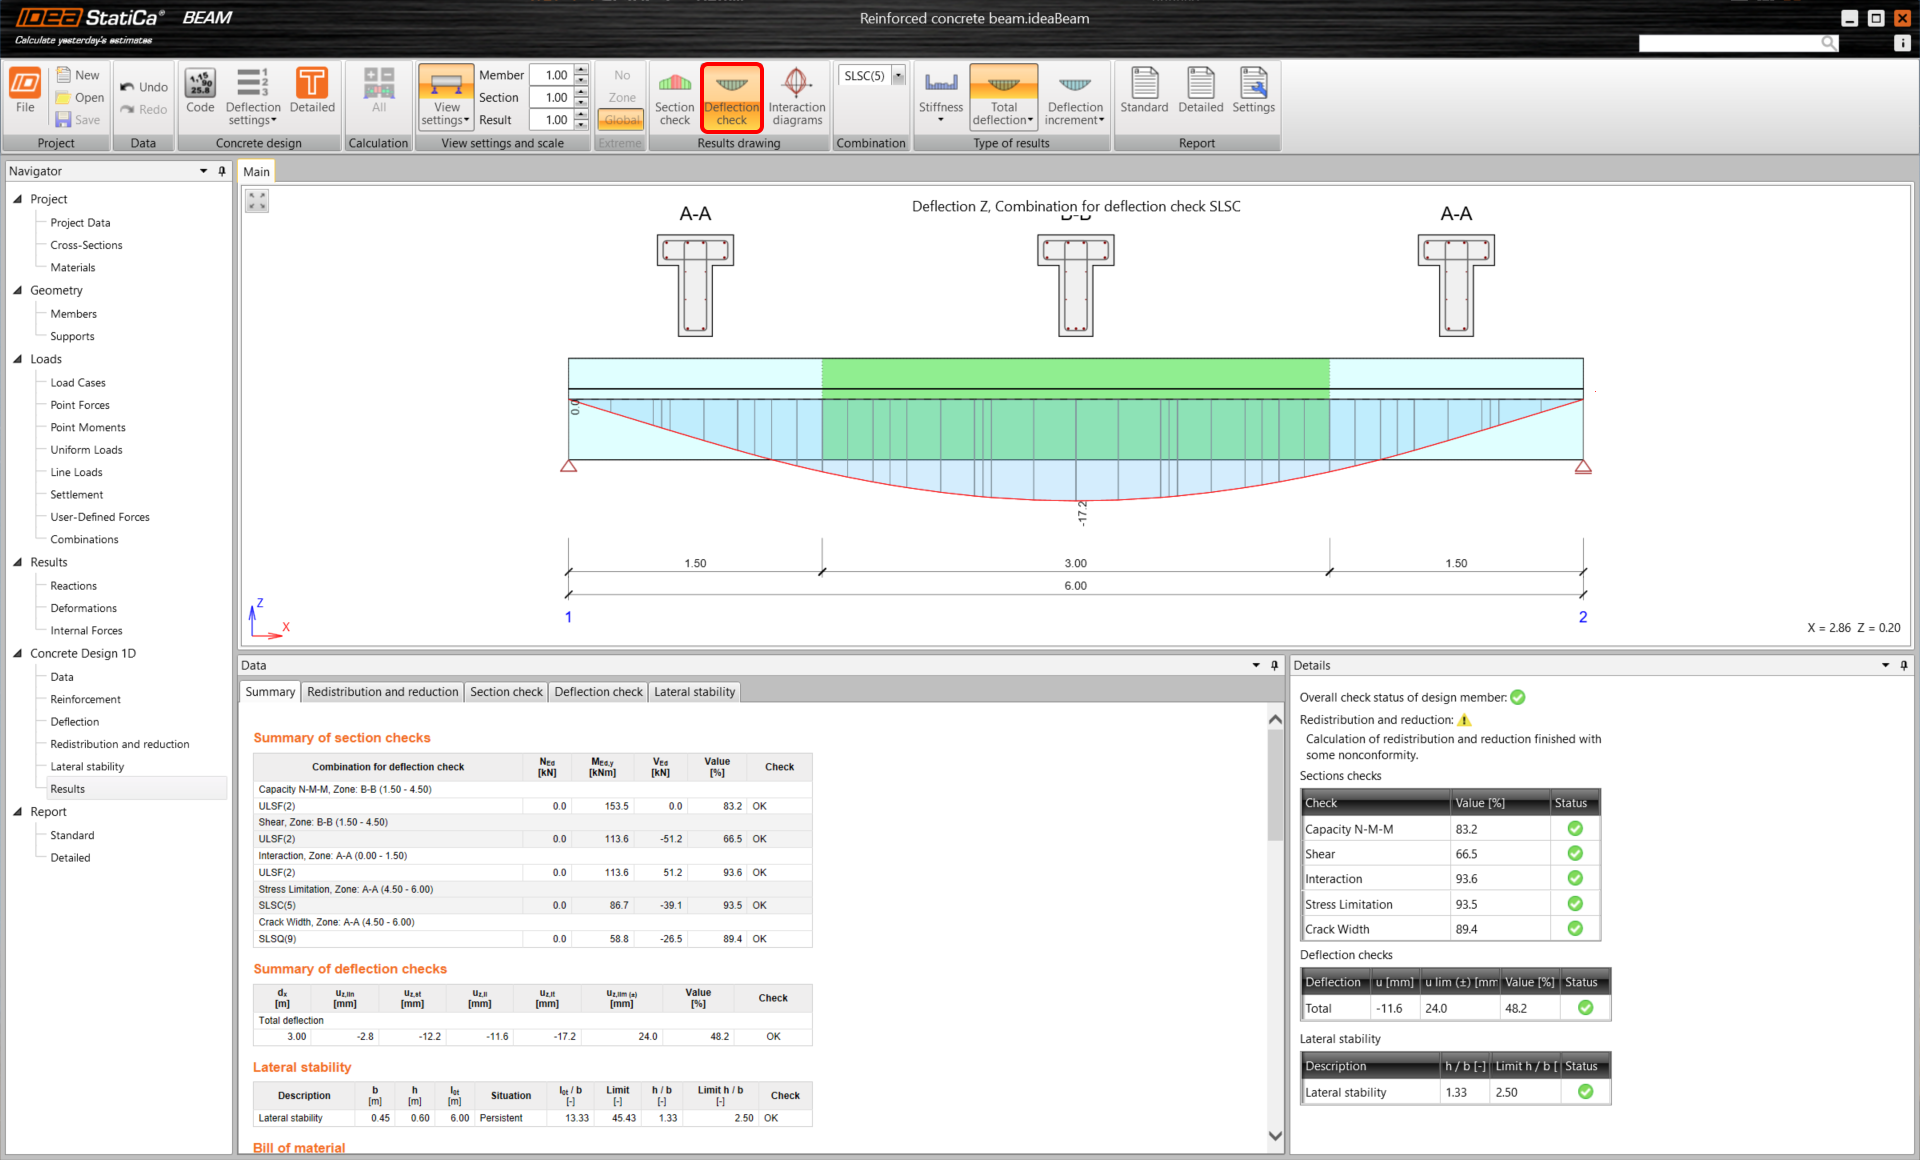
Le ruban supérieur vous permet de parcourir les résultats et vous pouvez toujours voir le taux de travail sur l'image du modèle. Examinons le taux de travail de la vérification de limitation des contraintes pour le béton.

Vous pouvez également basculer pour afficher les vérifications de flèche.
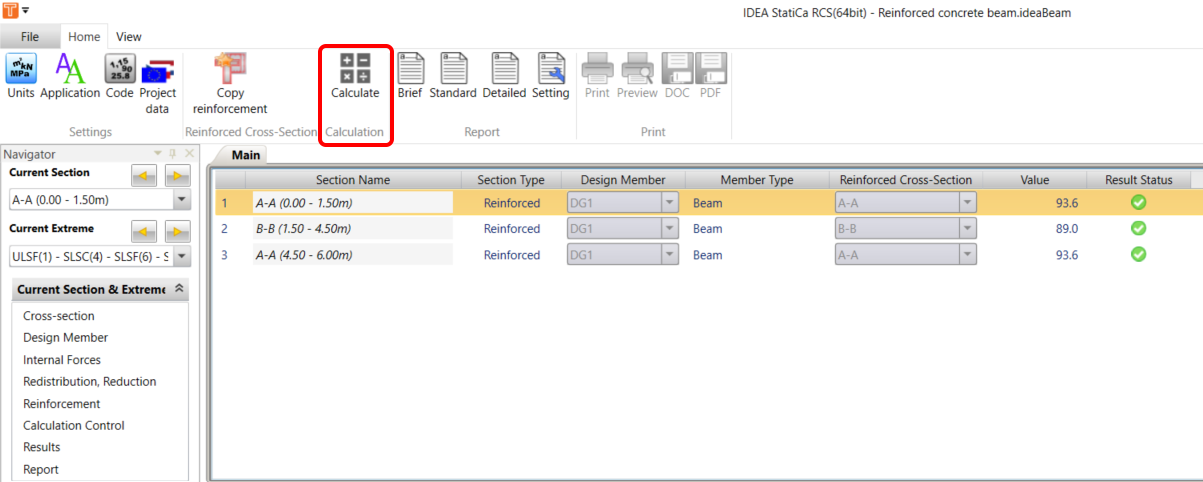
Si vous souhaitez voir les résultats détaillés de manière visualisée, vous pouvez exporter toutes les zones vers le module RCS via Détaillé.

Vous arriverez dans l'onglet Section de RCS, où vous pouvez lancer les calculs via le bouton Tout.
Une fois que vous accédez aux résultats et que vous basculez entre les onglets, vous pouvez parcourir toutes les vérifications effectuées pour la section et l'extrême sélectionnés.
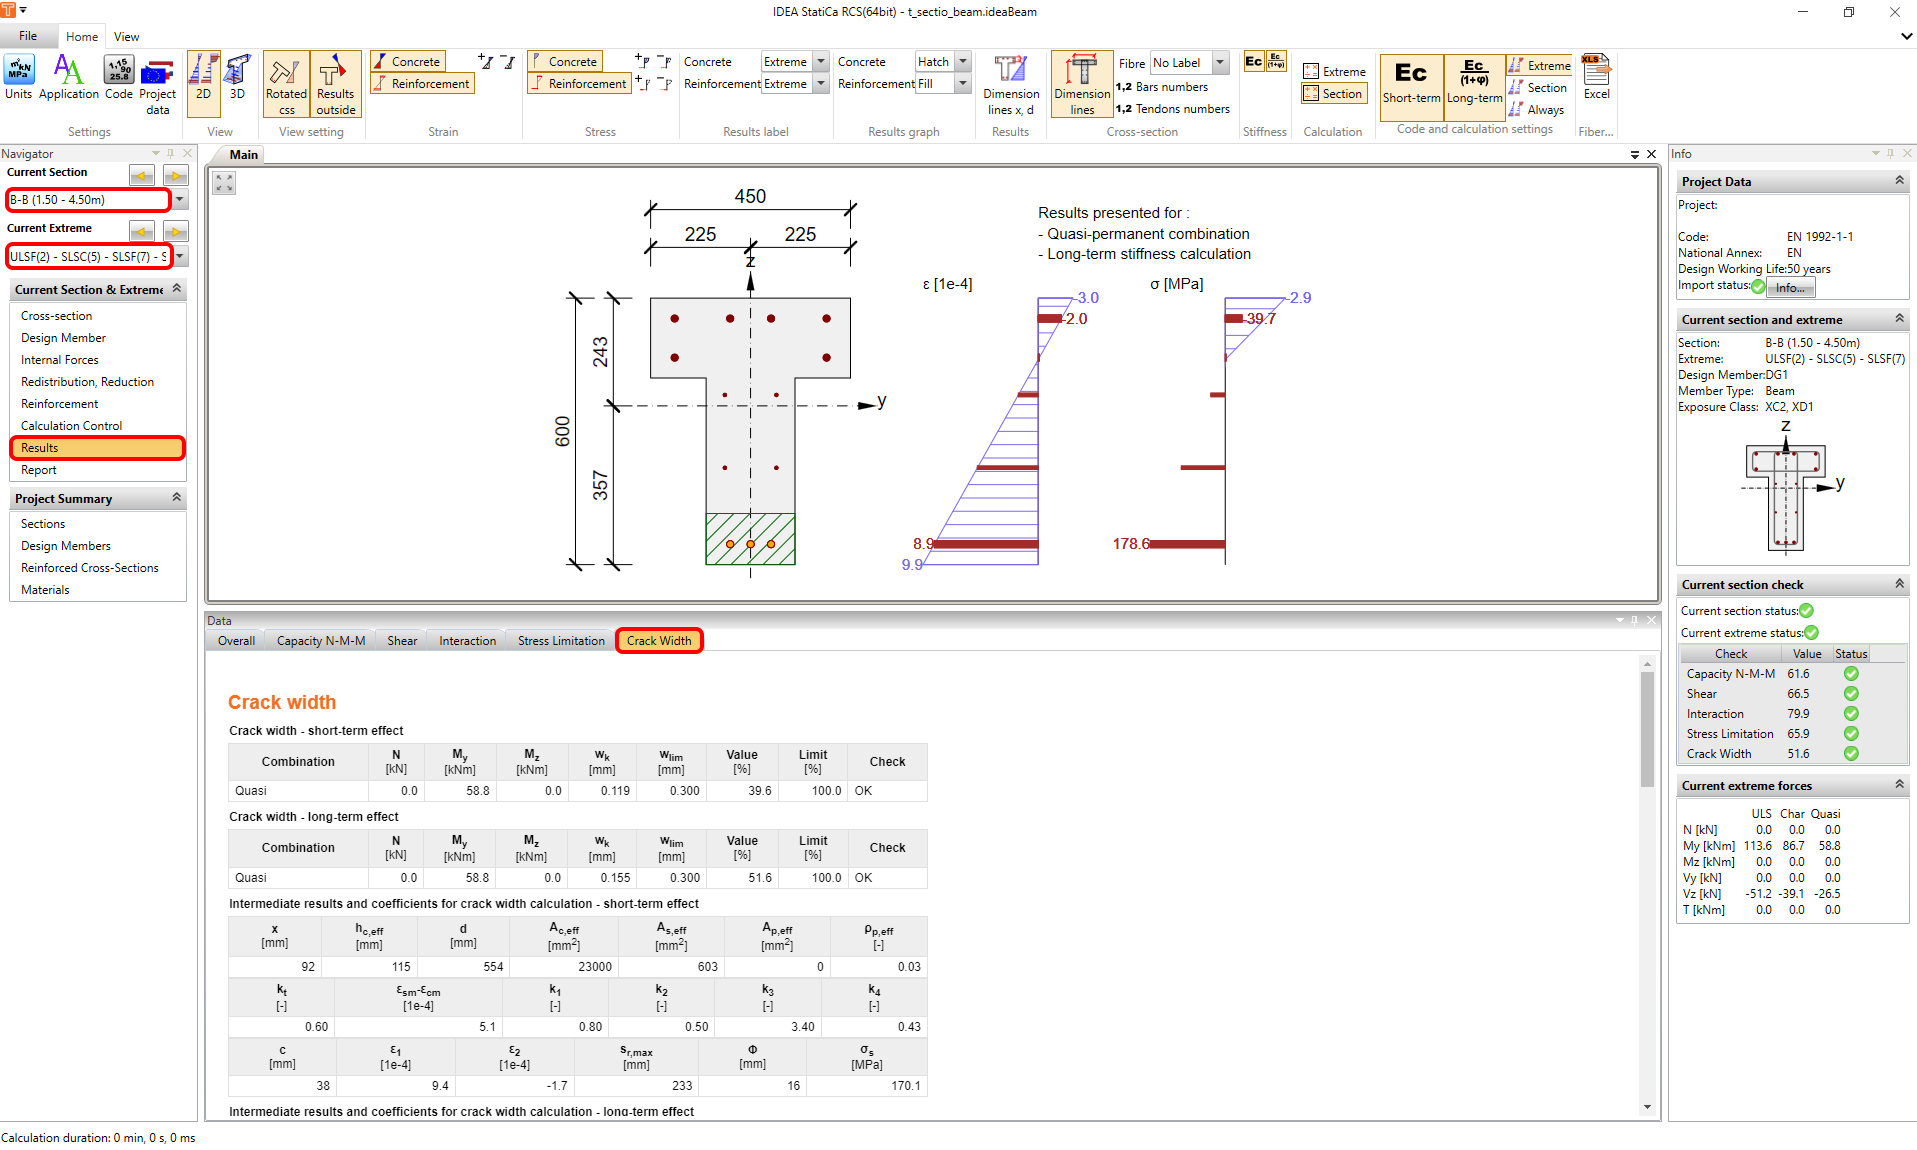
Pour revenir à IDEA StatiCa Beam, il suffit de fermer la fenêtre RCS.
4 Rapport
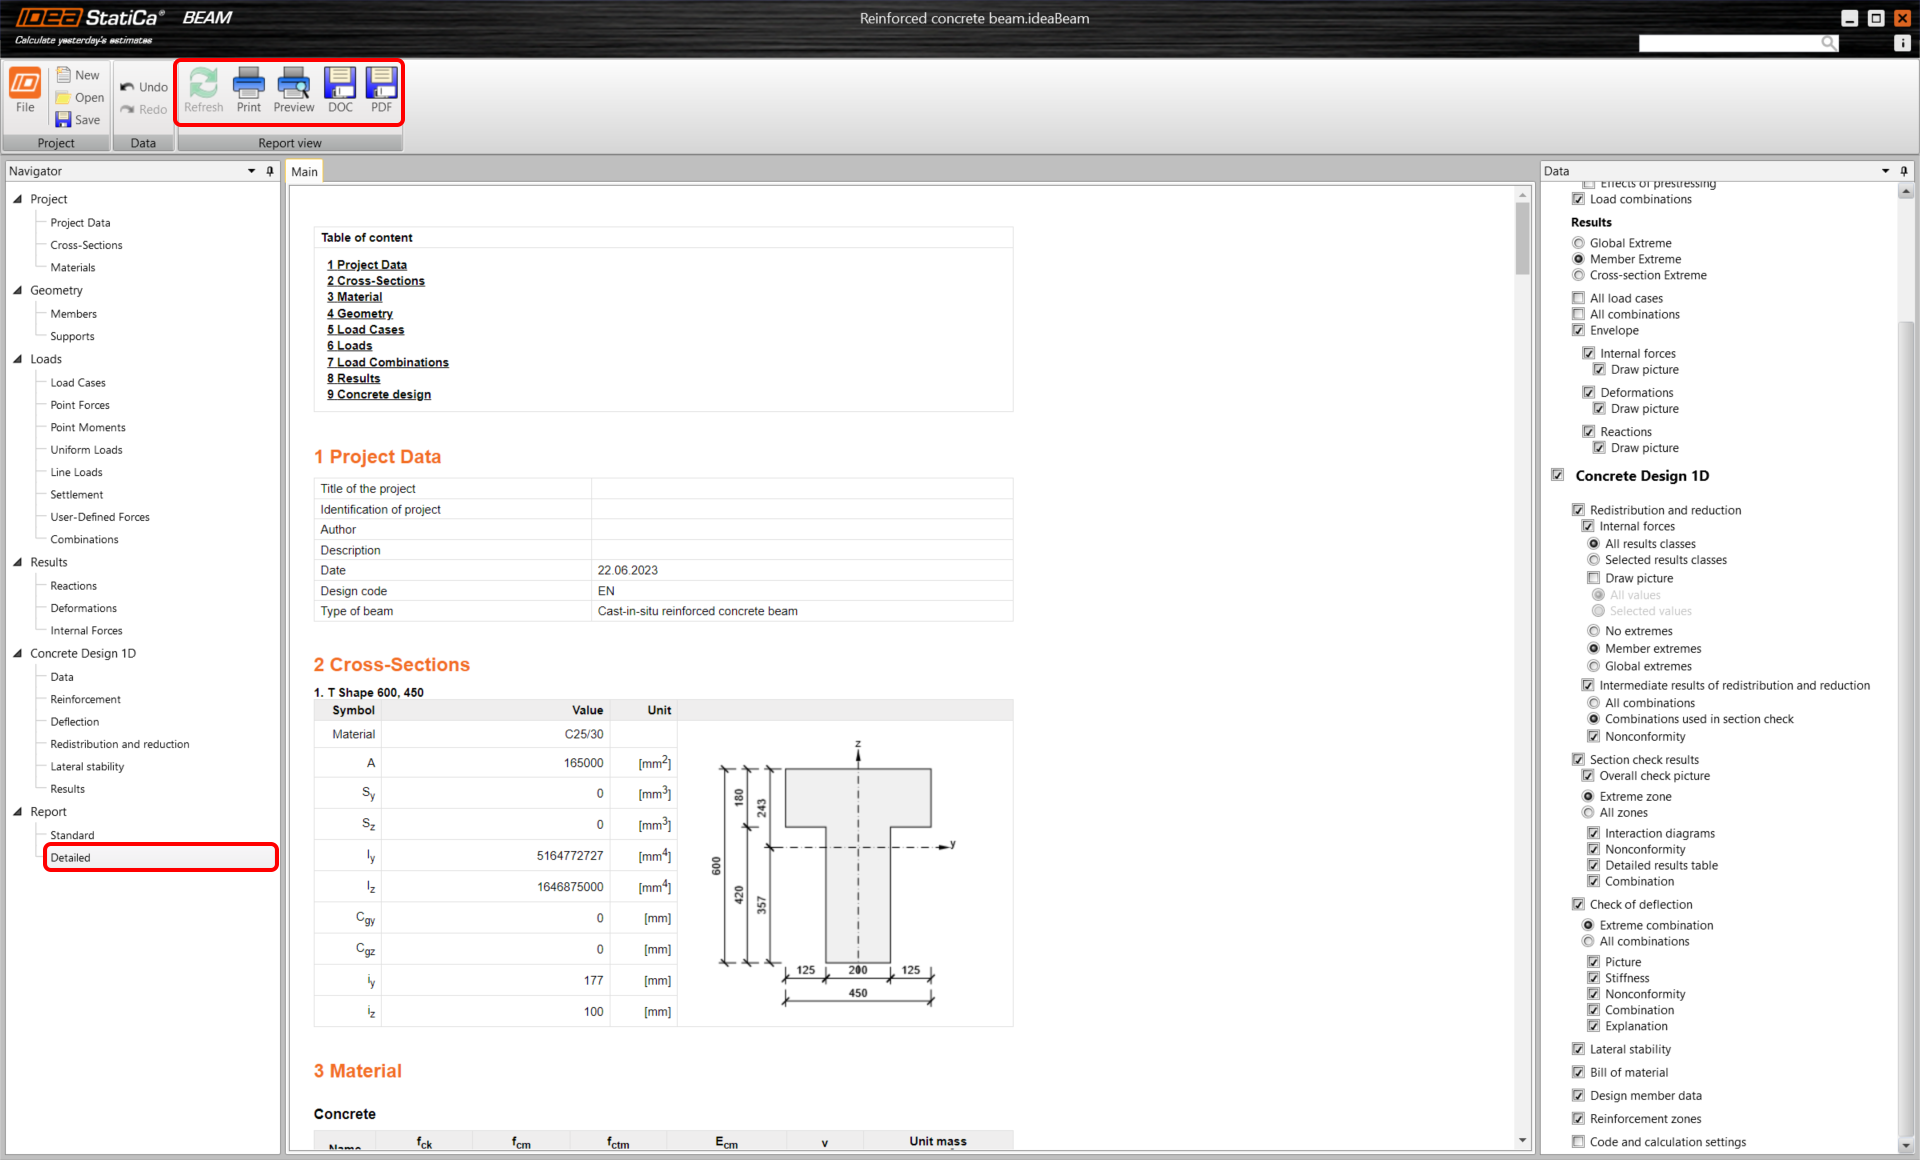
Enfin, accédez à Aperçu/Impression du rapport. IDEA StatiCa propose un rapport entièrement personnalisable à imprimer ou à enregistrer dans un format modifiable.

Vous avez maintenant conçu, ferraillé et effectué la vérification normative d'une poutre en béton armé selon l'Eurocode.