Grasshopper API-koppeling - hoe een parametrisch verbindingsmodel importeren en berekenen (02) versie 24
Grasshopper - Installatie van de plugin
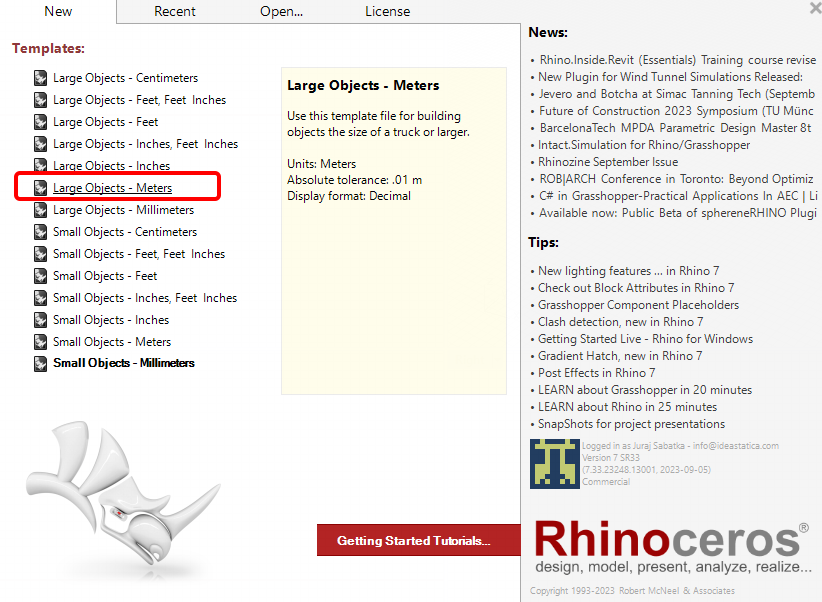
Je kunt een proefversie van Rhino3d en Grasshopper downloaden via de Rhino3d website. Start Rhinoceros en selecteer de template met Meters:
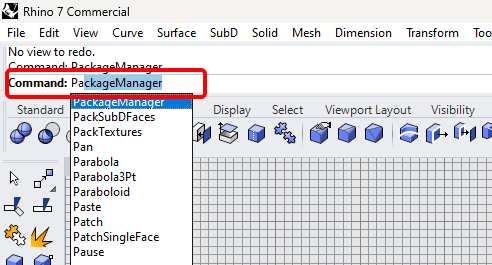
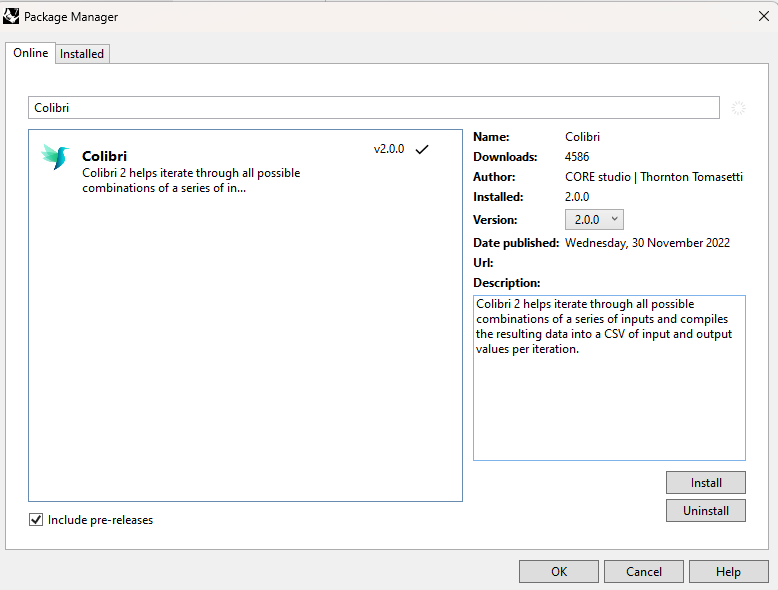
Voer in de command regel "Package Manager" in:
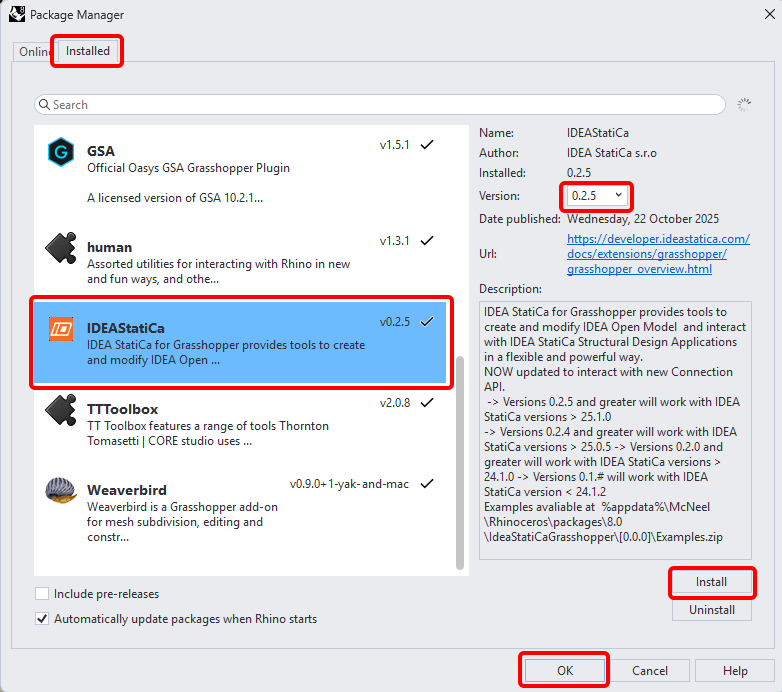
Een nieuw venster verschijnt; selecteer IDEAStatiCa en klik op Install. De plugin wordt gedownload en geïnstalleerd. Om actief te worden, is een herstart van Rhinoceros noodzakelijk.
Om Grasshopper te starten met de IDEA StatiCa plugin, selecteer Tools / Grasshopper in het Rhihoceros tabblad.
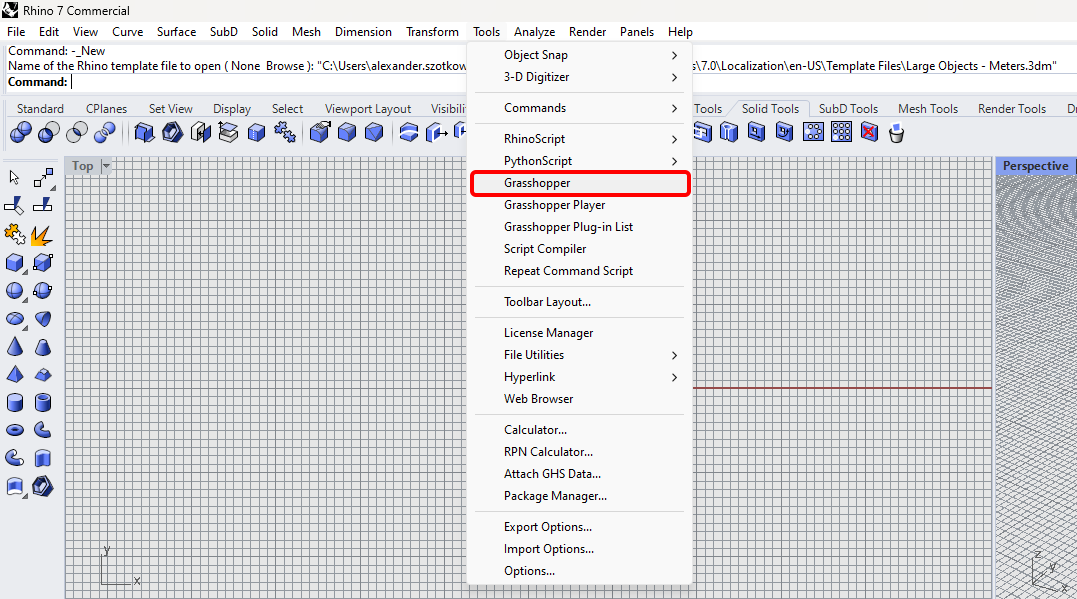
Zoals u kunt zien, is de plugin nu beschikbaar.

Leer meer over de componenten en opdrachten in de IDEA StatiCa-plugin voor Grasshopper in het artikel Beschrijving van Grasshopper-plug-incomponenten.
Colibri plugin
Omdat Grasshopper niet met lussen kan werken, moet u een andere plugin installeren - COLIBRI, die u in deze tutorial zult gebruiken.
IDEA StatiCa Connection – Ontwerp van een verbinding en parameters instellen
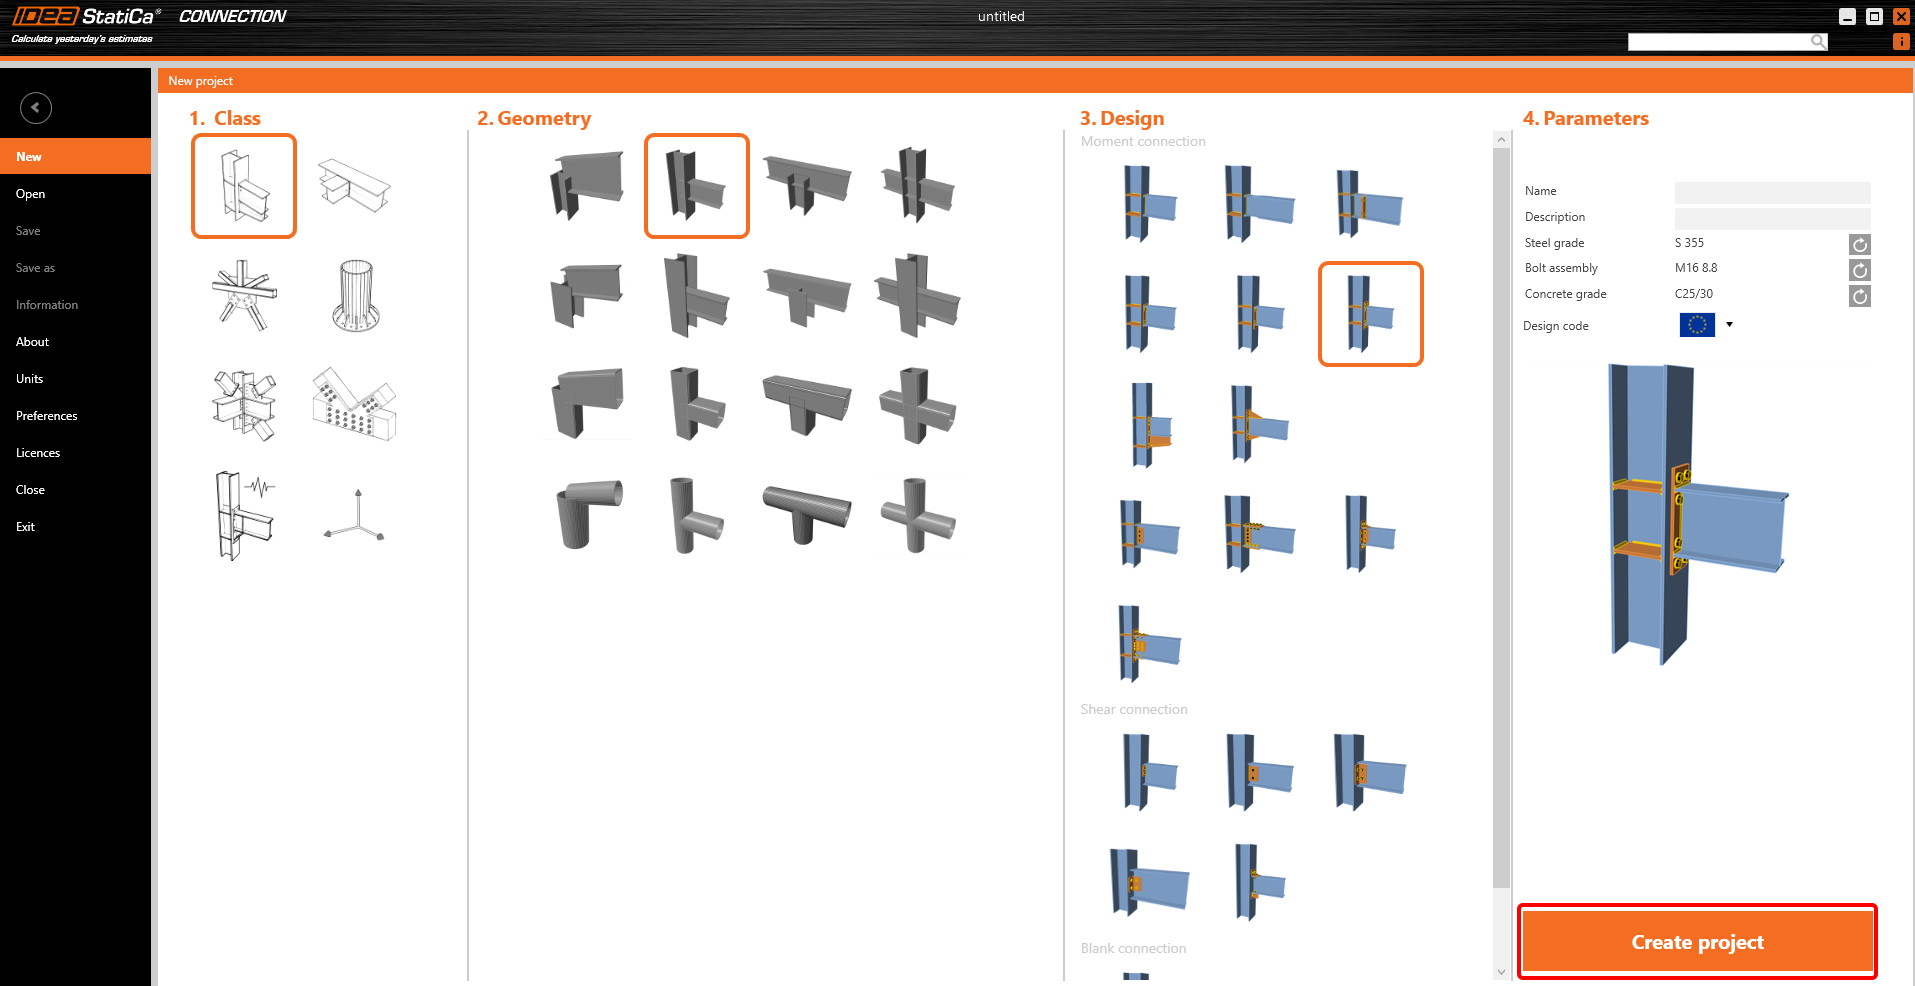
Voor het voorbeeld maakt u een eenvoudige momentverbinding met behulp van een template:
Om met parameters te kunnen werken, is het noodzakelijk het tabblad Ontwikkelaar in te schakelen via Voorkeuren / Geavanceerde instellingen:

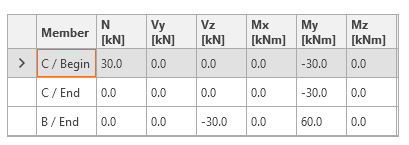
Eerst moet u de belastingen instellen volgens de volgende afbeelding:
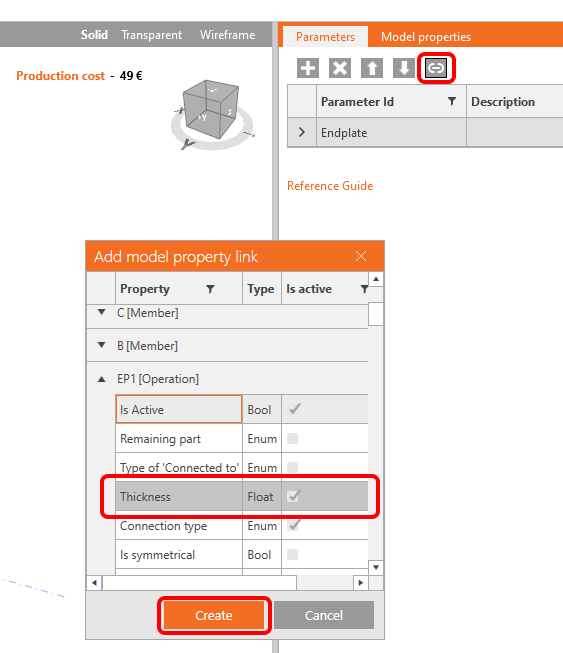
Nu moet u twee parameters instellen voor deze verbinding. De eerste is de dikte van de kopplaat. Klik op de plus-knop in het tabblad Ontwikkelaar en wijzig de tekst volgens de afbeelding:

Om deze parameter te koppelen aan de bijbehorende kopplaatdikte, klikt u op de koppeling-knop en selecteert u het eigenschapsveld zoals weergegeven in de volgende afbeelding:
Als tweede parameter stelt u de diameter van de bouten in:

Opmerking: De expressie is een tekst, dus het is noodzakelijk om apostrofs te gebruiken.
Koppel deze parameter aan de bijbehorende bewerking:
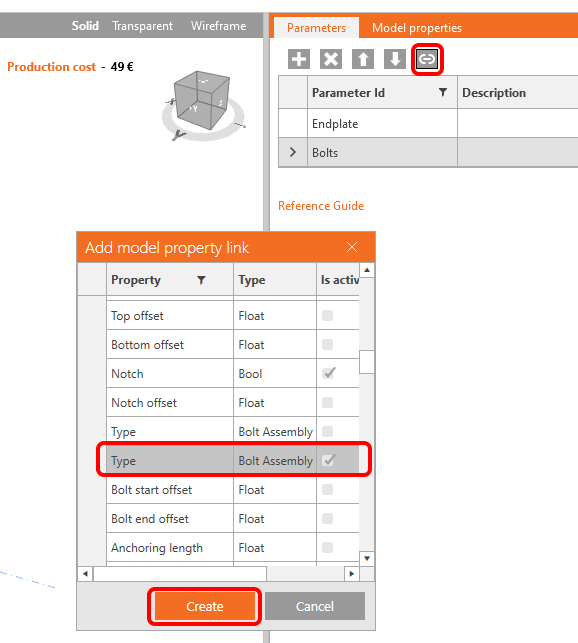
Nu kunt u de koppelingen controleren in het tabblad Modeleigenschappen:

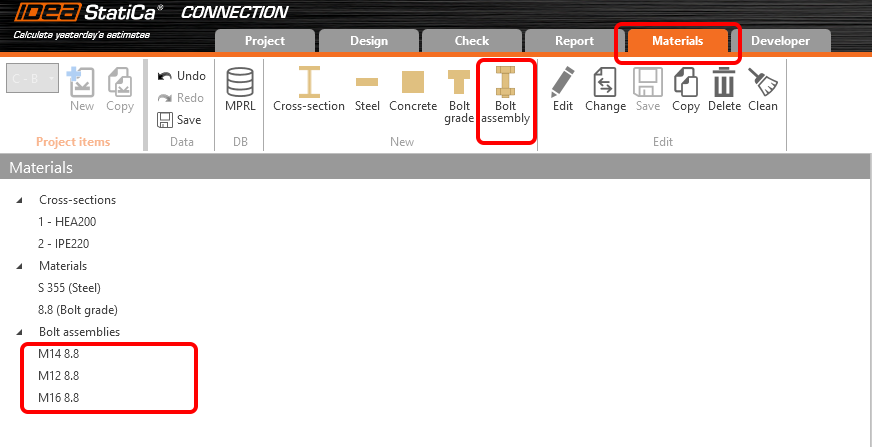
Omdat het doel is om met de diameter van de bouten te werken, moeten we de bijbehorende boutsamenstelling aan het bestand toevoegen:
Ten slotte kunt u deze verbinding opslaan onder de naam Example2.ideaCon.
Grasshopper - Het *ideaCon-bestand importeren en de parameters aanpassen
Maak een nieuw document aan, selecteer het tabblad Params in het bovenste lint en plaats de component File Path op het canvas.
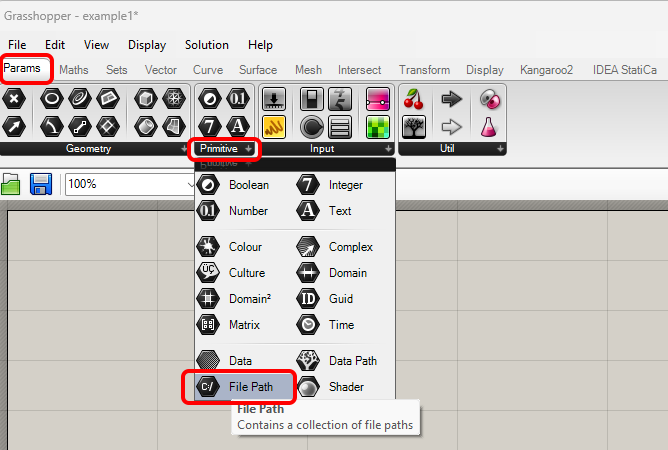
Klik met de rechtermuisknop op de component en selecteer het bestand Example2.ideaCon dat we eerder hebben opgeslagen.
Opmerking: Als u het bijgevoegde bestand opent, moet u dit pad dienovereenkomstig aanpassen.
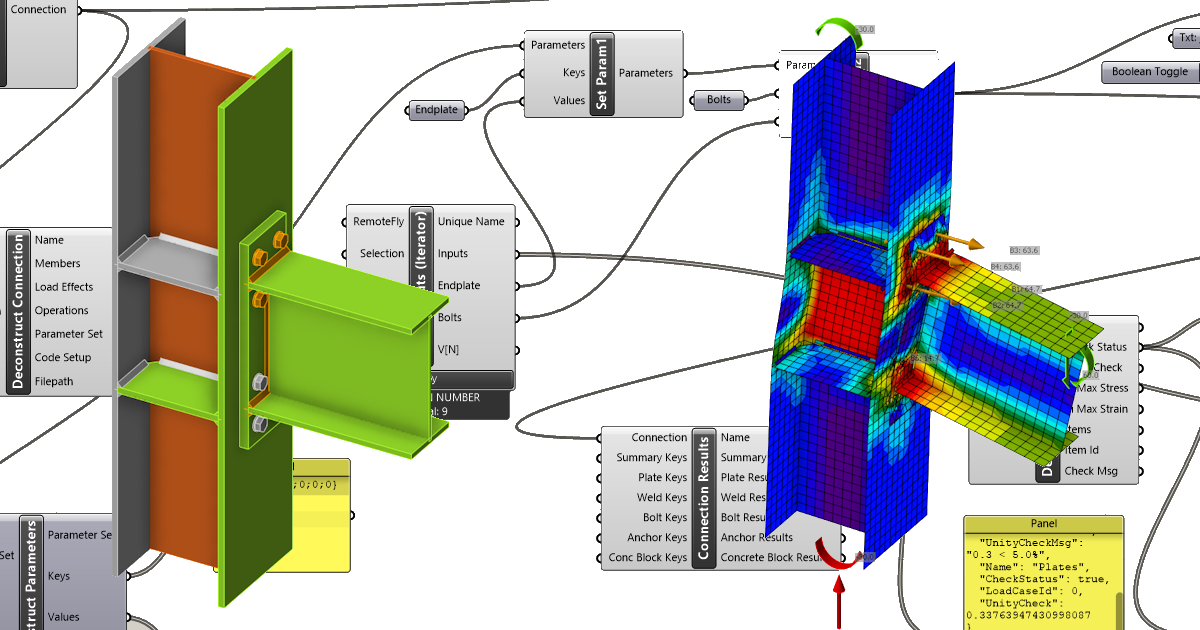
Voeg nu de volgende componenten toe aan het canvas en verbind ze zoals weergegeven in de afbeelding.
Bestand importeren:
IDEA StatiCa / Connection / Reference Connection
IDEA StatiCa / Connection / Deconstruct Connection
IDEA StatiCa / Connection / Modify Connection
Parameters weergeven:
IDEA StatiCa / Connection / Deconstruct Parameters
Hier kunt u componenten Params / Input / Panel toevoegen om de waarden van onze parameters te bekijken.
Parameters aanpassen:
IDEA StatiCa / Connection / Modify Parameters (1)
IDEA StatiCa / Connection / Modify Parameters (2)
IDEA StatiCa / Connection / Modify Connection
Voor het gewijzigde bestand met andere resultaten stellen we het achtervoegsel in op _updated.
Berekening en resultaten:
IDEA StatiCa / Connection / Calculate Connection
IDEA StatiCa / Connection / Connection Results
IDEA StatiCa / Connection / Deconstruct Result Items
Hier kunt u opnieuw componenten Params / Input / Panel toevoegen om de waarden van de resultaten te bekijken.
Colibri-componenten voor het doorlopen van parametercombinaties:
TTTollbox / Colibri Inputs
TTTollbox / Colibri Outputs
TTTollbox / Colibri Aggregator
Voor de invoer bevat de eerste Waardelijst 3 waarden (0.010, 0.015, 0.020) voor de dikte van de kopplaat.
De tweede bevat drie waarden (M12 8.8, M14 8.8, M16 8.8) voor de boutdiameter.
De resultaten worden opgeslagen in het bestand data.csv. Standaard wordt dit opgeslagen in c:\Colibri; hier dient u het pad in te stellen op C:/IDEA. Zorg ervoor dat u de benodigde toegangsrechten heeft.

Klik op de knop Colibri Inputs / Fly om de volledige iteratie te doorlopen. Na enige tijd wordt het CSV-bestand aangemaakt.
De directe resultaten met Waar / Onwaar zijn zichtbaar wanneer u het bestand opent.

Interpretatie van de resultaten
Voor deze specifieke verbinding zijn bevredigende resultaten te behalen met
- Bouten M16 8.8 met een kopplaatdikte van 10 mm
of
- Bouten M14 8.8 met een kopplaatdikte van 15 mm
Meer complexe voorbeelden zijn te vinden op uw pc in de map
"%appdata%\McNeel\Rhinoceros\packages\7.0\IDEAStatiCa\0.1.1\Examples.zip"
Gerelateerde opnames
Deel 1 - parameters instellen in IDEA StatiCa Connection
Deel 2 - verbinding uploaden en weergeven in Rhino
Deel 3 - iteratieproces over de parameters
Deel 4 - interpretatie van de resultaten
Toegevoegde downloads
- Example2.zip (ZIP, 64 kB)