SAP2000 BIM-Verknüpfung für die Bemessung von Stahlbetonstrukturen (EN)
Hinweis
Die Verknüpfung zur Beam-Anwendung ist nur mit IDEA Version 24.1.2 und älter möglich.
1 So aktivieren Sie die Verknüpfung
BIM-Verknüpfung Aktivierung für SAP2000 (v23 und neuer)
BIM-Verknüpfung Aktivierung für SAP2000 (v22 und älter)
2 So verwenden Sie die Verknüpfung
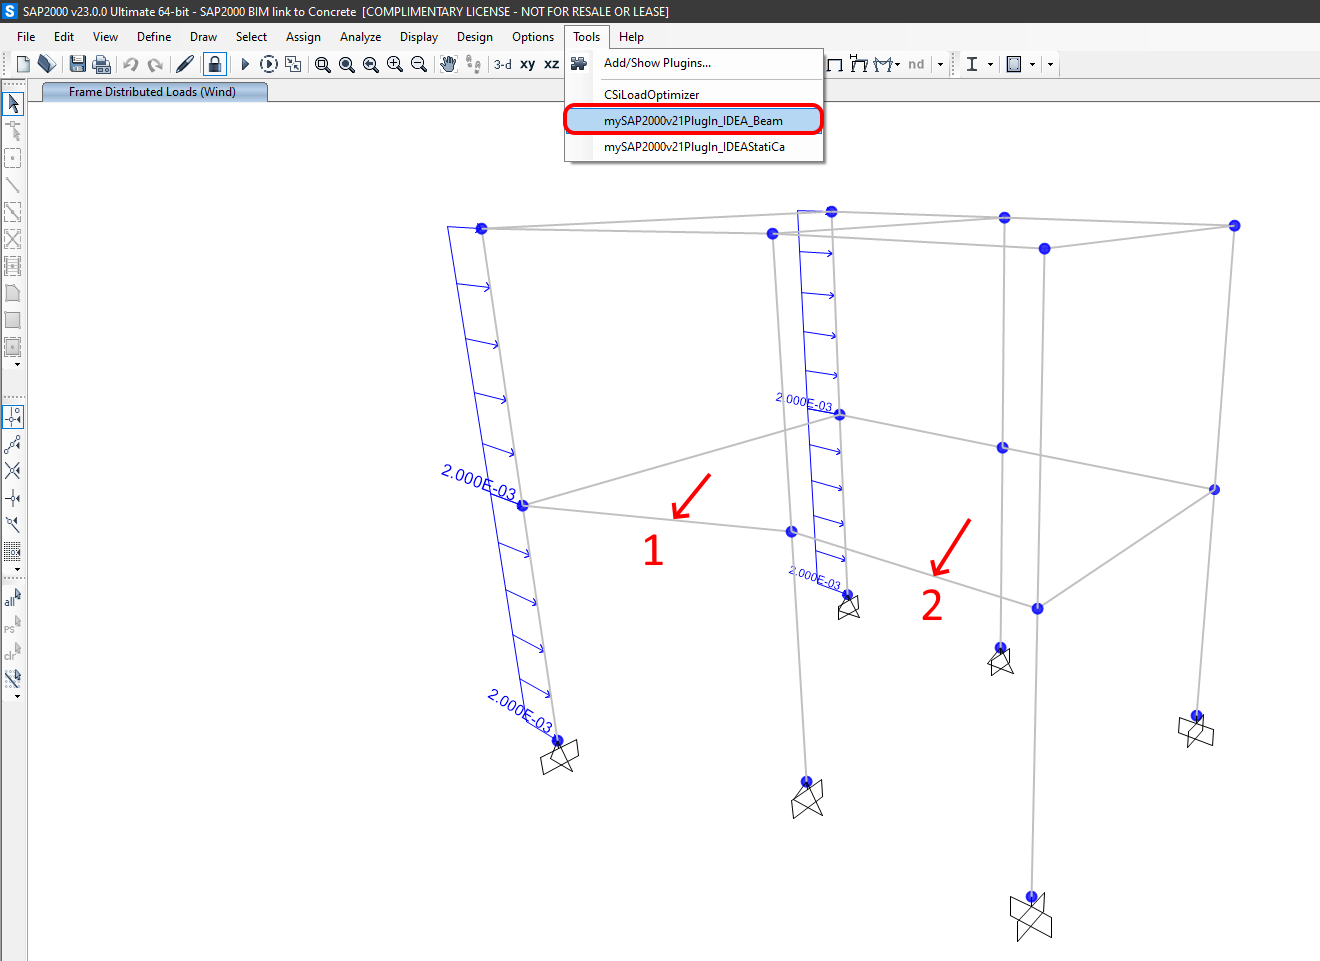
Führen Sie die Berechnung aus und wählen Sie die Träger (1,2). Öffnen Sie die Tools und verwenden Sie das Plugin SAP2000v21Plugin_IDEA_Beam.
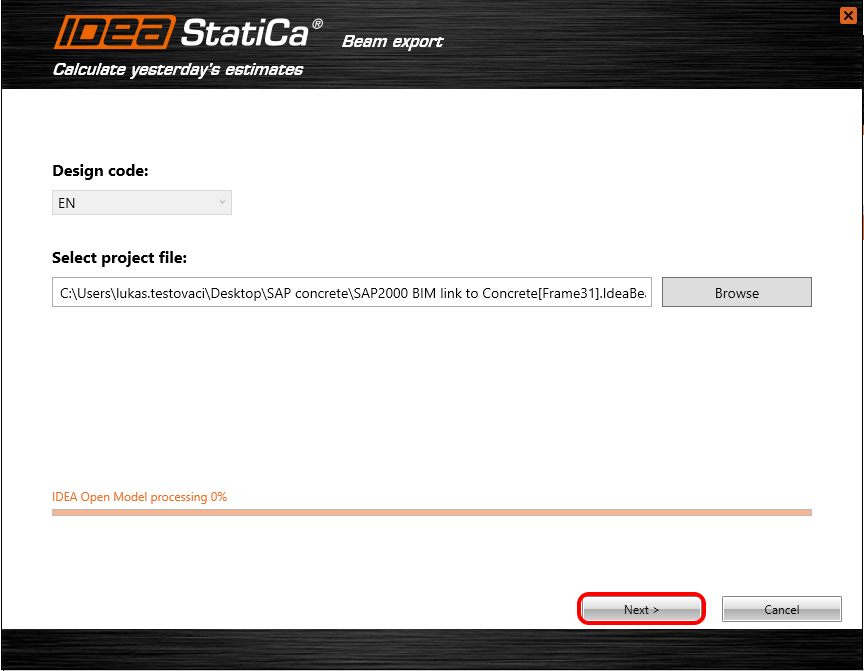
Bestätigen Sie den Eurocode.

Wählen Sie den Pfad, unter dem Sie das Projekt speichern möchten, und fahren Sie mit Weiter fort.
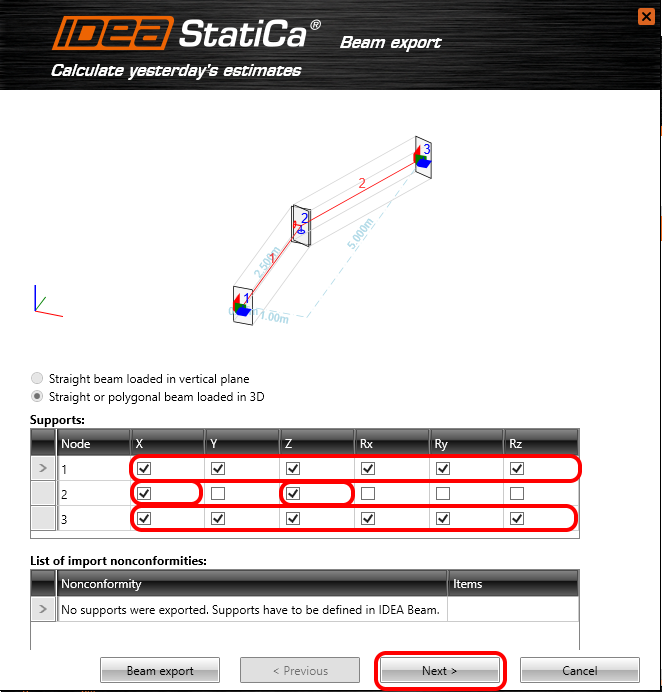
Der Träger ist in der globalen Ebene XY gekrümmt. Die Randbedingungen sollten das globale Modell in SAP2000 abbilden. Aufgrund monolithischer Verbindungen ist an den Enden eine Einspannung und in der Mitte eine Fesselung der Freiheitsgrade X und Z vorzusehen.
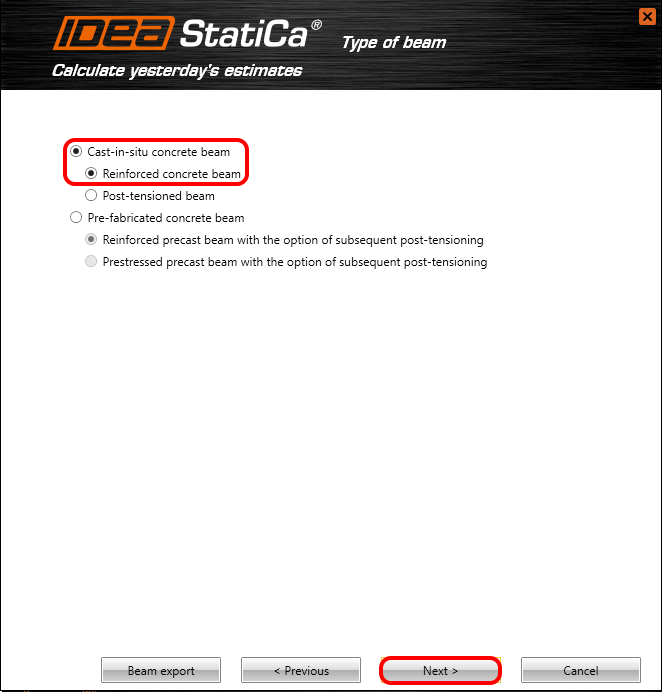
Wählen Sie Ortbetonträger, der bewehrt wird.
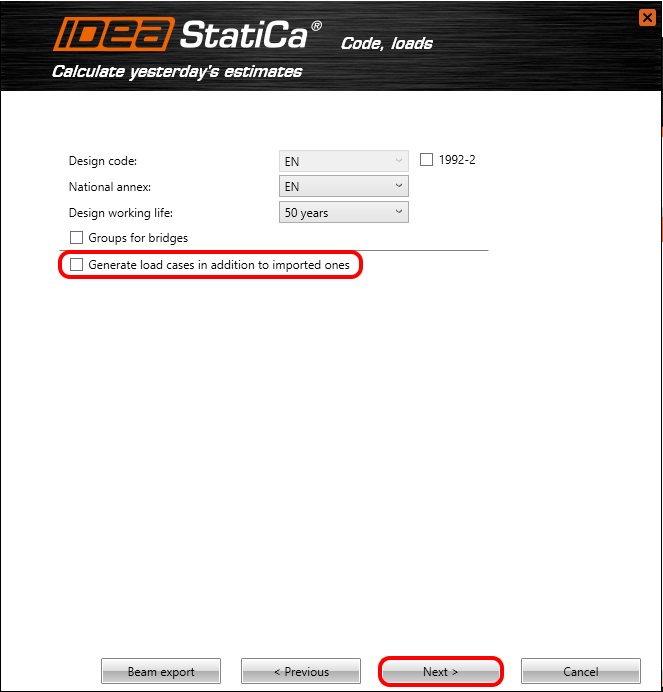
Der Träger wird gemäß Eurocode mit einer Nutzungsdauer von 50 Jahren nachgewiesen. Alle Schnittgrößen werden aus SAP2000 exportiert. Daher wird das Kontrollkästchen zur Erzeugung zusätzlicher Lasten nicht aktiviert.
Alle Schnittgrößen werden in IDEA StatiCa Beam exportiert. Deaktivieren Sie das Kontrollkästchen (1), um die ständigen Lastfälle anzuzeigen. Alle Lasten werden in den ausgewählten Fensterreiter verschoben. Schließen Sie die Einstellungen mit allen erforderlichen Schritten ab, indem Sie die Schaltfläche Fertigstellen (3) drücken.

3 IDEA StatiCa Beam Projekt
Lastfälle
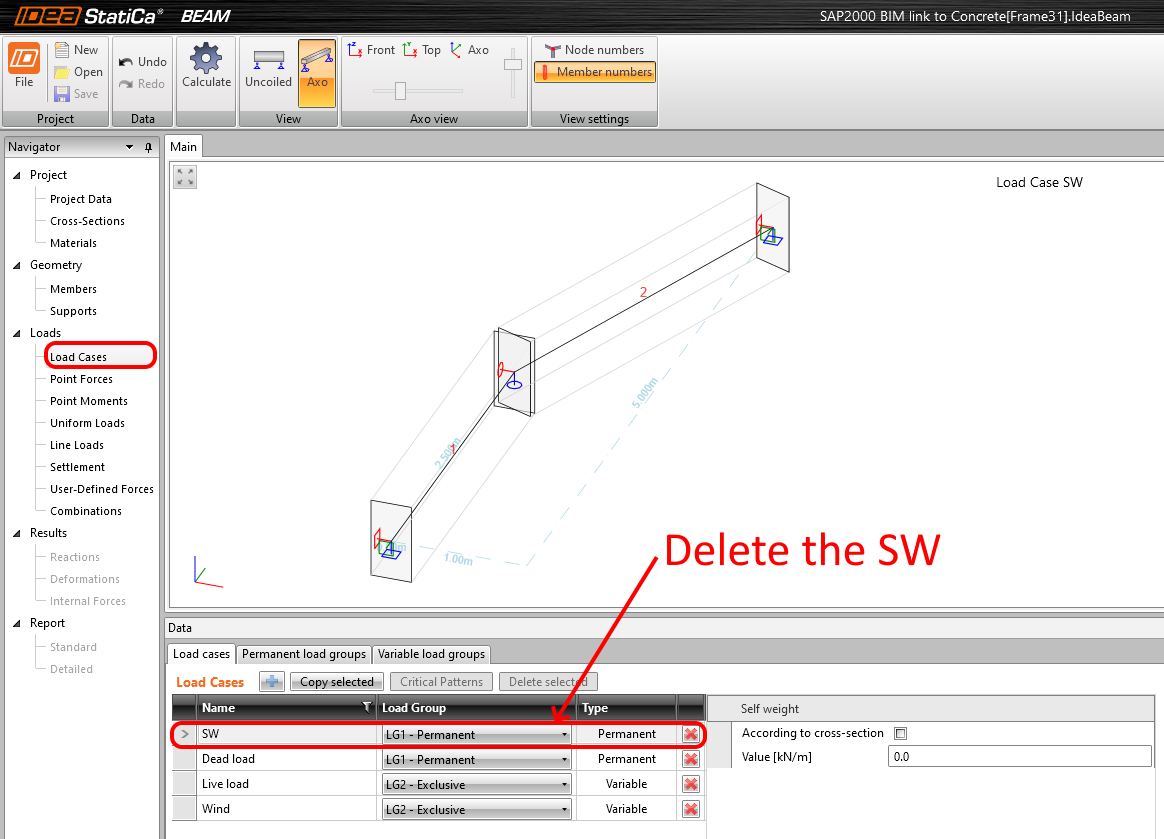
Das Programm erstellt automatisch den Lastfall EG (Eigengewicht), der inaktiv ist. Das Eigengewicht wird aus SAP2000 exportiert. Löschen Sie den Lastfall EG.
Die Psi-Faktoren für die Kombinationen müssen manuell festgelegt werden. Benennen Sie die Variable Lastgruppen, setzen Sie den Typ auf Standard und ändern Sie die Psi-Faktoren für Wind.

Ändern Sie die Einstellungen auf der Lastfallkarte.

Benutzerdefinierte Schnittgrößen
Die importierten Schnittgrößen aus SAP2000 stehen zur Kontrolle unter Benutzerdefinierte Schnittgrößen zur Verfügung.

Kombinationen
Die Kombinationen werden automatisch erstellt. Verschieben Sie alle Lastfälle in den mittleren Reiter. Das bedeutet, dass alle für die Kombination verwendet werden.

Daten
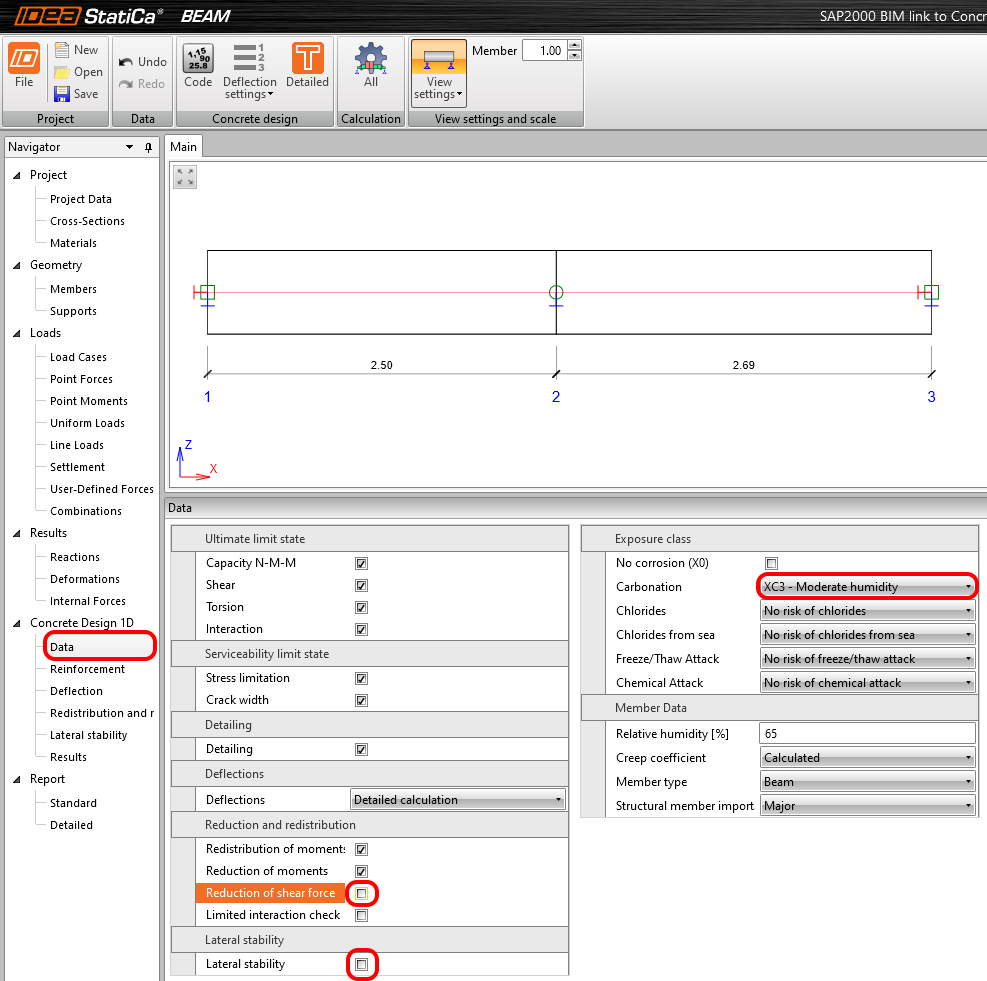
Die Nachweise Biegedrillknicken und Abminderung der Querkraft werden deaktiviert. Die Expositionsklasse wird auf XC3 gesetzt.
Bewehrung
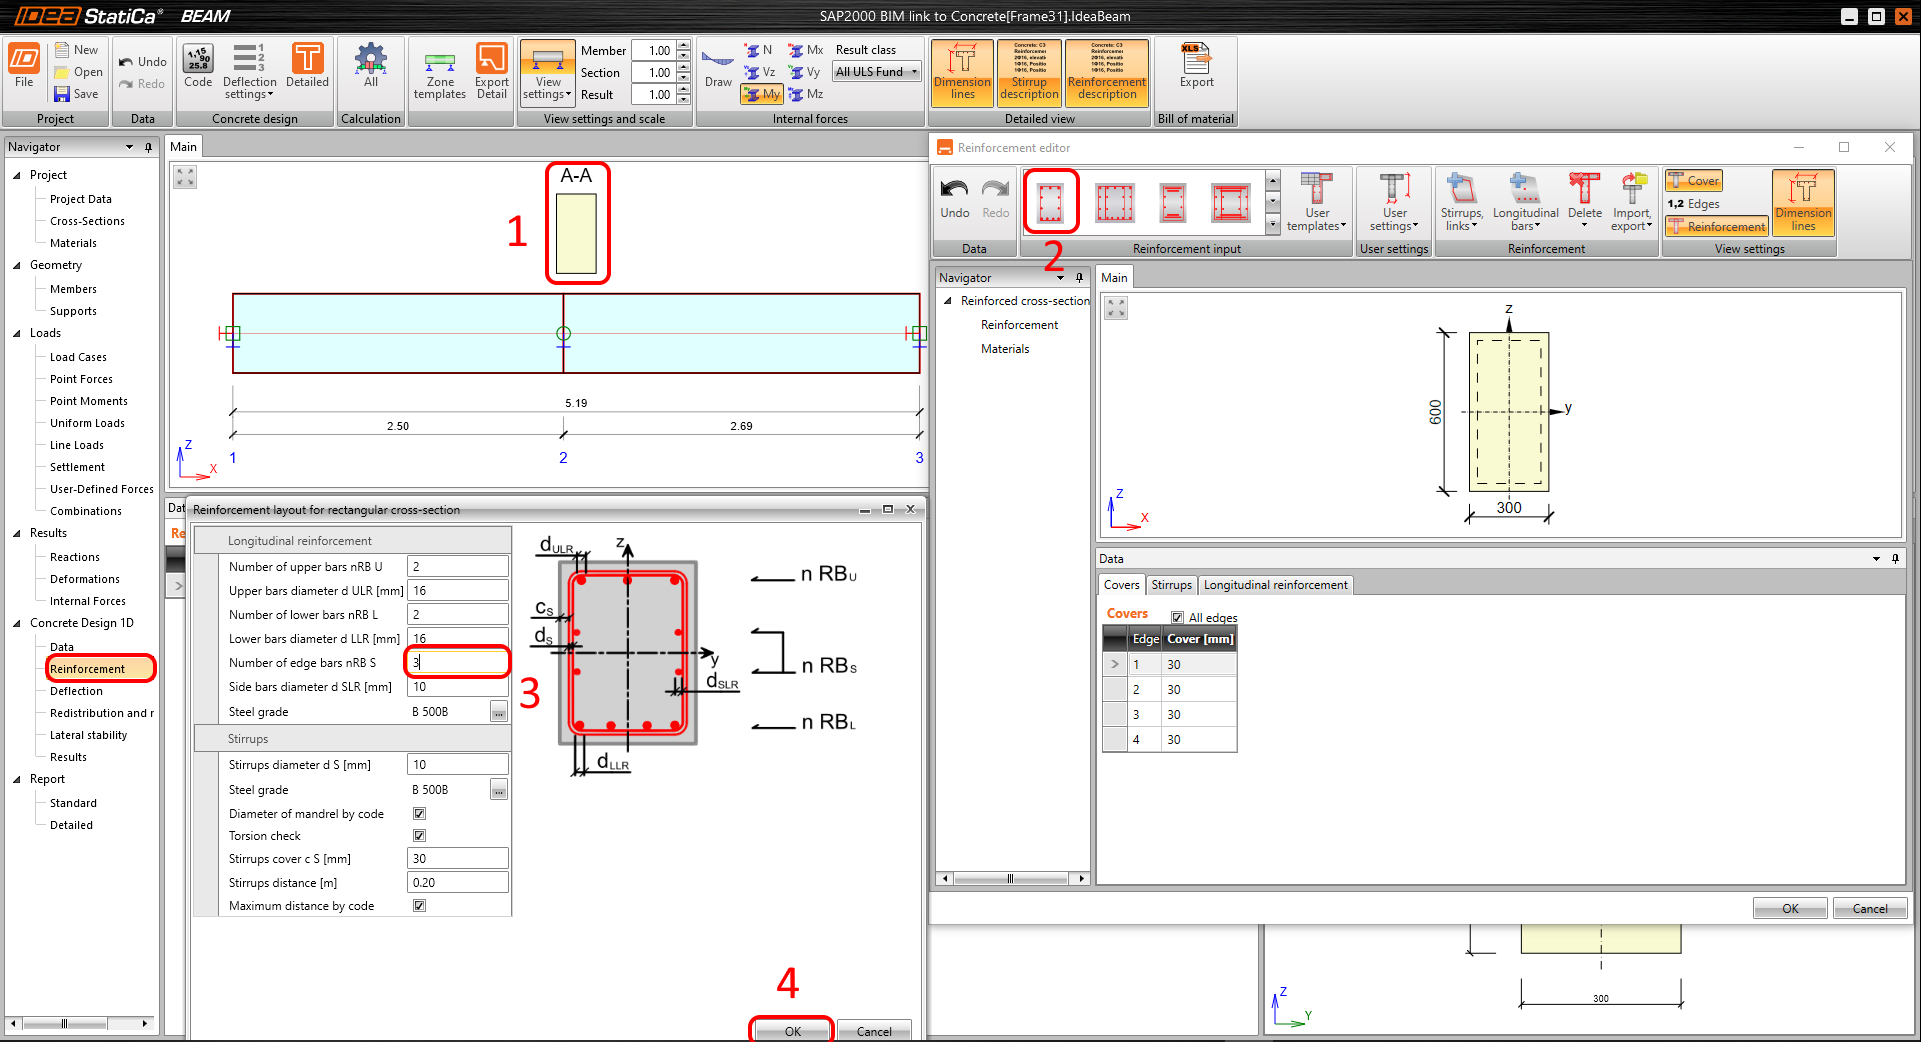
Das Bewehrungslayout ist für alle Träger gleich. Setzen Sie Eine Zone für das Bewehrungslayout in der Zonenvorlage.

Wählen Sie den Querschnitt in der Szene (1) aus und wählen Sie die erste Vorlage für die Bewehrung des Rechteckquerschnitts (2). Ändern Sie die Standardwerte im Registerkarteneditor auf 3 Stäbe an den Rändern (3). Bestätigen Sie die Einstellungen (4).
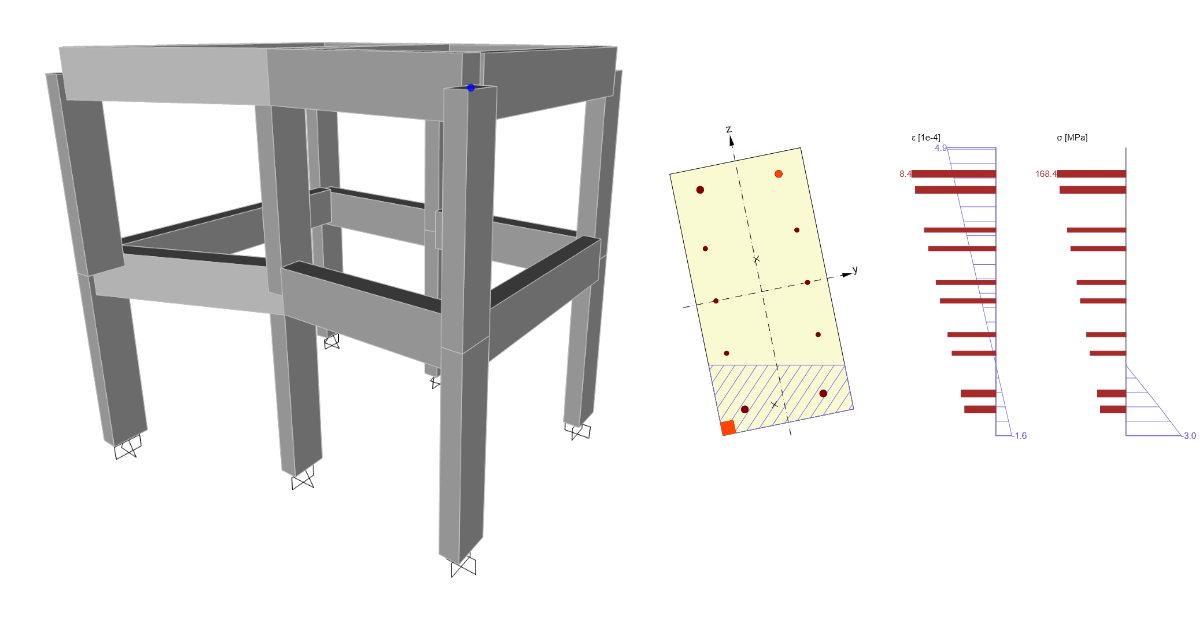
Ergebnisse
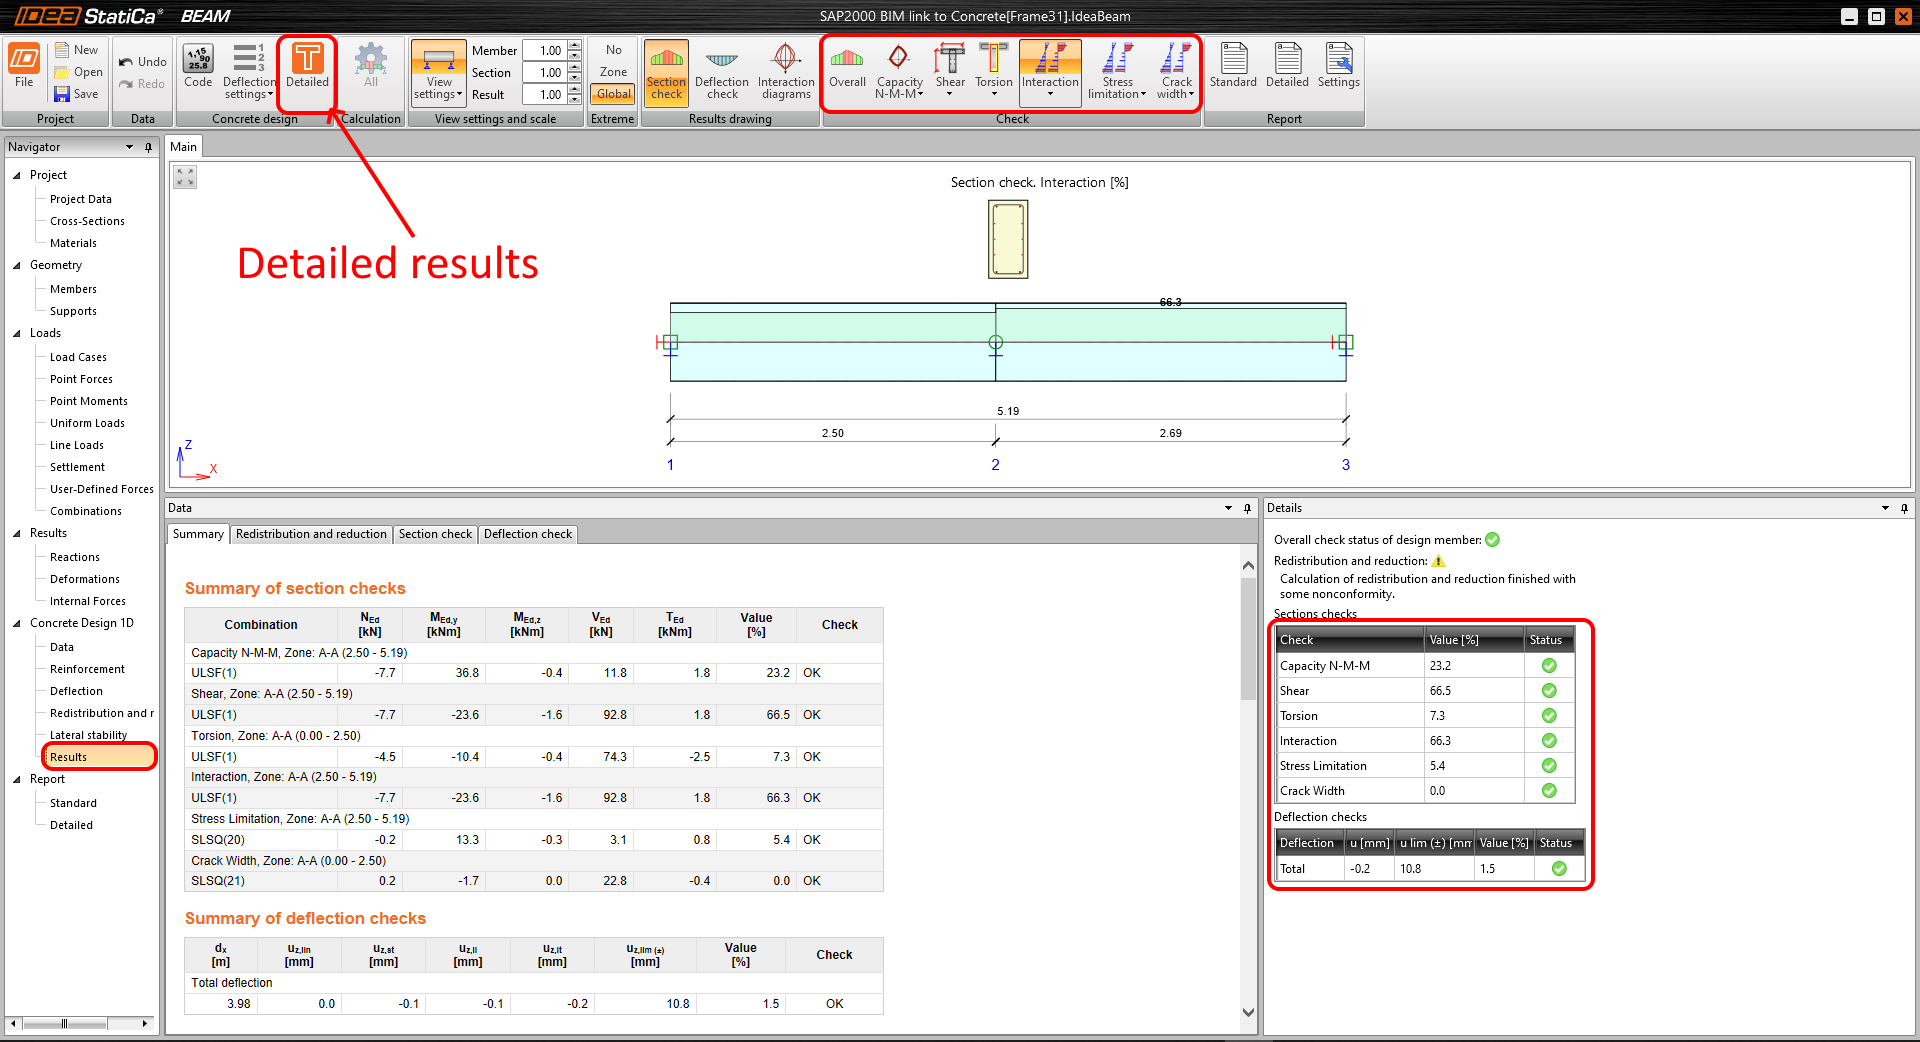
Führen Sie die Berechnung aus, um die Ergebnisse zu erhalten. Die Detaillierten Ergebnisse finden Sie im Menüband, wenn Sie die gleichnamige Schaltfläche drücken.
Bericht
Sie können zwischen Detaillierten und Standardberichten wählen. Die Dokumente sind vollständig anpassbar und können als PDF- oder DOC-Dateien gedruckt werden.

VERWANDTE INHALTE
So erstellen Sie eine XML-Datei für die IDEA StatiCa BIM-Anwendung