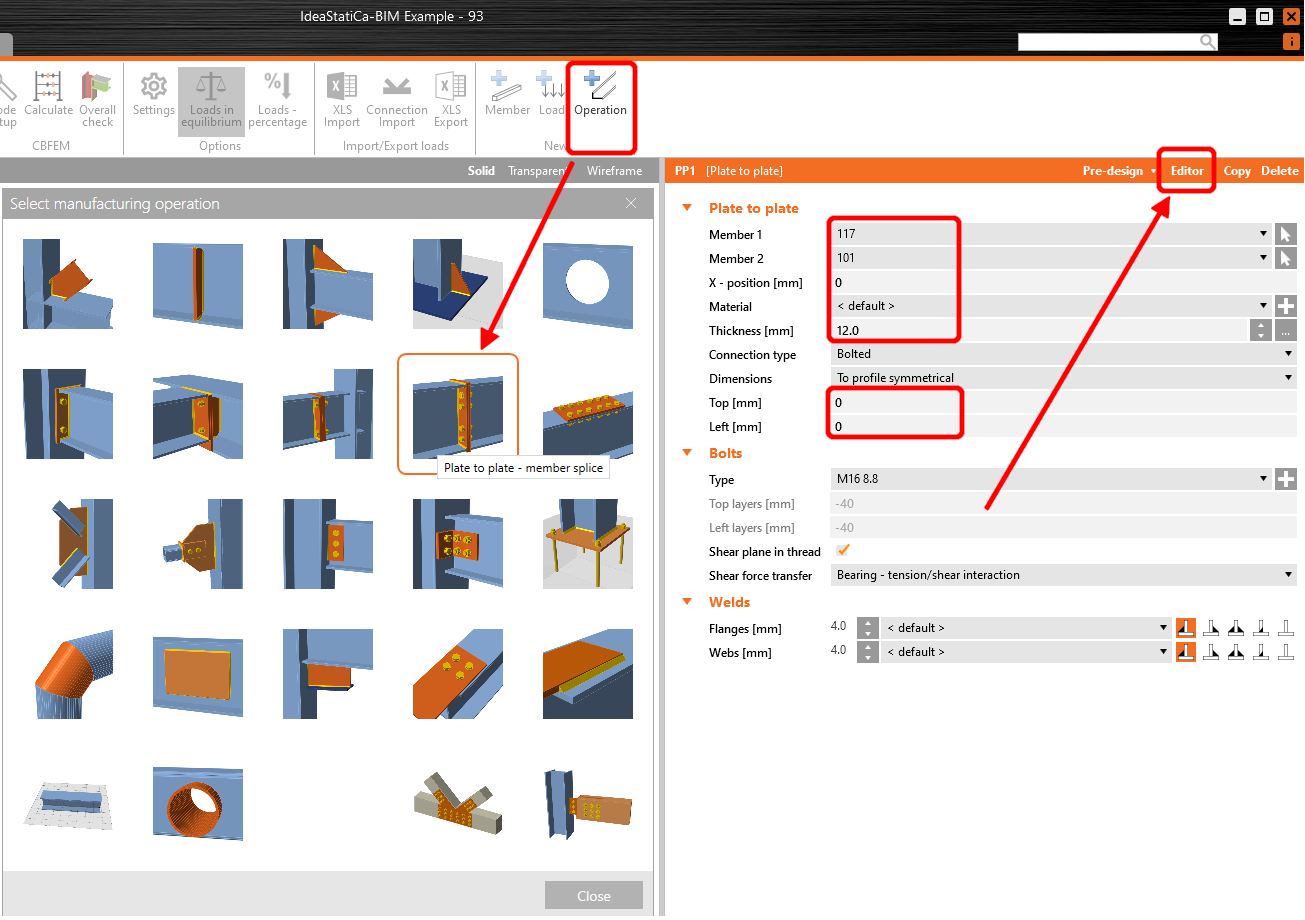
Faceți clic pe Operație și selectați Placă la placă. Modificați valorile conform imaginii, apoi faceți clic pe Editor.
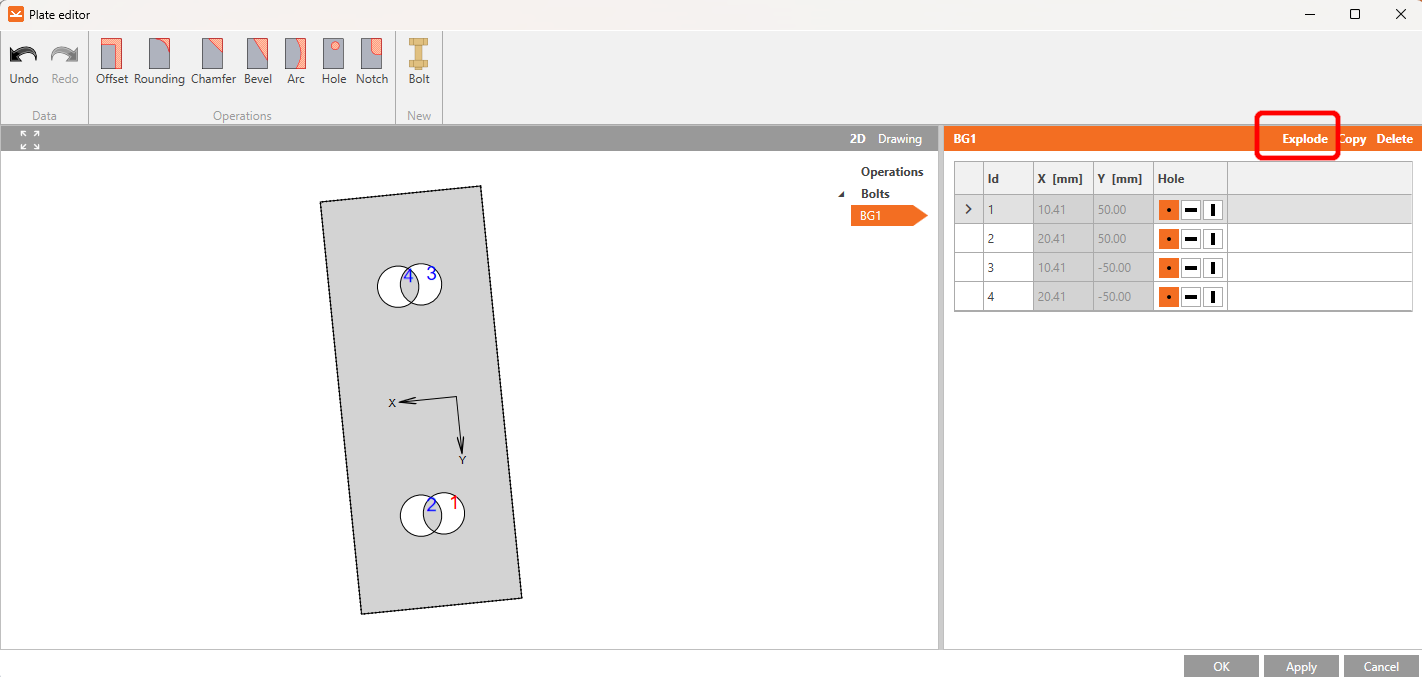
Faceți clic pe Explodare, ștergeți șuruburile nr. 1 și 3, și setați valorile pentru șuruburile nr. 2 și 4 conform imaginii.
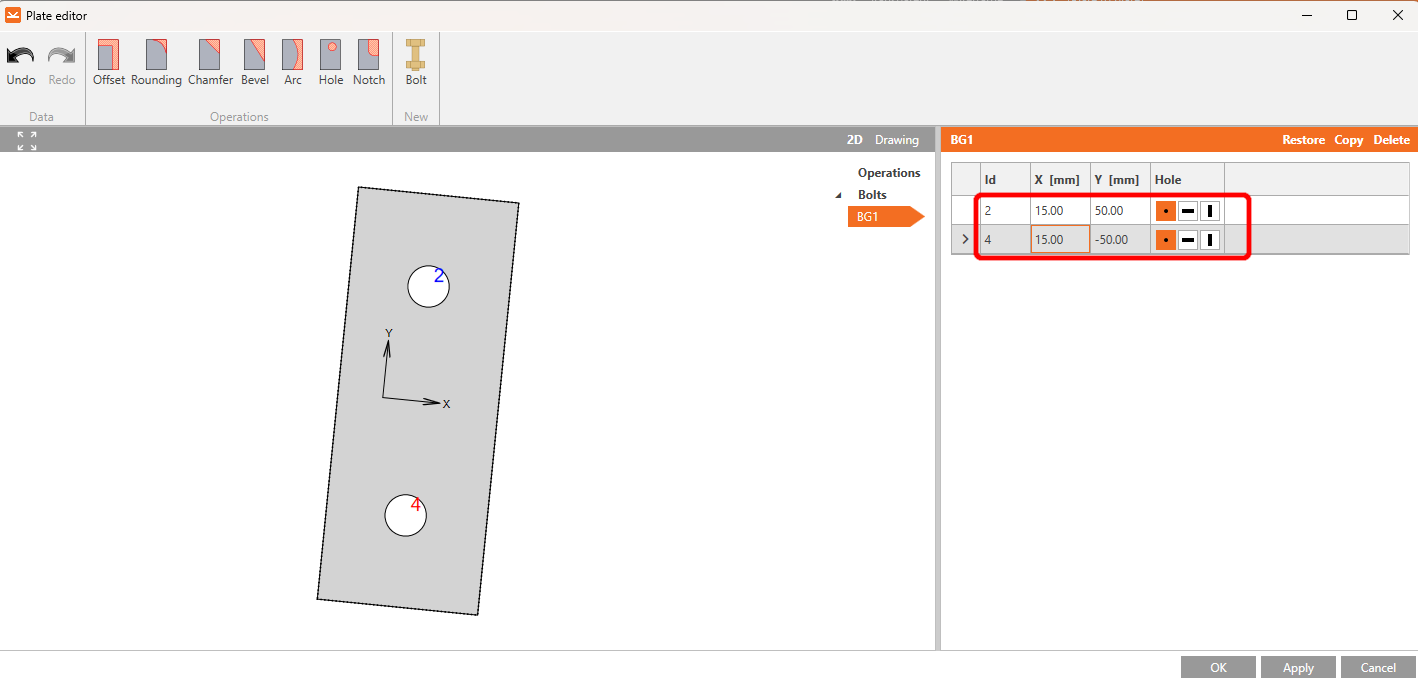
După ce efectuați modificările, elementul ar trebui să arate astfel. Continuați făcând clic pe ok.
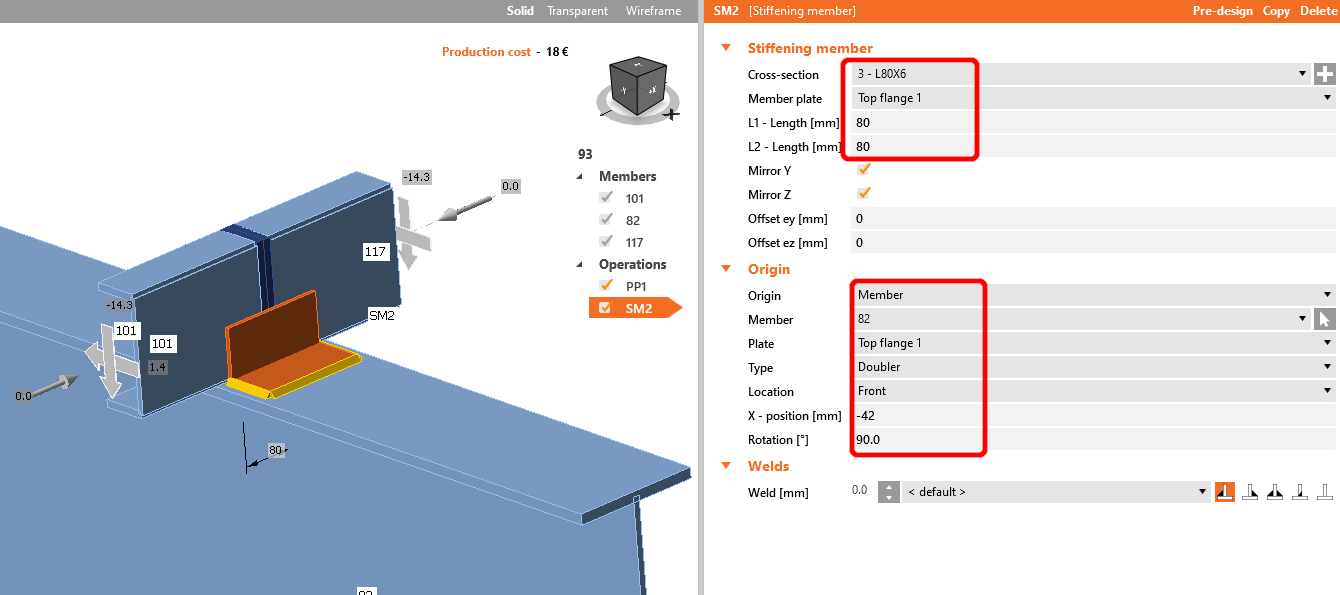
Următoarea operație este Elementul de rigidizare. Mai întâi, trebuie să adăugați o nouă secțiune transversală L80x6, faceți clic pe crucea albă din rândul secțiunii transversale, selectați profilul L și introduceți numele necesar în căutare. După aceea, completați valorile conform imaginii următoare. Prin urmare, modelul nostru ar trebui să arate conform imaginii de mai jos.
Adăugați operația Grilă șuruburi/ancore.
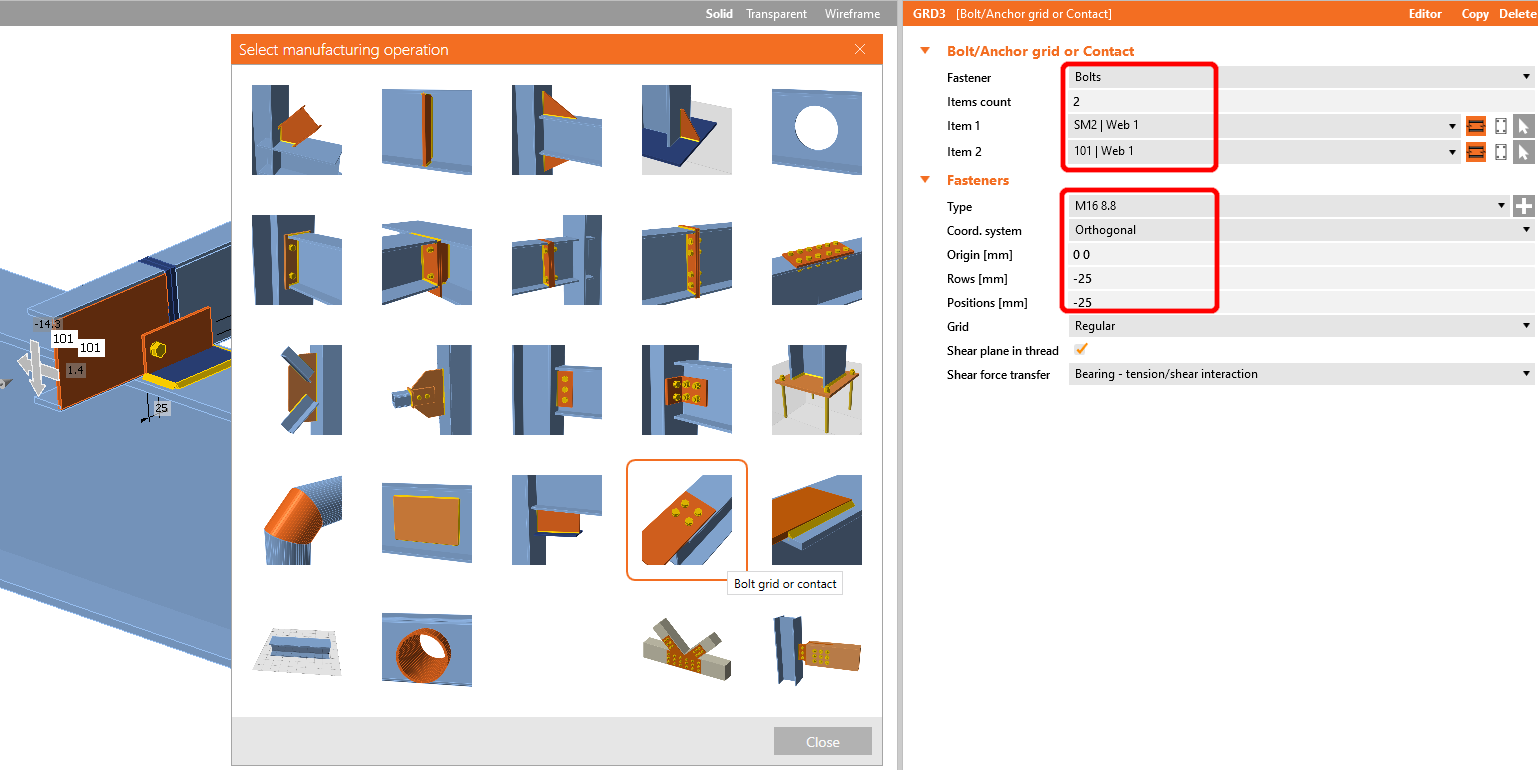
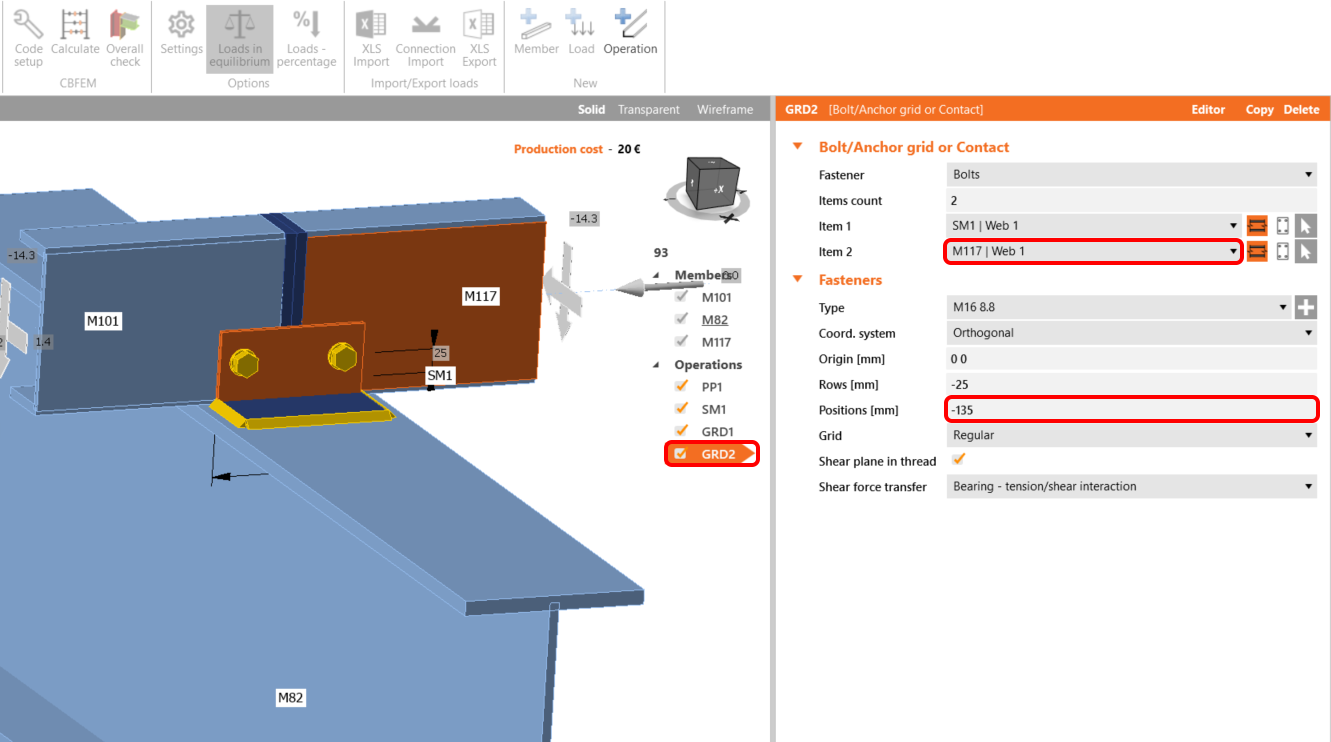
Copiați această operație și modificați valorile selectate.
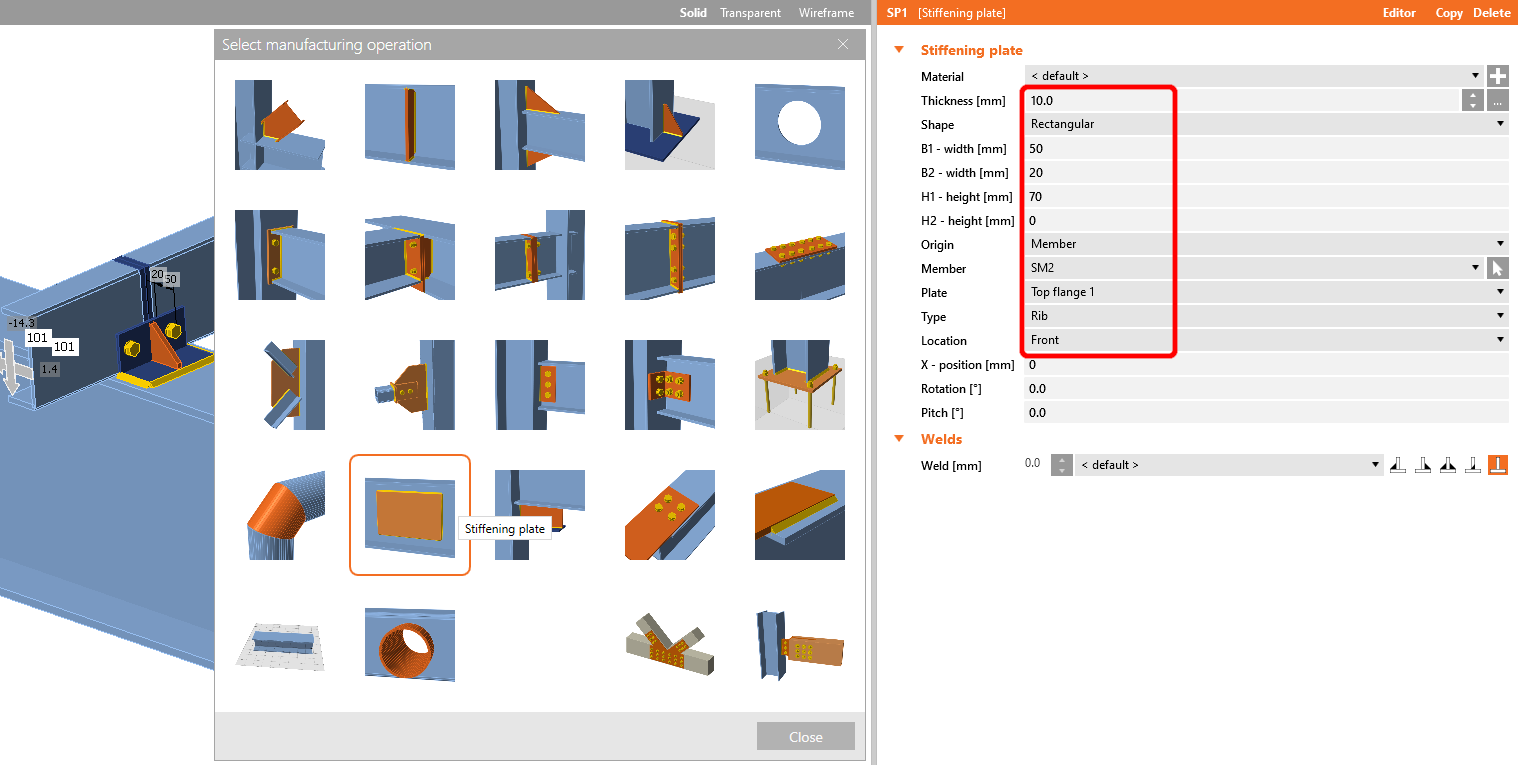
Acum adăugați o Placă de rigidizare la rost și setați valorile conform imaginii.
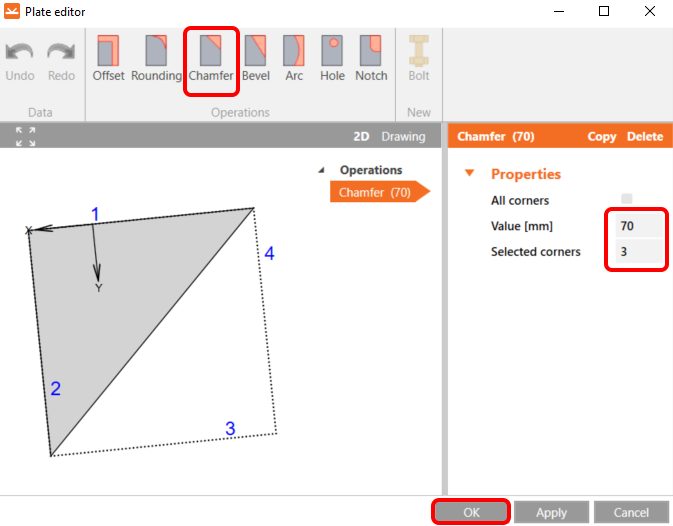
Apoi mergeți la Editor, selectați operația de teșire și setați-o conform imaginii.
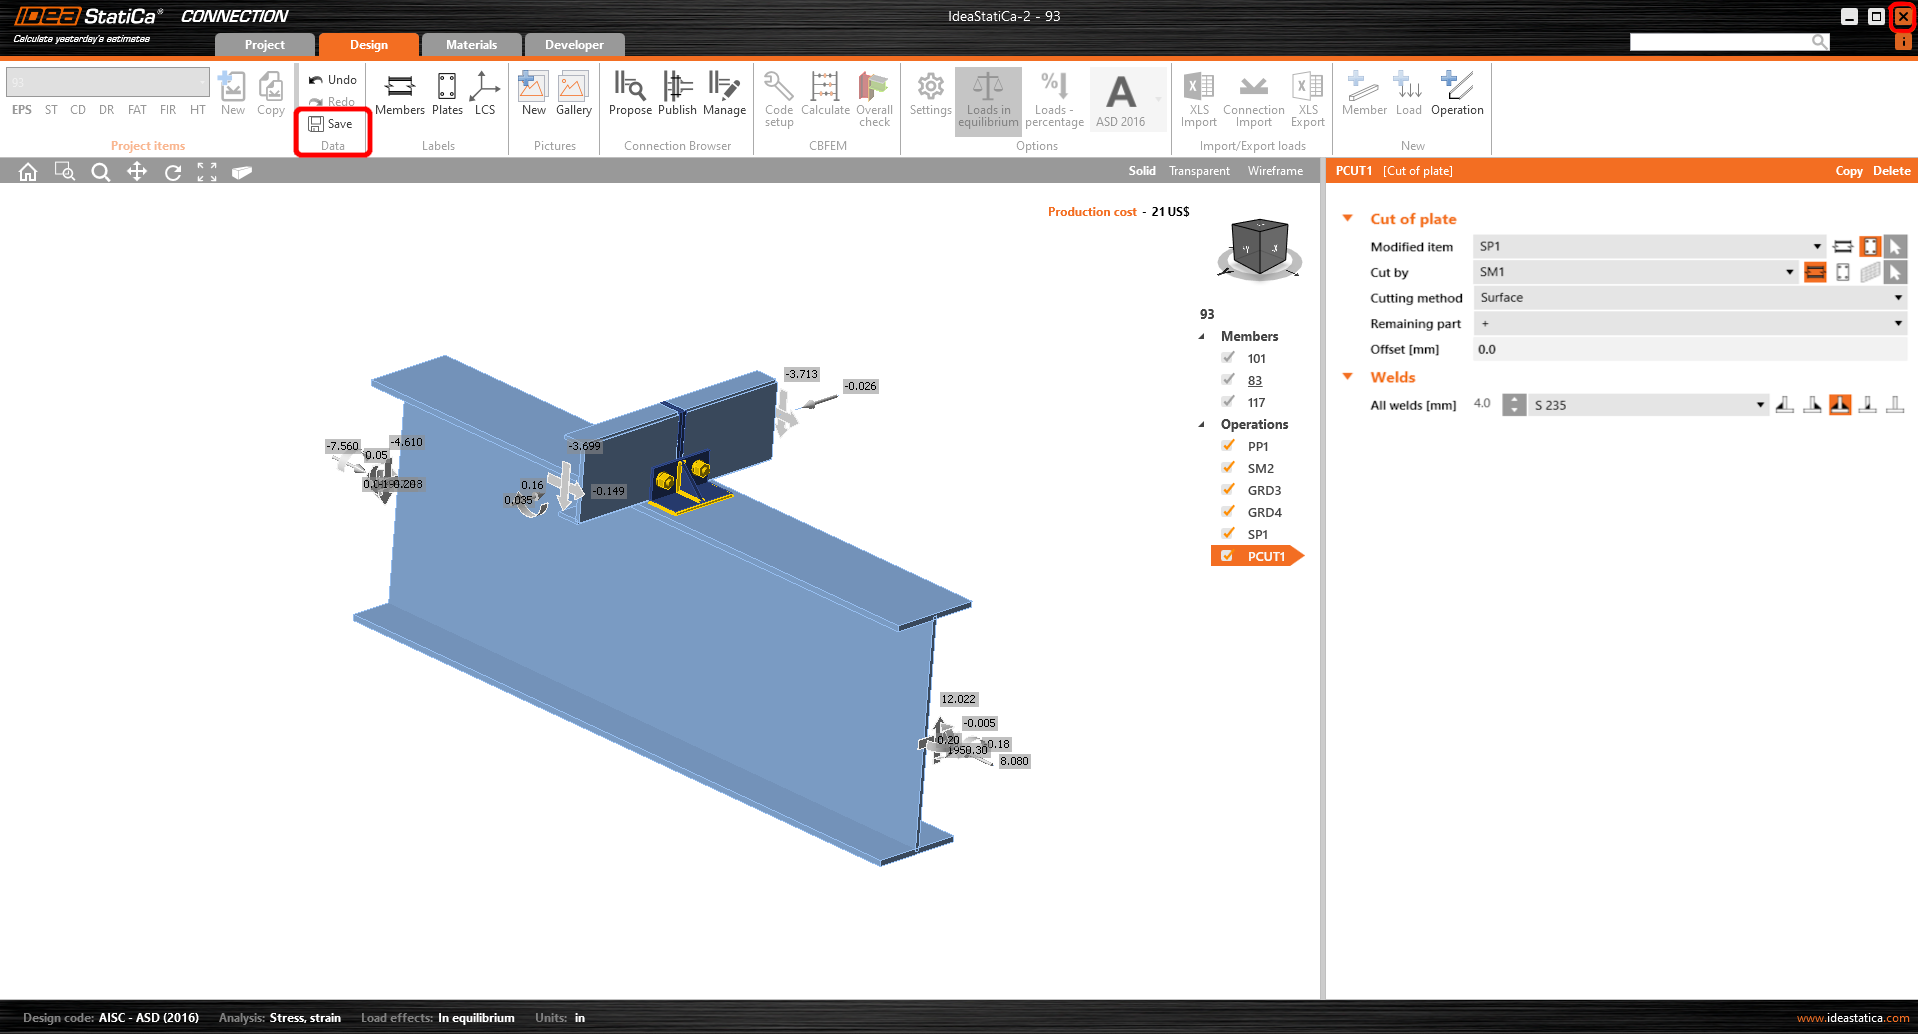
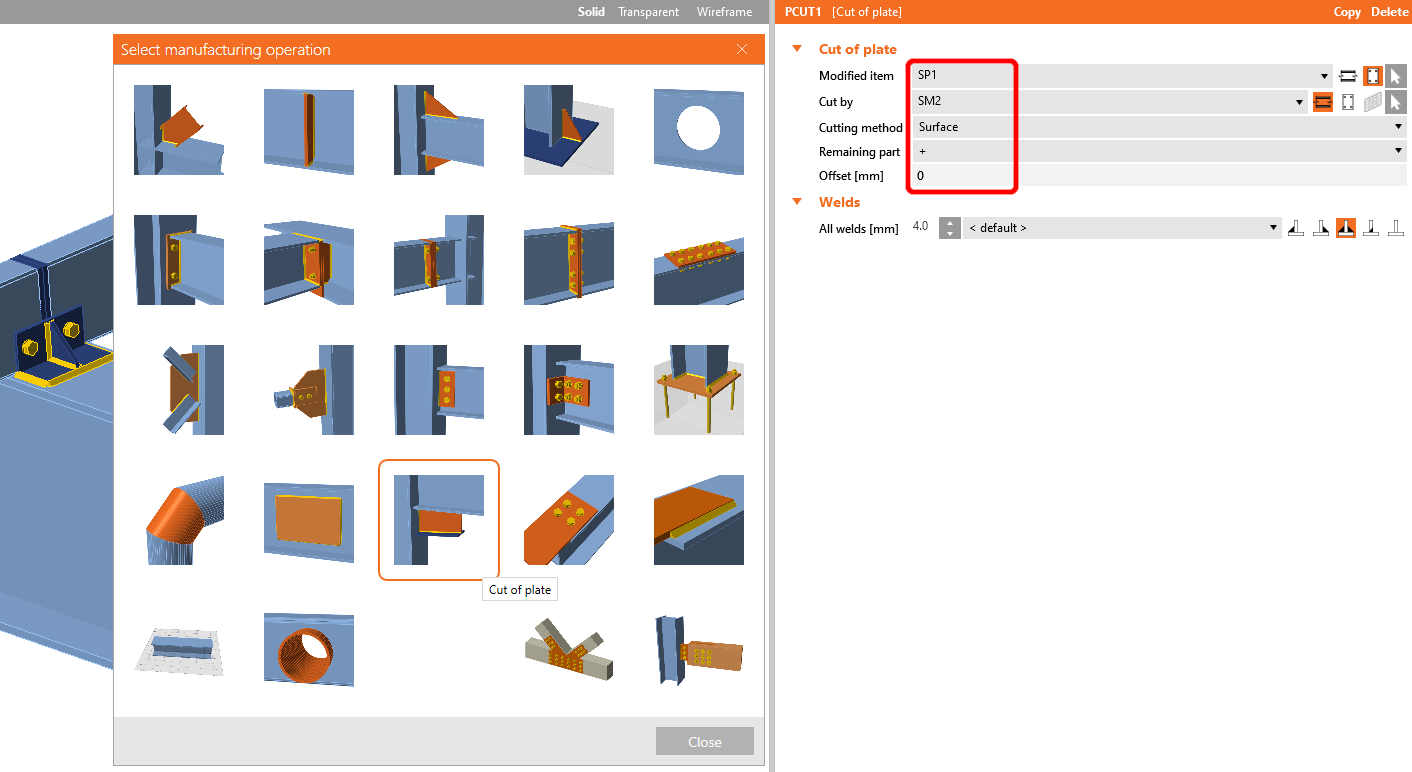
Ultima operație este Tăierea plăcii.
Acum faceți clic pe Salvare și închideți modulul Connection.